Quick Guide: Calibrating Flow Rate in OrcaSlicer with Objective Methods

Frustrated with "subjective" flow rate calibration in OrcaSlicer? This quick guide will help you ditch the guesswork and objectively master your flow rate for consistently perfect prints.
Why Flow Rate Matters (The Short Version)
Flow rate (Extrusion Multiplier, EM) controls how much filament your nozzle extrudes. Get it right, and your prints are strong, dimensionally accurate, and smooth. Get it wrong, and you'll face issues like:
- Over-extrusion: Wasted material, blobs, stringing, rough surfaces, weakened parts.
- Under-extrusion: Gaps, weak layers, poor surface finish, holes.
 Source: help.prusa3d.com
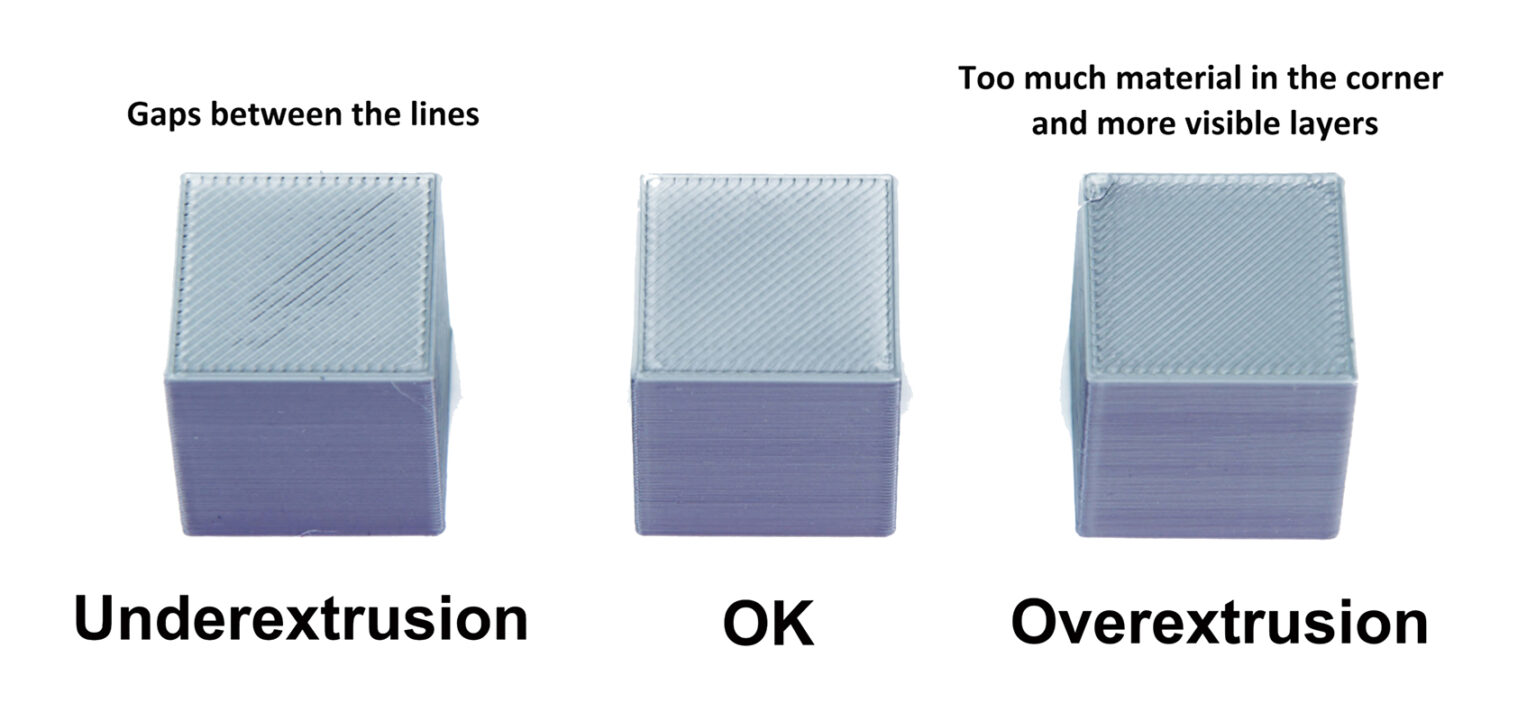
The Problem with "Eyeballing" OrcaSlicer's Tests
Many of us try to visually inspect OrcaSlicer's calibration tiles for the "smoothest" one. The common complaint? "All my tiles look identical!" This isn't your fault; it's because:
- Human eyes struggle: It's hard to see tiny differences.
- Hidden issues: Mechanical problems (loose gantry) or other slicer settings (Max Volumetric Speed) can mask the actual flow variations. If your printer can't physically extrude the commanded amount, or the test G-code itself is flawed, visual differences won't appear.
This means we need a quantitative approach.
The Objective Solution: Measurement-Based Calibration
To truly nail your flow rate, we'll use measurements.
1. Essential Prerequisites (Don't Skip These!)
Before anything else, ensure these are dialed in:
- Calibrate E-Steps First: Your extruder must move the exact commanded amount of filament. An incorrect E-step value introduces a consistent error that ruins any flow rate calibration. Refer to this in-depth step-by-step guide by All3DP.
- Measure Filament Diameter: Filament diameter can vary. Measure your filament in multiple spots with a caliper (e.g., 5 measurements, 10cm apart) and input the average into OrcaSlicer under the filament settings. This removes a hidden variable affecting your flow.
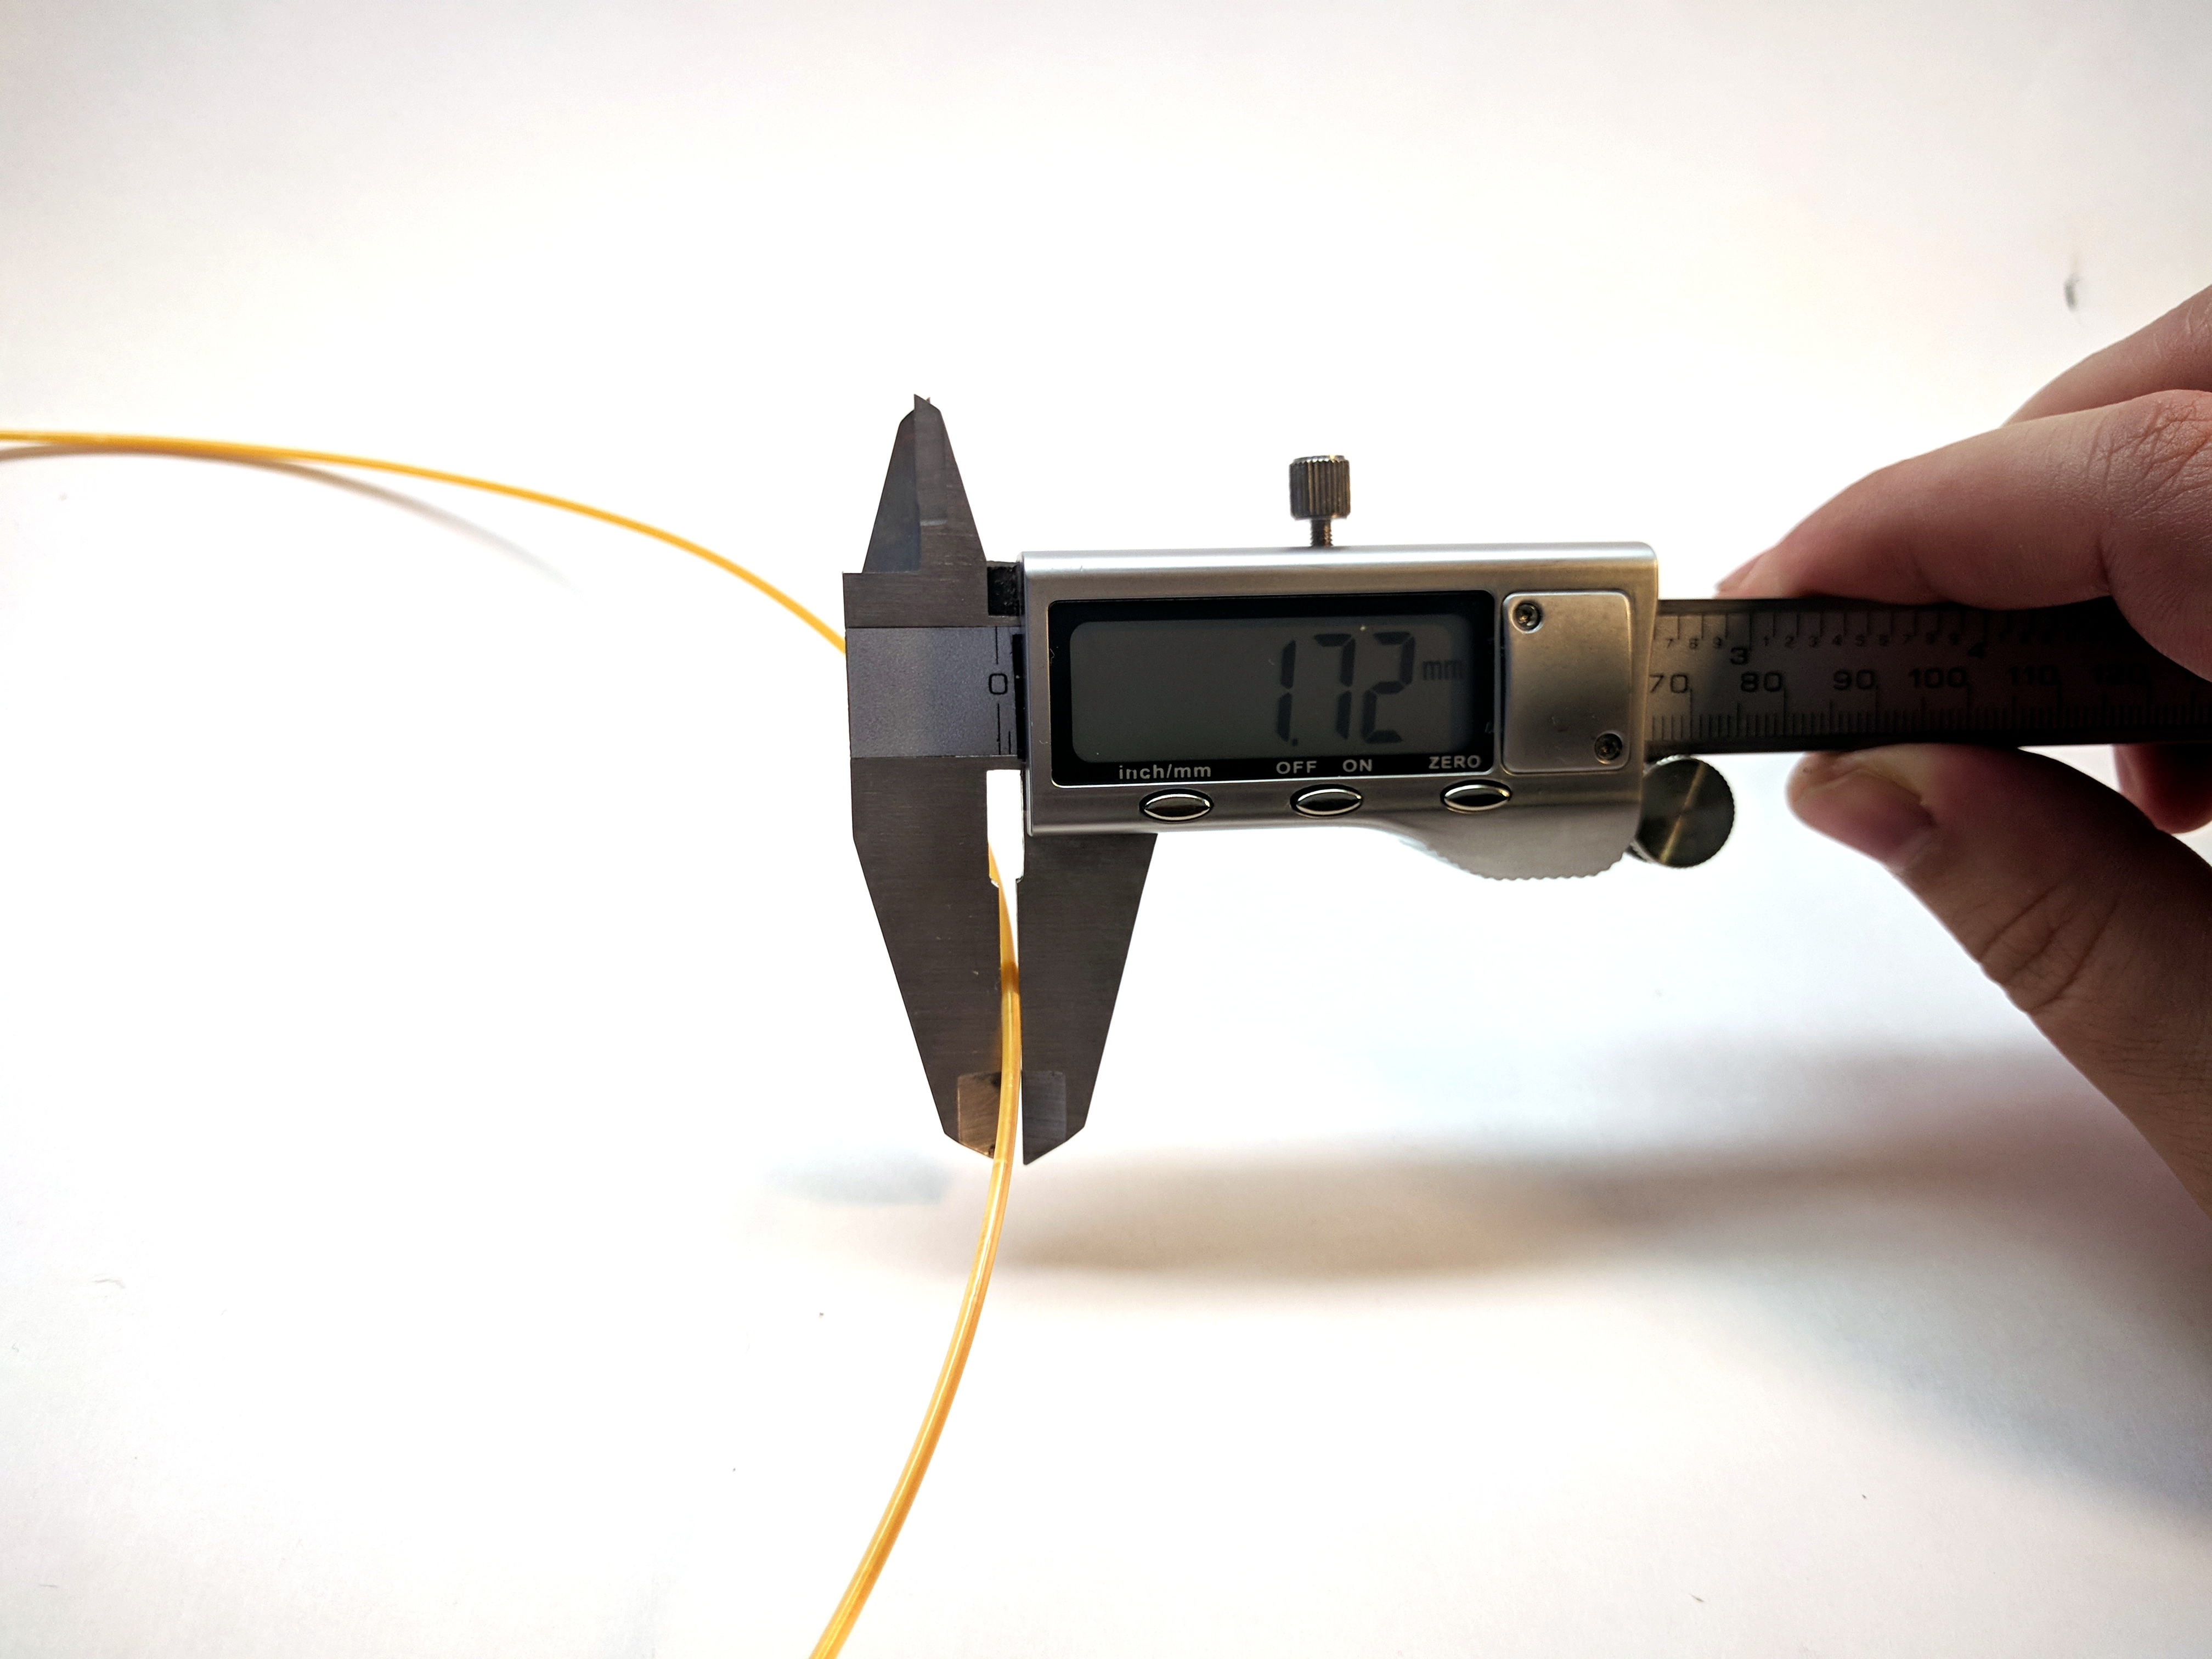 Source: captubes.com
2. The Single-Wall Cube Test
This is the most reliable method. You'll print a hollow, single-wall cube and measure its thickness precisely.
Setting Up OrcaSlicer for the Test
- Download a single-wall test cube STL (e.g., Calibration Cubes by Max on Printables.com).
- In OrcaSlicer, set these key print settings:
- Layer Height: Your typical printing layer height (e.g., 0.2mm).
- Perimeters/Wall Loops: Set to 1. Verify in preview!
- Top Layers: Set to 0.
- Infill: Set to 0%.
- Vase (Spiralize) Mode: Often enabled for this test (usually works fine in OrcaSlicer).
- Line Width (Extrusion Width): CRITICAL. Set it to precisely match your nozzle diameter (e.g., 0.4mm for a 0.4mm nozzle).
- Print Speed: Use your normal wall printing speed.
- Initial Flow Rate: Set to 1.0 (100%) in the filament settings for this test print.

- Slice and print your cube
Precise Measurement
Once cool, remove the print. Use accurate digital calipers or a micrometer. Take multiple measurements (e.g., three per wall, all four walls) towards the center of the walls. Avoid corners or first/last layers as they can be inaccurate. Average these measurements for a reliable result.
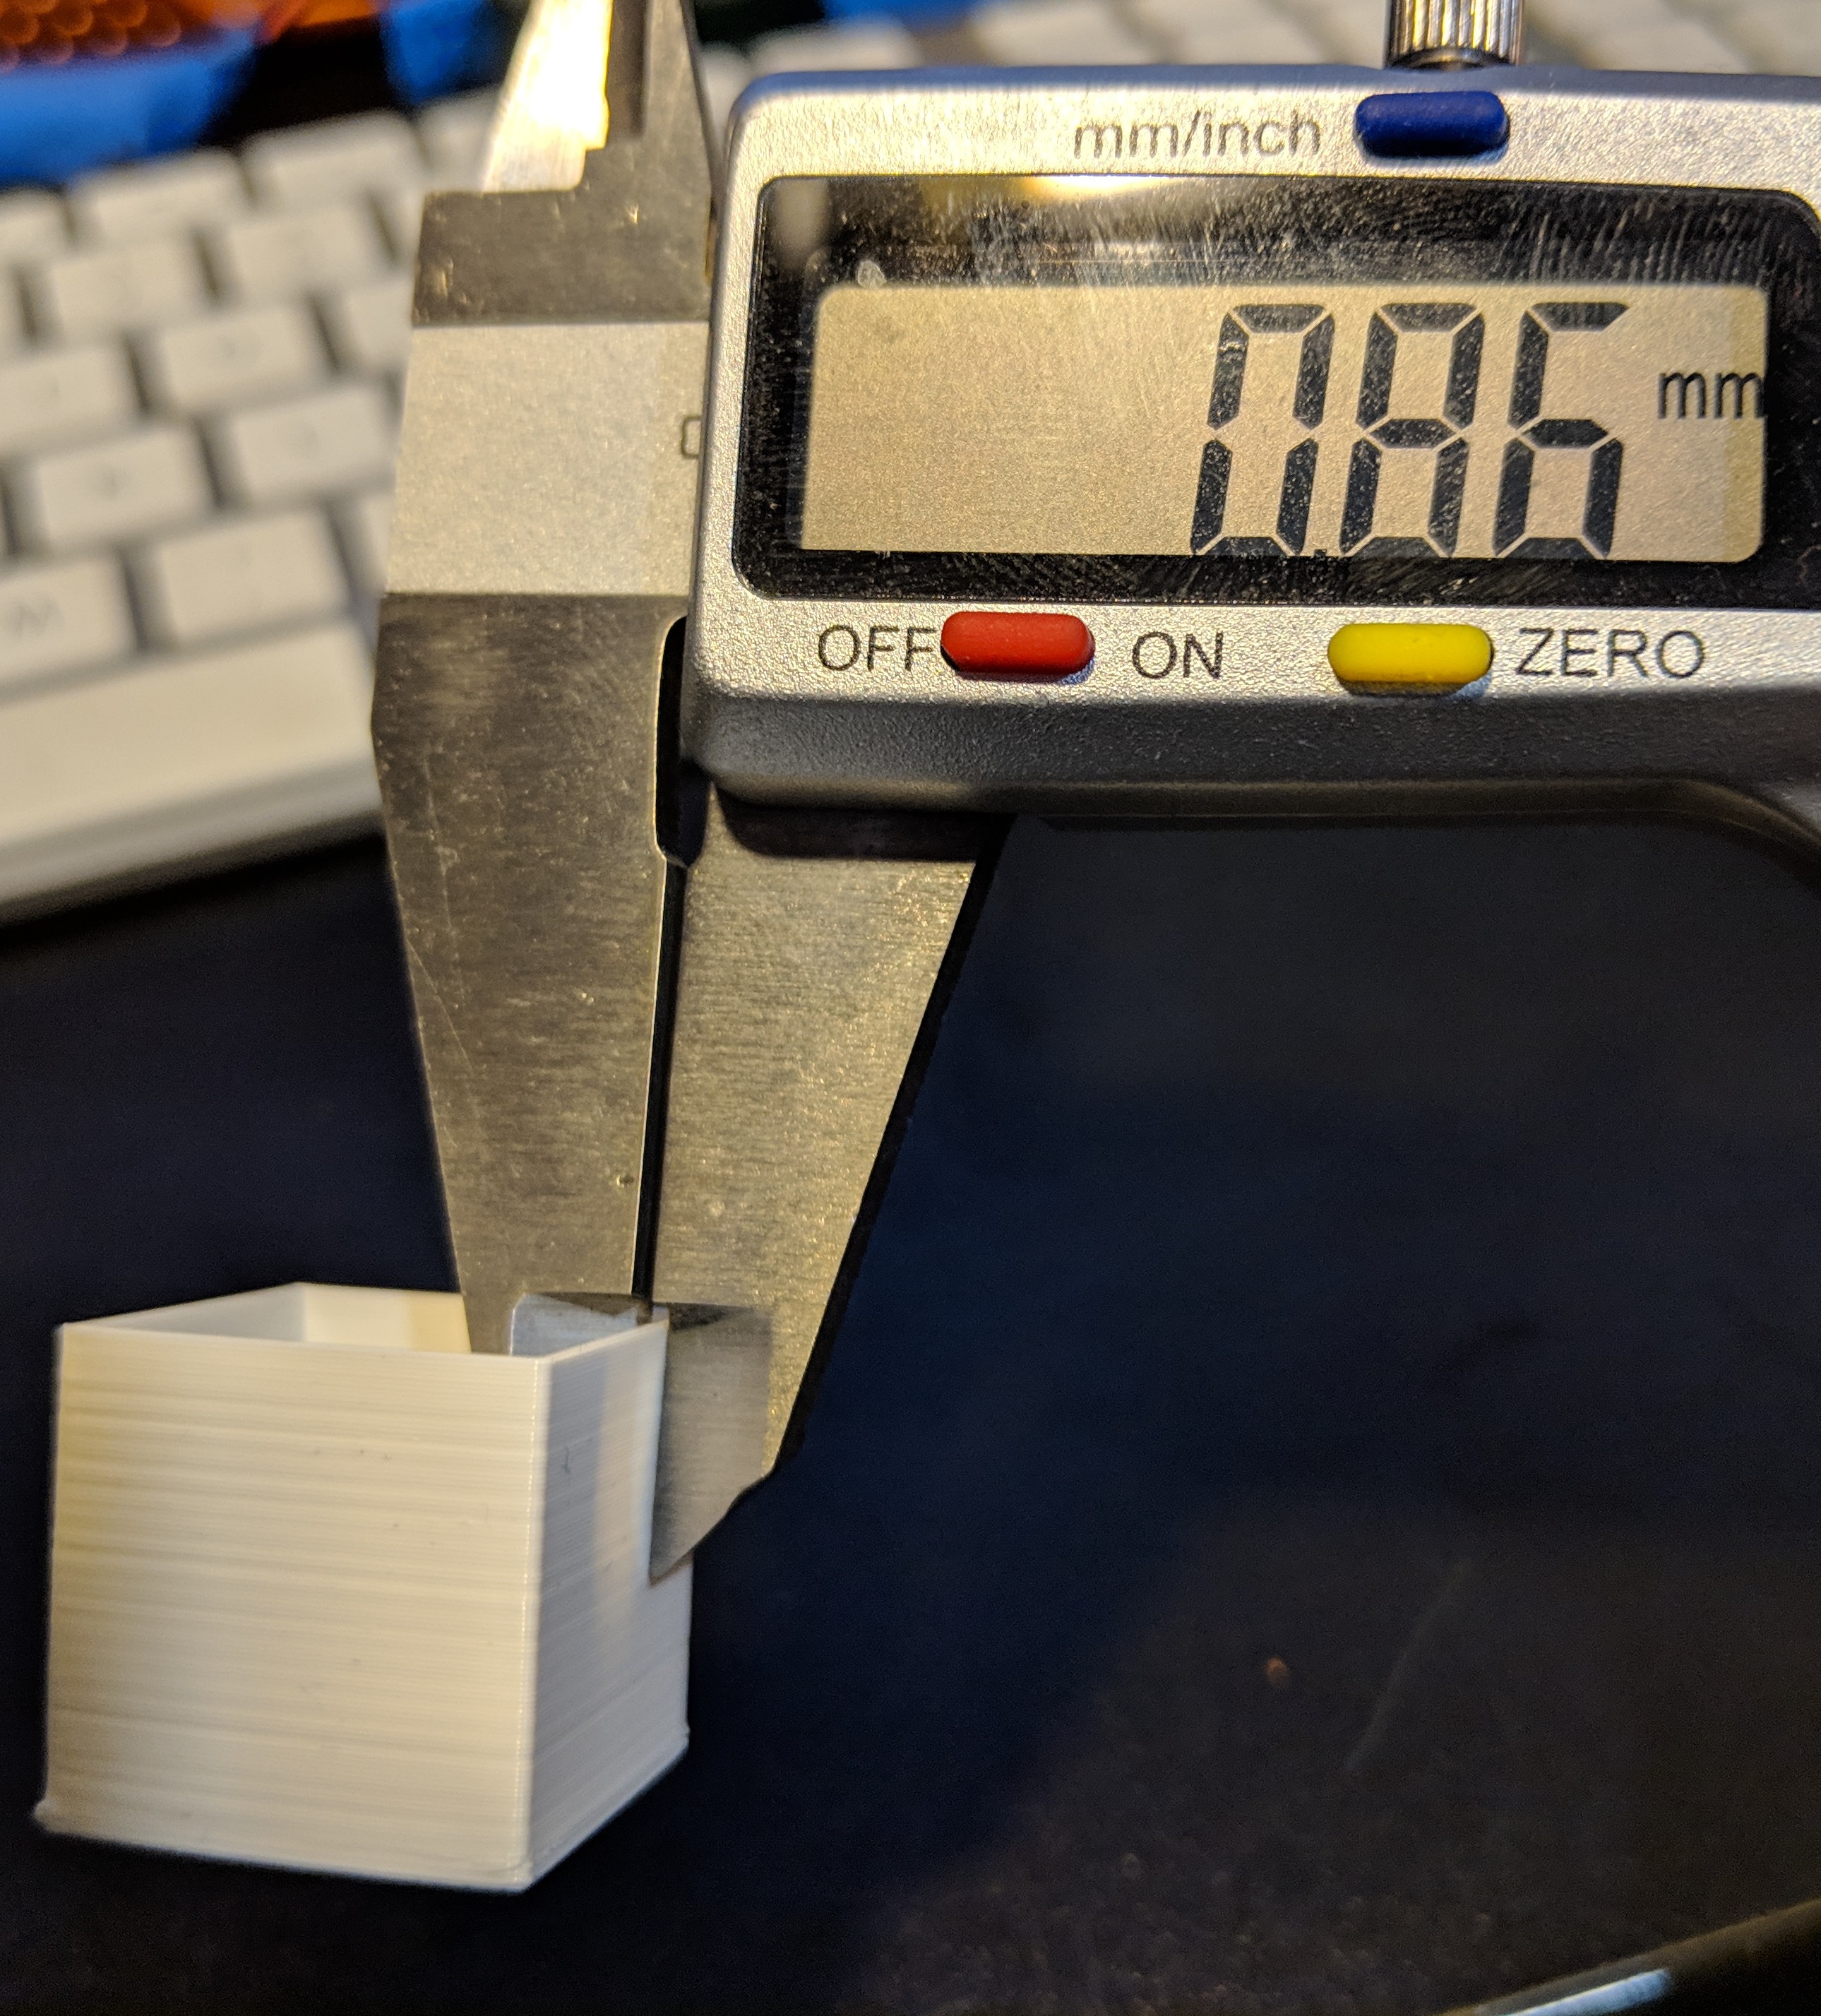 Source: 3dprinting.stackexchange.com
Calculate Your New Flow Ratio
Use this formula:
New Flow Rate = (Target Wall Thickness / Average Measured Wall Thickness) * Current Flow Rate
- Target Wall Thickness: What you set in OrcaSlicer (e.g., 0.4mm).
- Average Measured Wall Thickness: What you just measured.
- Current Flow Rate: What you used for the test (1.0 or 100%).
Example: Target: 0.4mm, Measured: 0.42mm, Current Flow: 1.0 New Flow Rate = (0.40 / 0.42) * 1.0 = 0.952
Iterative Refinement
Update your filament profile in OrcaSlicer with the New Flow Rate. Then, reprint the single-wall cube and measure again. Repeat until the measured wall thickness is very close to your target. Aim for less than 3% deviation for precision.
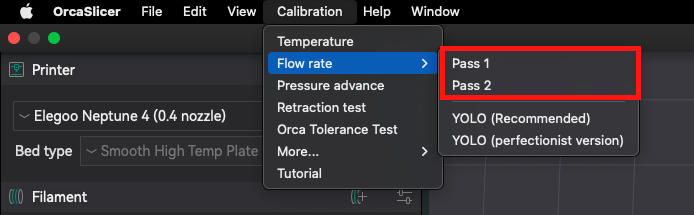
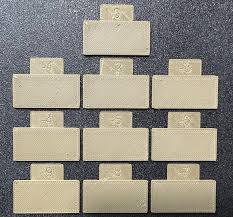
Quick Tips for OrcaSlicer's Built-in Tests
Even if you prefer the single-wall cube, understanding OrcaSlicer's built-in "Pass 1" and "Pass 2" tests can help. They vary flow rates across tiles, which you can objectively assess.
 Source: obico.io
Beyond Visual Smoothness: Look for:
- No visible gaps (under-extrusion).
- No excessive material buildup or roughness (over-extrusion).
- Hold to light to spot tiny gaps between lines.
"Identical Tiles" Troubleshooting: This common issue signals deeper problems:
- Low Max Volumetric Speed (MVS): If MVS in your filament profile is too low, it caps flow across all tiles. Increase it.
- Print Speed: Temporarily slowing down the test print speed can reveal differences if MVS is limiting.
- Mechanical Issues: Loose gantry nuts, damaged nozzles, or incorrect E-steps can hide flow variations.
- Reset Profiles: Sometimes, rebuilding your OrcaSlicer profile from scratch can resolve odd issues.
Beyond Basic Flow: Advanced Considerations
- Volumetric Flow Rate (Max Flow) Calibration: This defines your hotend's maximum melting capacity (mm³/s). Calibrating it sets the speed limit for your printer without under-extrusion. OrcaSlicer has a built-in "Max Flowrate" test. Refer to our other guide for more information on the Max Volumetric Speed test!
- Pressure Advance (K-Factor) Calibration: This firmware setting prevents bulging corners and gaps by adjusting extrusion around speed changes. Crucial for sharp details. You can also refer to this guide to conduct a pressure advance calibration.
Conclusion
Objective flow rate calibration is key to exceptional 3D prints. By prioritizing E-step calibration, accurate filament diameter measurements, and the single-wall cube test, you'll gain precision. When OrcaSlicer's built-in tests seem stuck, remember to check MVS and mechanical integrity. Embrace data-driven tuning, and you'll unlock your printer's full potential!
Also available in: Deutsch | Español | Français | Italiano | Nederlands | Polski | Português | Русский