
Every 3D printing enthusiast — from first-time Ender 3 owners to seasoned Voron builders — runs into print quality problems. The difference between a frustrating hobby and a rewarding one is knowing how to diagnose and fix issues quickly.
This guide covers every common 3D printing defect with clear symptoms, root causes, and step-by-step fixes. Use the table of contents below to jump to your specific problem, or read through to build a complete troubleshooting toolkit.
Pro Tip: Catch Problems Before They Waste Filament
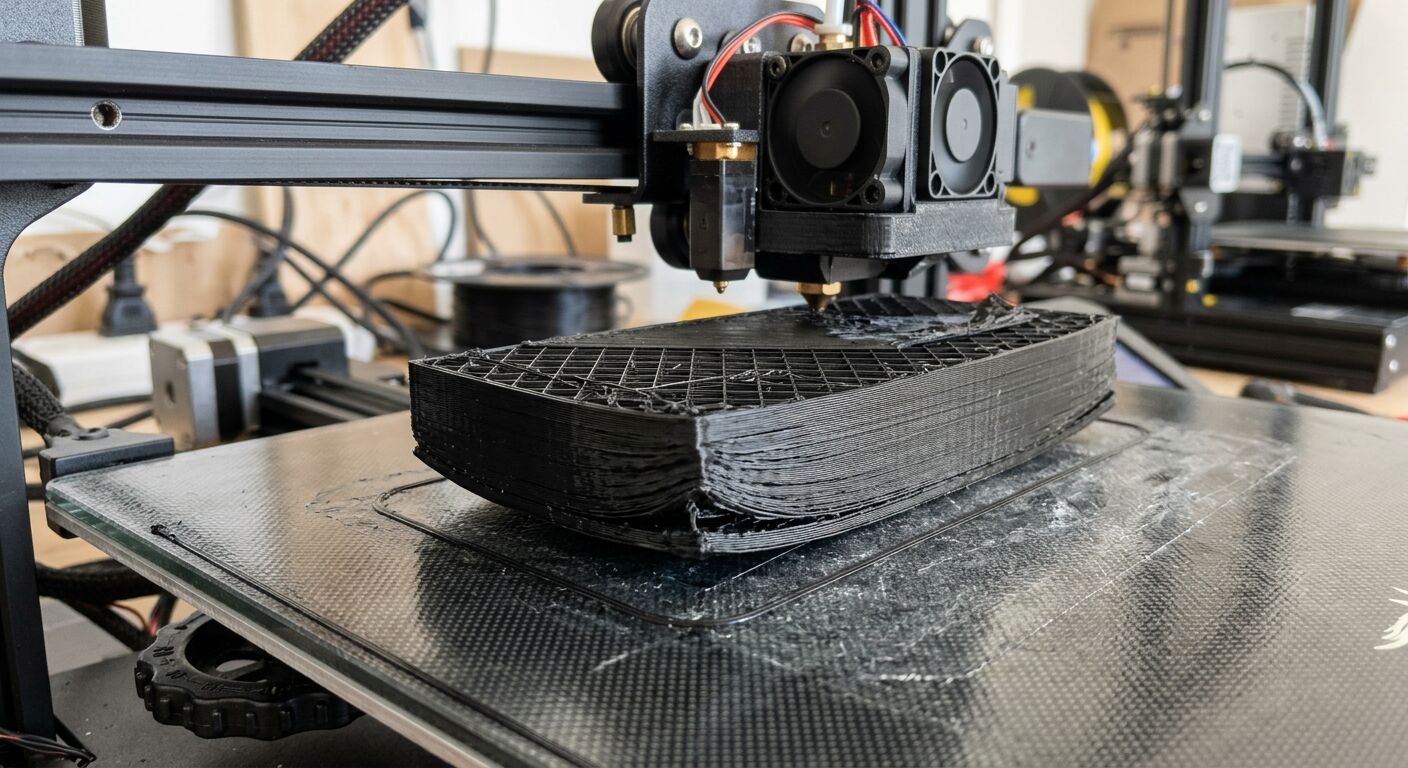
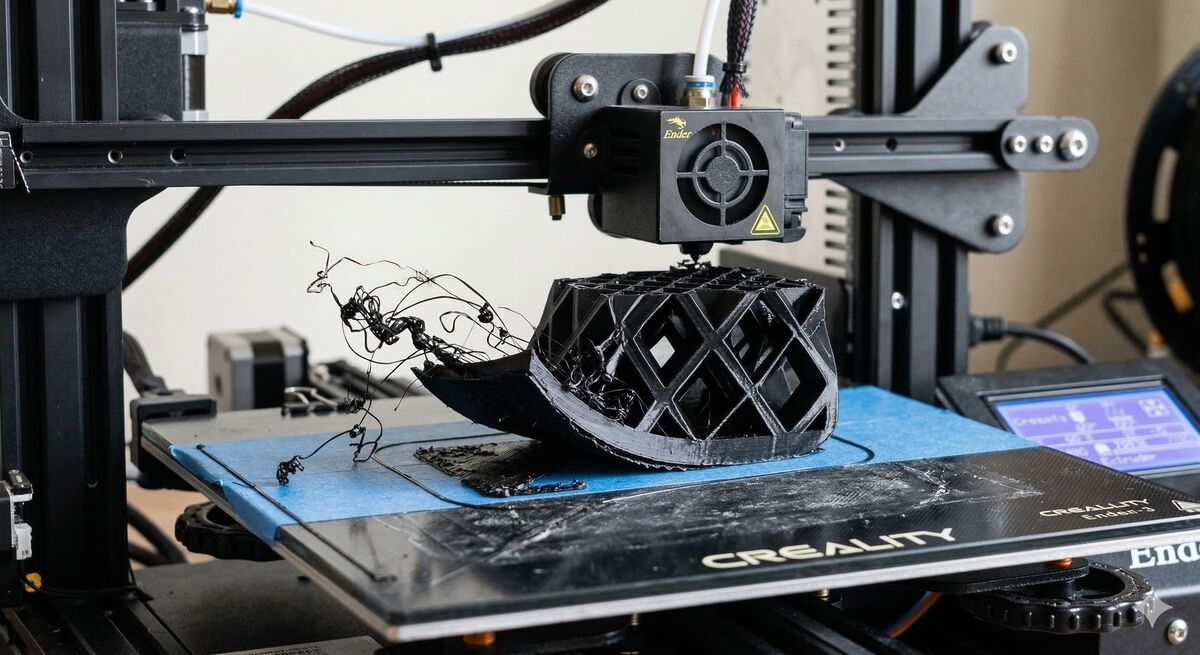
Many of these issues — especially spaghetti, layer shifting, and detachment — can be caught mid-print by Obico's AI failure detection. It monitors your print via webcam and alerts you (or pauses the print) when it detects something going wrong. Free tier available.
 Source:


