Mastering Layer Adhesion: Tips for Stronger 3D Prints
Introduction
Hello and welcome to the world of 3D printing! It's a place full of potential, but like any new endeavor, it comes with its own set of challenges. Let's explore what you might face and how to tackle these hurdles effectively.
Overview of 3D Printing Challenges
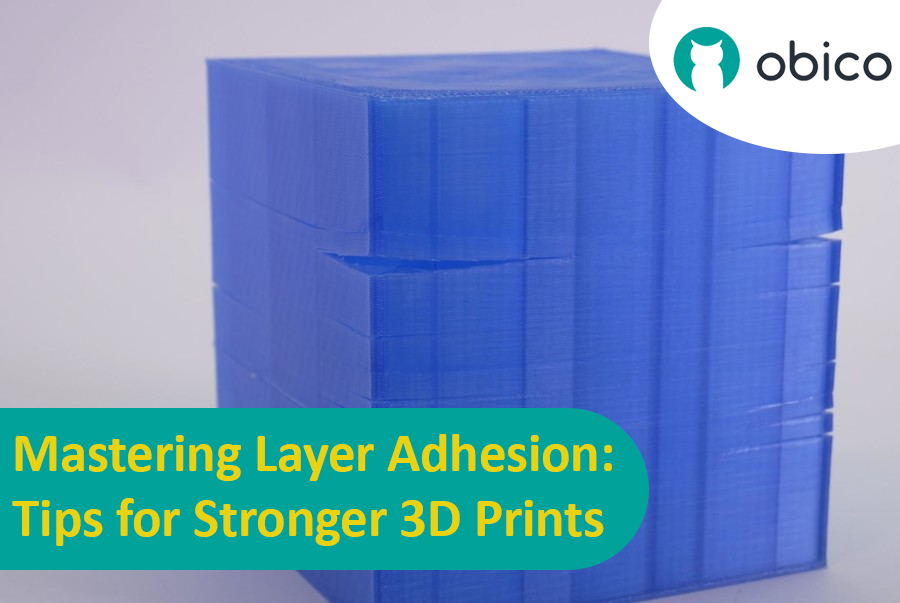
Picture yourself setting up a 3D print. You've got your design ready, your printer prepped, and you're all set to go. But sometimes, things don't work out as smoothly as we'd like. From prints warping or not sticking correctly to issues with the final quality, 3D printing can be a bit unpredictable. However, understanding these challenges is the first step toward mastering the art of 3D printing.
Importance of Layer Adhesion in 3D Printing
One key aspect to focus on is layer adhesion. This is crucial for the strength and durability of your 3D prints. When layers don't stick together properly, your print can become weak and fragile. Ensuring good layer adhesion is essential, whether you're printing something functional or just for fun. It's about making sure that each layer bonds well with the next, creating a strong, cohesive final product. Let's dive in and see how you can improve your 3D printing skills, starting with better layer adhesion.
Understanding Layer Separation and Splitting
Navigating the nuances of 3D printing, one term you'll frequently encounter is 'layer separation and splitting'. This phenomenon can be a bit of a stumbling block, but understanding it is key to producing high-quality prints.
Definition and Causes
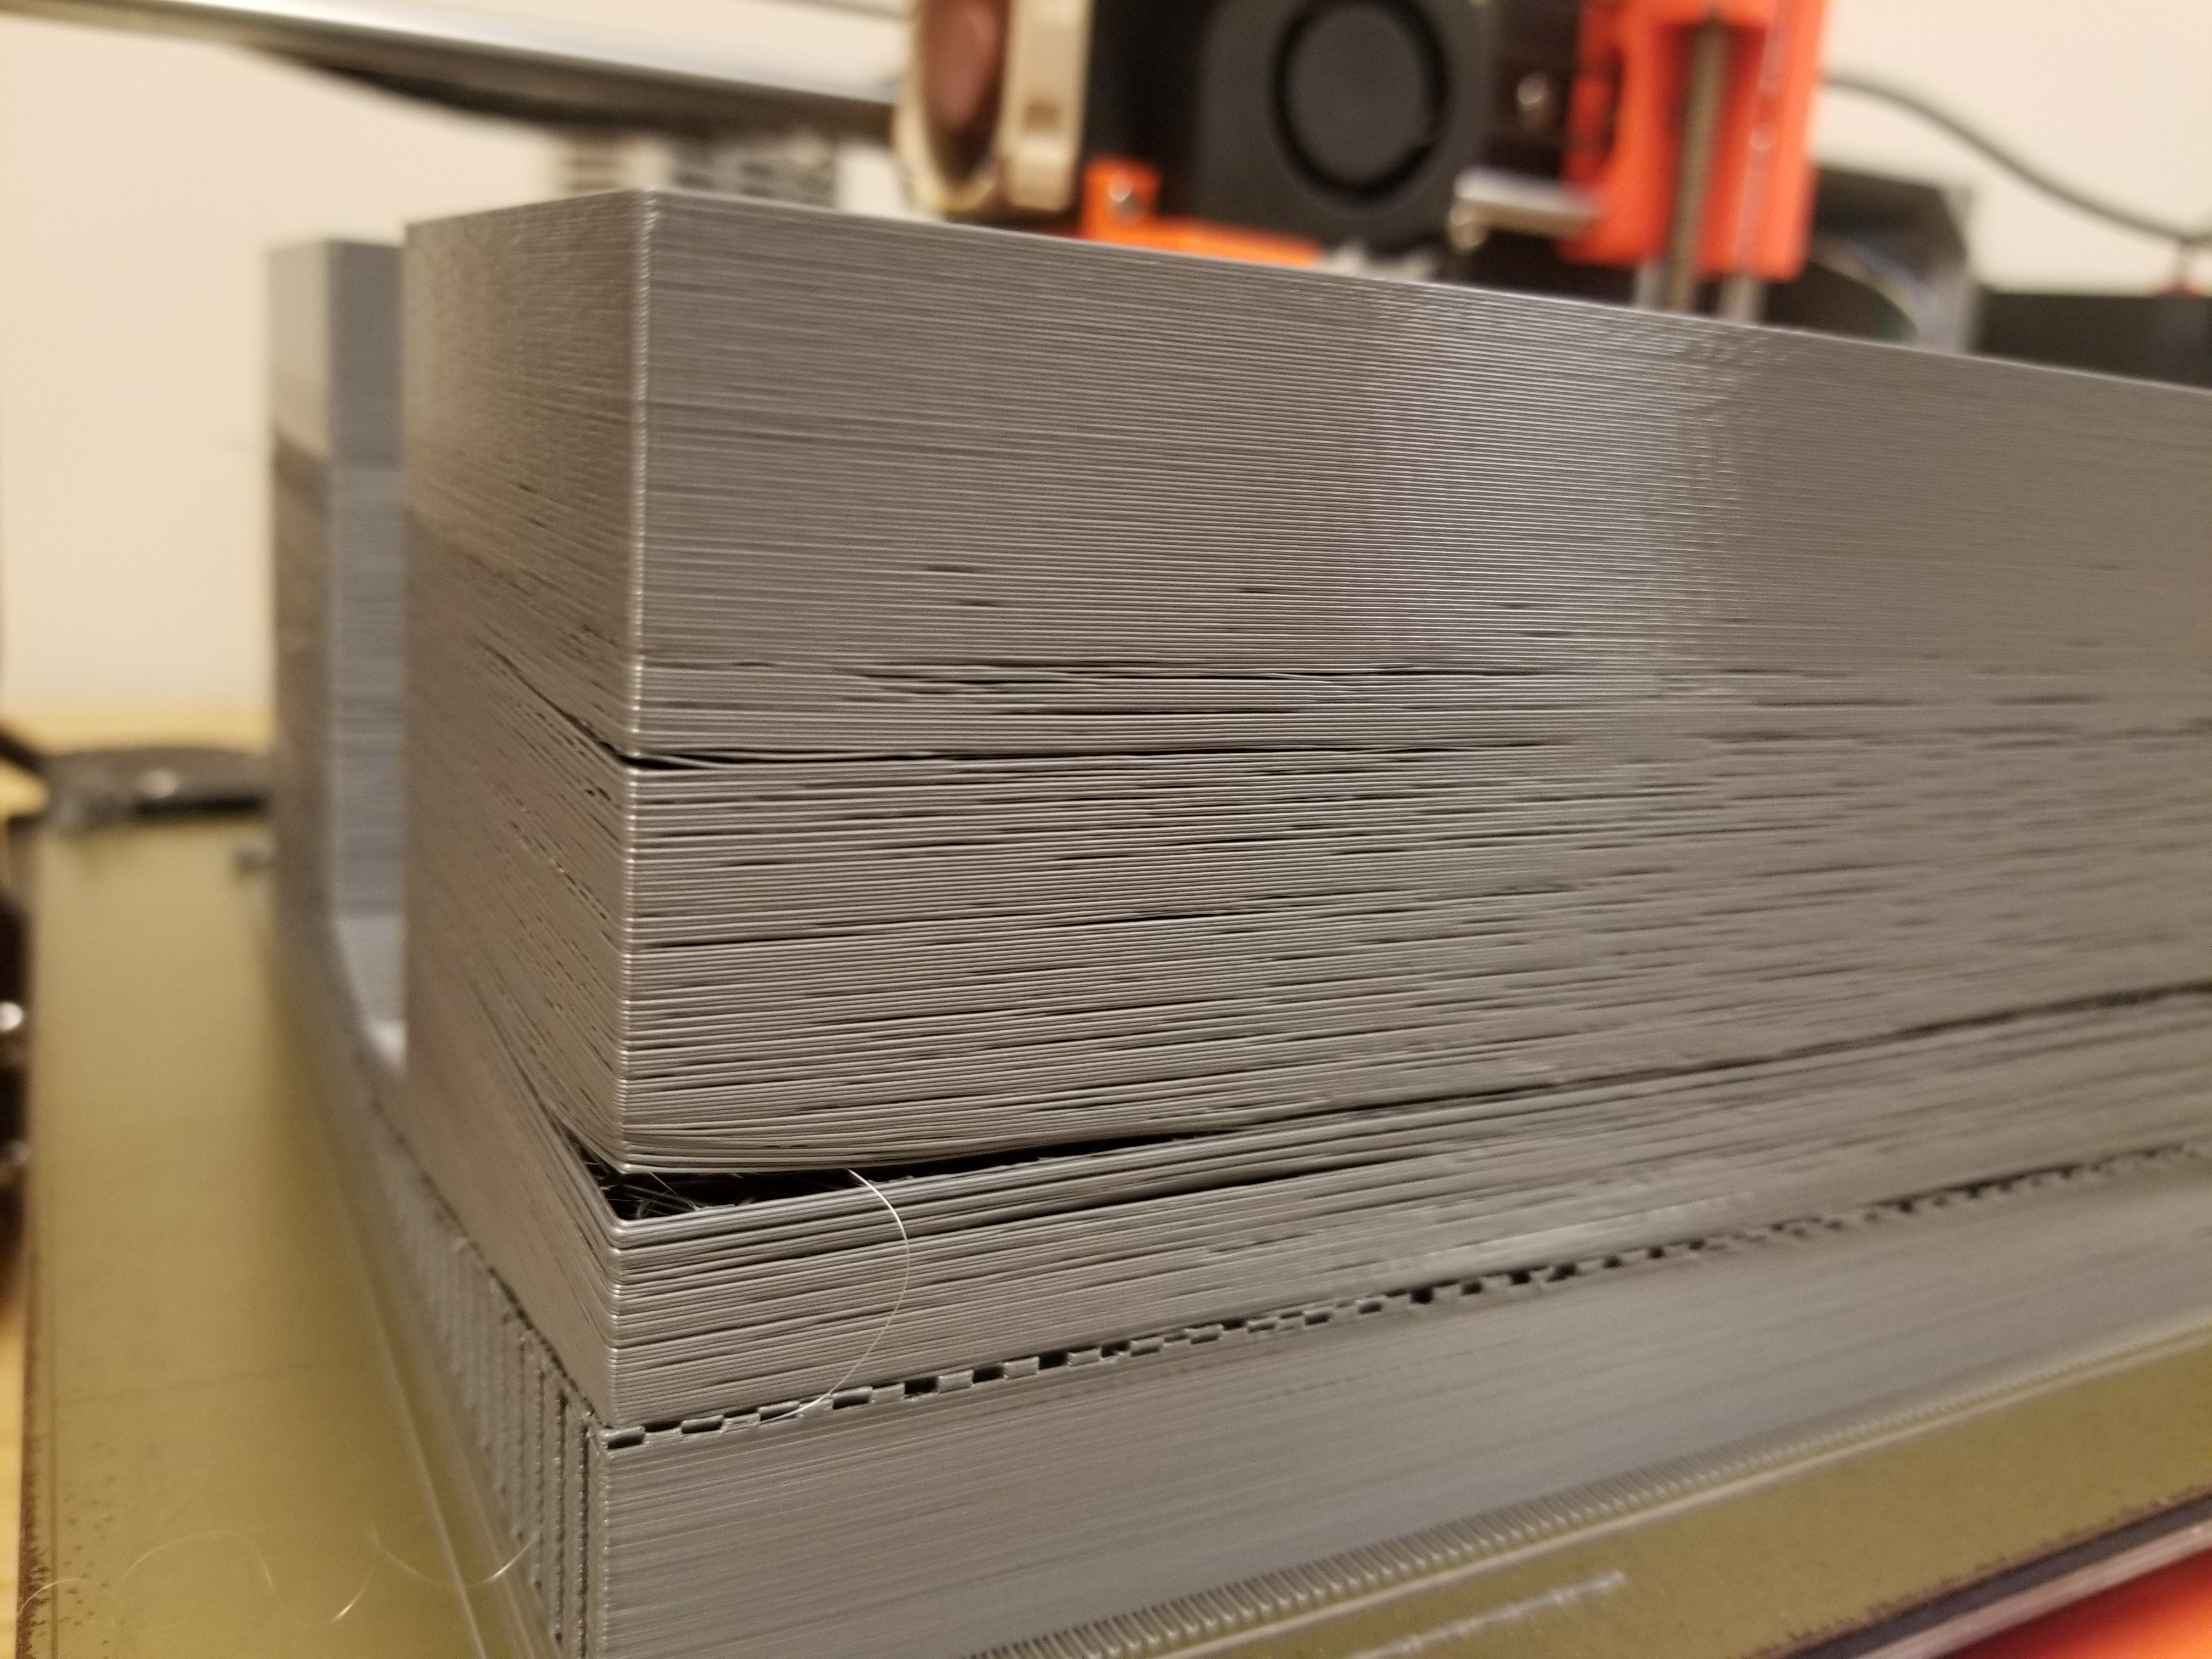
So, what exactly is layer separation? It's when individual layers of your print don't stick to each other, leading to splits or gaps. Think of it like a loaf of bread where the slices start coming apart. Several factors can contribute to this. It might be due to incorrect print settings – like the temperature being too low, or the print speed too high. Sometimes, it's about the filament quality or even environmental factors like drafts cooling the print too quickly. Getting to grips with these causes helps in troubleshooting and refining your printing process.
Impact on Print Quality and Strength
The impact of layer separation is twofold. First, it affects the aesthetic quality of your prints – nobody wants a model that looks like it's about to fall apart. But more importantly, it compromises the structural integrity. A print with poor layer adhesion is like a building with weak foundations. It's not as strong or durable as it should be, which is especially critical for functional parts. Understanding and mitigating layer separation is crucial for ensuring your prints are not only visually appealing but also robust and reliable.
Identifying Layer Adhesion Issues
Detecting and resolving layer adhesion problems is a crucial skill in 3D printing. Knowing what to look for and how to fix these issues can make a significant difference in your printing success.
Common Signs of Poor Layer Bonding
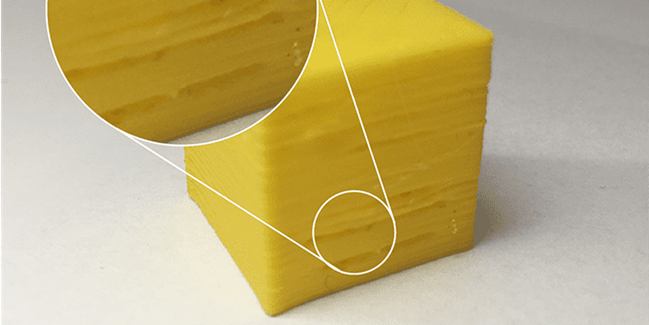
Spotting poor layer bonding isn’t too difficult once you know the signs. The most obvious indicator is when you see layers of your print separating or peeling apart – much like leaves in a book that won’t stay shut. You might also notice cracks or splits, particularly in the upper layers of your print. Another subtle clue is a change in texture; the surface might feel rough or uneven, indicating that the layers aren’t fusing together as they should. Keep an eye out for these signs – they’re your first hint that something’s amiss with your layer adhesion.
Troubleshooting Layer Adhesion Problems
So, you've identified the problem – now what? Troubleshooting layer adhesion starts with revisiting your print settings. Check your printing temperature first; it’s often the main culprit. If it’s too low, the filament won’t bond properly. Next, consider your print speed. If the printer is moving too fast, the layers may not have enough time to fuse. Environmental factors, like drafts or fluctuating room temperatures, can also affect adhesion. Finally, don’t overlook the condition of your filament. If it’s old or has absorbed moisture, it might not print reliably. By methodically addressing these areas, you can significantly improve layer bonding and, as a result, the overall quality of your prints.
In the next sections, we’ll dive deeper into specific solutions and techniques to enhance layer adhesion and achieve more successful 3D printing results.
Comprehensive Solutions for Layer Adhesion
Achieving perfect layer adhesion is crucial for high-quality 3D prints. Let’s explore some effective strategies that can help you optimize layer bonding in your projects.
Optimizing Layer Height for Stronger Bonds
Getting the layer height right is a critical step towards enhancing layer adhesion. It's all about finding that sweet spot where each layer melds seamlessly into the next.
Relationship Between Layer Height and Nozzle Diameter
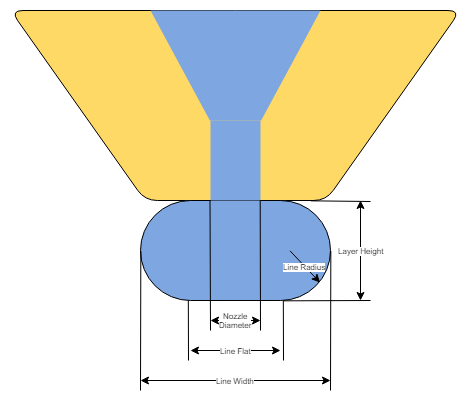
There's a close relationship between the layer height you choose and your nozzle diameter. Think of it like pouring syrup on pancakes; the width of the nozzle is like the size of your syrup bottle opening. If you pour too fast (print with a layer height too thick for your nozzle), you won’t get that even spread you’re looking for. Generally, your layer height should be about 25% less than your nozzle diameter to ensure good adhesion.
Recommended Layer Heights for Different Nozzles
The ideal layer height typically aligns with half of the nozzle diameter. For instance, with a 0.4 mm nozzle, a layer height of 0.2 mm is optimal, and for a 0.6 mm nozzle, a layer height of 0.3 mm is recommended. It's important to avoid using layer heights that exceed 75% of the nozzle diameter to ensure the best print quality and layer adhesion.

Adjusting Print Temperatures for Optimal Adhesion
Temperature plays a pivotal role in how well your layers stick together. It’s about finding that Goldilocks zone – not too hot, not too cold.
Importance of Correct Printing Temperature
The right temperature ensures that the filament flows smoothly and bonds properly. Too cold, and the layers won’t stick; too hot, and you might face issues like warping or stringing. The correct temperature allows the filament to melt and fuse in a way that maximizes adhesion without compromising the quality of the print.
Finding the Ideal Temperature for Different Filaments
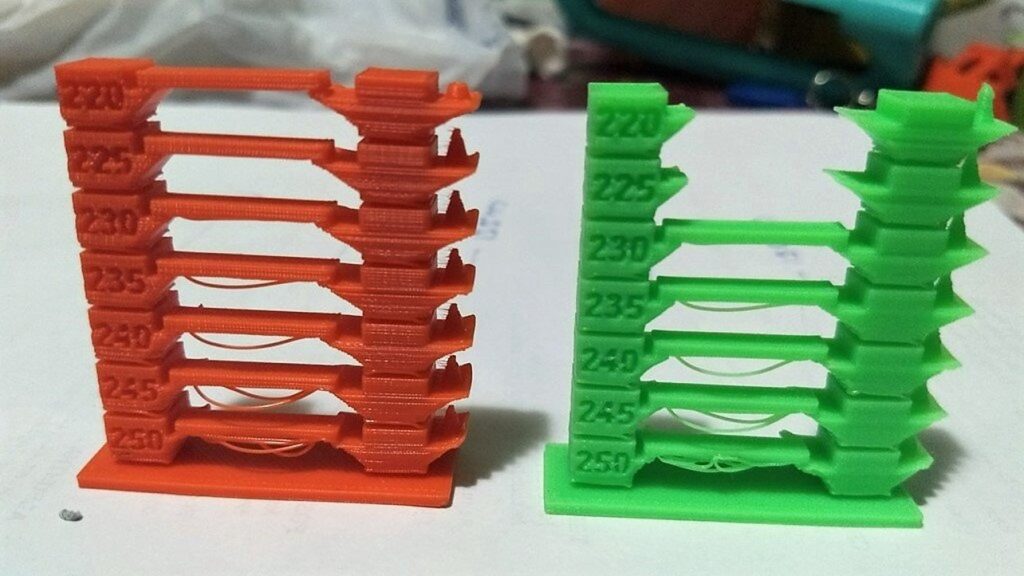
Different materials require different temperatures. For instance, PLA usually works best between 195-220°C, while ABS needs a hotter range, around 220-250°C. It’s crucial to refer to the filament manufacturer's guidelines and, if necessary, tweak the temperature in small increments. A test print can be a great way to dial in the perfect setting for your specific filament.
By focusing on these key areas, you can significantly improve the strength and durability of your 3D prints. Next, we’ll look into more specific techniques and settings adjustments that can further enhance layer adhesion.
Advanced Techniques to Prevent Layer Separation
While basic settings play a significant role in achieving good layer adhesion, sometimes you need to employ more advanced techniques to tackle layer separation issues effectively.
Using Enclosures for Temperature Stability
An enclosure for your 3D printer can be a game-changer, especially when working with materials prone to warping or splitting.
Benefits of Enclosed Printing Environment
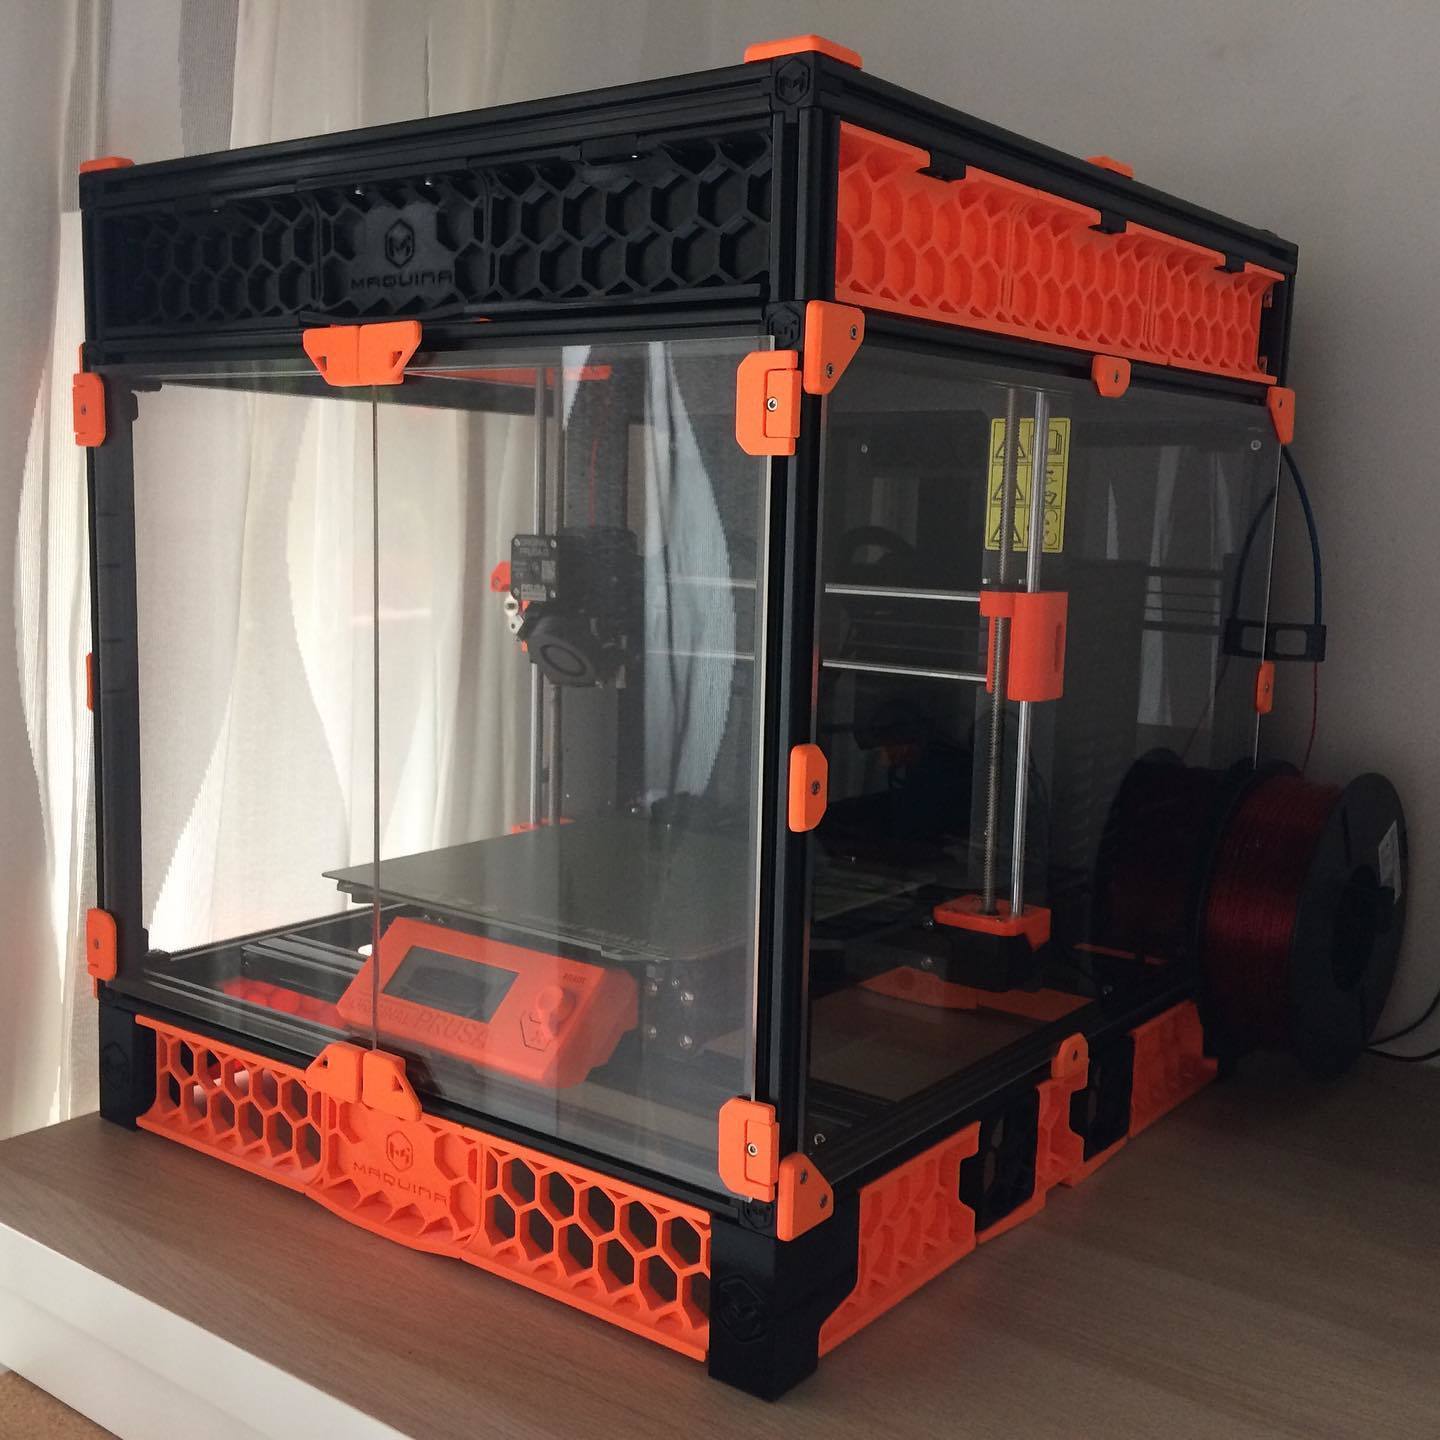
Enclosures maintain a consistent temperature around your print, mitigating the rapid cooling that can lead to layer separation. This stable environment is particularly beneficial for materials like ABS, which are sensitive to temperature fluctuations. Enclosures also protect your prints from drafts or sudden changes in room temperature, providing a controlled setting for more predictable printing outcomes.
DIY Solutions and Commercial Enclosures
You don't always need to invest in expensive commercial solutions. A simple DIY enclosure can be made from materials like cardboard, plastic, or even repurposed furniture. However, if you prefer ready-made solutions, there are plenty of options available in the market tailored to fit various printer models. Remember, safety first: Ensure your DIY enclosure is well-ventilated and made from non-flammable materials.
Importance of Print Bed Leveling
A level print bed is fundamental for the initial layer’s adhesion, which sets the foundation for the rest of your print.
Step-by-Step Guide to Bed Leveling
Achieving a perfectly leveled bed is essential for optimal first-layer adhesion. Here’s a clear and straightforward guide to manual bed leveling:
- Clean the Print Bed: Begin by cleaning the print bed thoroughly to remove any debris, dust, or residues. This ensures a smooth surface for your print to adhere to.
- Heat the Bed and Nozzle: Preheat your printer's bed and nozzle to their typical printing temperatures. This is important because materials expand slightly when heated, and you want to level your bed under the same conditions it will be printing.
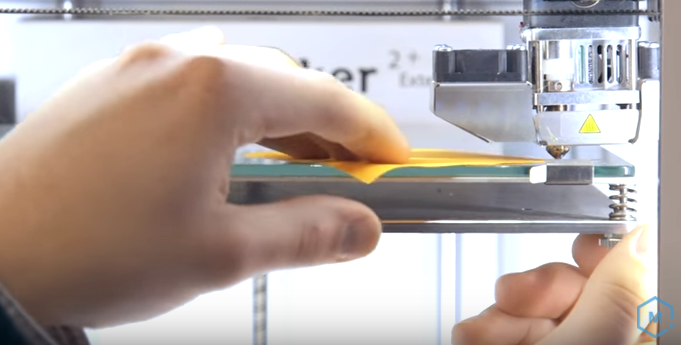
- Check Nozzle Distance with Paper Method: Take a standard sheet of paper and slide it between the nozzle and the bed. You should feel a slight resistance as the paper moves. If it's too loose or too tight, adjust the bed height using the bed leveling screws.
- Repeat Across Different Bed Points: Perform this test at multiple points across the bed – typically the corners and the center. This ensures an even and consistent distance between the nozzle and bed across the entire printing surface.
Impact on First Layer Adhesion
A level bed is critical for uniform first layer adhesion. When the first layer is evenly applied, it forms a strong foundation for the rest of the print, reducing the chances of warping or layer separation.
Auto Bed Leveling Systems
In addition to manual bed leveling, many modern 3D printers come equipped with auto bed leveling systems. These systems use sensors to automatically detect and compensate for any unevenness in the bed. While auto bed leveling can greatly simplify the process, it’s still recommended to periodically check and maintain the bed level manually to ensure the system is functioning correctly.
Fine-Tuning Your Printer Settings
Getting the best out of your 3D printer often involves fine-tuning various settings. These adjustments can significantly impact layer adhesion and overall print quality.
Calibrating Flow Rate/Extrusion Multiplier
The flow rate or extrusion multiplier determines how much filament is extruded during printing. Proper calibration is key to ensuring that each layer has just the right amount of material.
How to Adjust and Test Flow Rate
Adjusting the flow rate isn’t as daunting as it sounds. Here’s a simplified approach:
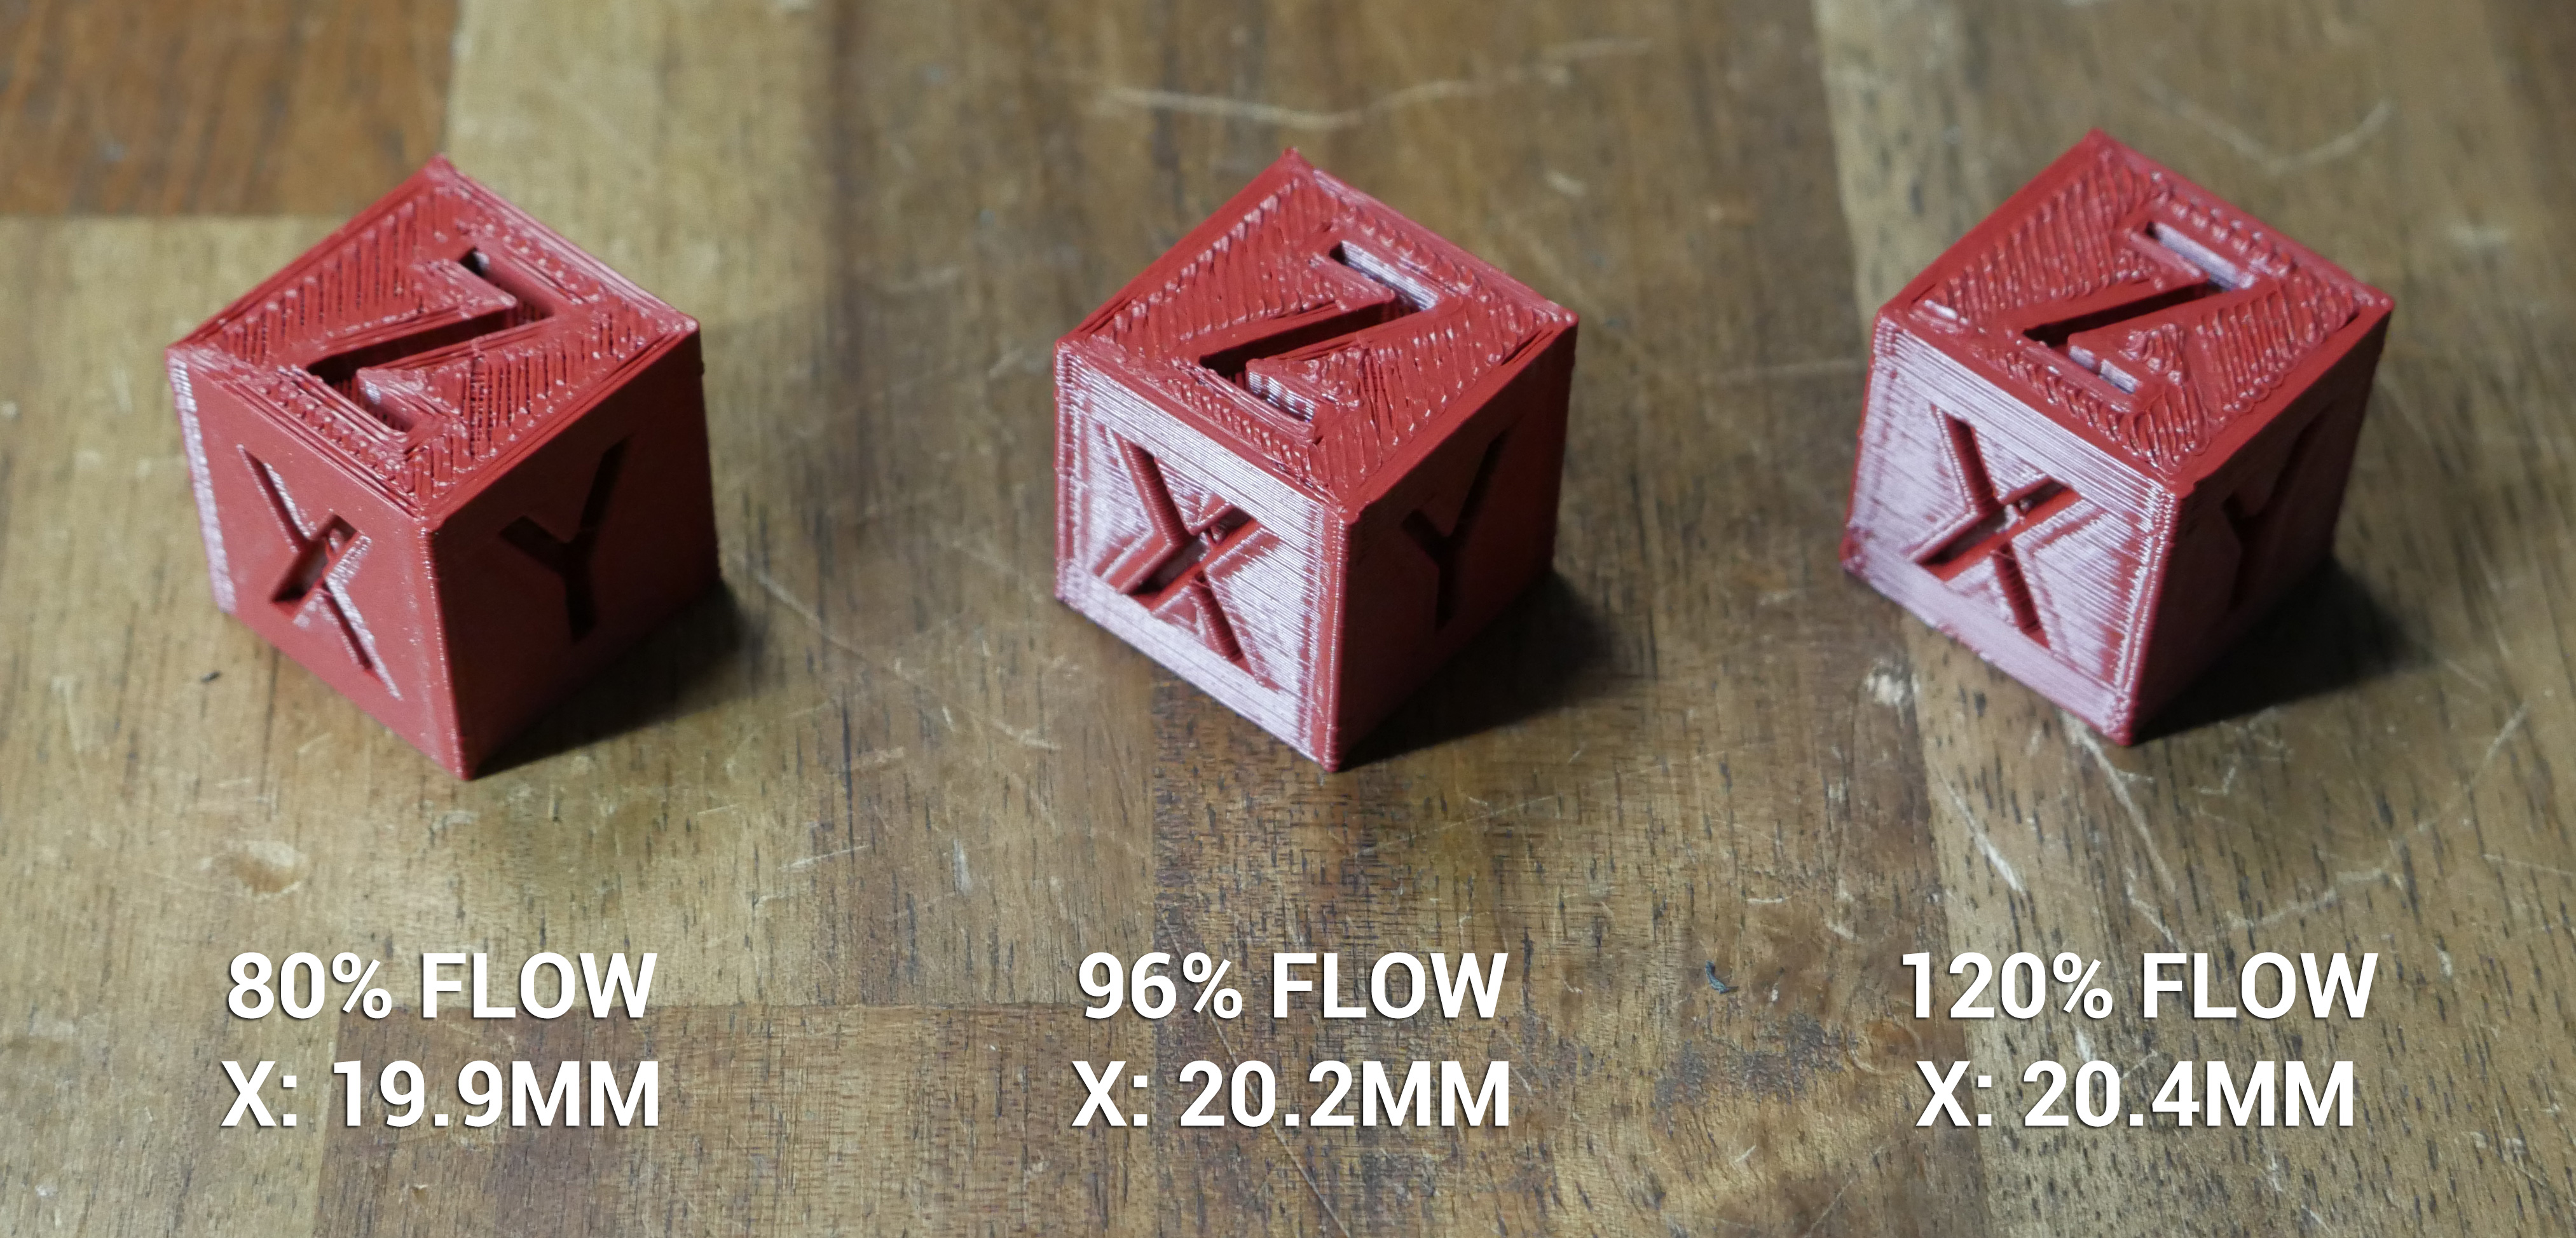
- Start with a test print – a small cube works well.
- If you notice gaps or thin layers, increase the flow rate slightly.
- Conversely, if the print looks overly thick or blobs are forming, reduce the flow rate.
- Make adjustments in small increments, around 5%, and reprint the test object to observe the effects.
Balancing Extrusion for Even Layers
Balanced extrusion is crucial for even layers. An unbalanced flow can lead to over-extrusion or under-extrusion, both detrimental to layer adhesion. Regularly calibrating your printer for the specific filament you're using can help maintain this balance.
Managing Print Speed for Better Adhesion
Print speed can have a significant impact on how well the layers of your print bond together.
Effects of Print Speed on Layer Bonding
Fast print speeds can lead to insufficient bonding time between layers, resulting in weak adhesion. On the other hand, too slow a speed might cause overheating and warping. Finding a balanced speed is essential for good layer adhesion.
Ideal Speed Settings for Various Materials
Each material has its ideal print speed range. For instance, PLA can generally be printed faster than ABS or TPU. A good starting point is around 50-60 mm/s for PLA, adjusting downwards for materials like ABS or flexible filaments. Remember, these are just starting points – depending on your printer and filament, you might need to experiment to find the optimal speed.
By carefully calibrating your flow rate and managing print speed, you can enhance layer adhesion, leading to stronger and more reliable prints.
Material-Specific Strategies
Each filament type has its unique properties and challenges. Understanding these can help you adjust your printing approach to achieve better layer adhesion and overall print quality.
Overcoming Challenges with Specific Filaments
Different materials require different strategies to optimize layer adhesion. Let’s explore some of the most common filaments and how to handle them.
ABS: Enclosures and Temperature Control
ABS filament is known for its strength but can be tricky due to its tendency to warp and split.
Enclosures: An enclosure helps maintain a consistent temperature, reducing warping. If your printer doesn’t come with one, consider building or buying an enclosure.
Temperature Control: ABS requires a higher extruder temperature, typically around 220-250°C. A heated bed is also essential, with temperatures around 100°C to ensure the first layers stick well and remain flat.
PLA: Temperature Adjustments and Cooling
PLA is popular for its ease of use but still requires careful temperature management.
Extruder Temperature: PLA doesn’t need as high temperatures as ABS. Generally, 195-220°C works well.
Cooling: PLA benefits from active cooling to achieve crisp details and prevent warping. A part cooling fan is helpful, but make sure it’s not cooling the filament too quickly to avoid layer adhesion issues.
PETG: Balancing Heat and Cooling Needs
PETG combines the ease of PLA with the strength of ABS but can be sticky and prone to stringing.
Heat Management: PETG requires a moderate temperature, usually between 230-250°C, for good layer bonding.
Cooling: Unlike PLA, PETG doesn’t need aggressive cooling. Setting the fan to a lower speed can prevent layer separation and maintain the strength of the print.
By tailoring your approach to each material, you can overcome filament-specific challenges, leading to improved layer adhesion and overall print success.
Maintenance Tips for Consistent Layer Adhesion
Regular maintenance of your 3D printer is crucial for ensuring consistent layer adhesion and the overall longevity of your machine. Here are some key tips to keep your printer in top shape.
Regular Nozzle Cleaning and Maintenance
The nozzle is where the magic happens in 3D printing, so keeping it clean and well-maintained is essential.
Techniques for Effective Nozzle Cleaning
- Brushing: Use a small wire brush to gently clean the exterior of the nozzle.
- Cold Pulling: Heat the nozzle, then insert a filament until it melts. Cool down the nozzle and quickly pull the filament out. This can help remove any internal debris.
- Chemical Cleaning: For stubborn clogs, a chemical cleaner designed for 3D printer nozzles can be effective.
Preventing Clogs and Ensuring Smooth Extrusion
- Regular Checks: Regularly inspect your nozzle for signs of clogging or damage.
- Quality Filament: Using high-quality filament reduces the risk of clogs caused by impurities.
- Correct Temperature Settings: Ensure you’re using the right temperature for your filament to prevent under or over-extrusion.
Filament Storage and Handling
Proper filament storage and handling are just as important as printer maintenance.
Avoiding Moisture in Filaments
- Desiccants: Store your filament spools in airtight containers with desiccant packets to absorb moisture.
- Dry Environment: Keep your filament in a dry environment to prevent moisture absorption.
Best Practices for Filament Storage
- Original Packaging: Whenever possible, store filaments in their original packaging.
- Avoid Sunlight: Store filaments away from direct sunlight which can degrade the material over time.
- Label and Organize: Keep your filaments labeled and organized for easy identification and to avoid using the wrong type for a print job.
By following these maintenance and storage tips, you can ensure your printer and filaments remain in optimal condition, leading to better print quality and layer adhesion.
FAQs
1. Why is layer adhesion important in 3D printing? Layer adhesion is crucial because it determines the structural integrity and durability of the printed object. Poor adhesion can lead to weak prints that are prone to breaking or deforming.
2. How can I tell if my 3D printer has layer adhesion problems? Signs of layer adhesion issues include visible gaps between layers, layers peeling apart, or the print being easily broken along layer lines.
3. What causes poor layer adhesion in 3D prints? Common causes include incorrect printing temperature, improper layer height, fast print speeds, and environmental factors such as drafts or humidity.
4. Can different filaments affect layer adhesion? Yes, different filaments have unique properties and require specific settings for optimal adhesion. For instance, ABS and PLA have different temperature and cooling requirements.
5. How does print speed affect layer adhesion? Too fast a print speed can prevent proper bonding between layers, as the filament may not have enough time to properly melt and fuse with the previous layer.
6. Is it necessary to use an enclosure for all types of filaments? Not all filaments require an enclosure. It's more critical for materials prone to warping, like ABS. PLA and PETG can often be printed successfully without an enclosure.
7. How often should I clean my 3D printer's nozzle? It depends on usage, but a general rule is to inspect and clean the nozzle after every few prints or whenever you notice signs of clogging or under-extrusion.
8. Does filament storage affect print quality? Yes, improper storage can lead to moisture absorption, which can degrade the filament quality and lead to poor layer adhesion.
9. Can bed leveling impact layer adhesion? Absolutely. An uneven bed can lead to inconsistent first layer adhesion, which sets the foundation for the rest of the print.
10. What is the best way to test for optimal layer adhesion? Conducting test prints with small adjustments in temperature, speed, and flow rate can help determine the best settings for your specific filament and printer model.
Conclusion
As we've explored the intricate world of 3D printing, it’s clear that mastering layer adhesion is key to creating strong, durable, and high-quality prints. From understanding the basics of layer separation and the importance of fine-tuning printer settings, to adopting material-specific strategies and maintaining your equipment, every step plays a crucial role in the outcome of your 3D printing projects.
Remember, 3D printing is as much an art as it is a science. It requires patience, experimentation, and a willingness to learn from each print. Whether you’re dealing with ABS, PLA, PETG, or any other filament, the journey towards perfecting your prints is continuous and ever-evolving.
So, keep experimenting with those settings, maintain your printer with care, and always be open to learning new techniques. With each layer you print, you're not just building a model; you're also building your skills and knowledge in this fascinating field of technology.
Happy printing, and may your layers always adhere seamlessly!
