Set up Obico for Klipper
This guide is for the users who use Klipper with Moonraker and Mainsail or Fluidd. If you are using OctoPrint with Klipper, please follow the Obico for OctoPrint guide instead.
This guide is for users who installed Klipper themselves. If you have a printer that came with Klipper pre-installed, follow the guide for your 3D printer:
This guide assumes you are connecting to the Obico Cloud. If you are connecting to a self-hosted Obico Server, you will need to use the address of your self-hosted server.
Hardware requirements
Before you start, make sure:
- You have set up Klipper and the Moonraker API correctly, and it is connected to your printer. A interface such as Mainsail/Fluidd is highly recommended.
- A webcam is set up for your printer and connected to Mainsail/Fluidd/Moonraker.
- There is sufficient lighting to illuminate the printing area of your printer. If your printer is in a lighted room, you are probably fine. If you'll print with light off, you will need to make sure the printing area is illuminated when your printer is printing. A LED strip or small LED lamp will do the trick.
Step 1: Download Obico for Klipper and run install.sh
- Use SSH to connect to the Raspberry Pi your Klipper runs on.
- Run the following commands one by one:
    cd ~
    git clone https://github.com/TheSpaghettiDetective/moonraker-obico.git
    cd moonraker-obico
    ./install.sh
- Follow the guided installation steps on your screen. You may be asked to enter your password in order to run
sudocommands. - When asked for additional information about configuration files, provide their location or the appropriate number. Default for Klipper may be:
moonraker.confconfiguration file:~/printer_data/config/moonraker.confor~/moonraker.conf(see Moonraker docs)- Moonraker network address: The IP or hostname of the Klipper machine
- Moonraker network port:
7125(HTTP) or7130(HTTPS) (see [server]) - Log file directory:
/logsfolder (root level of the disk) (see moonraker.log)
- Next, the installation process will ask you to enter details required to link your printer to the Obico server. Provide:
- The Obico Server you want to link it to. The default is
https://app.obico.io(the Obico Cloud). Alternatively, you can also host your own Obico Server: enter the IP address or hostname of your own server (e.g. http://192.168.0.5:3334). - A 6-digit verification code. Leave the terminal window open on this screen.
- The Obico Server you want to link it to. The default is
- Follow the guide outlined in Step 3 to either link your Klipper machine and Obico automatically or manually by using the one-time passcode.
- You do not need the one-time passcode if automatic linking is successful below.
Step 2: Sign up for an Obico account.
Follow instructions in the "📱 Mobile App" tab if you are using the Obico mobile app, or the "🌐 Web App" tab if you are using the web app.
Your Obico account is the same for the mobile app and the web app. If you sign up for an account using the mobile app, you can sign in to the web app later with the same email and password. And vice versa.
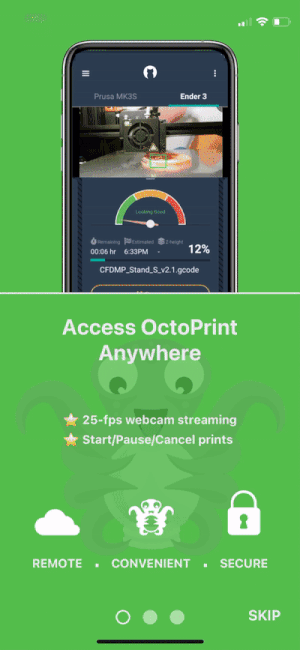
All functions are available equally in the mobile and the web app. However, with the mobile app, you can receive push notifications on your phone to easily track the print progress, and get alerted in case a failure is detected.
- 📱 Mobile App
- 🌐 Web App
- Download the Obico app from the Apple App Store or Google Play Store.
- Open the mobile app. Click through the first time tour and then tap “Let’s Go!”.
- Simply tap "YES!" on the "Hardware Required" screen.
- Tap "Sign Up/Sign In" button to proceed to the sign up/sign in screen.
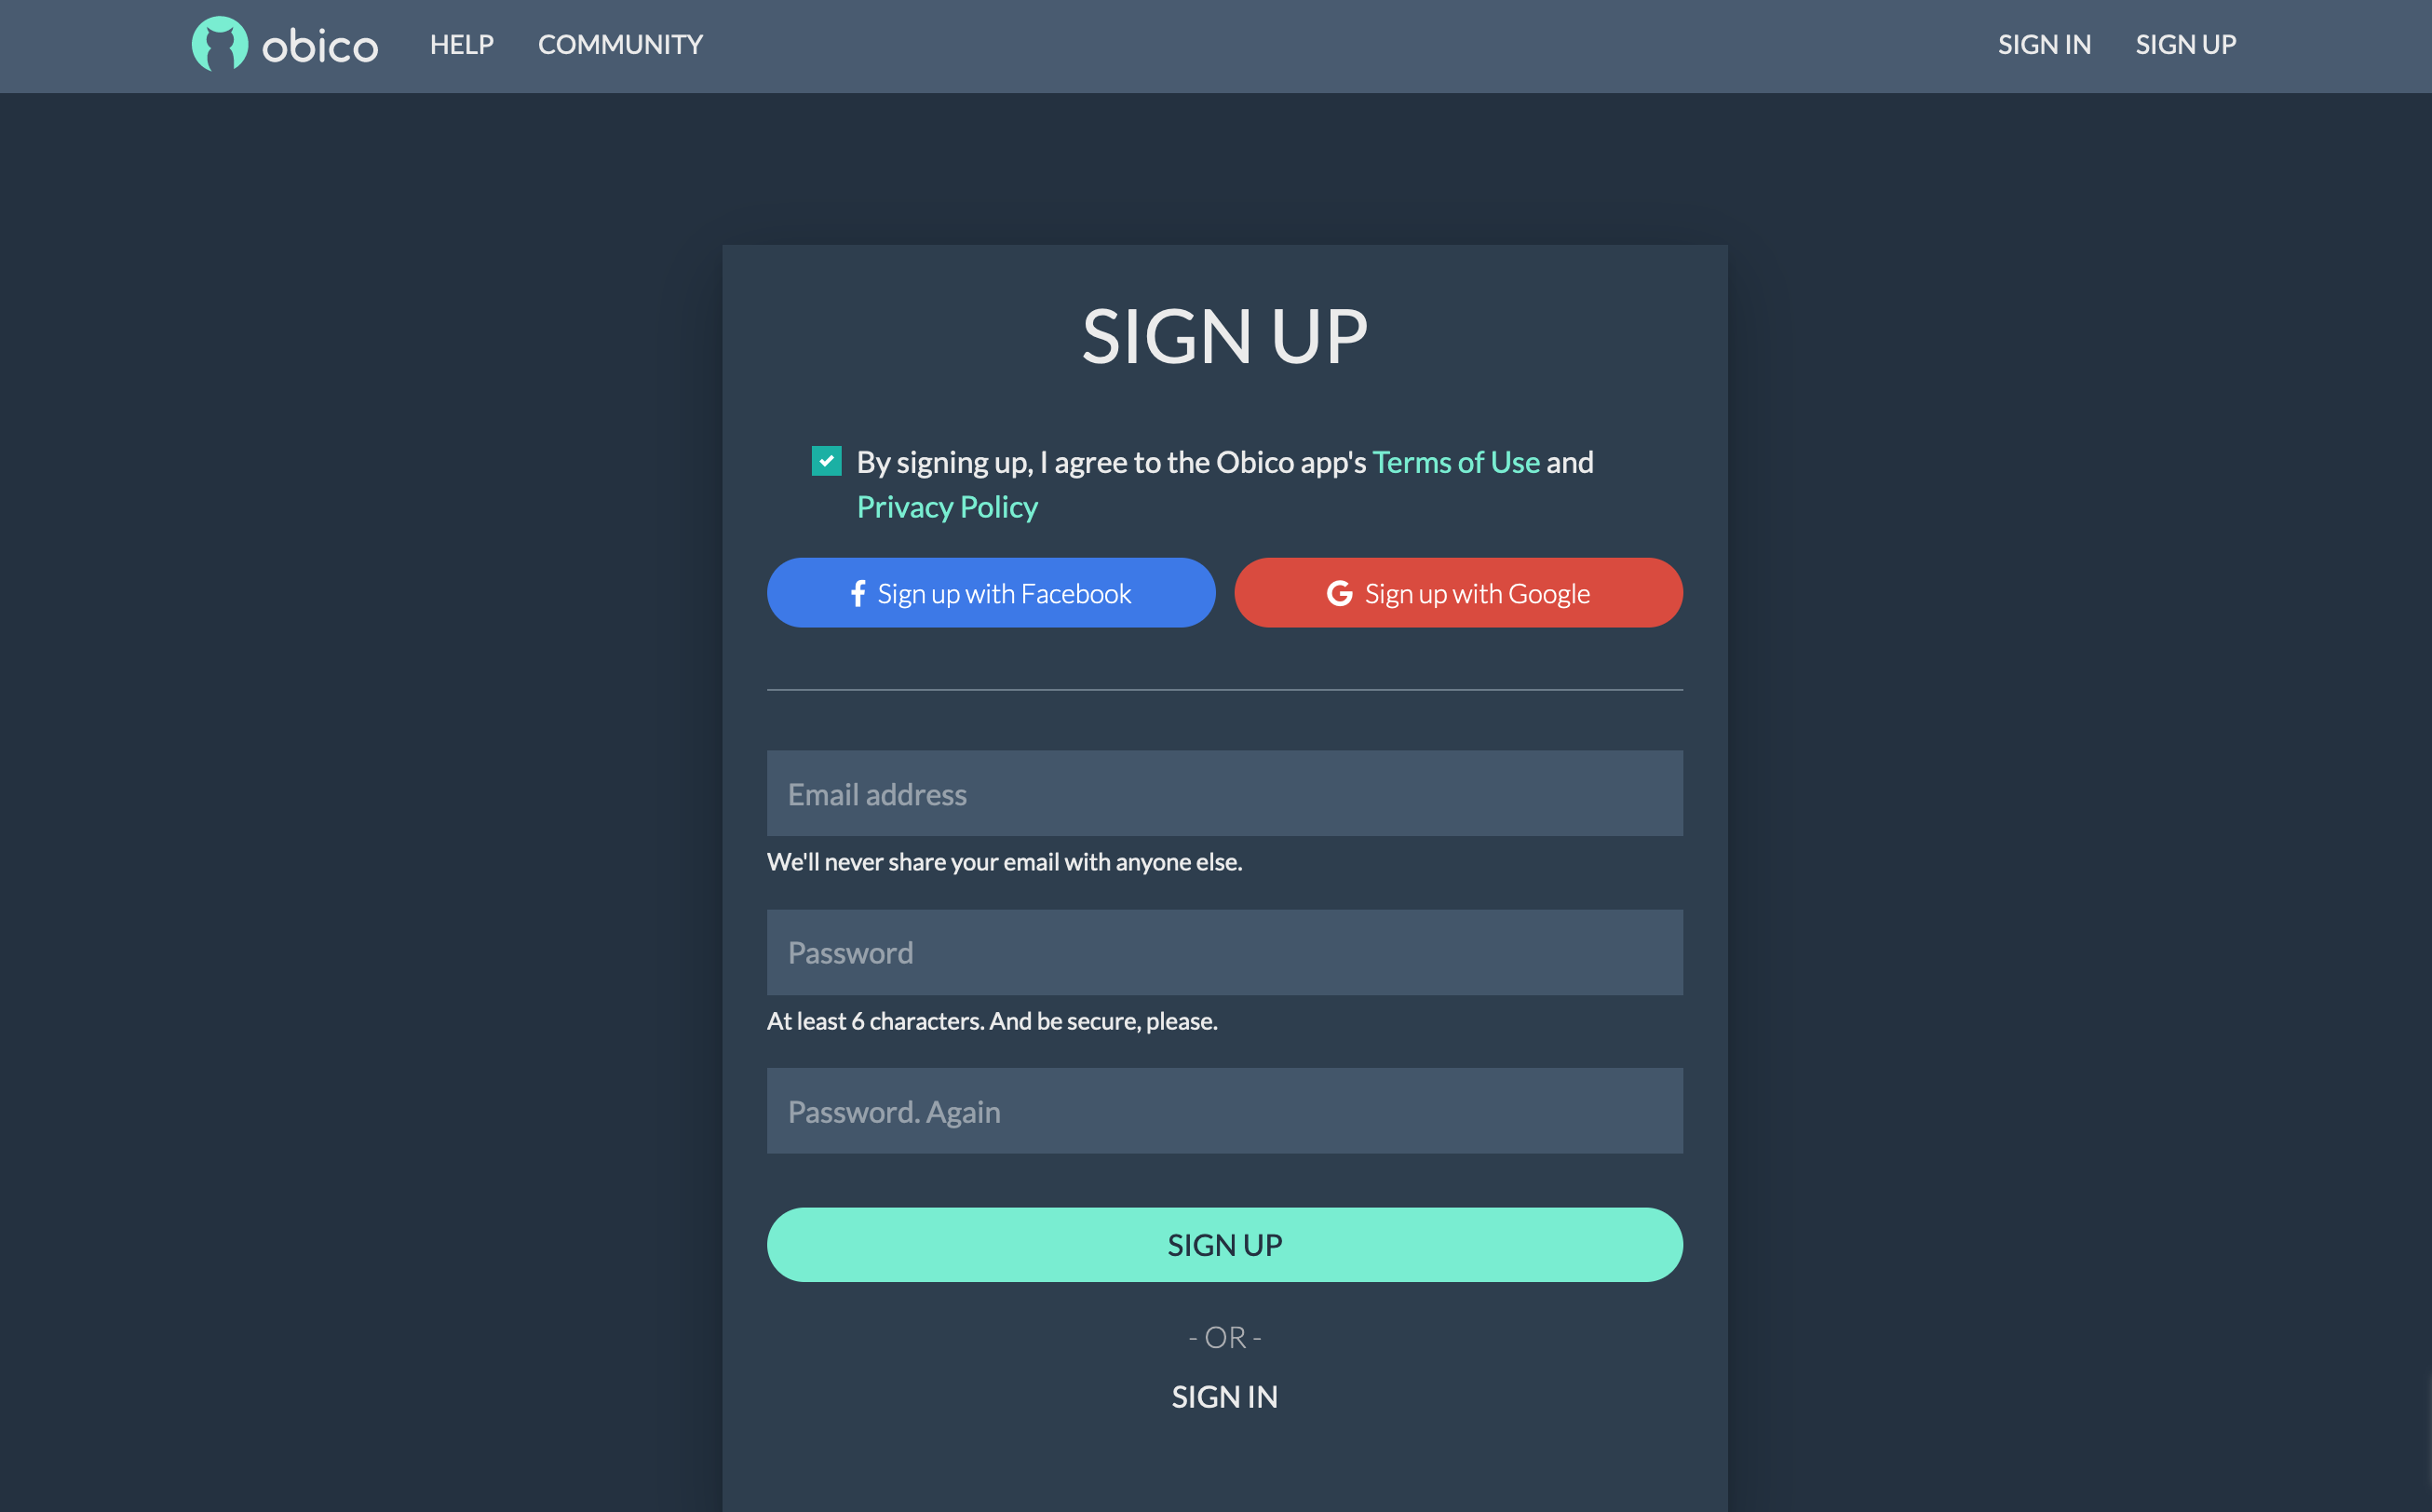
- Sign up with your email, Google or Facebook account. If you have already registered, click the "Sign In" button and sign in to your account.
If you are connecting to a self-hosted Obico Server, press the wrench icon (🔧) on the top-left corner of the sign-up screen to change the server address.
- Open the Obico Server sign up page in a new browser tab.
- Sign up with your email, Google or Facebook account. If you have already registered, click the "Sign In" button and sign in to your account.
Step 3: Launch the "Link Printer" wizard in the Obico app
If your phone or computer is one the the same local network as your Klipper is, the Obico app can find your Klipper machine automatically. This is the easiest way to link your printer to your Obico account.
- 📱 Mobile App
- 🌐 Web App
- Press "Link Printer" button on the welcome screen. If you don't see that screen, tap the menu icon (☰) on the top-left corner, and select "Link New Printer".
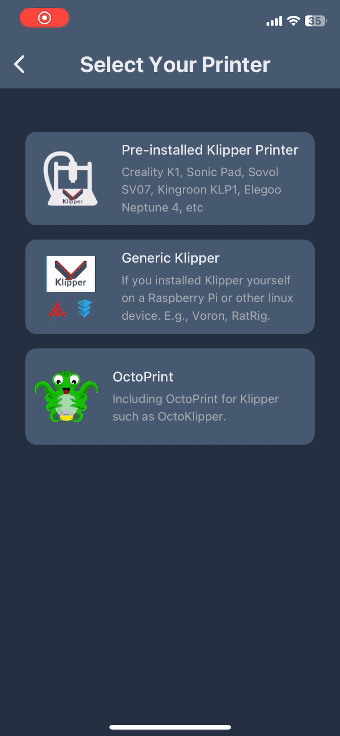
- Choose “Generic Klipper” on the next screen.
- Assuming you have followed the previous steps and installed the plugin, you can simply click the "Yes, the Plugin is Installed" button.
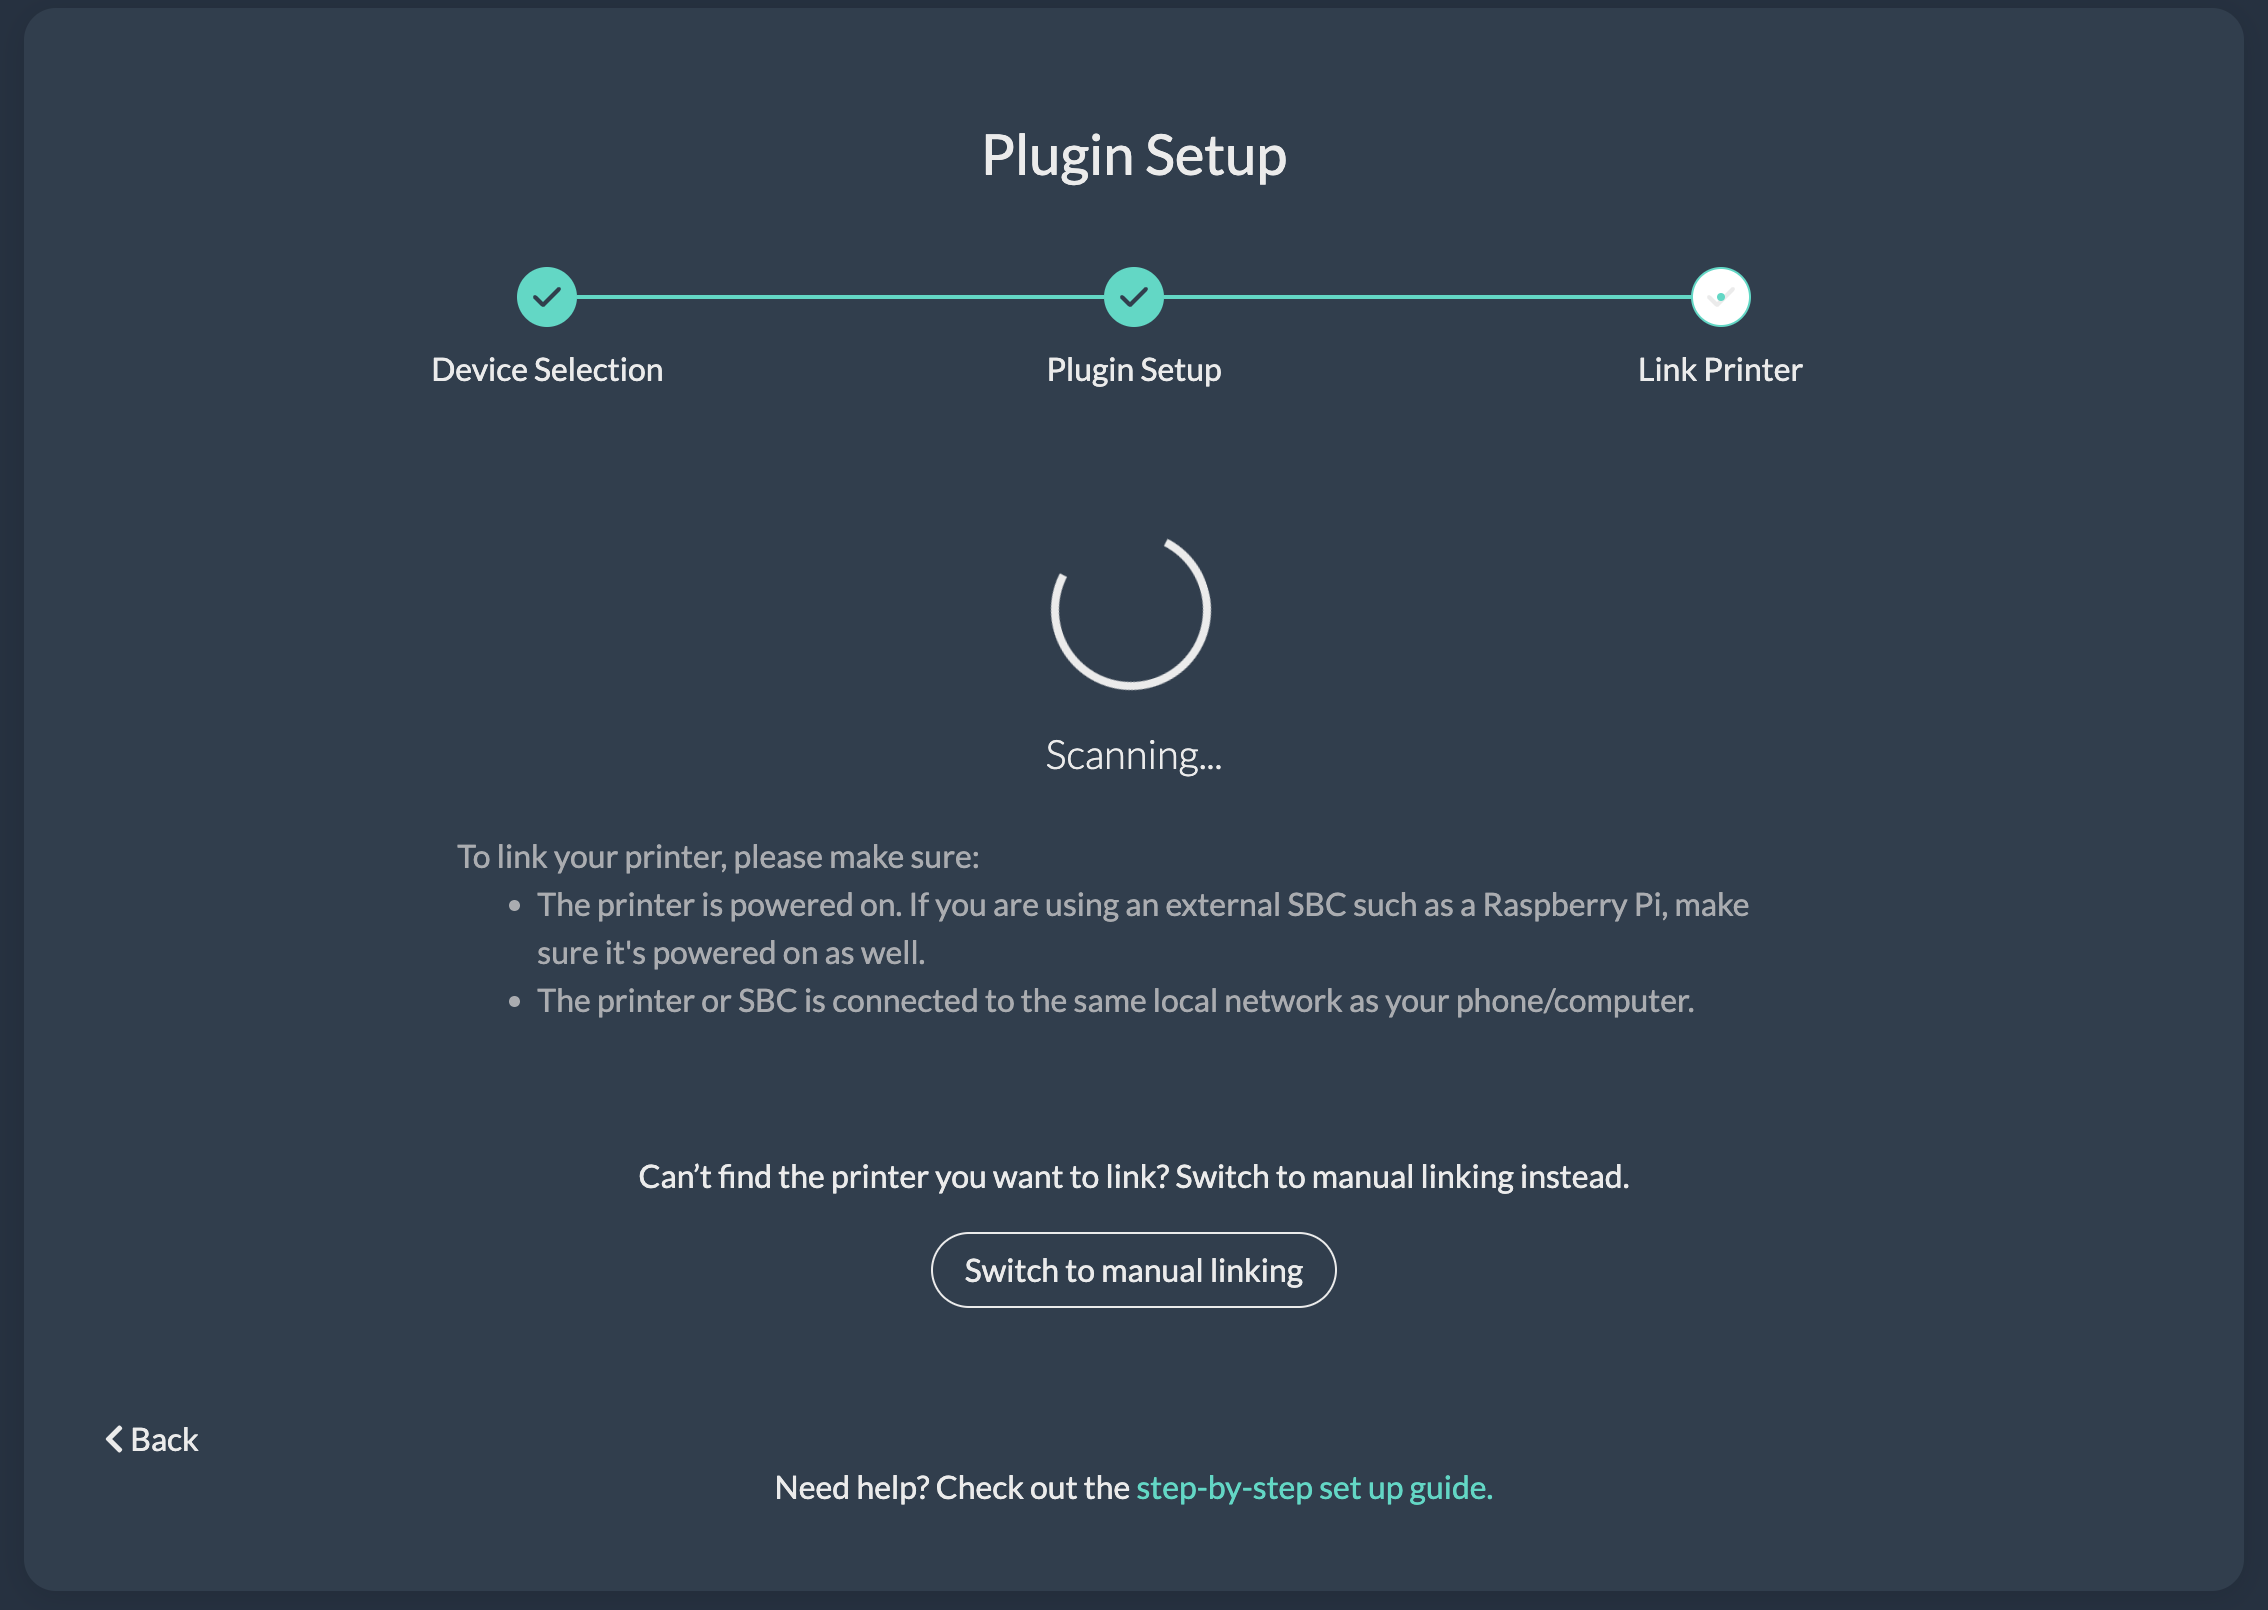
- The app will start scanning for the Klipper printer connected to the same local network.
- If a printer is found, simply click the "Link" button and the app will do the rest for you.
If, however, the app can't find your Klipper printer after 1 minute of scanning, you need to follow the Manual Setup Guide to link your printer using a one-time passcode.
- Optionally, you can now give your printer a name. If you skip this step, your printer will have the default name "My Awesome Cloud Printer".
- On the welcome page, click the "Link Printer" button.
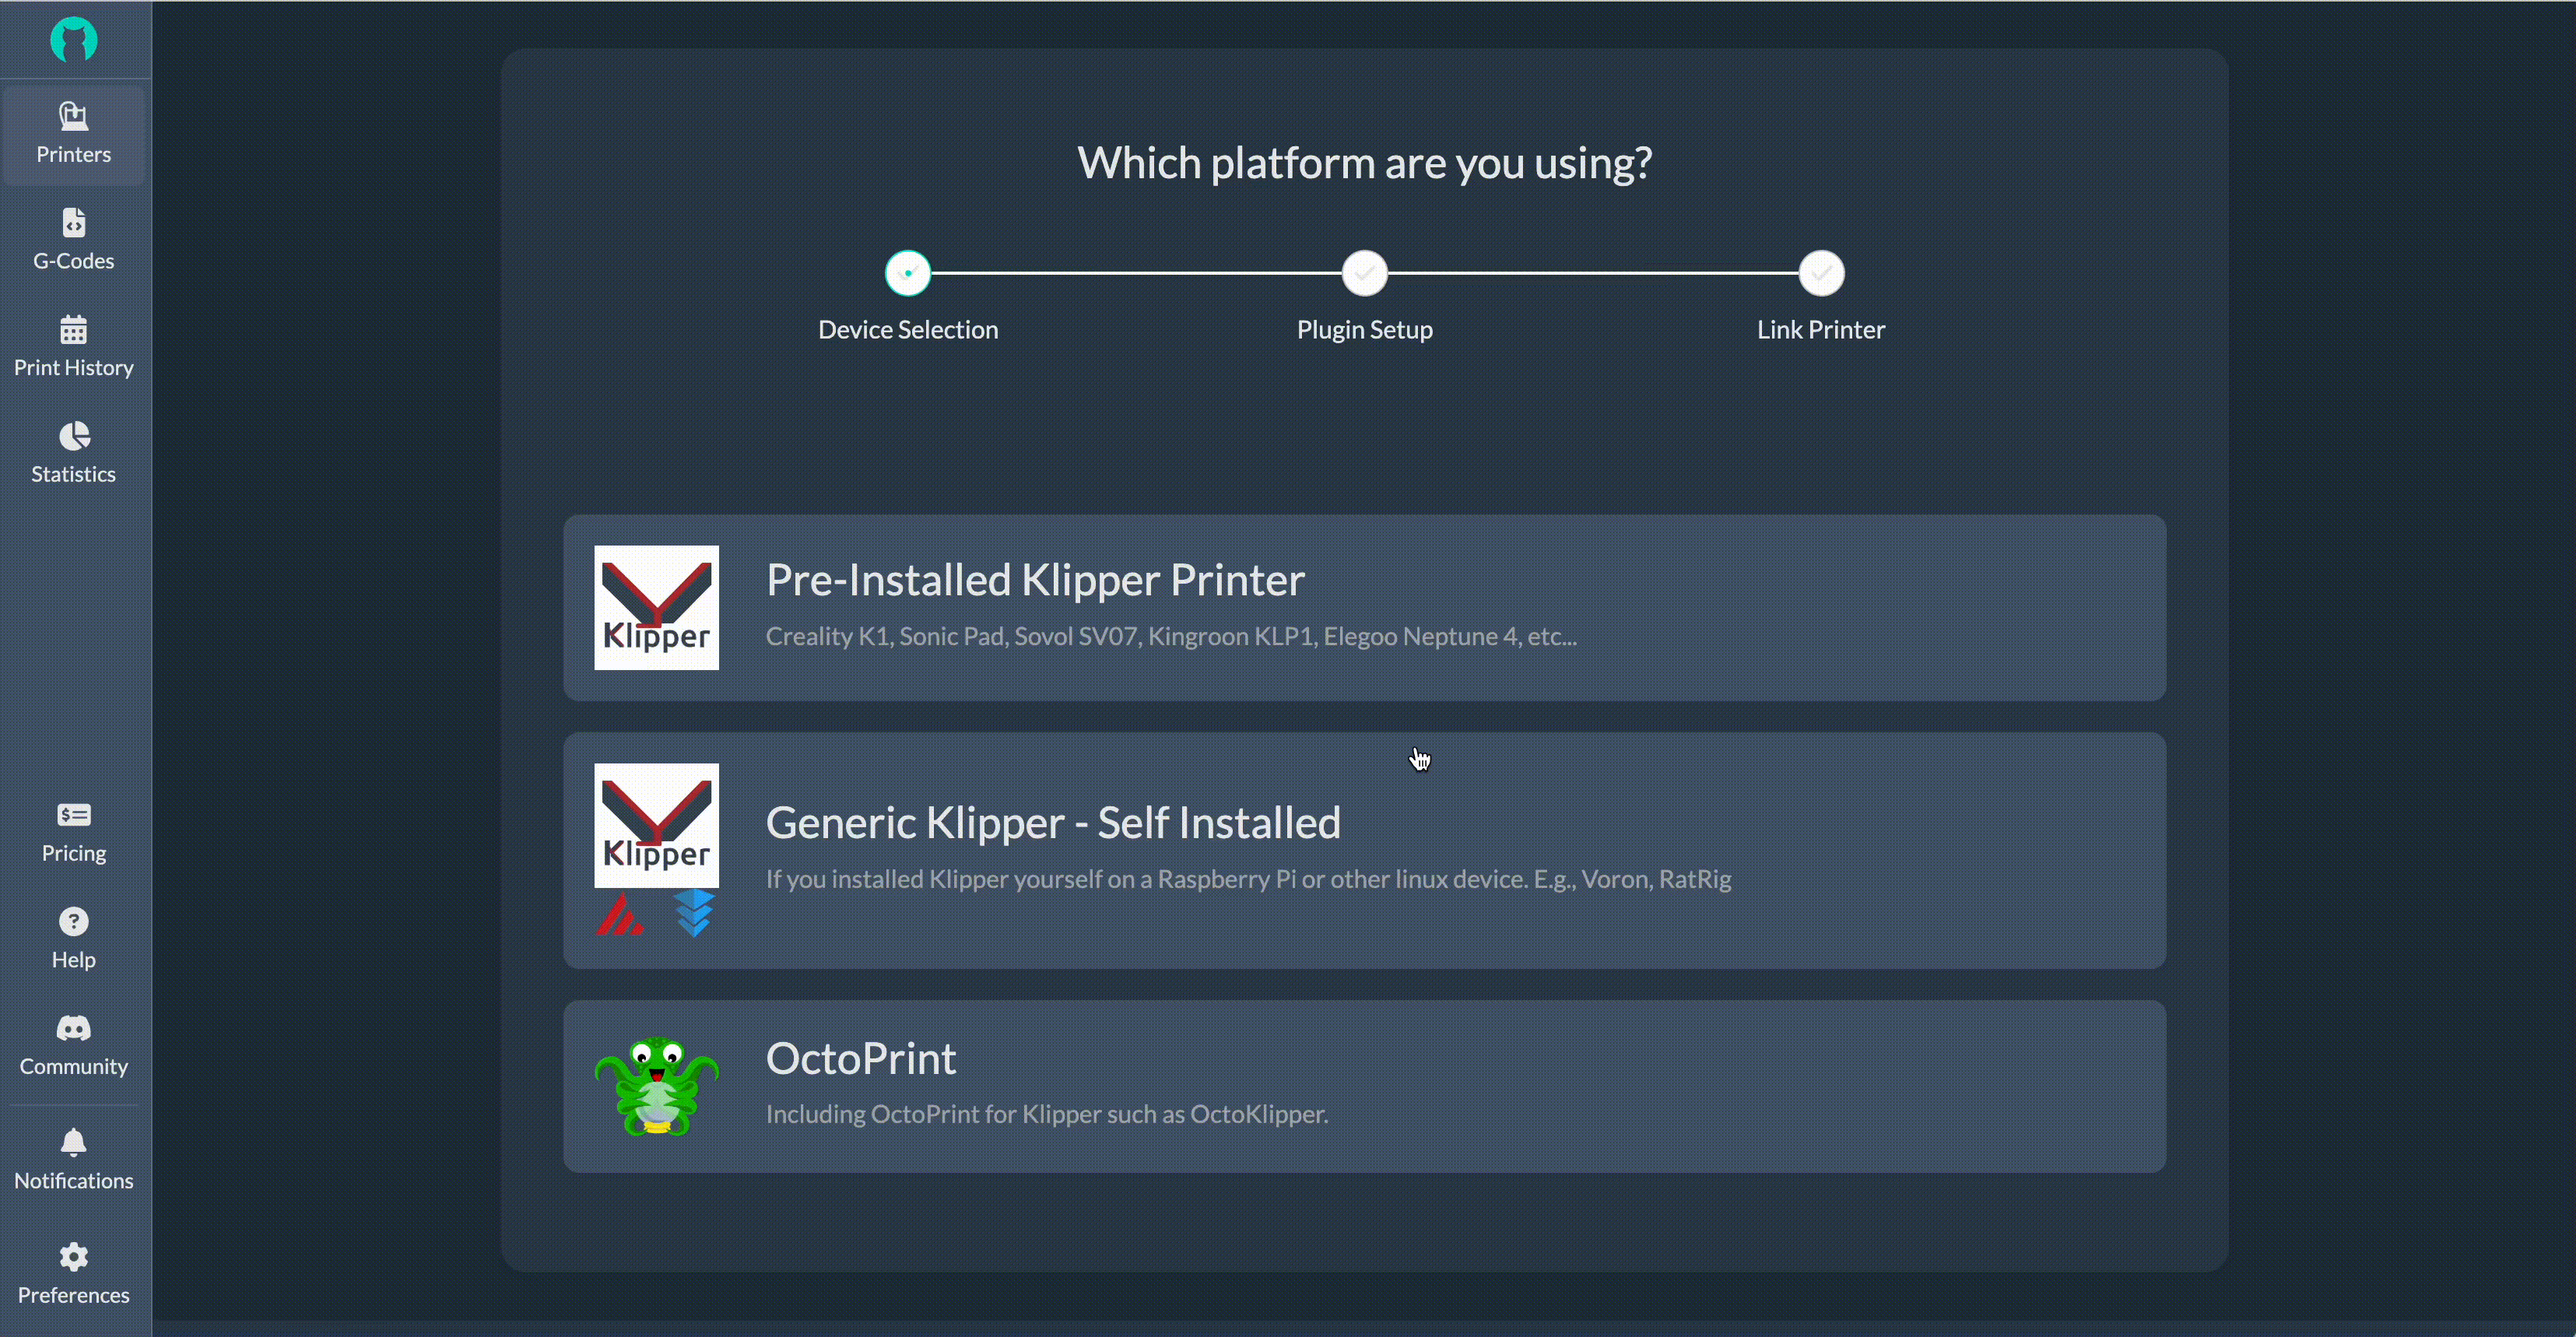
- Click "Generic Klipper" on the page that asks you to select a platform
- Assuming you have followed the previous steps and run the
install.shscript, simply press "Next". - The app will start scanning for your Klipper connected to the same local network.
- If your Klipper printer is found, simply click the "Link" button and the app will do the rest for you.
If, however, the app can't find your Klipper printer after 1 minute of scanning, you need to follow the Manual Setup Guide to link your printer using a one-time passcode.
- Optionally, you can now give your printer a name. If you skip this step, your printer will have the default name "My Awesome Cloud Printer".
Step 4: Restart the Raspberry Pi.
Once the Raspberry Pi has booted up, you should be able to see your printer and the webcam stream in the Obico app.
What's next?
Check out your printer feed!
Press "Go Check Out Printer Feed!" to see everything you care about your printer: the webcam feed, heater temperature, time remaining on the print job, and more! Remember, you can see your printer feed anywhere you go, as long as you have an internet connection on your phone!
Test the magical failure detection!
The Detective sounds too magical to be true? See The Detective in action for yourself.
Change printer settings.
The default settings for your printer in The Spaghetti Detective are the ones that most users find the most reasonable. But feel free to tweak them to your liking:
- Change notification settings (mobile app only). By default you receive push notifications when The Detective finds something fishy, and for the status of whatever your printer is printing. But you can choose to receive a lot more.
- Change printer settings, such as if The Detective should pause your printer when a failure is detected.
Link Your Printer Manually With One-Time Passcode
Only follow this section if linking your printer automatically in step 3 did not work.
If your printer is not recognized automatically, you can link your printer with a one-time passcode instead.
- 📱 Mobile App
- 🌐 Web App
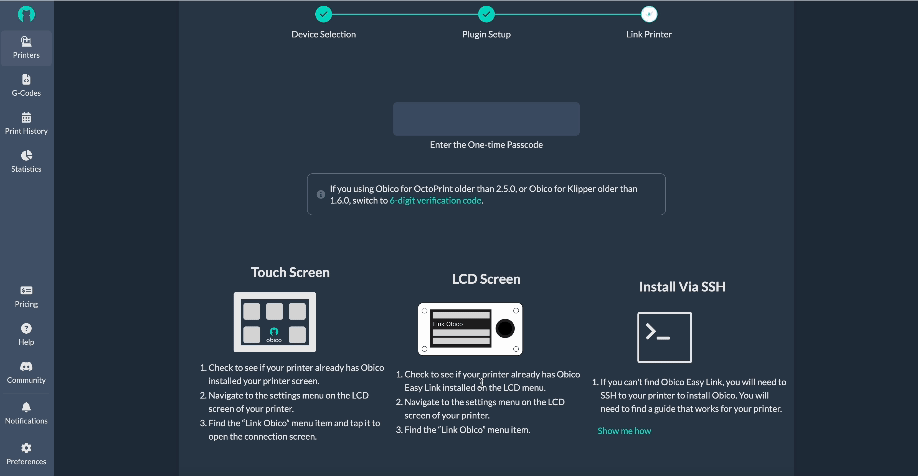
If you are on Obico for Klipper version older than 1.6.0, switch to Legacy Manual Setup Guide to link your printer using a six-digit code.
- Click "Switch to Manual Linking" button on the printer scanning page.

- Go back to the terminal window you had open in Step 2. Note the one-time passcode shown on the terminal screen

- Type the one-time passcode into manual linking page of the Obico web app. You're printer will be securely linked to your Obico account.
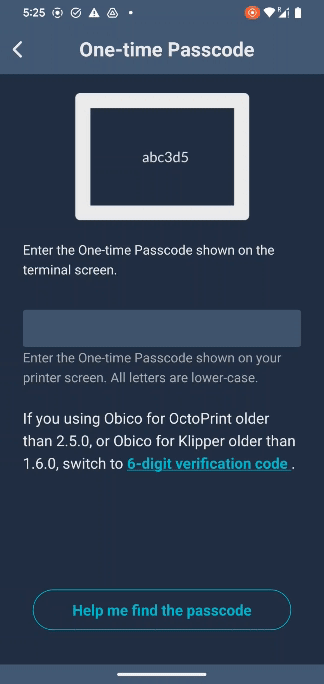
- Go to step 4 of the setup guide to complete the installation.
If you are on Obico for Klipper version older than 1.6.0, switch to Legacy Manual Setup Guide to link your printer using a six-digit code.
- Click "Switch to Manual Linking" button on the printer scanning page.
- Go back to the terminal window you had open in Step 2. Copy the one-time passcode shown on the terminal screen
- Paste the one-time passcode into manual linking page of the Obico web app. You're printer will be securely linked to your Obico account.
- Go to step 4 of the setup guide to complete the installation.