Kingroon 3D Printer - Klipper Remote Access and AI
Introduction
Kingroon is a big name in 3D printing. They make great printers that many people love to use, both for fun and for work. One cool thing about their printers is that they come with pre-installed Klipper firmware. This makes the printers even better and faster.
In this article, we'll talk about two Kingroon printers: the KLP1 and the KP3S Pro V2. We'll also show you how to connect them with Obico. This lets you use some neat features, like controlling your printer from far away and having AI help check on your prints.
Meet the Kingroon KLP1
If you've been searching for a top-tier 3D printer that doesn't break the bank, you might want to turn your attention to Kingroon's KLP1. This printer is making waves in the 3D printing world, and it's easy to see why.
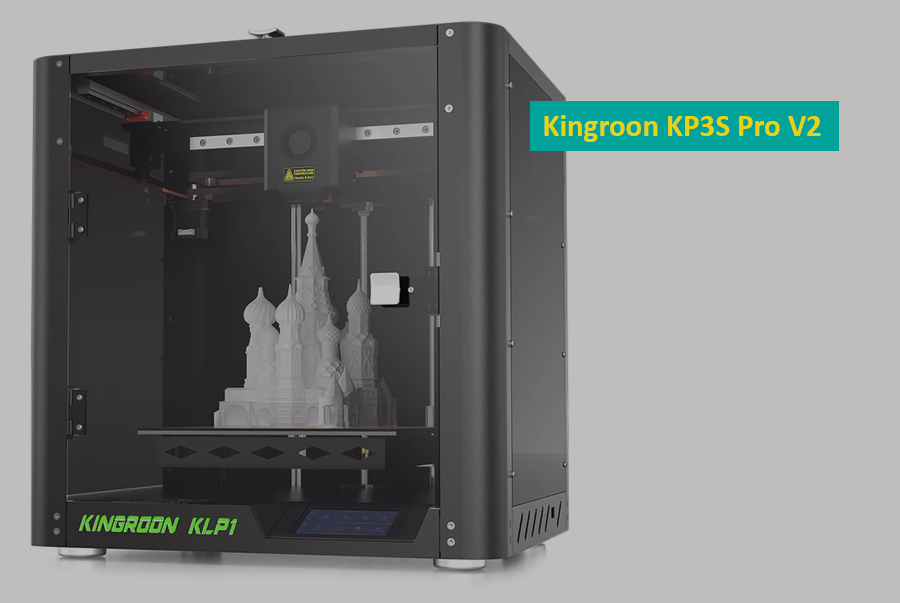
First off, it's speedy. Imagine having your prints ready at a lightning-fast 500mm/s, and with a whopping 20000mm/s² acceleration. No more waiting around for your projects to finish. And speaking of prints, the quality is top-notch thanks to its CoreXY structure, which is known for precision. Plus, it's built with linear guides on the X and Y axes, ensuring the printer moves smoothly, accurately, and lasts a long time even with heavy use.
One of the standout features is its Klipper firmware. If you're new to this, Klipper is like the brain of the 3D printer, and it helps the KLP1 work more efficiently. And guess what? You don't need any additional gadgets, like a Raspberry Pi, to get it up and running.
The KLP1 is also versatile. It has an all-metal hot end that can handle a wide range of materials, from common ones like PLA to more special ones like nylon. Plus, it has some cool features to make your life easier, like auto bed leveling, which means less time fiddling and more time printing.
To sum it up, the Kingroon KLP1 is a powerful, fast, and smart 3D printer that's packed with features. Whether you're just starting out or are a 3D printing pro, the KLP1 is worth checking out.
For more info about the printer or to purchase, you can go to the Printer official website
Unveiling the KP3S Pro V2
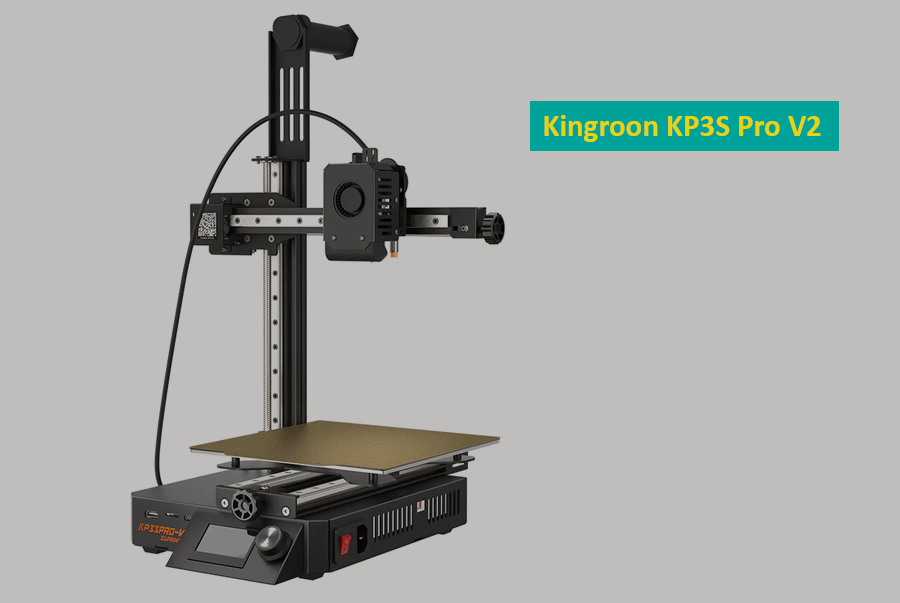
The Kingroon KP3S Pro V2 isn't just any 3D printer—it’s a paradigm shift in the world of 3D printing, combining speed, precision, and a user-friendly interface. With a Klipper firmware built right into its core, it promises to make 3D printing both exhilarating and accessible for everyone. At a price of $279.00, it's designed to offer outstanding value for its capabilities.
Dynamic Features At A Glance
- All-in-One Klipper Mainboard: No need for an additional Raspberry Pi, simplifying setup and reducing costs.
- High-Speed, High-Quality Printing: Achieve speeds of up to 350mm/s with the assurance of the ADXL345 module actively compensating for vibrations, ensuring clean prints.
- Precision in Every Movement: With linear rail guides on all axes, it ensures stability even during rapid maneuvers.
- Robust All-Metal Extruder: With a ceramic heating tube, expect swift heating, reliable extrusion, and impressive filament compatibility.
- Advanced Extrusion with 9.5:1 Gear Ratio: An improved resolution system for high-speed printing, coupled with a 5015 blower for efficient heat dissipation.
- Seamless Connectivity: An integrated WiFi module means you can command your printer from anywhere, with a robust signal output ensuring uninterrupted operation.
- Intuitive Interface: A 1.28-inch display screen provides easy operation and control.
- Universal Compatibility: Through its various interfaces, manage your prints from any screen, anywhere, and anytime.
- Fully Automated Bed Leveling: Reducing the time spent on manual calibrations, the printer ensures a level bed every time.
To find out more about the printer or to make a purchase, feel free to check out the official printer website
Why Remote Access is the Game-Changer
In the modern world of technology, being able to control devices from a distance has become more than just a convenience; it's a necessity. This is especially true for 3D printing, where the ability to manage, monitor, and modify your prints in real-time can make all the difference in the outcome. Let's dive into why remote access has become such a game-changer in the 3D printing realm.
Streamlining Operations for Maximum Efficiency
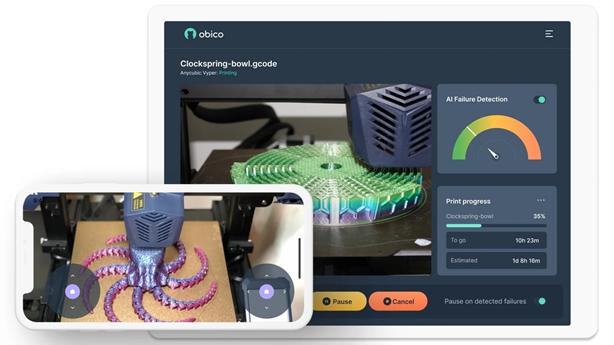
Remote access eliminates the need for continuous physical presence by the printer. Whether you're in another room, at a coffee shop, or even in another city, you can manage your printer's operations. This ensures that the printing process is smooth, reduces the risk of errors, and saves valuable time. Instead of frequently checking on the printer, you can get instant updates and make immediate adjustments as needed.
The Power of Real-time Control
Imagine detecting a minor glitch in the printing process and instantly pausing or adjusting the print settings from your mobile device. With remote access, you gain real-time control, allowing for quick interventions that can prevent potential mishaps. This not only ensures the quality of the final product but also reduces the wastage of materials.
Safe Printing, Smart Choices
Safety is paramount in 3D printing. Remote access provides an added layer of security. For instance, if a printer faces an unexpected issue, such as overheating, users can promptly shut it down from a safe distance. Additionally, with the ability to receive notifications about your printer's status, you're always in the know, enabling you to make informed and smart decisions about your print jobs.
Installation Guide: Obico for Klipper on Kingroon 3D printer
If you own a Kingroon 3D printer and wish to install Obico for Klipper, enabling remote access and AI features, follow these straightforward steps:
Step 1: Establish a Secure Connection to Your Printer's Board
To commence, connect securely to your printer's internal computer using SSH. Here's how:
-
Access Your Terminal or Command Prompt: Think of this as the gateway to your printer's computer.
-
Execute the Following Command and Press Enter:
ssh mks@your-printer-ip-address
Replace "your-printer-IP-address" with your printer's actual IP address, which can be found in the Advanced Settings on your printer's display screen.
-
Enter Your Credentials:
- When prompted, provide the following login credentials:
- Username: mks
- Password: makerbase This is similar to logging into your printer's computer system.
With these credentials entered successfully, you'll be connected to your printer's board, ready to proceed with the Obico for Klipper installation.
Step 2: Clone the Obico for Klipper Repository
Now, let's move on to the second step:
- Navigate to Your Home Directory:
In the terminal where you connected to your printer's board, you are now inside your printer's computer system. Access your home directory using this command:
cd ~
Think of it as visiting your computer's "home" folder.
-
Clone the Obico for Klipper Repository:
- Next, retrieve the Obico for Klipper software from GitHub. Execute this command:
git clone https://github.com/TheSpaghettiDetective/moonraker-obico.gitThis is akin to downloading a program onto your computer.
With the Obico for Klipper repository successfully cloned onto your printer's computer, you are now prepared to proceed with the installation.
Step 3: Access the Obico Repository
Let's proceed to the next step:
Enter the Newly Cloned Repository:
- To work with the Obico for Klipper files you just downloaded, navigate into the repository folder with this command:
cd moonraker-obico
Think of it as opening a folder on your computer.
Now, you're inside the Obico for Klipper repository and ready to proceed with the installation.
Step 4: Execute the Installation Script
You're almost there! Let's move on to the next step:
Run the Installation Script:
- To install Obico for Klipper, run a specialized script by executing this command and pressing Enter:
./install.sh
This script will configure Obico for Klipper on your printer's computer. While Obico for Klipper is being installed, follow the on-screen prompts for the subsequent steps in the installation process.
Step 5: Follow Installation Prompts
Now, continue to the next step, where you'll configure specific settings:
During the Installation Process:
- While the installation script is running, it will prompt you for specific settings. Here's what to input when prompted:
- Moonraker Host: When asked for the Moonraker host, input:
127.0.0.1
This tells Obico where to locate the Moonraker software.
- Moonraker Port: For the Moonraker port, enter:
7125
This sets the communication port for Moonraker.
- Moonraker Config File: Specify the path to your Moonraker configuration file when prompted. Typically, it's found at:
/home/mks/klipper_config/moonraker.conf
Ensure you input the correct path to your configuration file.
- Klipper Log Directory: For the Klipper log directory, provide the path to your Klipper log files, typically located at:
/home/mks/klipper_logs
This helps Obico locate the Klipper logs.
By providing these settings, you enable Obico for Klipper to communicate effectively with your Kingroon 3D printer's software. Continue following the installation prompts as needed.
Upon completing these steps, you will have successfully installed Obico for Klipper on your 3D printer. To maximize this setup, follow these additional steps:
Step 1: Sign up for an Obico Account
If you haven't already, create an Obico account to get started. You can do this via the Obico mobile app or the web app. Here's how:
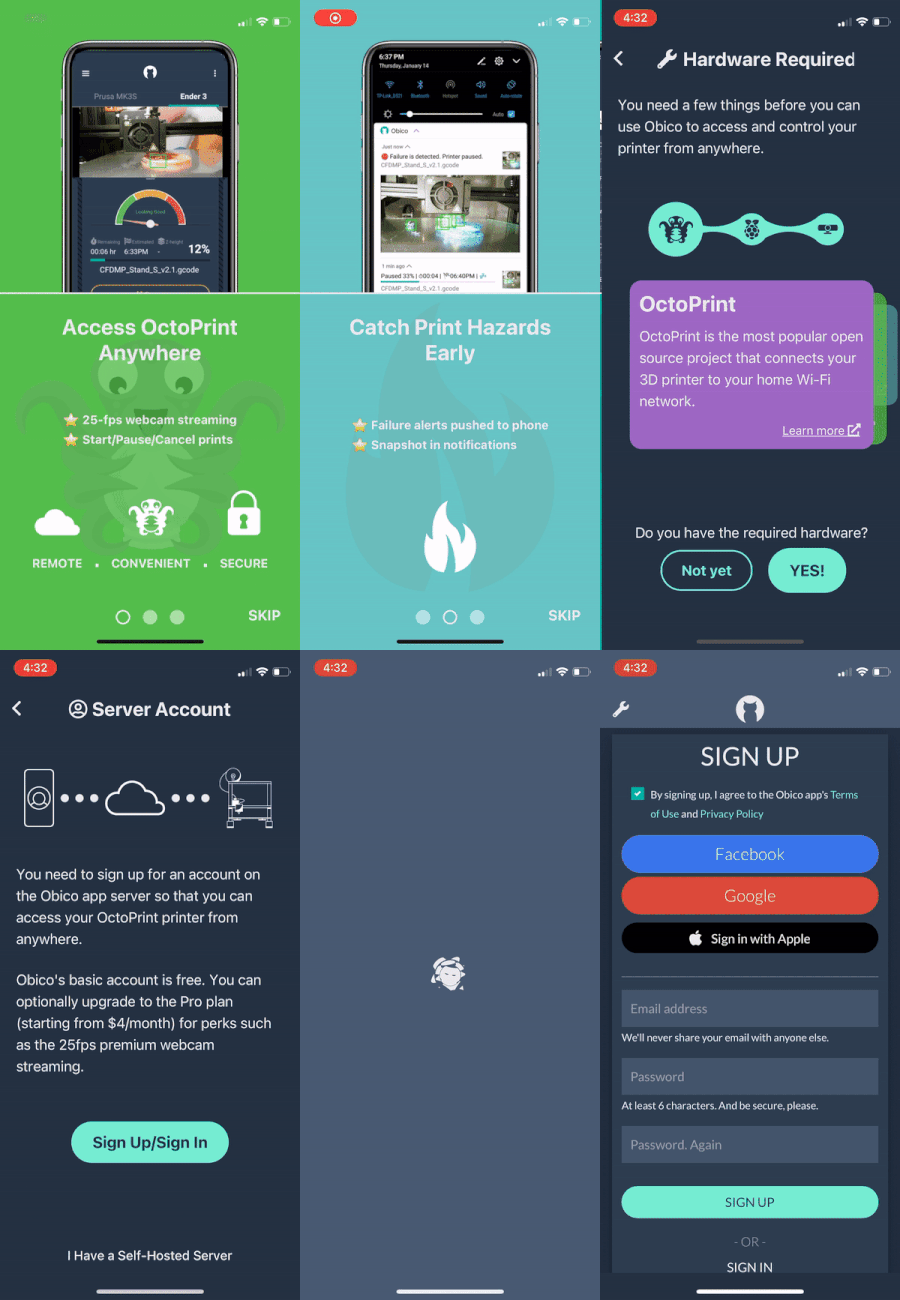
- 📱 Mobile App: Open the mobile app, follow the on-screen prompts to sign up for an Obico account.
- 🌐 Web App: If you prefer the web app, open a web browser and go to the Obico website. Click on the "Sign Up" option and follow the registration process.
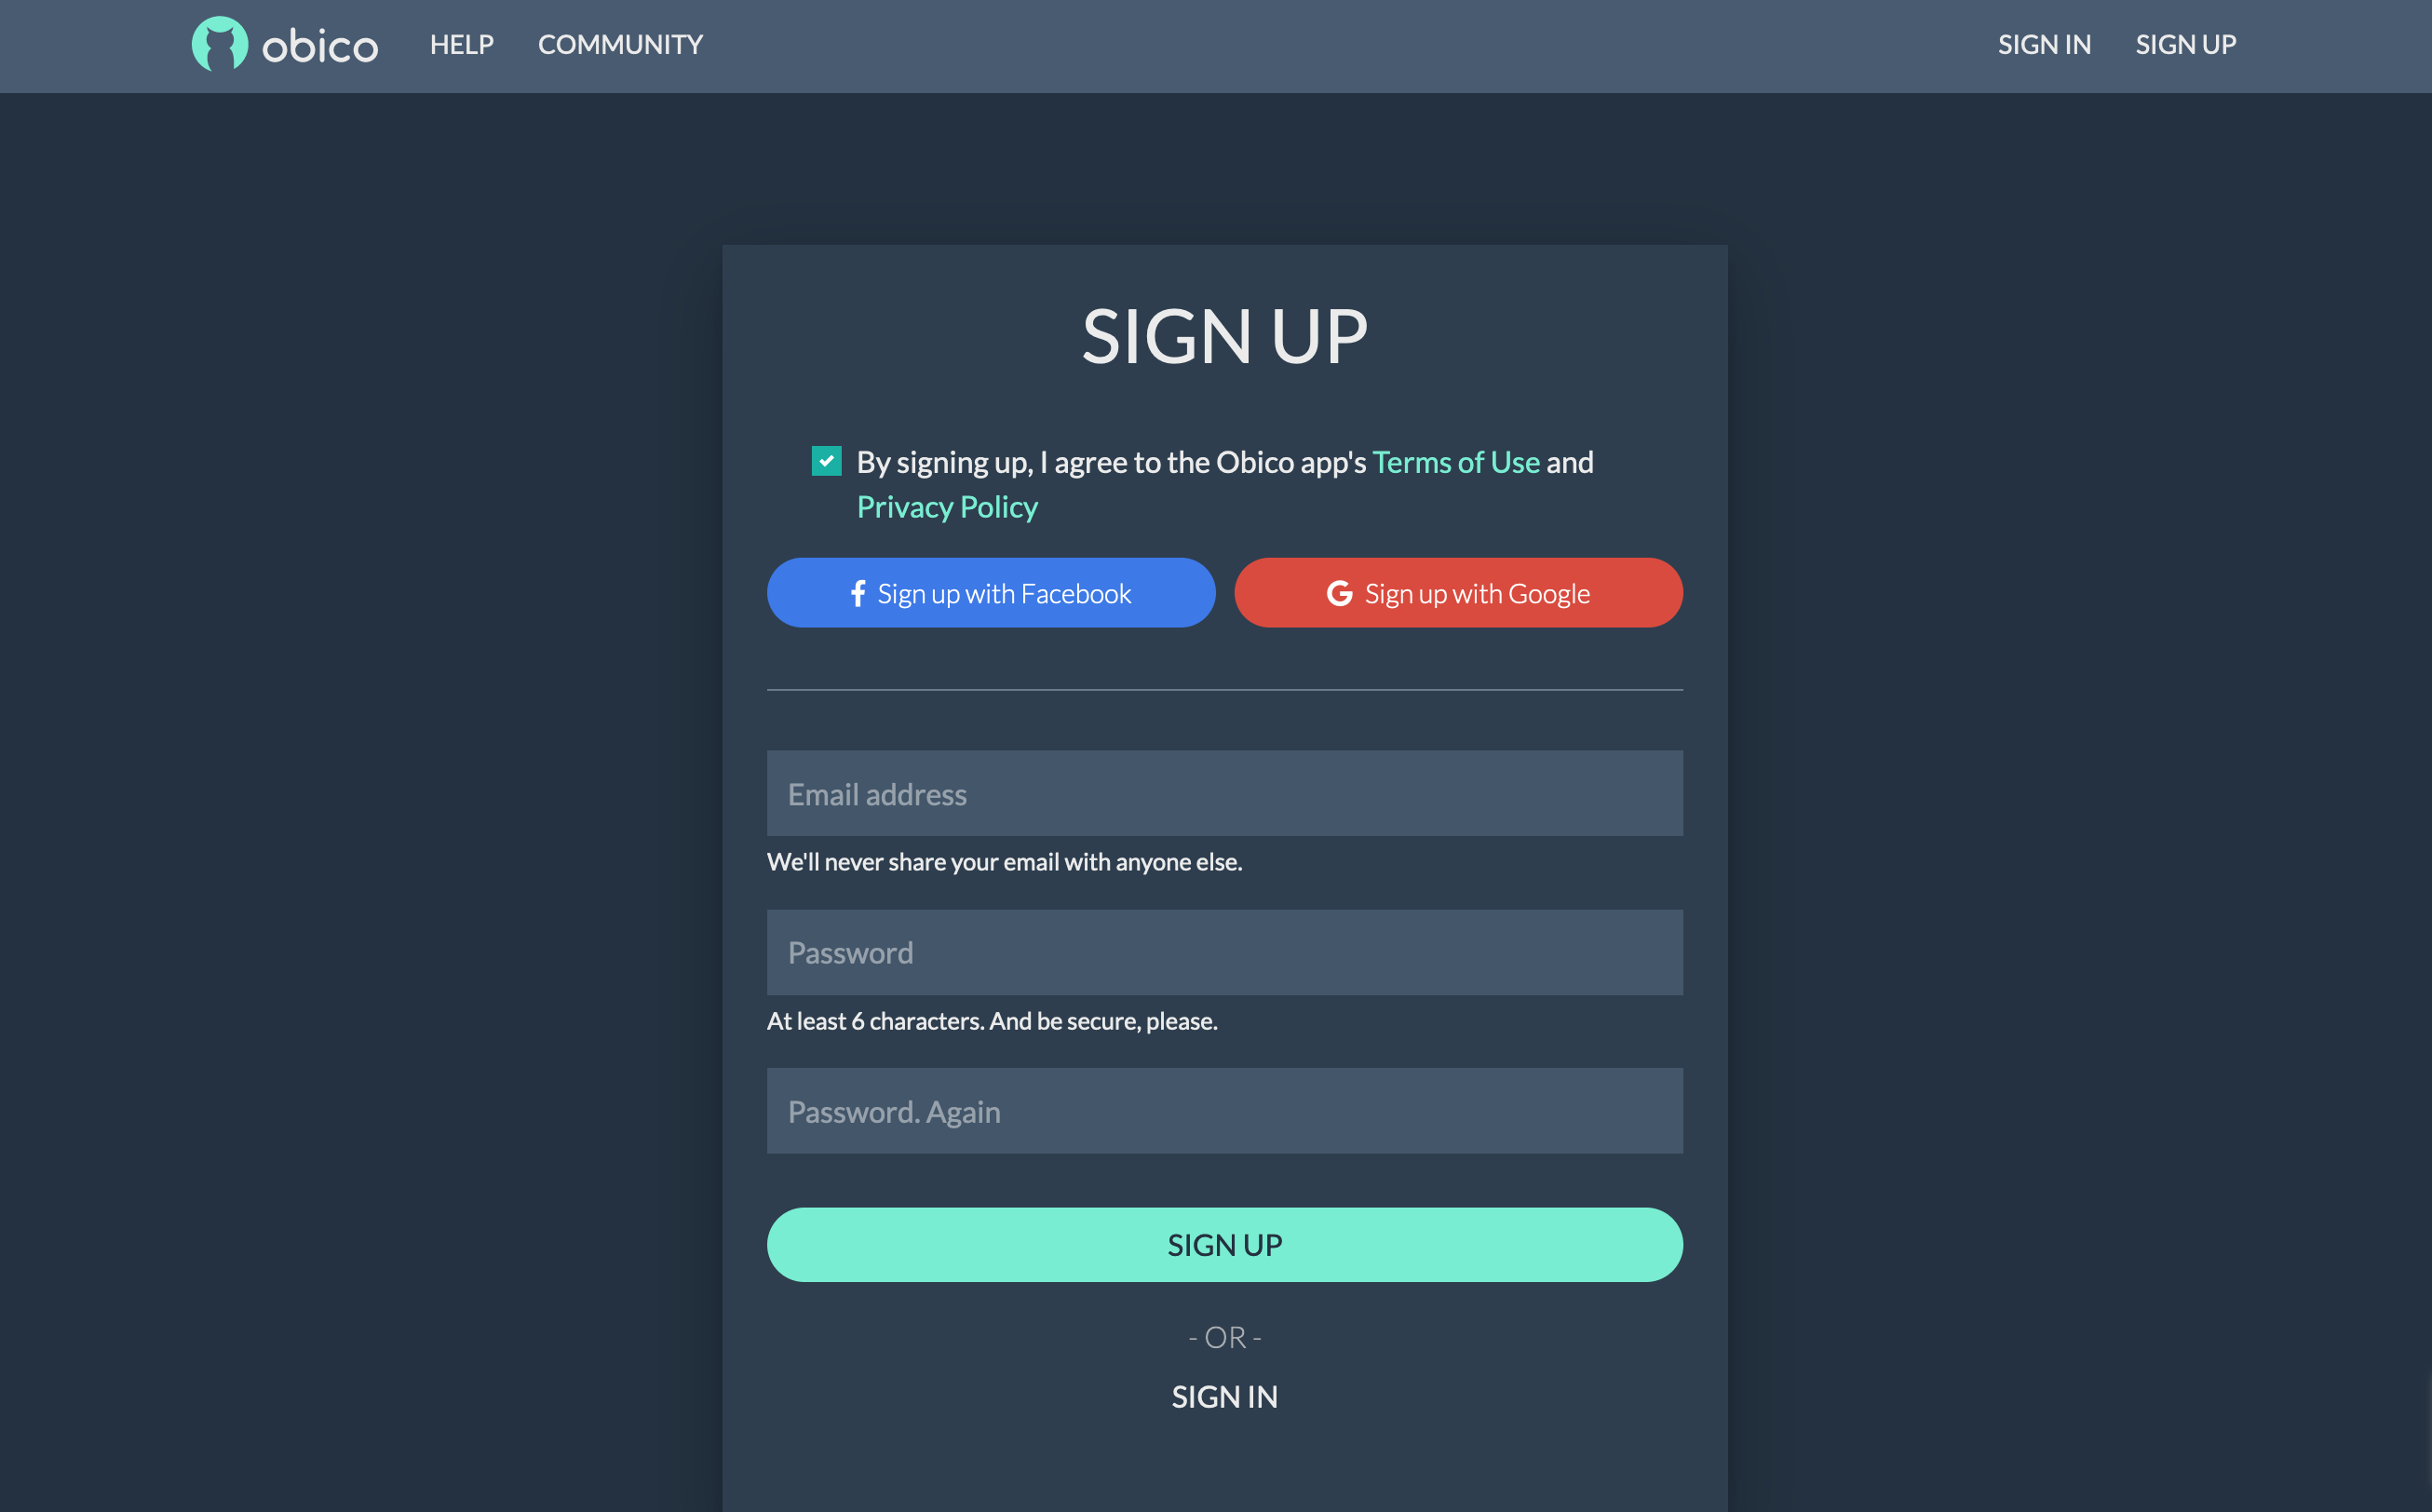
You can sign up with your email, Google, or Facebook account.
Step 2: Link Your Printer to Obico
To connect your Kingroon 3D printer to Obico and unlock its remote access and AI-powered features, follow these steps:
- Visit the Obico Website: Access the Obico website (or your own Obico server if you have one).
- Sign In: Log in to your Obico account using the credentials you just created. Once logged in, navigate to the "Printers" page on the Obico platform.
Step 3: Select "Klipper" and Connect Your Printer
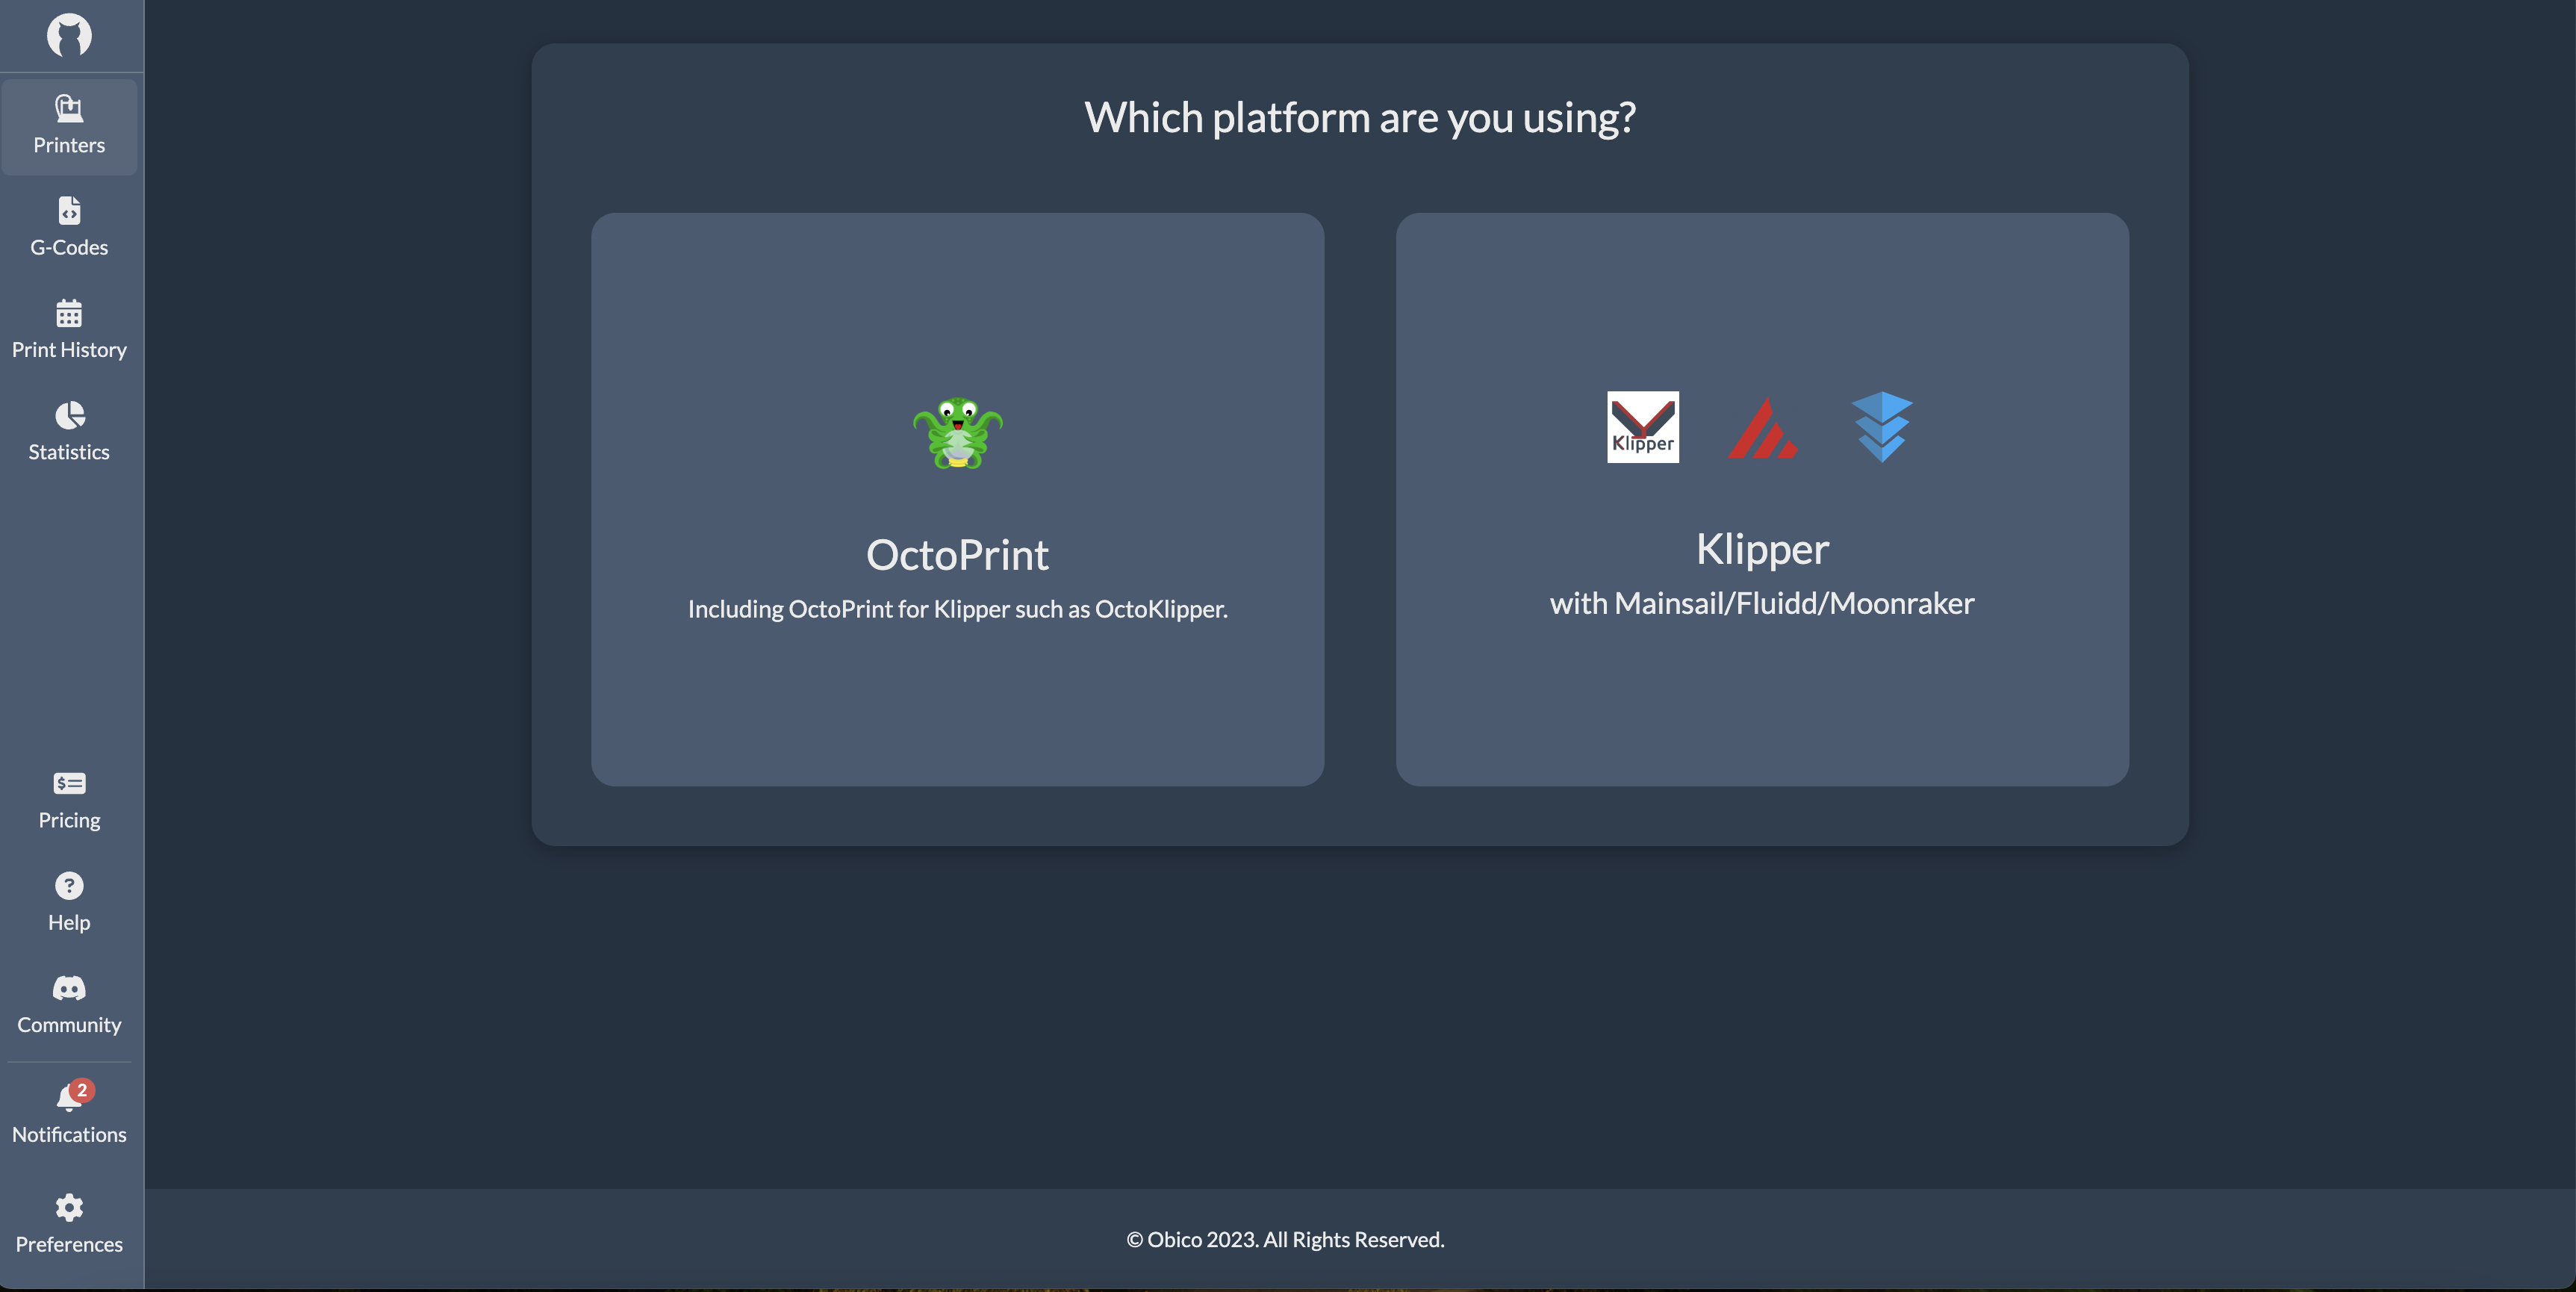
- Select "Klipper": Click "Link New Printer," and when prompted to choose your printer platform, select "Klipper" and then click "Next."
- Automatic Recognition: At this point, the Obico app should automatically detect your printer if it's on the same local network. If it is recognized, you can simply click the "Link" button in the Obico app to establish the connection between Obico and your printer.
Step 4: Provide a Custom Name for Your Printer (Optional)
You have the option to provide a custom name for your 3D printer if you prefer.
Step 5: Explore Your Printer Feed
With the setup complete, you can now enjoy the benefits of real-time monitoring, failure detection, and remote control of your Kingroon 3D printer through the Obico platform.
By following these steps, you'll have successfully set up Obico for Klipper on your 3D printer, granting you remote access and AI-powered features to enhance your 3D printing experience.
Note: In case your printer isn't automatically recognized on the Obico website, you can manually link it by following these steps:
- Enter Manual Linking Mode: Return to your terminal and enter 'y' to activate manual linking mode.
- Switch to Manual Setup: Within the Obico app, select "Switch to manual setup instead."
- Retrieve a Six-Digit Code: You will be provided with a six-digit code.
- Paste the Code: Paste the code into the terminal to manually link your printer.
These steps ensure that, even if auto-discovery doesn't work, you can still establish the connection between Obico and your Kingroon 3D printer.
What Obico for Klipper Offers with Kingroon KLP1 and KP3S Pro V2
Let's delve into the extensive range of features that Obico for Klipper offers, enhancing the 3D printing experience for Kingroon KLP1 and KP3S Pro V2 users.
Full Mainsail/Fluidd Remote Access
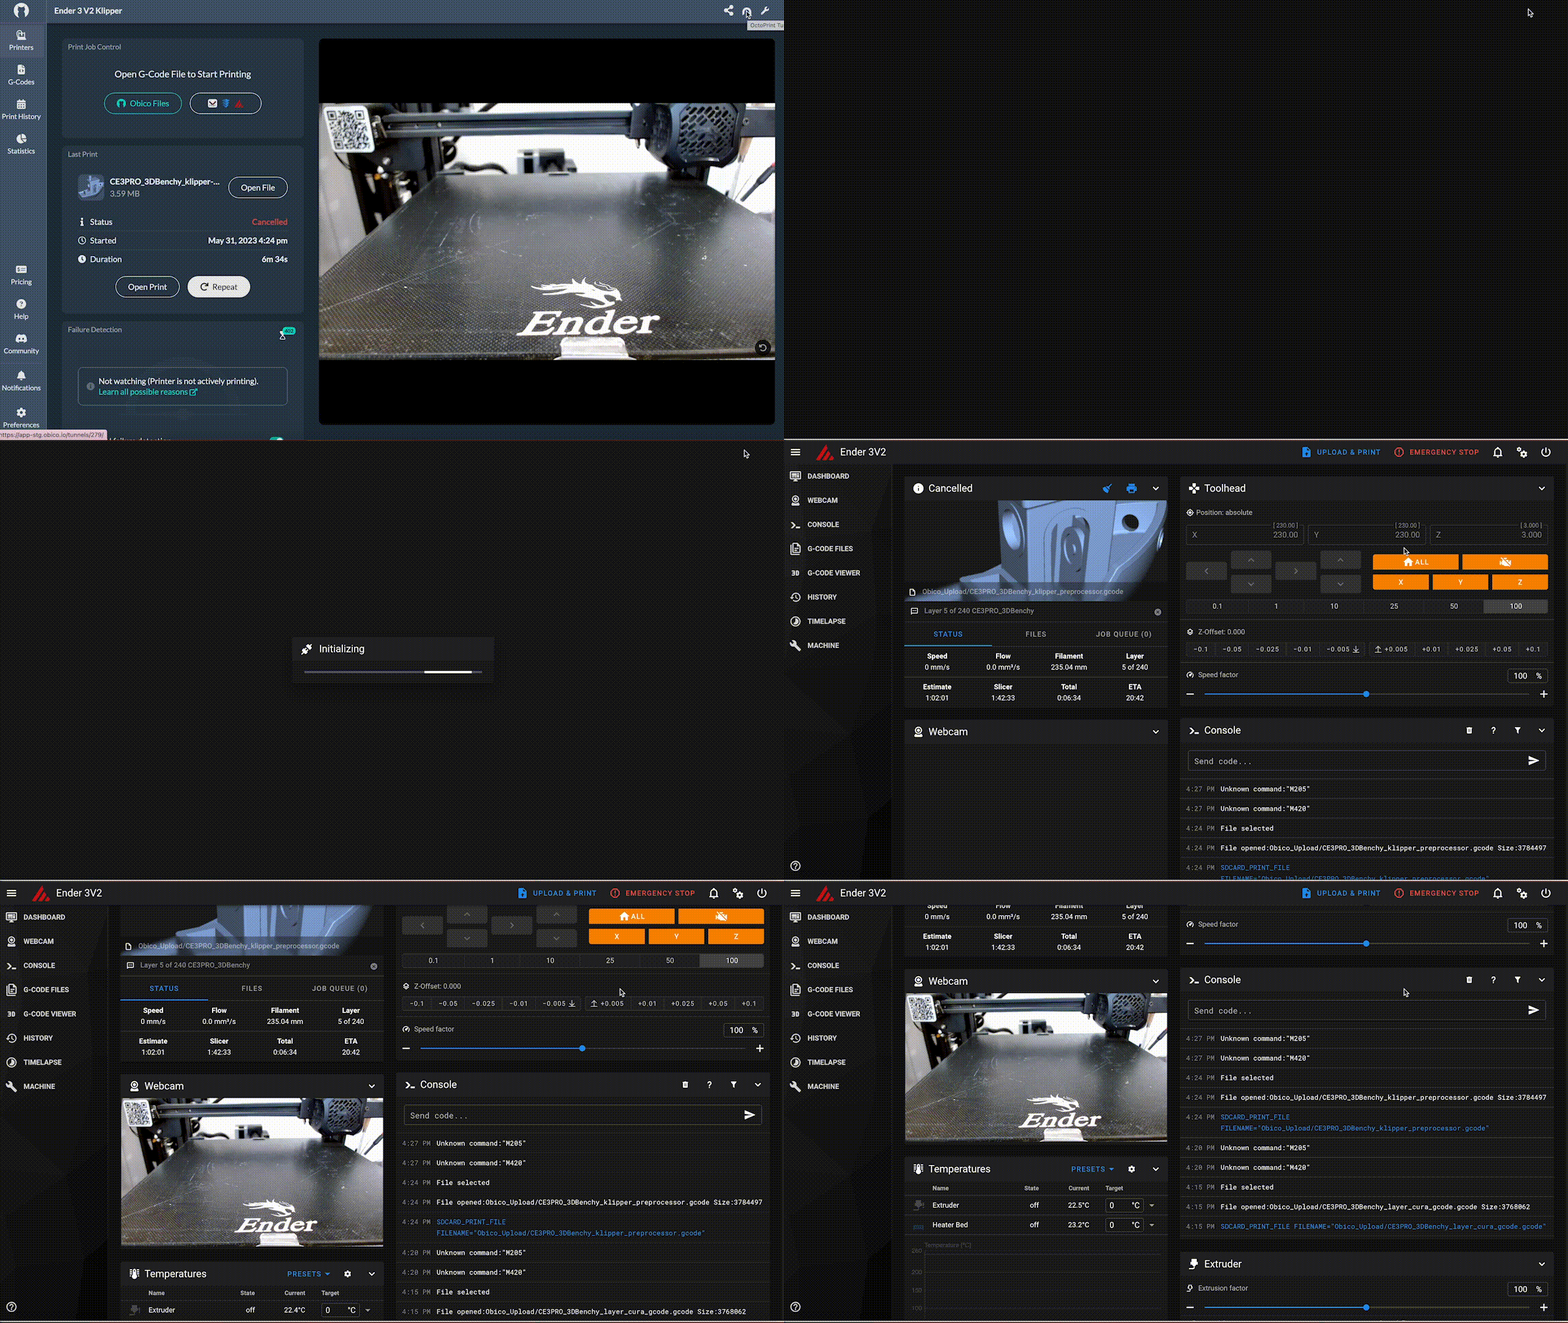
Dive into a world of convenience with Obico for Klipper. It gifts users of the Kingroon KLP1 and KP3S Pro V2 printers complete remote access via the Mainsail or Fluidd interface. This means you have the power to command and oversee your printer irrespective of your location – from your living room to across the globe.
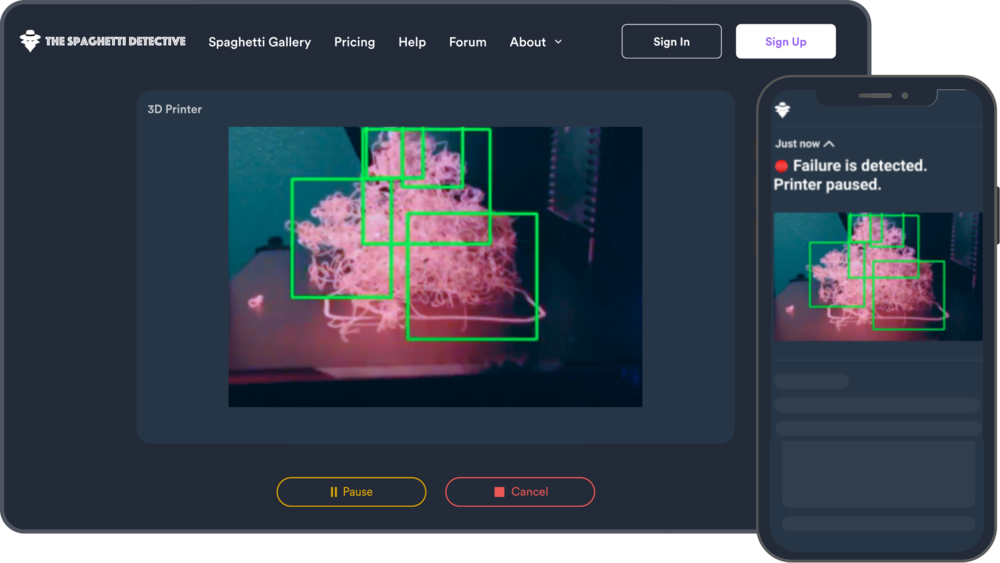
AI Failure Detection
Harness the prowess of cutting-edge technology. Obico's intelligent AI system continually scrutinizes your 3D printing process, pinpointing possible concerns and mishaps as they emerge. This is akin to having a watchful guardian ensuring every print job meets perfection.
Mobile App for iOS and Android
Accessibility is the name of the game. With Obico's intuitive mobile application tailored for both iOS and Android platforms, users can effortlessly supervise and monitor their Kingroon KLP1 and KP3S Pro V2 printers. This ushers in a new era of convenience, making 3D printing a breeze even on-the-go.
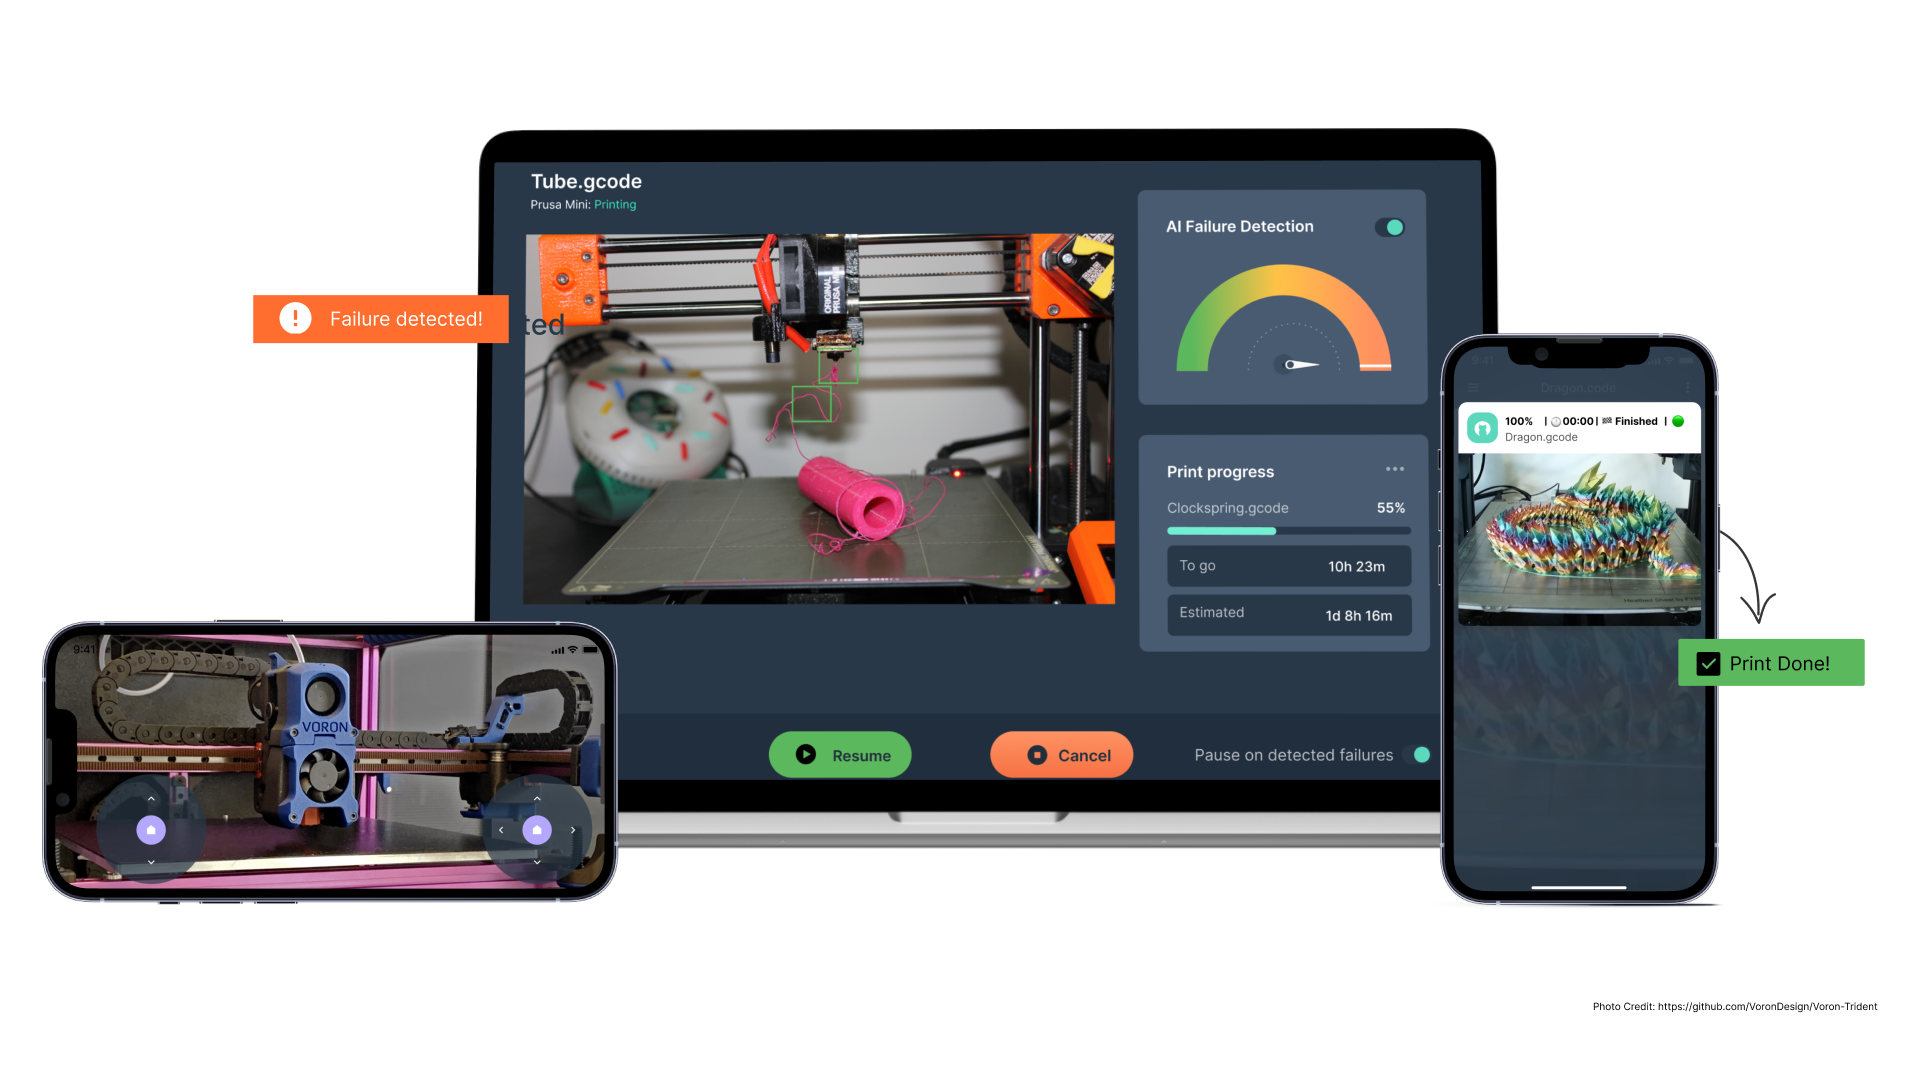
Comprehensive 3D Printer Status Notifications
Being informed is essential for optimal results. With Obico, users are never left in the dark. The platform offers intricate status notifications, ensuring you're constantly abreast of the nuances of your 3D printing endeavors.
Push Notifications
Why wait to check? Receive instantaneous push notifications on your mobile device. With Obico, you're always in sync, receiving timely alerts about vital happenings related to your print jobs.
Email Alerts
For those who value their email communications, Obico steps up to the plate. Avail critical updates and alerts delivered directly to your email, making sure you're always on top of your 3D printing assignments.
Discord Integration
For the modern tech enthusiast, Obico smoothly intertwines with Discord, the go-to communication platform. This integration ensures users receive timely notifications about their print status, fostering a sense of community and shared knowledge among 3D printing aficionados.
Troubleshooting "Buster-backports Release no longer has a Release file" Error
Continue to this part if you only face this error in the image below when you run the ./install.sh command to install Obico in your Makerbase 3D printer.
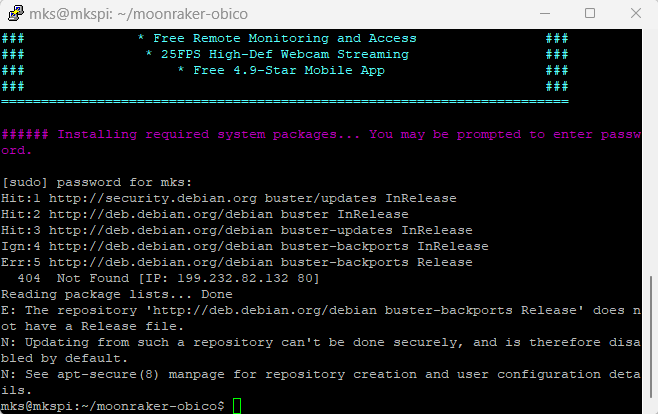
###### Installing required system packages... You may be prompted to enter password.
[sudo] password for mks:
Hit:1 http://security.debian.org buster/updates InRelease
Hit:2 http://deb.debian.org/debian buster InRelease
Hit:3 http://deb.debian.org/debian buster-updates InRelease
Ign:4 http://deb.debian.org/debian buster-backports InRelease
Err:5 http://deb.debian.org/debian buster-backports Release
404 Not Found [IP: 199.232.82.132 80]
Reading package lists... Done
E: The repository 'http://deb.debian.org/debian buster-backports Release' does not have a Release file.
N: Updating from such a repository can't be done securely, and is therefore disabled by default.
N: See apt-secure(8) manpage for repository creation and user configuration details.
mks@mkspi:~/moonraker-obico$
Just follow our easy step-by-step guide for simply solving this error so that you can continue your installing process just click here!
Conclusion
3D printing has revolutionized the way we approach manufacturing and design. Kingroon's offerings, the KLP1 and the KP3S Pro V2, have cemented their reputation in this domain, offering speed, precision, and affordability. Pre-installed with the Klipper firmware, these printers promise enhanced efficiency straight out of the box. However, the game-changer is the integration of Obico for Klipper. With features like full remote access, AI failure detection, and a dedicated mobile app, the 3D printing experience is elevated to new heights. For users of Kingroon's printers, this means less manual oversight, reduced errors, and a more streamlined process. In essence, Kingroon, when combined with Obico for Klipper, promises a future where 3D printing is not just faster and more precise but also smarter and more accessible, regardless of one's location or expertise level.
