Configure Obico for OctoPrint to use self-hosted server
Before you can configure Obico for OctoPrint plugin to use your own server, you need add a printer to The Spaghetti Detective server you just built and obtain the 6-digit Verification Code for that. To do so:
-
Pointing your browser to
http://your_server_ip:3334. -
Log in as a user (you can just login with
root@example.combut it's more secure to use a non-admin user). -
Add a new printer as described in this guide and obtain the 6-digit Verification Code. Note: Do it on your own server, not on the Obico cloud.
Then, navigate to octoprint to setup the plugin side of things:
-
Make sure that you have installed the Obico for OctoPrint plugin.
-
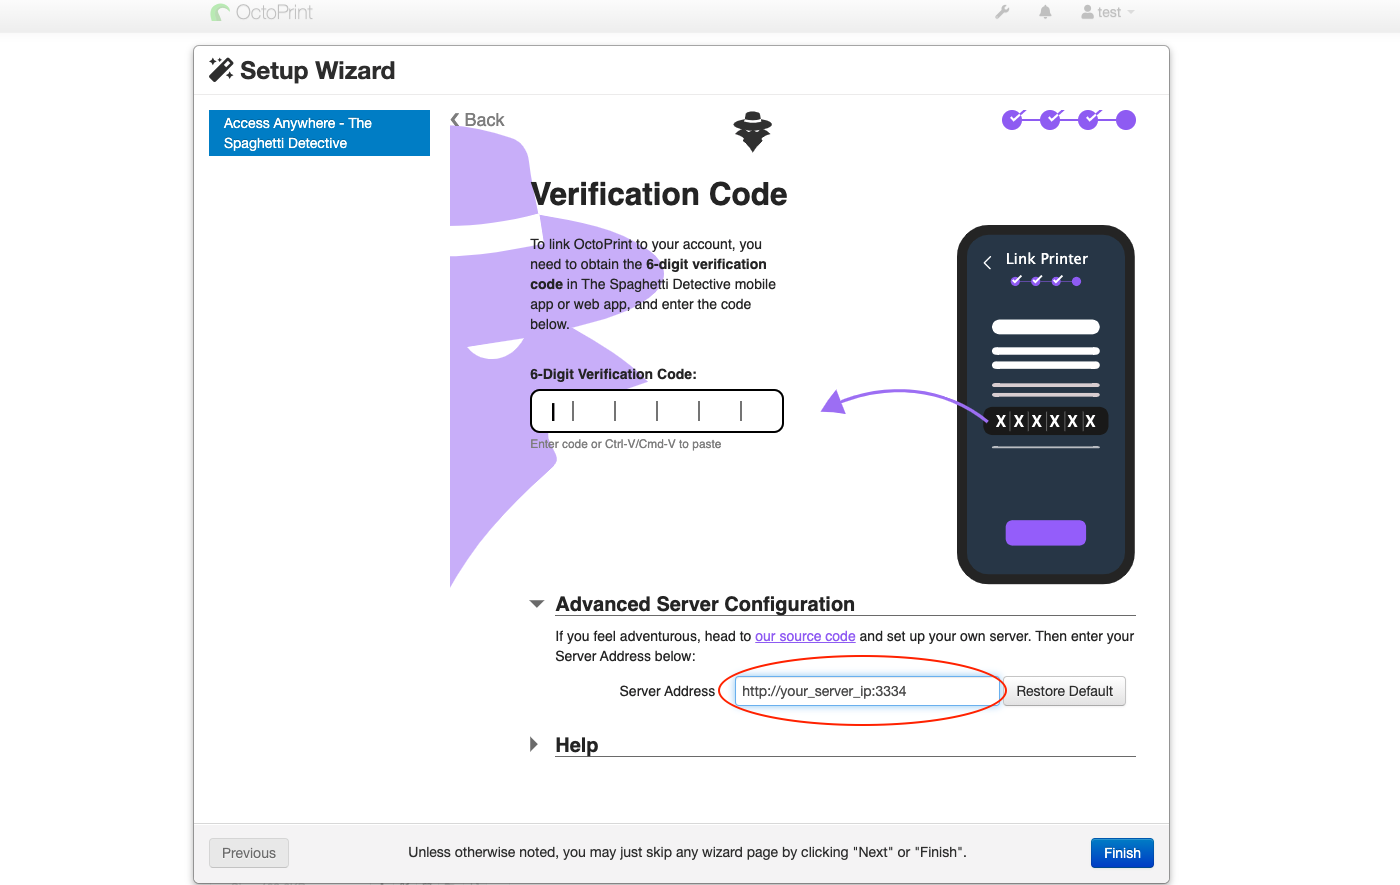
After restarting, go through the wizard as described in the setup guide, until you are at the last step that asks for the 6-digit Verification Code. Note: If Obico for OctoPrint plugin has been installed before and you do not see the wizard, click here.
-
Expand "Advanced Server Configuration". Find and change the Server Address to
http://your_server_ip:3334(use https:// if you have HTTPS configured, if you aren't sure, just use http://). You MUST include the "http://".
-
Enter in your code and octoprint should automatically link to your printer!
-
Give you printer a fancy name and enjoy Obico!