How to Use Prusa Slicer with Klipper 3D Printer Firmware

Klipper as a 3D printer firmware and PrusaSlicer as a 3D printing slicer have become widely popular in the past few years. They’re both completely free to use and loaded with features, and you get the benefits of open-source development with either of these programs.
It makes sense to use them together to streamline your 3D printing workflow and make the most out of these two pieces of software. In this guide, we’ll go over the process of setting up Prusaslicer with your Klipper 3D printer. It’s simple and quick and can help save you from the hassle of manually uploading your print files.
We’ll begin with understanding the benefits of using these two software together and then look at the detailed setup process. Let’s begin!
Klipper and PrusaSlicer: All the Benefits
Remote Printing
Klipper firmware facilitates easy remote 3D printing when you’re using it with Fluidd or Mainsail interfaces. You can access your printer on your desktop, smartphone, or tablet as long as your 3D printer and laptop are connected to the same wireless network.
With PrusaSlicer, you don’t need to manually transfer your Gcode file to an SD card and load it in your printer. Once set up, you can send your sliced 3D model in a single click to your Klipper 3D printer. It makes it highly convenient to start your 3D prints, even when you’re not in the same room as the printer.
No Need for an SD card
Typically, you’d need to copy-paste your gcode file on a dedicated SD card and transfer it to your 3D printer. You can then choose your gcode file and begin the printing process.
However, once you set up Klipper and PrusaSlicer to work together, the gcode files are directly stored on your Klipper’s storage. It eliminates the need for a separate SD card and makes it slightly easy for you.
Moreover, you can send a bunch of files on your Fluidd Dashboard and queue them for 3D printing without needing to constantly remove and insert the SD card from your printer. It comes in handy when you’re printing a bunch of parts together and don’t wish to slice them all at once.
These benefits might seem minor at first, but when you’re printing models on a daily basis, these small things can significantly improve your experience. So, now that we’ve understood the benefits, let’s look at the setup process.
Configuring PrusaSlicer Connection
In this step, we’ll configure the PrusaSlicer to connect with your Klipper firmware. Before we begin, double-check that you have the latest version of PrusaSlicer and Fluidd/Mainsail for your 3D printer.
- Open PrusaSlicer and Go to the Printer Settings Section.
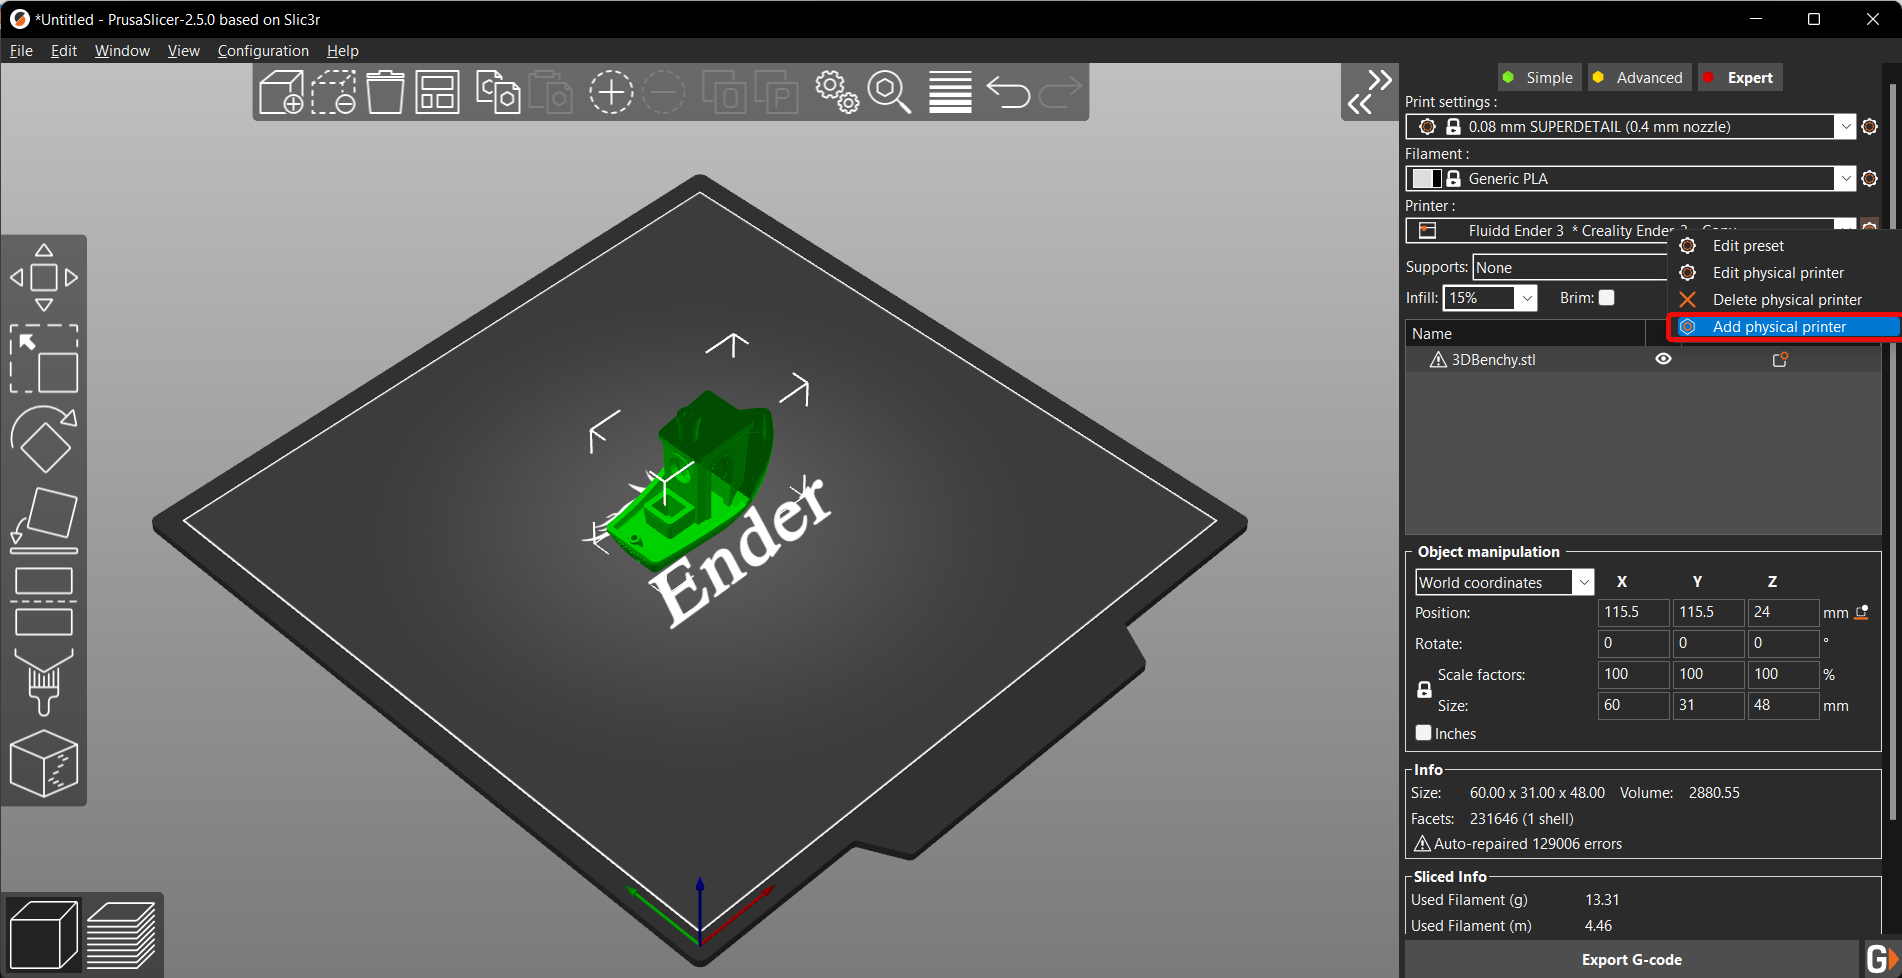
- Click on the arrow, and select Add Physical Printer from the drop-down menu.
- Type the name of your printer, and select from a system preset for your printer.
- Select Host Type as Octoprint from the drop-down menu.
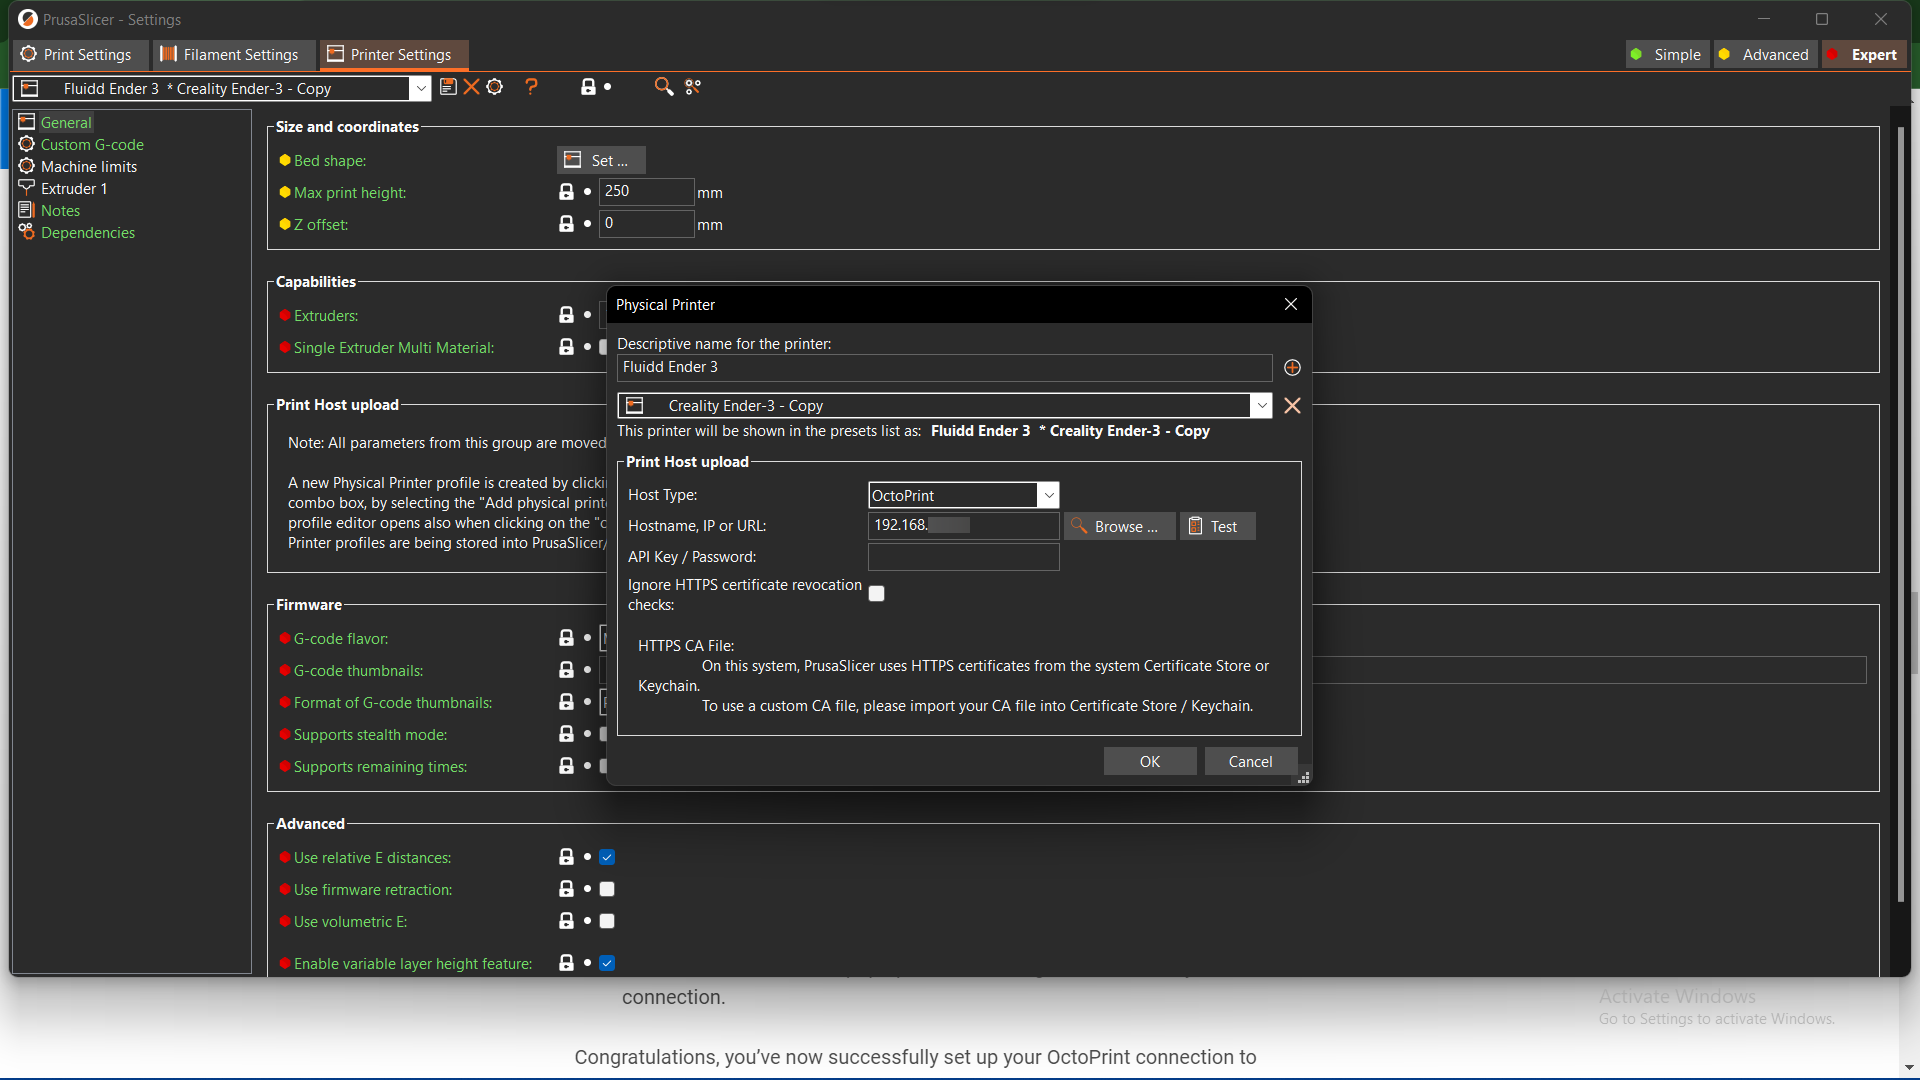
- Enter the IP address of your Fluidd web interface (e.g., 192.168.0.xxx).
- Open your Fluidd interface and go to the Settings section.
- Go to the Authentication section.
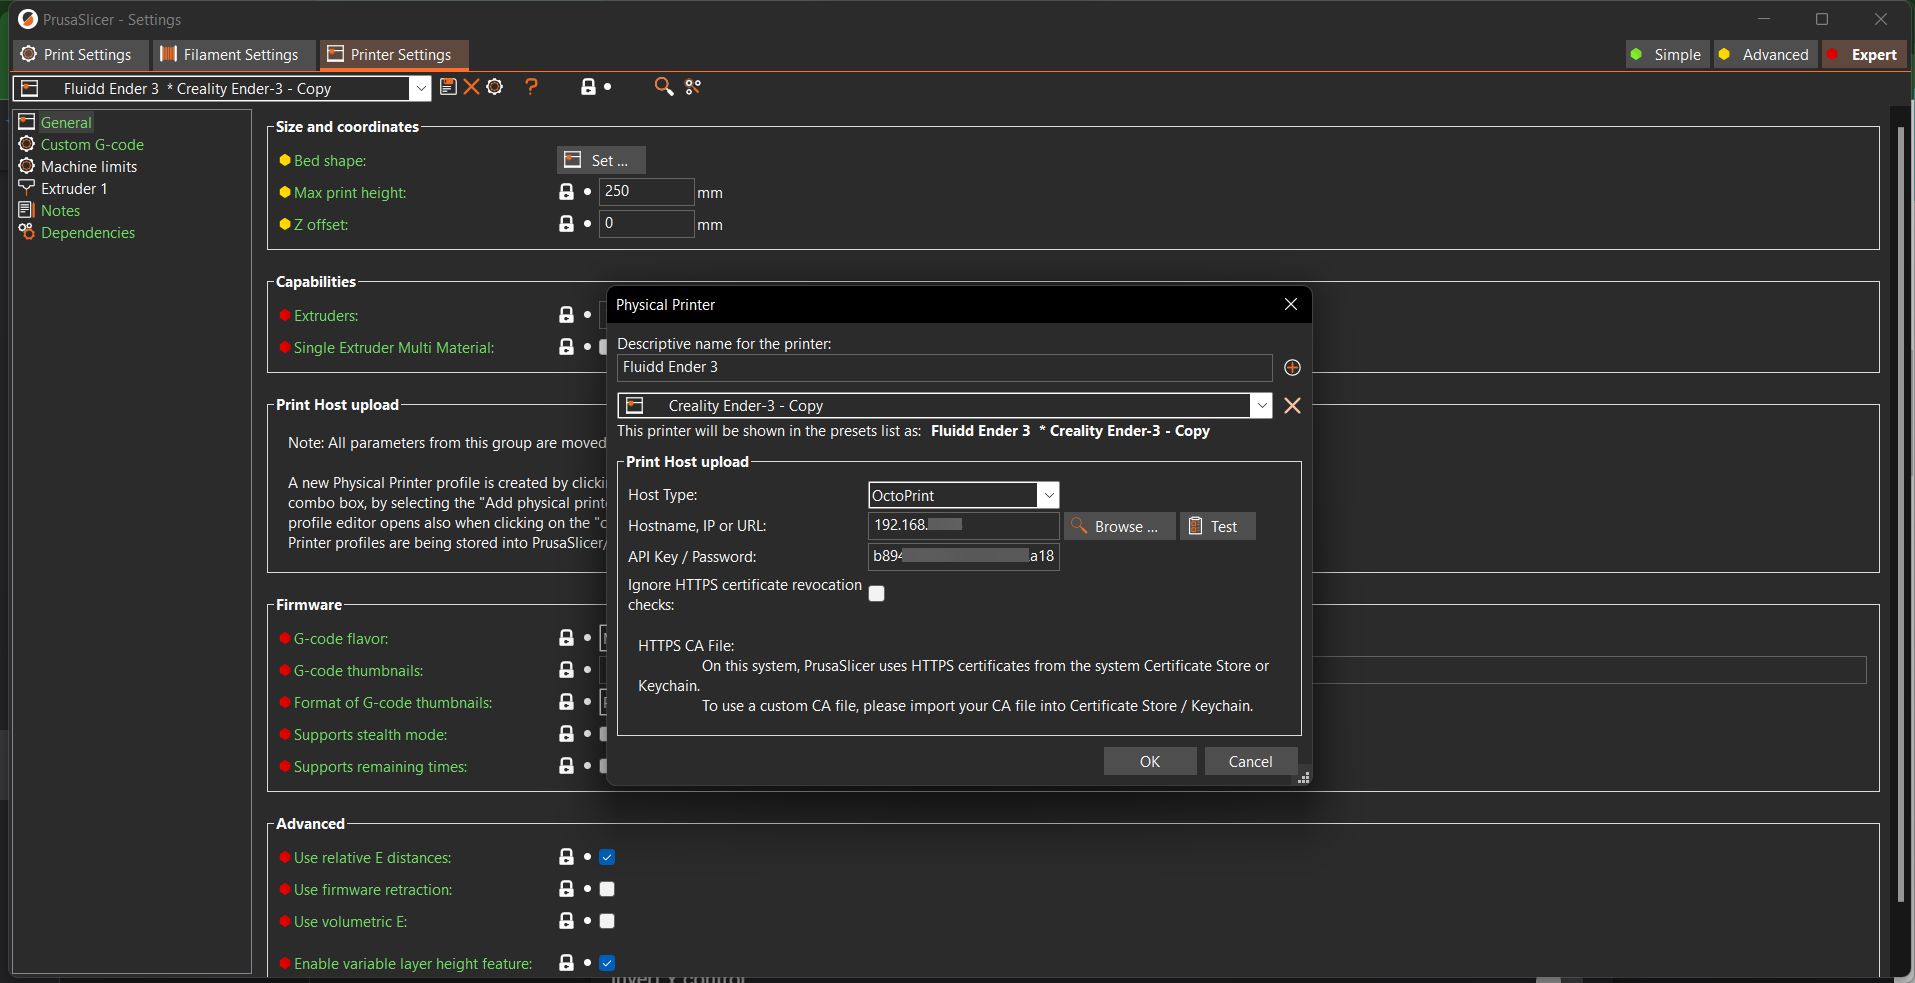
- Click on the API key. You’ll notice a serial key and QR code. Copy the Serial Key.
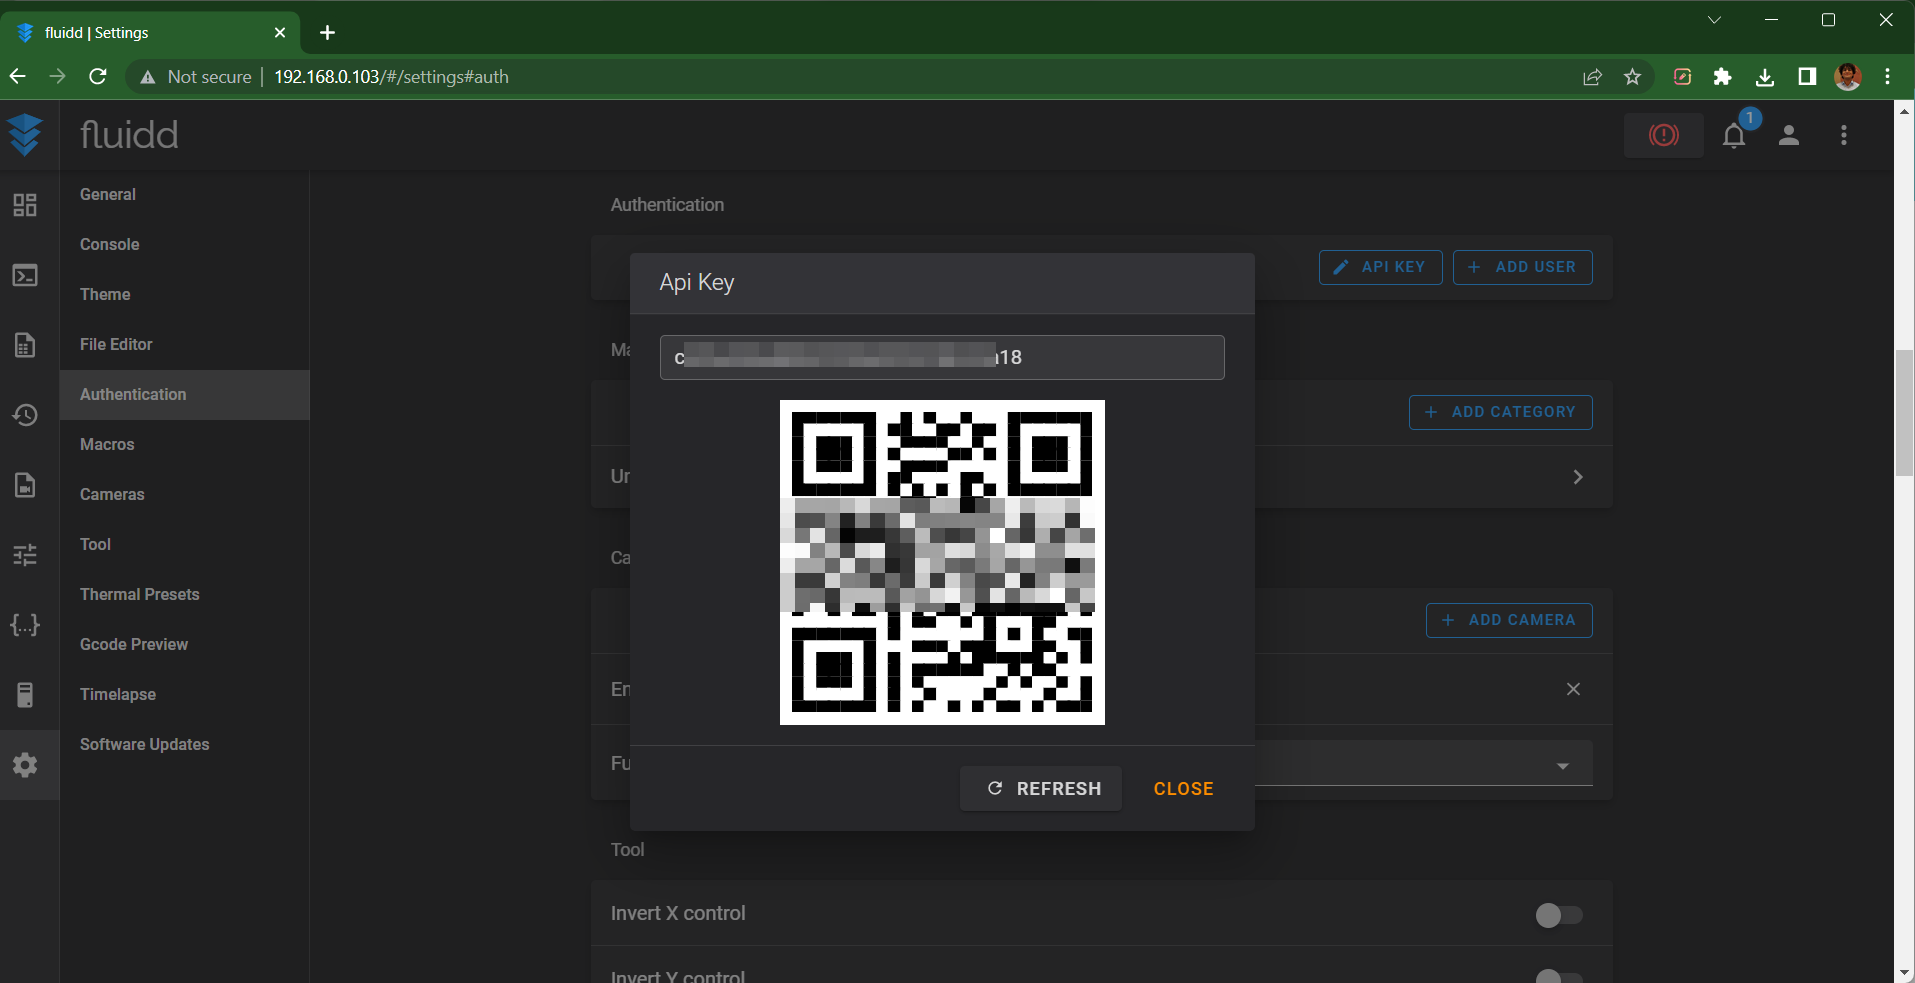
- Paste in PrusaSlicer’s API Key section.
- Click on Test to verify the connection. You’ll receive a Success message when the connection is established.
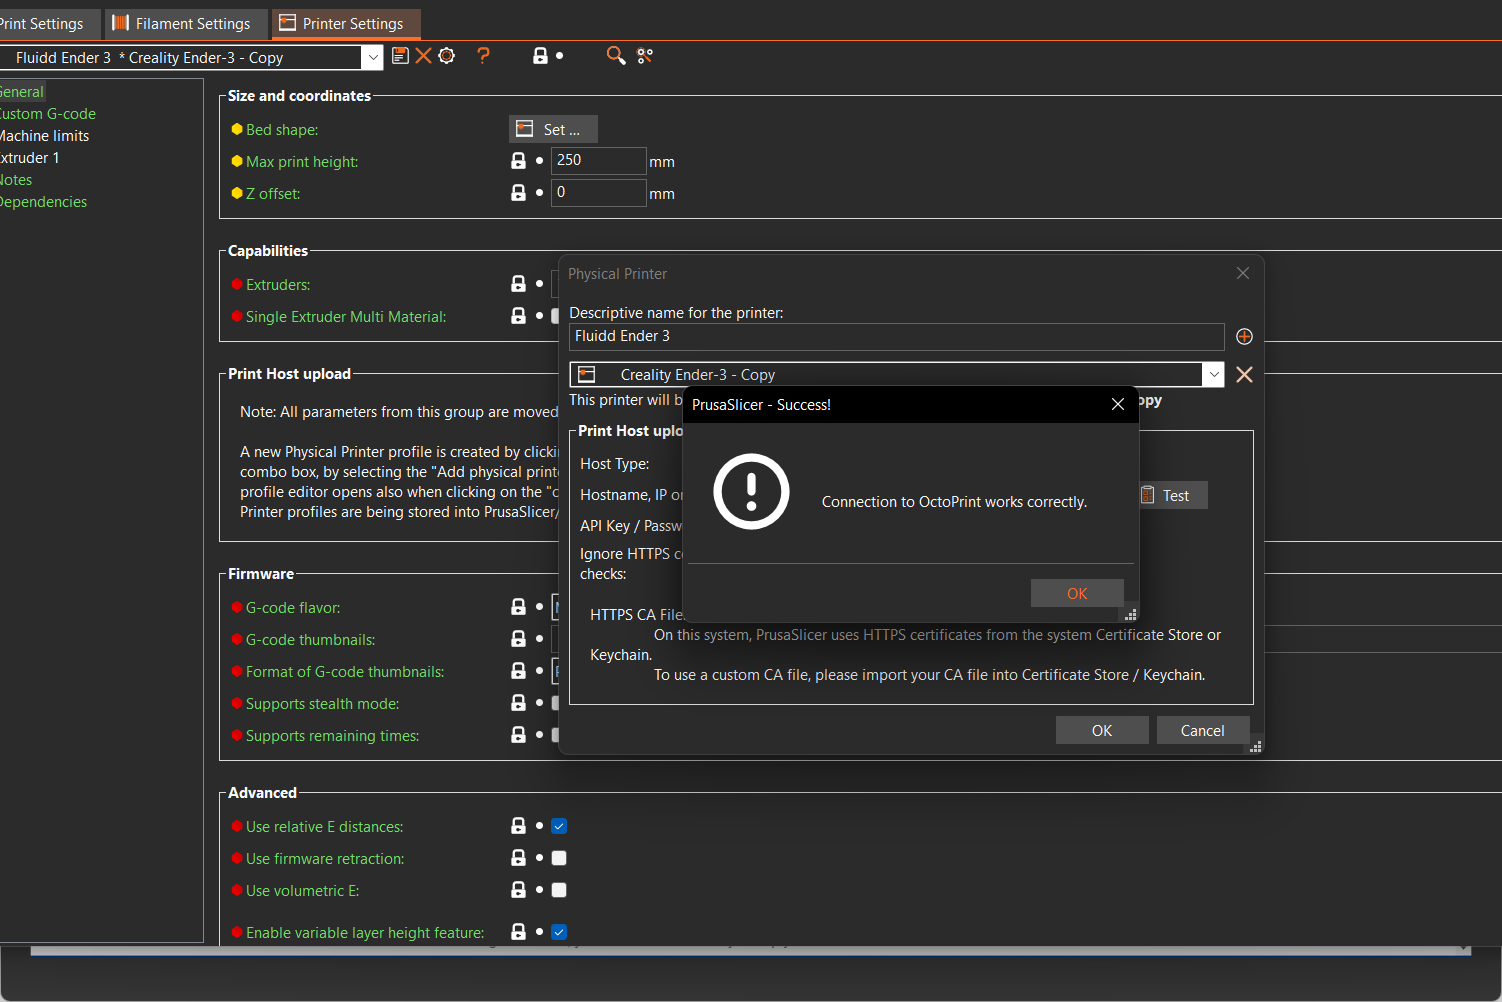
- Click OK and close the PrusaSlicer.
That’s it! You’ve successfully set up PrusaSlicer with Klipper firmware. Now let’s get onto actually using these together.
Using PrusaSlicer with Klipper
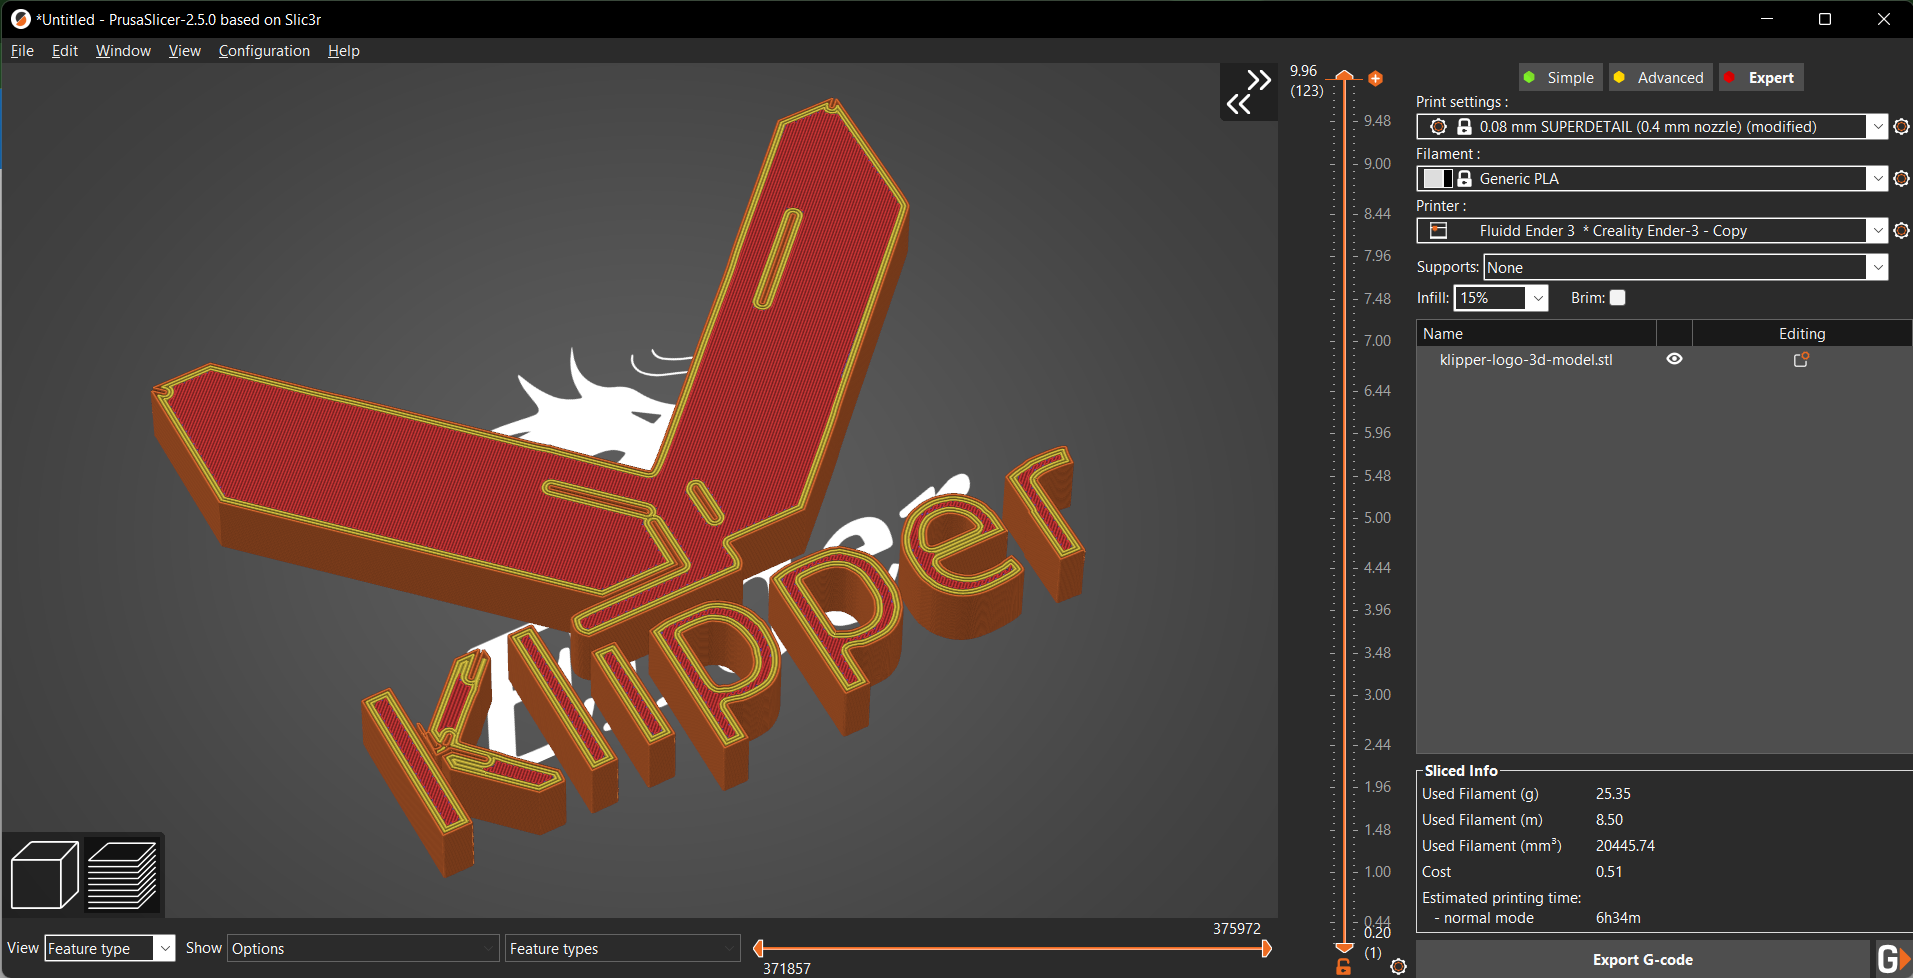
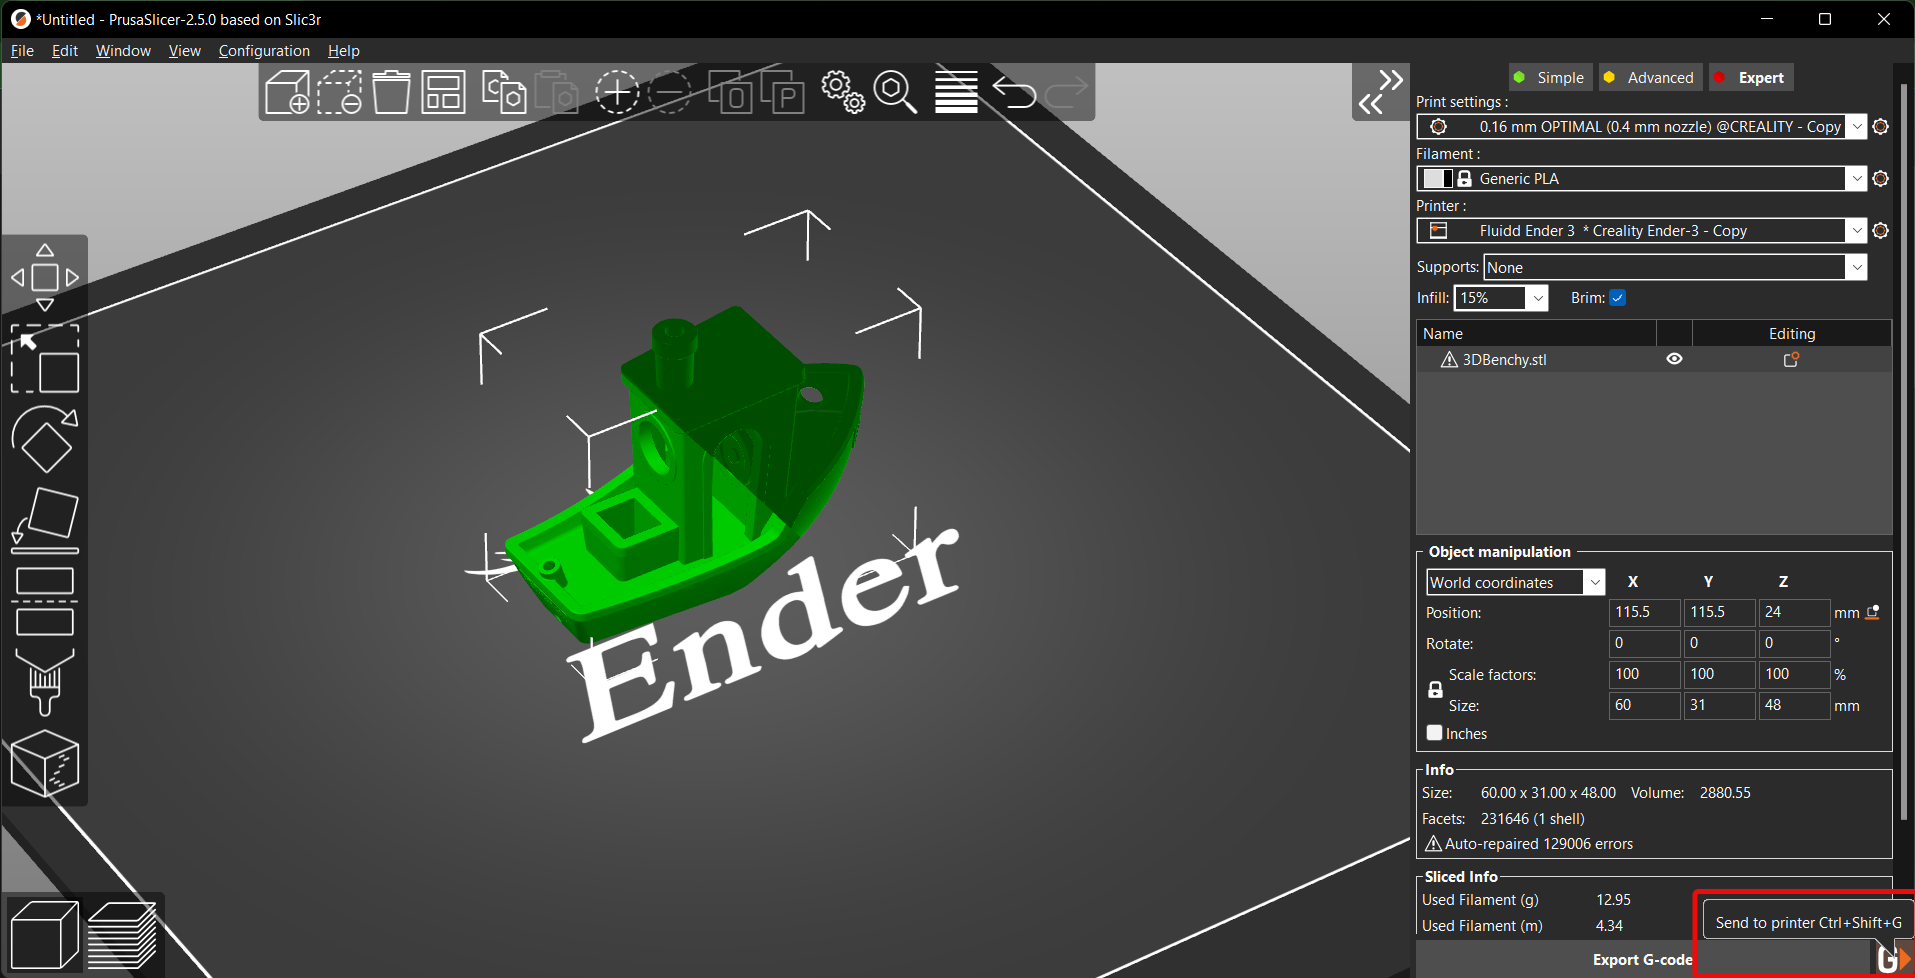
- Open the PrusaSlicer and load your 3D model.
- Configure the slicing settings, and slice the model.
- Once the slicing process is completed, you’ll notice an Export G code tab and G symbol on the bottom right of your screen.
- Click on the G symbol, and you’ll see a pop-up window. Choose whether you want to Upload and Start the print or upload it.
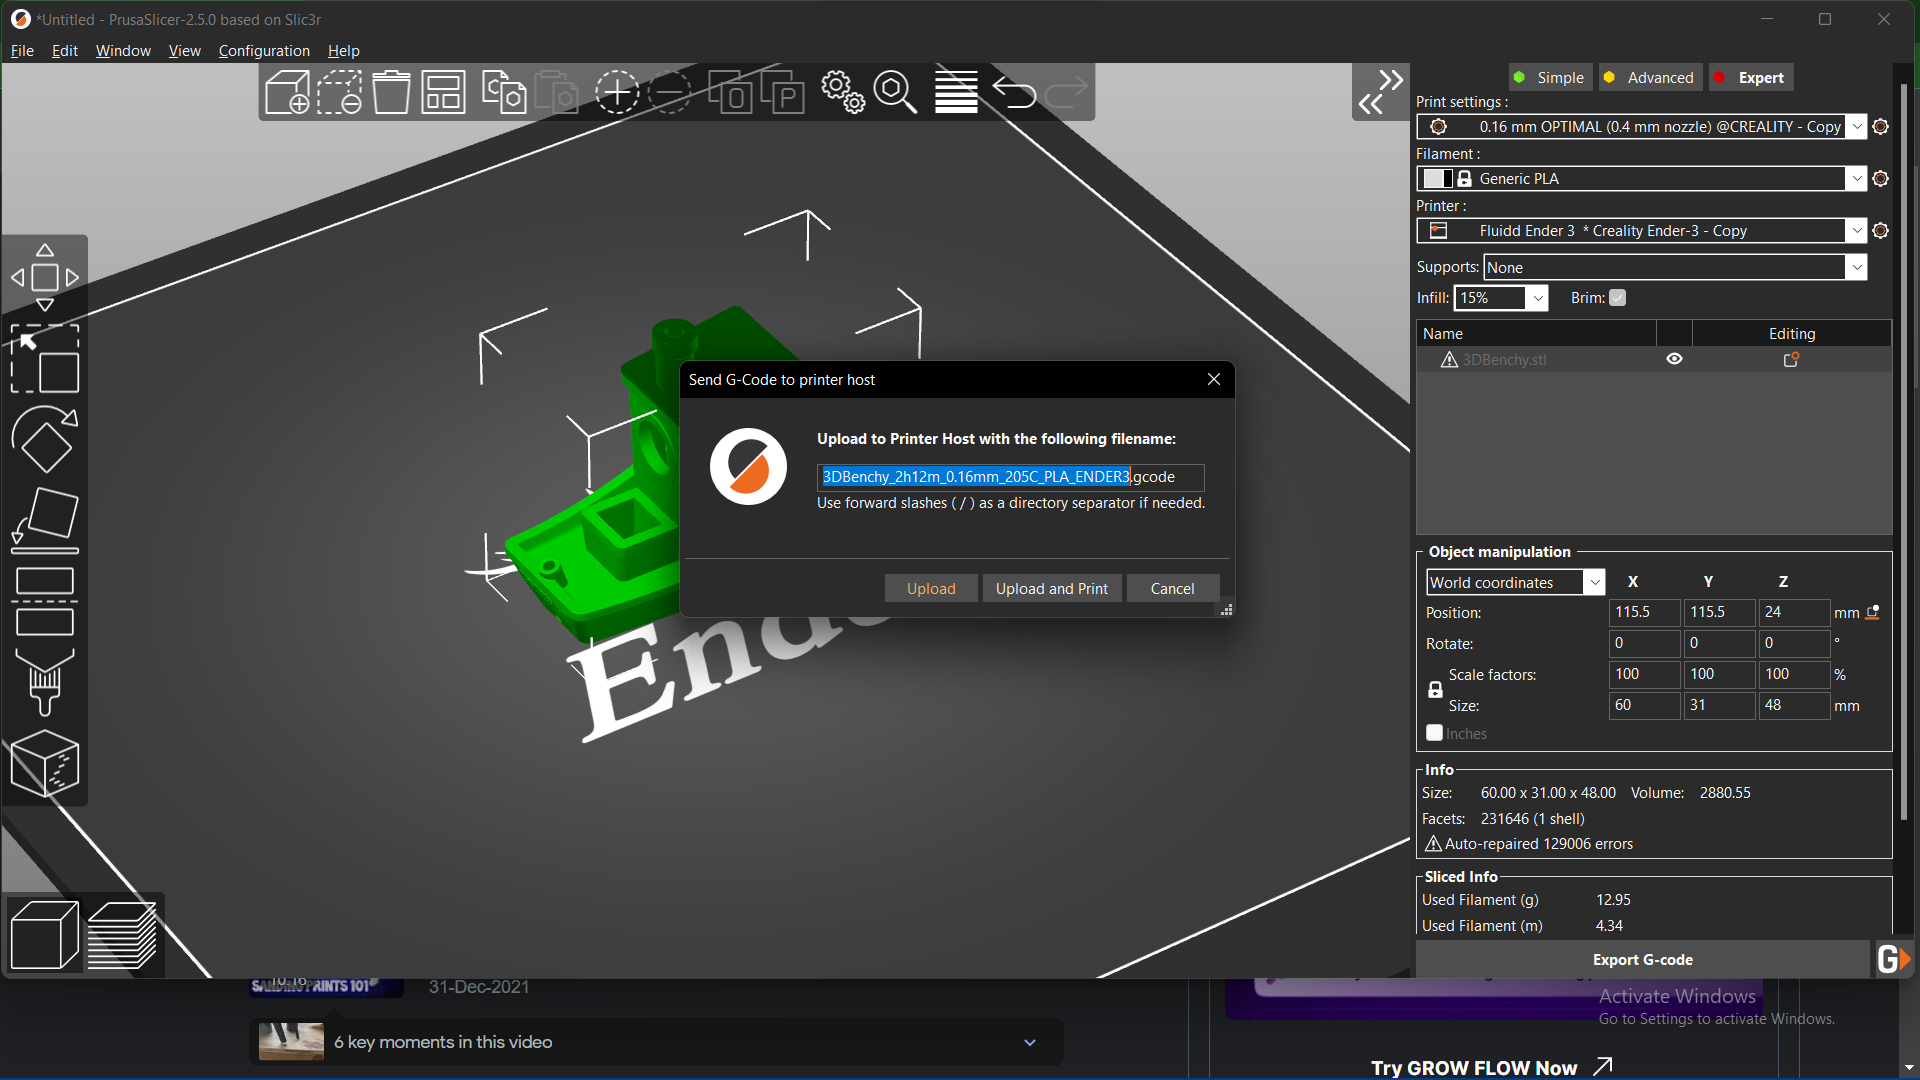
- The print will now upload to your Klipper interface.
Congratulations! You’ve now successfully configured and set up PrusaSlicer with Klipper firmware.
Starting Prints and Checking In On-The-Go
With PrusaSlicer and Klipper, you can upload and start your 3D prints as long as you’re on the same network. But what if you want to 3D print remotely, outside the range of your WiFi network?
Enter Obico.
You can upload your gcode files to Obico’s cloud server and store them there. It’s similar to queuing files in Klipper firmware, albeit you can access these gcode files from anywhere and on any device.
Using this configuration, you can start your 3D prints remotely on your smartphone or any other device. It’s hardly a two-step process, and you get the added benefit of remotely monitoring your ongoing print.
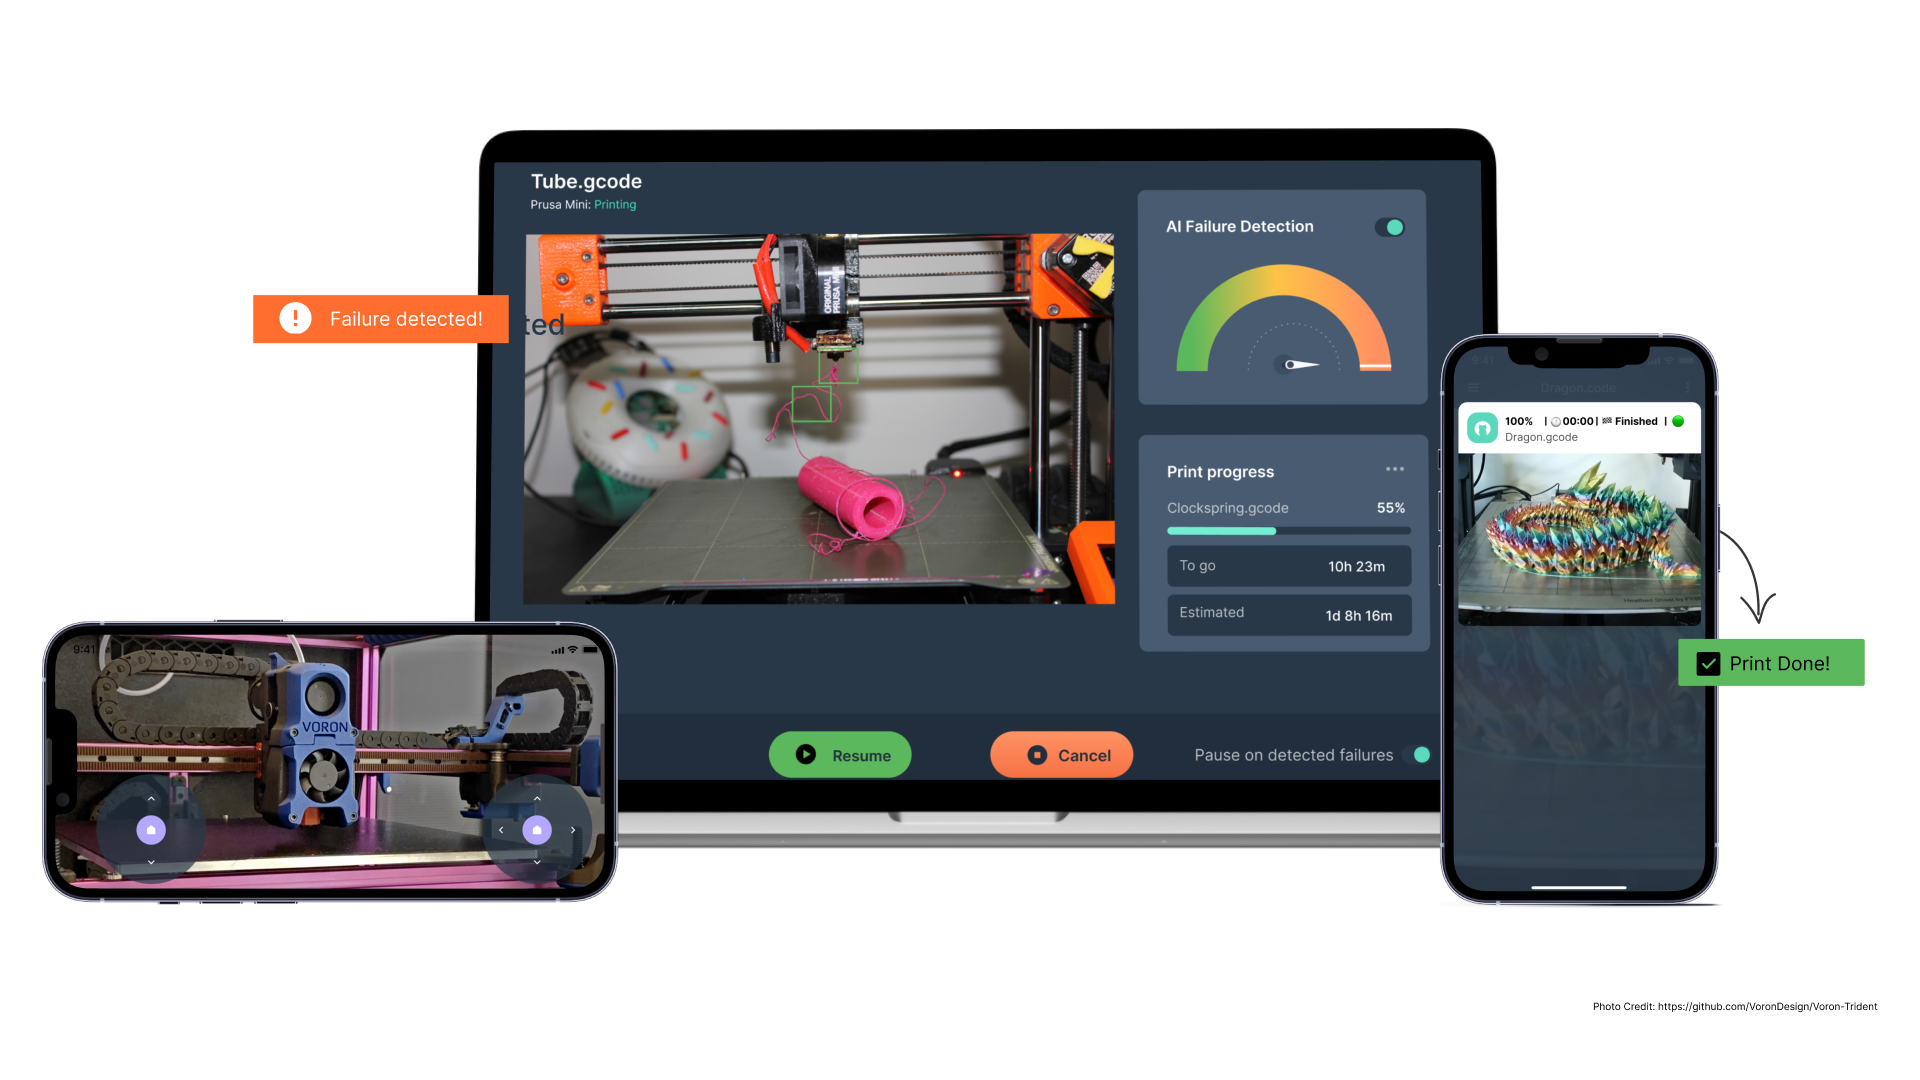
Furthermore, Obico’s AI print detection feature will look out for any signs of print failure and immediately notify you if anything goes wrong. This automated failure detection will help you save loads of wasted filament and prevent any potential accidents due to a failed print.
You can refer to our setup guide for Obico with Klipper and Obico with Octoprint. These guides will simplify the Obico installation process for your 3D printer and set you up for remote 3D printing.
If you have issues getting Obico installed for your 3D printer, you can join the Obico discord server to get help.
Let us know your experience of using the PrusaSlicer with Klipper firmware. If you find Obico useful, please give us a star on GitHub, or leave us a review on our mobile app in the iOS App Store or Google Play Store!