How to Use Cura Slicer with Klipper 3D Printer Firmware

Introduction
Klipper is quickly ranking its position as one of the best 3D printing firmware in the community. Using a combination of Raspberry Pi and web interface, Klipper significantly improves your 3D printer’s speed, print quality, and user experience.
Pair it up with Cura, and you open up a world of new possibilities for your 3D printing workflow. Cura is one of the most widely used and popular 3D printer slicers with top-notch features that help you achieve high-quality 3D prints.
Yet, as good as they are, there are some pointers you need to be mindful of when using Cura and Klipper together. In this article, we’ll understand how you can use these two software side-by-side to get the best quality results from your 3D printer.
Let’s Klip and Slice.
Cura and Klipper: The Good Side
Advantages of Cura Slicer
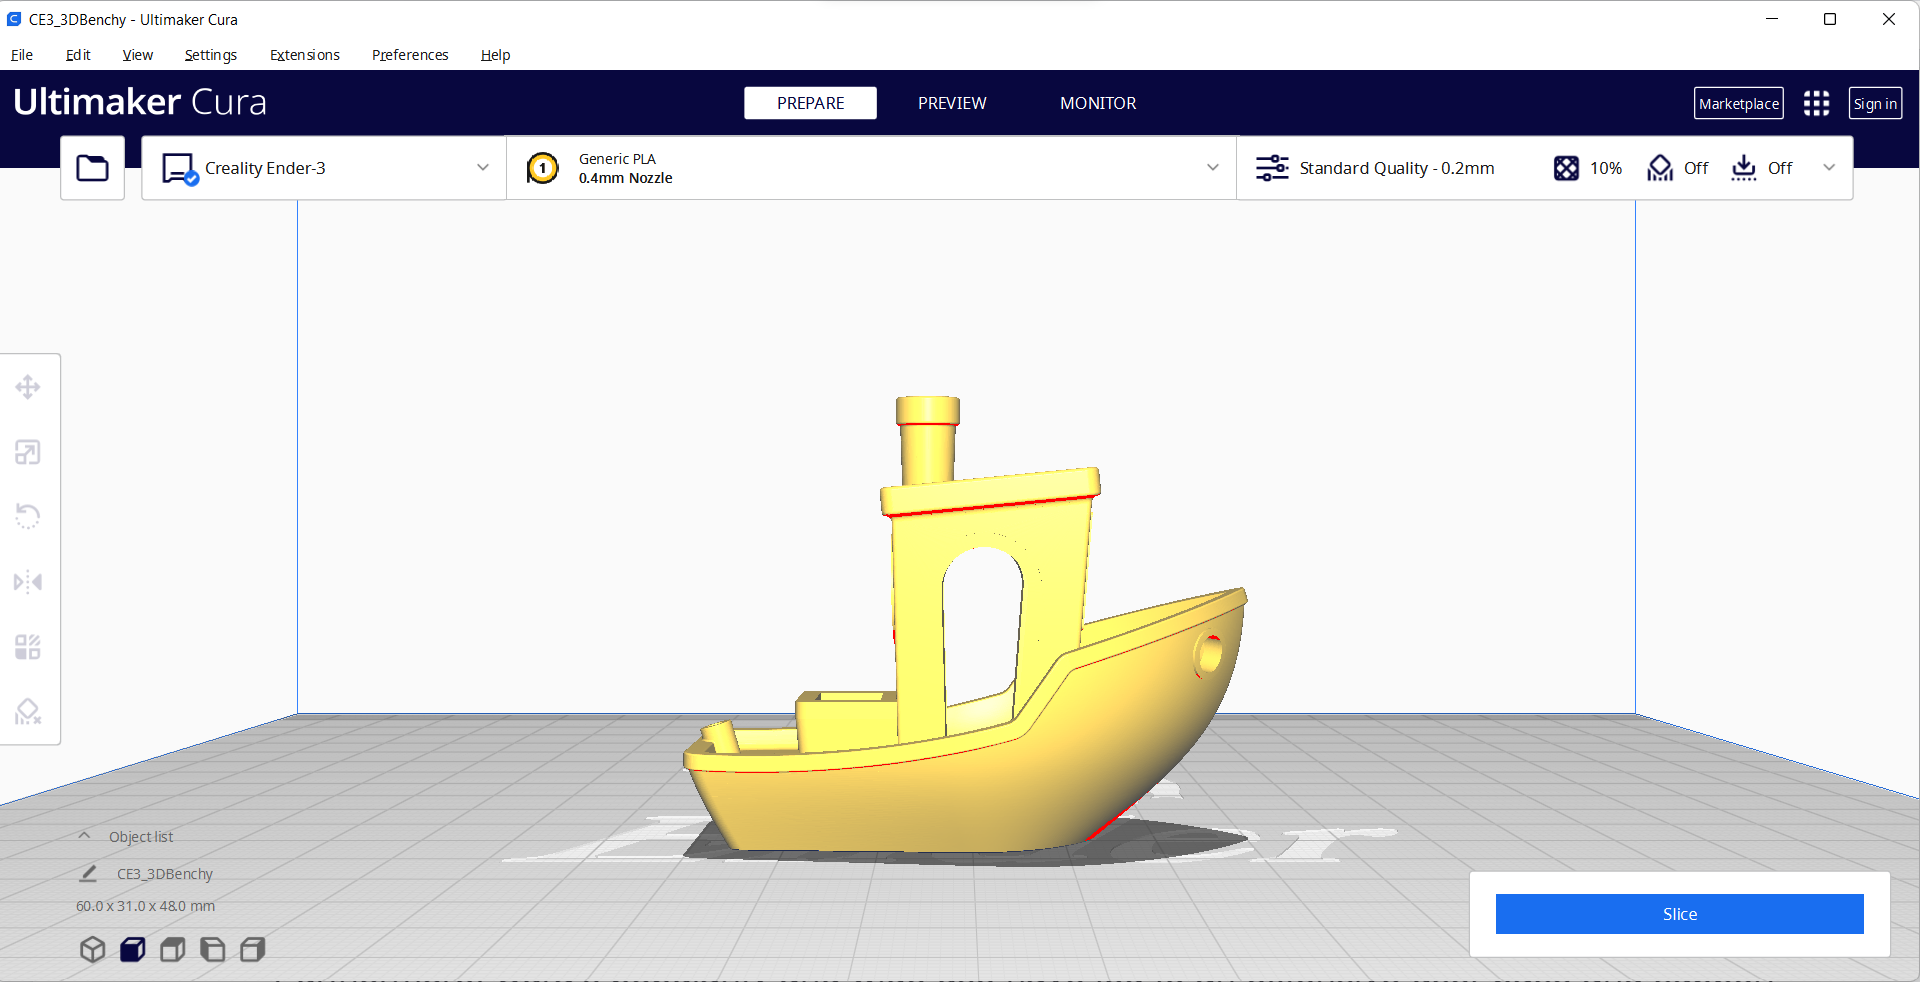
The benefits of Cura slicer lie in its user-friendly nature and open-source development. It supports numerous 3D printers, is easy to use, and Ultimaker constantly keeps Cura up-to-date with the latest features.
Cura also has a considerable amount of slicer settings. With its Expert mode, you can fine-tune almost every aspect of your 3D model and set it up for the best quality 3D print.
Cura’s Marketplace has several useful plugins that help you extend its functionality beyond the basics. You can integrate Cura with your modeling programs, add custom supports, repair your 3D mesh, and many more functions via these plugins.
The plugins also let you take advantage of remote 3D printing with Octoprint or Klipper. Once set up, you can send your sliced gcode files wirelessly to your 3D printer without needing an SD card. We’ll discuss the setup process for remote printing with Klipper later in the article.
Furthermore, Cura’s popularity and wide use have led to an extensive user base and support community that’s always ready to help you with any issues. You can find many guides and tutorials related to Cura’s various features.
Benefits of Klipper firmware
Klipper firmware is widely known for enhancing the printing speeds without losing on the print quality aspect. Integrating a powerful board like the Raspberry Pi gives Klipper the needed processing power for high-level features that significantly improve print quality.
For example, Klipper’s Input Shaping can reduce the ringing effect that occurs when printing at high speeds. Its Pressure Advance feature can help you achieve better corners and reduce filament stringing during printing. The Exclude Objects feature in Klipper can prevent a complete print failure by excluding specific failed prints on the build plate.
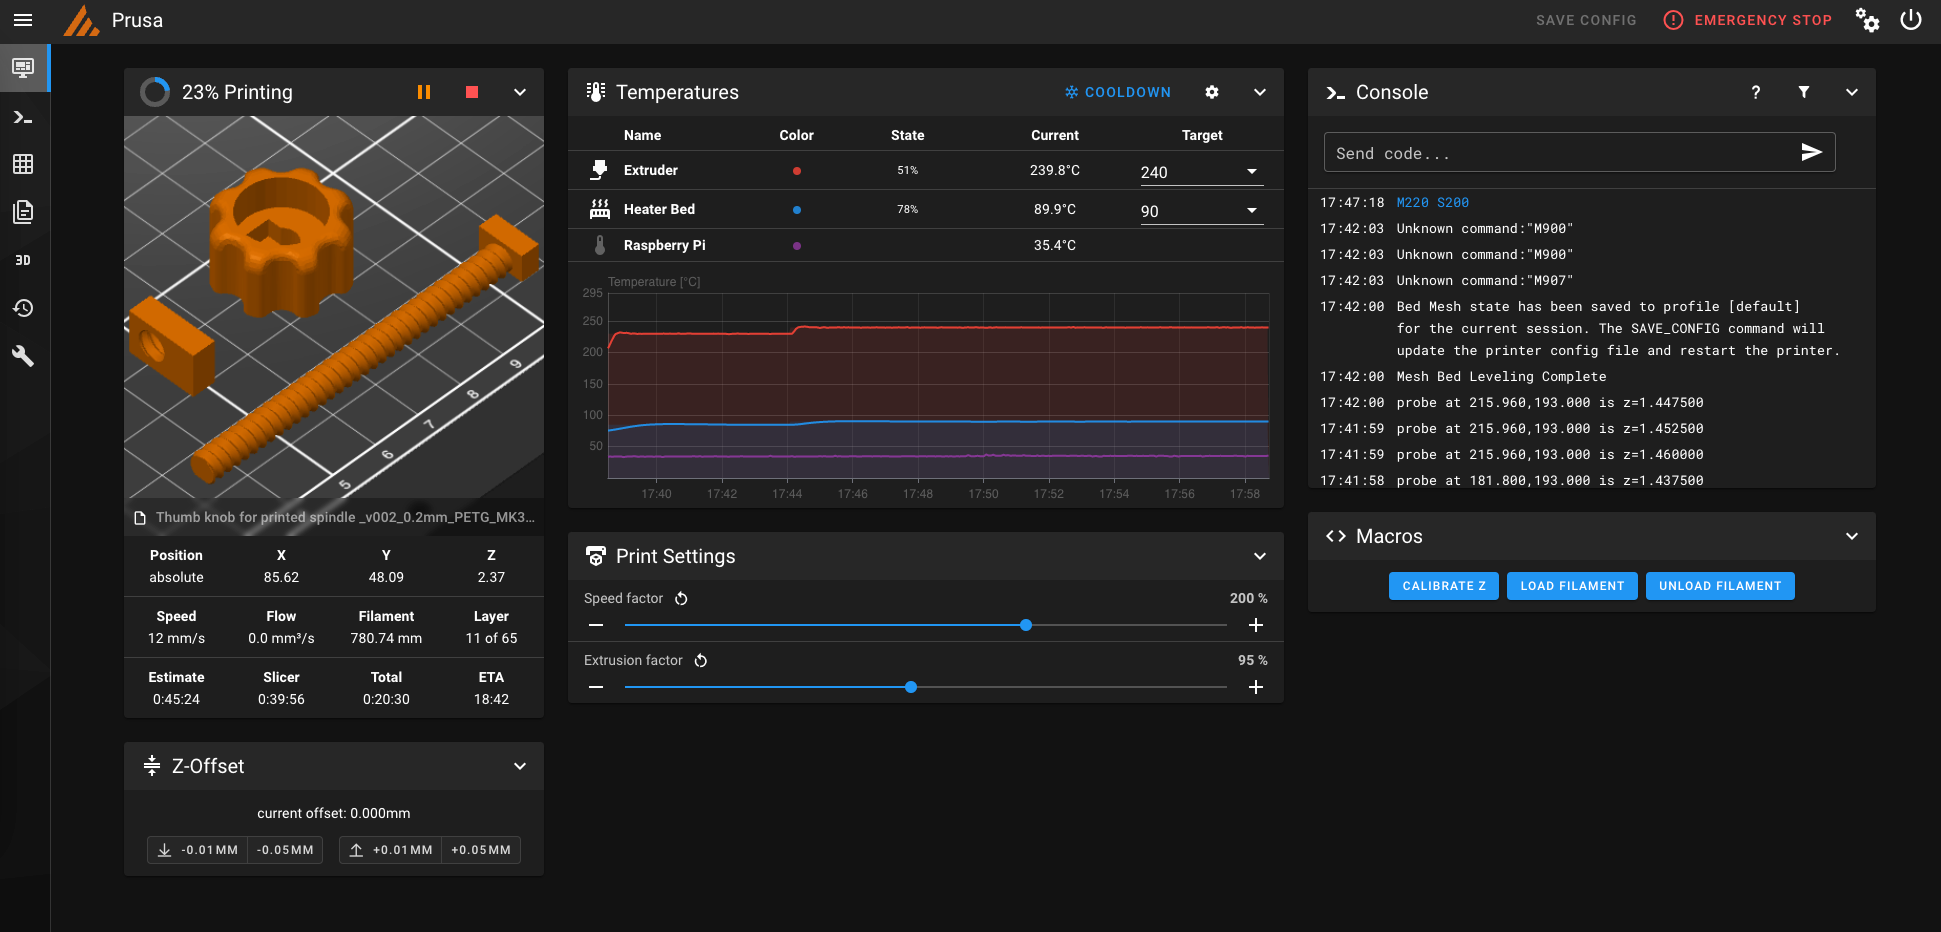
Using the Fluidd or Mainsail web interfaces, you can access your Klipper 3D printer on a laptop, smartphone, or tablet. You can change printer configurations quickly without needing to reload the firmware in the printer. This makes upgrading the hardware or adding accessories to your printer a straightforward process.
Lastly, Klipper’s community is growing by the day. It’s a relatively new firmware, but it has a great user community to guide you. The Klipper Discourse is a great place for troubleshooting your issues. On the Klipper Discord group, you’ll find loads of helpful resources and guidance for using Klipper with your 3D printer.
Cura Slicer Settings with Klipper
Specific slicer settings in Cura overlap with Klipper’s features and might negatively affect your print quality. In this section, we’ll look at some of the Cura settings you need to be careful about when using Klipper.
Turn off Coasting
Coasting in Cura helps you avoid oozing filament during the travel moves and helps to improve the corner quality in your prints. But, it’s challenging to fine-tune and overlaps with Klipper’s Pressure advance feature.
If you enable both of these simultaneously, your prints will have more blobbing and filament oozing. So, it’s best to disable the Coasting setting in Cura and use Pressure advance for better print quality.
Additionally, Set the Retraction Prime Amount to Zero. This setting, too, interferes with the ooze control in Klipper.
Start and End Print Macros
Macros in Klipper are an excellent way of executing a set of predefined commands at the click of a button. Moreover, Klipper also uses extended Gcode commands, which make it easy for you to perform a specific action.
Using these two features, you can configure your Start Print and End Print sequences directly in Klipper’s firmware and create a macro for them.
For instance, you can create [gcode_macro START_PRINT] and [gcode_macro END_PRINT] in your printer’s configuration file in Klipper. Later on, by going over your Machine Settings in Cura, you can edit the Start G code and End Gcode to solely START_PRINT and END_PRINT, respectively.
It will help you edit Klipper's start and end sequences without having to reslice your 3D model. Let’s understand it better with a practical example.
Suppose you have a printer with manual bed leveling and slice your model in Cura with a specific sequence. Later on, you decide to install a bed leveling sensor and want to print the same sliced model.
Typically, you’d have to reslice your model in Cura with different Start and End Gcode sequences. But, with Klipper, you can edit the Start Print and End Print macros in your configuration file and print the same model again without reslicing it.
Retraction, Acceleration, and Jerk Settings
Klipper has its acceleration and jerk settings which you can configure within the firmware. So, it’s better to leave these settings disabled in Cura and let Klipper handle them. This way, you won’t face any compatibility issues and will have uniform settings for your 3D printer.
Similarly, if you’re using large retraction settings, it’d be helpful to tune the Pressure Advance instead of adjusting in Cura. It’ll give you better results and improve Retractions in your prints.
Connecting Cura With Klipper
When using Cura with Klipper firmware, you can directly send your files from the slicer to your 3D printer using the Moonraker plugin.
Follow the steps below to configure the plugin for your Klipper 3D printer, and experience remote 3D printing.
- Ensure your desktop/laptop and Klipper are connected to the same network.
- Open Cura slicer.
- Open the Cura Marketplace, and Install the Moonraker connection plugin.
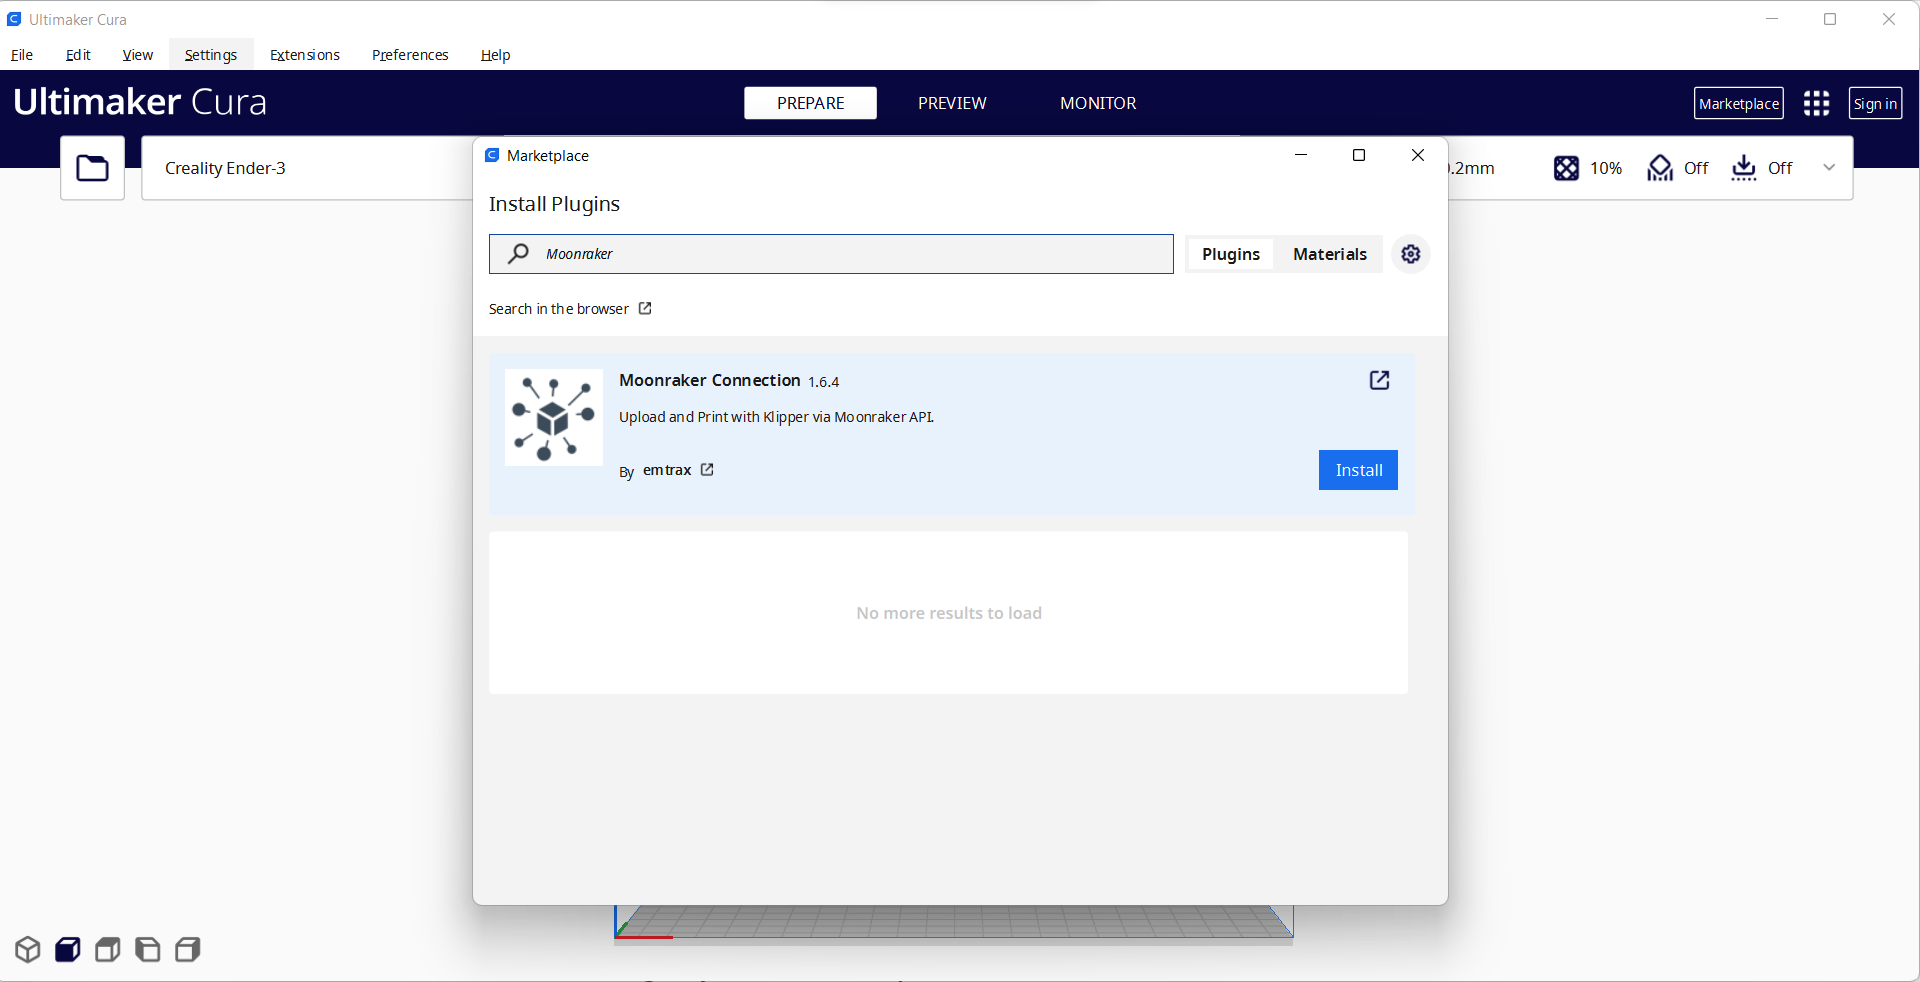
- Restart Cura for the changes to take effect.
- Click on your Printer on the main screen, and Open the Manage Printers section.
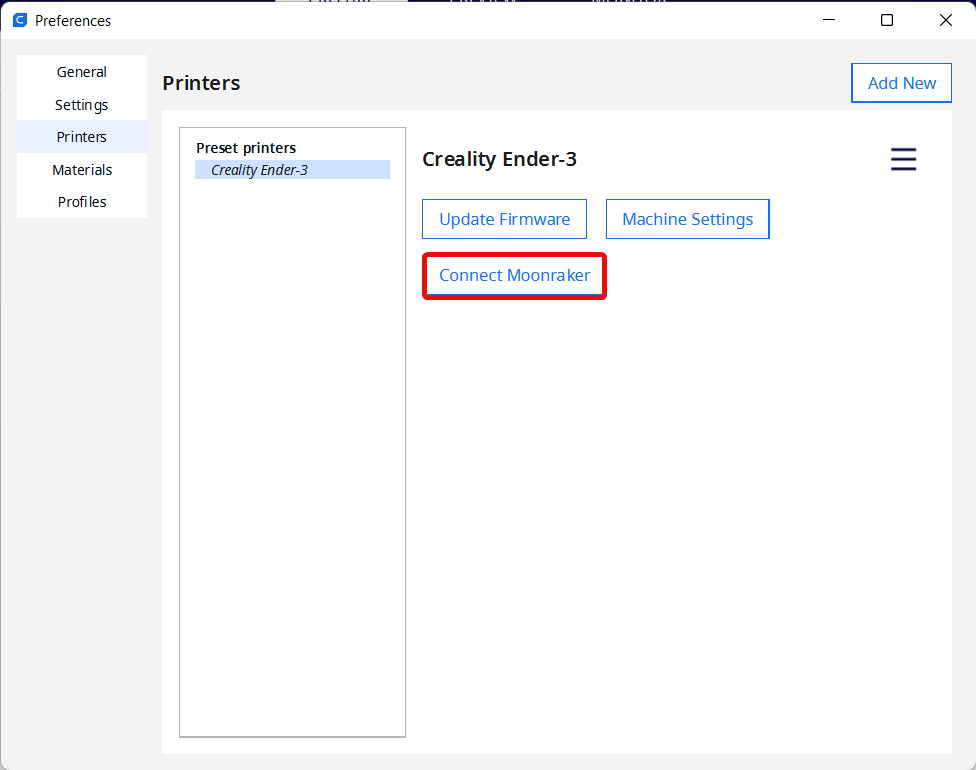
- You’ll notice a new Connect Moonraker option. Click on it to open a pop-up window.
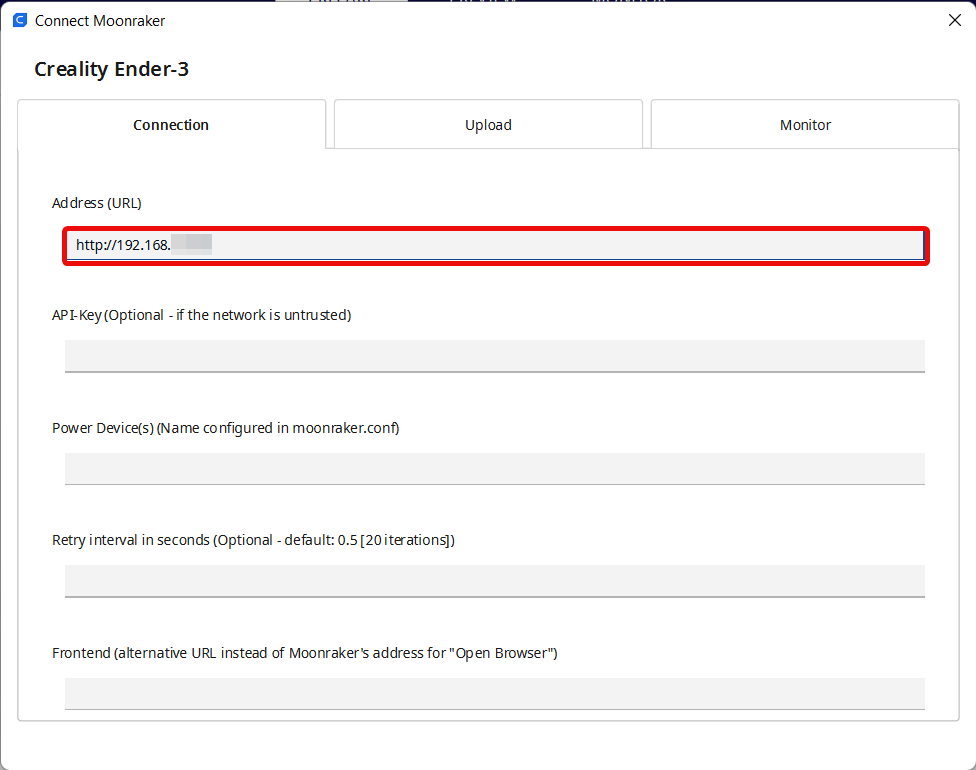
- Enter the IP address of your Raspberry Pi in the first section. It should look something like this - http://192.168.0.xxx.
- In the Upload section, you can select the file format of your sliced file. Gcode format will be your typical gcode file. In contrast, UFP with Thumbnail will display a small thumbnail of your 3D model beside the file name. It’s handy to quickly recognize your 3D file without looking at the name or loading it in a gcode previewer.
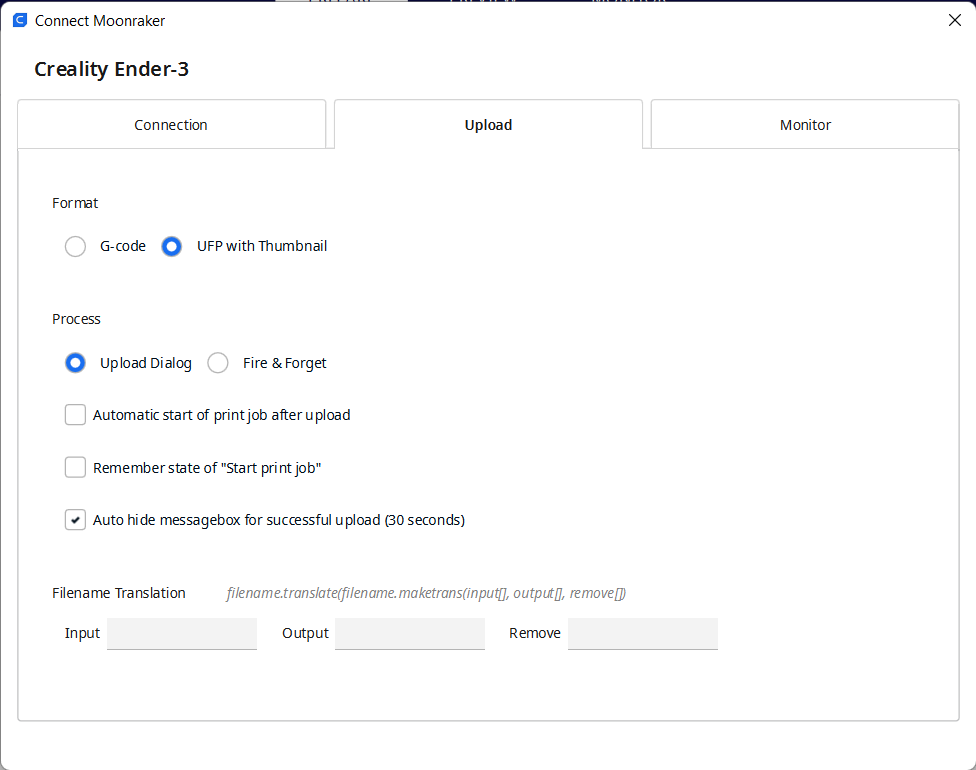
- Rest of the things, you can keep the default.
- In the Monitor section, you can input the URL of your Klipper camera. The URL should be like this - /webcam?action=stream. It’ll let you monitor your printer via the Cura slicer. You can leave this field blank, as Klipper lets you watch a camera feed.
- Closing the window saves the settings.
That’s It! You’ve successfully configured Cura to work with your Klipper 3D printer.
The next time you slice your 3D models, you’ll notice a small arrow beside the usual Save to the Disk option. Click on it, and Upload the file to your printer. You can start the print immediately after uploading or simply upload the file to Klipper’s directory.
Using Obico for Remote 3D Printing
While you can technically remote 3D print with Cura and Klipper, you’re limited to the range of your local home network. There’s also a requirement for your laptop and 3D printer to be connected to the same network.
However, with Obico, you’re not restricted by these limitations and can 3D print remotely from outside the range of your wireless network. You can access your 3D printer via mobile data on any device or location.
Obico lets you experience true remote 3D printing, and makes it easy to start, control, and monitor your 3D printer from anywhere. Additionally, you get the benefits of Obico’s AI failure detection feature, which automatically detects any failed prints and instantly notifies you.
The AI print failure detection has watched over 60 million hours of 3D printing footage and saved a lot of wasted filament material. It’s a nifty feature that can help put your mind at ease and free you from the constant stress of monitoring your 3D prints.
You can install Obico for Klipper as well as for Octoprint. The installation process is pretty straightforward, and should you run into any issues; there’s an excellent Discord community you can join to get help.
Feel free to share your experiences using Cura with Klipper. If you find Obico useful, please give us a star on GitHub, or leave us a review on our mobile app in the iOS App Store or Google Play Store!