Installing Klipper (and Fluidd) on Your Ender 3 - Setup and Configuration

Introduction
Klipper firmware has become the go-to choice for high-speed 3D printing on a budget. It integrates the computing power of a Raspberry Pi with your 3D printer's controller to give you a clean, smooth, and fast 3D printing experience.
As Klipper is merely a firmware, you need an interface to interact with your 3D printer. Mainsail OS, Octoprint, and Fluidd are the three popular types of Klipper interfaces that are easy to use and help you to take full benefits of Klipper's features. We already have a guide that details the procedure of installing Klipper on an Ender 3 with Mainsail OS.
In this article, we'll go over the step-by-step procedure to install Klipper on an Ender 3, but with the Fluidd web interface. Read along to find the benefits of Fluidd and Klipper on your 3D printer.
What is Klipper?
Klipper is the brainchild of Kevin O'Connor and was first released way back in 2016. It's completely open-source and free to use for anyone. This open-source nature has led to tremendous growth and has become a popular 3D printer firmware for hobbyists and professionals.
Klipper utilizes an external computer, a Raspberry Pi, and integrates it with a 3D printer's motherboard. It takes advantage of the extra processing power of a Raspberry Pi to precisely control your 3D printer's movements. The combination of a Pi and a 3D printer's controller results in faster computation and can help you to achieve printing speeds of more than 150 mm/s quickly.
Why should you install Klipper on your 3D printer?
Besides fast 3D printing speeds, Klipper has some fantastic features designed to eliminate the issues in other 3D printing firmware and deliver a smooth user experience. Let's look at some of the notable advantages of Klipper firmware.
Precise Stepper motor movement
Klipper takes advantage of Raspberry Pi's processor to calculate the stepper motor movements in advance and with a precision of 25 microseconds. Instead of relying on any algorithm, it solely depends on the machine's kinematics and acceleration physics to deliver precise stepper motor movements. This feature adds to the stability of the printer and reduces the stepper motor noise.
Multiple micro-controller support
Klipper supports multiple microcontrollers on a 3D printer without needing extra code or a complicated setup. You can quickly run the different controllers for your extruder, tool head, heater, etc., right from Klipper's interface.
Smooth Pressure Advance
Klipper estimates and calculates the pressure inside the 3D printer's nozzle and adjusts it to deliver a smooth and even filament flow. It reduces oozing and helps achieve better retraction performance with minimal effort.
Custom programmable macros
Klipper gives you the option to create customized macros using gcode commands. You can use these macros to execute specific actions which might otherwise not be available readily. It gives you an extra customization level and eases the printer's interaction process.
What hardware is required to set up Klipper?
Klipper is a piece of software, and you'll need additional accessories to install and run it along with your 3D printer. Here's a list of hardware you'll require to set up and run Klipper on Ender 3.
- Raspberry Pi 3, 3B+ or 4. (Raspberry Zero is not recommended due to its limited processing power).
- Balena Etcher
- Fluidd
- PuTTY software
- Klipper configuration(s)
- Micro SD card(s)
- SD card reader
Additionally, it would be great if you're aware of your 3D printer's specifications. These will come in handy while configuring the Klipper firmware.
Once you have all the hardware, we can start setting up the Klipper with Fluidd on an Ender 3 3D printer.
How to install Klipper on your Ender 3 3D printer
We'll go step-by-step, and you'll find detailed instructions for installing Klipper on your Ender 3 3D printer. In this guide, we've chosen the Original Ender 3 (2018) as a reference for setting up Klipper. We've included the steps to install Klipper on the Original Ender 3 and the latest models.
Follow along closely, and you'll successfully install Fluidd and Klipper for your Ender 3.
Download Balena Etcher
Balena Etcher is a file-flashing tool that's used to flash OS files onto portable media. It's the recommended tool for flashing the Fluidd software, and we'll use it in our guide. Optionally, you can use the Raspberry Pi imager for macOS and Linux.
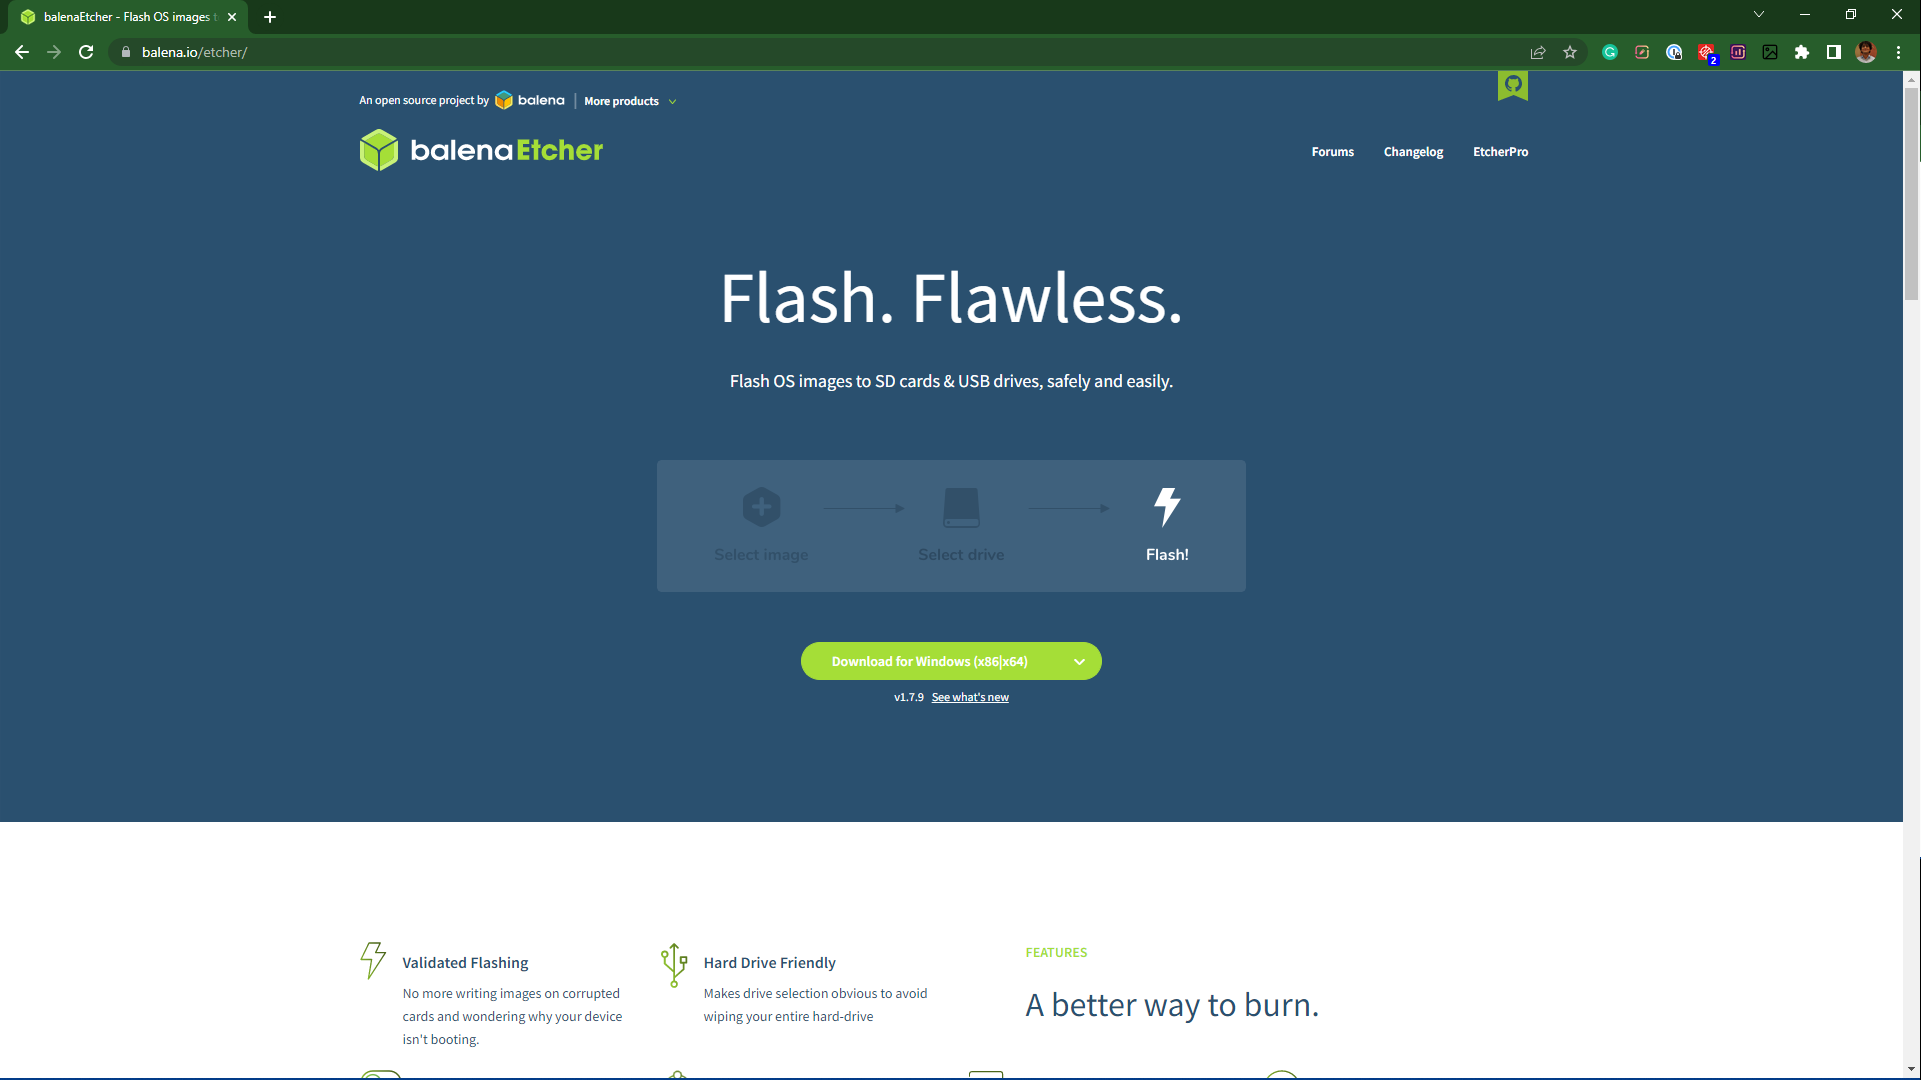
- Go to the Balena Etcher website and download the version according to your system's specifications.
- Install and Run the software.
Download Fluiddpi image
You can install the Fluidd web interface on your Raspberry Pi in four different ways. We'll use the Fluiddpi image as it's the easiest method to install the software on Raspberry Pi.
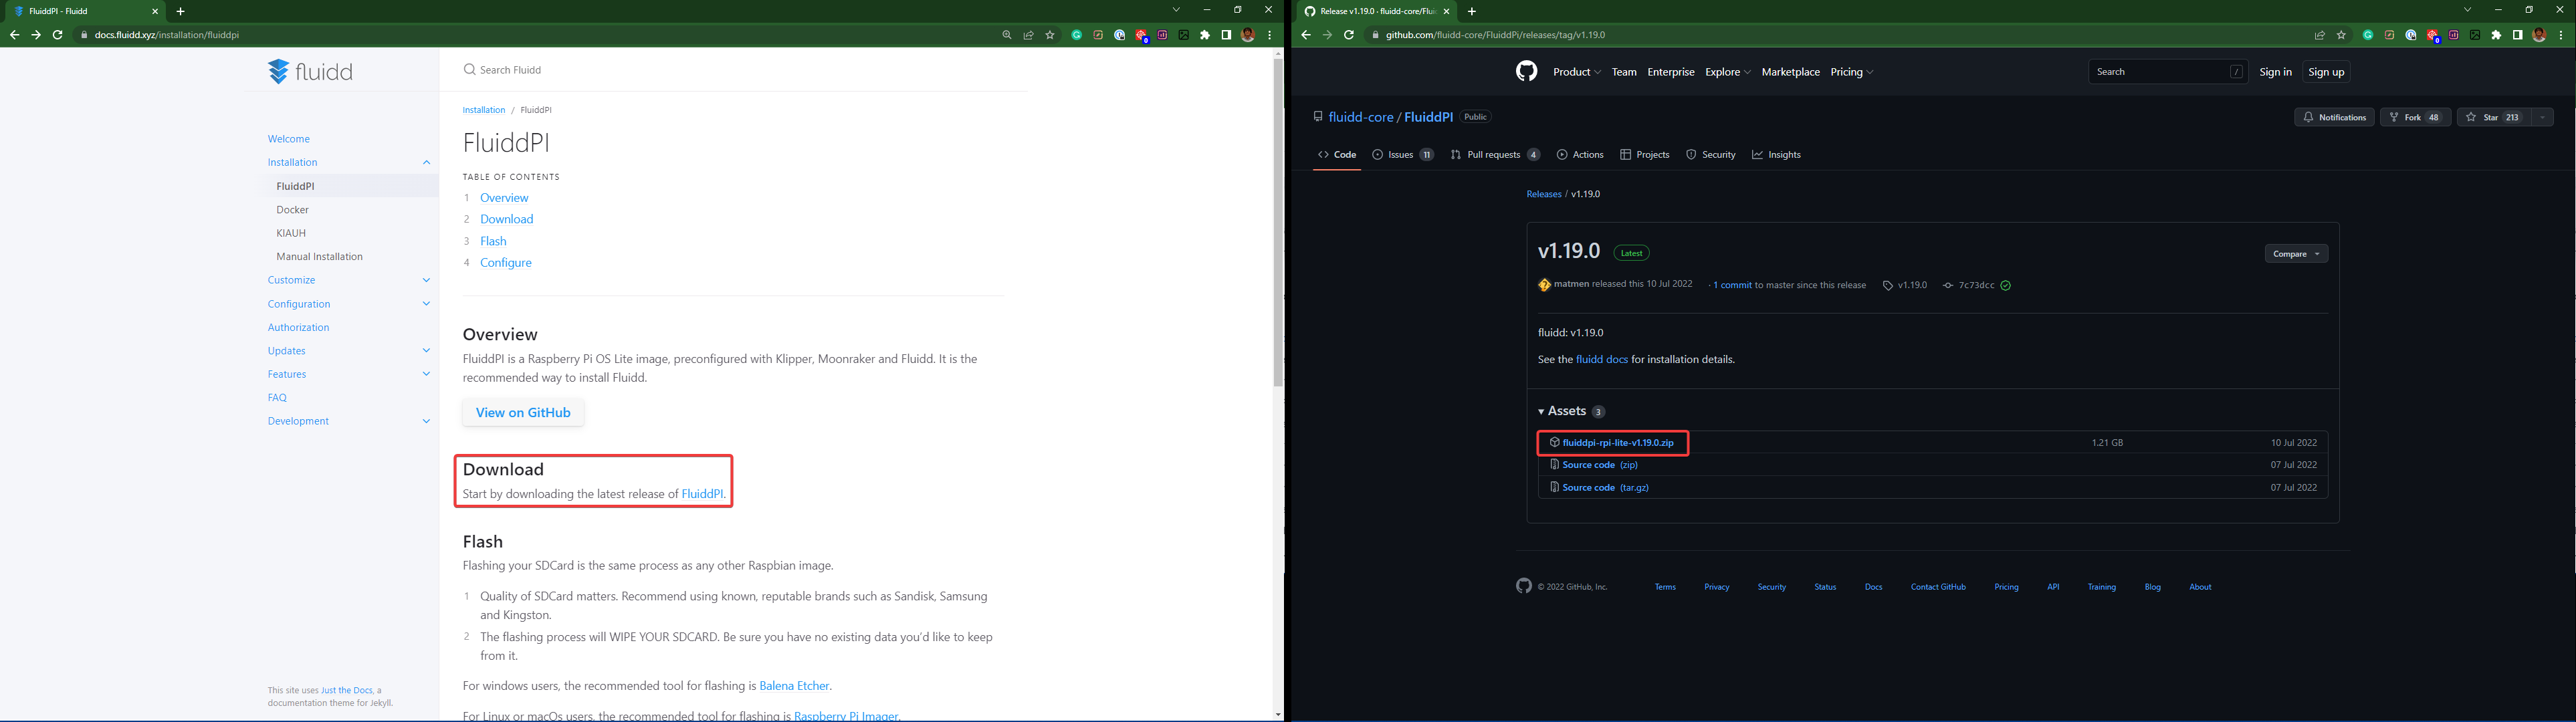
- Go to the Fluidd website.
- Open the installation tab and click on Fluiddpi.
- Download the latest release from Fluiddpi's GitHub page. It'll be a zip file of around 1.21 GB.
Flash FluiddPi using Balena Etcher
- Insert the microSD card into your computer using a card reader.
- Open the Balena Etcher software and click on the flash from file option.
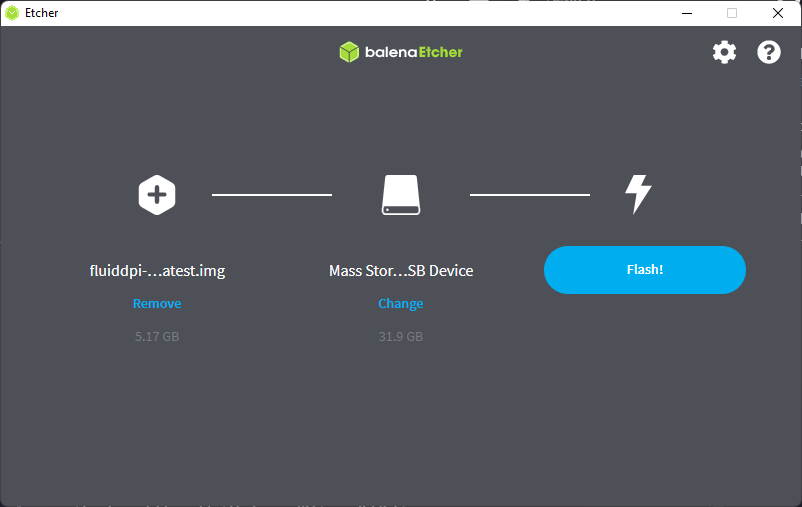
- Select the downloaded fluiddpi image file.
- Your microSD card should already be selected as the flashing device. Verify it.
- Click on flash and let the process run its course.
- You'll receive a 'flash completed' popup once the process is completed.

Add Wi-Fi credentials to Fluiddpi
In this step, we'll configure Fluiddpi's Wi-Fi setting using the Notepad++ application. If you don't already have it, install it from Notepad's website. This step will allow your Raspberry Pi to connect to your network.
- Open the microSD card drive from your desktop, and navigate to the fluiddpi-wpa-supplicant.txt file.
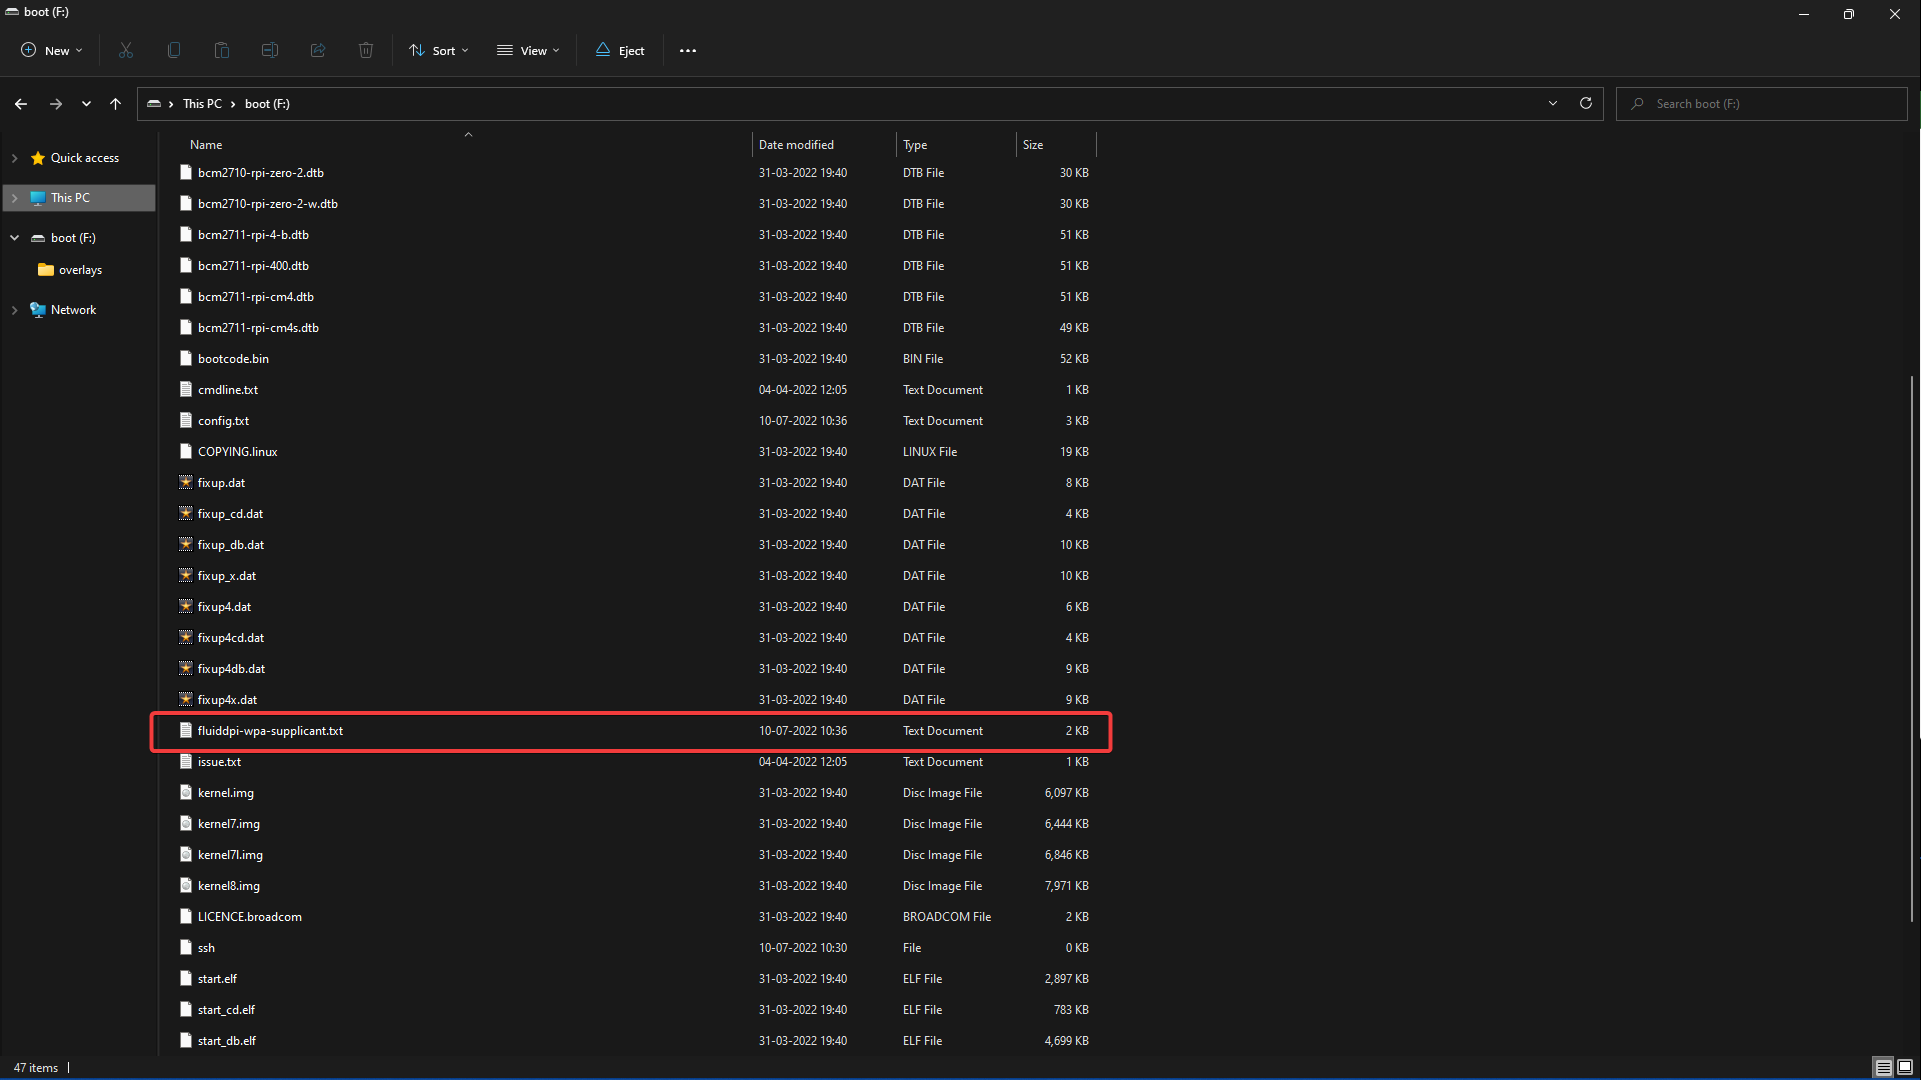
- Right-click on the file and open it with Notepad++.
- Depending upon your Wi-Fi configuration, remove the ' #' symbol to uncomment the code. For example, if you have a password for your Wi-Fi, enter your Wi-Fi name and password within the respective inverted commas and uncomment the lines.

- Go to line 49 and uncomment the country code in the file. If your country's name isn't mentioned, open the file link and add a separate line with your country code and name.
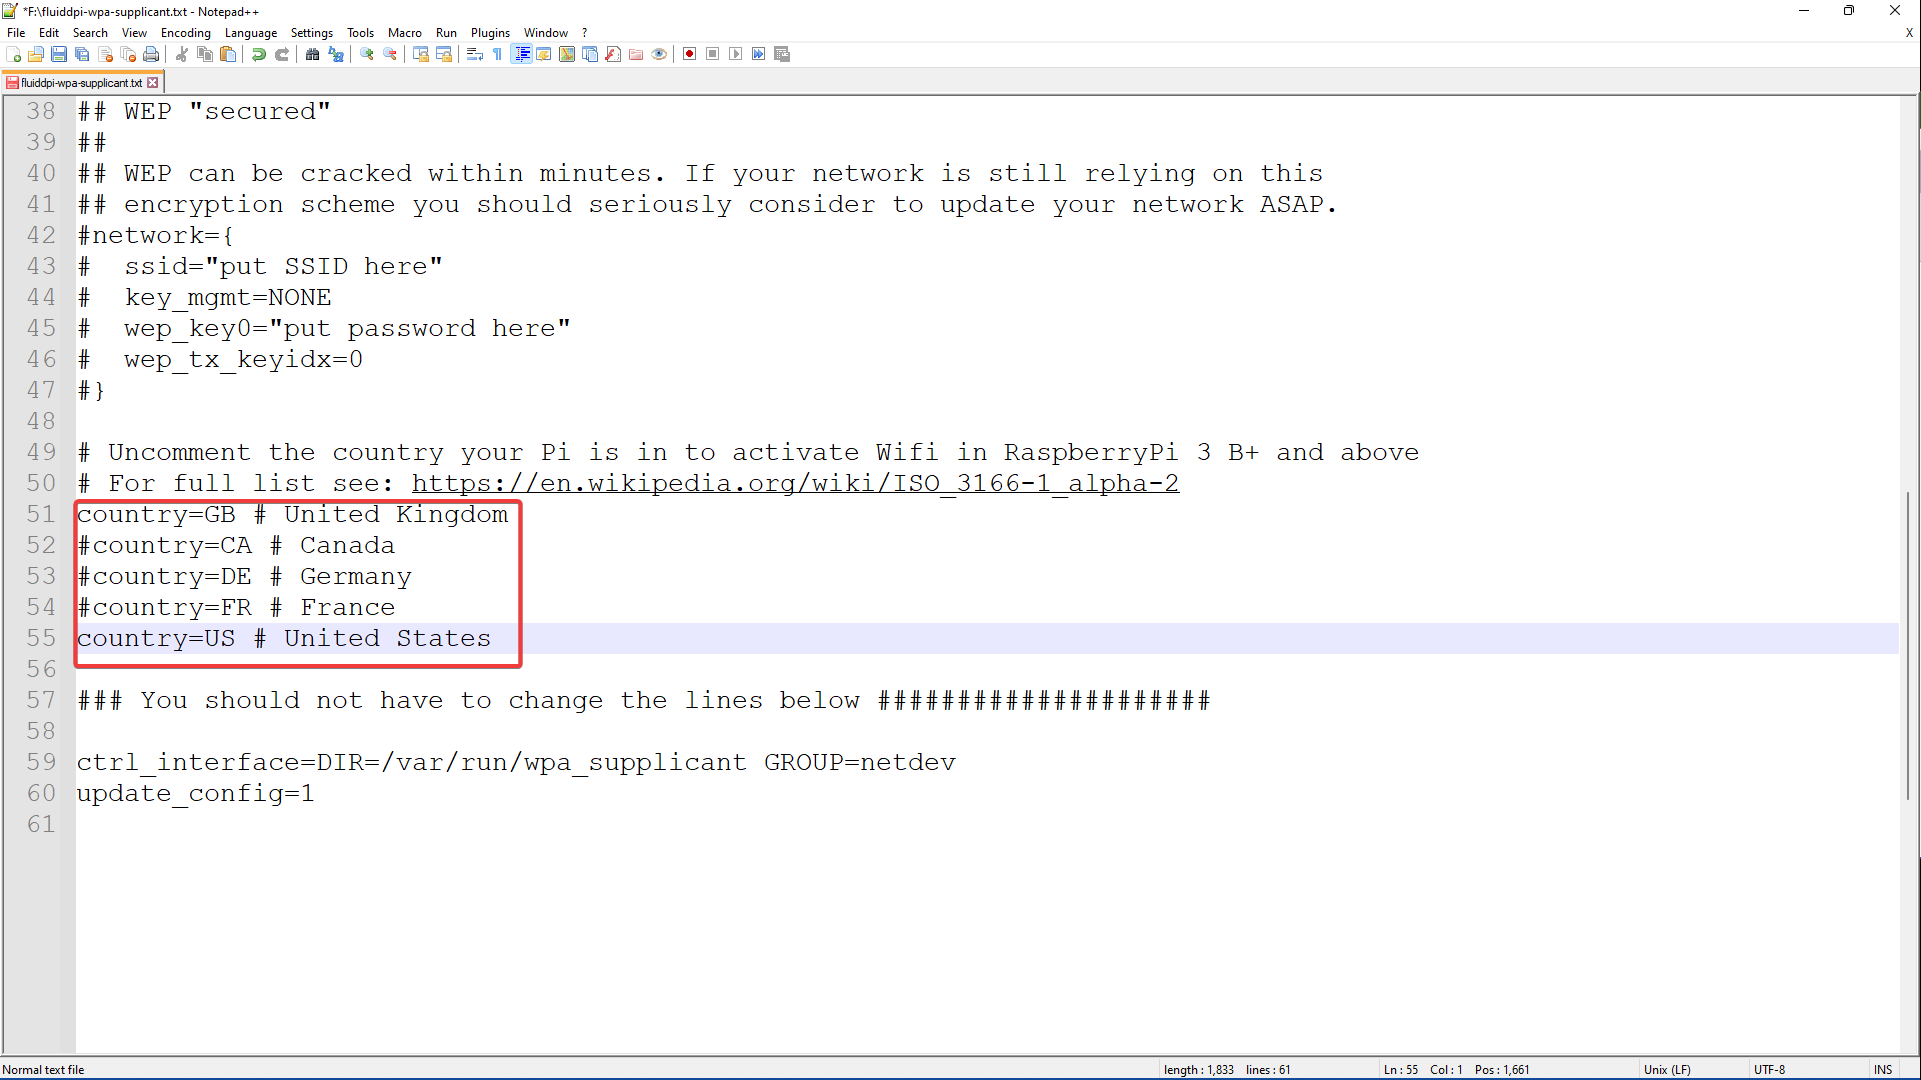
- Save the file, close the Notepad editor and eject the SD card.
Find Raspberry Pi IP Address
- Insert the flashed SD card in your Raspberry Pi and power it on.
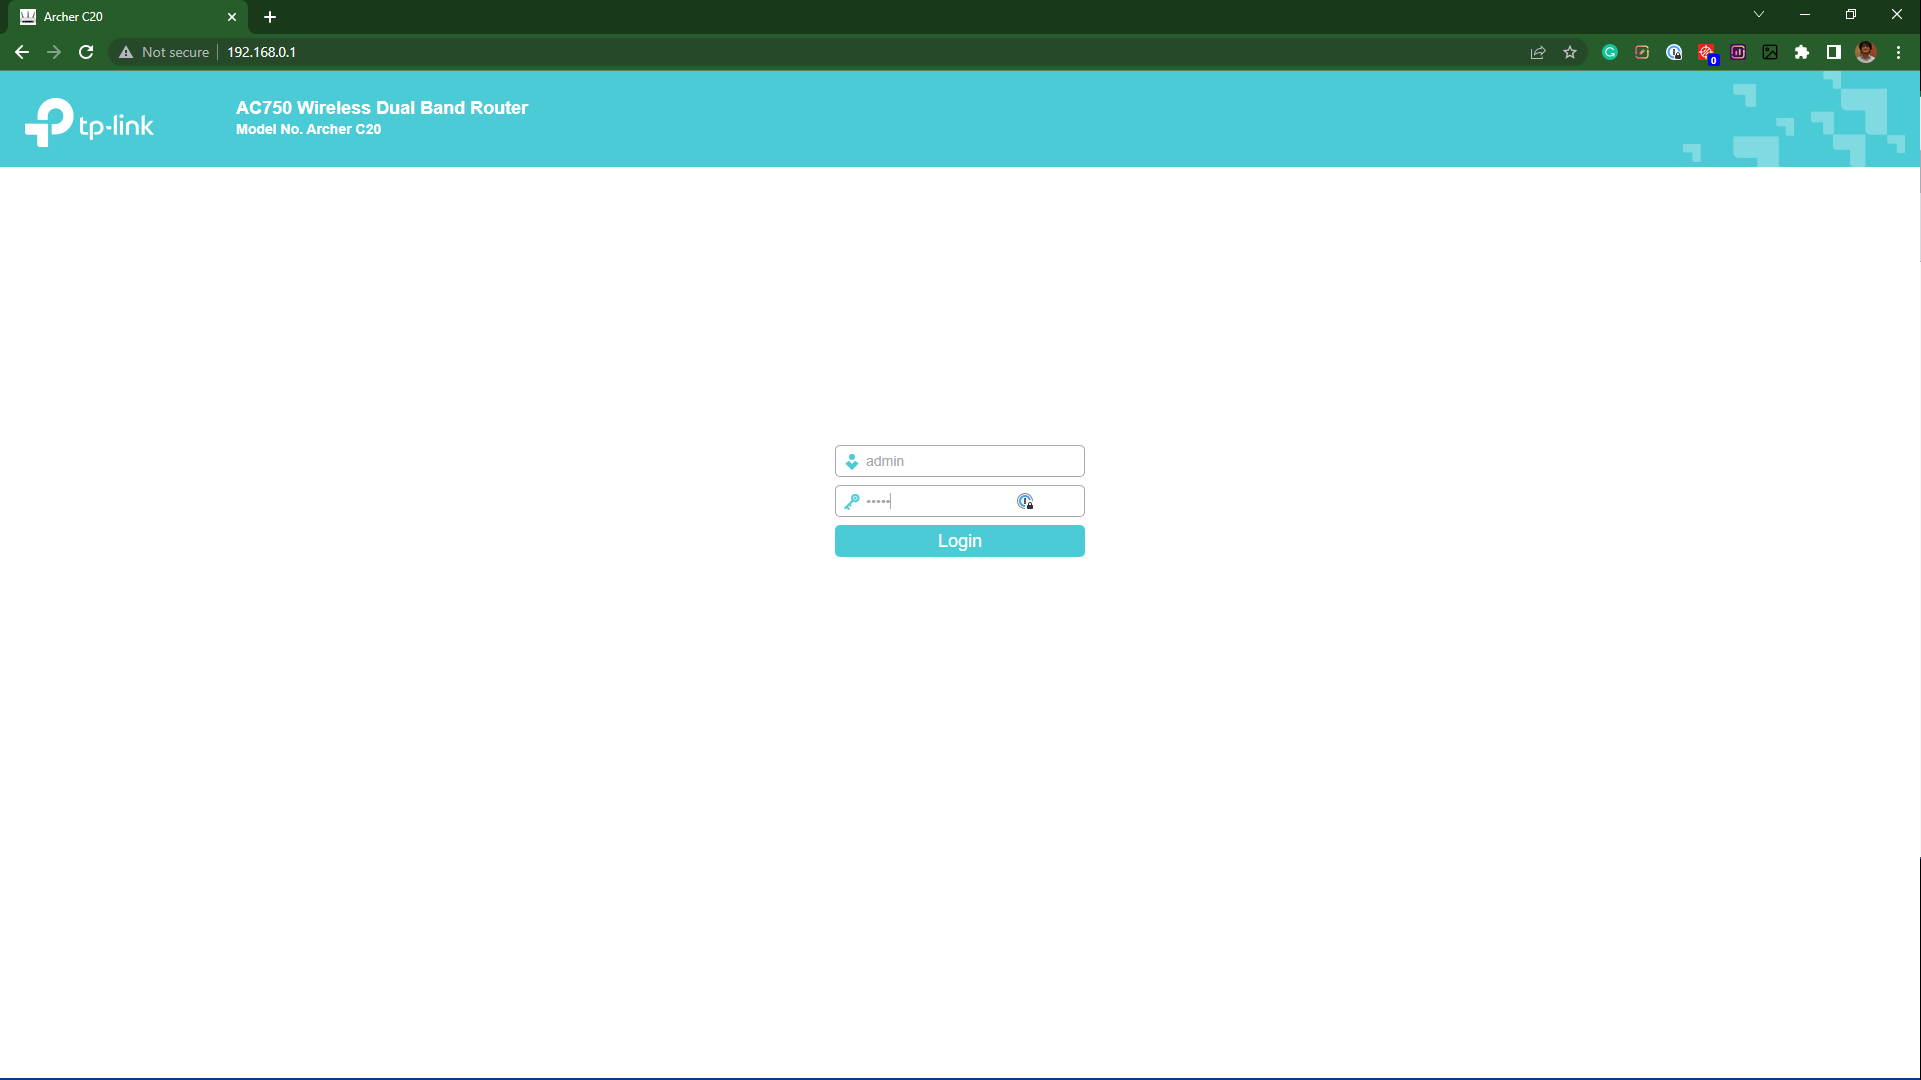
- Input your Router's IP address in your web browser and log in using your credentials.
- In this case, we're using a TP-link Wi-Fi router with a default IP address of 192.168.0.1 and login credentials as admin for both options. Each router will have a slightly different IP address and configuration, and a quick google search will help you with it.
- Go to the DHCP section on the left side, and click on the DHCP clients list.
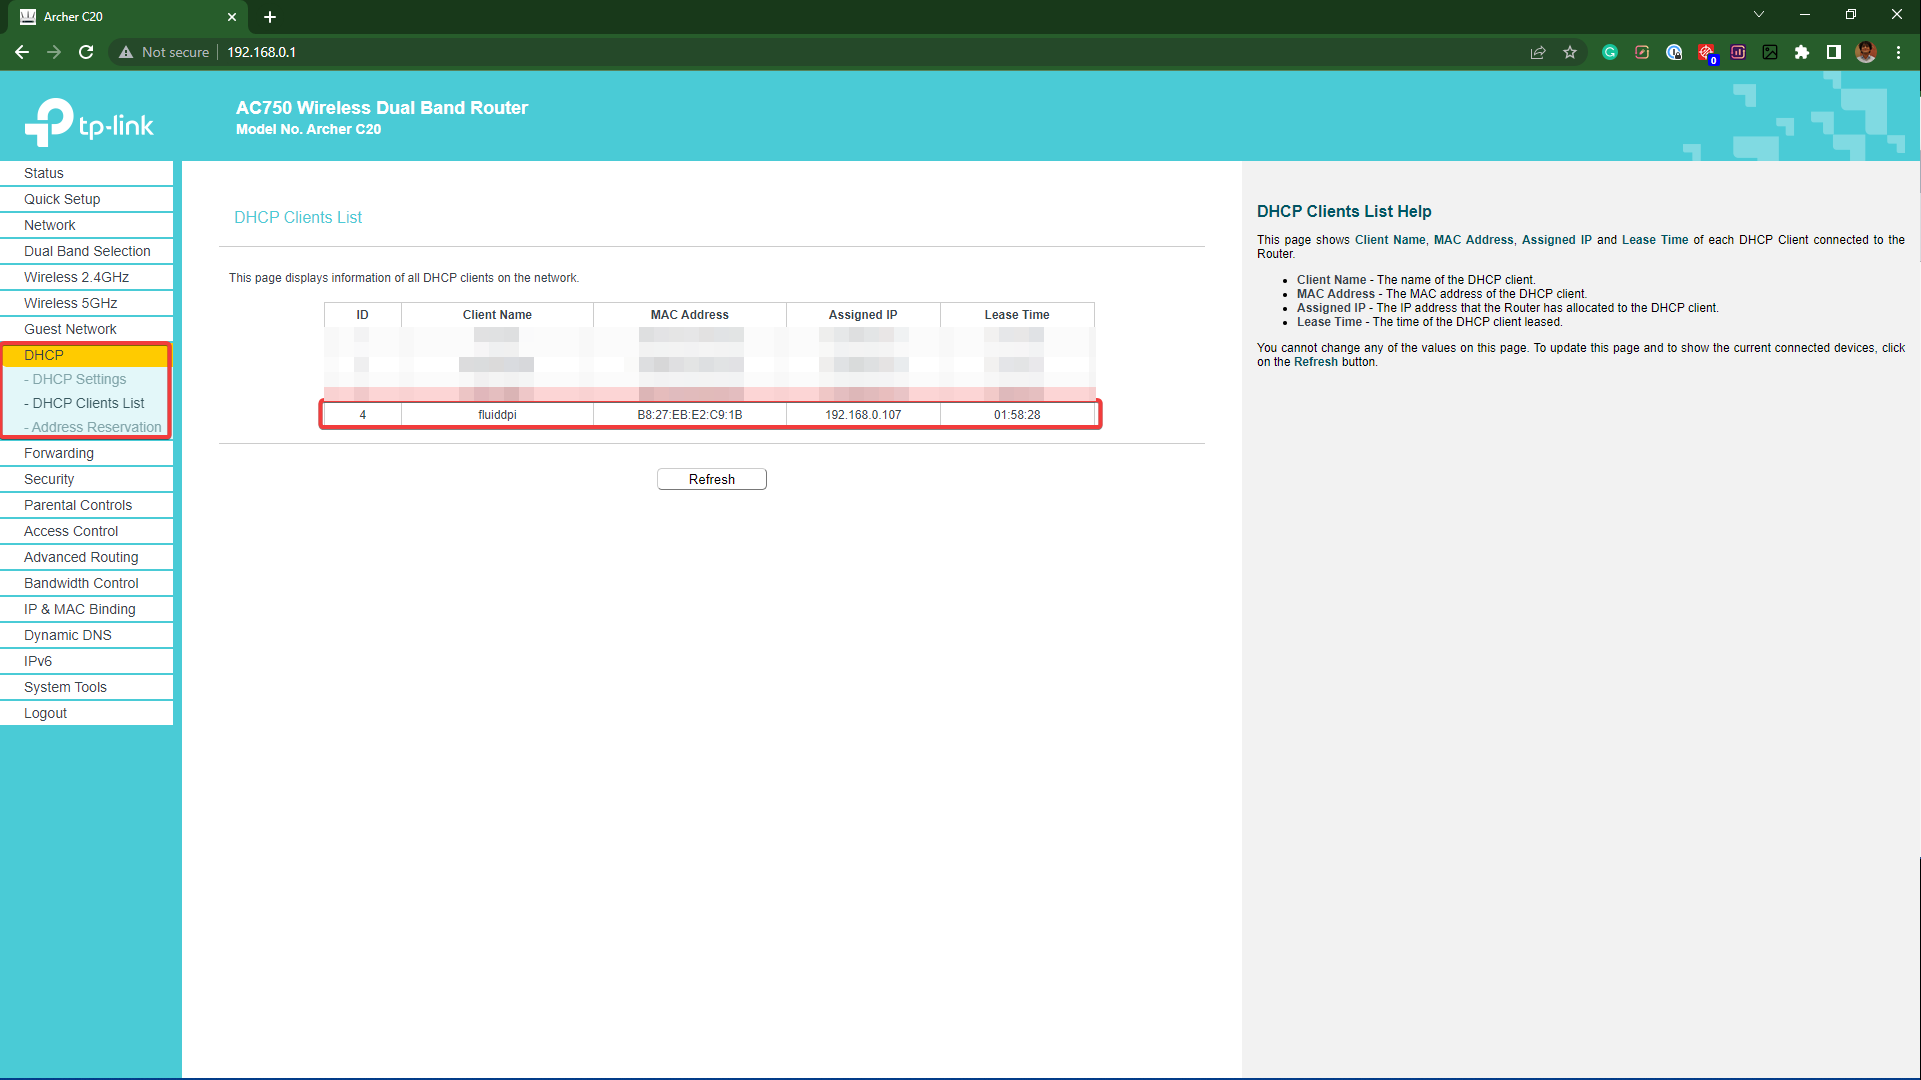
- Your Raspberry Pi will have a client name as fluiddpi and a unique IP address.
- Keep a note of this IP address.
Configure Klipper firmware
Klipper is designed for various 3D printers, and we need to configure it for your particular 3D printer. We'll use the PuTTY software to remotely access your Raspberry Pi and install and configure Klipper for your Ender 3.
- Download and Install PuTTY software from PuTTY's website.
- Open the software, input your Raspberry Pi's IP address, and set the connection type to SSH. A new command window will pop up.
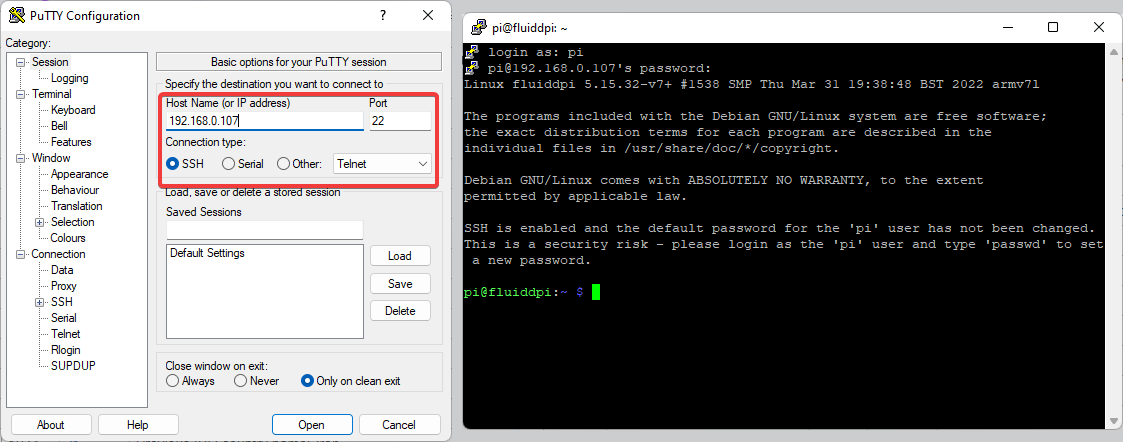
- You'll need to log in to your Raspberry Pi using the username as pi and password as raspberry.
- Type the following commands in the command window.
cd ~/Klipper/
make menuconfig
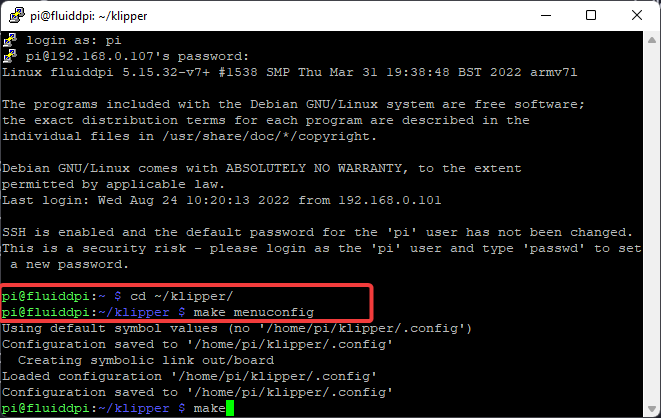
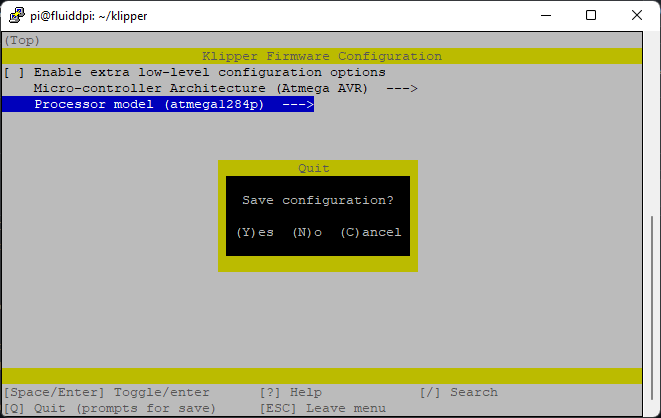
- A new configuration window will open, titled Klipper firmware configuration.
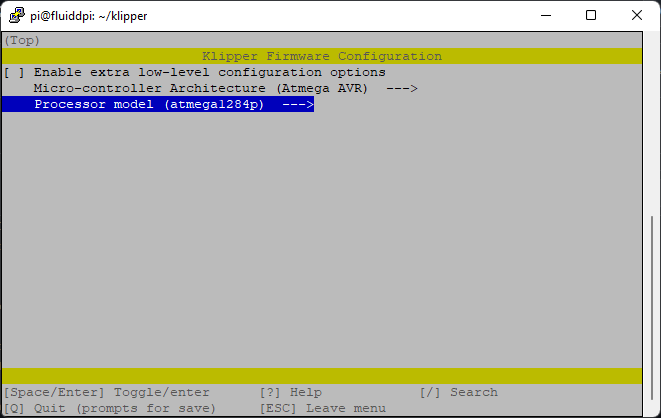
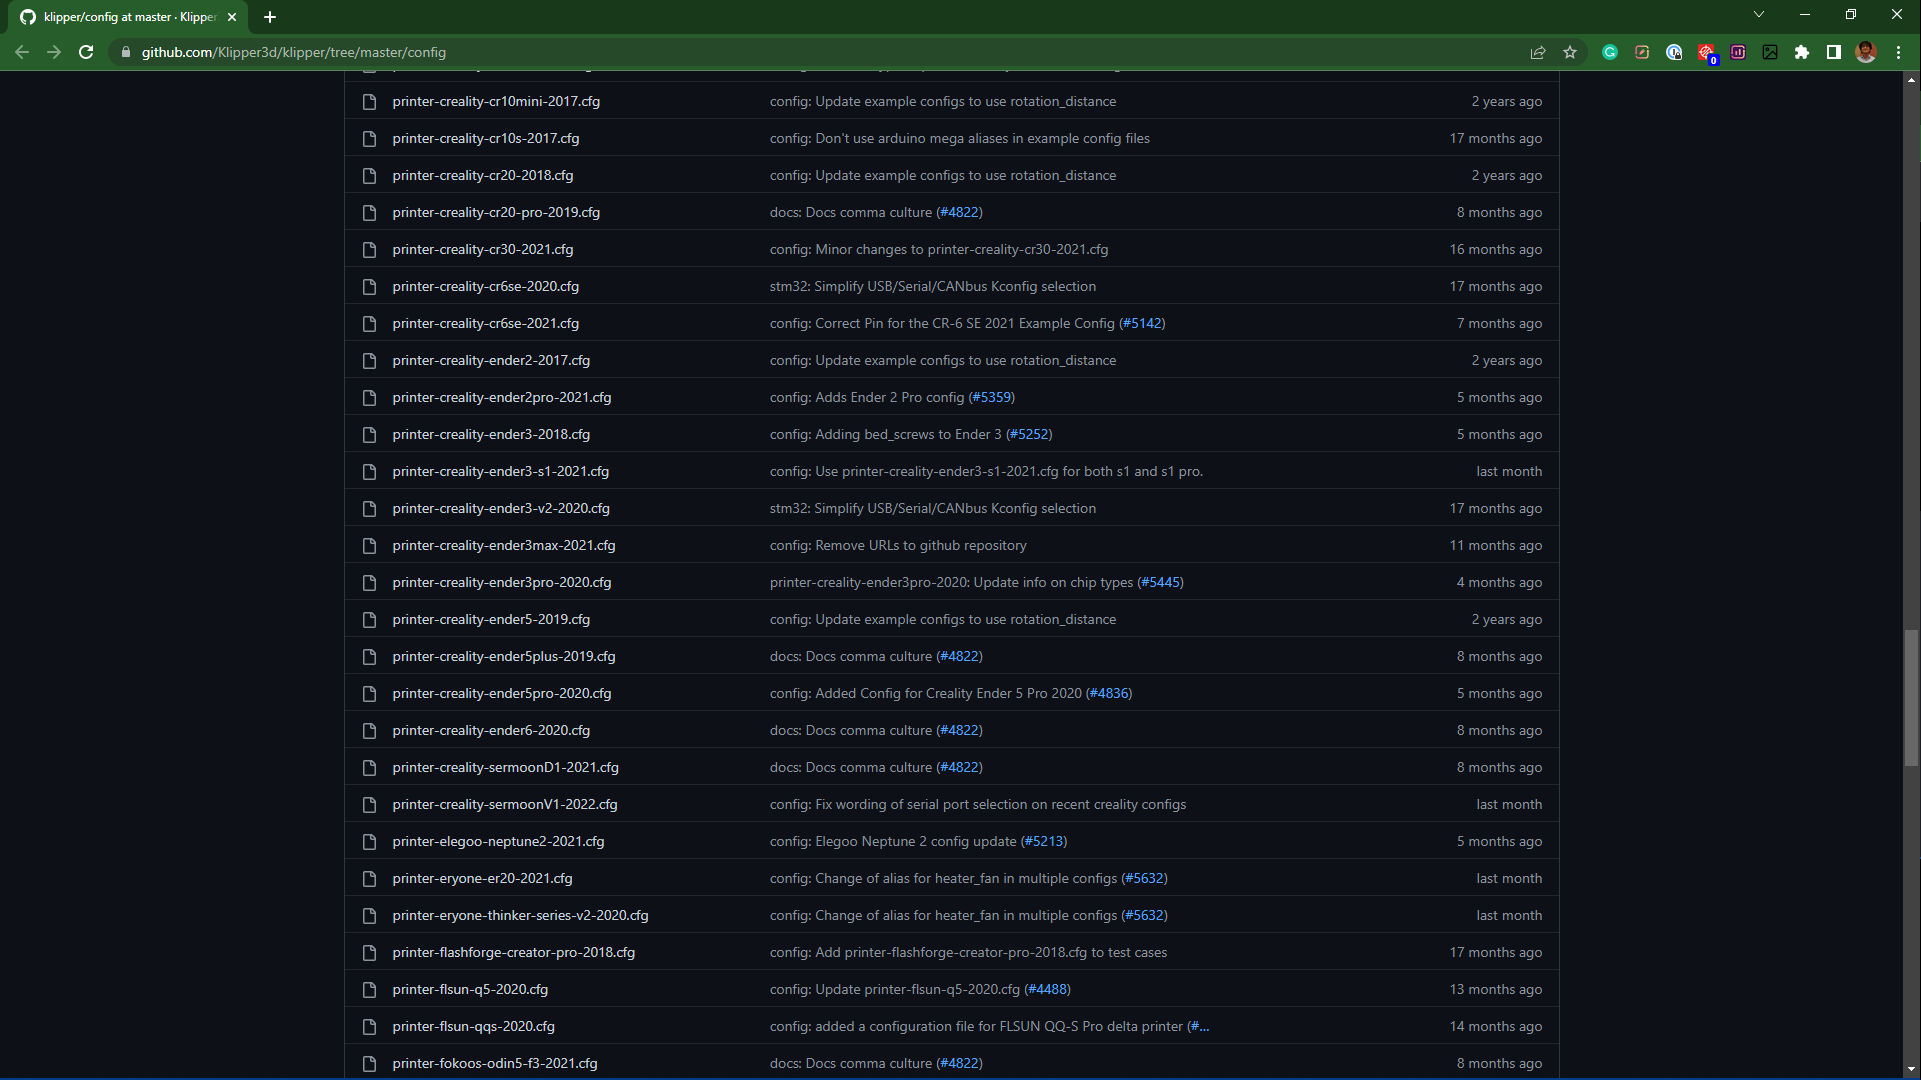
- You'll have to input your Ender 3 motherboard's specifications in this window. Go to Klipper's documentation, and open the configuration file that matches your particular Ender 3 model.
- The top comments will inform you about your Ender 3 boards' specifications. In this case, our Ender 3 uses an Atmega AVR board with an atmega1284p microprocessor.
- Input these credentials in Klipper's configuration window.
- Press Q and save the configuration by pressing Y. This will keep the settings and close the configuration window.
- Input the command make in the command terminal.
- The Raspberry Pi will configure and create the Klipper firmware file for your Ender 3 3D printer.
- Once completed, you'll either get a klipper.bin or klipper.elf.hex file as the final output.
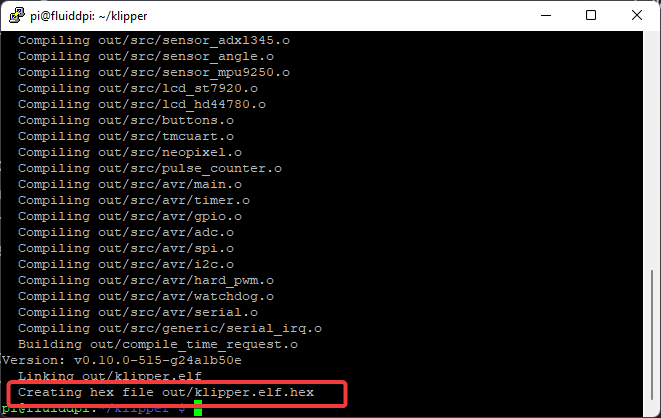
Note: If you're using the latest motherboards with your Ender 3, you'll receive a .hex file. In contrast, older Ender 3's with V.1.1.x motherboards will accept .hex file format. We'll review the installation process for both Ender 3 3D printers. You can skip the immediate two steps using an old Ender 3.
Retrieve the configured firmware
You'll need to flash and install the Klipper firmware in your Ender 3 3D printer. There are two different methods for installing the Klipper on an Ender 3. These methods depend on the file output type, and this particular step is solely required for the .bin file format.
- Install the WinSCP FTP software from its website. This software will let you wirelessly transfer files between your Raspberry Pi and the computer.
- Open the software and log in using your Pi's credentials. Set the file protocol to SFTP.

- Insert a blank SD card into the computer using a card reader. We'll use this SD card to install Klipper on your Ender 3.
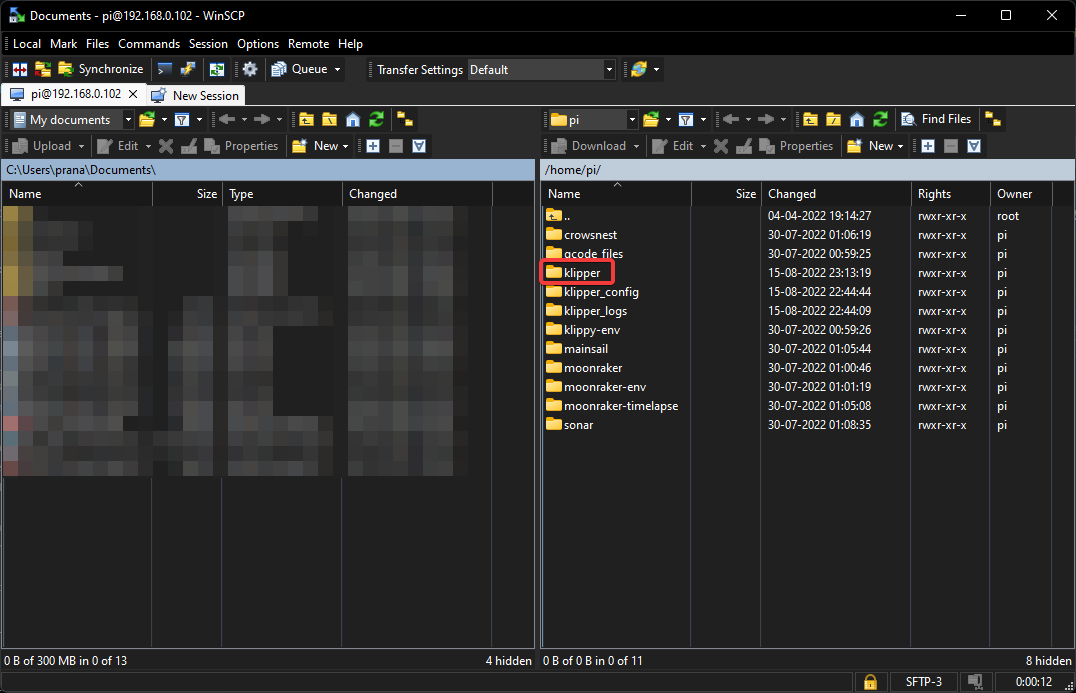
- The right side of the WinSCP window shows the Raspberry Pi's folders.
- Follow the file path as pi>>klipper>>out>>klipper.bin.
- Open the SD card on the left side of the window.
- Copy and paste the klipper.bin into your SD card.
- Rename the file to a unique name other than Klipper. Do not name it simply as firmware.bin, or there might be issues with the installation process.
- Close the WinSCP client window and eject the SD card.
Flash Klipper firmware to your Ender 3 (Latest models)
The latest Ender 3s come pre-installed with a bootloader and will automatically flash the firmware files.
- Insert the SD card with Klipper firmware into your Ender 3 and power it on. The printer will flash the firmware onto the Ender 3's controller.
- Power on the Raspberry Pi and connect the Raspberry Pi to the Ender 3. We need to verify a successful installation of Klipper on the Ender 3.
- Open the PuTTY command window and type the following command.
ls /dev/serial/by-id/*
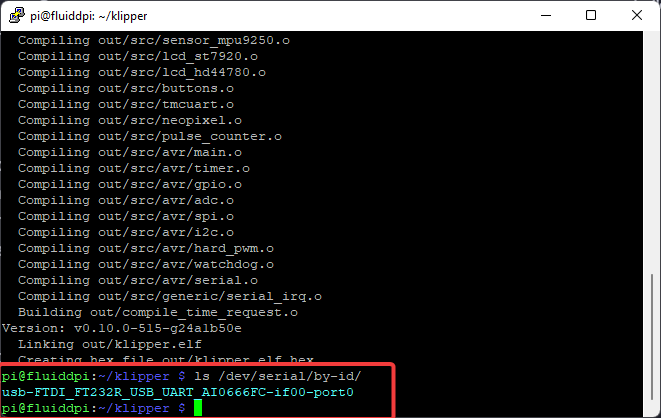
- If the installation process goes smoothly, the Pi will communicate with it and output a serial connection id. It should look something like this -
/dev/serial/by-id/USB-1a86_USB2.0-Serial-if00-port0
- If the window shows this message, the installation process was a success, and you can now begin configuring the Klipper for the Ender 3.
The immediate next step is solely for the old Ender 3s, and you can skip it.
Flash Klipper firmware to your Ender 3 (Old models)
With old Ender 3's, you must have a pre-installed bootloader on your printer. We don't need an additional SD card, and we'll use the Raspberry Pi to flash the Klipper firmware on the Ender 3 directly.
- Power On and connect the Raspberry Pi to the Ender 3.
- Open the PuTTY command window.
- Input the following command to check the serial port connection between the Pi and Ender 3.
ls /dev/serial/by-id/*
- A successful connection will output the serial port ID which should look something like this - /dev/serial/by-id/USB-1a86_USB2.0-Serial-if00-port0
- Once verified, enter the following commands in the window.
sudo service Klipper stop
make flash FLASH_DEVICE=/dev/serial/by-id/USB-1a86_USB2.0-Serial-if00-port0
sudo service klipper start
- It'll begin flashing the .hex file to your Ender 3. In the end, you'll get a success message indicating that the Klipper firmware has been successfully installed on your Ender 3.
Configure Klipper for Ender 3
You'll need to configure the Klipper firmware to the Ender 3's hardware. We'll use Fluidd's web interface to execute this step.
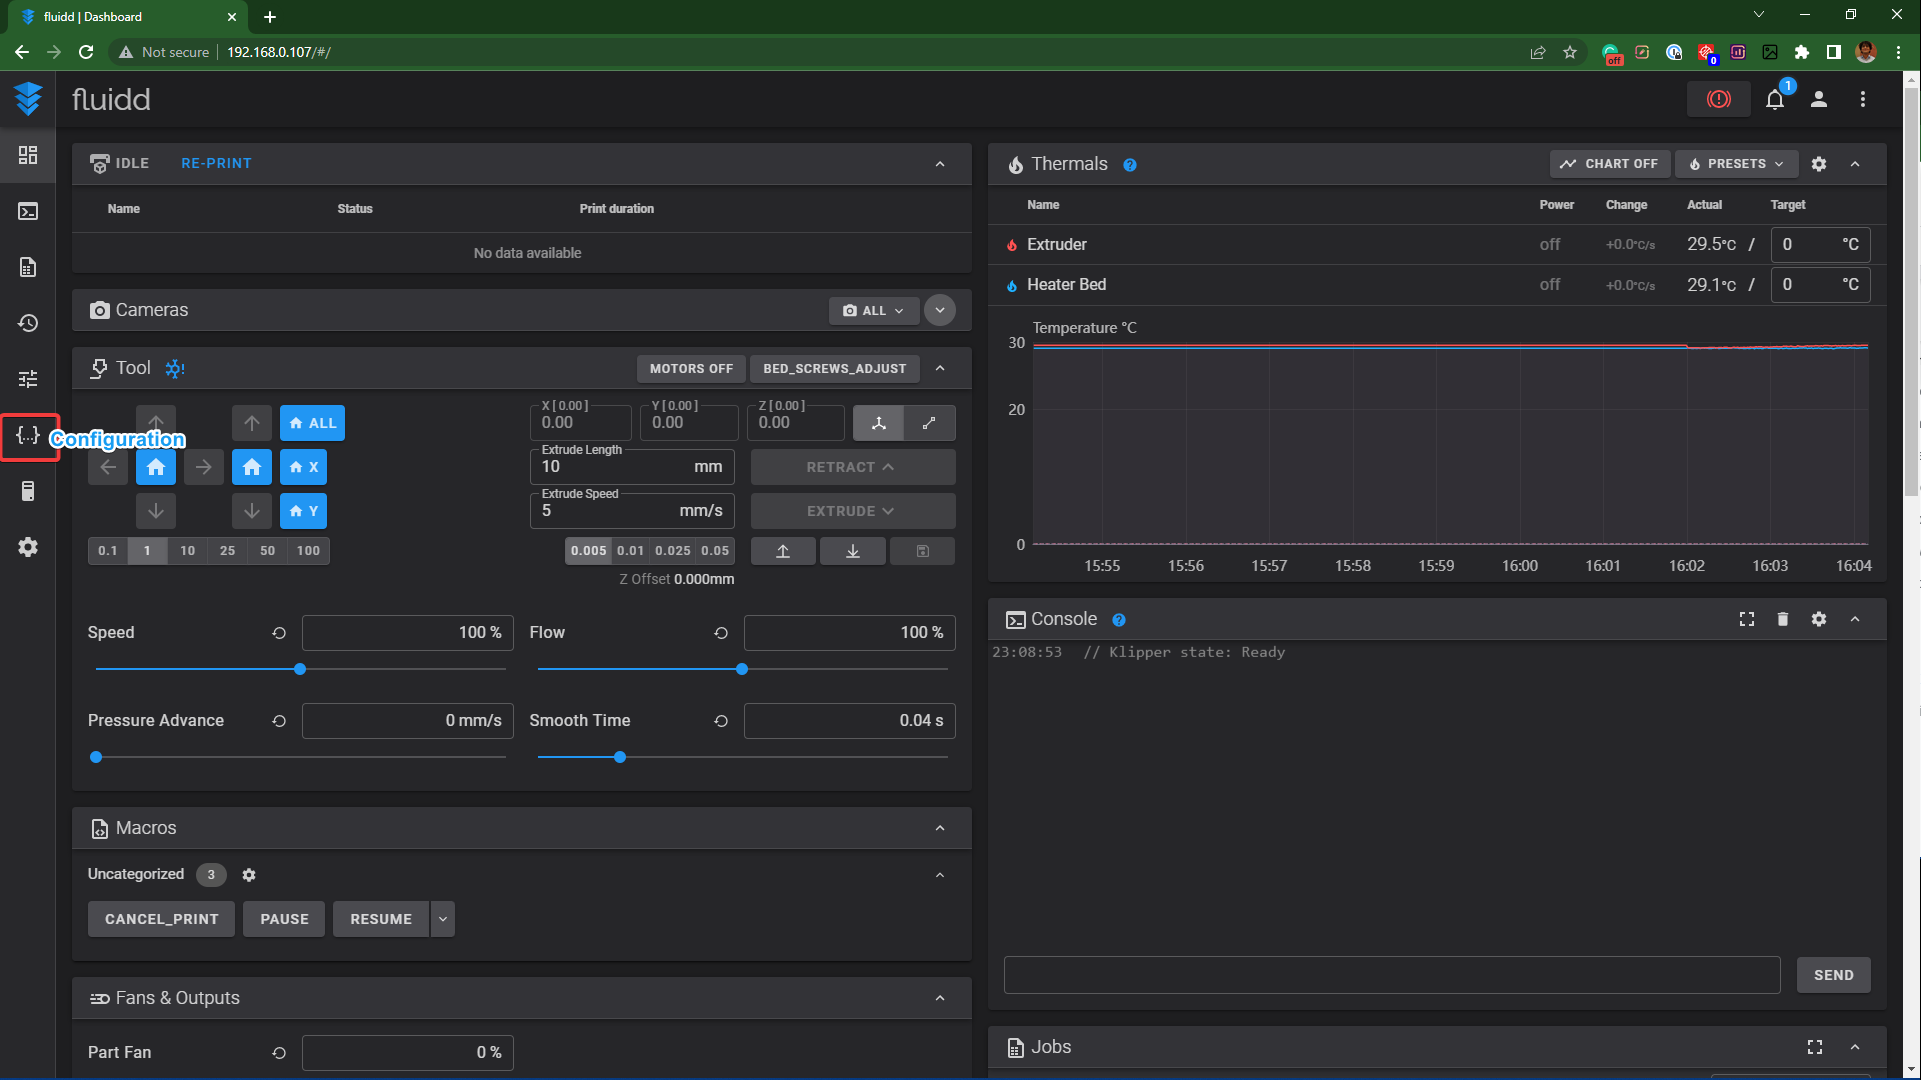
- Input the Raspberry Pi's IP address in your browser and log in to the Fluidd web interface.
- Ignore any error warnings for now.
- Click on the configuration symbol on Fluidd's left side. It'll be the 3rd icon from the bottom.
- In the other files tab, click on Config_examples.
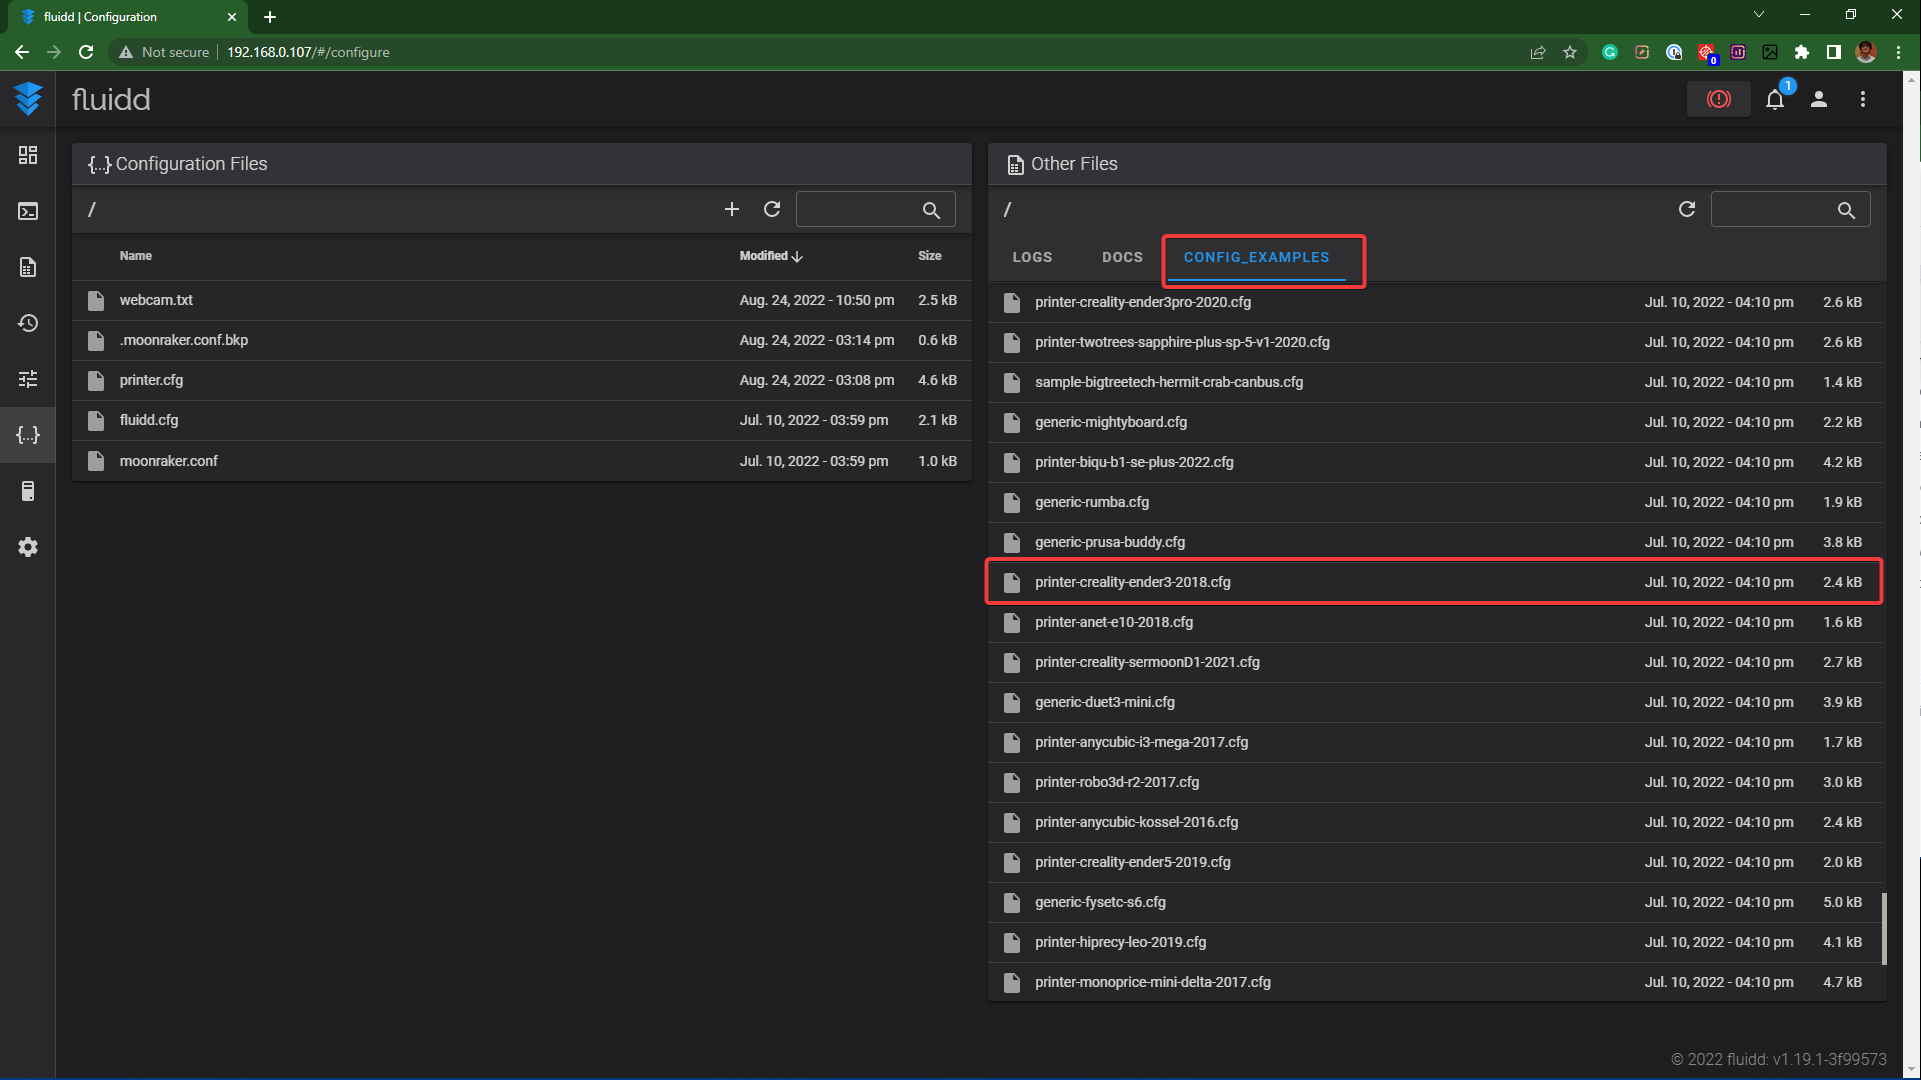
- Search for your Ender 3's configuration file, and right-click to download it.
- Click on the ' +' icon in the Configuration files section and upload the Ender 3's configuration file.
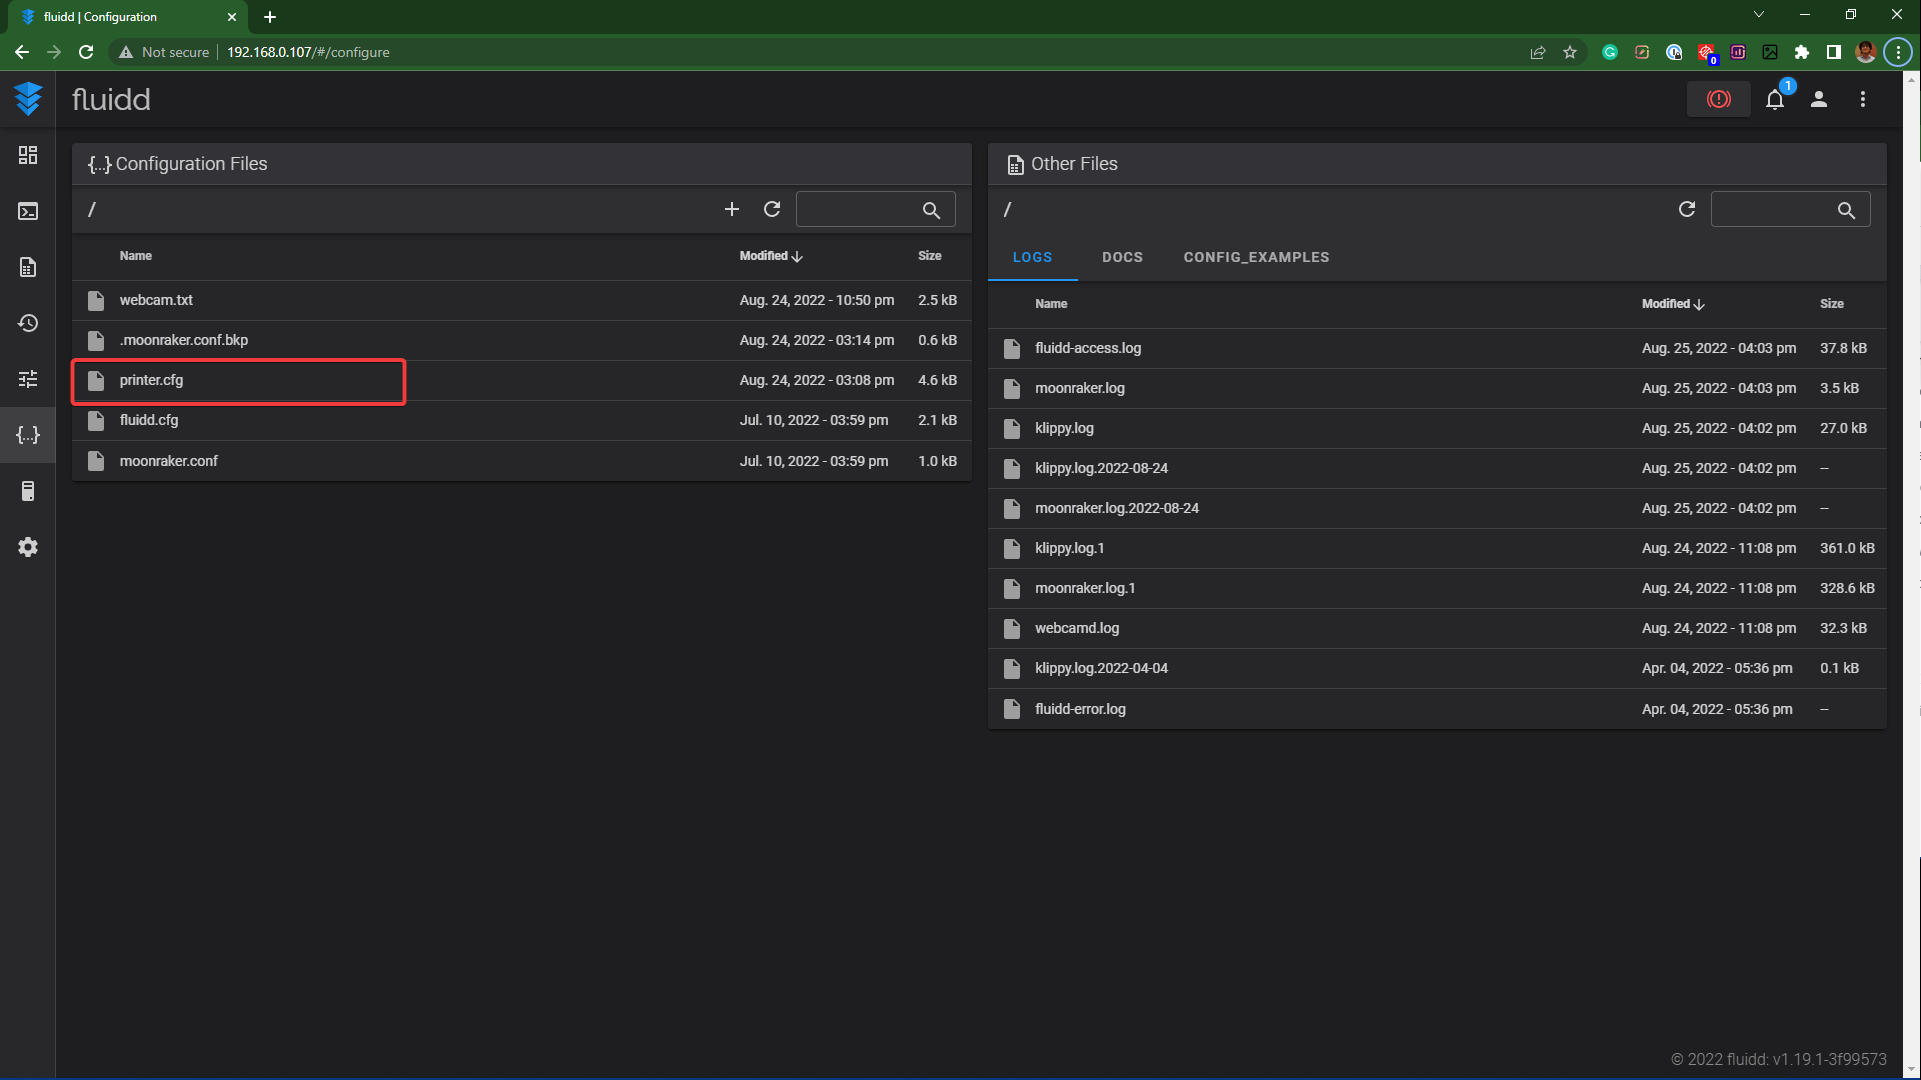
- Rename it to printer.cfg.
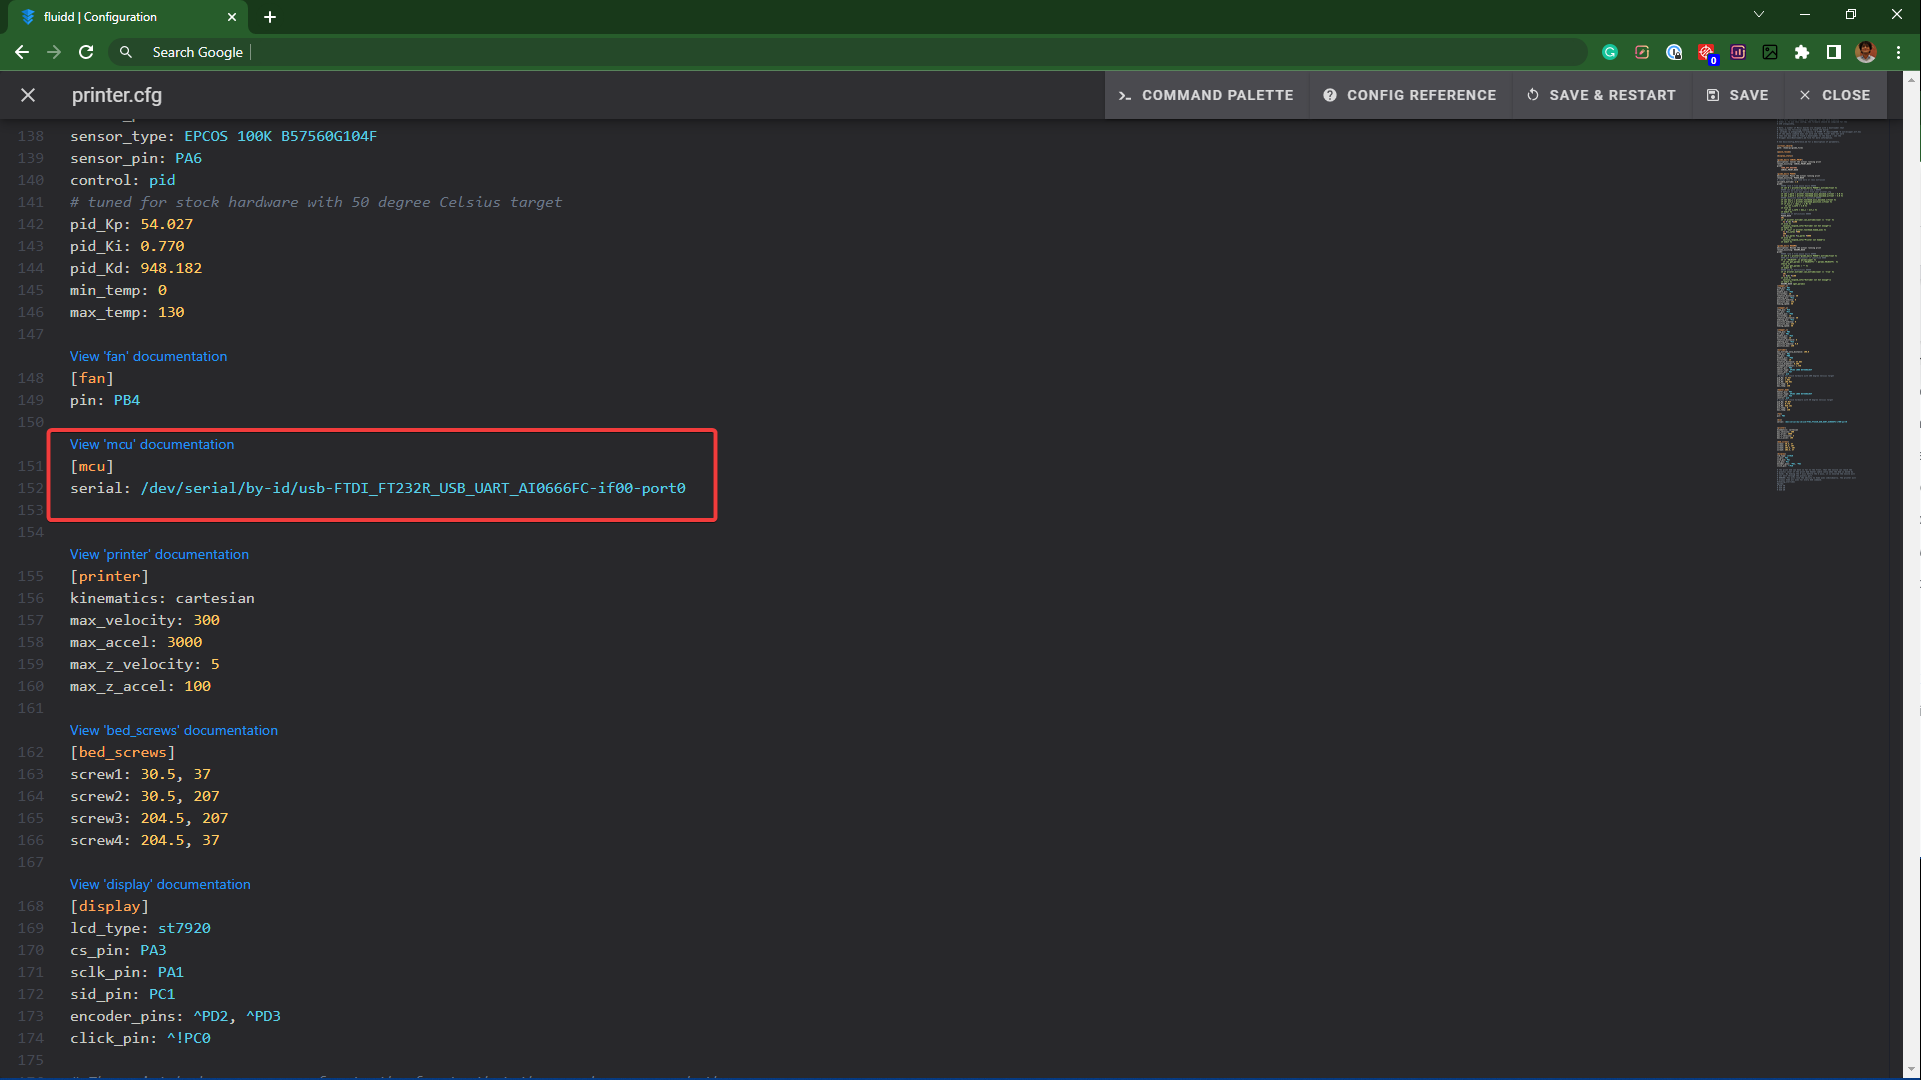
- Open the printer.cfg file and navigate to its [mcu] section.
- Copy paste the serial port ID of your Ender 3 in this section. It should look something like this.
[mcu]
serial: /dev/serial/by-id/USB-1a86_USB2.0-Serial-if00-port0
- Save and close the file.
Configure Fluidd for Klipper and Ender 3
- In the configuration file section, open the fluidd.cfg file.
- Copy the entire code and close the file.
- Open the printer.cfg file.
- Paste the whole code in this file below the comments section.
- Save and close the file.
- Open the home tab (1st icon on top) and click on Firmware Restart and Restart Klipper consecutively.
- You'll now be able to get control options for your Ender 3, indicating a successful installation. You can test the installation using various buttons to control the Ender 3.
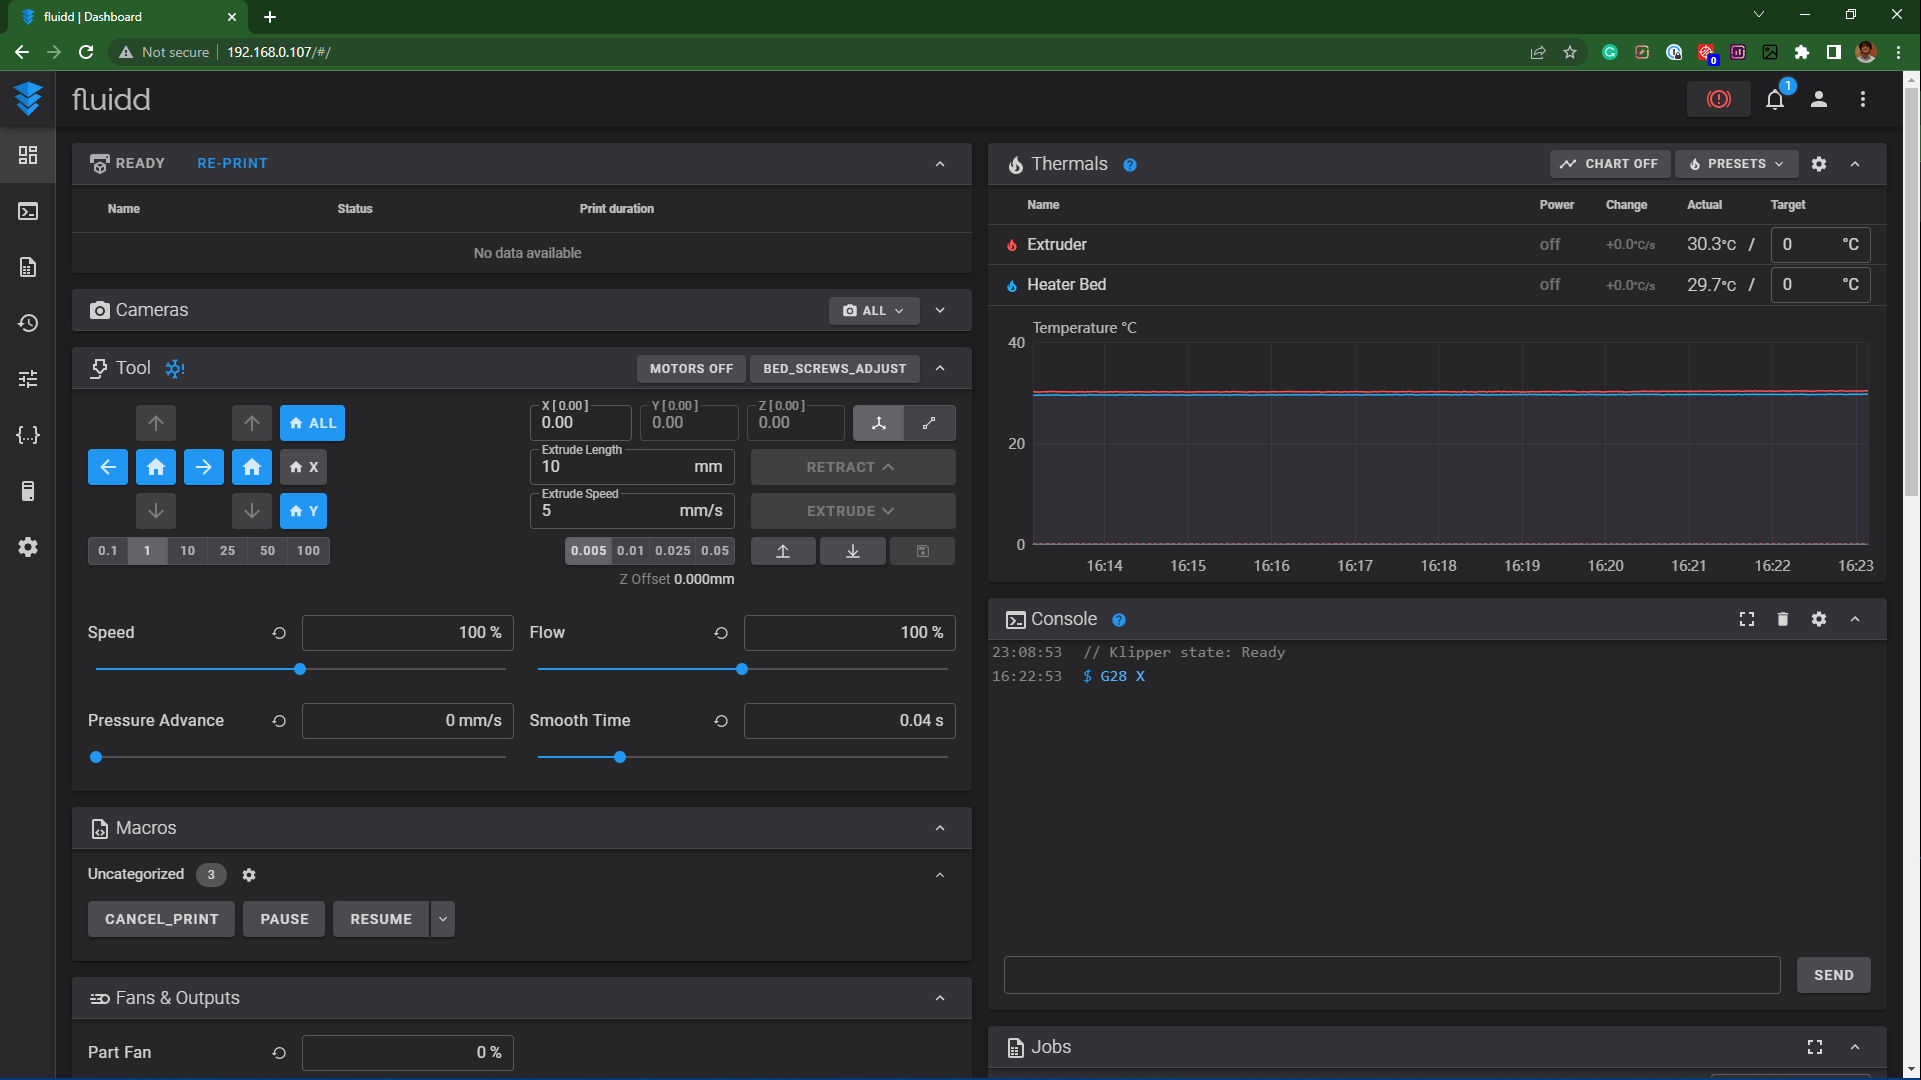
Explore Klipper Further
You can now explore the various features of Klipper using Fluidd's interface. The left panel is for navigating through the different sections of the interface.
The home tab will be your control center, and you can control and monitor your 3D printer's various parameters from this tab. The console tab displays the gcode commands, and the jobs tab is for file navigation. Similarly, each tab has its function and gives you an easy way to configure Fluidd's interface to your liking.
Despite all these Klipper's features, you're restricted to your wireless network's range and can control and monitor your 3D printer within certain boundaries. This aspect limits you from experiencing the true meaning of remotely controlling your 3D printer.
You can, however, overcome this limitation by matching up your Klipper with Obico software. This software utilizes your web interface and lets you remotely control and monitor your 3D printer from anywhere in the world.
Setup Obico for Klipper
Obico eliminates the need for you to be connected to the same network as your 3D printer. You can monitor and control your 3D printer from half a world away using Obico. As it’s browser-based software, you can access it from any device and operating system. In addition, Obico’s AI failure detection system can watch your prints for you and alert you, or even pause the printer, when a failure is detected. You can use Obico on your phone, desktop or tablet.
Let's install Obico for your 3D printer and access it from anywhere worldwide.
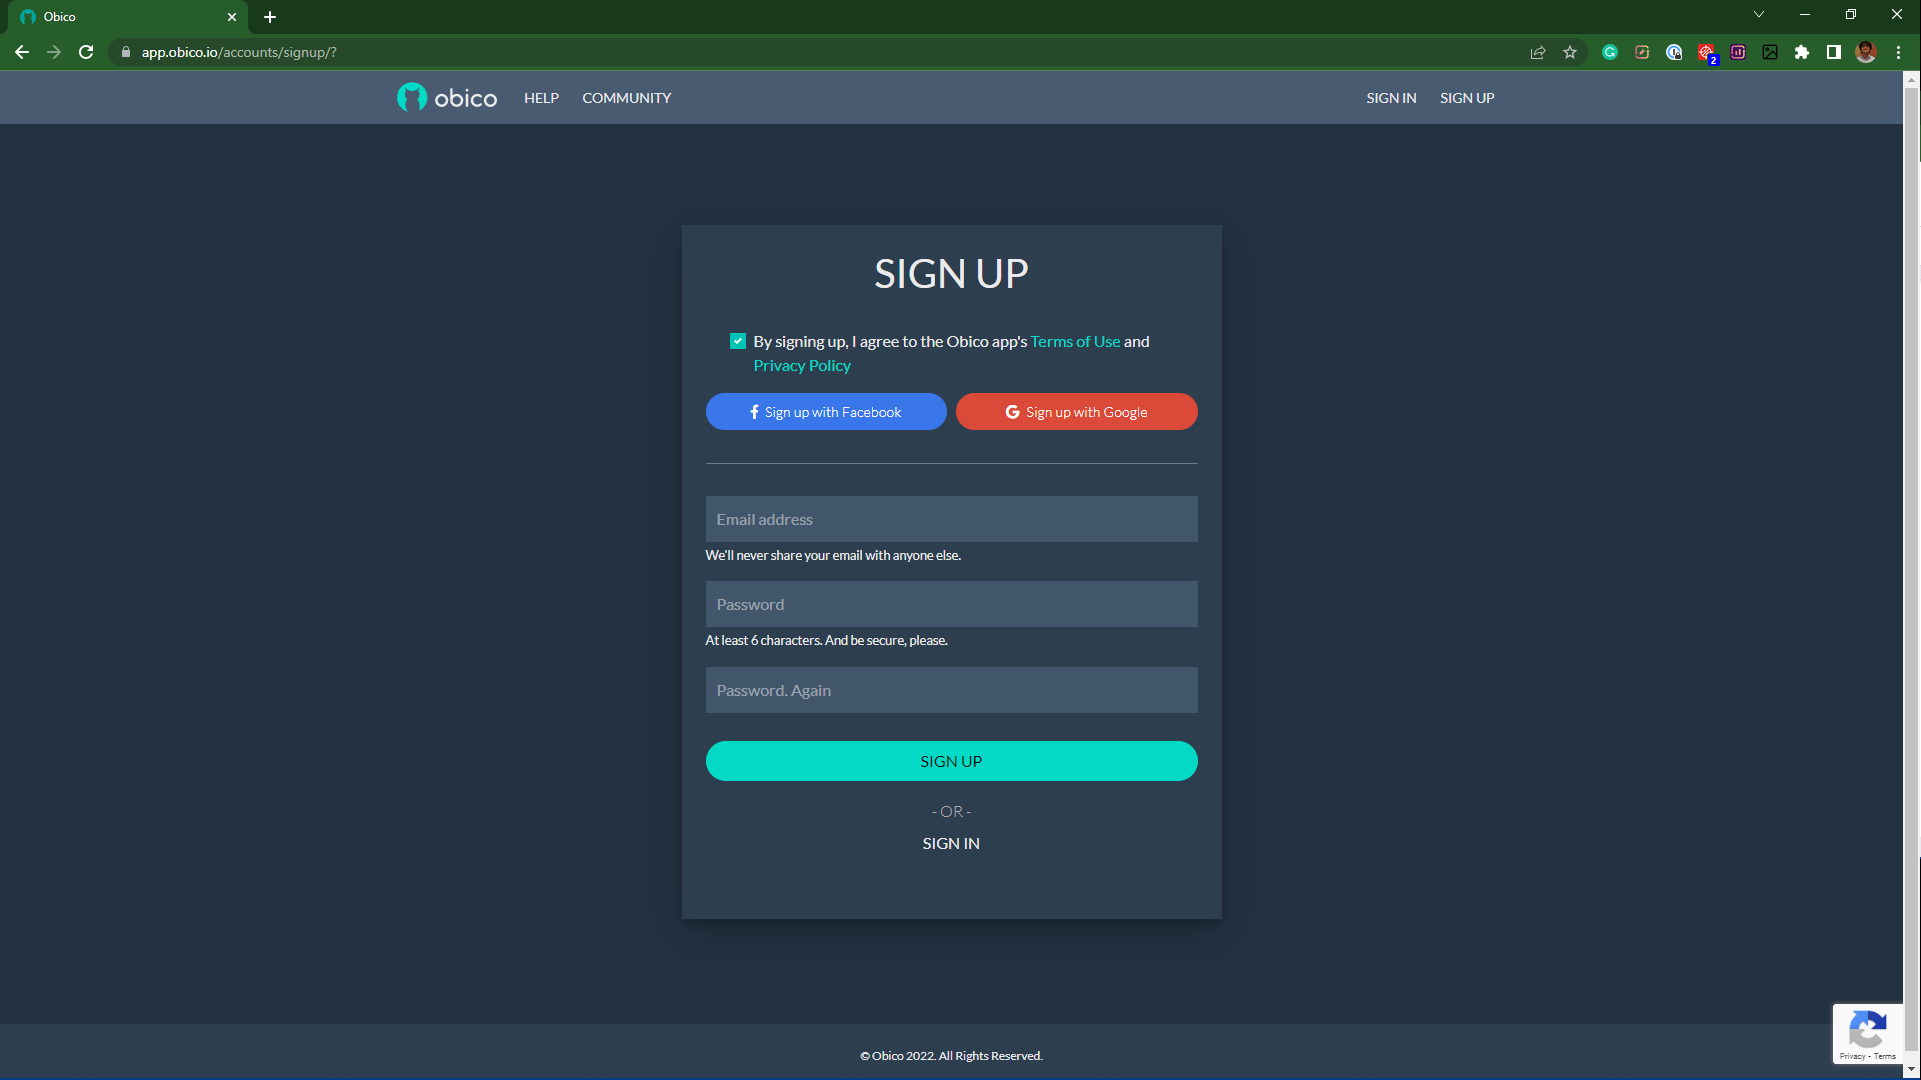
- Go to the Obico website and set up an account using your credentials or learn more about self-hosting.
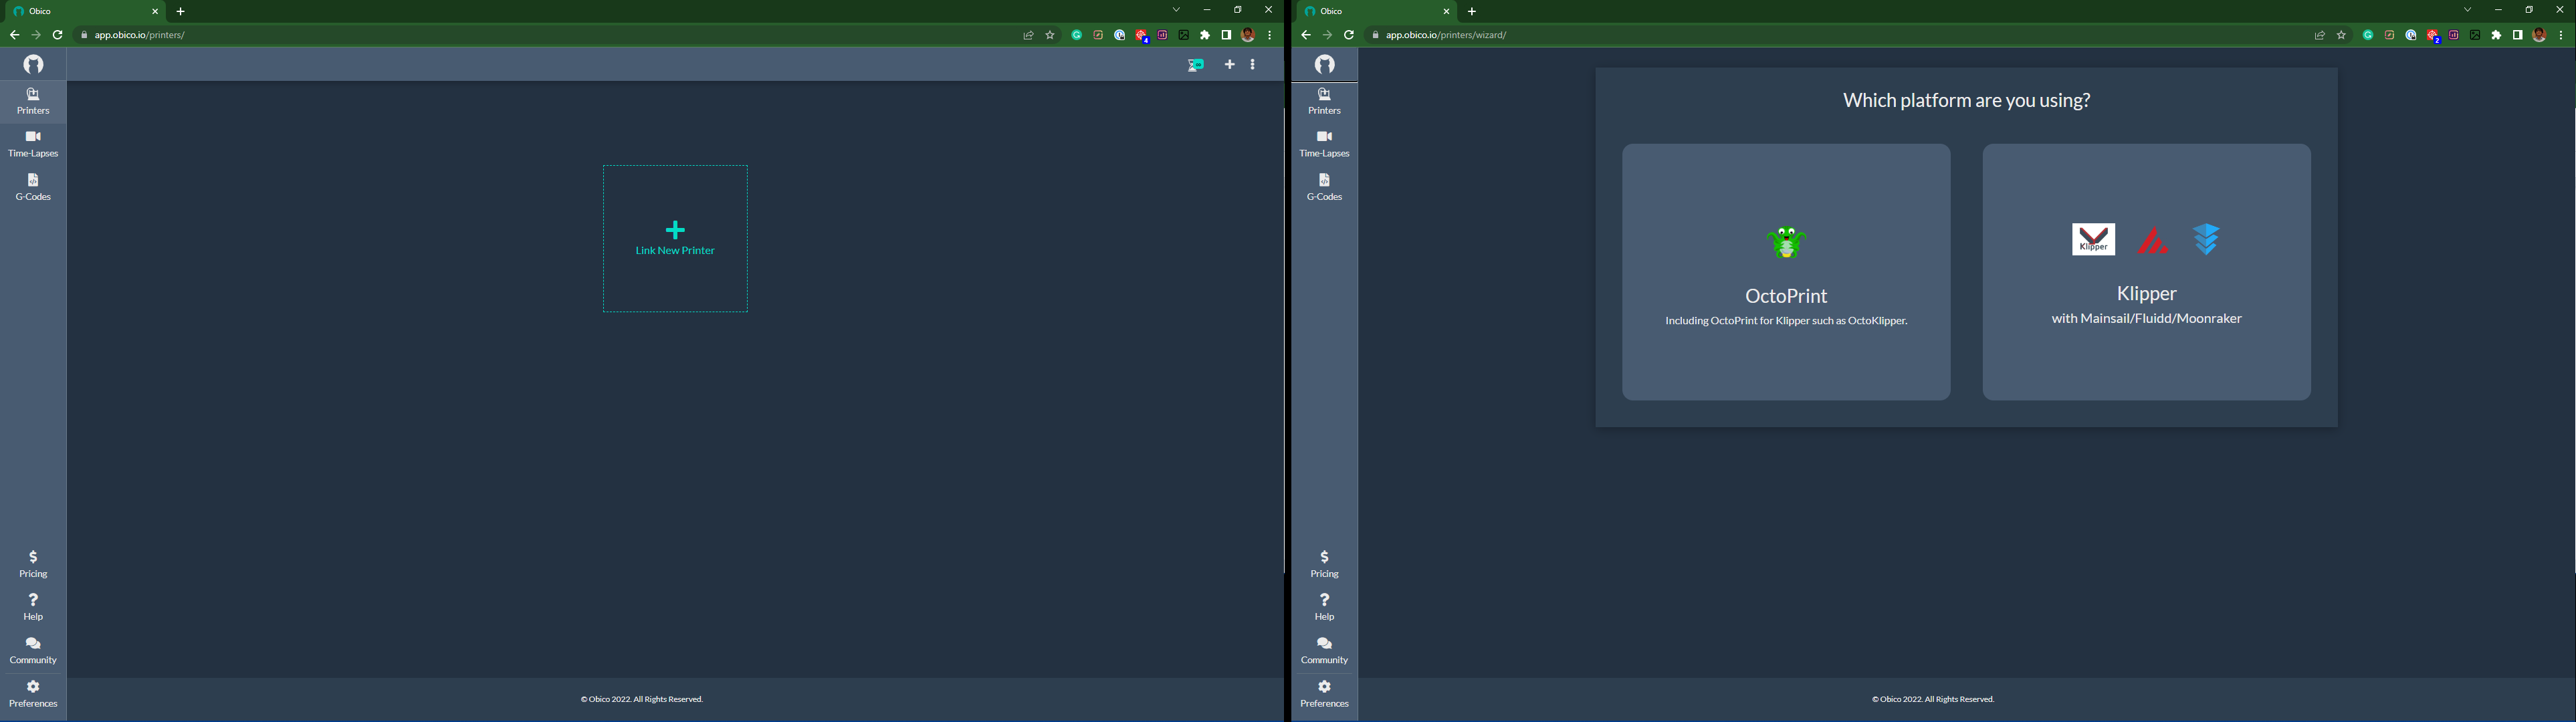
- Once logged in, click on Add Printer and select Fluidd.
- Open the Putty command window and type the following commands. These commands will set up Obico on your Raspberry Pi.
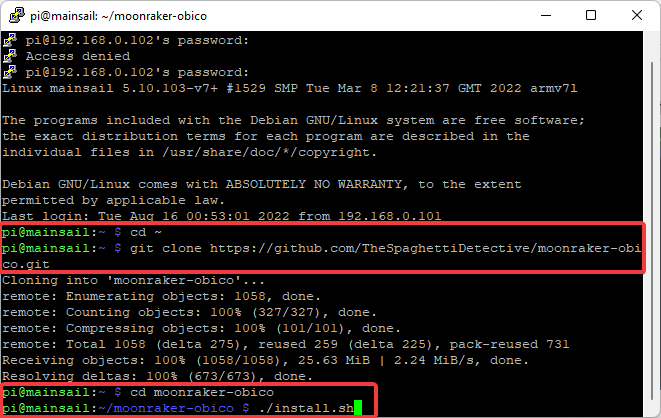
cd ~
git clone https://github.com/TheSpaghettiDetective/moonraker-obico.git
cd moonraker-obico
./install.sh
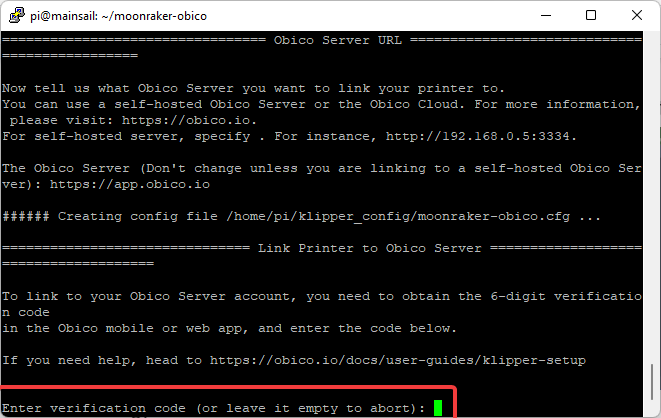
- After the installation procedure, you'll be asked for a 6-digit verification code.
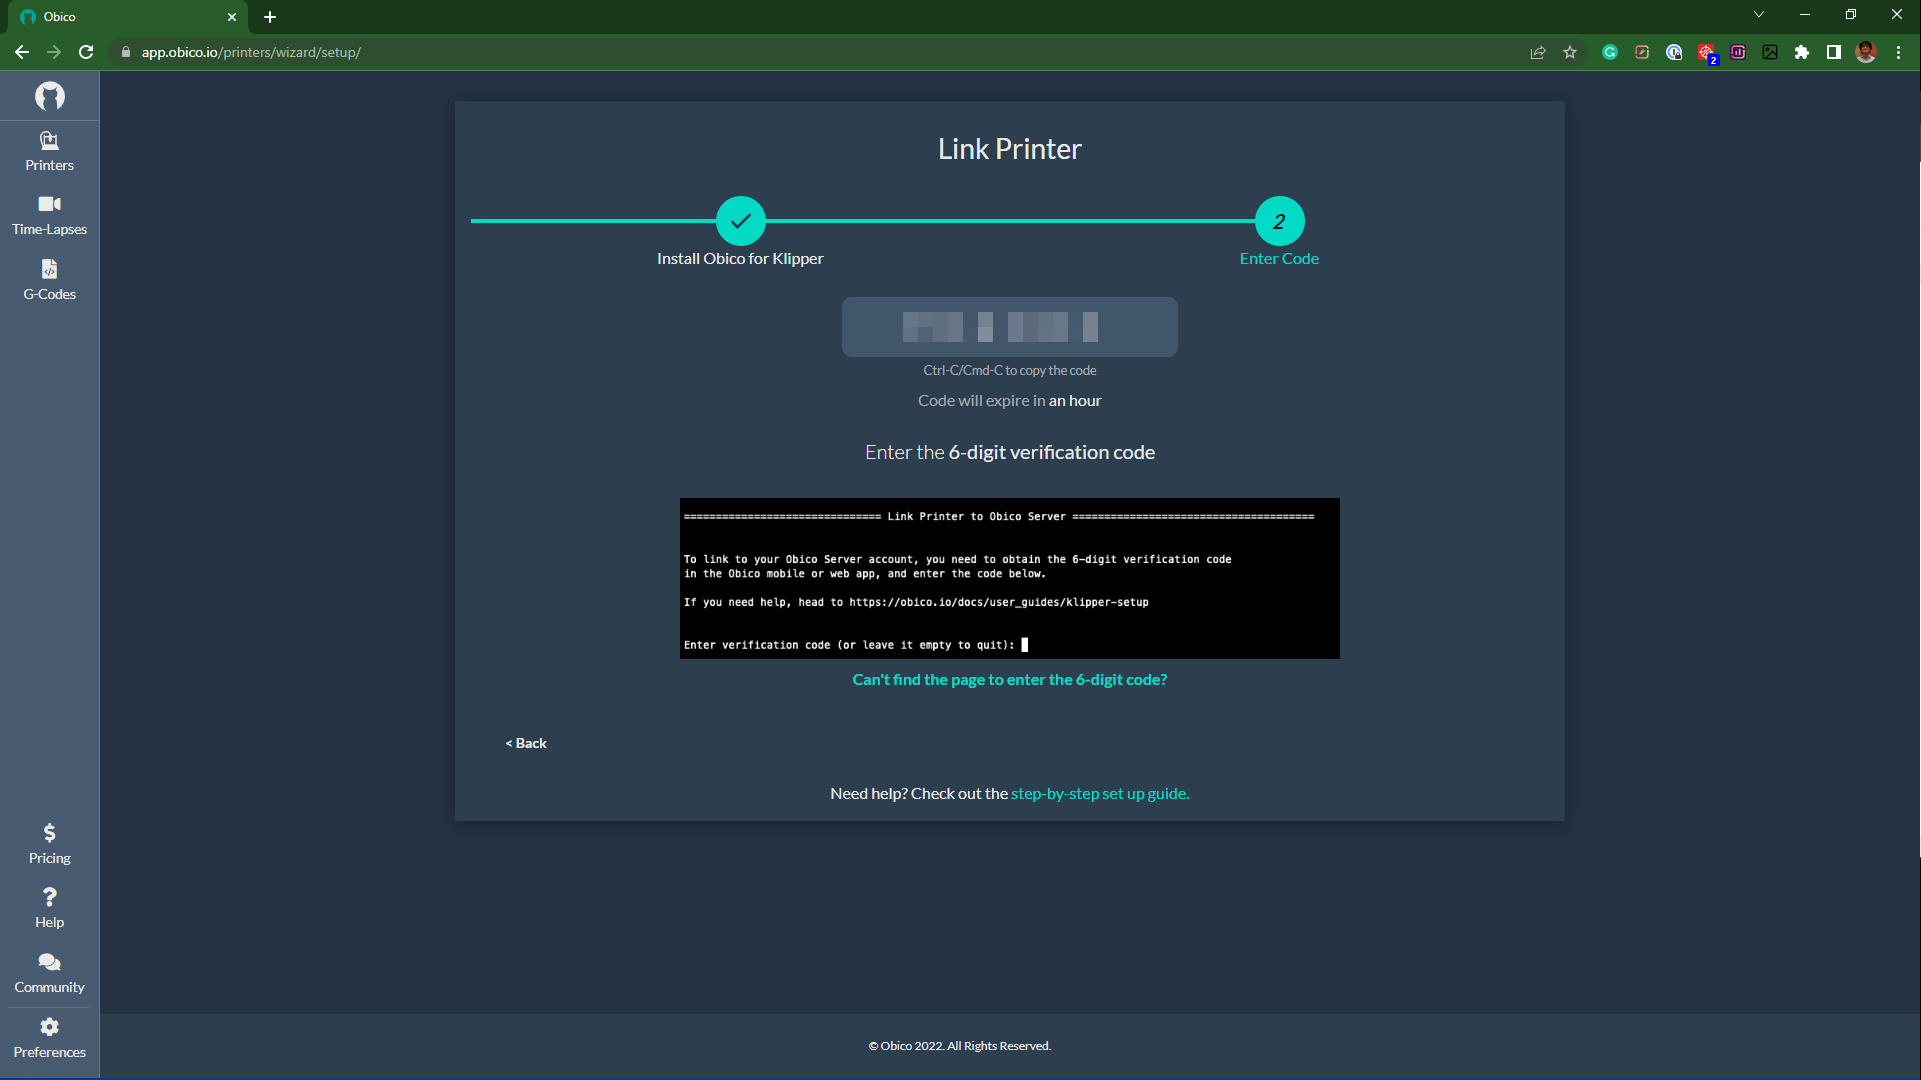
- Open the Obico's webpage and proceed to the second step.
- Ender the 6-digit code in the command window.
- You'll get a successful installation message once the procedure is completed.
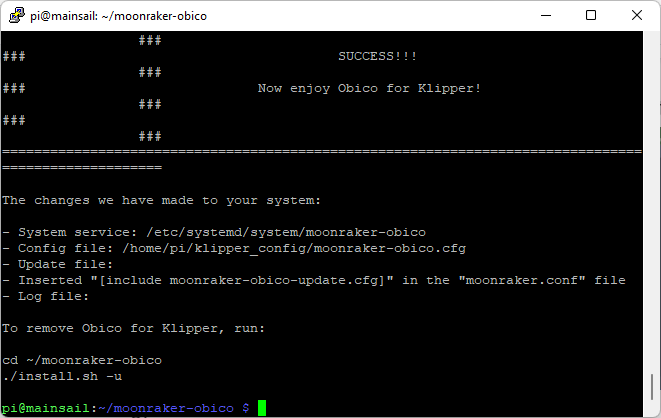
- Your 3D printer is now successfully connected to the Obico platform.
You can now access your 3D printer from anywhere, on any device, and truly experience the benefits of remote monitoring your printer.
That's it. With this final step, you've successfully installed Klipper on the Ender 3 with Fluidd web interface.
If you have issues getting Obico installed for your 3D printer, check out the complete setup guide or join the Obico discord server to get help.
Let us know your experience of using the Klipper for Ender 3. If you find Obico useful, please give us a star on GitHub, or leave us a review on our mobile app in the iOS App Store or Google Play Store!