Klipper PID Tuning - How to Guide

![]()
Klipper firmware is getting all the praise lately owing to its vast range of features and top-notch performance. It also offers several configuration options to calibrate your printer to deliver high-quality 3D prints.
One crucial parameter we’ll be configuring today is PID tuning for your 3D printer. Setting the correct PID settings ensures that your hot end and print bed are heated in the least time possible and maintain the set temperature with great precision.
This article will guide you through the PID calibration process for your 3D printer using Klipper. It’ll help you to understand more about these PID settings and sort out any heating issues with your machine.
Let’s start tuning up these beds and hot ends!
What is PID control in a 3D printer?
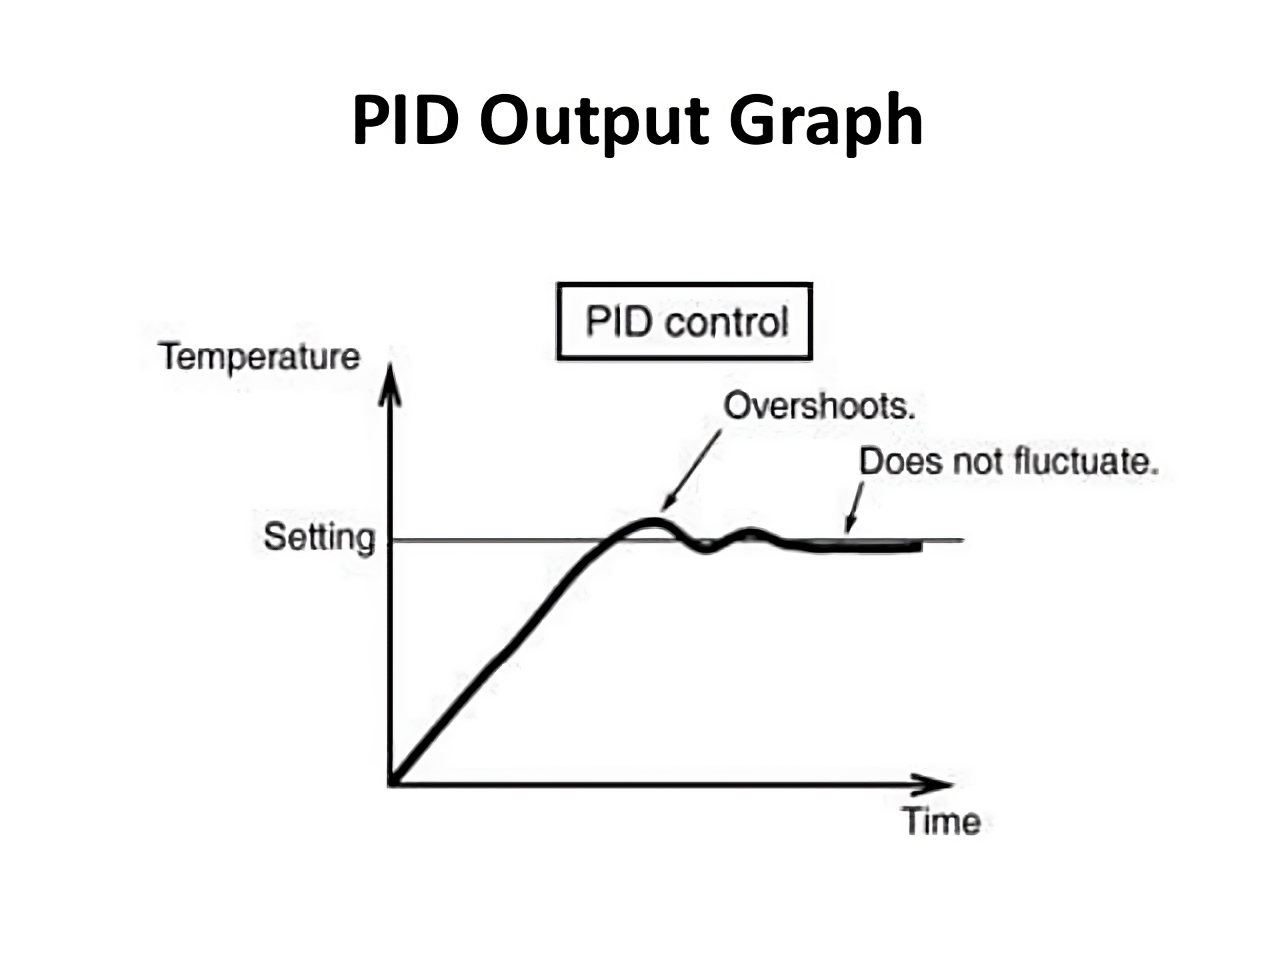 Photo Courtesy: Micro Controllers Lab
PID stands for Proportional, Integral, and Derivative actions that a controller takes to maintain a steady state for a particular function. It’s a closed-loop feedback system that continuously measures the error in your system and tries to correct it.
Let’s understand this controller action with a practical use case.
Suppose you’ve set your extruder temperature at 200 °C through your printer’s console. The Proportional action will try to bring the temperature up to 200 °C and continuously check it with your printer’s thermistor output. But, due to the functioning of proportional control, it’ll be close to this value, but never precisely 200 °C.
Here steps in the Integral control action. It tries to bridge the gap between the set value (200 °C) and the error in the system. But, the way it works, it doesn’t stop the heating when the hot end reaches close to 200 °C, thus resulting in an overshoot.
Finally, the Derivative control controls this overshoot and tries to maintain the Integral variable within a set range. It always looks ahead to the future to estimate the Integral overshoot and tries to compensate for it to achieve the steady state temperature in less time.
All three functions use a specific factor to compute and control their action during the heating cycle. Even if one of these factors has an incorrect value, you might encounter heating issues during your print cycle.
For example, the printer might not reach the set value at all. Or it might struggle to maintain a steady temperature, leading to constant temperature fluctuations during the prints. These issues result in a poor printing experience and might deteriorate your print quality.
Hence, it’s crucial to calibrate your PID settings once in a while to ensure efficient heating of your printer’s components. Now that we’ve looked at the basics of PID control, it’ll be easier to understand and interpret the PID tuning process in Klipper.
PID tuning process in Klipper firmware
Extended G-Codes in Klipper
Klipper makes it incredibly effortless to calibrate your PID settings with the help of extended G codes. These extended gcodes are spelled-out versions of standard G and M codes that your printer might use for performing specific actions.
For example, in Marlin firmware, you’d need to input the M104 command to disable/turn off your 3D printer’s heaters. Similarly, the M25 command pauses the print in progress on your printer. But, remembering the various commands and their functions can get hectic, thereby refraining you from using them at all.
So, Klipper takes a slightly different approach and simplifies this command system by using extended G-codes. In Klipper, to turn off your heater, you simply need to add the ''' TURN_OFF_HEATERS ''' command in Klipper’s console. Likewise, by entering the ''' PAUSE ''' command, you can quickly pause your ongoing print.
These extended gcodes come in handy during the calibration process, and we’re using these codes to simplify our PID tuning process. Let’s begin.
Calibrating PID settings for Hot end
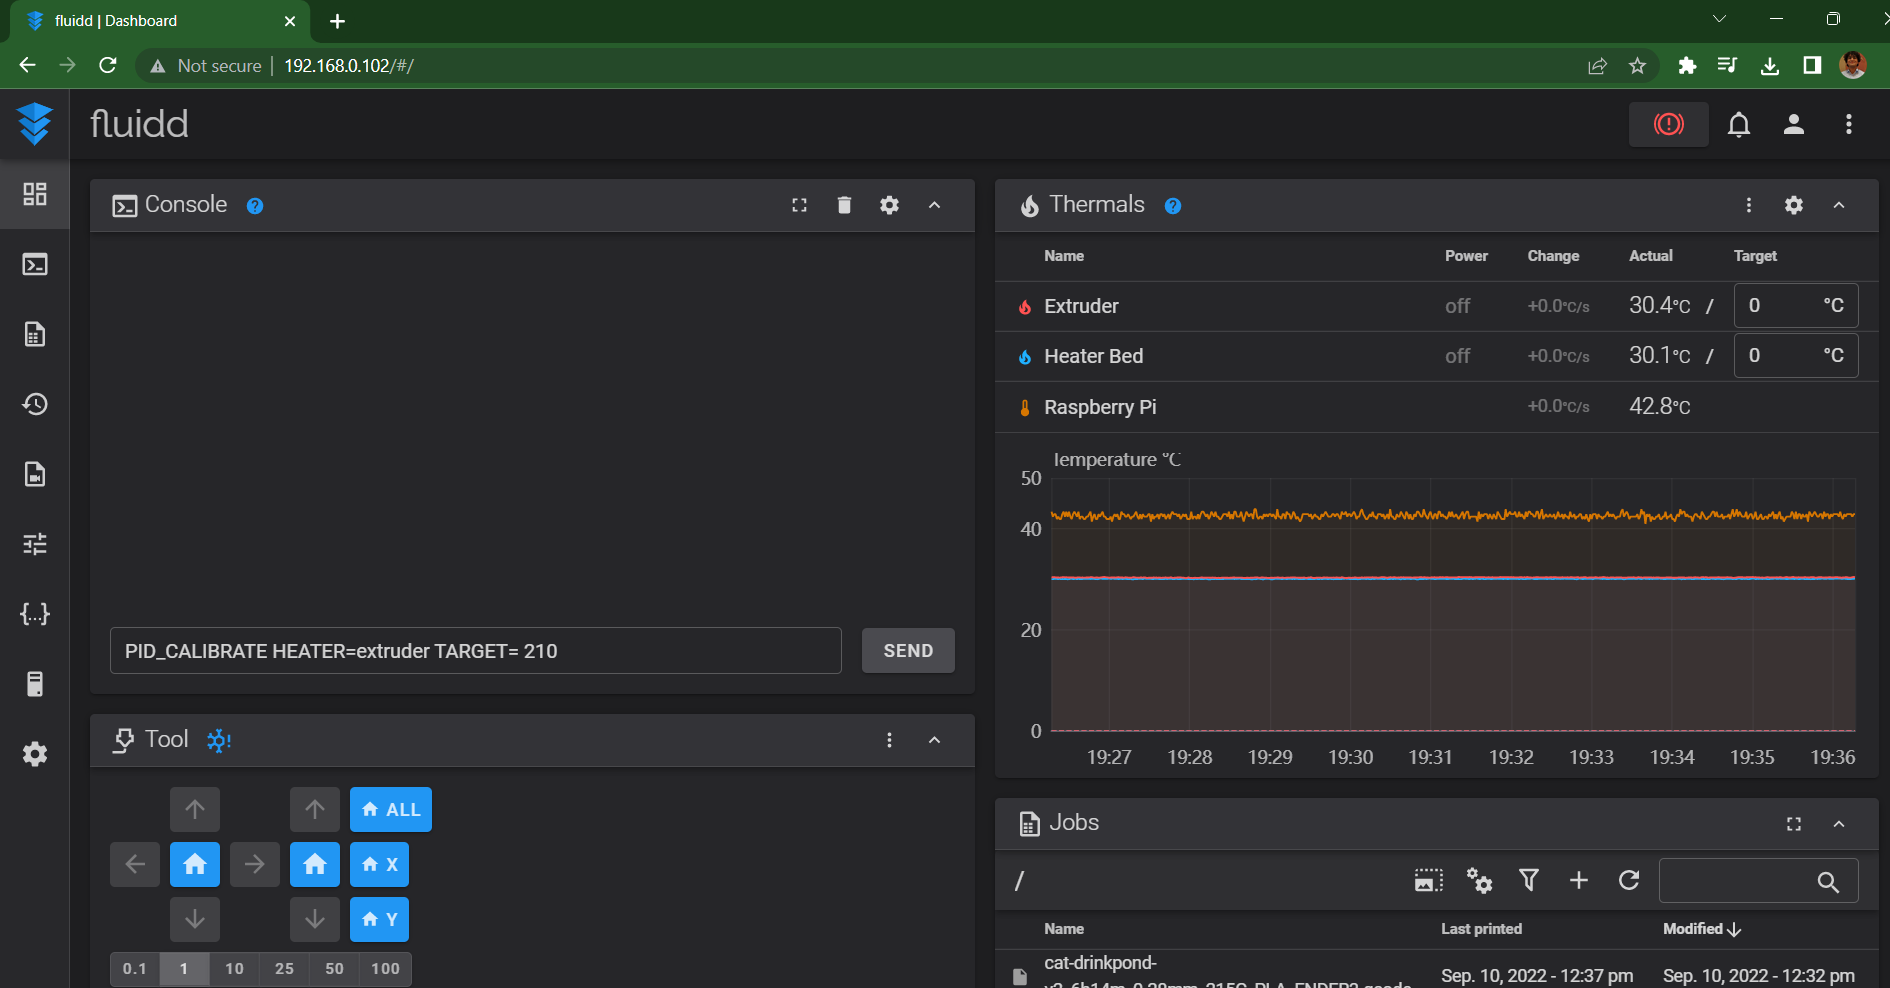
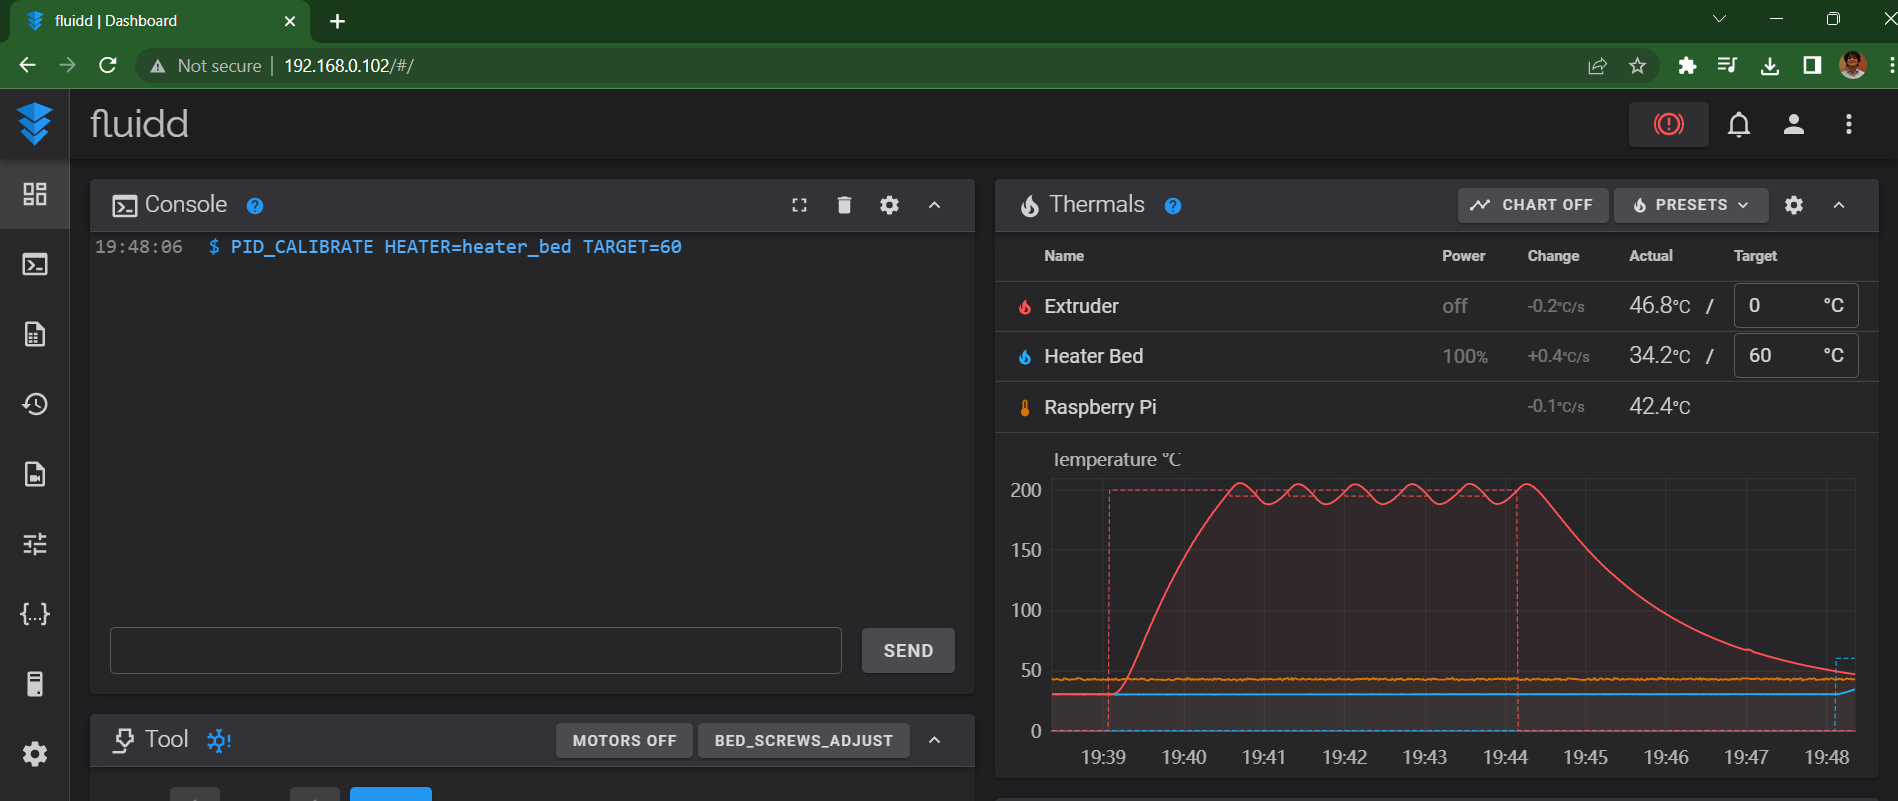
- Open your Klipper instance and go to the main dashboard. We’ll use the Fluidd UI for this article, but the process remains the same for Mainsail and other Klipper interfaces.
- In the console, input PID_CALIBRATE HEATER=extruder TARGET=200. Enter the command.
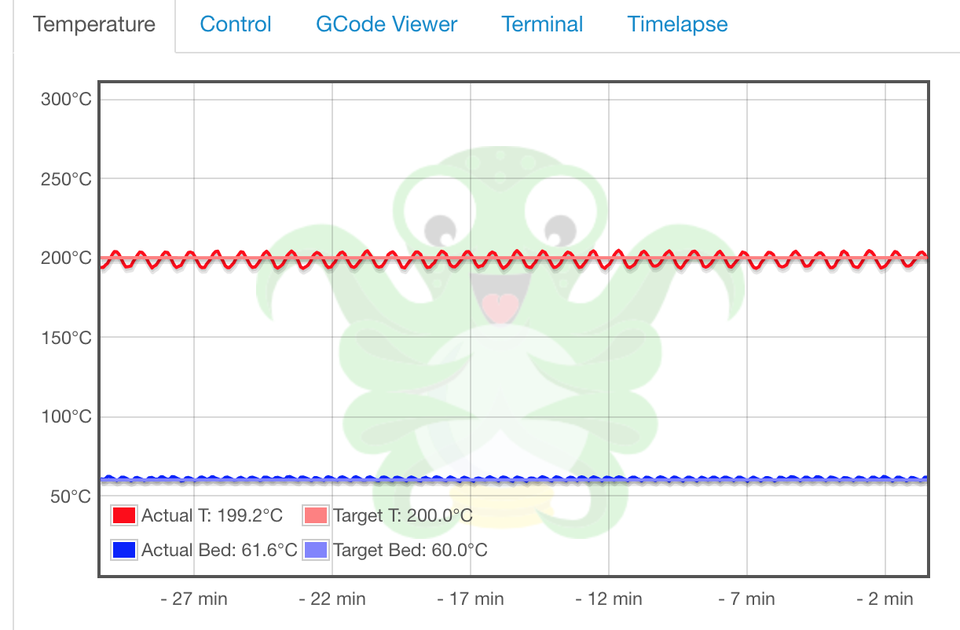
- Let the printer carry out the PID tuning process. You can keep an eye on this by monitoring the temperature fluctuations in the Thermals section.
- Once completed, you’ll receive a notification in the console area indicating the PID parameters and the final calibrated values.
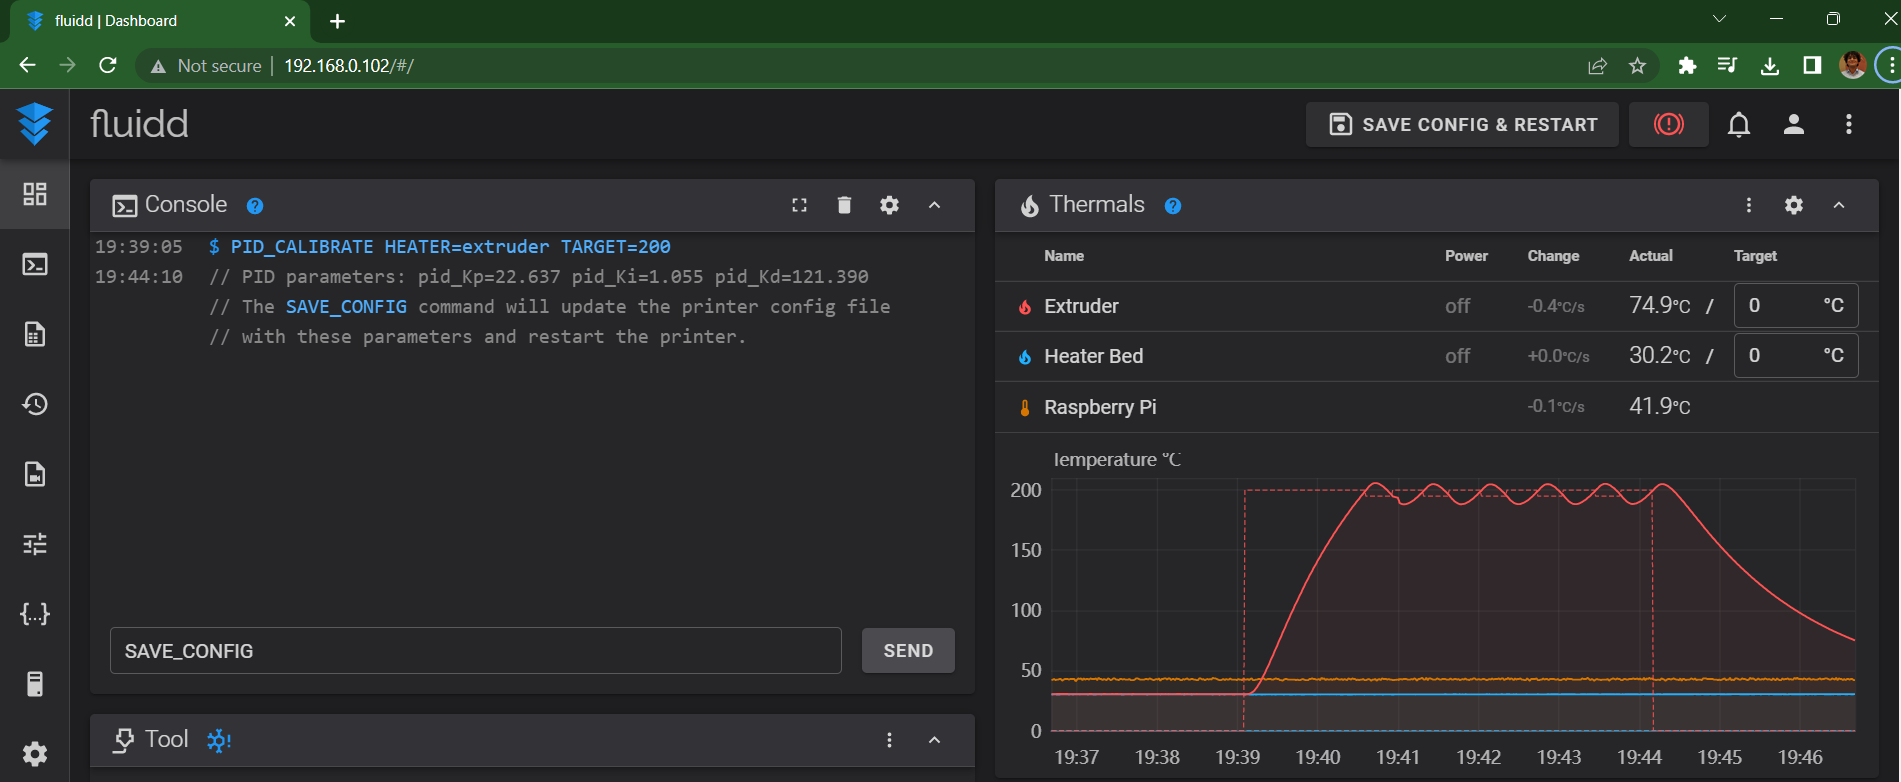
- Input the ''' SAVE_CONFIG ''' command in the Klipper console. This command will save the calibrated values to your printer’s configuration file and restart the firmware.
Calibrating PID settings for Heater Bed
- Enter the ''' PID_CALIBRATE HEATER=heater_bed TARGET=60 command in the Klipper’s console window. '''
- Let Klipper execute the calibration process.
- Once done, you’ll get the set of PID values for your 3D printer in the console window.
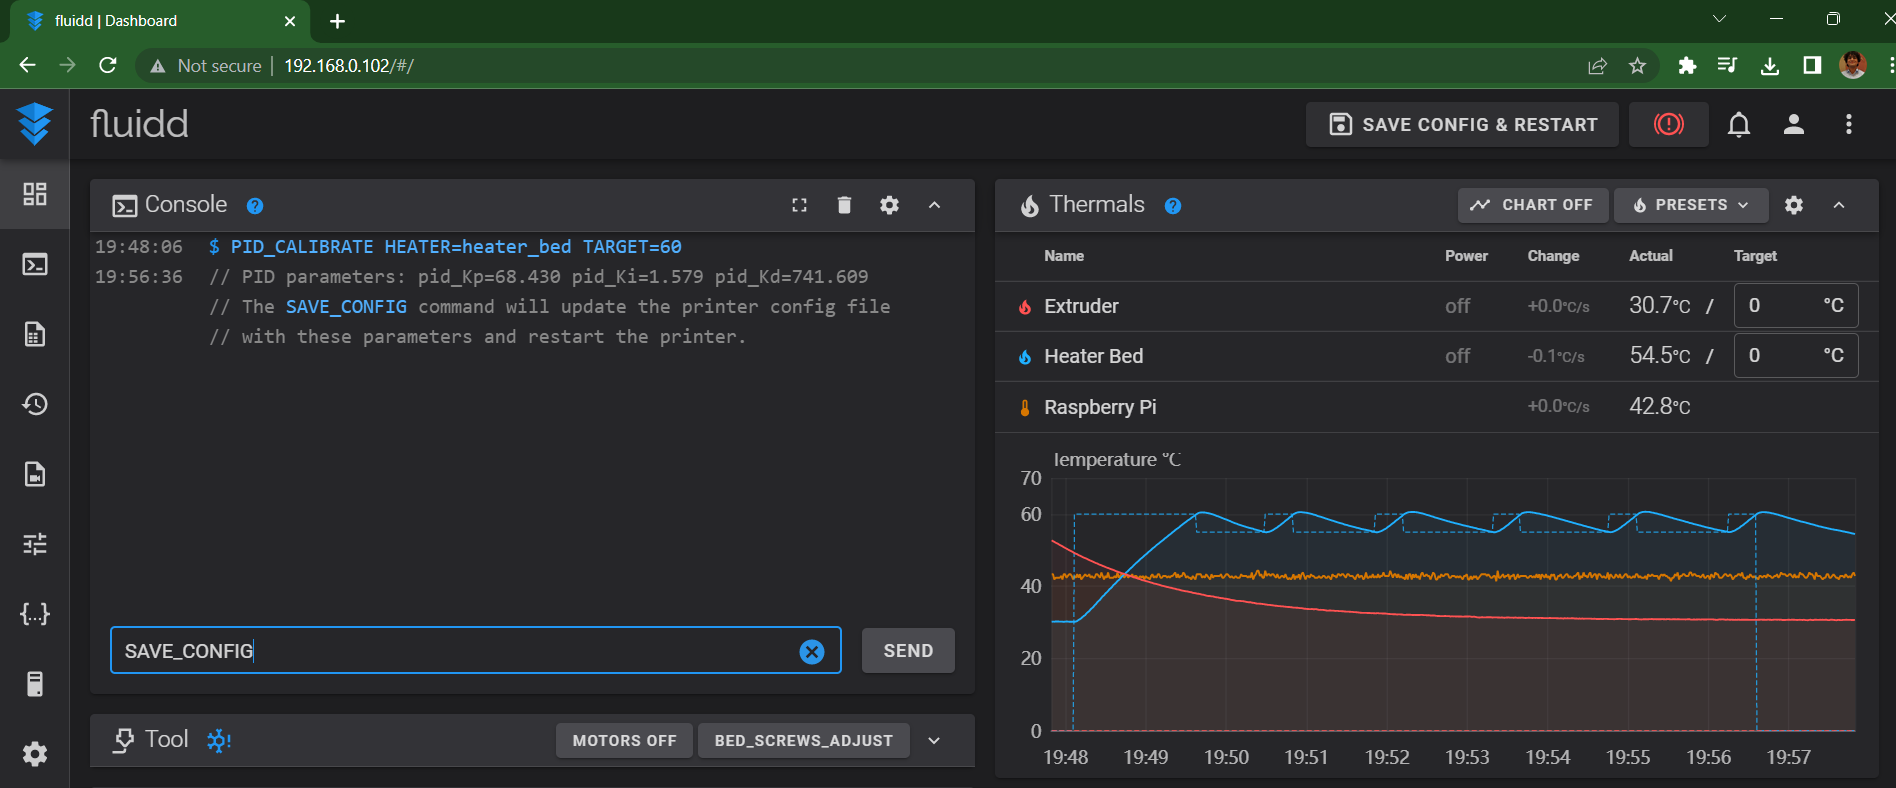
- Execute the SAVE_CONFIG command in the console. It will update the new values in the printer’s configuration file and restart the firmware.
That’s it! You’ve now calibrated the PID settings for your hot end and heater bed.
Troubleshooting PID tuning in Klipper
Save config command not working
If your Klipper instance is not automatically saving the calibrated PID values, you can still manually input them in the printer’s configuration file.
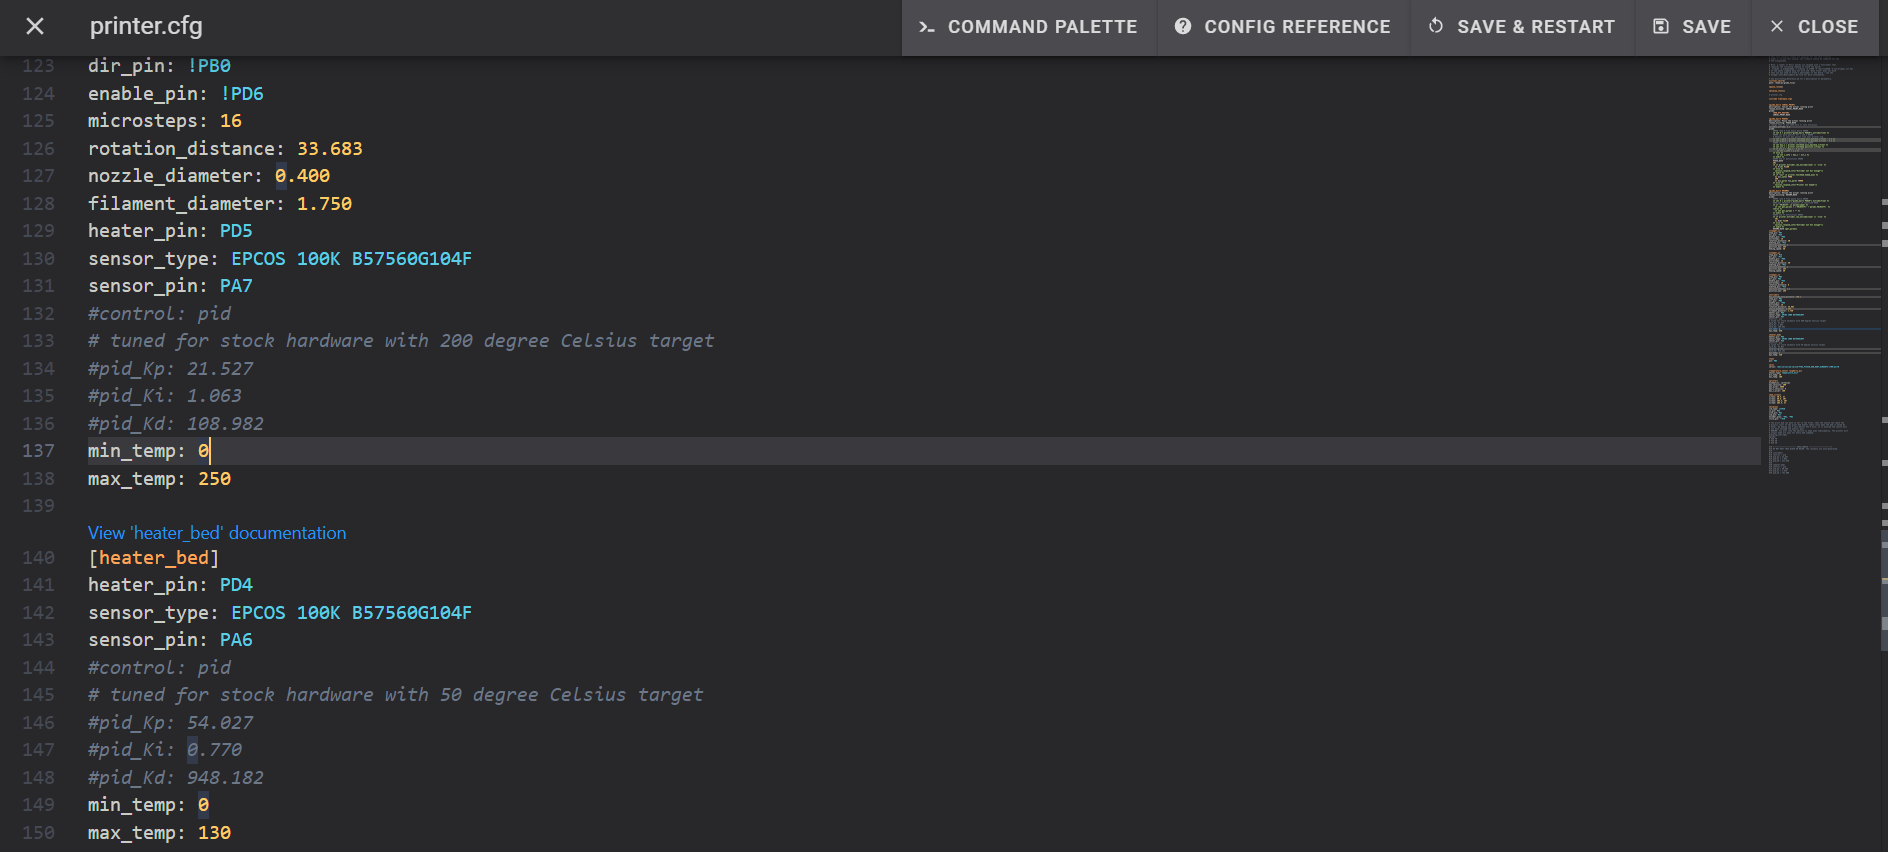
Open the printer.cfg file from the configuration section. Look for the #control pid section and replace the old PID values with the new numbers. Save and Restart the firmware.
Creating a log file to detect any issues
Klipper lets you create a log file of your PID tuning process to review it later in case of any accidental issues. Add the WRITE_FILE=1 command at the end of the TARGET=200 string and hit enter.
Klipper will create a new log file in the configuration section by the name “/tmp/heattest.txt. “ You can access it anytime if you’d like a close review of the entire process.
Final Thoughts
The PID tuning process in Klipper is probably the easiest to execute compared to other firmware. Using extended gcodes, Klipper makes the entire process smooth and quick for beginners and seasoned 3D printer users.
Let us know your experience with Klipper and how it has improved your 3D printing experience. You can further check out Obico for Klipper, which we’ve created to help you monitor your prints remotely from anywhere and detect print failures using AI failure detection. Learn how to get started for free.
If you have any further input or suggestions on the guide or wish to learn something more, feel free to comment below and let us know.
Related Articles: