Klipper Tuning Guide - Get the Best Klipper experience on your Ender 3

The Ender 3 series of 3D printers have made all the news for the last couple of years. Featuring an amazing set of features at a budget pricing, Ender 3 has made 3D printing accessible for several hobbyists and first-time users.
Another equally important thing that's been making rounds in the 3D printing community is the Klipper firmware. First released in 2016, Klipper is quickly ranking up amongst users as the go-to firmware for high-speed 3D printing. It's free, easy to use, and has many useful features that help you get the best printing experience.
We've explored the combination of Klipper and Ender in depth with several of our articles. Klipper elevates the performance of Ender 3 well-beyond expectations and with a bit of fine-tuning the print quality rivals even that of the high-end 3D printers.
In this article, we'll explore this partnership in detail and understand how you can fine-tune your Ender 3 to get the most out of the Klipper firmware.
Let's Klippify the Ender!
Klipper and Ender 3: The Dynamic Duo
The first Ender 3 was released in 2018 when the hobbyist 3D printing market was relatively in its initial stages. It took the 3D printing community by storm owing to its full-metal design, decent components, excellent print quality, and a budget pricing of less than $250.
Later down the line, Creality released eight versions of the original Ender 3, all equally well-built. The open-source nature of the Ender 3 printers further helped in making the machine popular amongst the maker community. Users started modding the printer, customizing it, and adapting its firmware to suit their projects.
While the 3D printing hardware is improving with the Ender 3, Klipper was slowly starting to form its place on the software front. With Klipper, KevinOConnor focused on improving the print speeds of FDM 3D printers while balancing the print quality.
The flexible nature and wide accessibility of the Ender 3 made it easy for users to experiment with the Klipper firmware. With Klipper on Ender 3, you can print with speeds of 100+ mm/s; without compromising its print quality.
As we were testing the combination of these two in our articles, we realized there's more you can achieve with Klipper on Ender 3. A slight fine-tuning of specific features in Klipper can go a long way in improving the print quality and reliability of the Ender 3.
That's precisely our goal for this article. For users who've already set up Klipper, this guide goes through the process of fine-tuning Klipper for their Ender 3 3D printers. You can also use it as a reference for other 3D printers and help get the best out of Klipper on your machines. Let's begin.
Setting up Klipper on Ender 3
Let's start with the basics of installing Klipper on Ender 3. There are already detailed guides for setting up Klipper, but in this section, we'll look at a few tips and tricks to help you with the process.
Use Fluidd or Mainsail OS for Web-interface

Photo Courtesy: lixxbox via Github
Klipper doesn't have its interface, so you'll need an external interface to interact with your Ender 3. Octoprint is a popular option, but it weighs down your Pi board and leaves little room for other features. Plus, Octoprint's UI is not optimized for Klipper.
Fluidd and Mainsail are developed with Klipper in their focus. Both have a clean UI, neat design, and a bunch of features that let you explore Klipper's functionalities with ease. You can refer to our Fluidd and Mainsail installation guides for a step-by-step walkthrough of the setup process.
Use KIUAH for Klipper
![]()
KIAUH is an amazing tool for all things Klipper. You can install multiple web interfaces, back up your configurations, set up hardware, and update your Klipper firmware from a single interface.
It'll help you quickly switch between Fluidd and Mainsail interfaces on your Ender 3 and configure external hardware for the printer.
Backup Configuration files

Before making any changes, keep a backup of your original configuration files. It's a good practice and comes in handy if anything goes wrong with your update procedure.
You can download the original backup for your Ender 3 from Klipper's config examples. Or you can download a copy of your initial printer configuration and store it on your device.
Check your printer serial ID
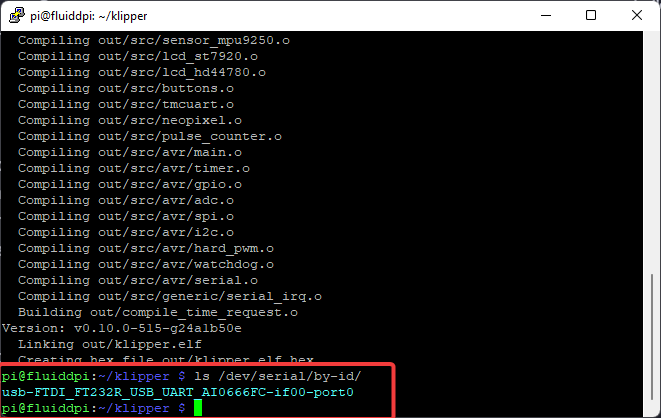
If you're not getting the correct serial ID during the initial setup process, you're likely having connection issues with the printer. Double-check the connection of the Pi board with Ender 3, and ensure you've followed the steps to the point.
Pre-check basic features��

Check all the functions of your printer before starting a print. Verify everything's working as it's supposed to before you begin printing with Klipper on your Ender 3.
Klipper's configuration checks page is an excellent source for this step. Nero 3D on YouTube, too, has a great Klipper checklist that walks you through the things you need to check before starting your prints.
Slicer Settings for Klipper and Ender 3
The slicer software influences the print quality of any 3D printing setup. Specifically, with Klipper, there are certain settings you need to be mindful of to get the best prints on your Ender 3.
Disable Coasting Settings

The coasting feature lets you adjust the filament flow before and after your print head changes its acceleration speeds. It's effective in reducing filament ooze and helps with stringing issues as well.
But, the Pressure Advance feature in Klipper is already developed for the same results. The difference being it works on the firmware level and, once tuned, can drastically improve your print quality.
So, to prevent a mismatch of both these settings, it'd be helpful to disable the coasting feature in your slicer settings.
No 'extra restart distance' and "advanced extruder pressure" Settings
Similar to coasting, extra restart distance and advanced extruder pressure both help with improving the extrusion of your Ender 3.
But, these clash with Klipper's Pressure Advance feature, and enabling them might result in poor print quality. Therefore, it'd be helpful to calibrate your Pressure Advance settings and disable these features in your slicer.
Use Gcode Macros

Klipper gives you the convenience of defining your macros right in its firmware. You can later input this macro in your slicer for a start and end Gcodes instead of a long string of commands.
Using it will ensure that your Ender 3 follows the same procedure whenever the printing starts or ends, regardless of the slicer you're using.
Disable Acceleration Settings

Klipper already has its acceleration algorithms which are fine-tuned for optimal print quality. Once you calibrate the Input Shaping feature, Klipper optimizes the printer's movements to reduce surface artifacts like ringing and ghosting.
If you enable the slicer to take control of these settings, it over-defines the acceleration limits. You won't know exactly which settings your Ender 3 uses for the prints. Hence, it's a good practice to disable any acceleration and jerk control settings in your slicer.
Run Calibration Prints

If you're using SuperSlicer for preparing your 3D models, it has a nifty calibration section that lets you print calibration models for your 3D printer.
SuperSlicer is based on PrusaSlicer and has a similar layout and UI. Its calibration menu has an extensive collection of 3D prints, which you can run to dial your Ender 3's print quality.
There are notes on using the calibration models, and overall it is a great way to fine-tune your slicer's settings before you begin printing.
Firmware Feature Calibration for Ender 3
Klipper has many features that benefit Ender 3 and improve its printing speeds, quality, and overall user experience. PID tuning, Pressure Advance, and Input Shaping, to name a few. We've thoroughly tested these features with Ender 3 and noticed an overall improvement in its printing performance.
This section will help you adjust these Klipper features for the Ender 3 and iron out any minor issues.
PID Tuning

PID tuning helps you precisely control the heating of your Ender 3 hot end and print bed. It'll also inform you about potential heating issues with your printer. The PID tuning process is relatively straightforward, and you can execute it within 15-20 minutes.
You can refer to the Klipper PID tuning article for a detailed walkthrough of the process. Once done, you'll notice stable print temperatures and faster heating times on your Ender 3.
Pressure Advance

Pressure Advance adjusts the nozzle pressure in your hot end before it extrudes or retracts the filament. It increases the print quality around the corners while helping with ooze reduction and filament stringing issues.
There's a slight process for calibrating your pressure advance settings in Klipper. The procedure is straightforward, but referring to the Pressure advance tuning guide will ease it out for you.
Input Shaping

Input Shaping is one of the most advanced features in Klipper. It calibrates the input pulses to the stepper motors to produce fewer vibrations. The effect is reduced ringing and ghosting in your prints when printing at high speeds, and it results in improved print quality without compromising on the print speeds of your Ender 3.
Calibrating Input Shaping is quite an involved procedure, and you can choose between Manual and Automatic methods for adjusting the Input shaping. We have a detailed article on calibrating Input Shaping for Ender 3, which you can read to understand the procedure better.
Exclude Objects

Photo Courtesy: Mainsail Documentation
Consider if you're executing a multiple-part 3D print on your Ender 3, and one of the prints on the print bed fails. You'd have to cancel the entire printing process due to a single print failure.
Exclude objects is Klipper's way around this issue. It lets you exclude specific prints from the current printing process in case of a part failure. This way, you don't have to cancel out printing of all the parts but solely of the failed print. You end up saving your precious 3D printing material and time with this feature.
External Components for Ender 3
KlipperScreen
![]()
Photo Courtesy: KlipperScreen
Klipper uses a web-based UI. It lets you control your 3D printer from your workstation using a laptop or PC. But, when you're running multiple printers, or if your printer is located far away from your work desk, it can get cumbersome to interact with your printer.
KlipperScreen is an elegant solution that lets you interact with your Ender 3 via a touchscreen-based UI. You get all the controls, temperature charts, webcam views, and more on a screen using which you can control your printer. It's a neat addition to the Ender 3 and replaces the dated LCD on older models, giving the printer a modern look.
Add BLTouch
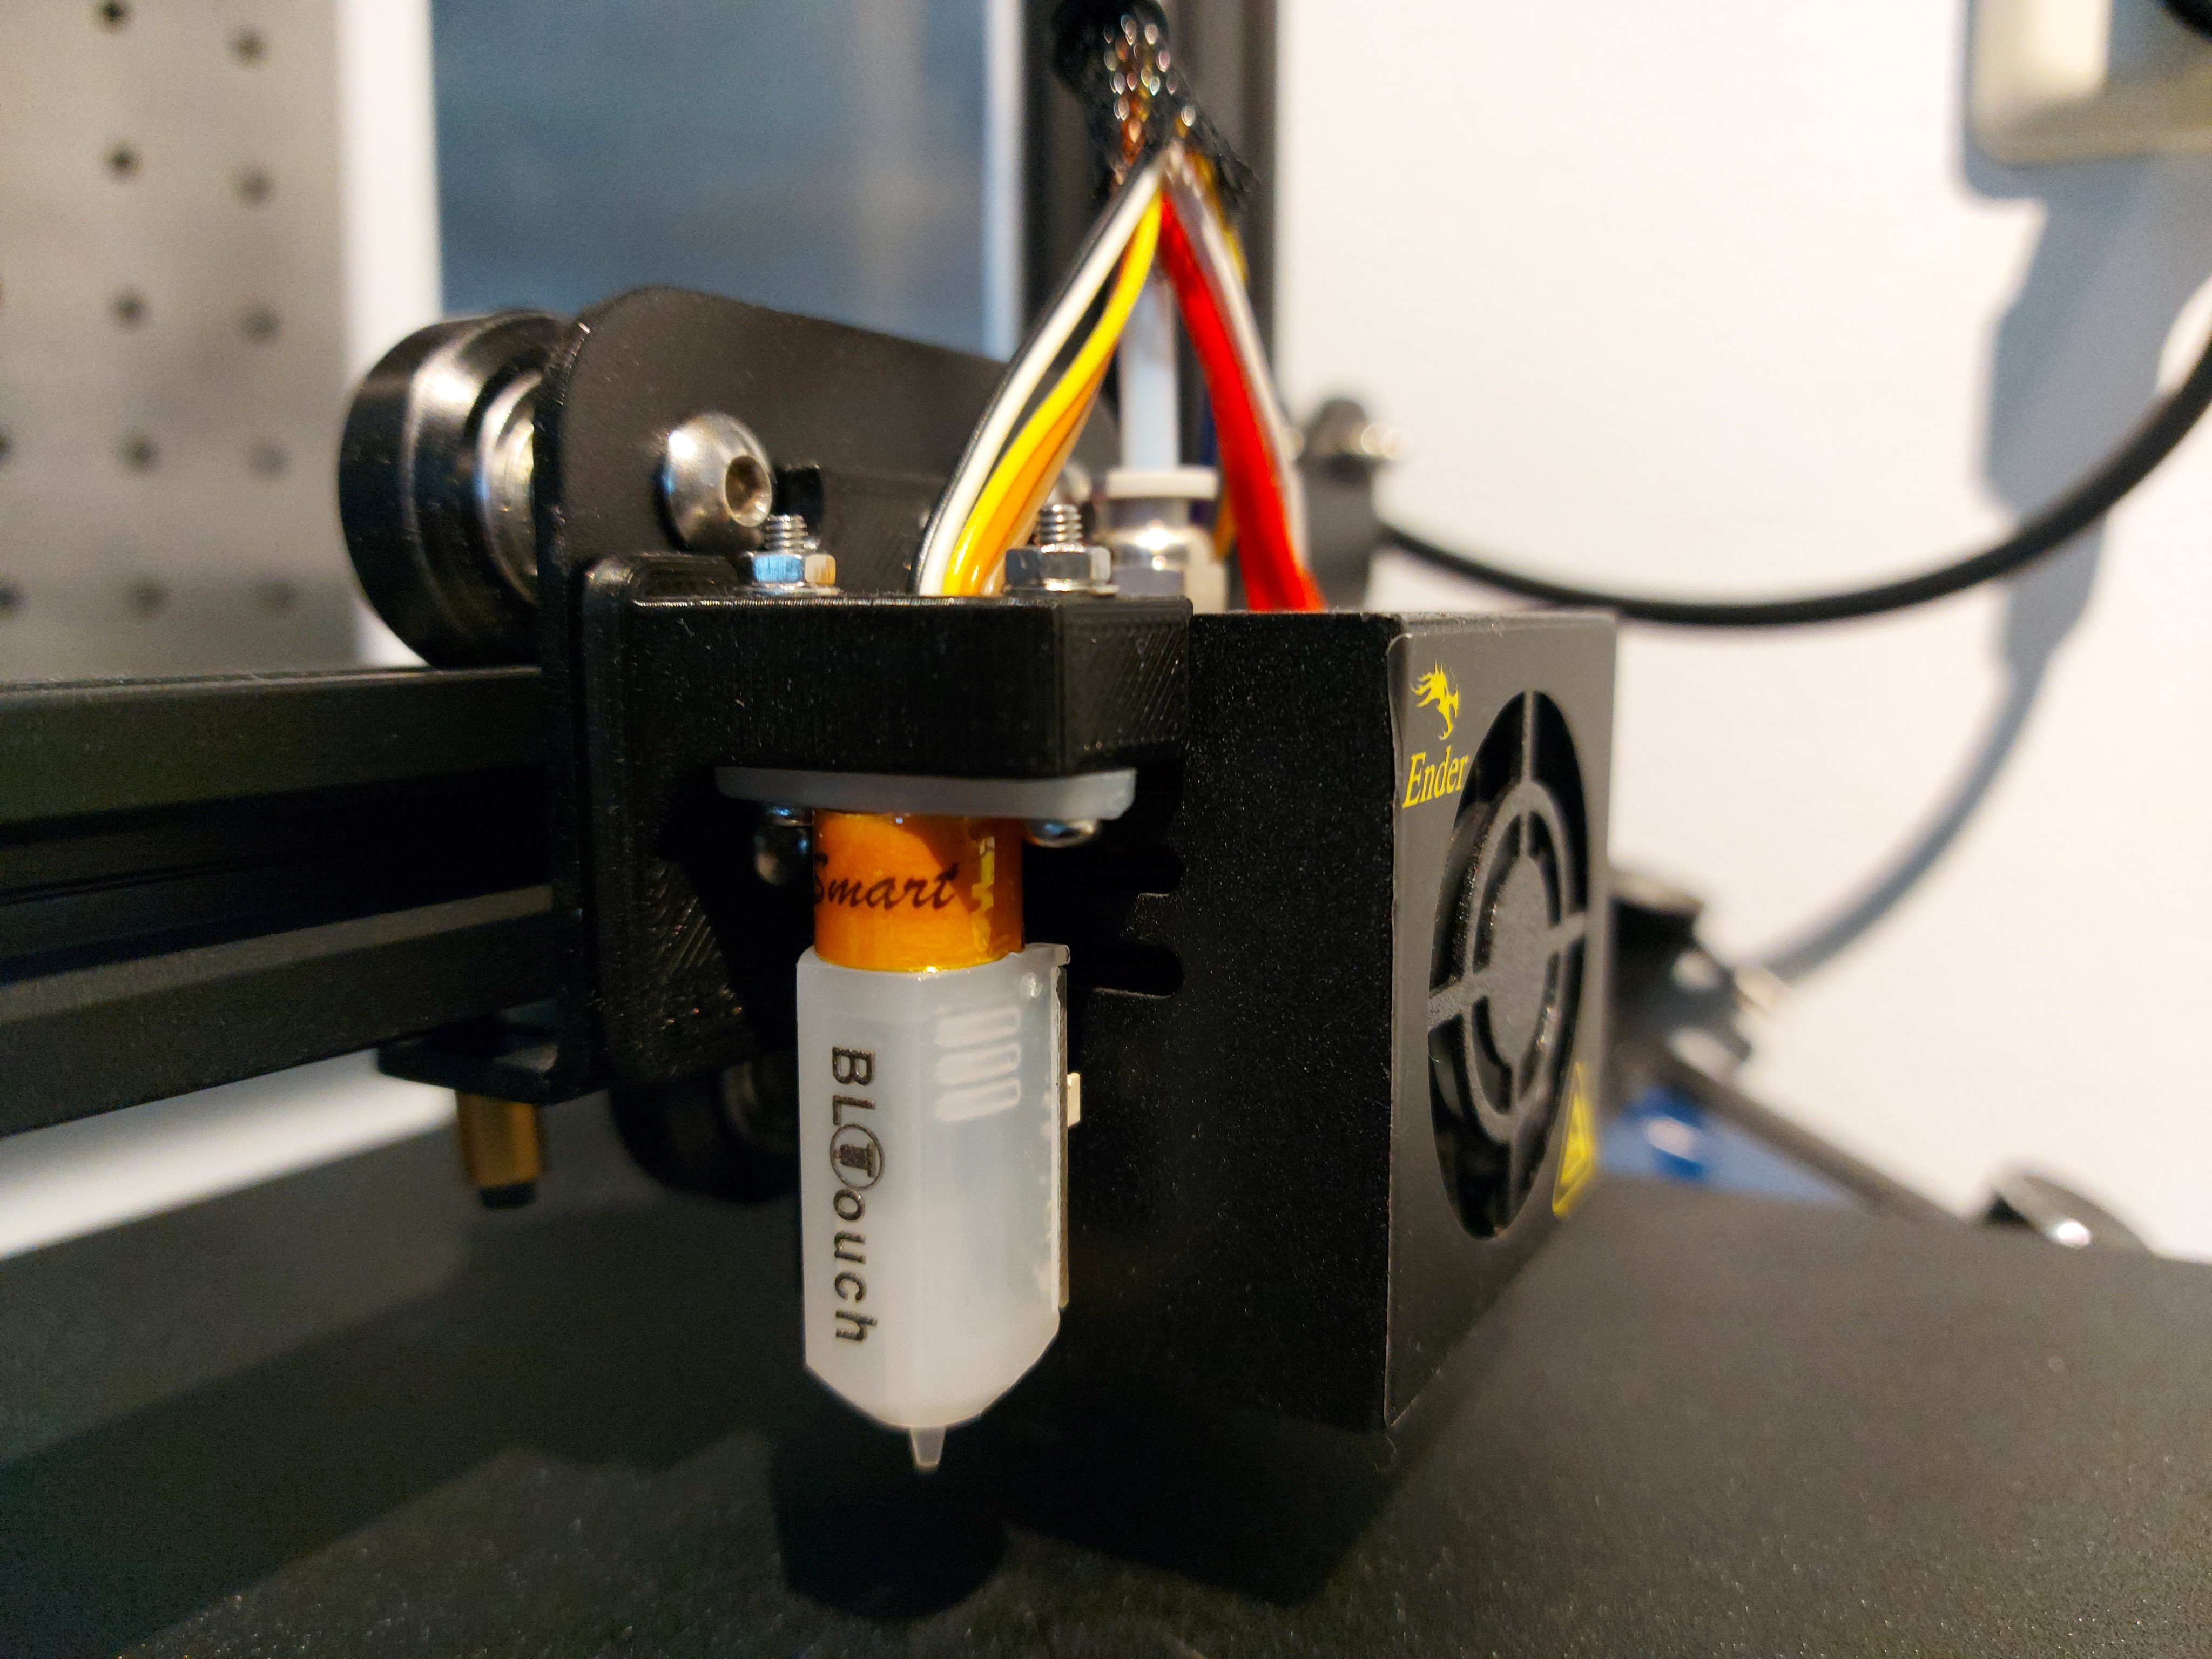
Photo Courtesy: hrussel via Thingiverse
If you're using an older generation of the Ender 3, likely, you don't have a leveling sensor installed on your machine. And while manual bed leveling is excellent, it becomes tiresome after a while. The leveling accuracy, too, is poor and might lead to print failures.
The BLTouch sensor is a great addition that'll help improve your leveling accuracy and the Ender 3s printing experience. It's easy to set up in Klipper, and there's a detailed Reddit guide on this topic that you can install on your Ender 3.
Configure Camera and Timelapse
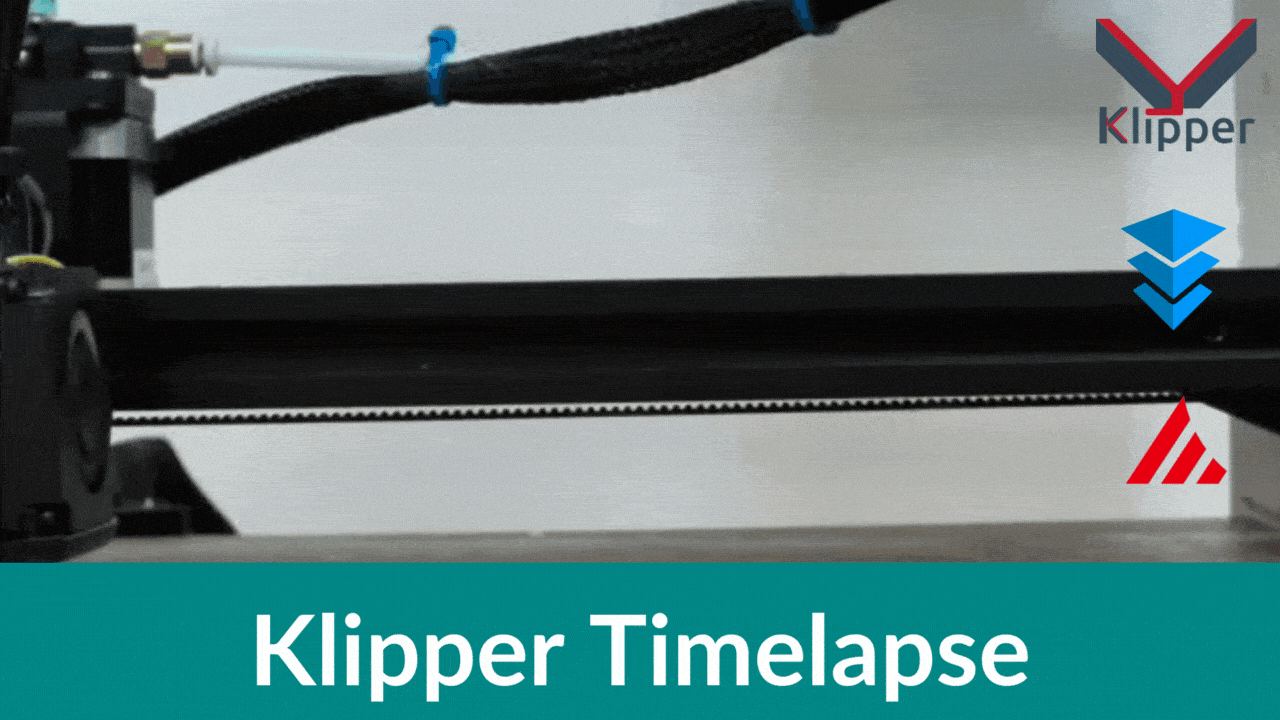
Klipper firmware's remote accessibility and use of a Raspberry Pi board give way to pairing up a webcam with your Ender 3. Using a camera, you can remotely monitor your prints and create time-lapse videos to capture the entire process quickly.
Configuring Klipper Camera and Klipper Timelapse lets you keep an eye on your ongoing prints, and you can quickly stop the process in case of a print failure.
Install Obico on Ender 3

Obico takes Klipper's remote functionality one step further. Once you set up Obico on Ender 3, you can remotely control and monitor your 3D prints from anywhere in the world.
Obico frees you from the limits of your wireless network and lets you interact with your printer from any location and device.
Additionally, its AI failure detection helps you keep an eye on print failure and instantly notifies you if the print goes haywire. This feature saves you from losing considerable filament waste and reduces the chances of any potential 3D printer damage.
Obico elevates your experience using Klipper with Ender 3 and gives you added peace of mind with its AI failure detection feature. It acts as your 3D printing assistant and lets you focus on other tasks while you run the Ender 3 in the background.
Final Thoughts
Klipper and Ender 3 are the perfect combinations to exist, giving you plenty of freedom to explore the 3D printing world. Klipper takes the Ender 3 up a notch and lets even hobbyist users on a budget experience the benefits of fast 3D printing speeds.
We believe this tuning guide helps you tune your Ender 3 for optimal print quality with Klipper firmware. If you have anything more that you'd like to see in this guide or want more Klipper-related topics, feel free to let us know in the comments below.
Till then, Enjoy printing with Klipper, and let us know if you have any feedback for the Obico software.