Klipper Timelapse With Fluidd or Mainsail - All You Need to Know

Introduction
Using the timelapse feature in Klipper, you can record your entire 3D printing process and share bits of it on your social media platforms. These videos are also a great tool to analyze print failures and pinpoint the causes behind a failed print.
Yet, despite their usefulness, setting time-lapse videos in Klipper can be challenging for several users. And while it's a relatively easy setup, the initial configuration can confuse beginner Klipper users easily.
In this article, we'll simplify this process for you. We'll go over the entire procedure step-by-step and configure the timelapse functionality for your Klipper instance. By the end of this guide, you'll be able to record picture-perfect timelapse videos of your 3D prints and share them within your social circle.
Let's start shooting.
What You'll Need?
The timelapse feature is a functionality that installs on your Klipper firmware, so we'll need a couple of things before we begin configuring it for your 3D printer–Klipper and a Camera.
First, you need a 3D printer with Klipper firmware installed on it. The process is relatively simple yet extensive. You can refer to our guide on Klipper installation using Fluidd for configuring the firmware on your 3D printer. Alternatively, you can install Klipper using Mainsail OS or KIAUH method.
Depending on your preferences, you can choose between any of the three Klipper installation methods. Practically, there's less difference between the three, and it comes down to your requirements.
As a camera, you can use a USB webcam to record your timelapse videos. We recommend using at least a 720p webcam like the Logitech C720 for recording the timelapse videos. It provides a decent balance between price and quality, and with good lighting, you can shoot high-quality timelapses.
You can also use a Raspberry Pi camera as a quick and easy solution to record timelapse on Klipper. There are two or three variations of the Raspberry Pi camera, with the cheapest being close to $30. They're easy to configure, and you can use either to shoot 1080p timelapse videos.
If you need more clarity on choosing the camera for your Klipper 3D printer, you can refer to our 3D printer camera guide. It'll help you choose a suitable camera that matches your needs and fits your budget.
Now that you have a Klipper 3D printer and a camera, we can start setting up the timelapse on your Klipper firmware.
How to Set up timelapse on Klipper
Install Moonraker timelapse component
- Go to the Moonraker timelapse website.
- Copy the code under the Installing the component section.
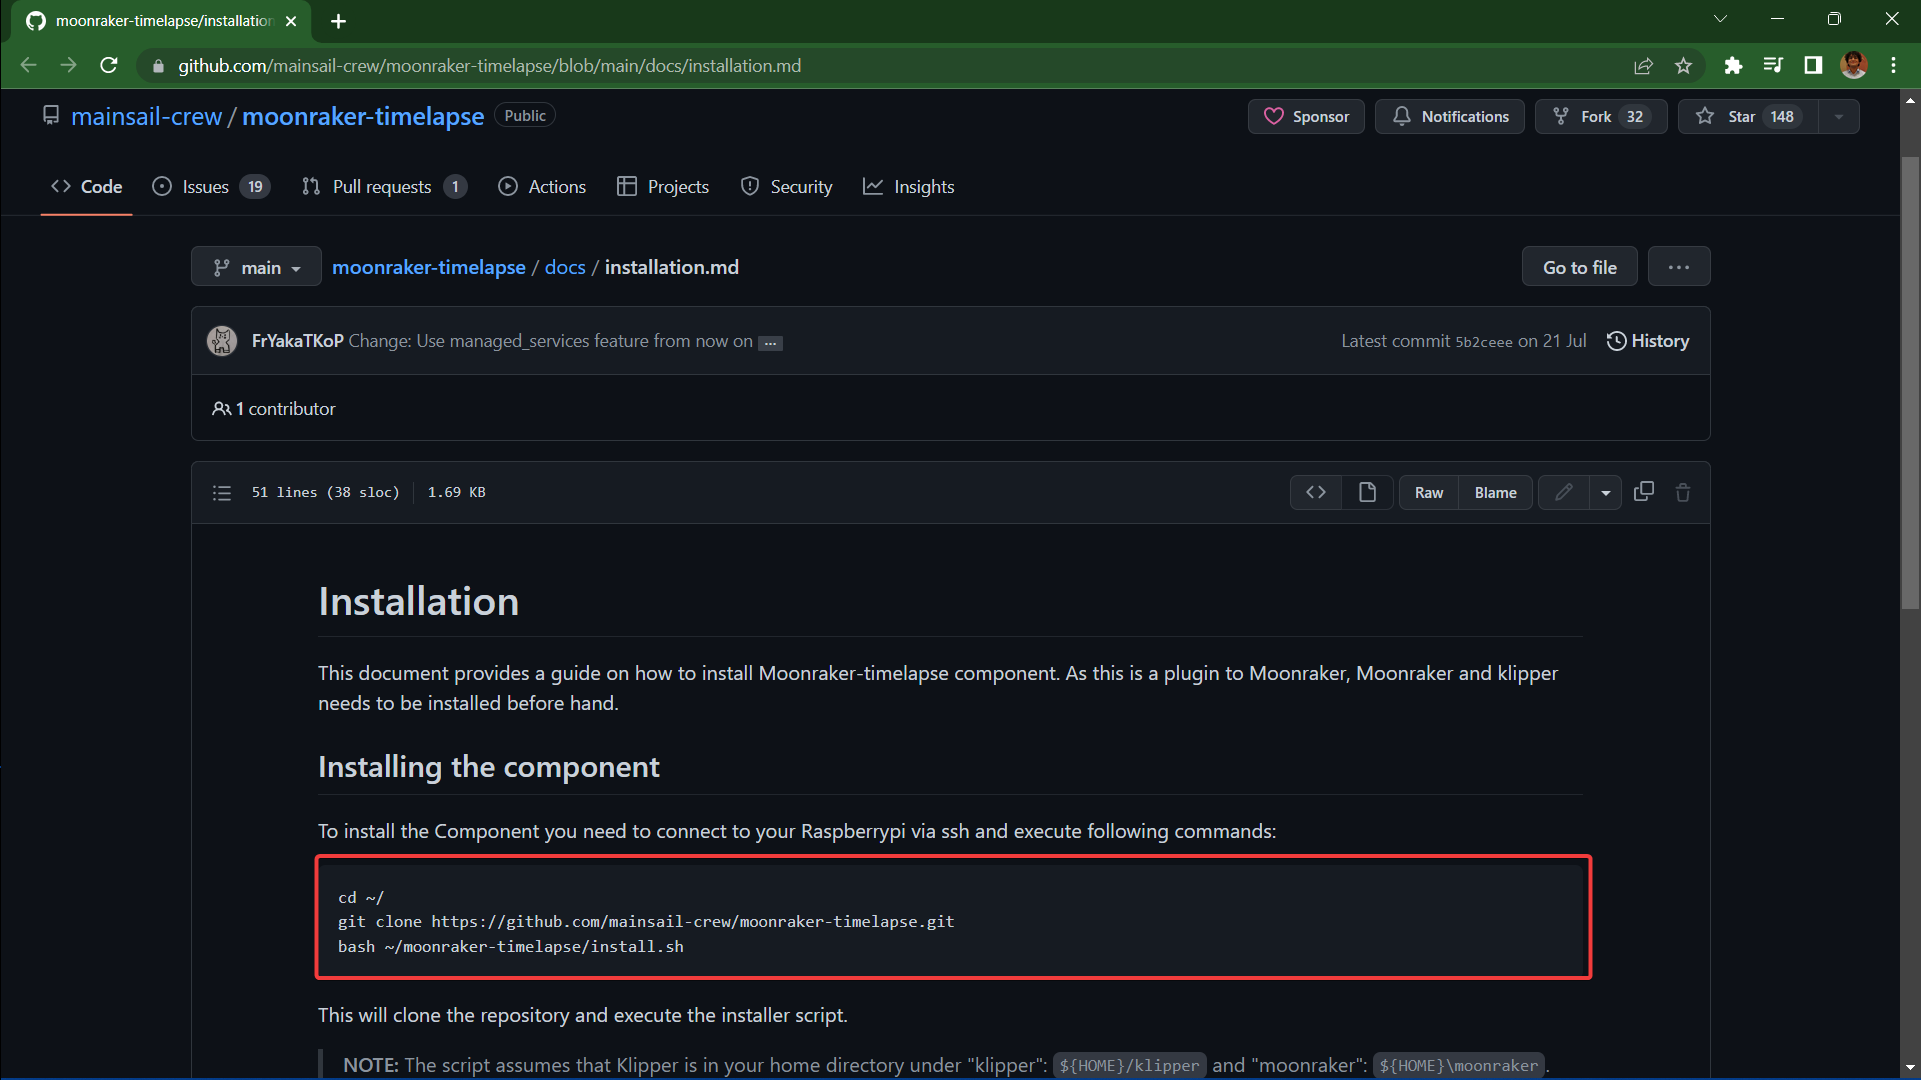
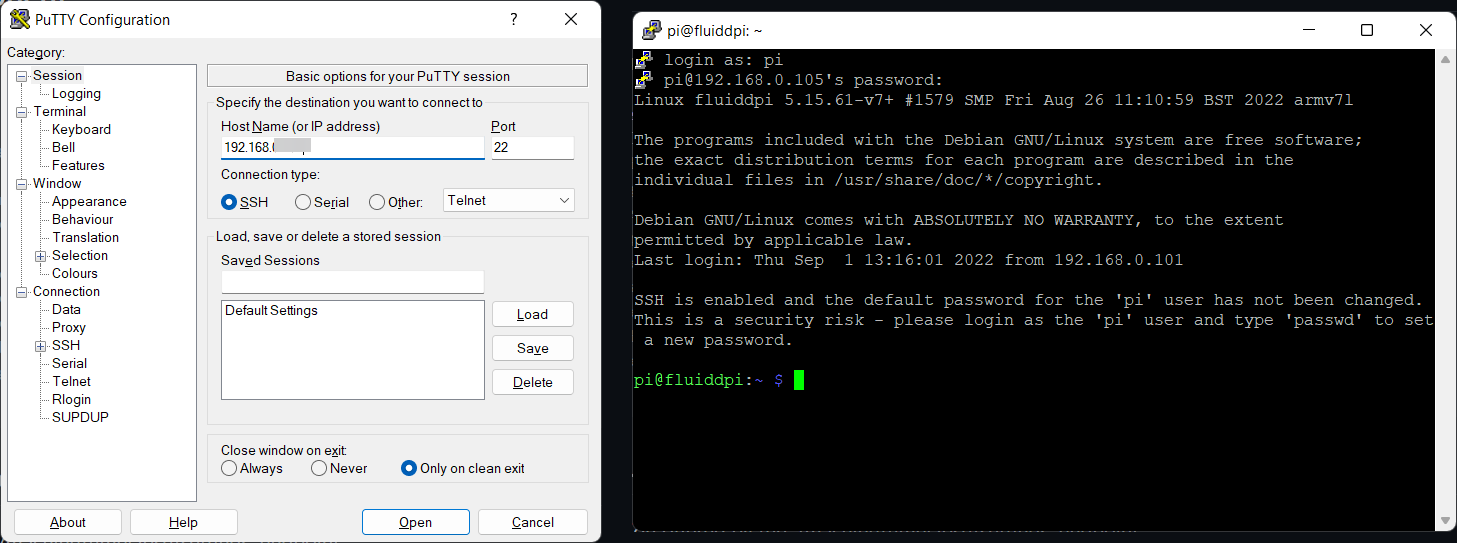
- Open PuTTy on your computer.
-
Input the IP address of your Raspberry Pi and log in using your credentials.
-
Paste the timelapse code in your PuTTy window and press enter.
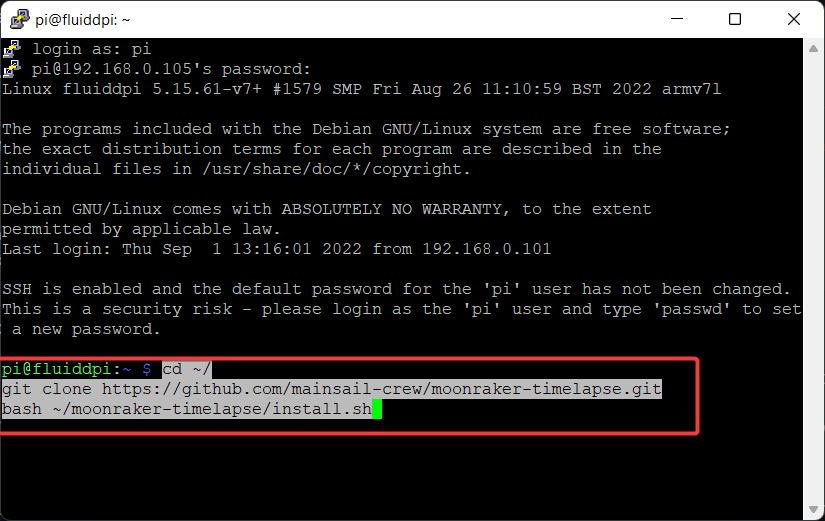
- The timelapse plugin will now be installed on your Klipper instance, and you'll get a success message at the end.
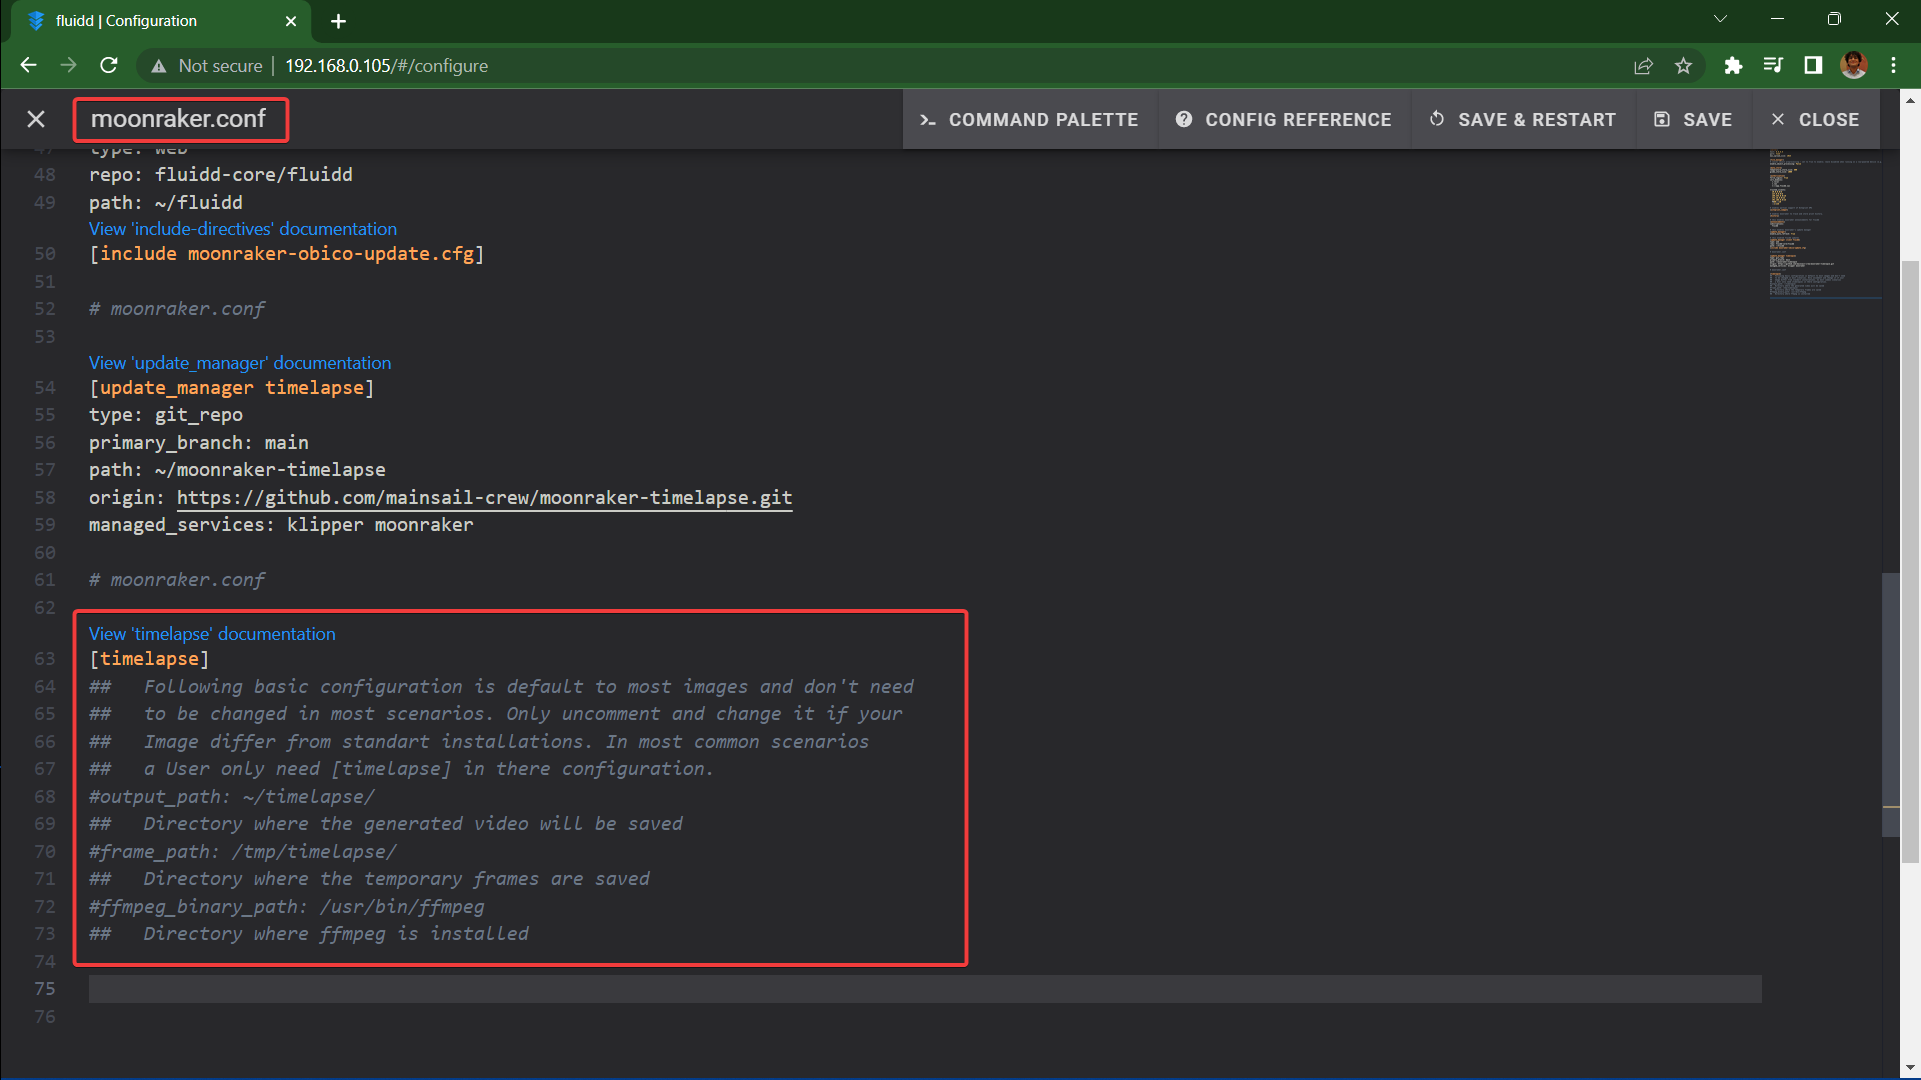
Enable timelapse component update with Moonraker update manager
- Copy the code at the bottom of the same Moonraker timelapse website as earlier.
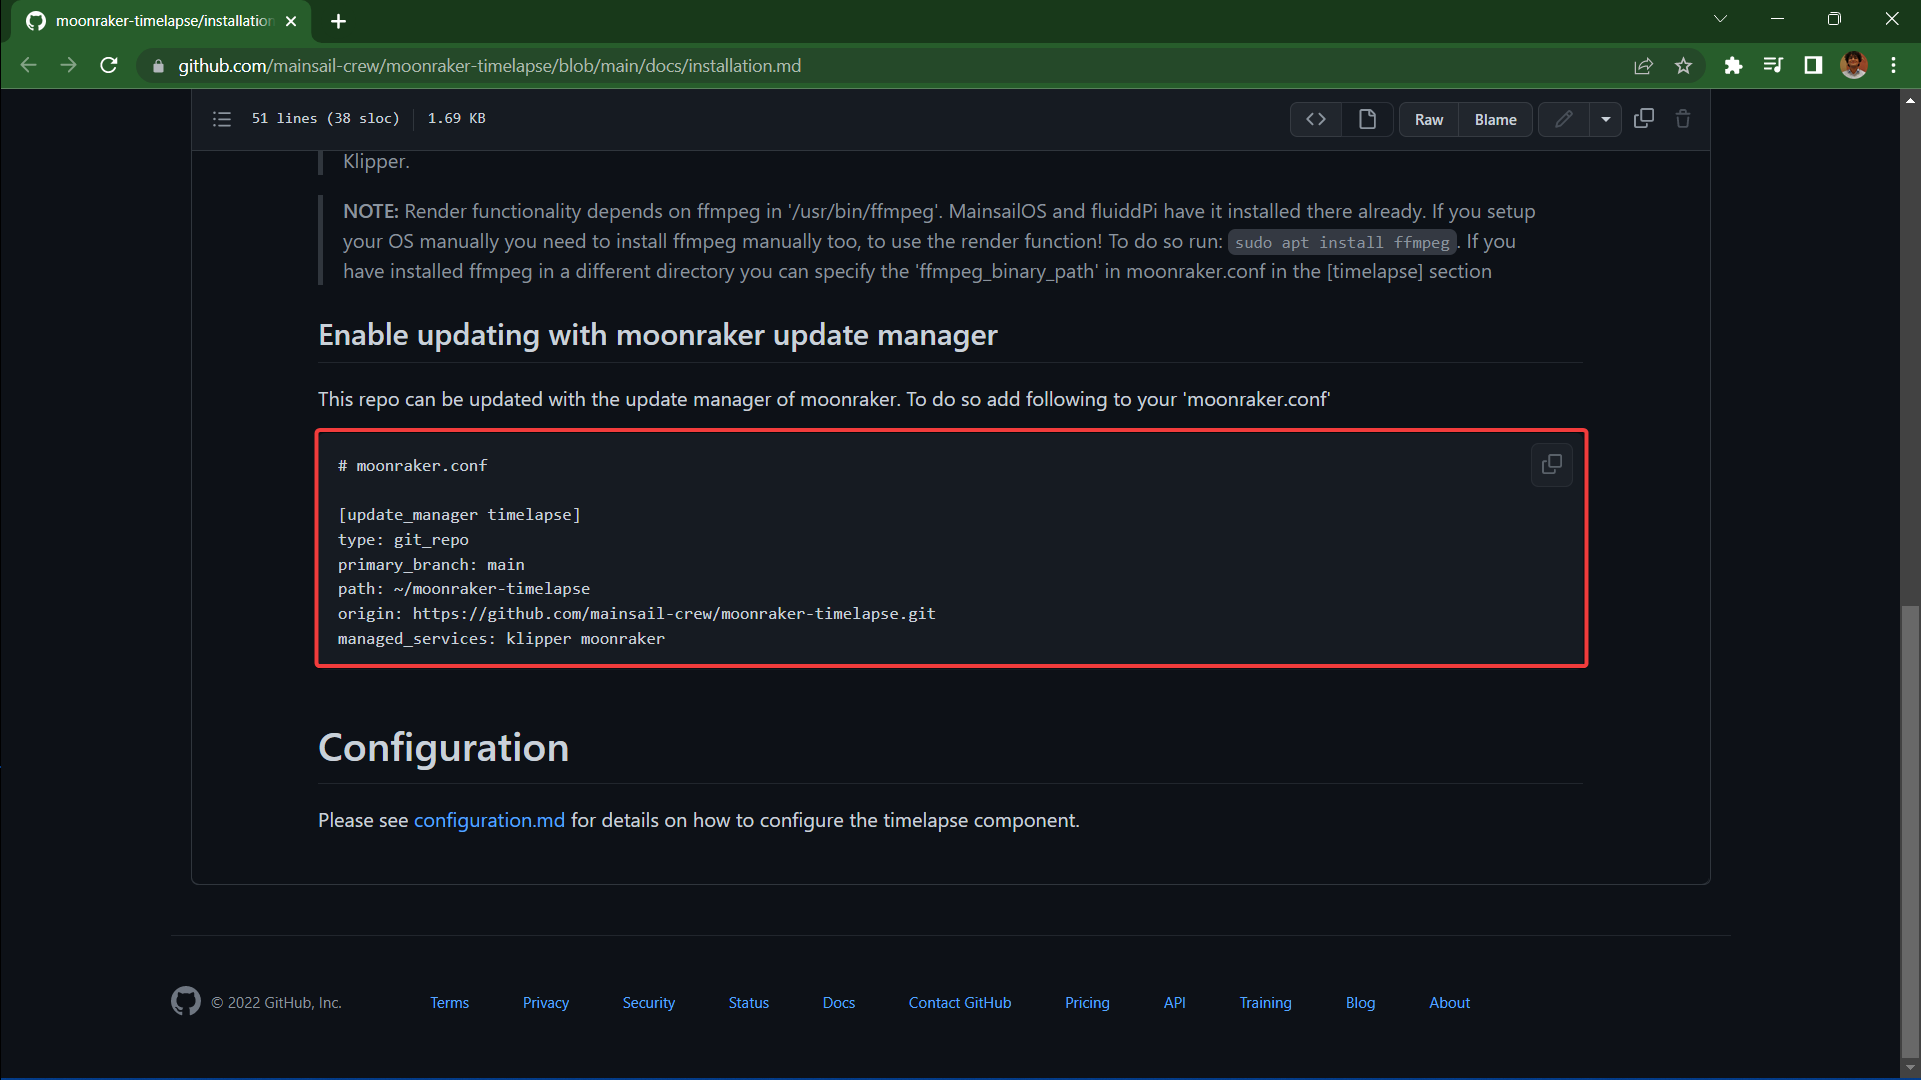
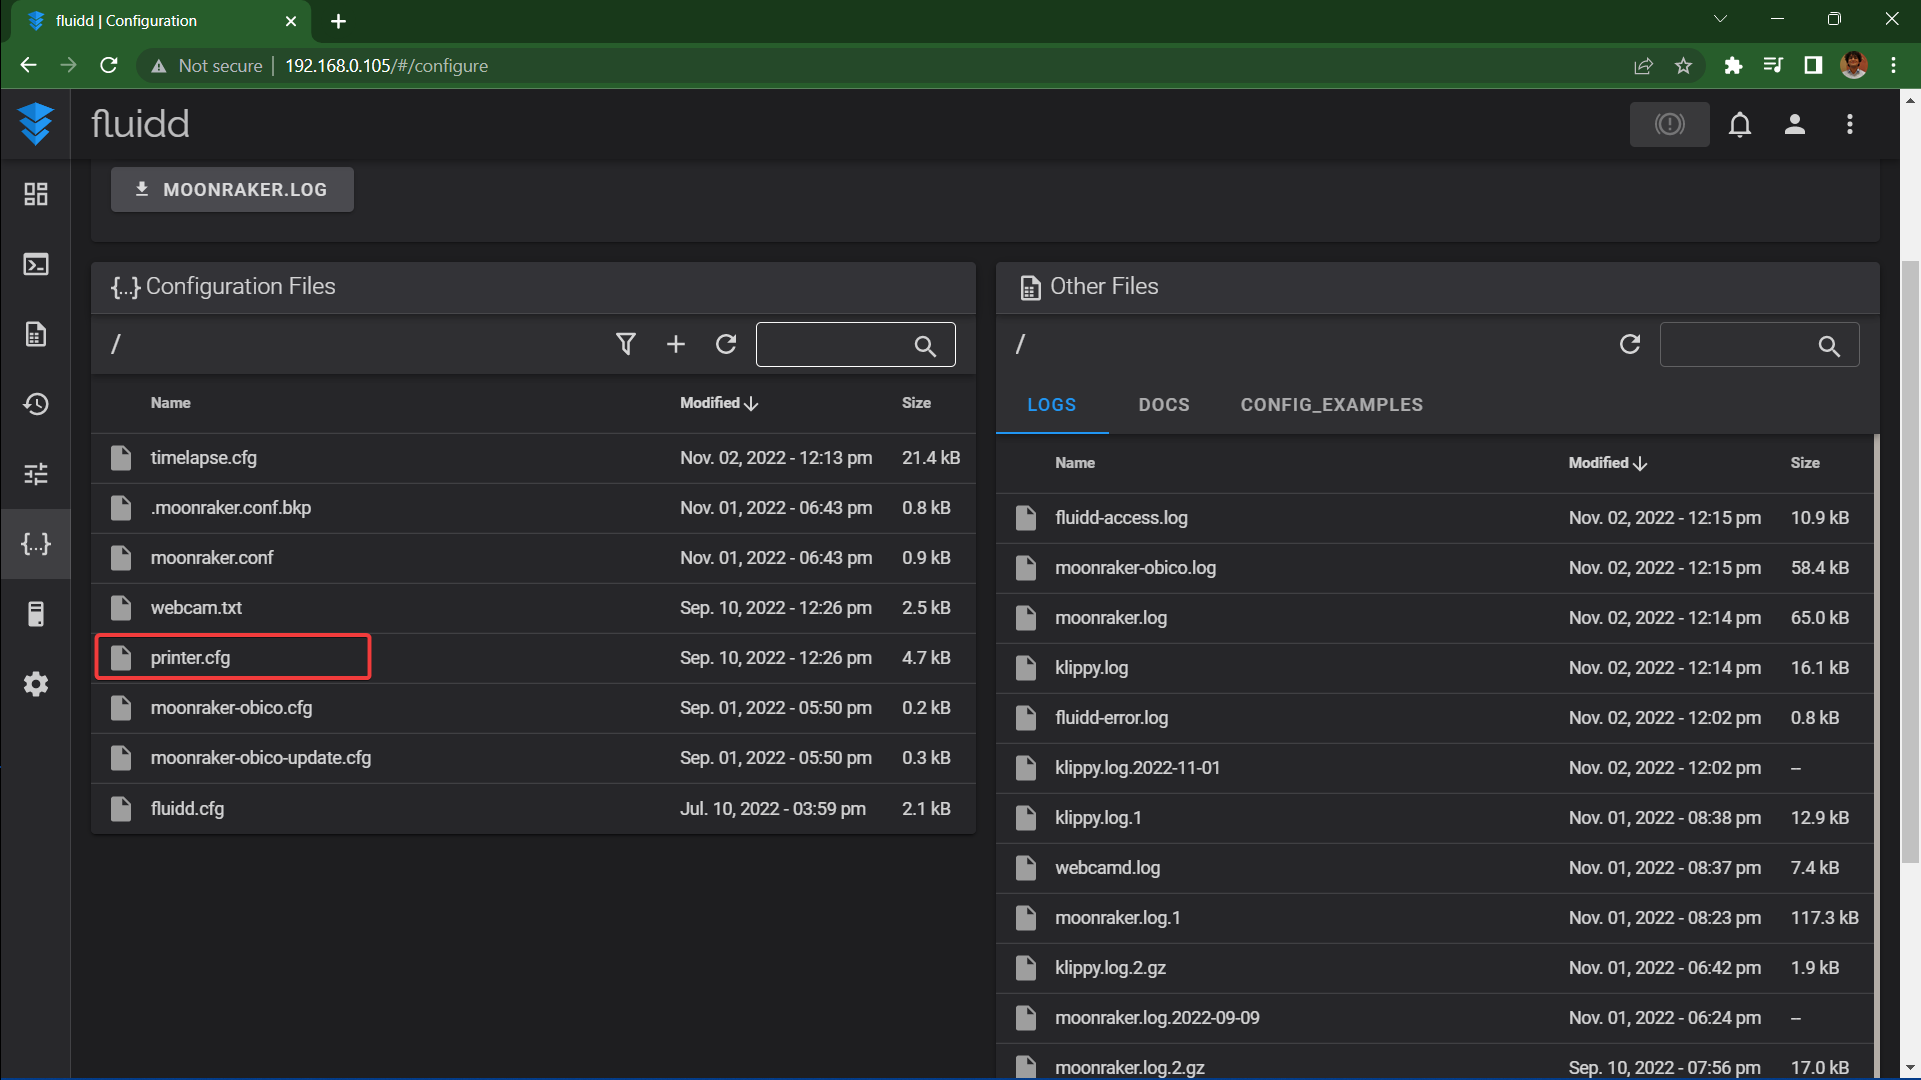
- Input the IP address of your Raspberry Pi and open the Fluidd web interface.
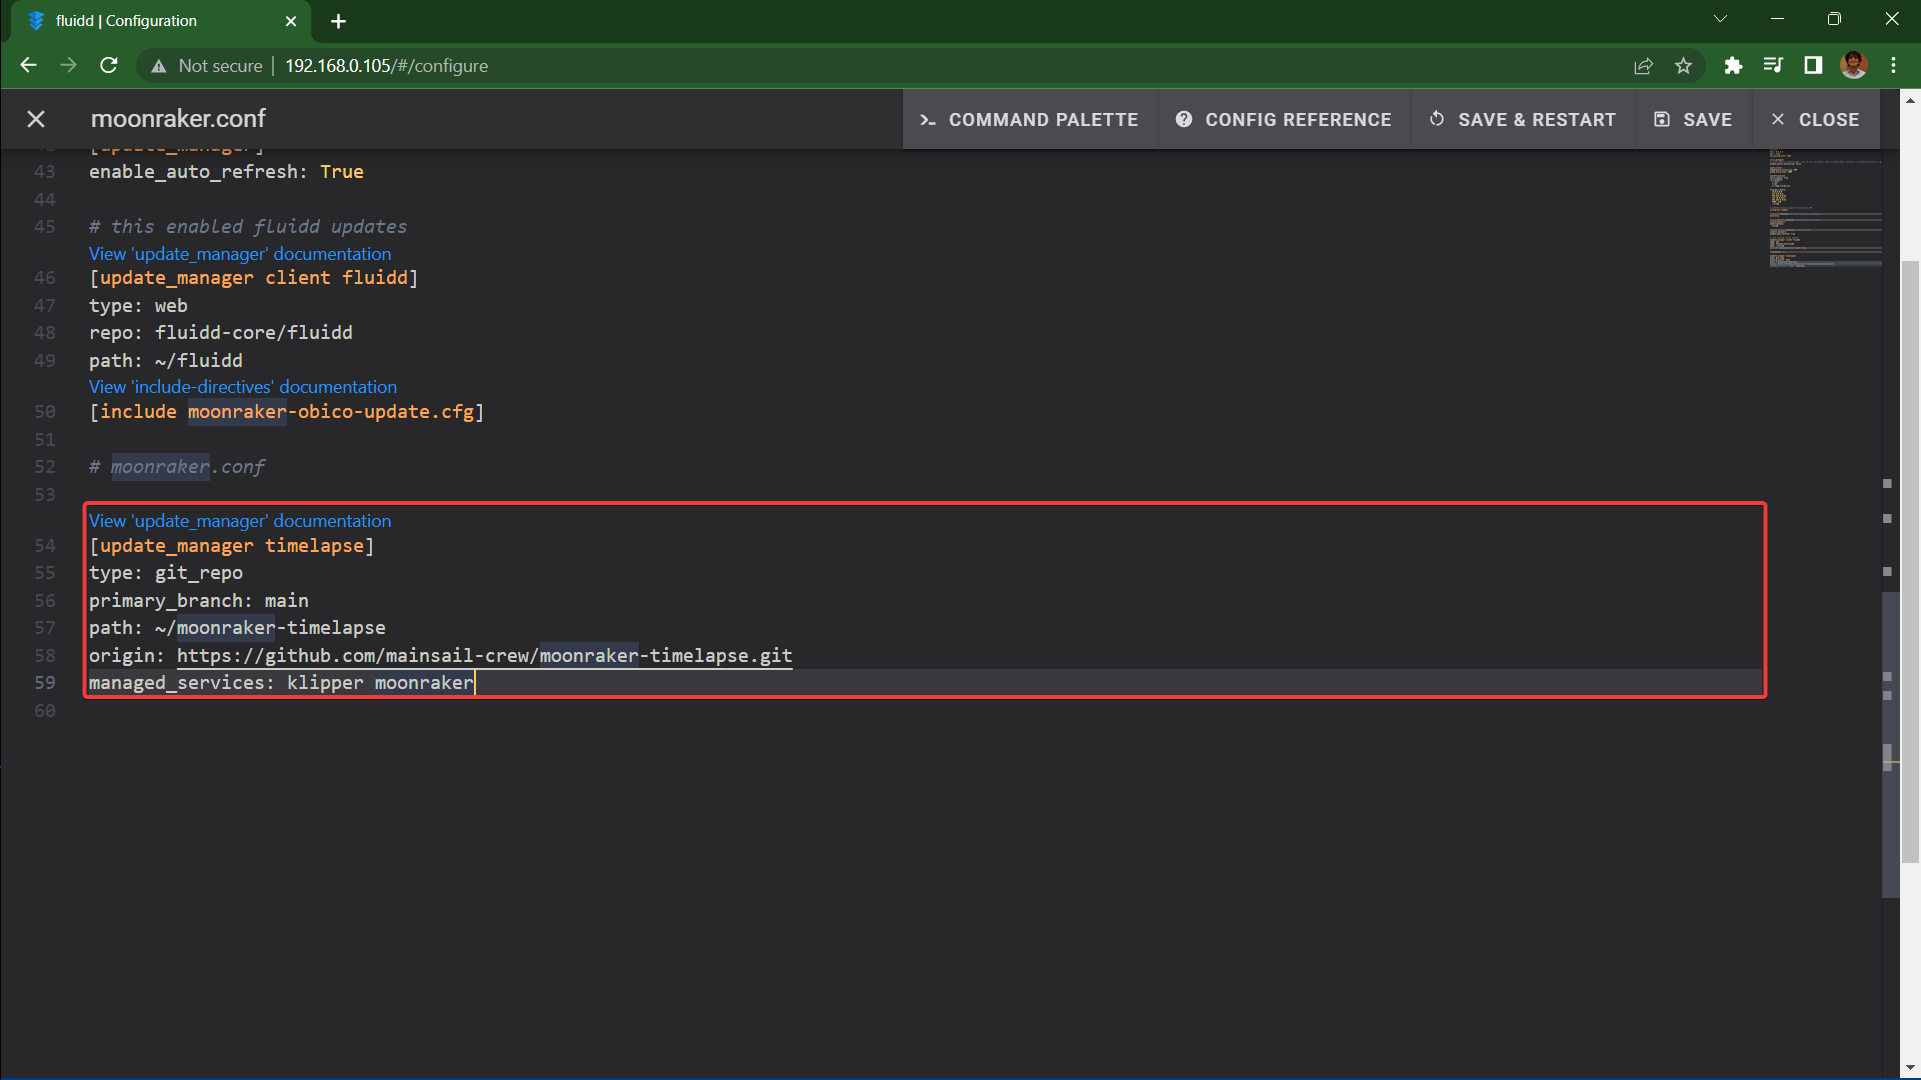
- Go to the configurations section and open moonraker.conf file.
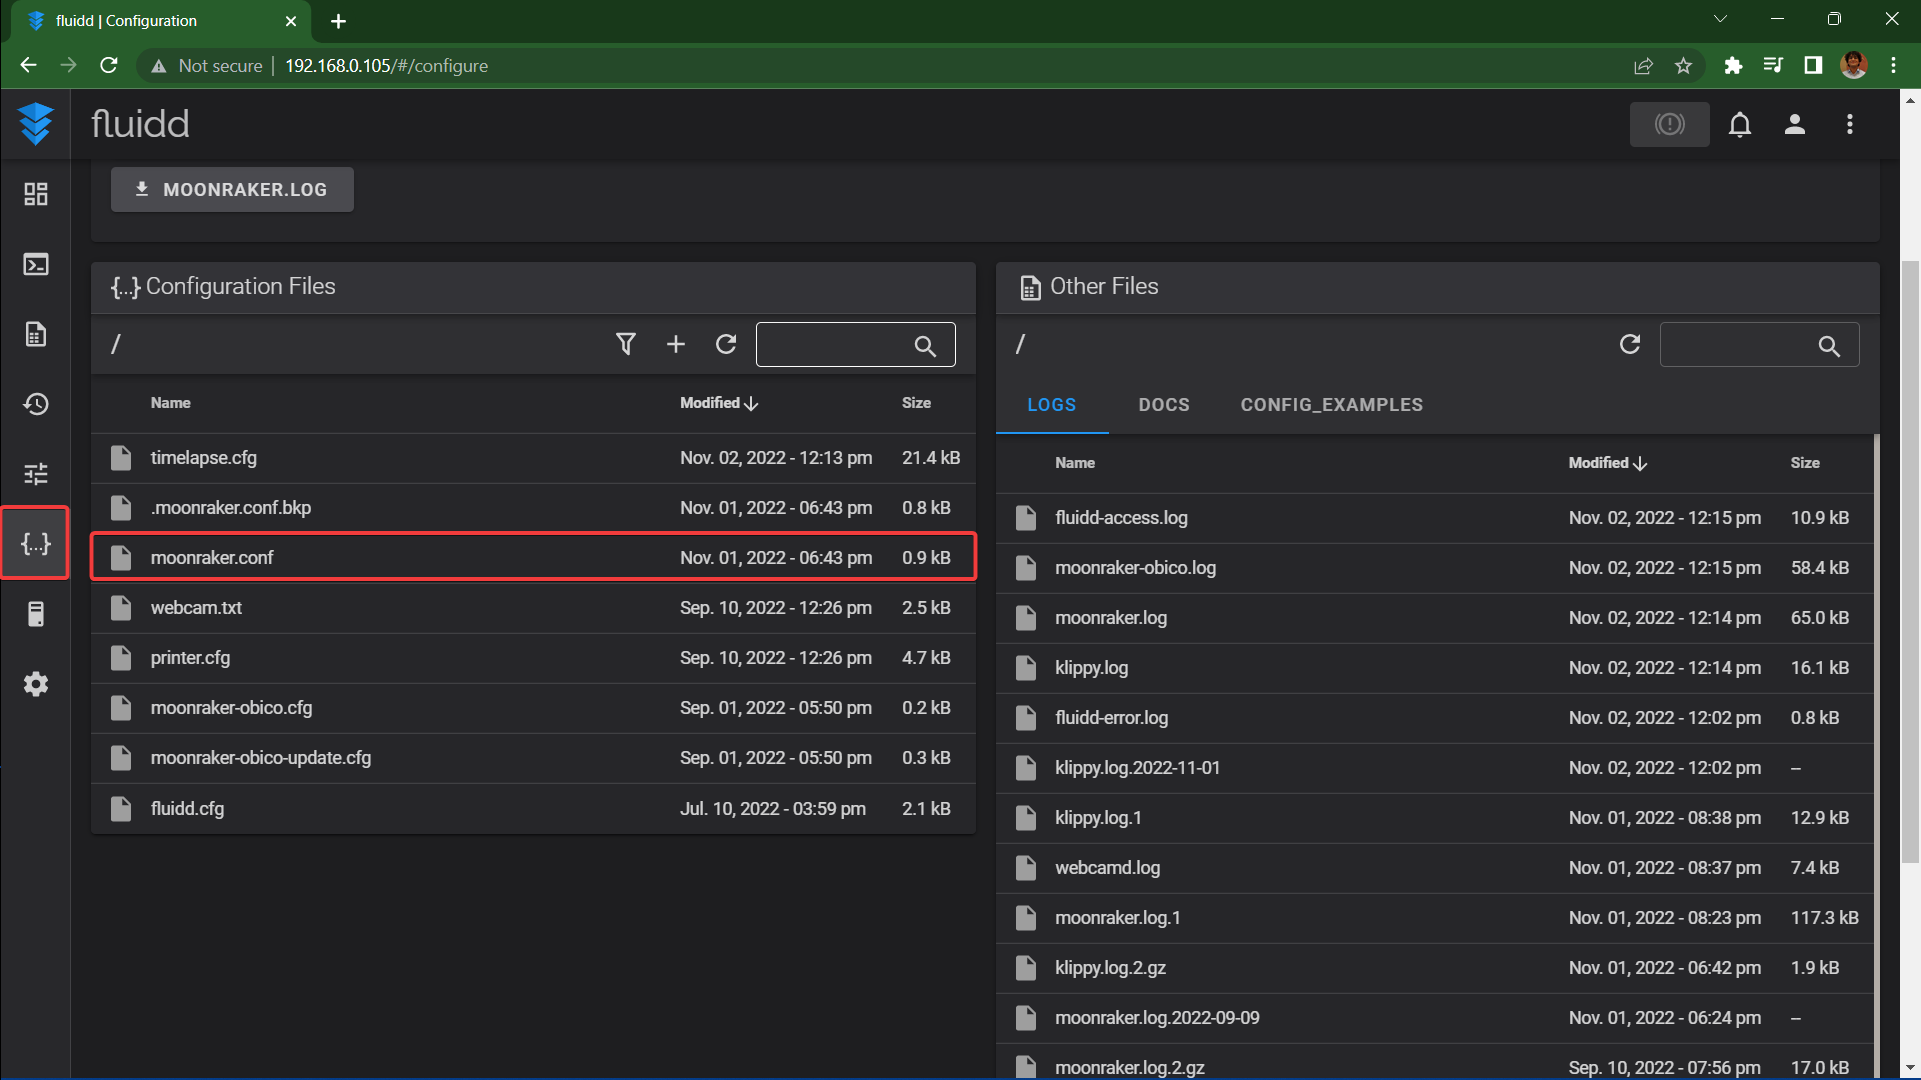
- Paste the code at the bottom of the file and click on save and restart.
- Check for the timelapse update section by going to settings>>software updates. There should be a section displaying a timelapse option.
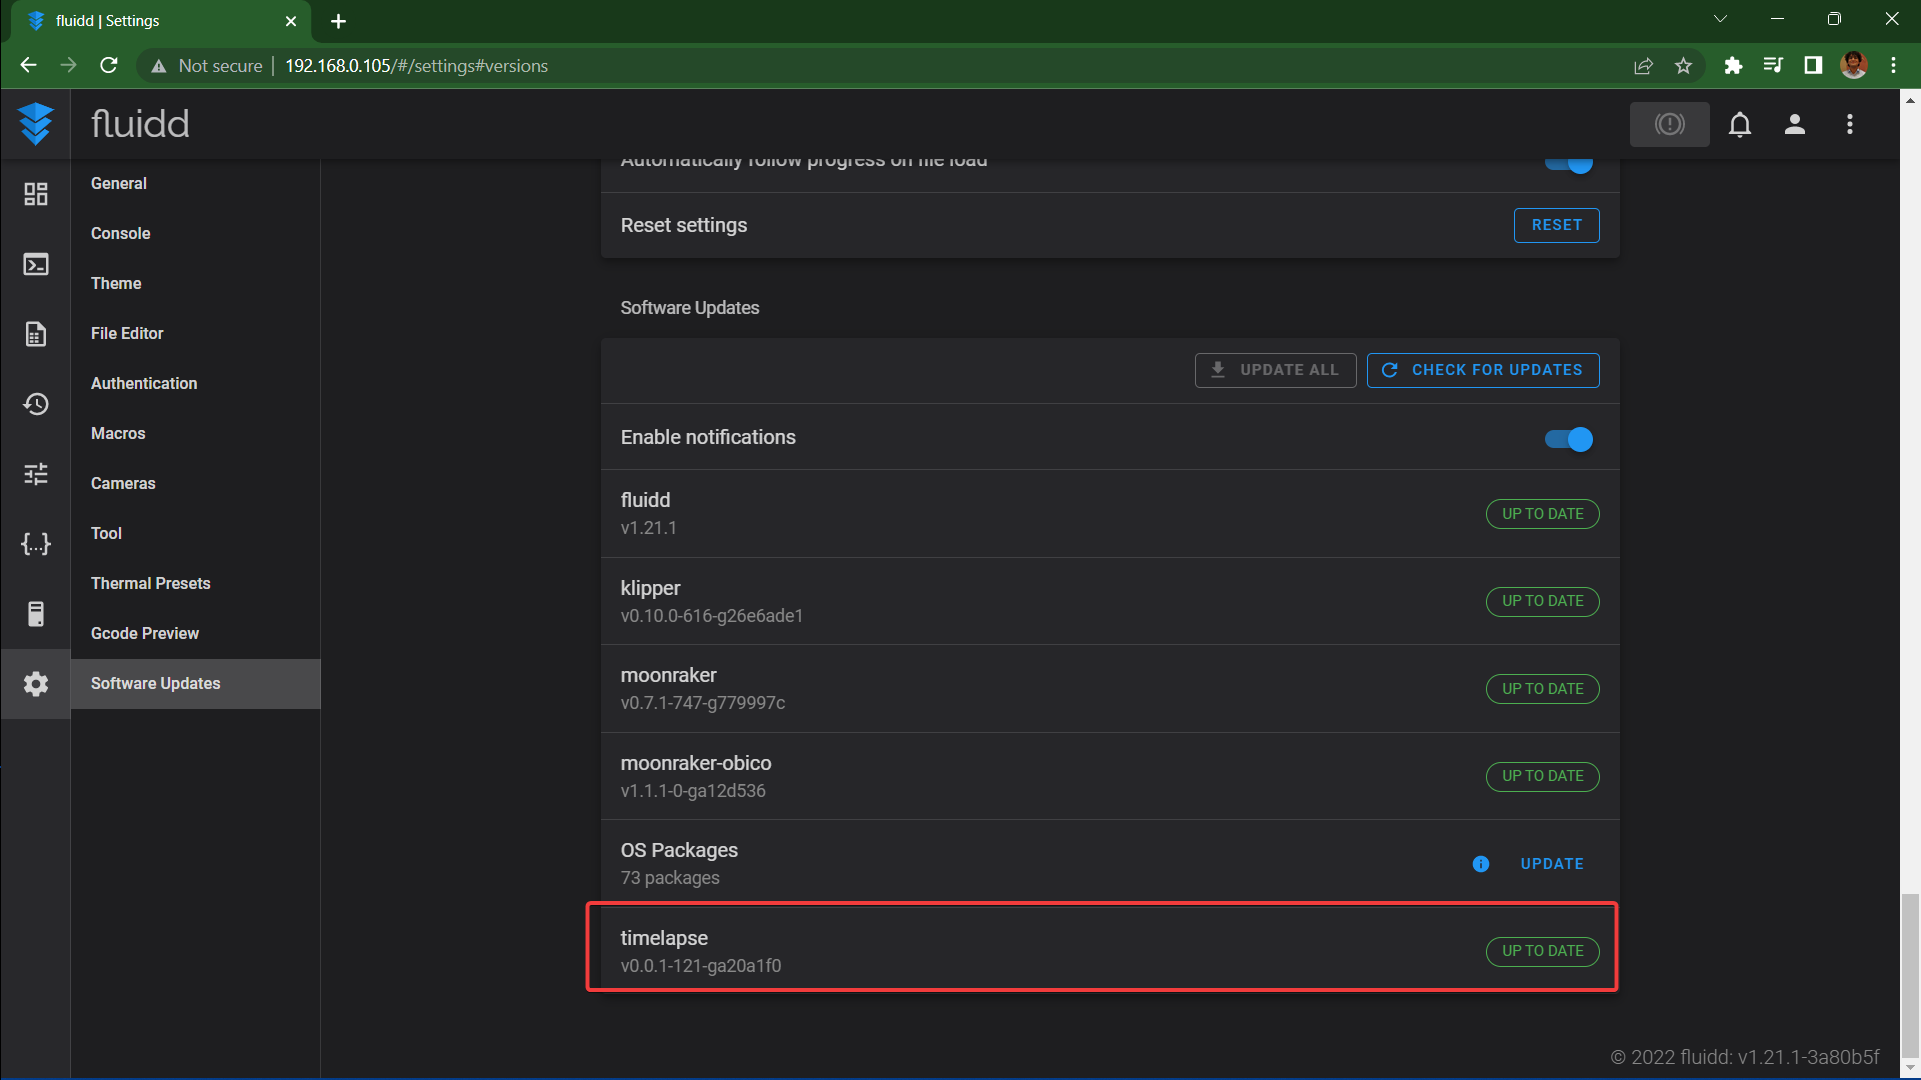
- You can now update the timelapse functionality directly through Fluidd.
Configure the timelapse Macro for your Slicer
This step will add a timelapse command in your Gcode files from the slicer. It'll indicate the Klipper firmware to take a snapshot of the ongoing print.
- Go to the Moonraker timelapse configuration website.
- Copy the code under the Define the Gcode Macro section.
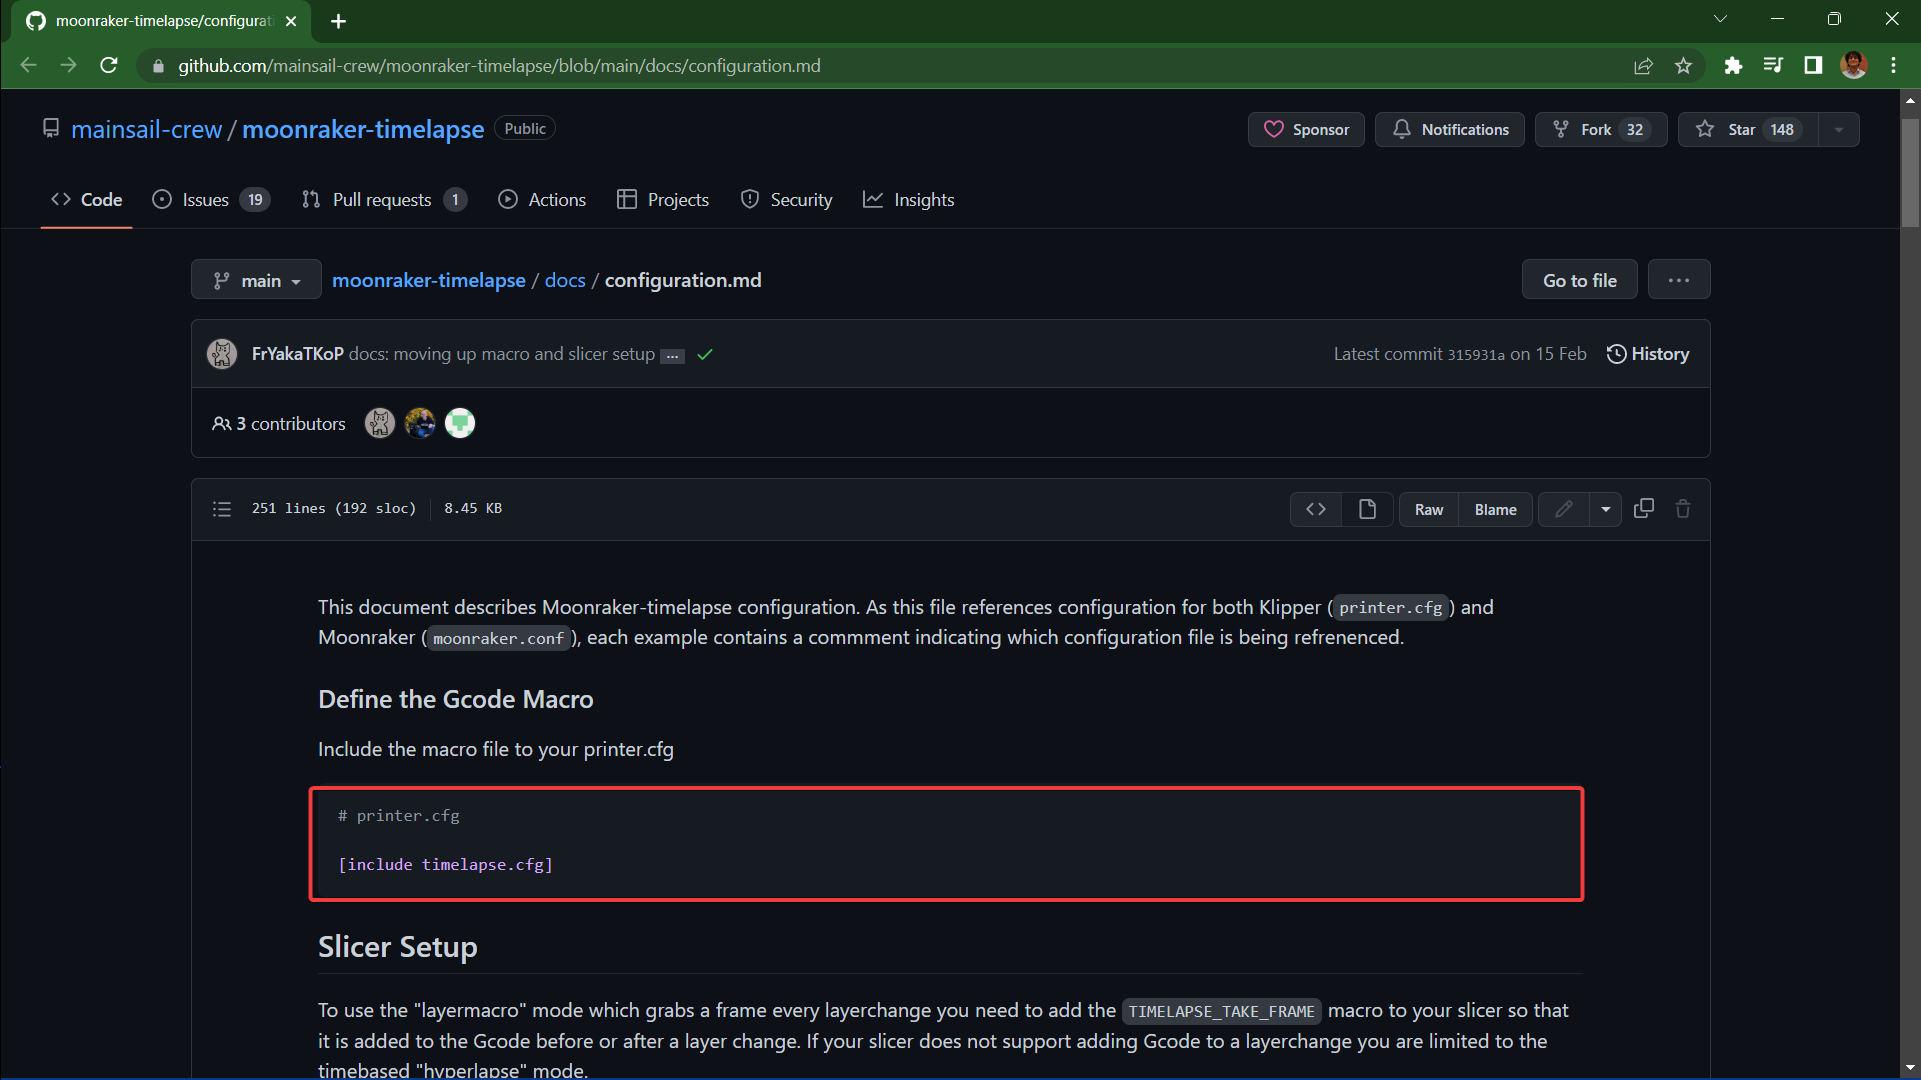
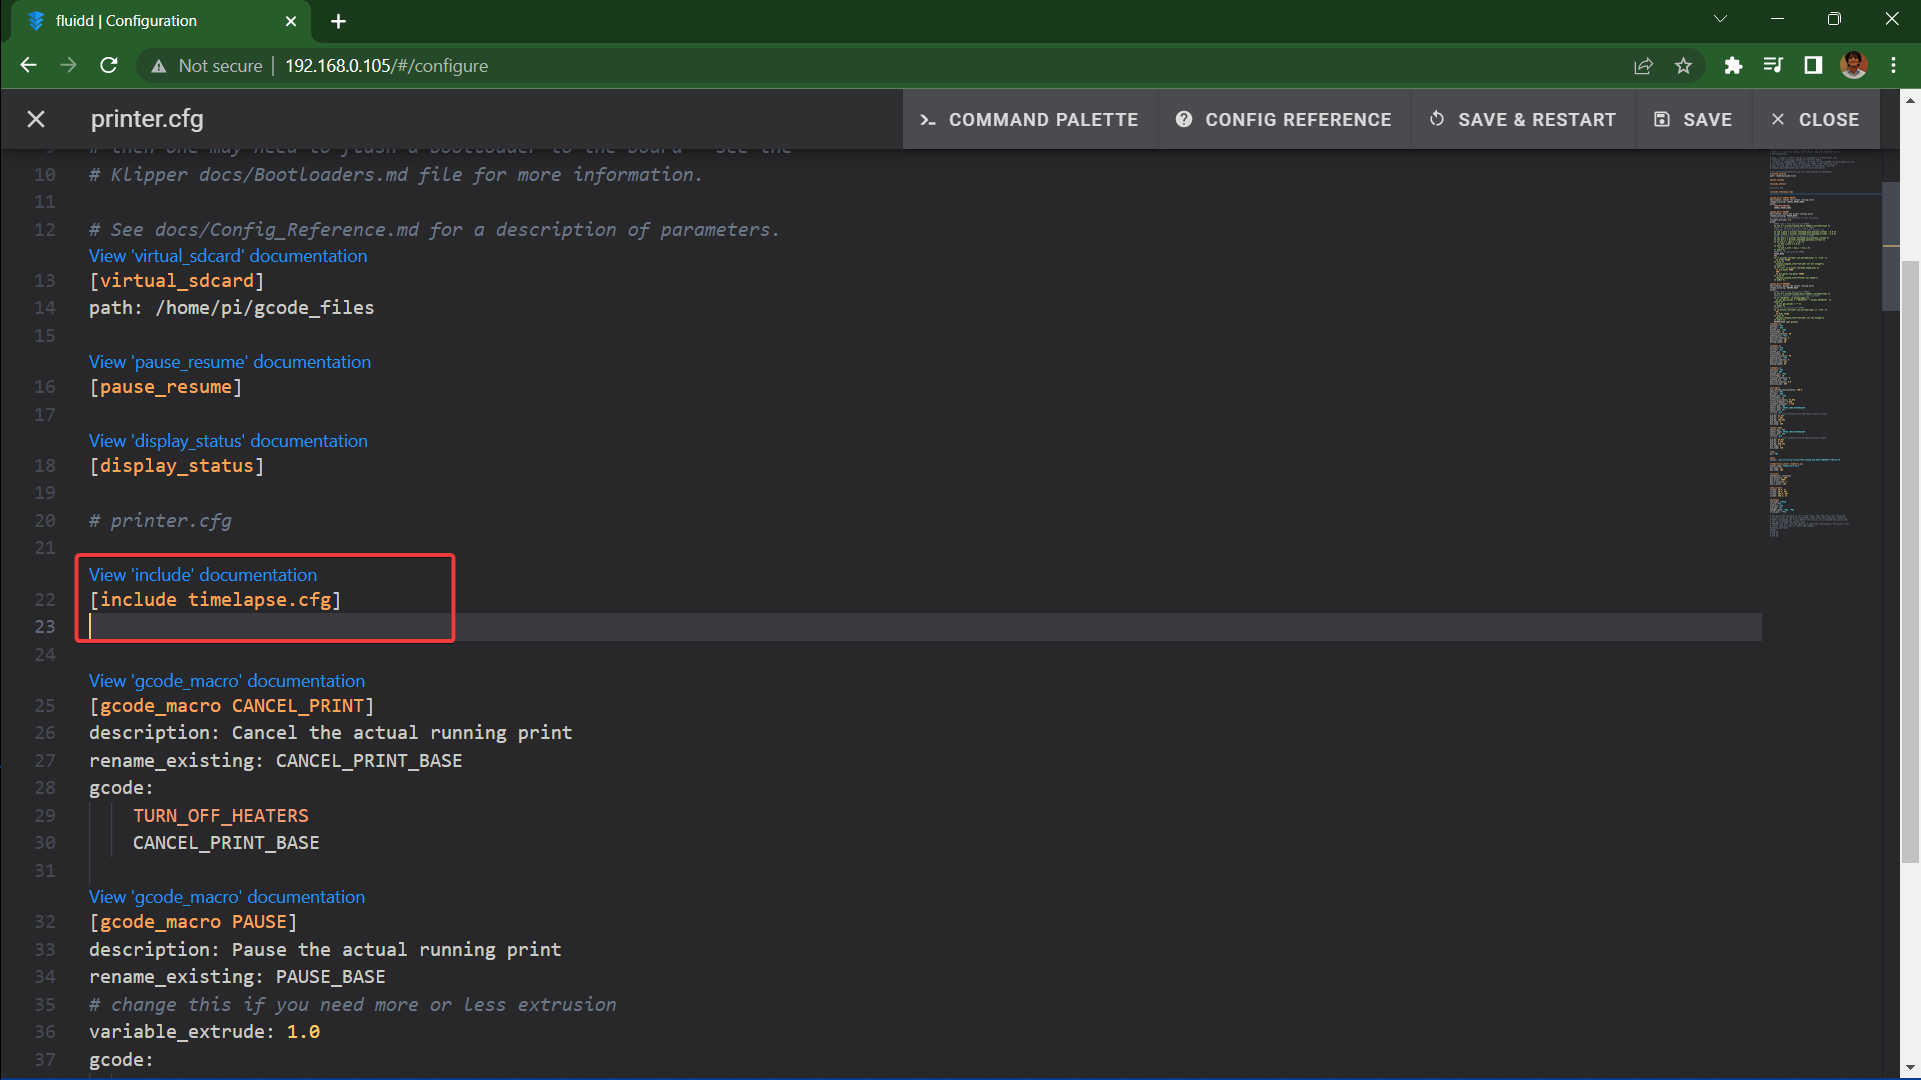
- Go to the configuration section on your Fluidd interface and open the printer.cfg file.
- Paste the code to the printer.cfg file and save and restart.
- Open your 3D printing slicer on the desktop.
Note: For this guide, we're using Ultimaker Cura. But, if you're using some other slicer, you can refer to the Moonraker configuration website.
- Click on Extensions -> Post Processing -> Modify G-Code.
- Navigate to Add a script -> Insert at layer change -> G-code to insert = TIMELAPSE_TAKE_FRAME
Cura will now insert this command after every layer indicating the Klipper firmware to take a snapshot after layer change.
Activate the Time-Lapse Component
- Copy the code under Activate the Component section on the configuration website.
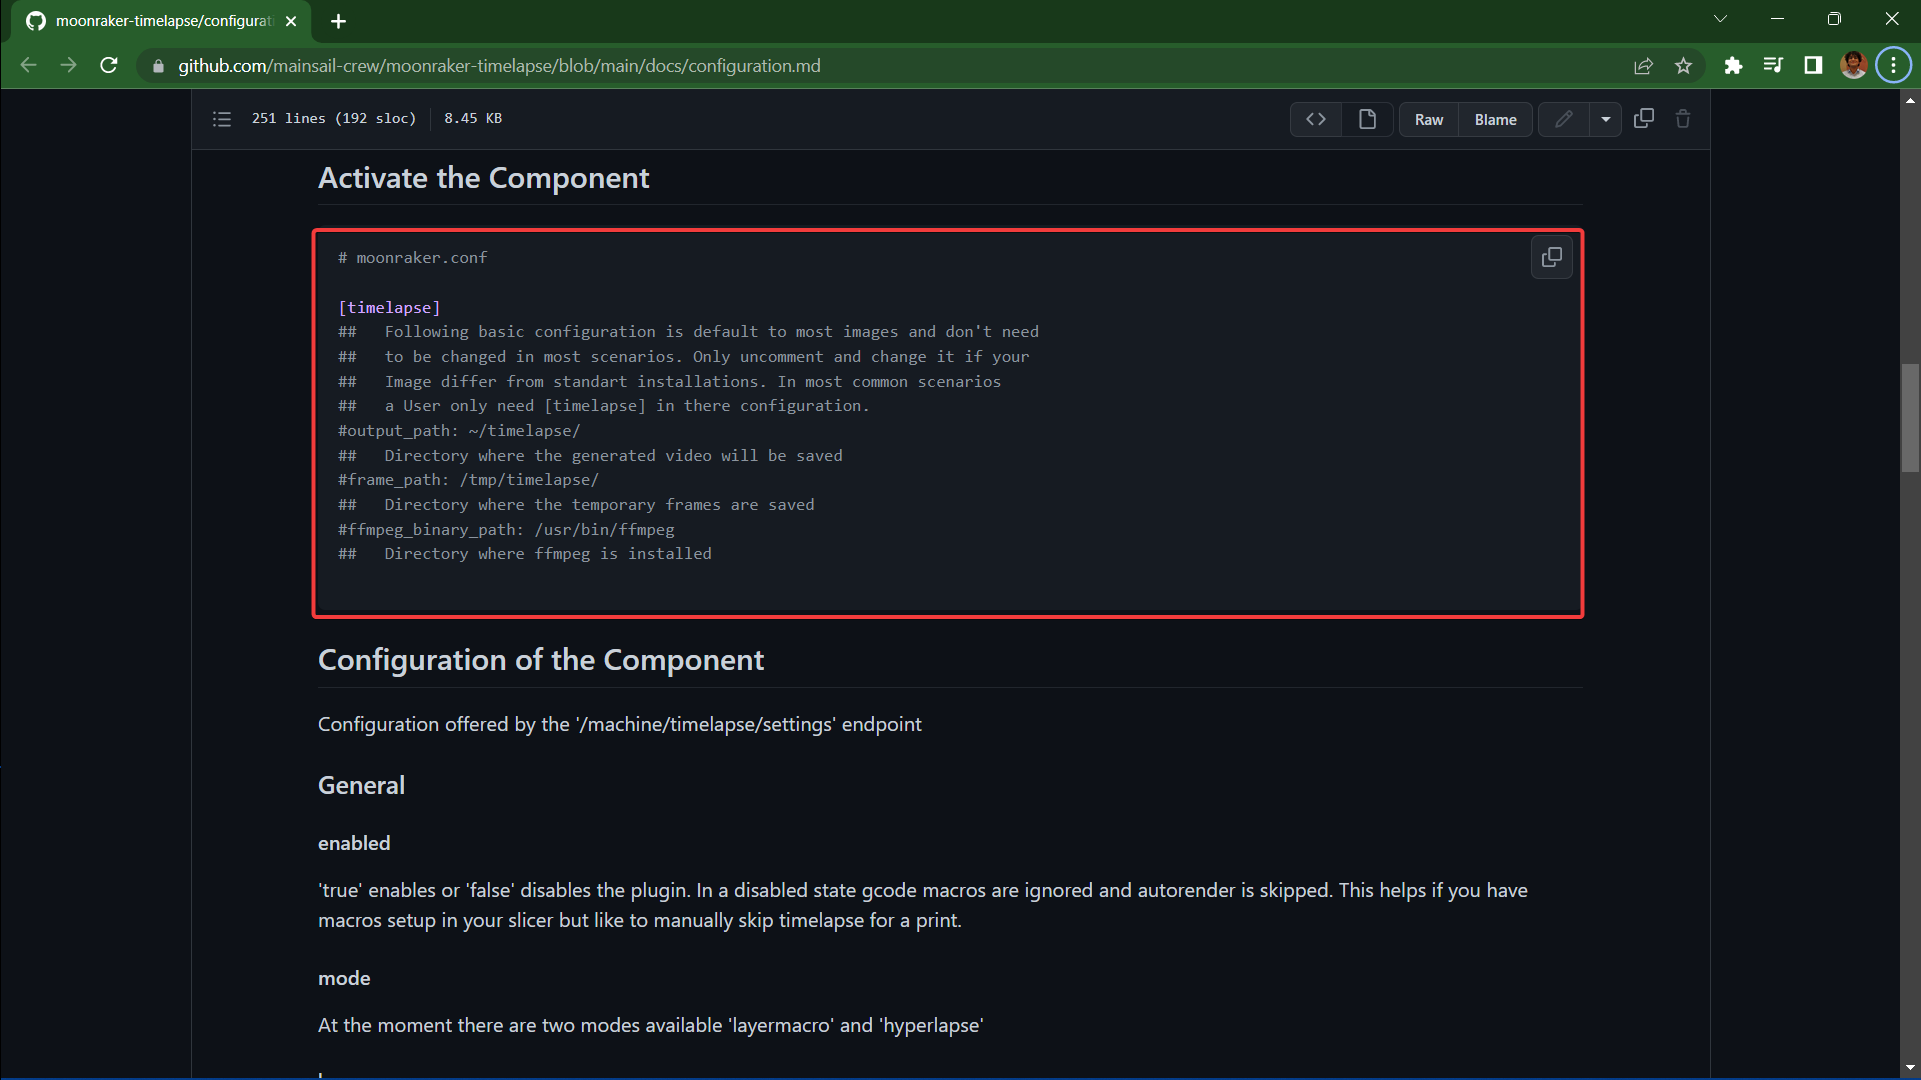
- Go to the moonraker.conf file in the configuration section.
- Paste the code and save and restart.
- You'll now notice a separate timelapse section in the Menu bar of your Fluidd interface.
You've successfully installed time-lapse on your Klipper 3D printer. Now, you can either use it as it is or configure it according to your workflow needs. In the next section, we'll go over some of the neat functions of the Klipper timelapse and understand how you can configure them.
Features in Klipper timelapse
Render Settings
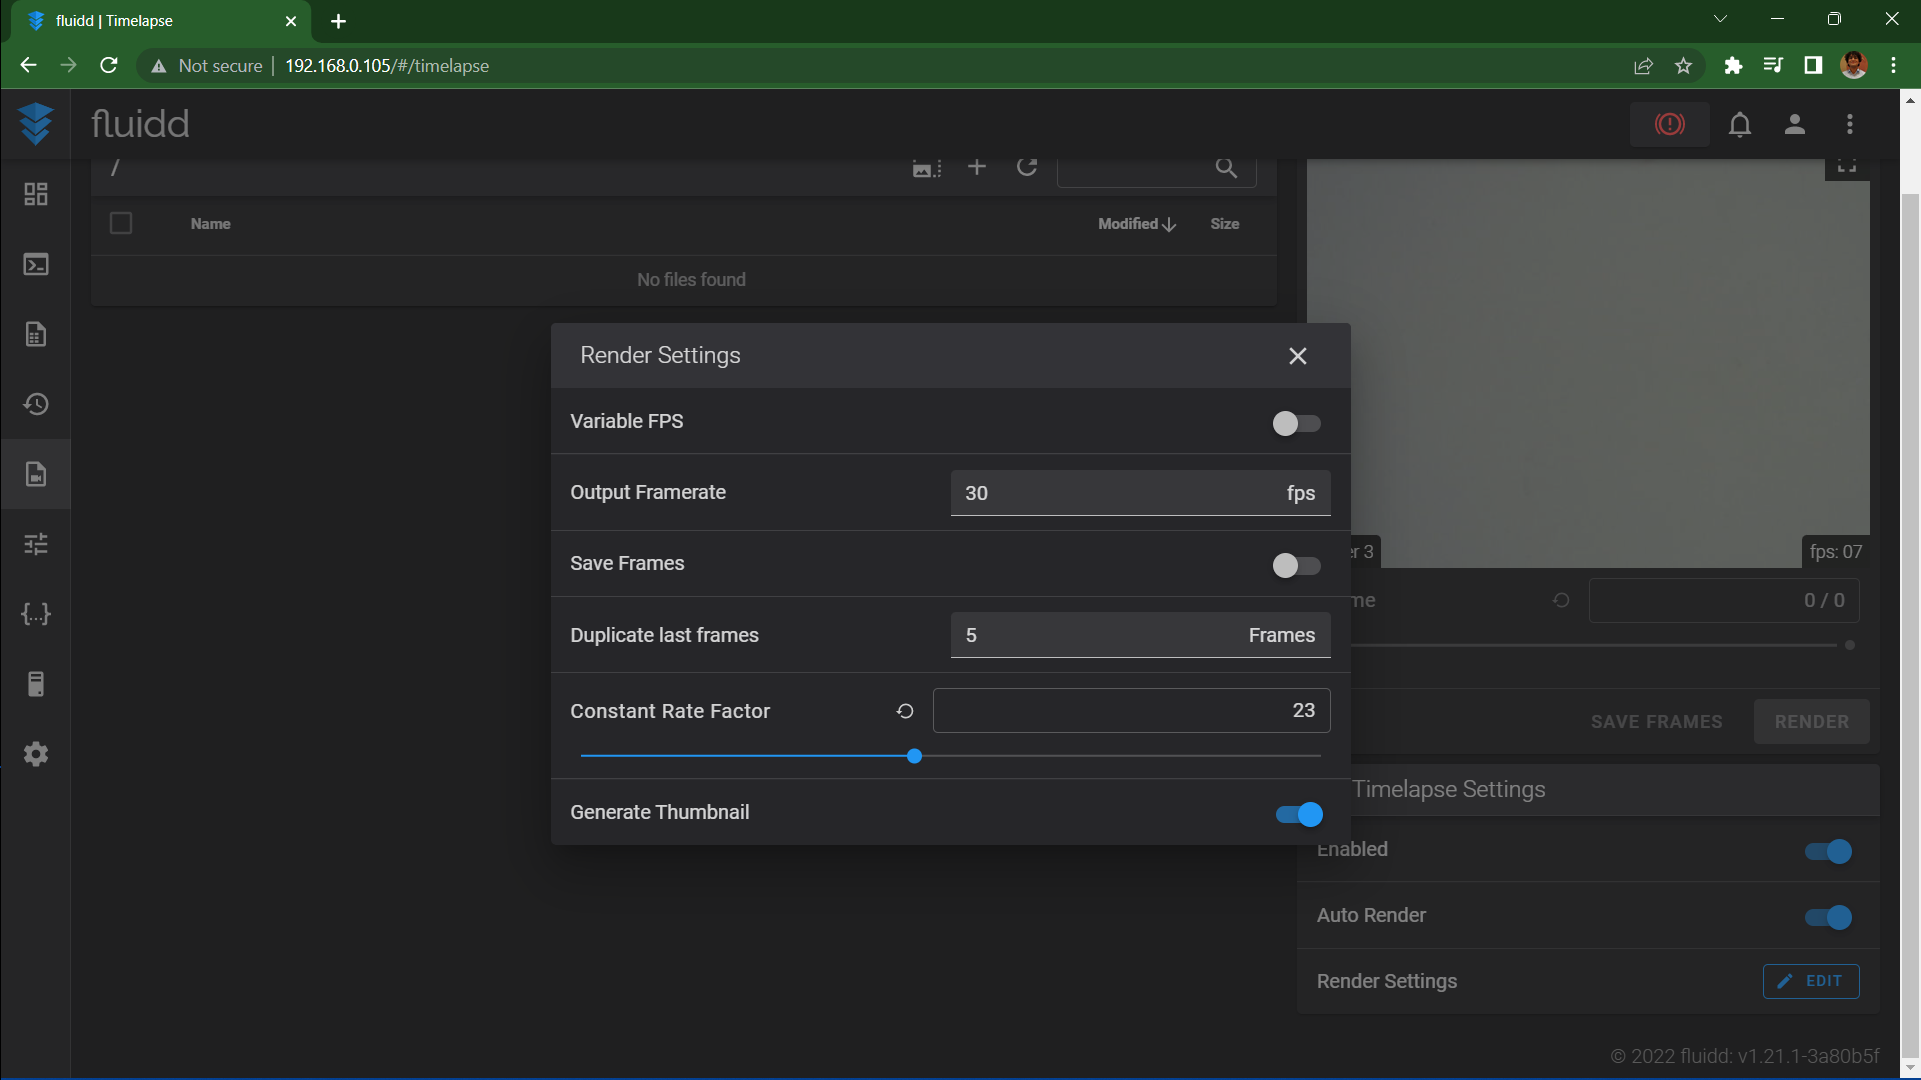
Render settings allow you to control the final output of your Klipper timelapse video. The frame rate indicates the number of shots per minute that'll be included in the final video. A higher frame will give you a smoother video as it combines multiple snapshots in a single minute. For introductory purposes, a 30 fps rate is adequate for good results.
You can also save the frames/shots using the timelapse option. This function lets you edit these snapshots in your editing software and create a customized timelapse video.
The duplicate frame rate and constant rate factor settings can be left as they are. They don't significantly affect the final output and can be unnecessarily confusing for beginners.
Finally, the timelapse plugin can auto-generate a thumbnail for your video and embed it on the file. It's handy to recognize your 3D prints quickly, and it would be helpful if you keep it enabled.
Camera Selection and Mode
If you have a multi-camera setup, you can select a particular camera to shoot your timelapse videos. It's a neat feature, using which you can choose a primary camera for streaming your video and a high-resolution one for recording timelapses.
The camera mode lets you switch between the Gcode Macro command and a Hyperlapse setting. The Gcode macro uses the macro command we configured earlier to shoot a snapshot of every layer.
The Hyperlapse mode comes in handy if your slicer lacks the support for inserting custom gcode scripts. You can set the time duration of snapshots to be recorded, let's say 20 secs. The timelapse plugin will record a shot every 20 seconds and combine them all in the final video.
Park Head (Octolapse)
The Park head functionality lets you record seamless timelapse videos without the constant movement of the print head in between. It 'parks' the extruder and the print bed at a specific location at the instance of every snapshot. This action creates a smooth timelapse video similar to an Octolapse and makes it seem like the object appears out of the air.
You can configure various settings under the Park head section, which can be a separate article altogether. It can take extensive calibration and configuration to get smooth videos with the PAr head feature. So, you can skip it if you're content with simple timelapse videos.
Tips and Tricks for Getting Good Timelapse Videos
So far, we've configured and looked at some of the features of Klipper's timelapse functionality. But, you can further fine-tune your camera and shoot environment settings to obtain a high-quality timelapse video. Let's look at some useful tips.
Lighting
Ensure your 3D printing area is adequately illuminated. Avoid any light source behind your 3D printing bed, and try to light the front side of your 3D prints. If you have the provisions, a two-light setup at the front should suffice for recording a well-lit timelapse video. Otherwise, use a single light source to illuminate right beside the camera, illuminating your 3D print from the front.
Camera Position
Position your camera such that it captures the entire 3D printing process. A top-down view is helpful for small prints but will limit you when printing tall objects. For tall prints, position your camera to cover the entire height of your 3D-printed model. Positioning your camera perfectly will take trial and error, but it will significantly help you shoot excellent-quality videos.
Focus
Ensure your 3D prints are always focused and you get a sharp and clear image of them. If you're using a fixed-focus webcam, try printing a focus adjustment adaptor to quickly configure the camera's focus. A focused video will help you create a crisp timelapse video and will be helpful in quickly diagnosing print failure and poor surface quality in your 3D prints.
Next Steps
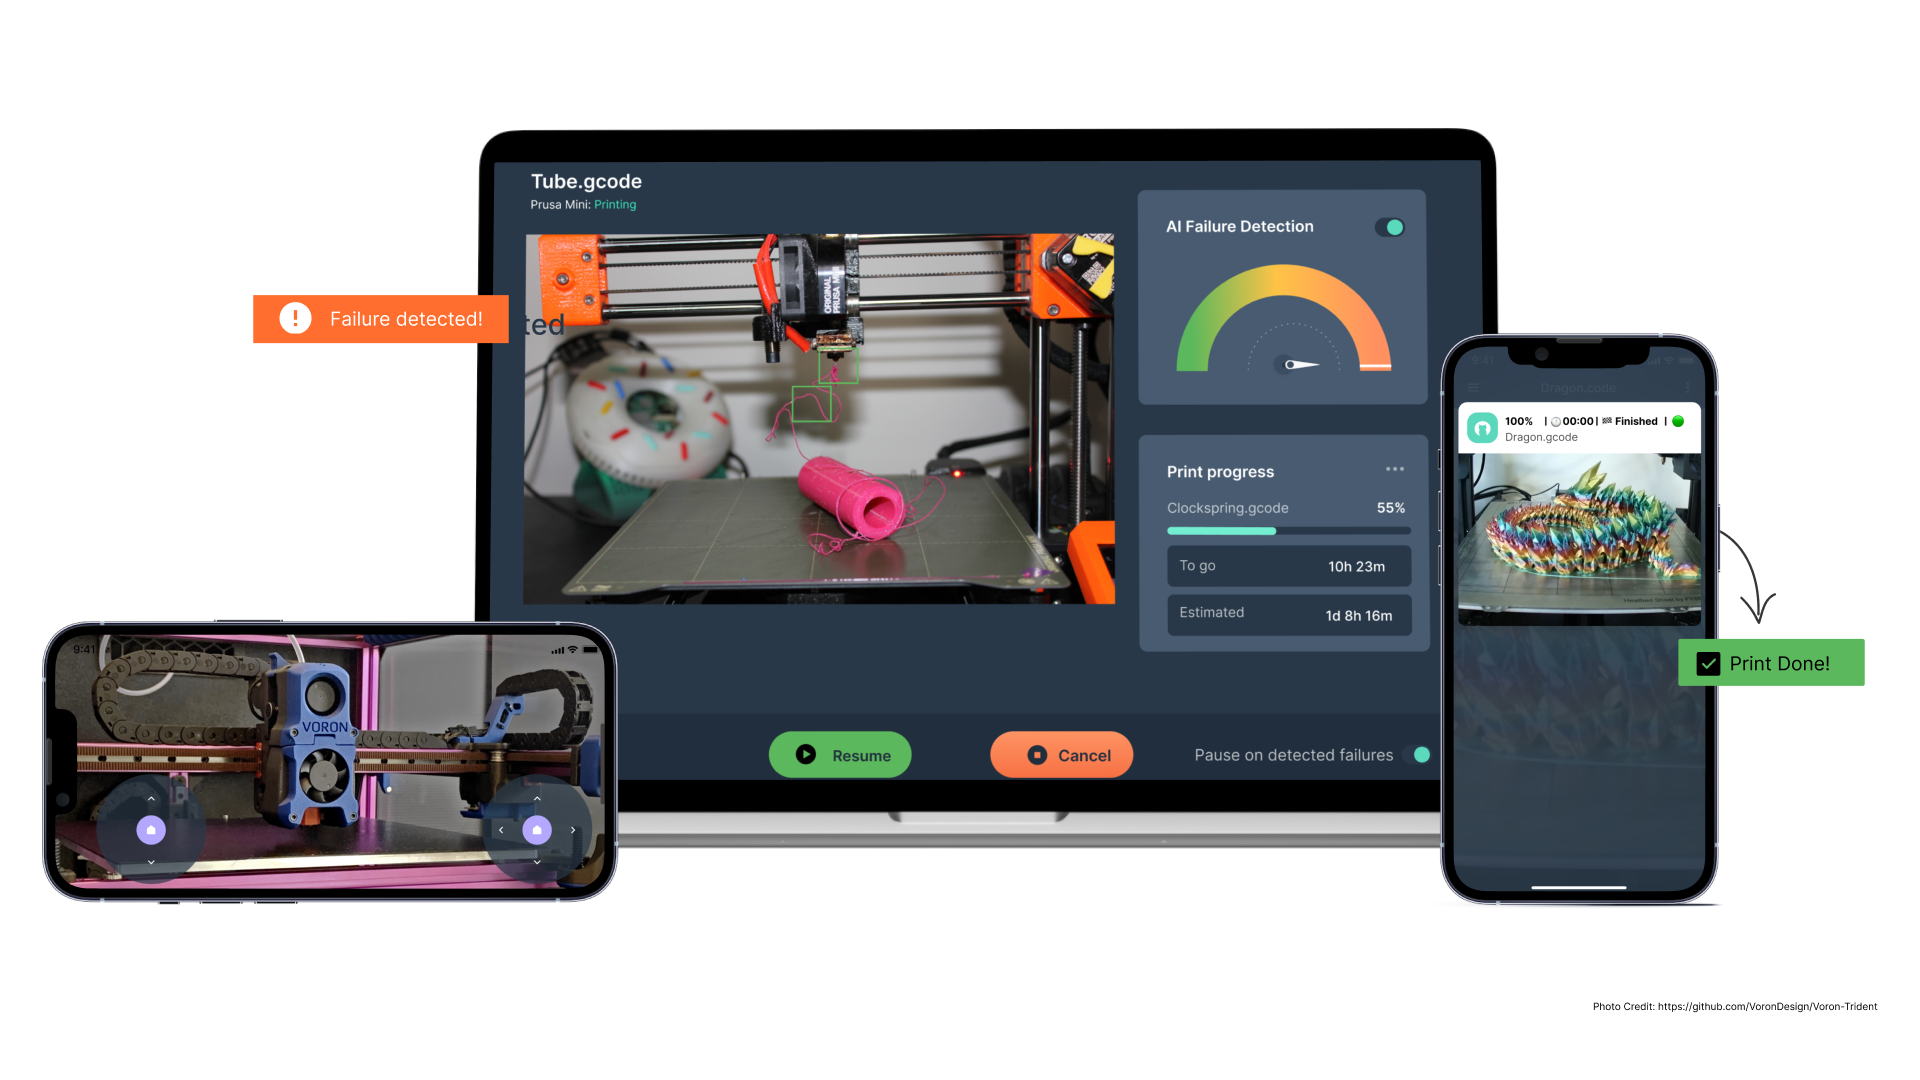
Shooting a timelapse video is one of the many exciting things you can do with Klipper firmware. Since you've now set up a camera to record timelapses, you can also use it to remotely monitor and control your 3D printer using the Obico software.
With Obico, you can control your 3D printer from anywhere in the world, on any device, in real-time. Furthermore, Obico features AI failure detection functionality to detect print failures and instantly notify you about them. Obico also automatically shoots and keeps timelapse videos for quick reference.
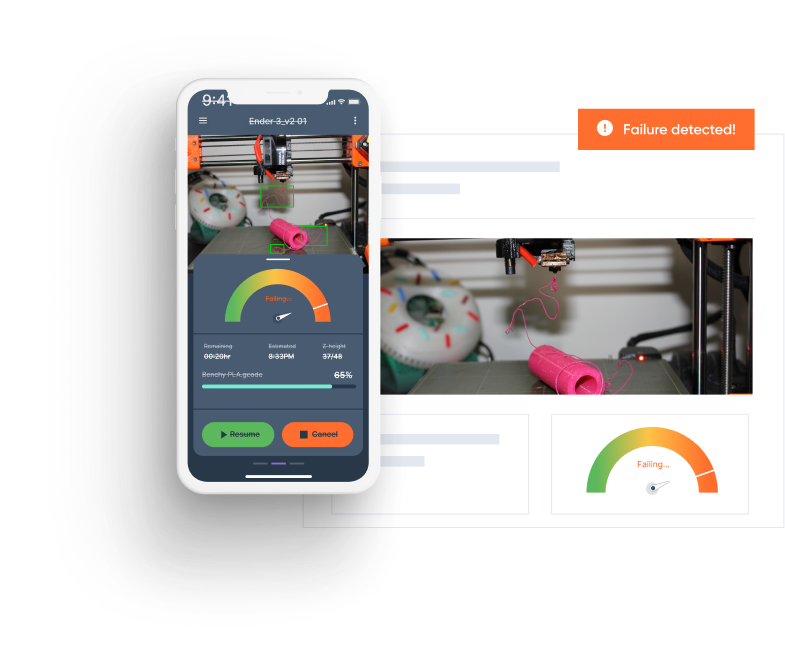
Obico can save you from several failed printing hours and loads of wasted filament material. It can be handy if you have multiple 3D printers or operate a 3D printing farm. So, along with the Klipper time-lapse, you can use Obico's AI failure detection and remote print monitoring to enhance your 3D printing experience. Obico's failure detection uses machine learning and your camera to monitor your prints for you, and if a failure is detected, Obico will notify you via sms, email, discord, etc..., or it can even stop the print for you. Get started for free.