12 Best Free 3D Printer Test Models

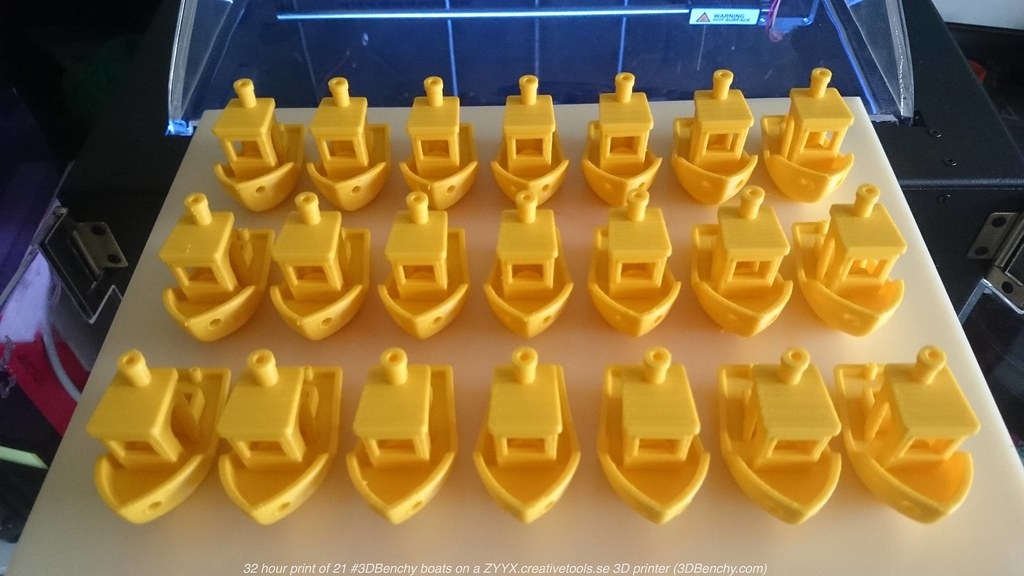
Photo Courtesy- 3D Benchy via Flickr
The 3D printer calibration is crucial to ensure that your machine creates parts as intended. To 3D print your part as closely as possible to the original design, you need to adjust the 3D printing temperatures, material flows, tolerances, and many other factors.
There are several calibration models you can use to find and tune your print settings. But not all of them are needed, and to be honest, some of them are not even good models.
This article aims to do two things. We want you to adjust your machine and make it as accurate as possible so you can make the best 3D prints. And we want to help you find the best calibration models among the hundreds that are already out there.
This will help you save valuable printing time, materials, and work while getting the best calibration results possible. So, without further ado, let's get your 3D printers squared away!
Test Prints
3D Benchy
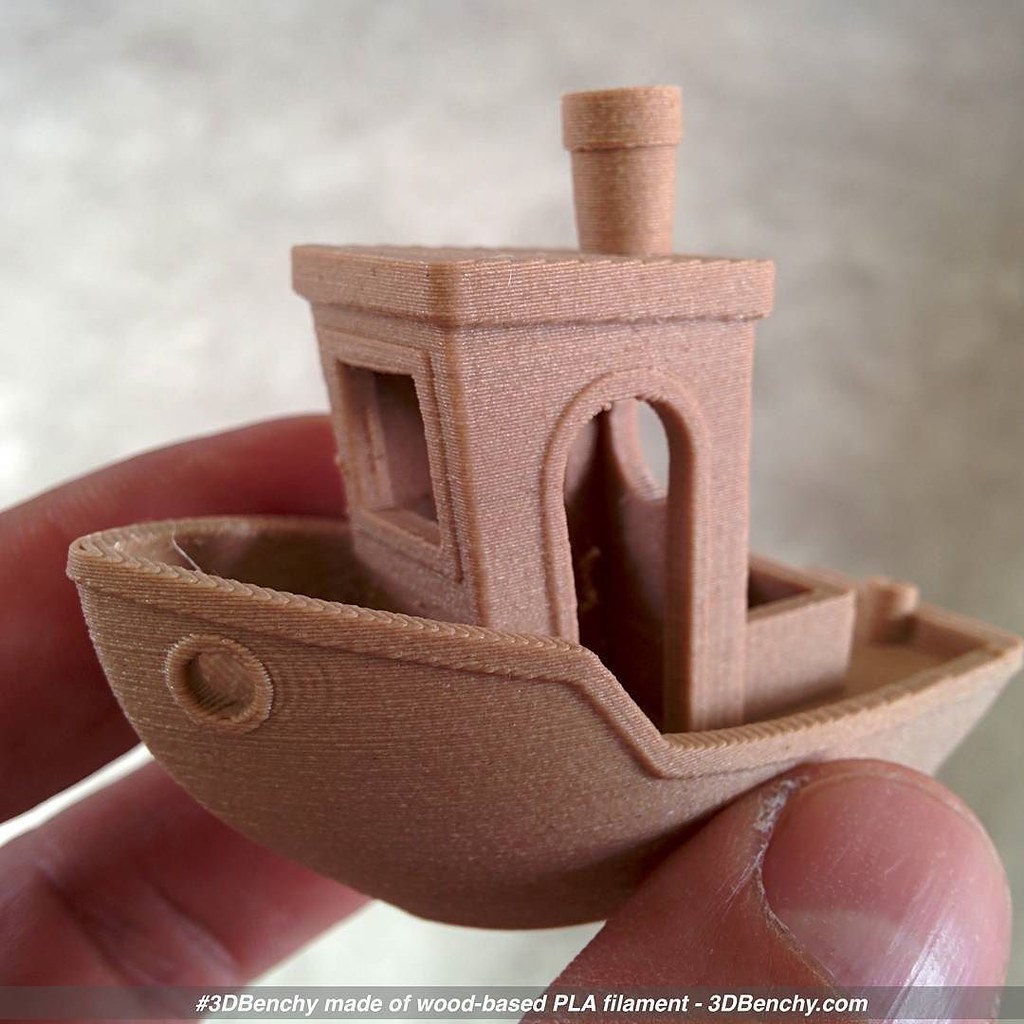
Photo Courtesy- 3D Benchy via Flickr
The 3D Benchy Boat is one of the most famous test models. It's meant to test several important parts of your printing process, but once it's done, it's also a nice piece to show off.
Designed by the Creatives Tool team, the 3D Benchy has several versions. The most basic boat has features to test your printer's retraction, bridging, and Z-axis parameters. On the first layer, it has a fine logo that shows how small your 3D printer can print.
It takes about two to three hours to finish and shows you what problems your printer might have. Because it's so popular, it's easy to share your 3D Benchy on community boards and get help with your 3D printing problems.
Every person who uses a 3D printer should have at least one Benchy, and after that, the sky's the limit. Plus, if you're into the whole speed printing thing with the latest Klipper firmware, Bambu, and the Voron printer, there's an entire Speedboat community dedicated to 3D printing the Benchy Boat at the highest speed possible.
- Where to find it - Thingiverse
- Who designed it - CreativeTools
Calicat
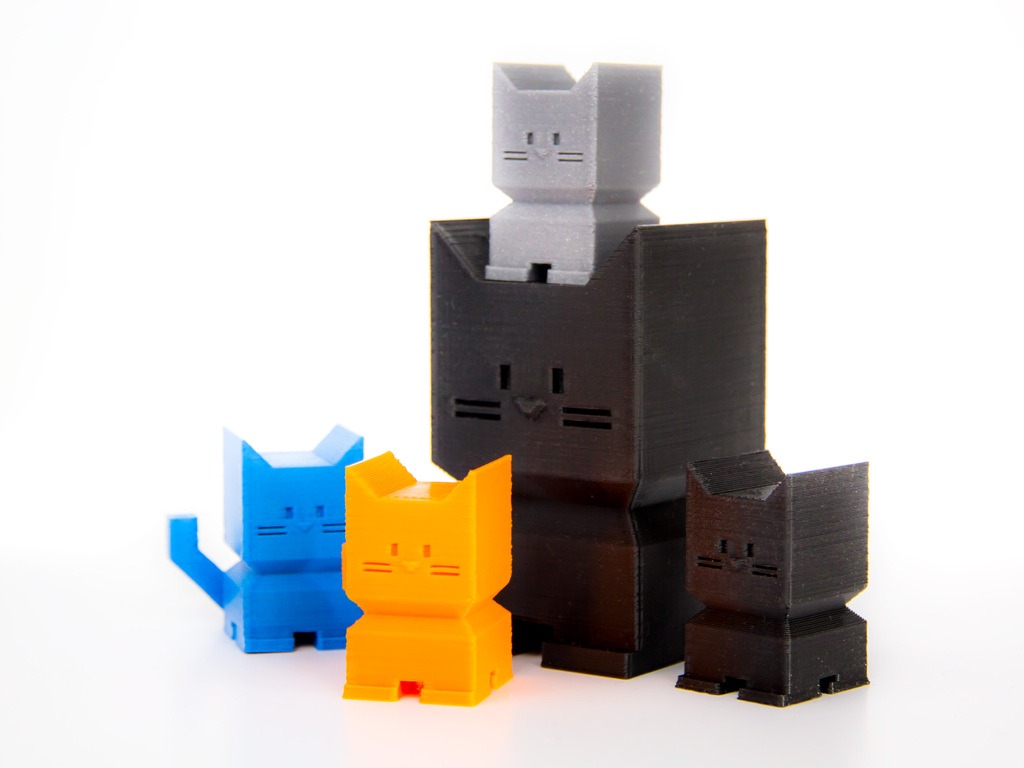
Photo Courtesy- Dezign via Thingiverse
Calicat is a cute 3D printer test model for all cat lovers. It's a small, easy print that shows how accurate your printer's measurements are, how well it retracts, and how good the print quality is.
It has a body height of 20 mm and a total height of about 35 mm. The cute cat will print in about an hour, and it's a great way to test your printer's calibration quickly. You can print it instead of the XYZ calibration cube and start a collection of Calicat on your 3D printer bench.
The Calicat is a model that has been downloaded more than 400,000 times, so you can't go wrong with it. It's a great way to try out your new 3D printing material or add another cat 3D print to your collection.
- Where to find it - Thingiverse
- Who designed it - Dezign
XYZ Cube
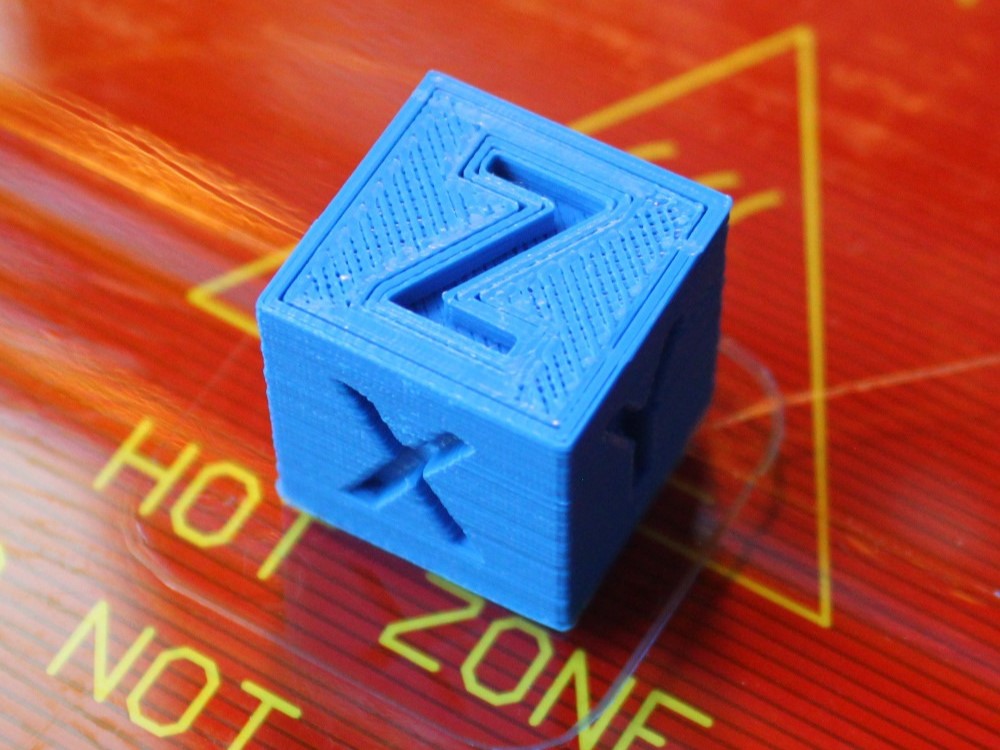
Photo Courtesy- iDig3Dprinting via Thingiverse
The well-known XYZ cube is a simple but useful test piece for 3D printing. It is a small cube that is 20 mm on each side and 20 mm high. Its main purpose is to see if your 3D printer prints the right size.
Some people's first test print after putting together their 3D printer is the XYZ calibration cube. The cube takes 20–30 minutes to print and gives you an idea of how precise, square and accurate the printer is.
If your cube is off by a few millimeters on each side, you know that your printer isn't very accurate. The benefit is that as the cube takes such a short time to 3D print, you can quickly fix and test your new settings. It makes the process of calibration easy and saves a lot of time.
You can also print the empty calibration cube to test the printer's extruder flow and wall thickness settings. The empty cube is an even faster print that quickly shows how well the printer can extrude.
- Where to find it - Thingiverse
- Who designed it - iDig3Dprinting
All In One 3D Printer test
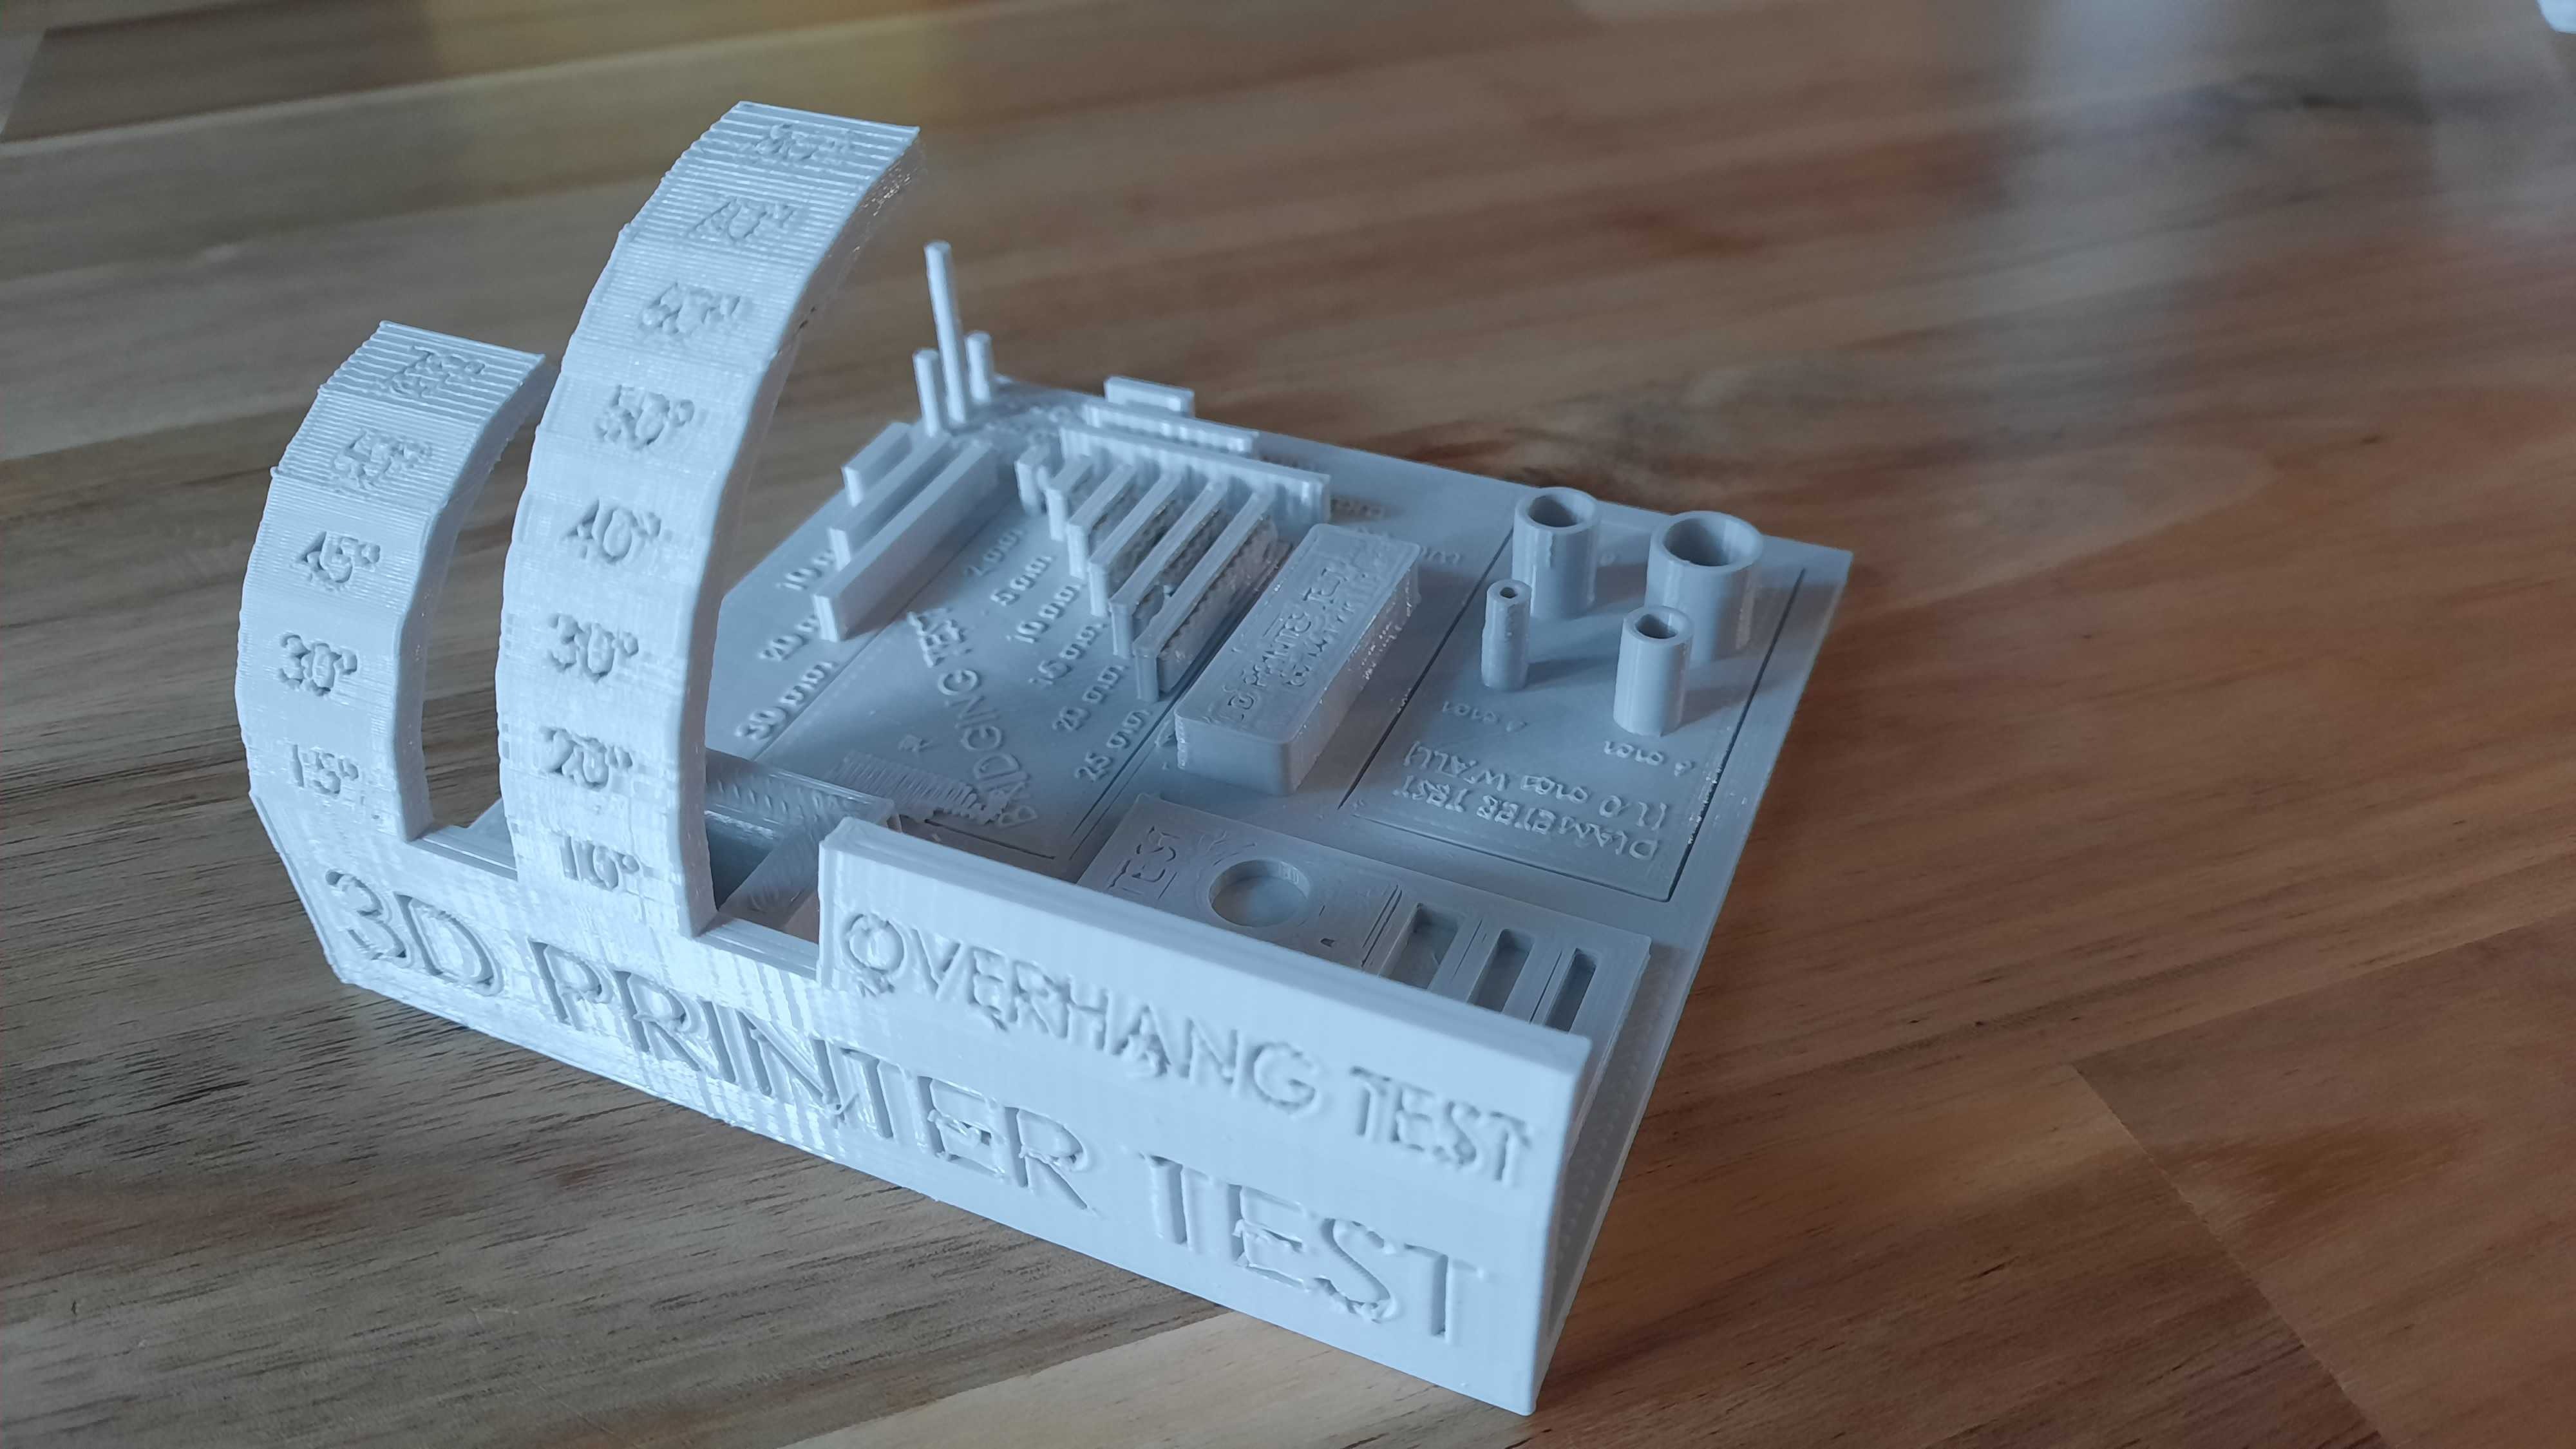
Photo Courtesy- gcadoret via Thingiverse
This popular test print probably deserves all of the likes and millions of downloads it has gotten. It combines several testing parameters into one neatly designed model. It makes it easy to test all of the settings on your 3D printer at once.
The All In One 3D Printer Test is a single design that includes a support test, a scale test, an overhang test, a hole test, a width test, and a bridge test. All of the tests are spread out well, and it's easy to check that the printing results are correct.
The overhang test goes up to 80 degrees and tests how far your printer can print without support. You have the bridging tests, which look at how long a bridge you can print in 3D without changing the quality of the print very much.
The diameter test can be used to test the ovalness of the printer and verify the tightness of your printer's belts. The 3D model takes a while to print, but it saves you the trouble of printing many test pieces.
If you want to save some minutes, you get everything in a single 3D print test piece, and there's even a Mini All in one 3D printer test.
- Where to find it - Thingiverse
- Who designed it - majda107
Temperature towers
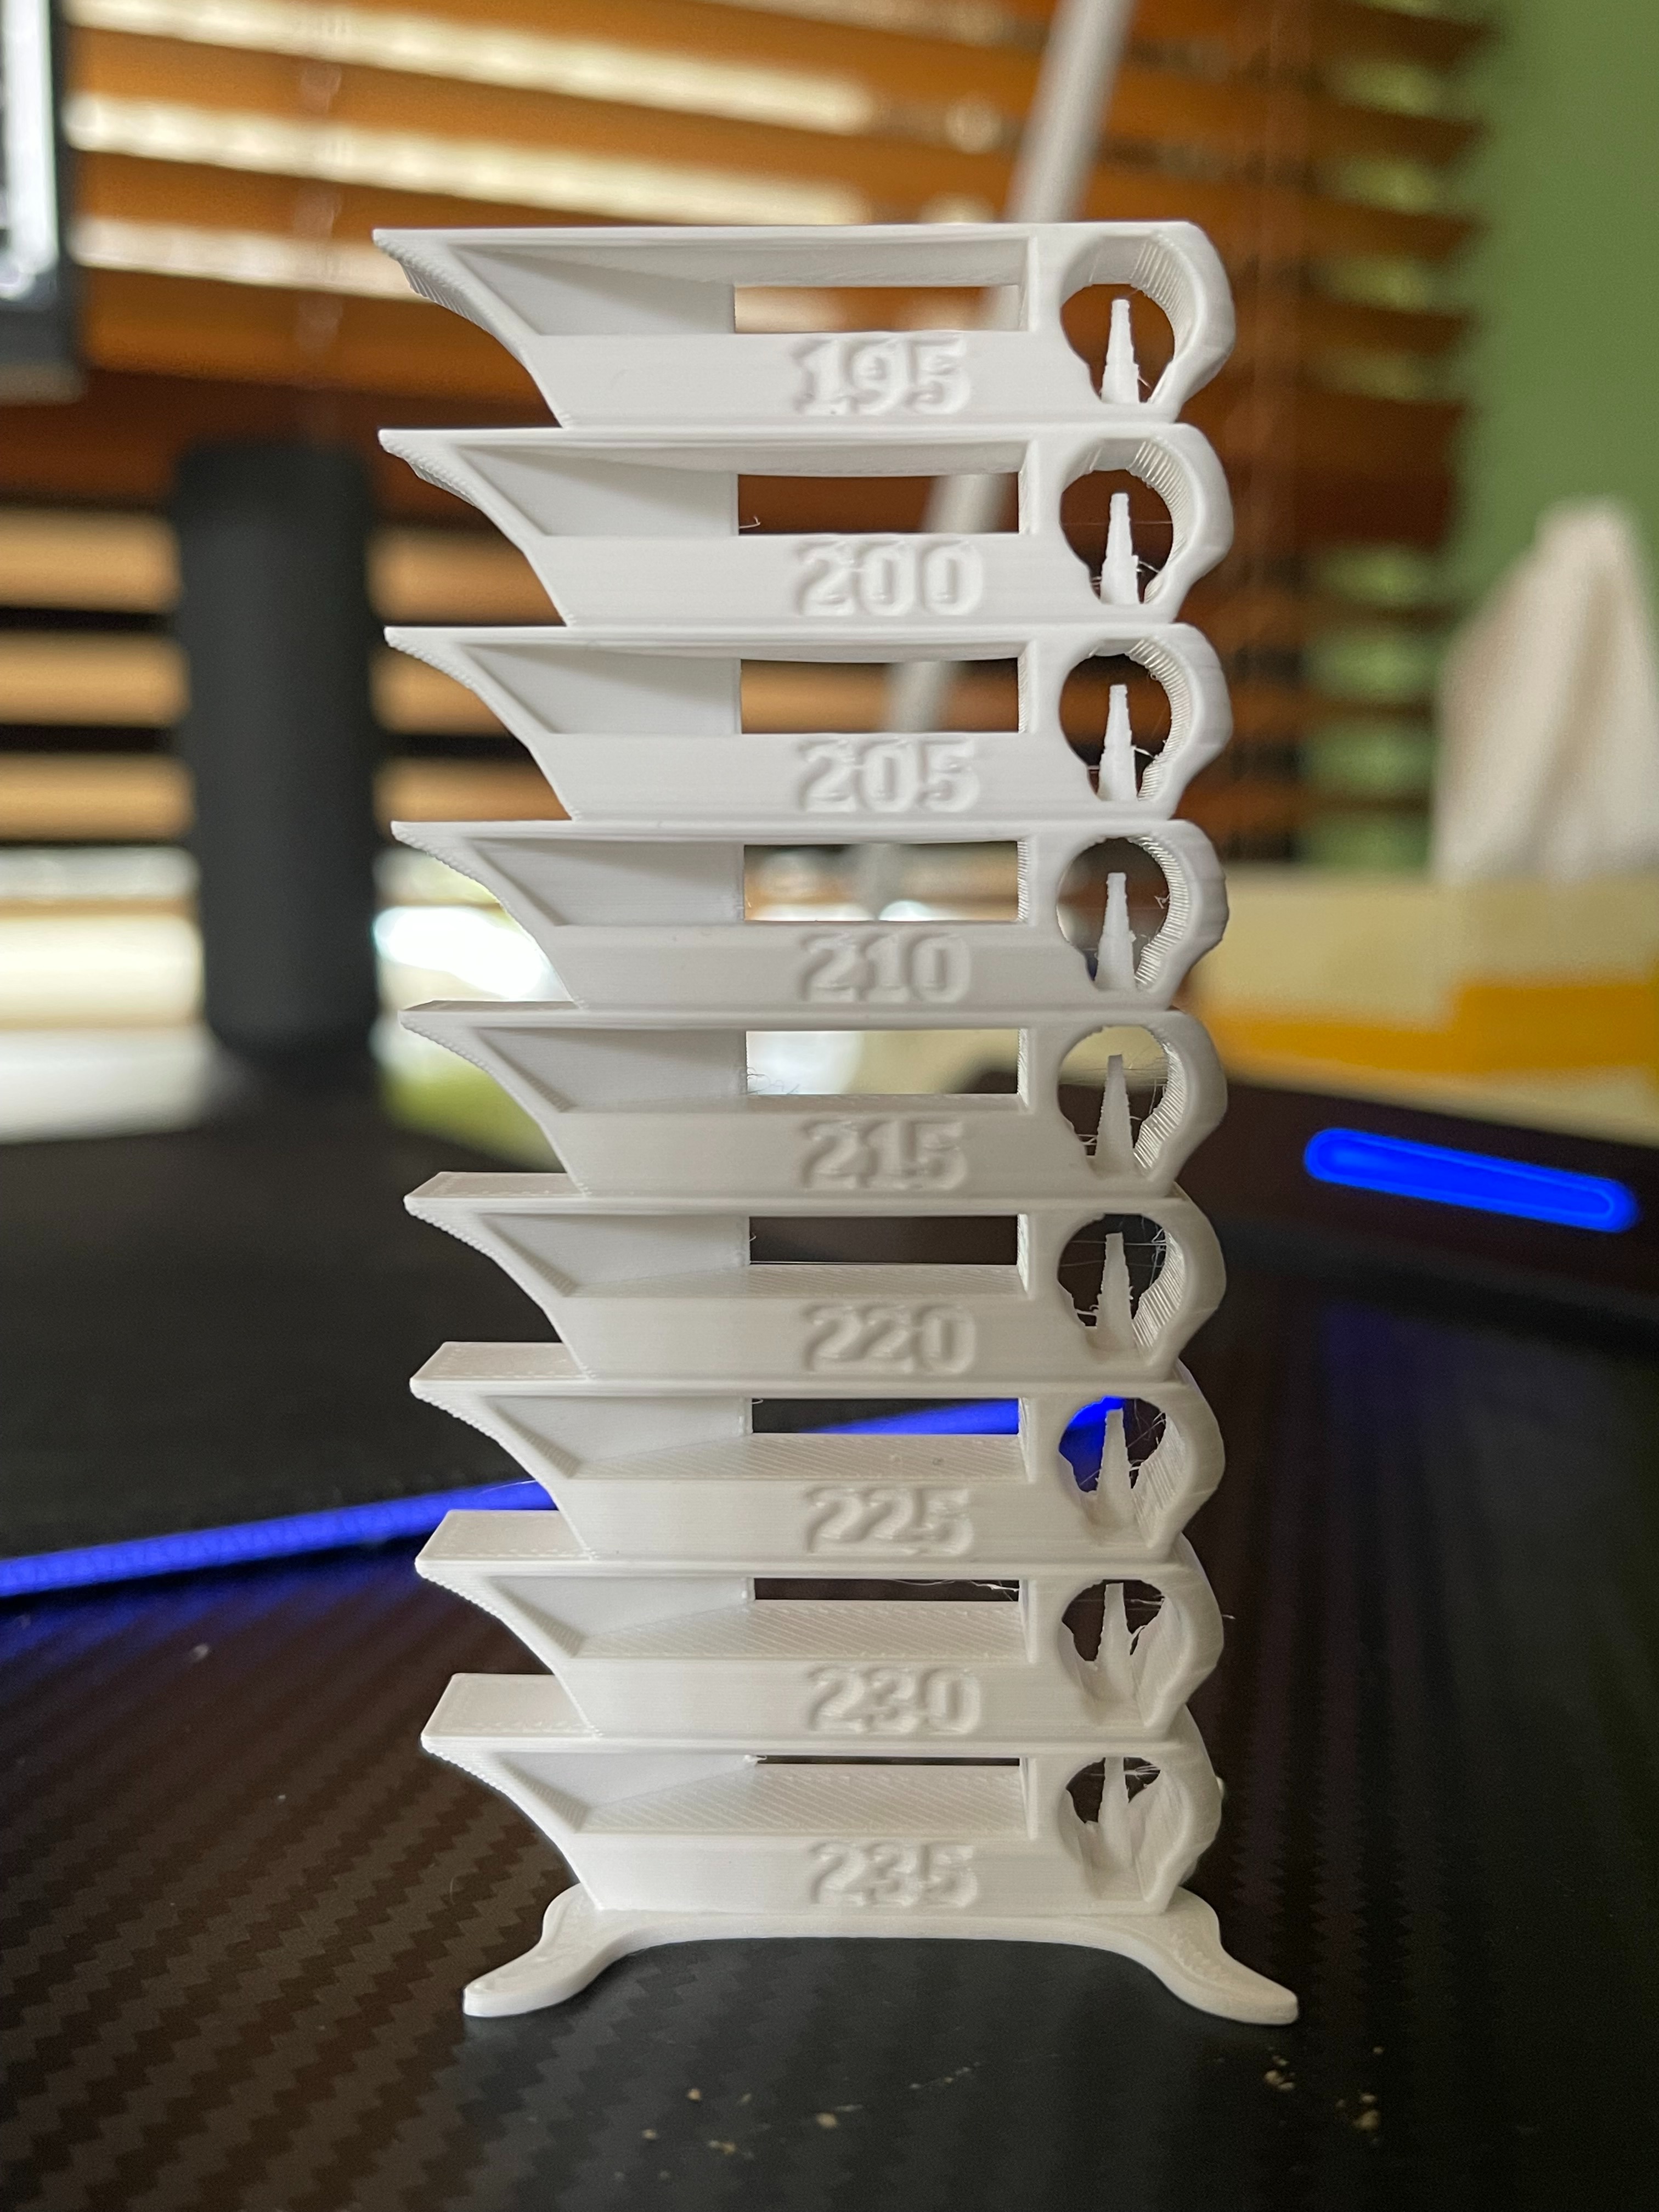 Photo Courtesy- markmil via Thingiverse
Ever thought about what the exact printing temperature of your 3D printing filament is? Changed brands, or do you have trouble printing? In such cases, a temperature tower comes in extremely handy.
A temperature tower is meant to help you figure out the exact printing temperature for your material. Manufacturers usually give a wide range of temperatures at which you can 3D print. It can range from 30 to 40 degrees, and it can be hard to figure out the exact printing temperature.
A temperature tower is made up of different parts that are all meant to be 3D printed at different temperatures. It helps you see what temperature gives you the best quality print. Just add a small Gcode instruction to your 3D printing slicer, and you're good to go.
You can 3D print a number of different temperature towers. Some are simple vertical designs, and others have pretty customization options. The Smart Compact Temperature Tower by gaaZolee on Thingiverse is our favorite.
Their design can be 3D printed quickly and easily, and it gives you a range of about 30 degrees. There are also built-in retraction and bridging parameter tests, so you can find out which temperature settings give you the best quality for these printing parameters.
- Where to find it - Thingiverse
- Who designed it - gaaZolee
Retraction Test
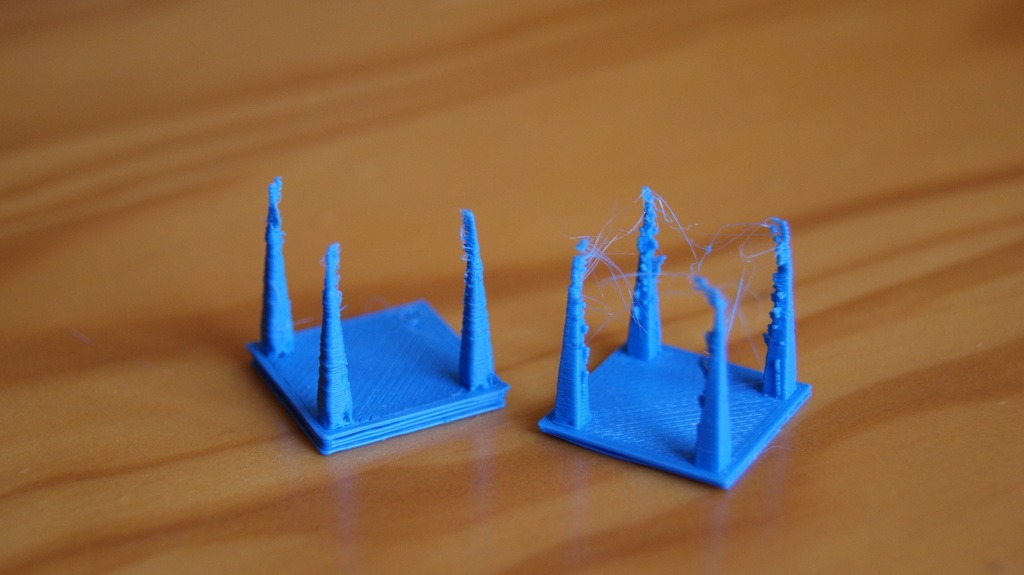
Photo Courtesy- BravusMan via Thingiverse
The Retraction Test Model is a quick 3D print that you can use to test your 3D printer's retraction settings. It checks for strings, blobs, zits, and any other problems with retraction.
Most tests of retraction use simple models with two straight, vertical towers. The test makes sure that when the nozzle hops from one tower to another, the filament is pulled back as it needs to be.
The retraction test shows how the slicer's retraction distance, retraction speed, and filament primer settings work. It's a model that's easy to print, and you can find different versions of it. A retraction test should be done every time you load new material.
- Where to find it - Thingiverse
- Who designed it - deltapenguin
Clearance test
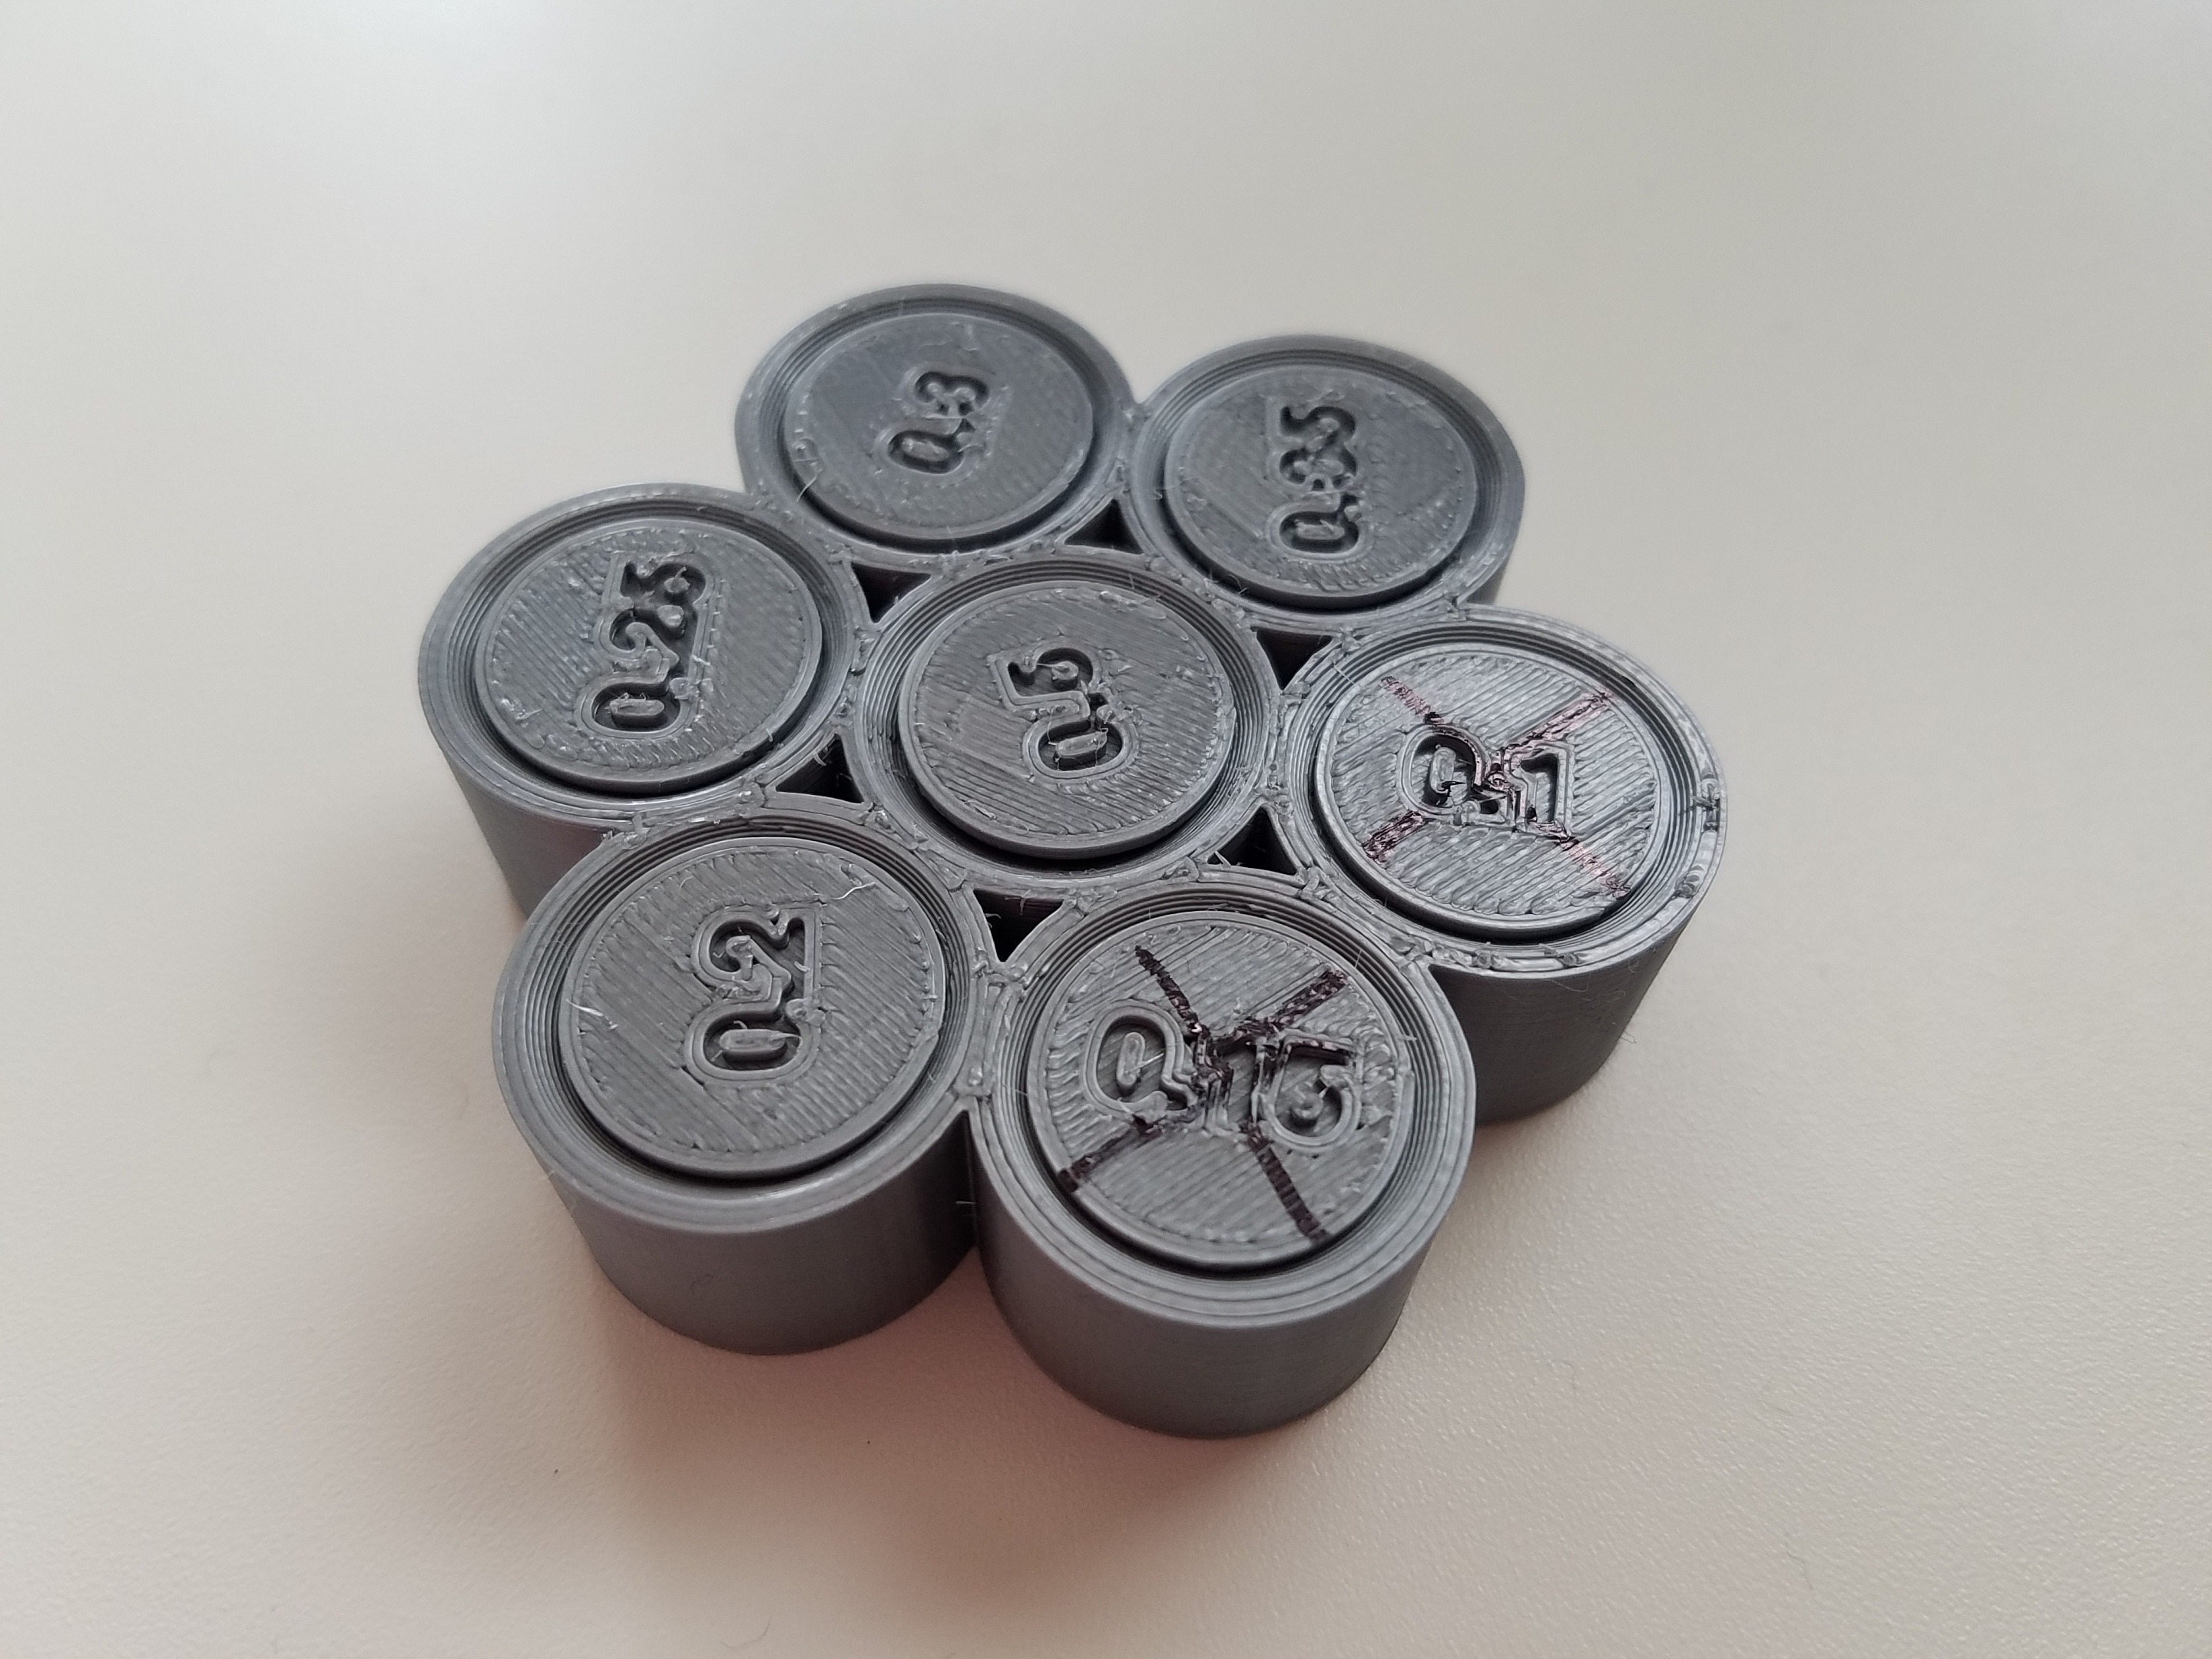
Photo Courtesy- hamano via Thingiverse
Let's say you're printing assembly models that are made up of many small prints that fit together. Or you're printing "print-in-place" models like the gear bearing with your 3D printer. The clearance between the moving parts in both cases must match the design.
Between the moving parts of the design, there may be a 0.2 mm clearance. But in real 3D-printed models, this clearance could almost be nonexistent because of the way liquid plastic expands or because your 3D printer isn't very accurate.
With a clearance test, you can find out exactly how accurate your 3D printer can get. It generally has a cylinder or a roller bearing inside an enclosure, with different clearances between the moving parts.
You can design your parts better if you know that your printer can print up to a certain clearance level. You no longer have to change your plans back and forth, and you can get a 3D-printed part that fits perfectly in one go.
Angus from MakerMuse has a fantastic clearance test model. It's a paid model, but the small fee is well worth it. There are a number of free test designs on Thingiverse that are made to give you results similar to that of Angus' design.
- Where to find it - Thingiverse
- Who designed it - zapta
Bed Leveling test
Photo Courtesy- kmwilson343 via Thingiverse
In 3D printing, it can be hard to get the first layer right, especially if you have to manually level your printer. By printing a few pieces on each corner, you can do a bed leveling test to see how level your print bed is.
Most bed leveling tests have a few squares with a minimal layer height. These squares are printed on the sides and in the middle of the print bed. They show you quickly how far away the nozzle is from the surface you're printing on.
You can tell if your nozzle is too close or too far from the build plate by looking at the quality of these squares. If your prints are facing first layer issues or have bed adhesion problems, you should 3D print a bed leveling test.
- Where to find it - Thingiverse
- Who designed it - elmerohueso
Torture test
 Photo Courtesy- Lazerlord via Thingiverse
Torture test pieces are models that are made to see how far your 3D printer can go. As their names suggest, these 3D prints really put your 3D printer to the test and push it to its limits.
There are a number of free torture test pieces on Thingiverse and Printables that you can print out. Some are meant to test the overhangs and retraction, while others test your printer's tolerance and clearance measures.
Makers Muse's Lattice cube model helped make the torture tests more well-known in some ways. It's a challenging model to 3D print and requires you to completely dial in your 3D printer's settings.
Popular test prints you can do on your machine are the Polypearl tower torture test, the Toaster torture model, and the Dual Rook model. These are great for testing how well your printers work and are also a great way to show off how well 3D printing works.
- Where to find it - Thingiverse
- Who designed it - Lazelord
Supports Test

Photo Courtesy- zapta via Thingiverse
Supports can be the worst thing about 3D printing, and removing them is one of the things people hate most about FDM 3D printing. Supports make it easier to print complicated shapes, but if they aren't printed well, it can be very hard to take these structures apart.
The Supports test piece is meant to be a quick print that you can use to test your printer's support settings. This particular model was featured on the CHEPs YouTube video and is as easy as it gets for checking support settings.
It looks like a cross or plus sign with a single tower in the middle and four overhangs on the top. The model prints in one or two hours. You can try out different support factors like Z distance, XY distance, support density, and support patterns.
If you're having trouble removing supports in post-processing, you need to print this model. This test print will help materials like PETG and ABS a lot since these plastics are known for their support issues.
- Where to find it - Thingiverse
- Who designed it - zapta
Lithophane calibration��
Photo Courtesy- stikako via Thingiverse
As good as 3D-printed lithophanes look, dialing down your lithophane settings is also a challenge.
Lithophanes change the amount of light that can pass through a certain point. Darker areas in your image will have a thicker cross-section, while the lighter parts will be thinner. A great lithophane has this thickness perfectly calibrated at different points.
The lithophane test print lets you figure out how thick or thin pictures can be printed in 3D to get the best quality. It's a square piece with different thicknesses that test how much light goes through each part. This test print can be used to find out how thick you need to set the lithophane model in your lithophane design software.
We strongly suggest printing this test piece every time you switch between different shades of white filament. You can also print it if you want to change the shape of your lithophanes or try out new ideas for these 3D-printed pictures.
- Where to find it - Thingiverse
- Who designed it - stikako
Klipper test prints
The Klipper firmware is a fantastic piece of software in the 3D printing community. On cheap 3D printers like the Ender 3, the Anycubic Kobra, and others, you can print at speeds of upwards of 100 mm/s, which is crazy fast.
However, with great printing speeds comes great calibration needs. It's hard to do 3D printing at high speeds, and you have to tweak your machine to get good print quality.
Luckily, Klipper has a few ingenious features like the Pressure advance and the Resonance compensation. These help you get good results when printing, no matter how fast you print.
The Pressure Advance has a cube that shows how the pressure in the nozzle changes at each point. It helps with problems like retraction and too much expansion. Follow our full guide to fine-tune the Pressure Advance settings on your Klipper printer.
For the Resonance compensation, a quick square piece tests to see if your 3D print is ringing. It lets you see how ringing or ghosting affects your prints and lets you fine-tune your print settings to get rid of it.
- Where to find it - Klipper Website
Final Thoughts
Test prints are a great way to get out of a 3D printing jam. These models help you figure out what's wrong with your printing and let you fix it the best way possible.
Keep in mind that too much testing might be counterproductive. Calibration should be done one step at a time because too much of it won't help. First, you calibrate, then you 3D print, and then (if you need to) you re-calibrate.
Please leave a comment below if you need more help with these test prints. And if you need assistance monitoring your 3D printer and detecting print errors, remotely, feel free to check out Obico!