Celestrius Data Collection Guide (Klipper) - Batch 2 - Z-Offset
This guide is only for the Klipper users. If you are using OctoPrint, please follow this guide.
This guide assumes you already have a nozzle camera installed on your 3D printer and connected to OctoPrint or Klipper. This guide also assumes you have already adjusted your nozzle cameras resolution as described in the Prusa Mini/Mini+ or the Voron 2.4/Trident with Stealthburner guides. If you have not installed a nozzle camera yet, follow the guide for Prusa Mini/Mini+ or Voron 2.4/Trident with Stealthburner
Required files/software
The following files (also linked throughout the document) are required.
Step 1. Download and configure the Celestrius data collection program for Klipper
Install the Celestrius data collection program
1. SSH to the Raspberry Pi (or other single-board-computer) you set up to run Klipper.
2. Run the following commands on the console:
cd && git clone https://github.com/TheSpaghettiDetective/moonraker-celestrius.git
cd moonraker-celestrius
./celestrius.sh install
Configure the Celestrius data collection program
Read the policy on how your data will be collected and sent to the server. Instead of some fancy legal language, we tried to phrase the policy understandable for everyone. We want to look at only the data that you approve of. Once your data is uploaded, we will wait a period of seven days before accessing it. If, during that time, you notice you have uploaded data unintentionally, send us an email and we will delete the requested data.
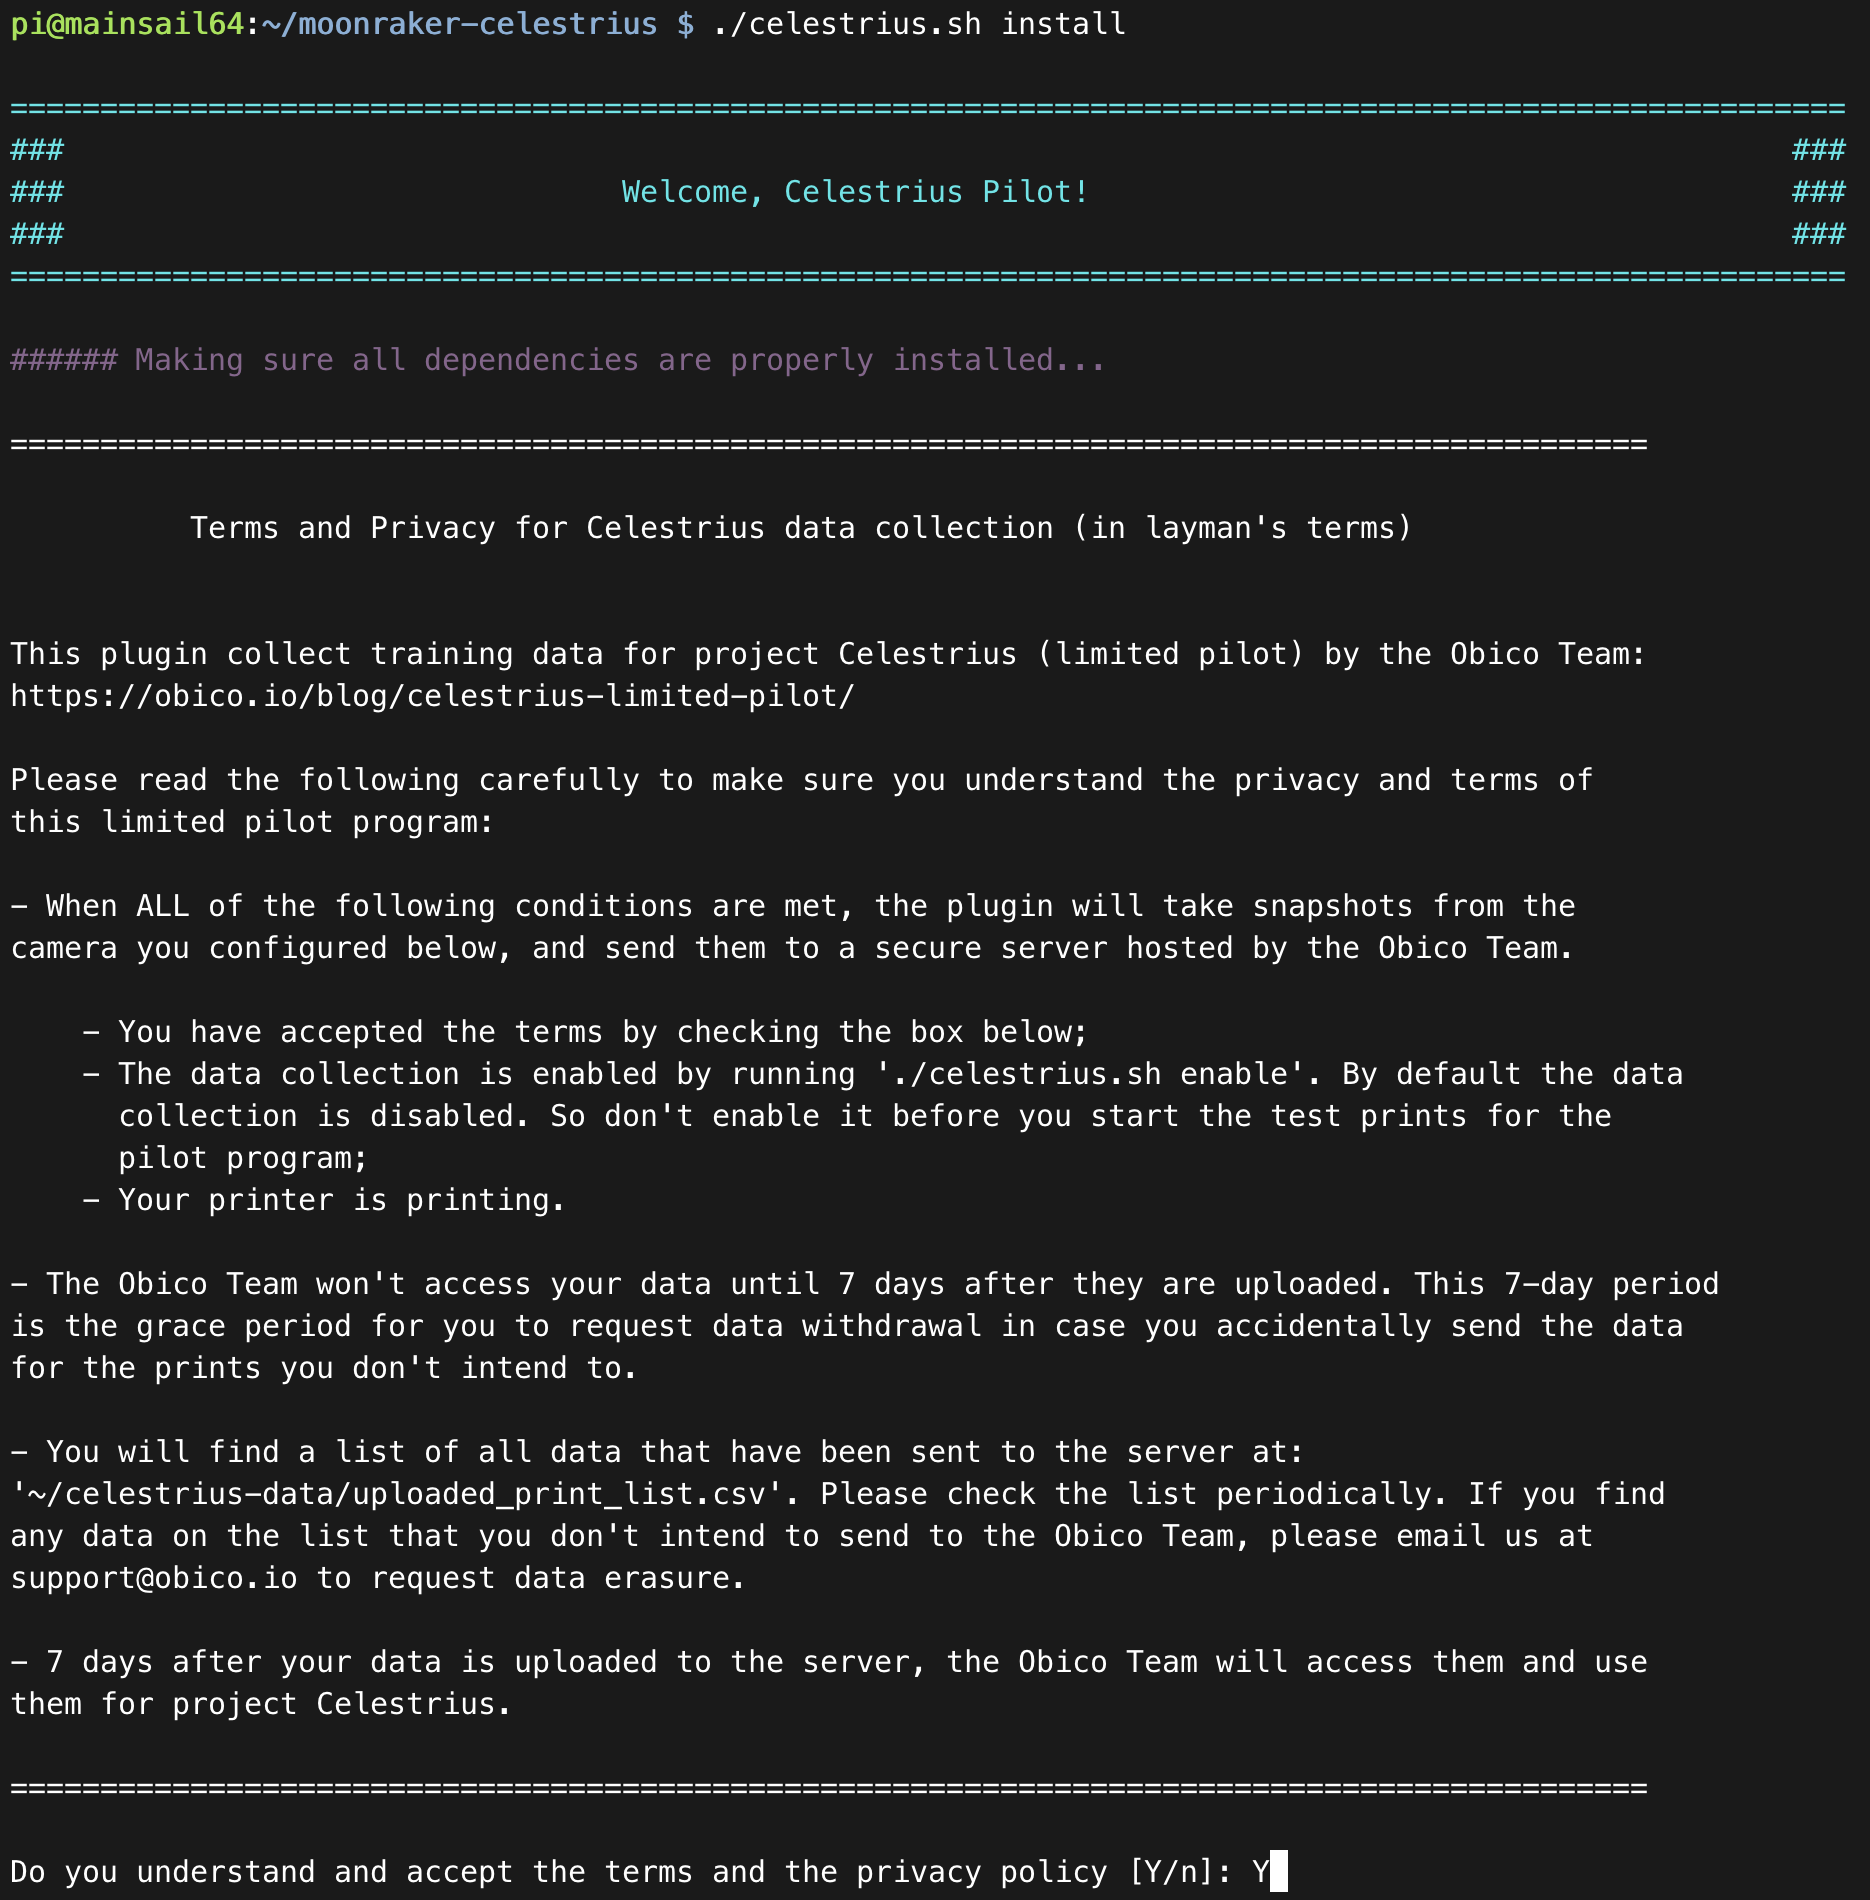
Follow the prompt to get the program configured.
A few things to note:
-
The data collection is OFF for now. You will need to run
./celestrius.sh enableto turn it on. This is so that it's less likely for you to send data that you don't intend to. -
Use the email you signed up for the limited pilot with. Please make sure the email is correct as this will be used to communicate with you throughout the pilot program.
-
The Snapshot URL is for the nozzle camera you set up for project Celestrius. Please note if you have multiple cameras set up, this may NOT be the main camera you configured for your printer. Also the format of the URL is
http(s)://ip-or-hostname(:port)/the/rest/of/the/url.
How data collection works
By default, as previously mentioned, the data collection program will be OFF and not collecting data. To turn on data collection, run cd ~/moonraker-celestrius && ./celestrius.sh enable.
Once turned on, data collection will remain on until you turn it off. Be sure to turn off data collection after running data collecting prints to avoid sending unwanted/unnecessary data.
Step 2. Enable the Exclude Object feature
For the Celestrius Z-offset plugin to work, the [exclude_object] feature must be enabled in Klipper.
1. Open your printer.cfg file in Mainsail or Fluidd.
2. Paste [exclude_object] into the configuration file.
3. Save and restart Klipper
Step 3. Calibrate your first layer
The most important thing before you do the data collection is to make sure your first layer is calibrated. Otherwise, it may signficantly impact the quality of the data collected from your nozzle camera.
1. Turn OFF Celestrius data collection if you turned it on
cd ~/moonraker-celestrius
./celestrius.sh disable
2 Download test.3mf from Printables. The .3mf file is included, so you should not need to edit any settings to make the Celestrius Data Collection to work.
3 Check your print quality
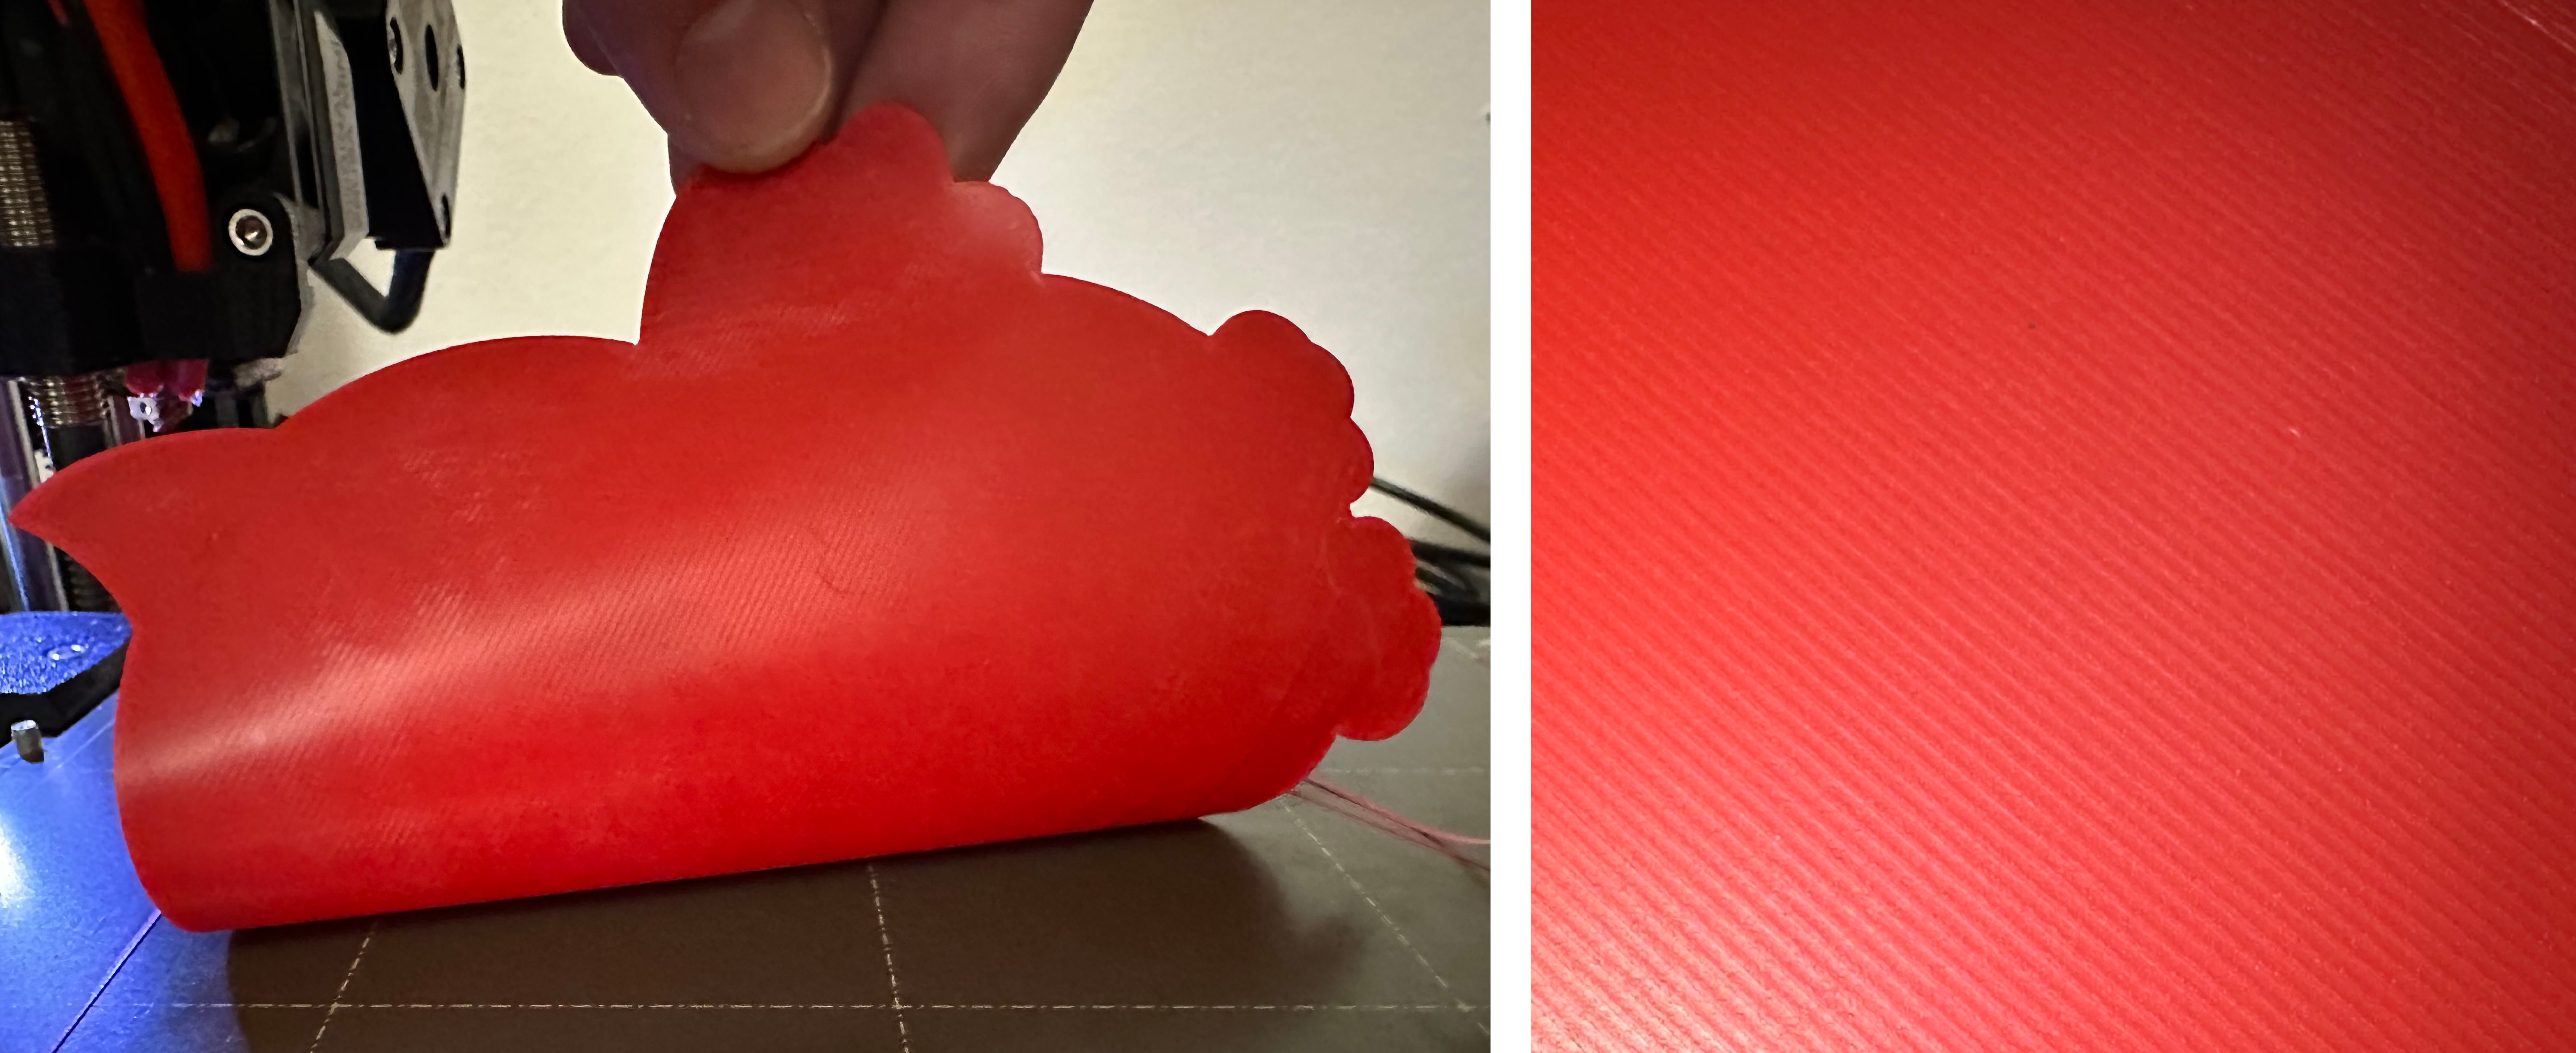
Once the print finishes, compare your finished print with the one shown.
Keep an eye out for the following:
The view from the nozzle camera should look something like the image below.

-
The lines should slightly overlap each other so that when you remove the print from the plate, it is one homogenous surface with no gaps or voids.
-
The overall surface is flat and smooth.
Improve print quality if necessary
If your print is not one homogeneous smooth surface, or there are gaps or voids in the print, try the following in order:
1. Level the bed. Do this before adjusting any other settings as it is the most common issue.
2. Adjust the Z-offset slighlty.
3. Ensure the nozzle is not clogged, and it is free from debris.
4. Calibrate the flow rate using Teaching Tech's tutorial.
Once your print is close enough to the examples above, your 3D printer is properly calibrated for a good first layer with proper bed adhesion and adequate flow.
Step 4. Experiment with z-offset and set the increment
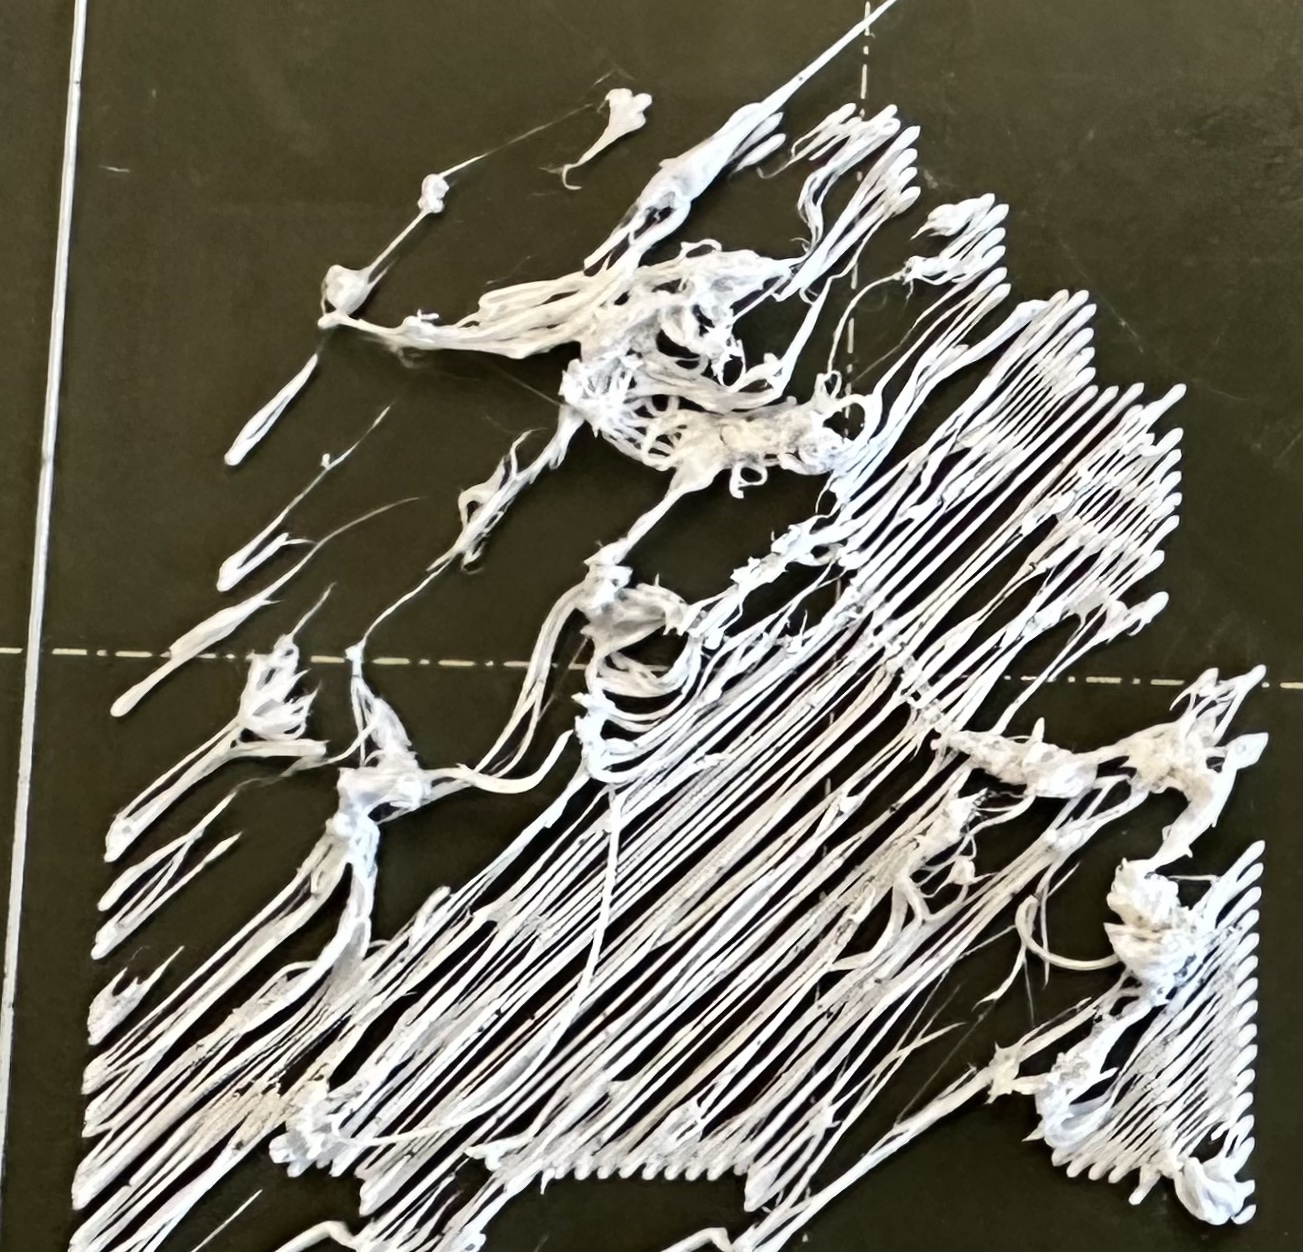
To run the experiment, re-print test.3mf. Once the print starts, slowly raise the Z-offset until you notice the print starting to have a completely failing first layer. The print should look something like the model above.
Once your print is close enough to the examples above, your 3D printer is properly calibrated for a good first layer with proper bed adhesion and adequate flow.
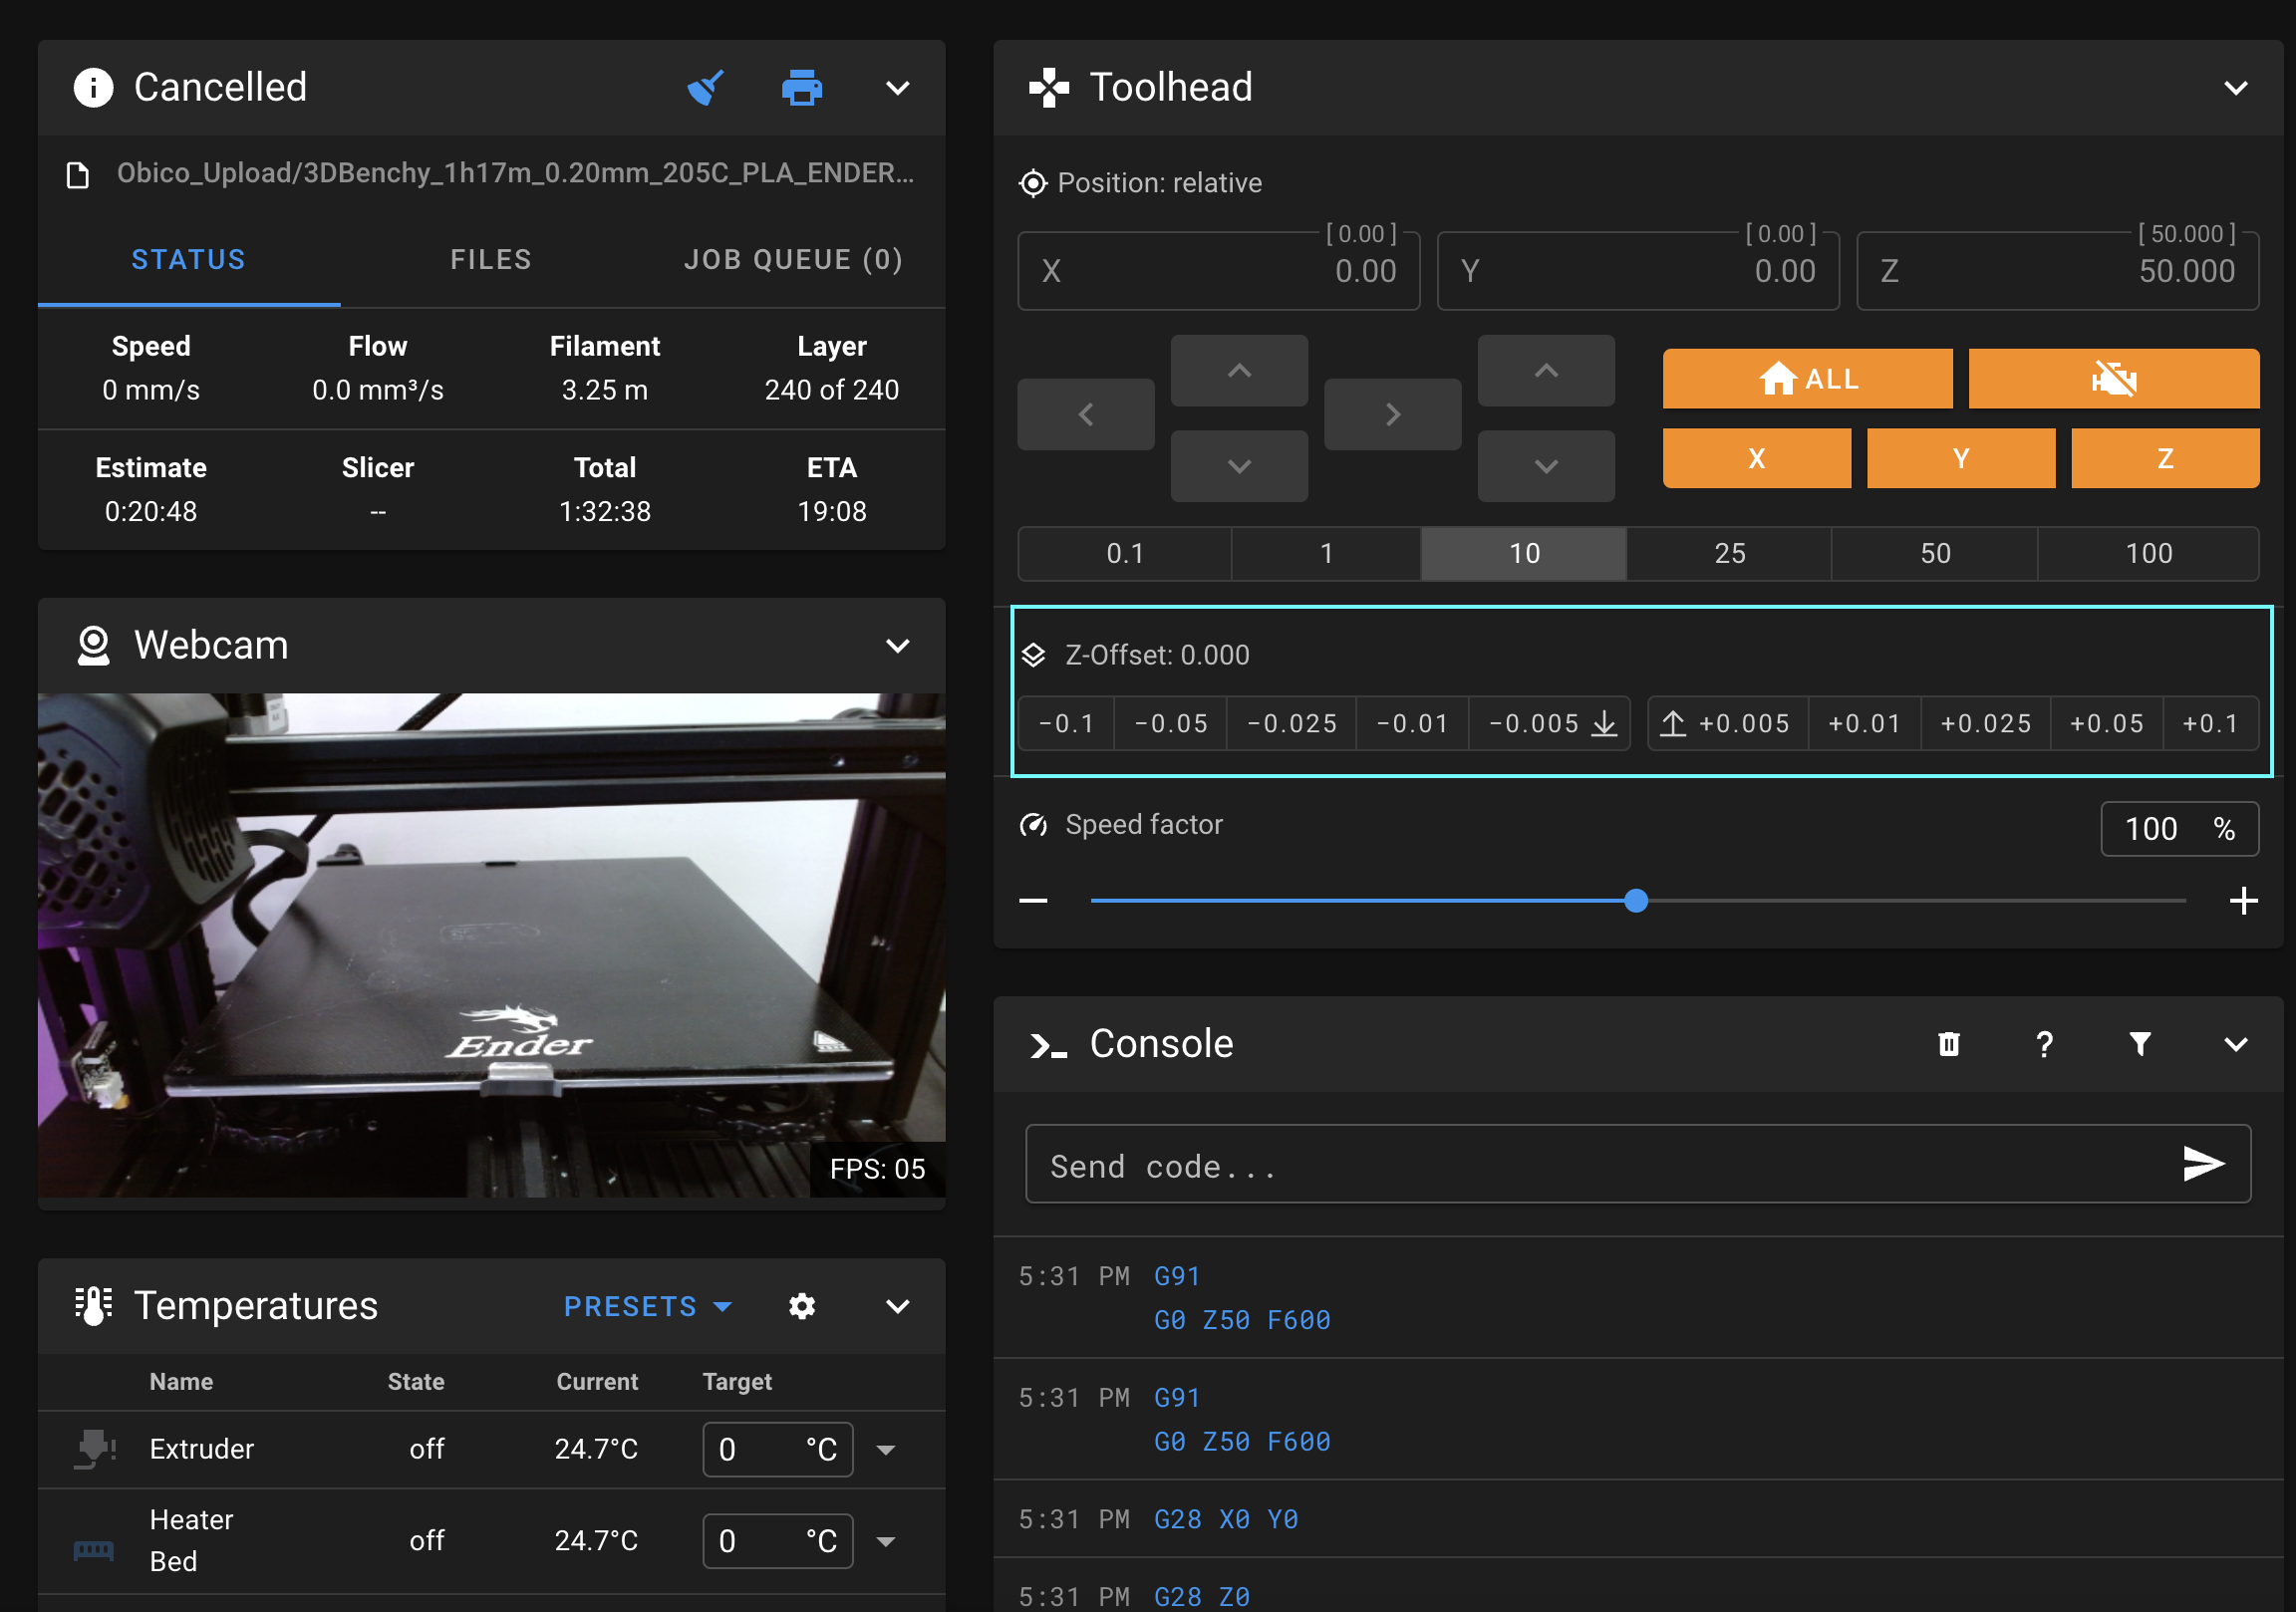
In Mainsail/Fluidd, you can adjust the z-offset live as shown above.
Once you find the z-offset that causes your print to fail, divide it by 4. For example, the print shown reached a maximum z-offset of 1.04mm, so for this print I did: 1.04mm/4= 0.26.
Set the z-offset increment
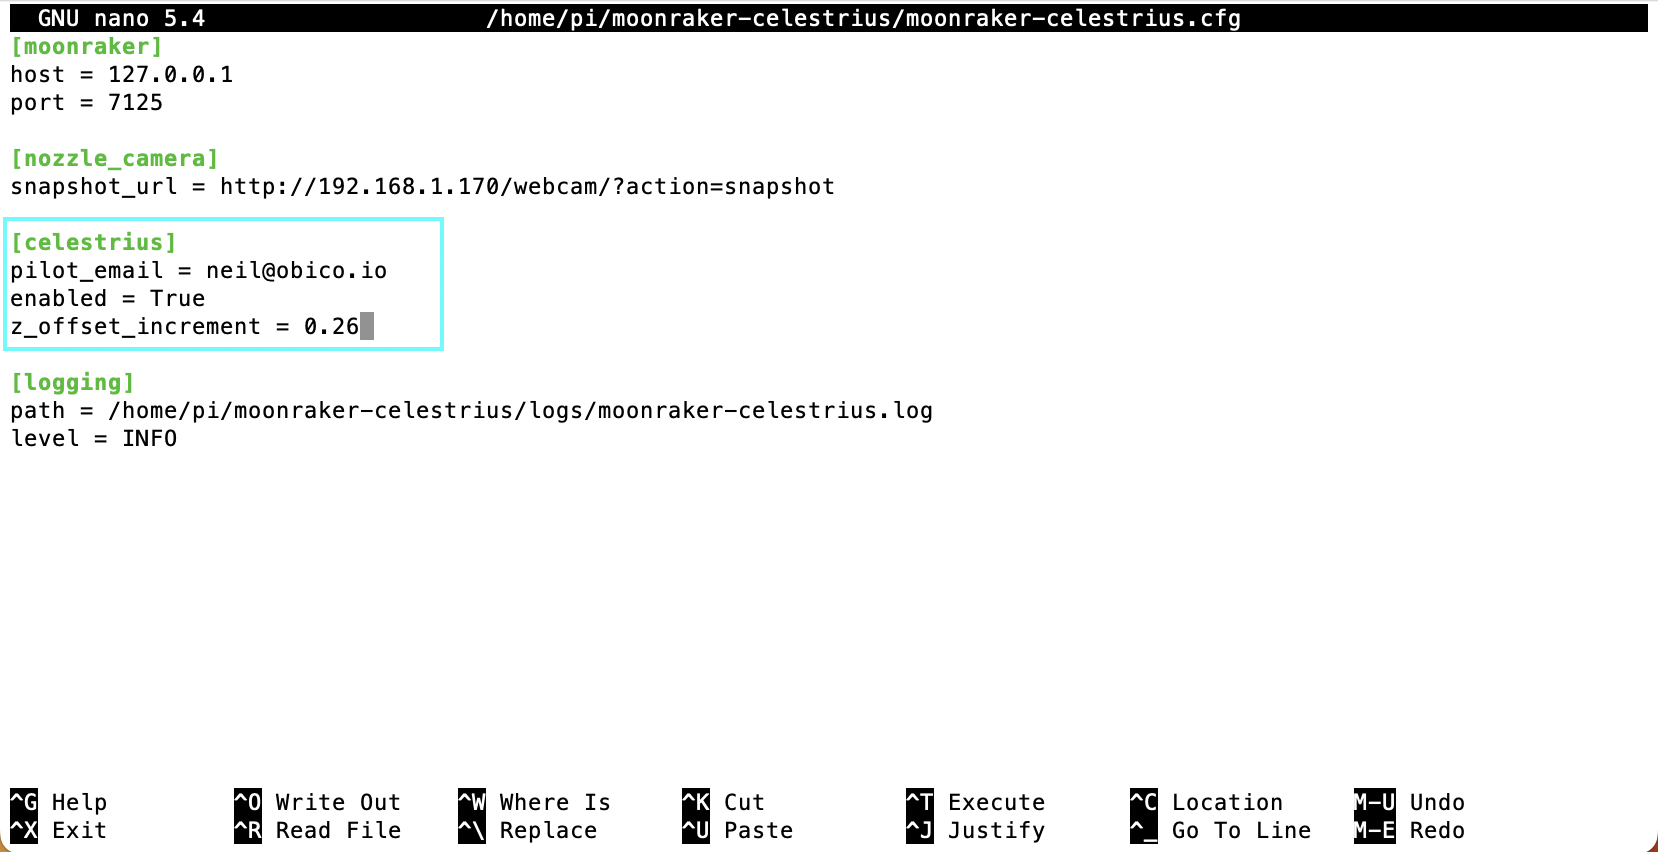
- SSH to the pi you are runnning Klipper on
- Run the following command:
nano ~/moonraker-celestrius/moonraker-celestrius.cfg - Enter the value you calculated above in the Z-offset Increment section.
Step 5. Print at least five models
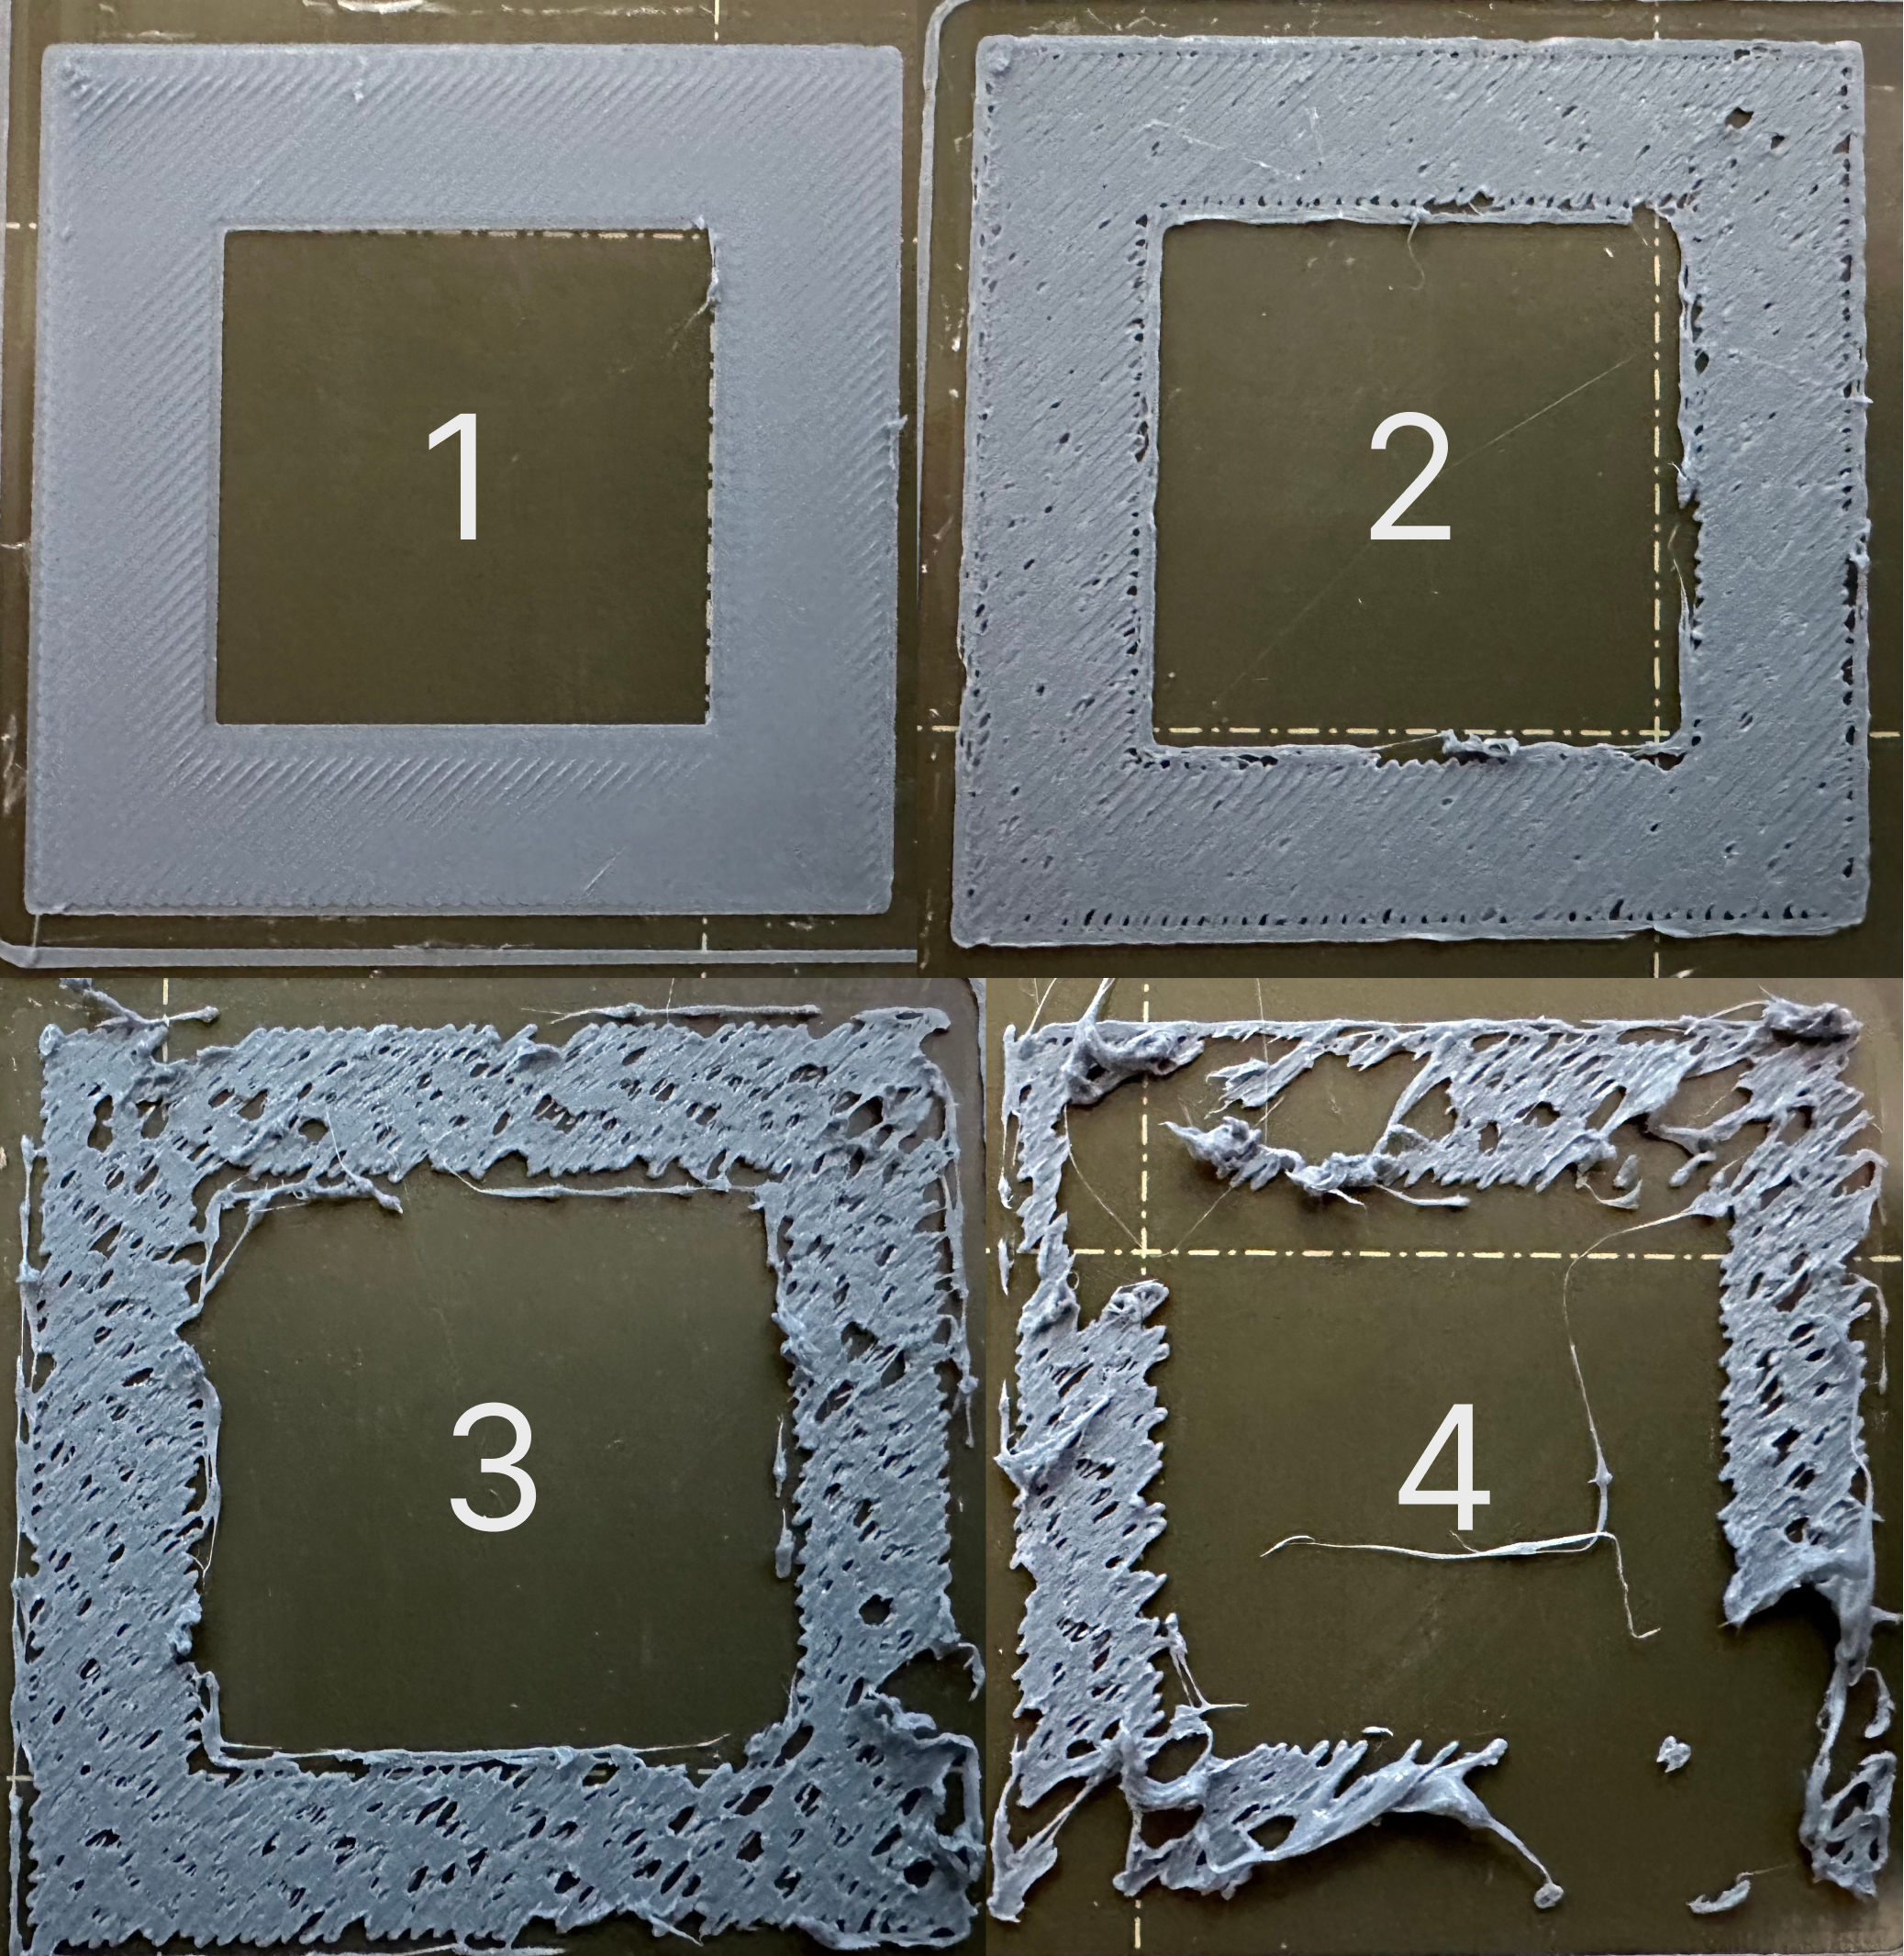
This link contains several test models that only contain one .2mm layer. You will be asked to print at least five of the files. Each file contains multiple object on the print bed. For example, 1-celestrius-z-offset-4-cirlces.3mf, contains four circles. The Obico Celestrius plugin has been written in a special way so that the first circle will be printed at the Z-offset configured in your printers settings. Each consecutive object will be printed with a higher z-offset than the last object. This will produce a print that starts at a high quality and worsens as the print continues. This simulates various bed leveling and z-offset issues that commonly occur when printing. We will collect the images and z-offset values throughout the print, and this information will be used to help train our model.
Please remember to turn on data collection. Otherwise your test print results won't get sent to the Obico Team.
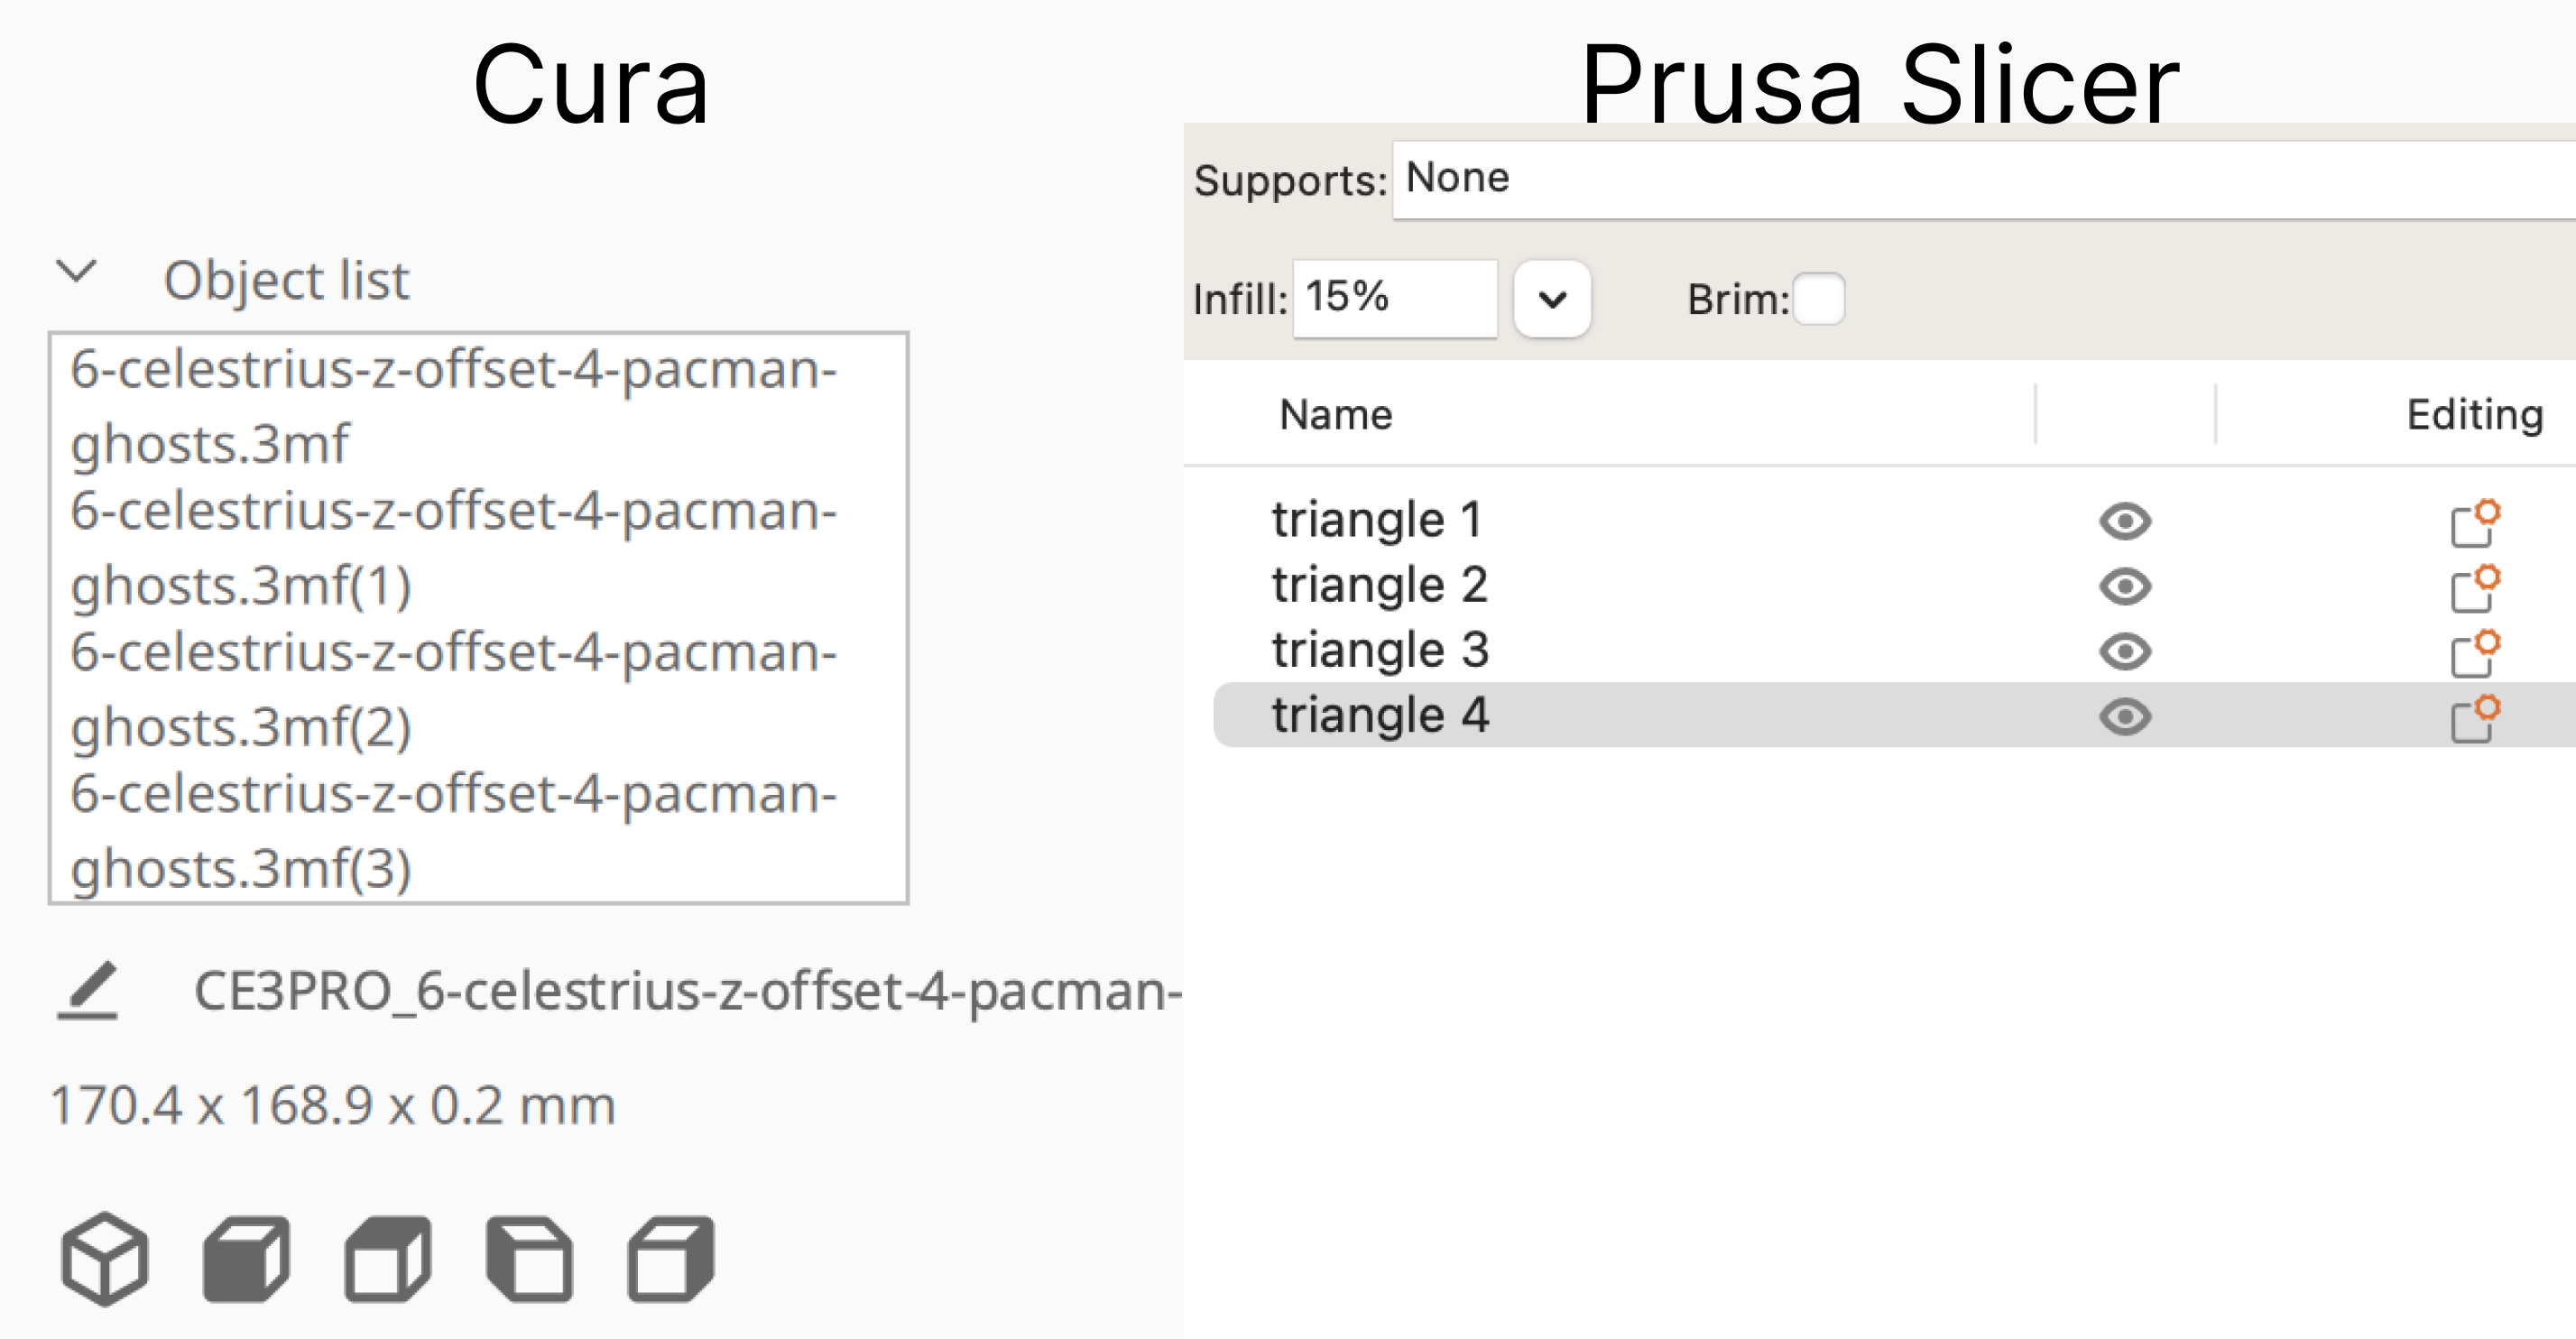
1. Slice the files with the same properly calibrated settings from step 2. .3mf files have been provided so that you can slice the file without having to make any modifications for the Celestrius data collection to work properly.The .3mf file should load in your slicer with objectslabeled with unique names. Using the .3mf file should produce this without you needing to make any changes.You can verify this in Cura or Prusa Slicer. In Prusa Slicer, object labels are shown in the right hand corner of the screen, and Cura shows object labels in the lower left corner of the screen.
The .3mf file is designed to be printed with a .4mm nozzle at .2mm layer height. If you do not have a .4mm nozzle, be sure to change the layer height of the model to be one half of the nozzle diameter.
2. Save the file with the words "celestrius" and "z-offset" in the file name.
Please make sure "celestrius" and "z-offset" appear in the g-code file name, otherwise data will not be collected. Data is only collected when these keywords appear in the file name as a precaution to ensure nothing unexpected happens when printing non-celestrius related files.
3. Turn ON Celestrius data collection
cd ~/moonraker-celestrius
./celestrius.sh enable
Please remember to turn on data collection. Otherwise your test print results won't get sent to the Obico Team.
4. Print all of the models. Please watch the print, and be ready to stop it if the print starts to fail catastrophicaly before it finishes. In general, try to let the print complete, but of course, if the level of failure is making you uncomfortable, filament is starting to blob around the nozzle, or other damage may occur, you can stop the print early and there is no need to repeat it. Consider wiping the bed clean with isopropyl alcohol in between prints to ensure consistent bed adhesion.
Step 6. Turn off data collection
Make sure you turn off data collection once you are done with step 1-4. Otherwise, the plugin may send unintended data to our server.
Optionally, you can review all the prints that have been sent to the server by running this command:
cat ~/celestrius-data/uploaded_print_list.csv
If you find any prints that you didn't intend to send and want us to delete them, please email us to request data erasure.
Your uploaded data won't be accessed by the Obico Team for 7 days. This is the give you a chance to request data erasure in case they are sent unintentionally.
