How to Install Klipper Using KIAUH - Klipper Install and Update Helper

![]()
Introduction
Klipper is quickly becoming the de-facto choice for fast 3D printing. 3D printer manufacturers such as Voron and Prusa3D have contributed to its popularity by using firmware in their machines. And as Klipper's completely open-source and free-to-use, you can install it virtually on any 3D printer, old or new.
In this article, we'll go over the installation process of setting up the Klipper firmware using the Klipper Installation And Update Helper (KIAUH). It's an effortless and interesting way to install Klipper on your 3D printer.
Let's start Klipping!
What is Klipper Firmware and why do you want it?
Klipperwas first released in 2016 by Kevin O'Connor as a 3D printer firmware for executing high-speed 3D printing. It controls your 3D printer's movements and various functionalities and acts as a bridge between your machine's software and hardware components.
Typically, 3D printers rely solely on their microcontrollers to compute and execute all printing tasks. It's a demanding role, and 8-bit controllers cannot manage the various functions efficiently, thus limiting their print speeds and delivering sub-par print quality. However, Klipper utilizes a supplementary computing device (typically a Raspberry Pi) in addition to the printer's microcontroller.
As Klipper uses an additional processing device, it can divide the printing duties between the Raspberry Pi and your printer's microcontroller. All the computations are done on the Pi, which is much faster and more powerful, and passed on to the controller. The controller's sole job is to pass these commands to the printer's hardware.
This configuration gives you access to various features such as smooth pressure advance, input shaping, high stepping rates, and multi-controller support. Besides these features, you can access all of Klipper's functionalities using a web interface with either Fluidd or Mainsail OS.
What is KIAUH, the Klipper Install and Update Helper, and why would you want to use it?
KIAUH is a firmware tool developed by th33xitus that enables you to install, configure, and update your Klipper firmware easily. It gives you an easy-to-use interface for installing the Klipper firmware and automates a considerable chunk of manual input.
It lets you back up your Klipper's configuration within a few steps and access every aspect of Klipper right from your Raspberry Pi. You can add the KlipperScreen, install Mainsail OS and Fluidd simultaneously, and remove any unnecessary files from the KIAUH interface.
Basically, KIAUH gives you an easy entry into the backdoor of the Klipper's firmware. It makes the installation and configuration process more straightforward and will come in handy if you're constantly tinkering with Klipper and your 3D printer.
Various methods for Installing Klipper
KIAUH is not the only method/tool for installing Klipper; however, it's also not the most standard procedure. You can install it with the help of Mainsail and Fluidd software or execute a manual installation for more control.
If you'd prefer the slightly involved method, you can refer to our guides for installing Klipper with Mainsail and Fluidd web interfaces. These guides will inform you about a somewhat different approach to installing Klipper.
What do you need to set up Klipper with KIAUH?
KIAUH itself is a tool that runs on Raspberry Pi's interface. It'd be easier to set up by installing Fluidd or Mainsail OS web interfaces. This procedure will help us to set up Klipper quickly and with minimal error.
Here's a list of things you'll need to set up Klipper with KIAUH.
- Raspberry Pi 3, 3B+, or 4.
- Balena Etcher
- Fluidd
- PuTTY software
- Advanced IP scanner software
- Micro SD card(s)
- SD card reader
Now that you're fully equipped with tools and knowledge, we can begin Klipper's installation process.
How to install Klipper using KIAUH
In this section, we'll go step-by-step over the process of installing Klipper with KIAUH. Follow these steps, and by the end, you'll have a successful installation of Klipper for your 3D printer.
Download an OS flashing tool
This guide will use the Balena Etcher software to install the FluiddPi image on your Raspberry Pi. Alternatively, you can use the Raspberry Pi Imager if it is pre-installed on your system.

- Go to Balena Etcher's website and download the latest version of the software.
- Install the software on your system and run it.
Download the FluiddPi image
FluiddPi is a preconfigured image for Klipper that comes with all the necessary functionalities you'll need to install and run on your system.
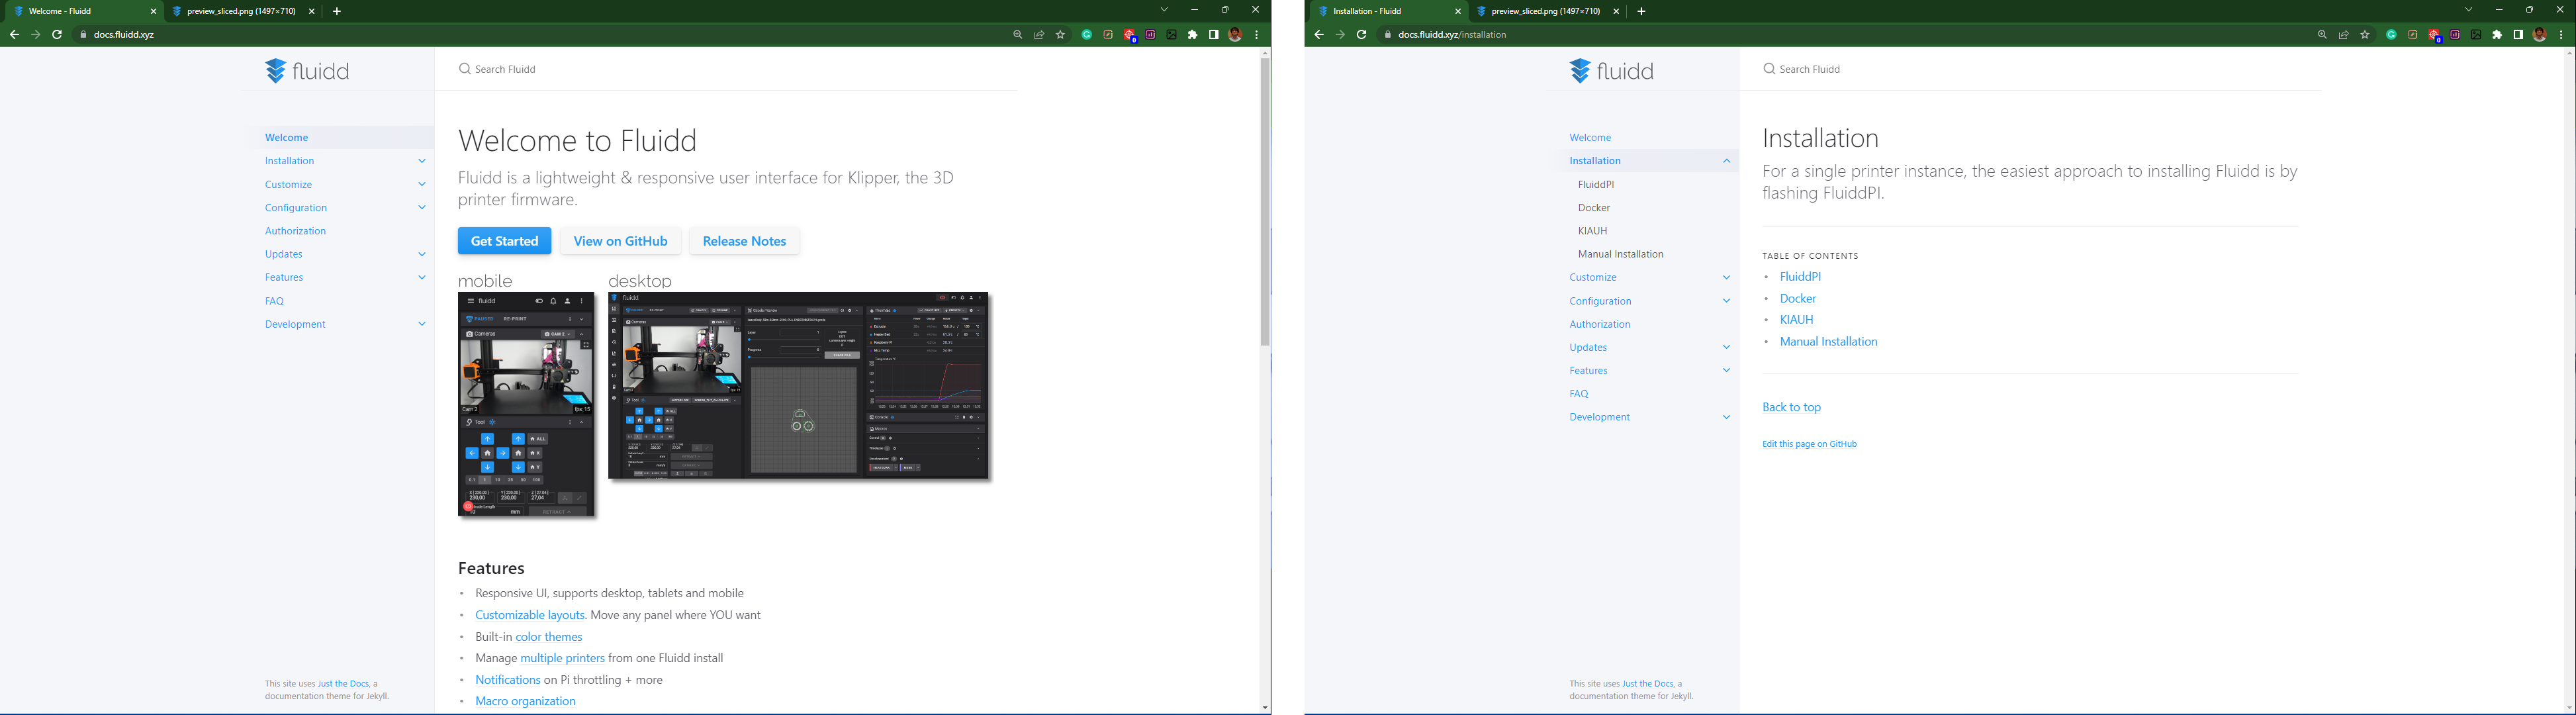
- Go to Fluidd's website and open the Installation tab.
- Select FluiddPi and click on the download link. It'll open FluiddPi's GitHub page.
- Download the latest release of the image. It'll be a zip file.

Install and Configure Fluidd on Raspberry Pi
- Insert a blank SD card in your desktop using a card reader.
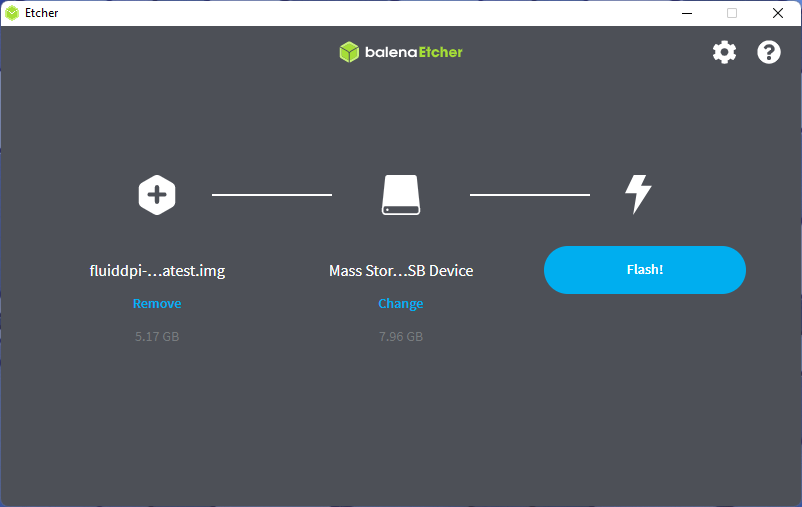
- Open the Balena Etcher software and load the downloaded FluiddPi image in the Flash from file section.
-
The Target section should indicate your SD card.
-
Click on Flash and let the process begin.
-
At the end of the process, you'll get a Flash Successful message indicating a successful installation of FluiddPi on the Pi. The SD card will be ejected from your desktop.
-
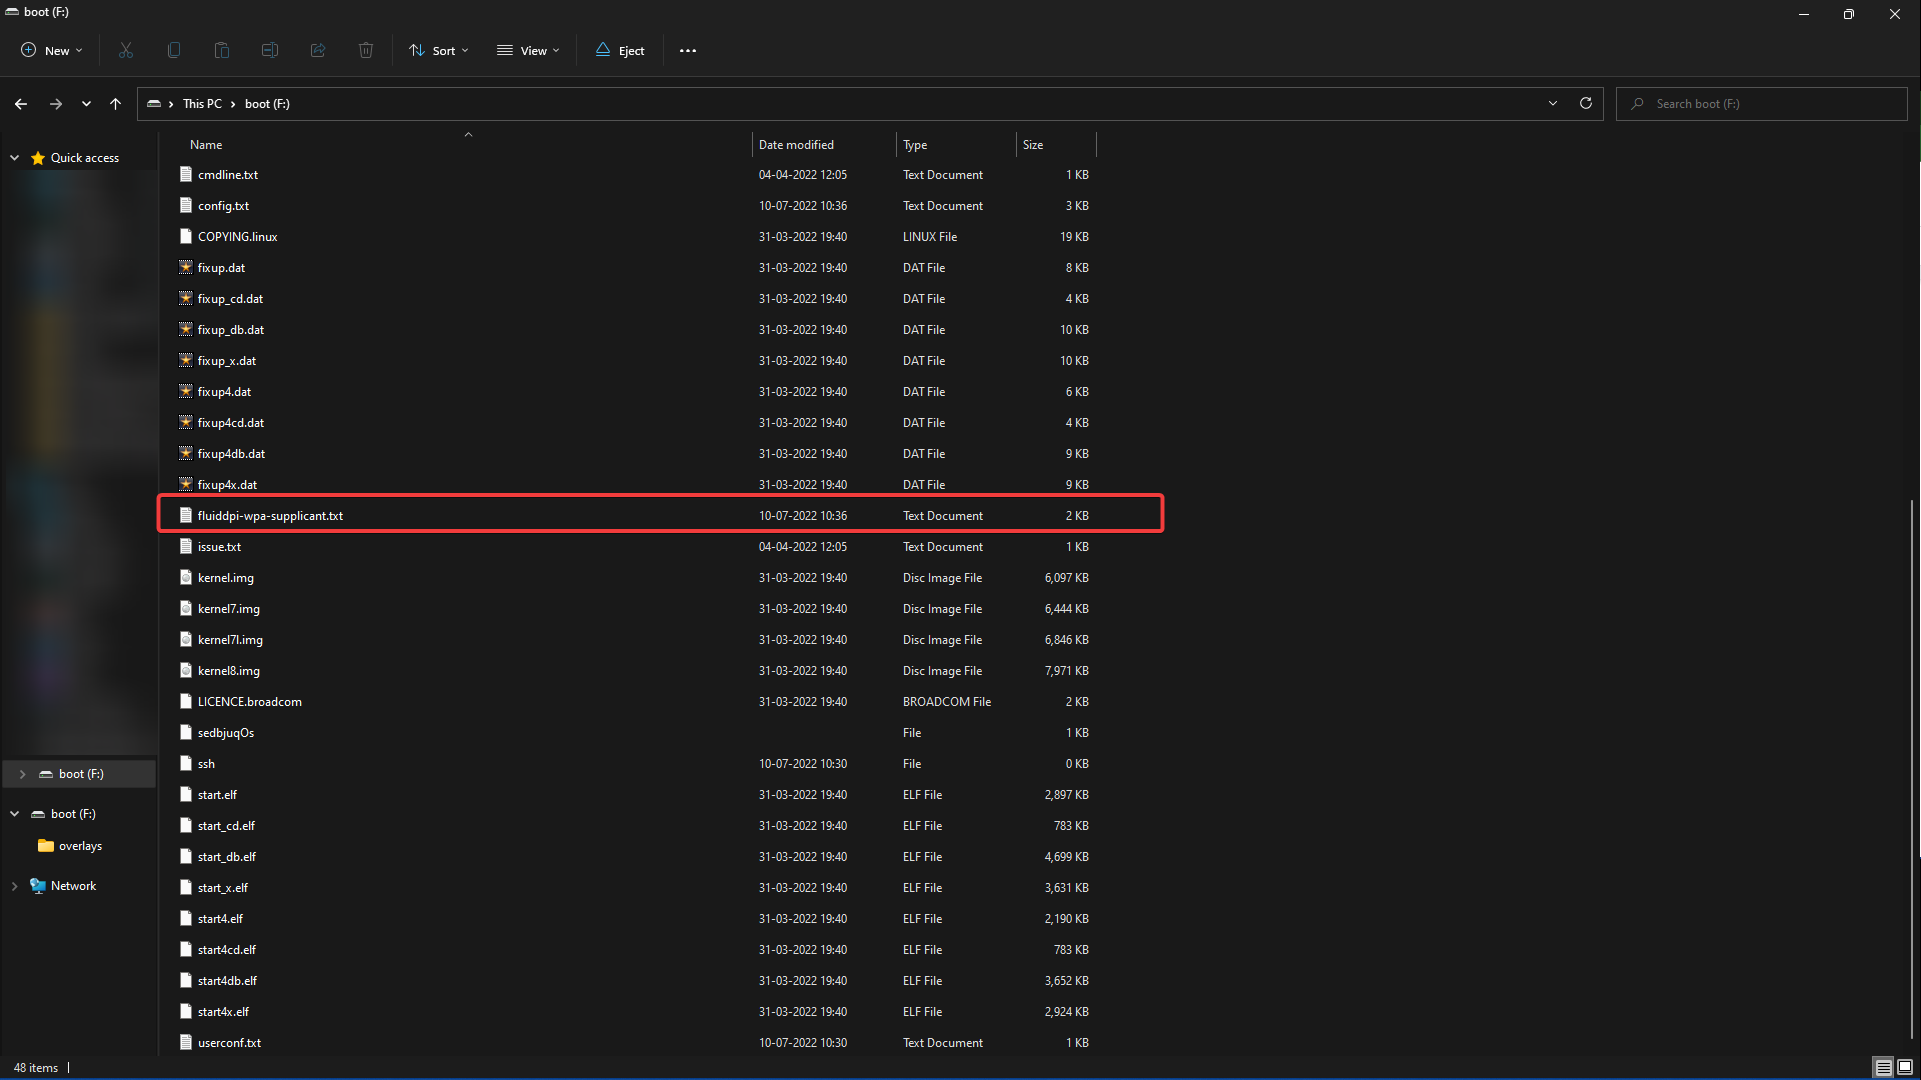
Reinsert the SD card and open the boot drive.
-
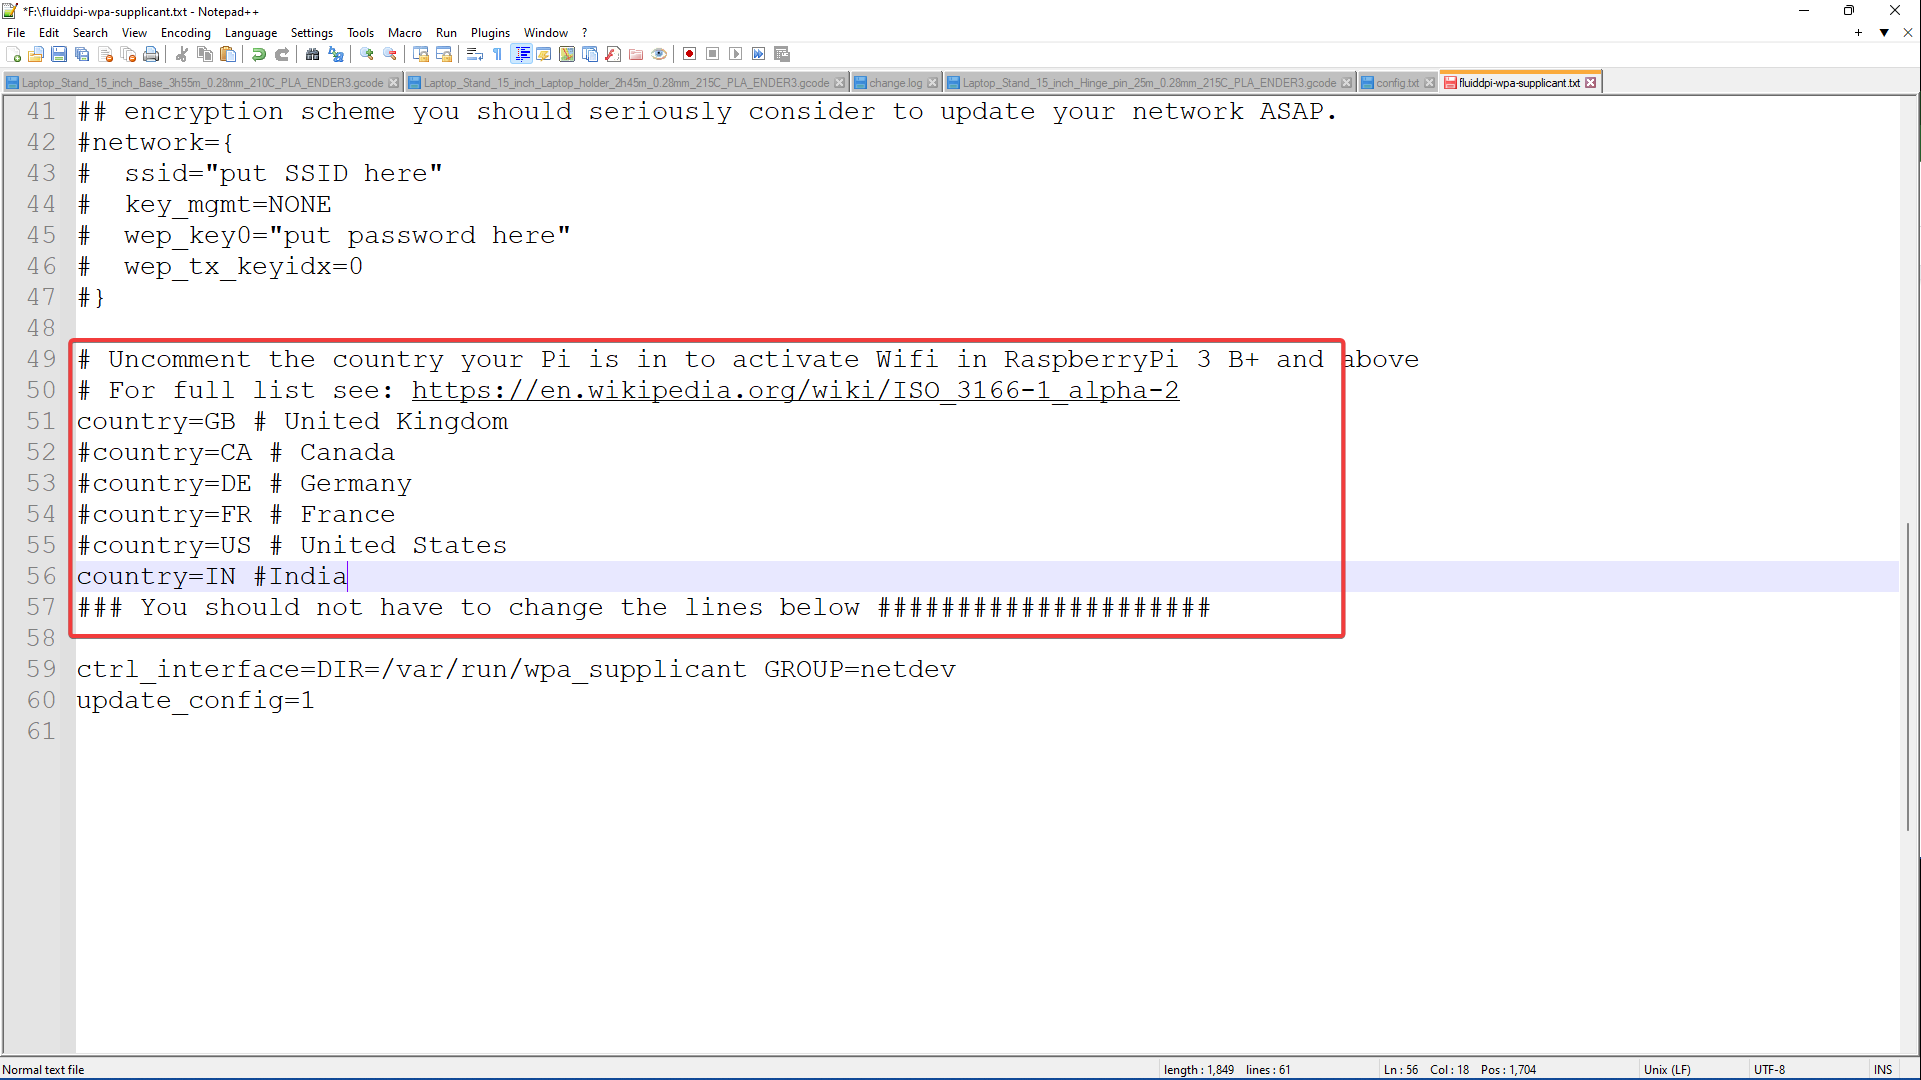
Navigate to fluiddpi-wpa-supplicant.txt file and open it using Notepad++.
- If you're on a protected WiFi, uncomment lines 27-30 by removing the single # symbol.
- Enter your network's name in the SSID section, and password in the PSK section.
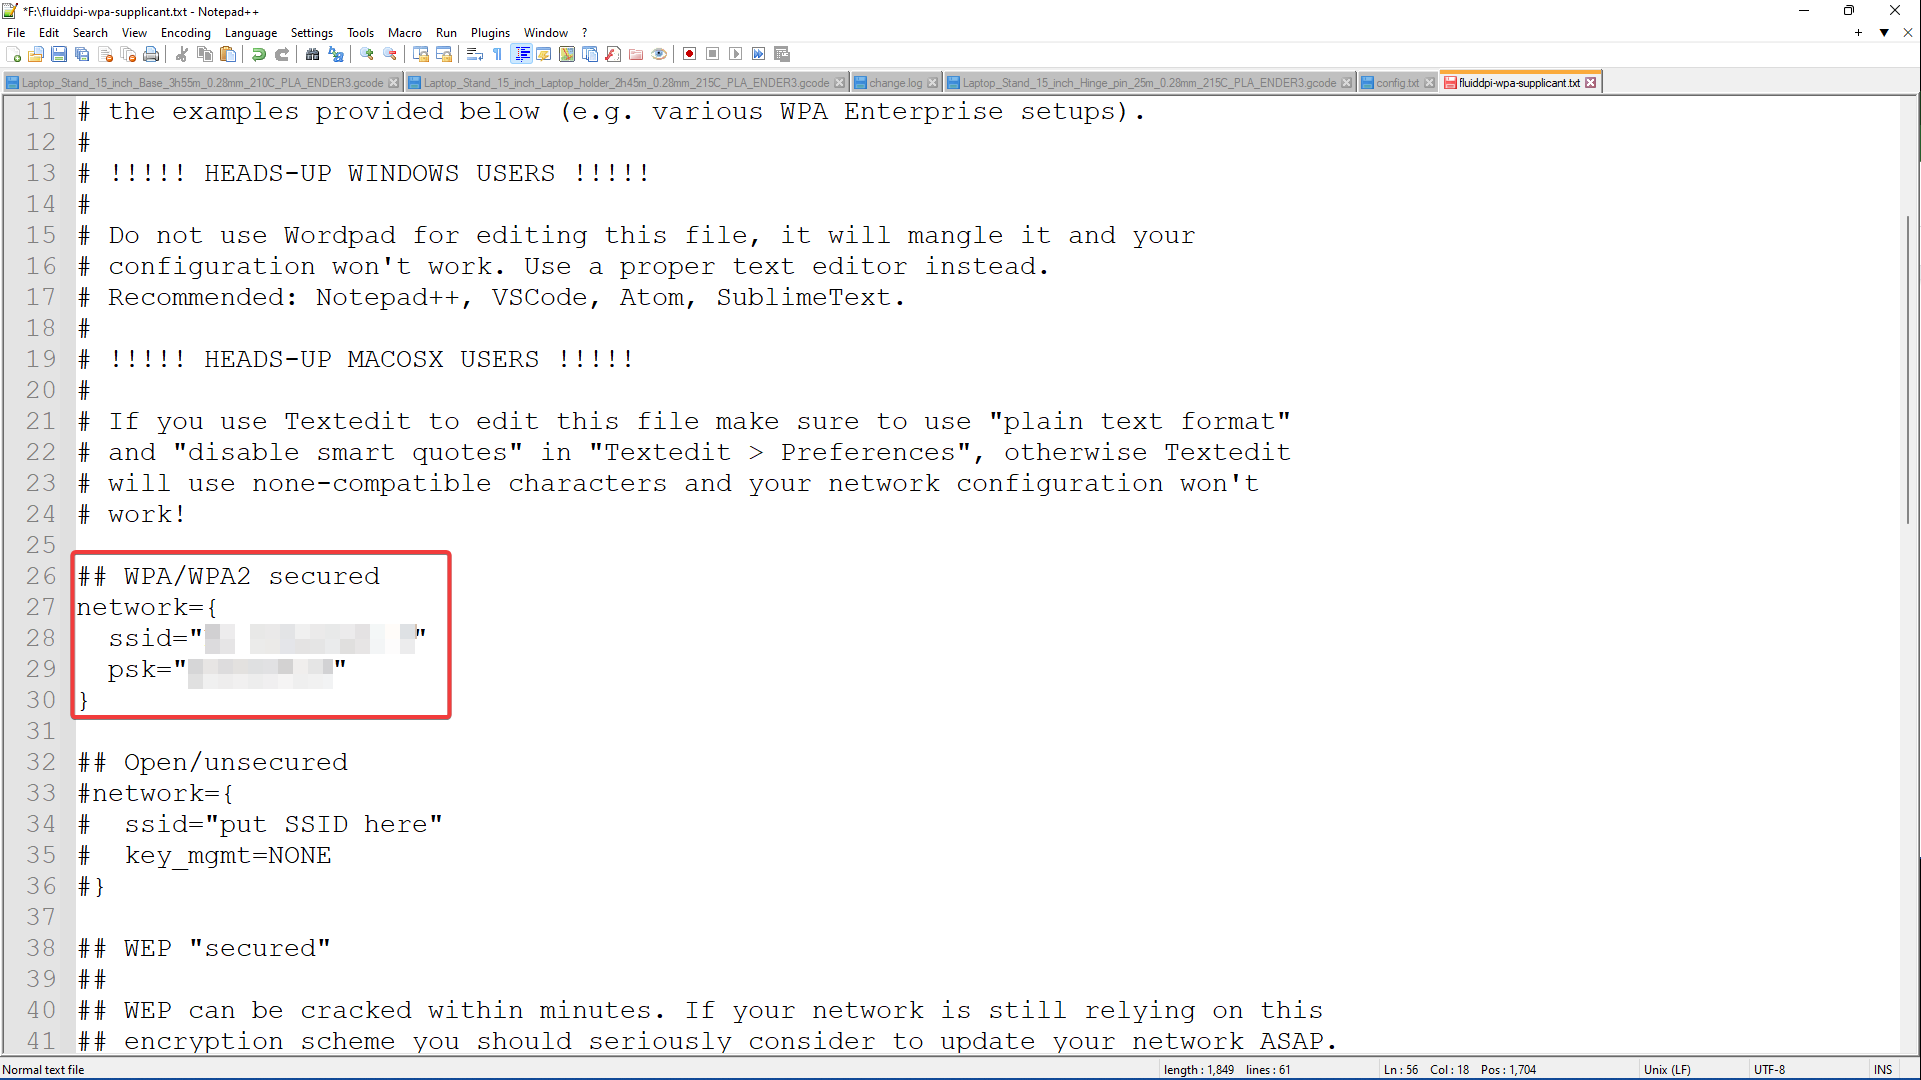
- Navigate to line 49 , and uncomment your country code by removing the # symbol. If you don't find your country code, open the mentioned link in the document and enter your country code at the bottom.
- Save and close the file. Eject the SD card and insert it in your Pi.
Install KIAUH on your Raspberry Pi
- Find the IP address of your Raspberry Pi using the Advanced IP scanner software. You need to install and run it, and it'll show all the devices connected to your wireless network.

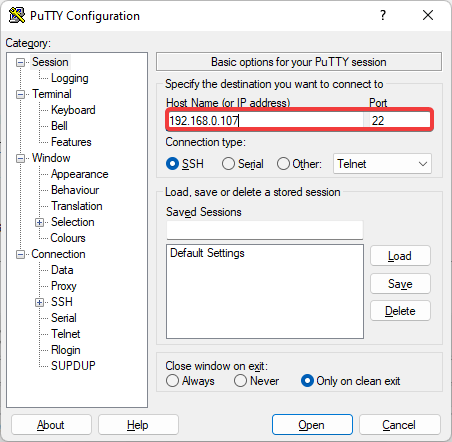
- Once you have the Pi's IP address, open the PuTTY software and enter the address. It'll let you access the Pi securely over your connection and make any changes via the command terminal.
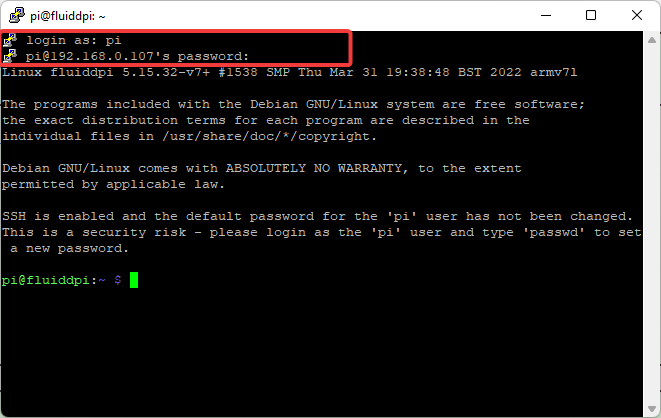
- The login credential by default for the FluiddPi are -
Username - pi
Password - raspberry
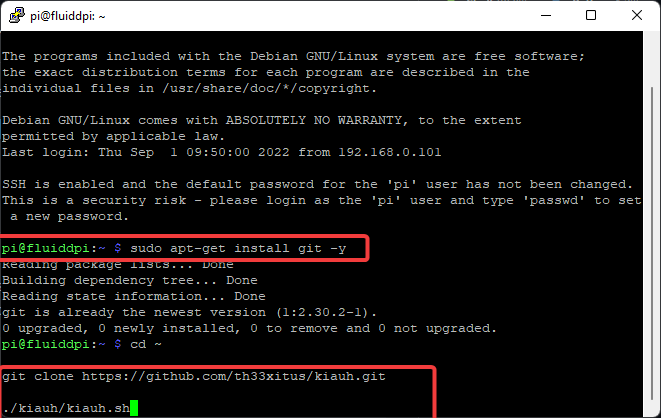
- Go to the KIAUH github page and copy the command for installing git. It looks like this -
sudo apt-get install git -y
- Once done, install KIAUH by typing the following commands. These are also available on the same page.
cd ~
git clone https://github.com/th33xitus/kiauh.git
./kiauh/kiauh.sh
- After successful installation, the KIAUH interface will appear in the command terminal.
Install Klipper using KIAUH
Once you're in the KIAUH interface, the left-hand side indicates the main navigation menu. And on the right side, you'll find the status of all the software available for the system. Currently, we have the Fluidd software. We'll need to install Klipper, Moonraker, and Obico on our Raspberry Pi.
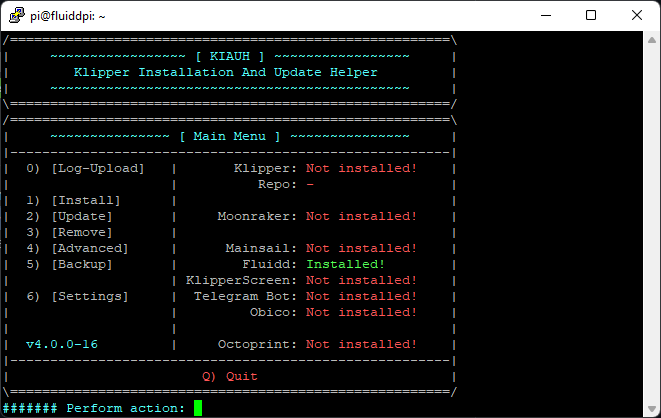
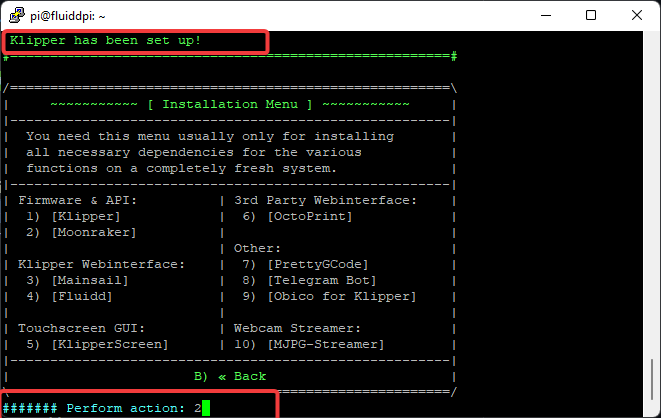
- Input numerical 1 and press enter. It'll take you to the Installation menu.
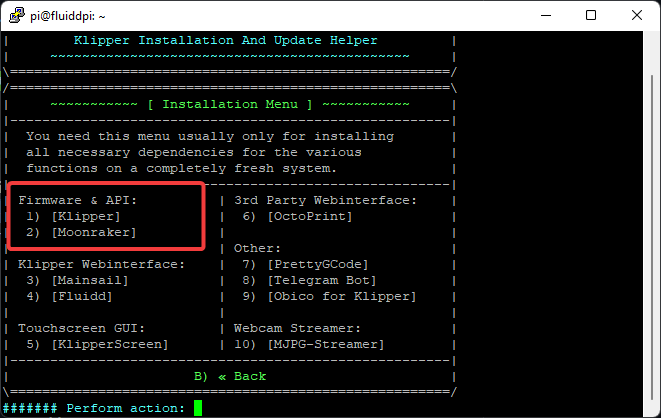
- Klipper is present in the Firmware and API section. Input and enter 1. It'll begin the Klipper installation process.
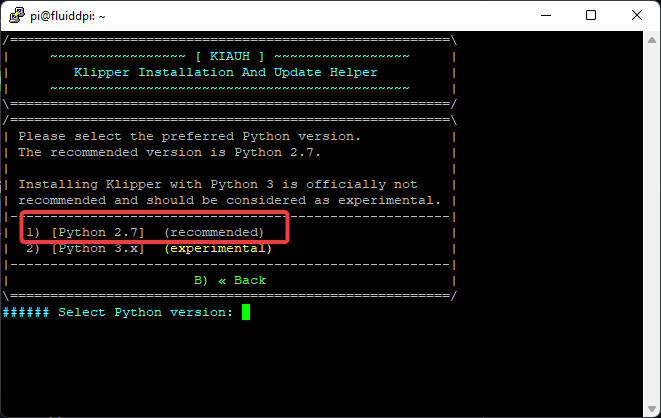
- Select the Python version as Python 2.7 by inputting 1. It's a stable version, and will give you predictable results.
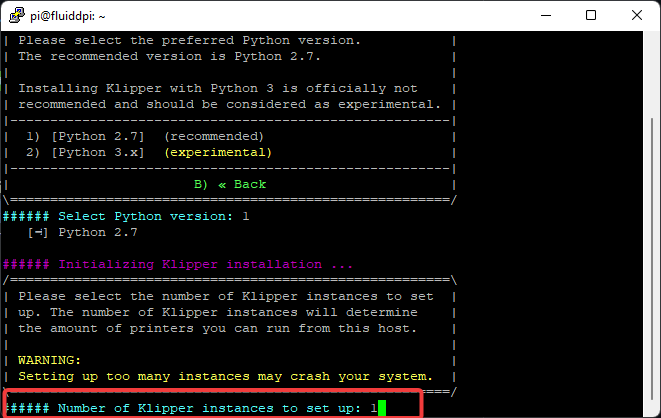
- Select the number of Klipper instances to set up. By default, the value is 1. Basically, this step lets you set up multiple Klipper instances for multiple 3D printers on a single Pi. The more instances you add, the more stress you'll put on your Pi. For this guide, we're keeping it at 1.
- KIAUH will now install Klipper on your Pi, and you'll get a 'Klipper has been setup' message towards the end. This indicates a successful installation of your Klipper for your Raspberry Pi.
- Follow the same procedure for Moonraker and MJPG streamer.
- Verify their installation status on the KIAUH interface. All three software should be indicated as 'Installed'.
- Do not close the terminal window. We'll use it to configure Klipper.
At this point, you've basically installed Klipper and Fluidd on your system. But, we need to configure the Klipper firmware for your 3D printer before we begin 3D printing on it.
Configure Klipper for your 3D printer
Klipper is developed for several 3D printers. Even if we've installed it on your system, it isn't aware of your printer's specifications, hardware, and limitations. In this step, we'll tailor Klipper for your 3D printer so that you can begin 3D printing on it.
- Connect the Raspberry Pi to your 3D printer.
- Enter the Pi's IP address in your web browser. It'll open the Fluidd web interface. Ignore any warnings for now.
- Go into the configuration tab by clicking on the 3rd icon from the bottom.
- Click on Config Samples on the right, and download your printer's configuration file.
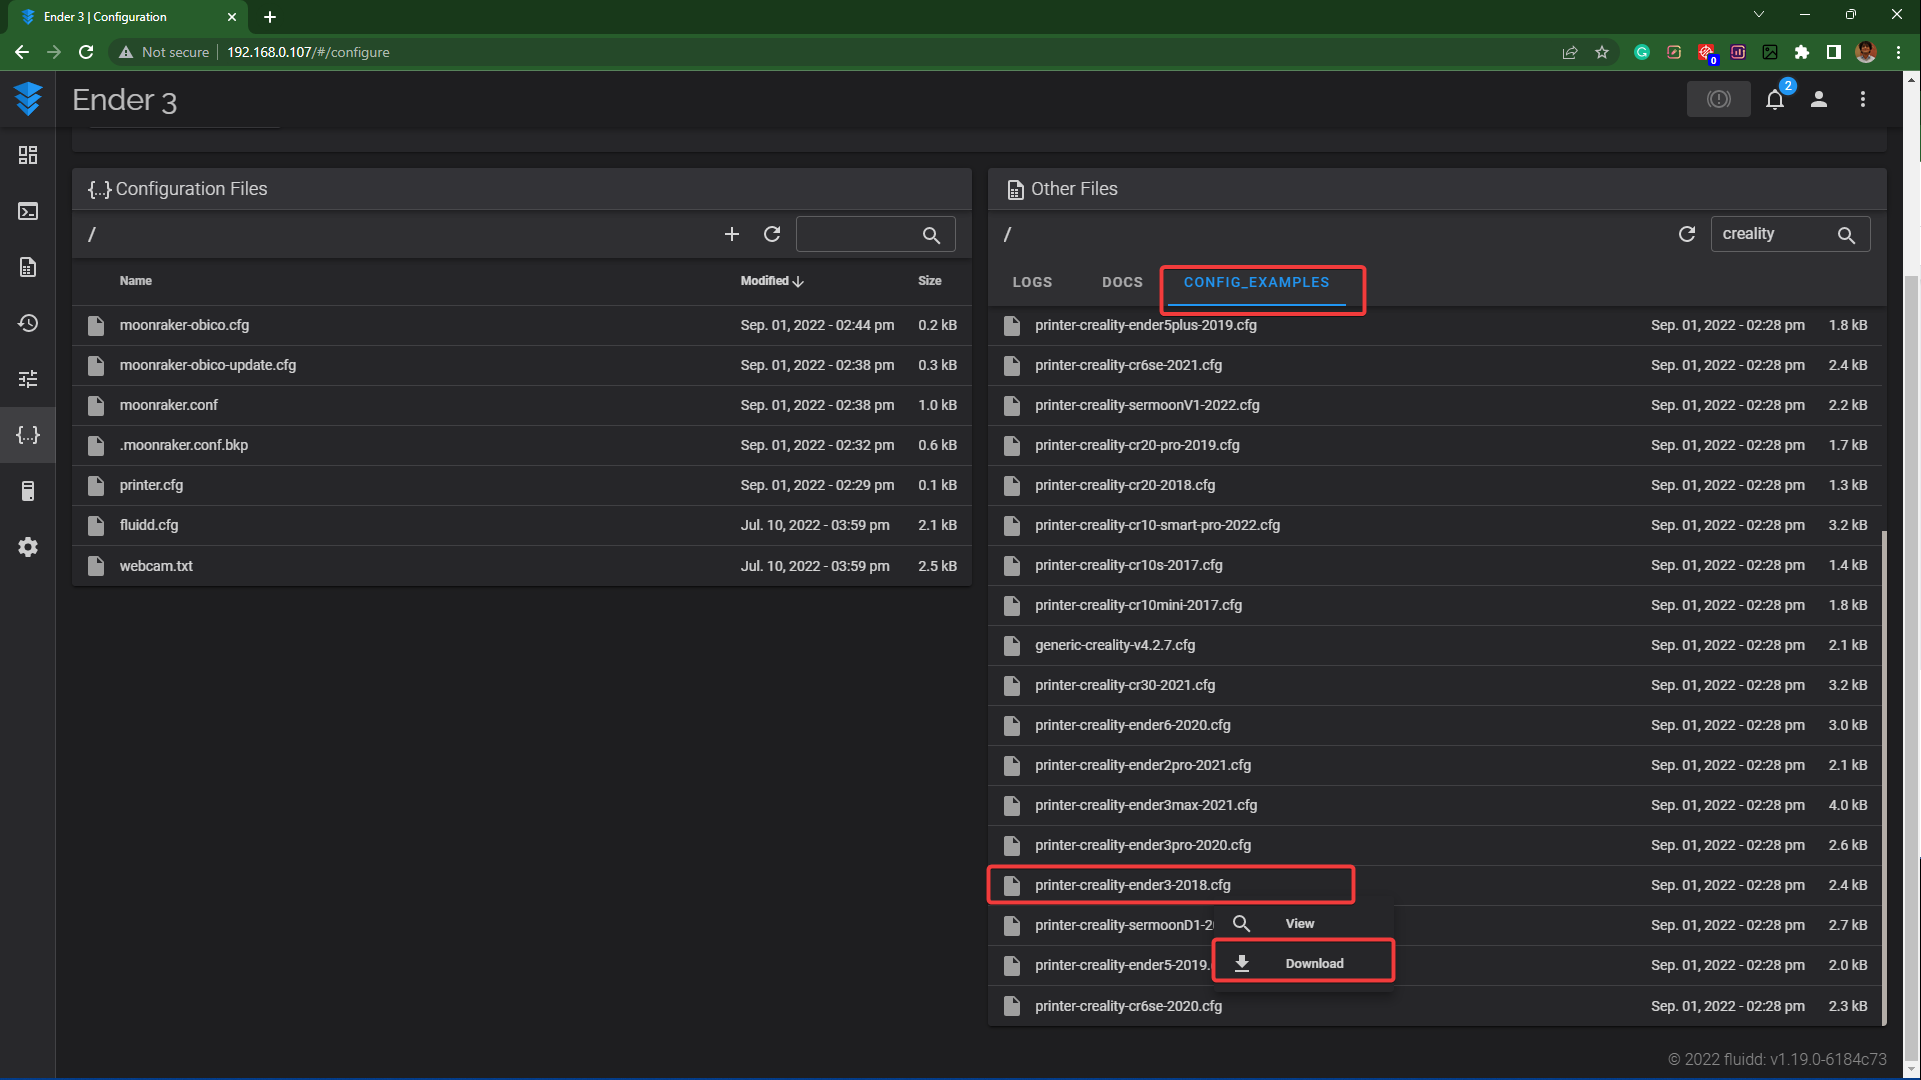
- Upload the printer's configuration file in the 'Configuration files' section. Rename it to the printer.cfg. This step will replace the default printer.cfg file.

- Open the PuTTY terminal window and input the following command -
ls /dev/serial/by-id/*
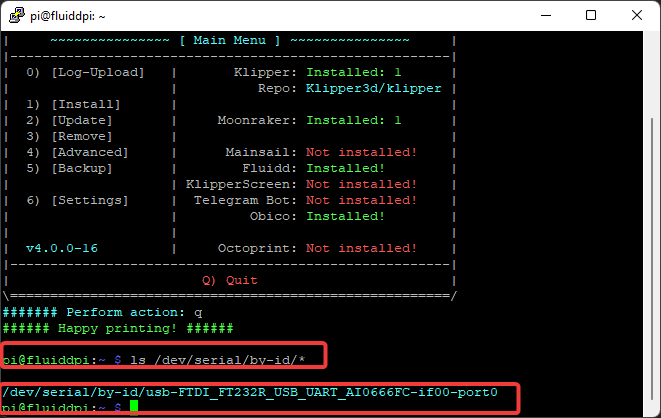
- If your Pi's successfully connected to your 3D printer, it'll display the port id, which will look something like this -
/dev/serial/by-id/USB-1a86_USB2.0-Serial-if00-port0
- Copy this code.
- Open the printer.cfg file from the configuration section.
- Navigate to the [mcu] section and paste the code below it. The final result should look like this -
[mcu]
serial: /dev/serial/by-id/USB-1a86_USB2.0-Serial-if02-port1
- Save and close the file.
- Restart the firmware.
- There should be no error warnings, indicating a successful connection between your Raspberry Pi and 3D printer.
- You can test the installation and connection using the control buttons on Fluidd's interface.
You're now ready to run your 3D printer with Klipper and control it directly from your desktop or smartphone. If you have a webcam, you can add it to your Klipper instance by going into the general settings. Explore Klipper as you'd like and enjoy the benefits of high-speed 3D printing.
Install Obico on Klipper
Usually, you need to be on the same network as your 3D printer to access and control it. It restricts your mobility, and you're limited to the network coverage of your WiFi. Obico solves this by giving you access to an authentic remote 3D printing experience.
Obico is a 3D printer host software and a successor to the popular Spaghetti Detective. Using Obico, you can monitor and control your 3D printer from anywhere in the world. You can use it on your smartphone, tablet, Windows PC, or even your iMac. It also features AI detection capabilities to notify you about any print failures.
Essentially, it unlocks an entirely new functionality and enables you to monitor and control your 3D printer anywhere. It goes great with Klipper and will be an excellent monitoring tool if you run several 3D printers or if you're constantly on the move. You can install it directly from KIAUH or follow the below-mentioned steps as an alternative method.
Let's install Obico for your printer and free you from your WiFi network restrictions.
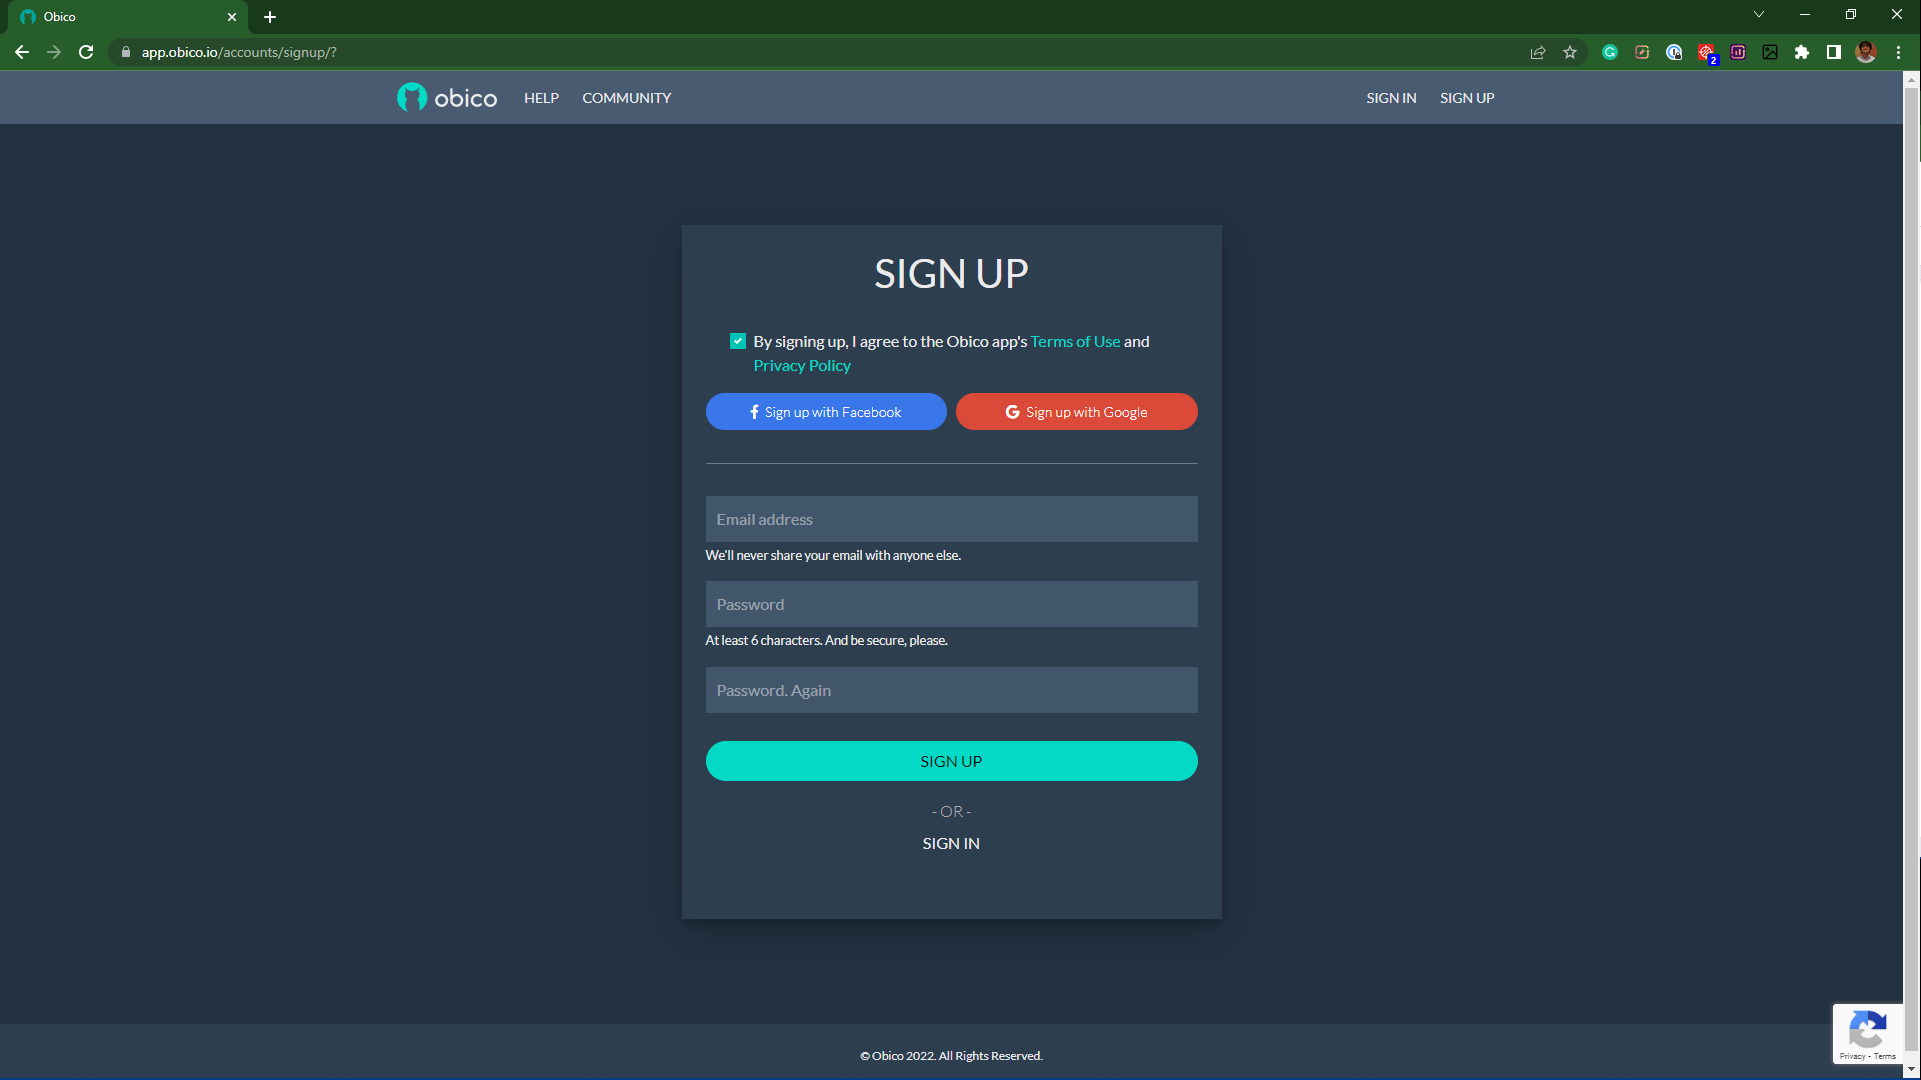
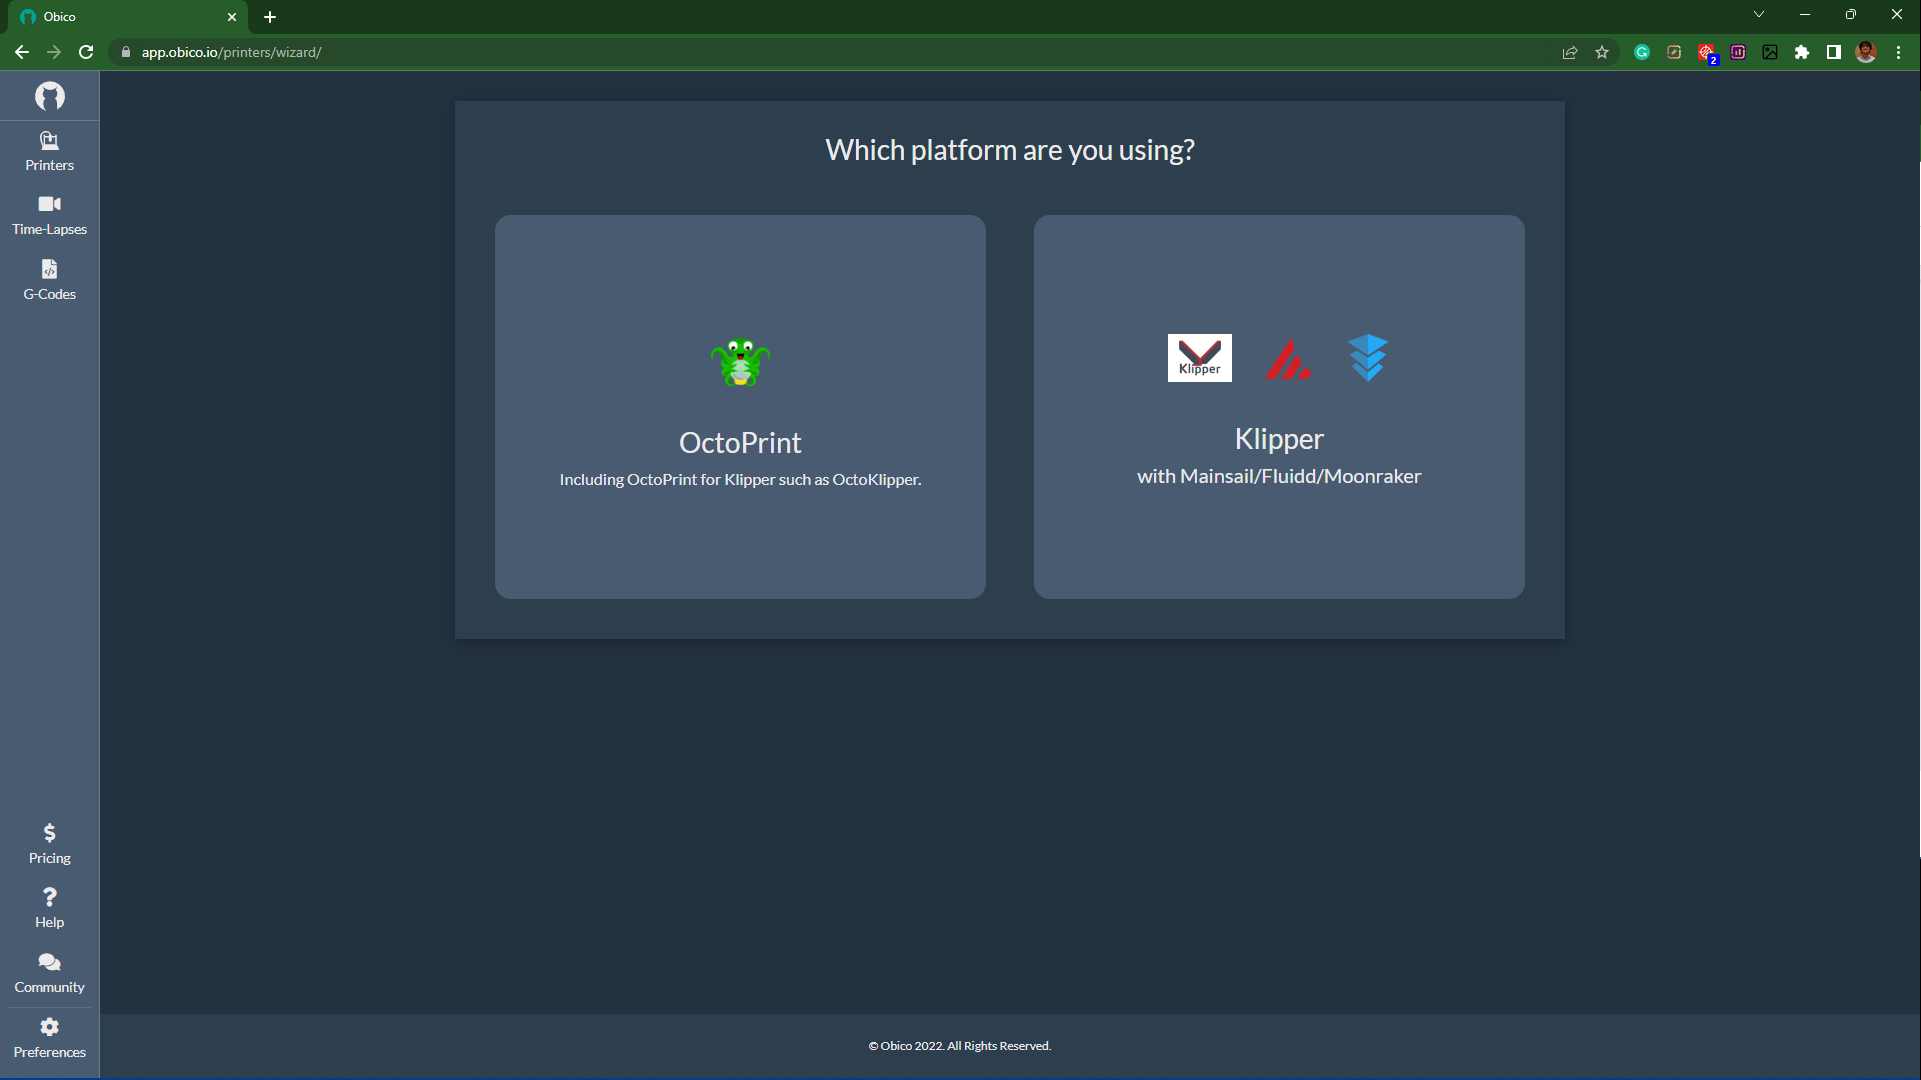
- Open Obico's website and set up your account. You can also choose to self-host your server.
- Click on Add Printer and select Klipper from the options.
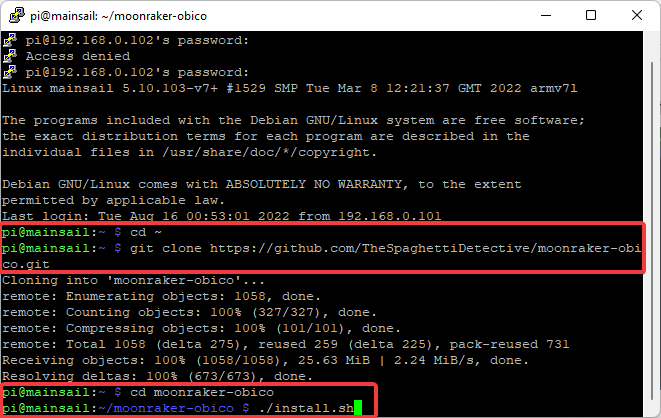
- Go to the PuTTY terminal window and input the following commands.
cd ~
git clone https://github.com/TheSpaghettiDetective/moonraker-obico.git
cd moonraker-obico
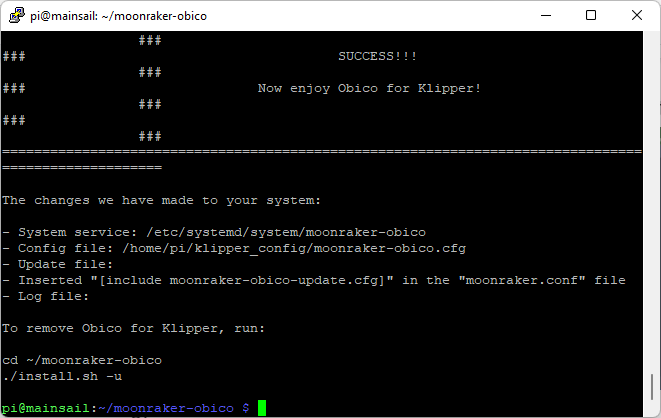
./install.sh
- In the end, you'll be asked for a 6-digit verification code.
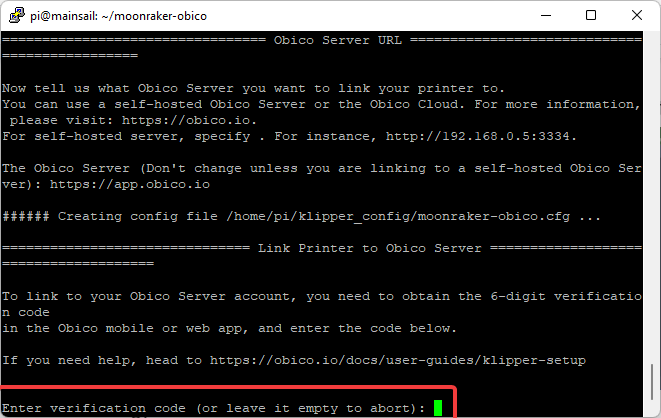
- Go back to Obico's window and proceed to the next step.
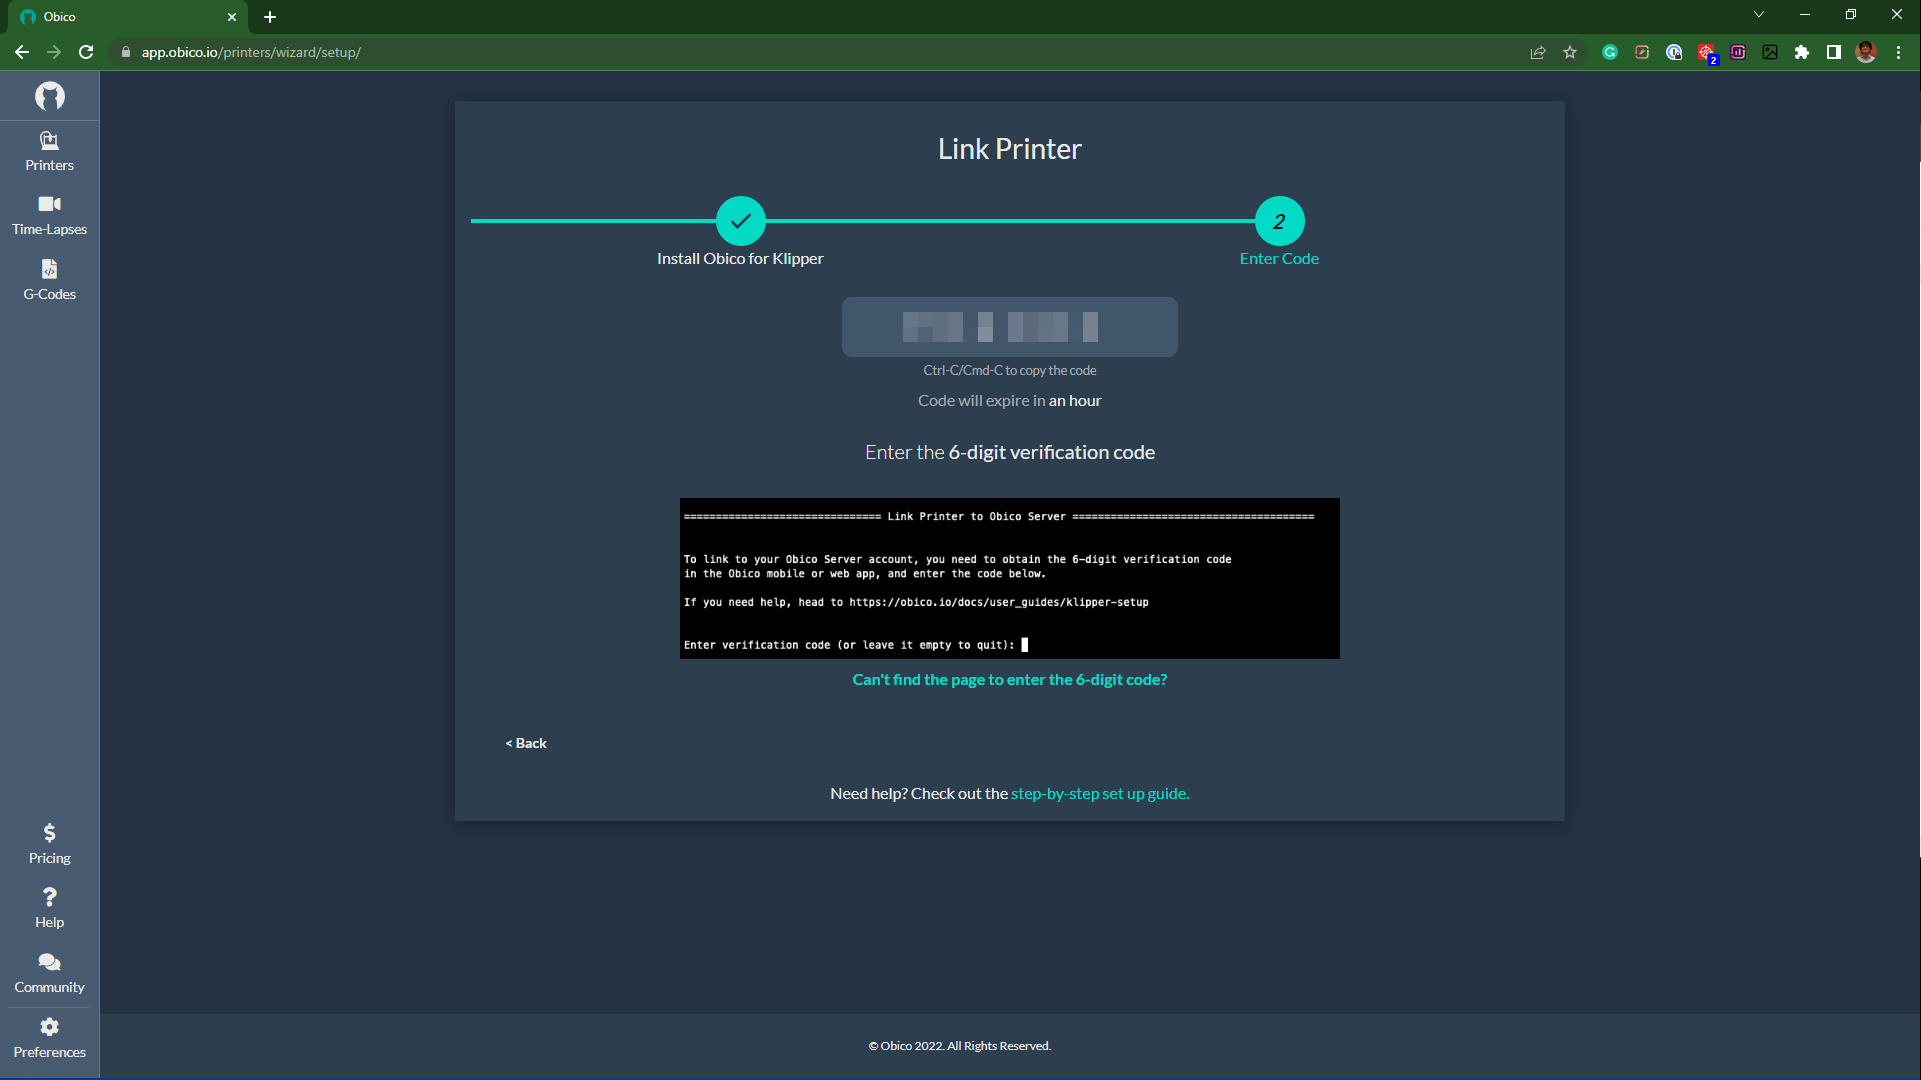
- Note the code, and enter PuTTY's terminal command window.
- You'll get a successful installation message after everything's configured successfully.
Your 3D printer with Klipper is now successfully connected to Obico. You can now access your machine virtually anywhere and experience the benefits of Obico's AI detection features.
If you have issues getting Obico installed for your 3D printer, check out the complete setup guide or join the Obico discord server to get help.
Let us know your experience of using the Klipper for Ender 3. If you find Obico useful, please give us a star on GitHub, or leave us a review on our mobile app in the iOS App Store or Google Play Store!