Octolapse - Setup And Configuration for the Best Timelapses

Octolapse with Octoprint is like a match made in heaven. These two go very well with each other and help you create awesome time lapse videos. And even though installing Octolapse is easy with Octoprint, setting it up and configuring it to deliver high-quality timelapse videos is slightly tricky.
In this article, we'll look at the detailed procedure for setting up Octolapse for your Octoprint instance with Cura and PrusaSlicer settings. We'll also share some tricks and tips to fine-tune your image settings to get the best quality footage for your 3D printing timelapse video.
Let's start with understanding the Octolapse plugin.
What is Octolapse?
Octolapse is a plugin for Octoprint that lets you record time-lapse videos of your 3D printed models without the disturbance of the printer's movements. When you create videos using Octolapse, it positions the print bed and the hot end to a pre-planned location and captures a snapshot with the 3D model in focus.
This process repeats several times, and Octolapse then stitches together all these still images to form a seamless video. The final result is an amazing time-lapse, where the model is in complete focus and appears as if it's being produced out of thin air.
These 'Octolapses' are popular on YouTube and other media sharing platforms and are a great way of visualizing the 3D printing process. The Octolapse video is quite helpful as it gives a clear view of the model as the printhead and the build plate remain stationary.
Octolapse's advantage lies in its excellent customization options, and you can fine-tune various parameters to get the best quality video. But, to get there, you'll have to experiment with many settings and understand how to configure the plugin correctly.
Hardware for Octolapse
Octolapse installs right onto your existing Octoprint instance, and all you need is a camera connected to your Raspberry Pi for shooting timelapse videos.
The caliber of the camera will play a vital role in the final quality of your Octolapse video. Therefore, you need to select the best camera that matches your needs and fits within your budget. For cameras, you have three options that you can use for Octolapse - Raspberry pi cameras, USB webcams, and a DSLR camera.
Three Raspberry cameras are each available with different specifications and at different prices. The Standard Pi Camera is the most affordable of the bunch, with the Raspberry Pi HQ Camera being the most expensive one. The Pi camera V2 falls between the two and delivers decent video quality for its price.
Alternatively, you can use a USB webcam directly with your Raspberry Pi to shoot Octo Lapses. Octoprint is natively compatible with a variety of webcams, allowing for video quality and price flexibility. Logitech's C270 is one of the top-rated webcam options due to its low price and well-balanced image quality.
Lastly, DSLR cameras are at the top end of the spectrum and will give you the best quality Octolapse video. However, you'll need a dedicated recording setup and equipment for shooting 3D printing timelapse videos.
If you're still confused with your camera choice, you can refer to our detailed guide, which will help you to choose the best camera for your Octolapse setup.
This guide will use the Logitech C270 webcam to configure the Octolapse plugin. Let's start the installation process.
How to Install Octolapse
Octolapse runs on Octoprint, so you'll need to have Octoprint installed on your Raspberry Pi. You can refer to this installation guide and set up Octoprint for your 3D printer. The following steps will detail the installation procedure solely for Octolapse.
Configure the camera settings
In this step, we'll configure Octopi's settings to match your camera's configuration. We'll also give root permissions to mjpg-streamer, allowing us to set custom image preferences.
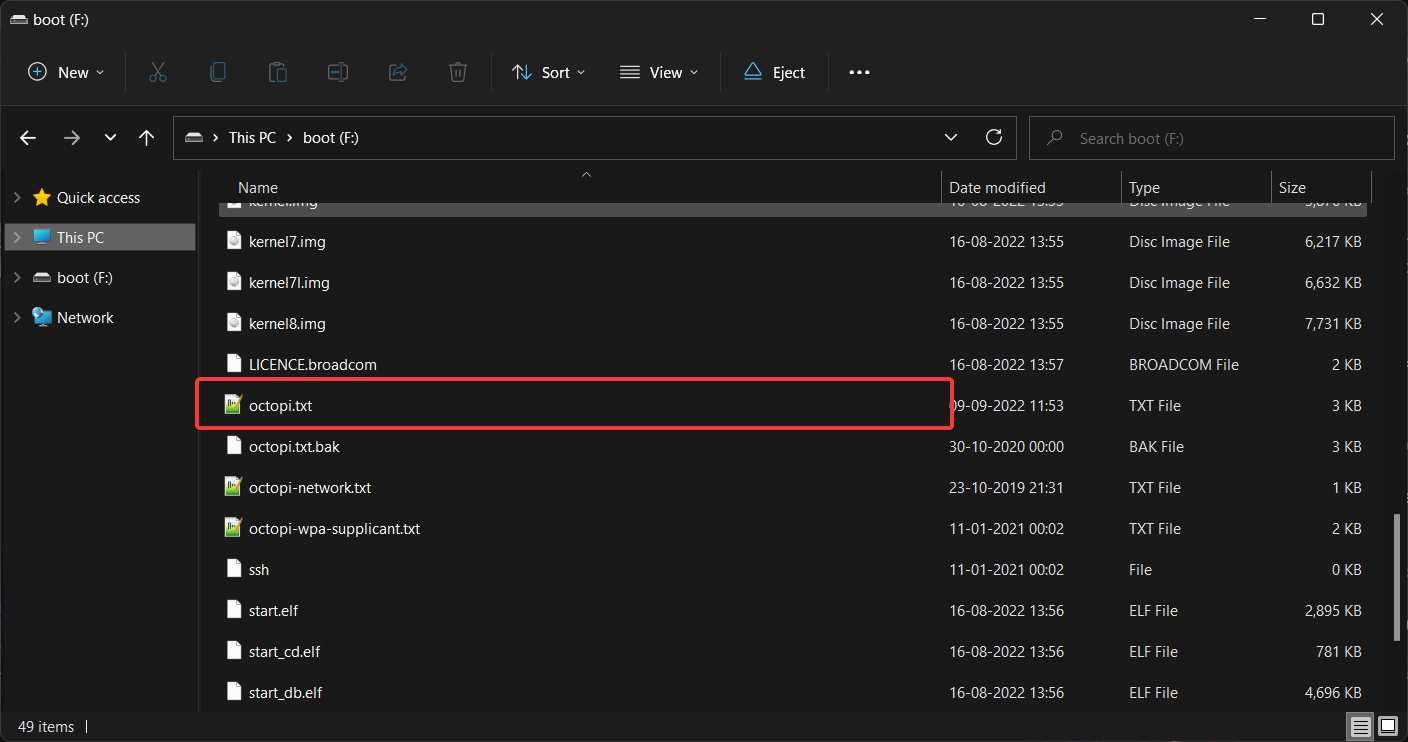
- Insert the Octoprint SD card into your computer.
- Open the boot folder, and navigate to the octopi.txt file.
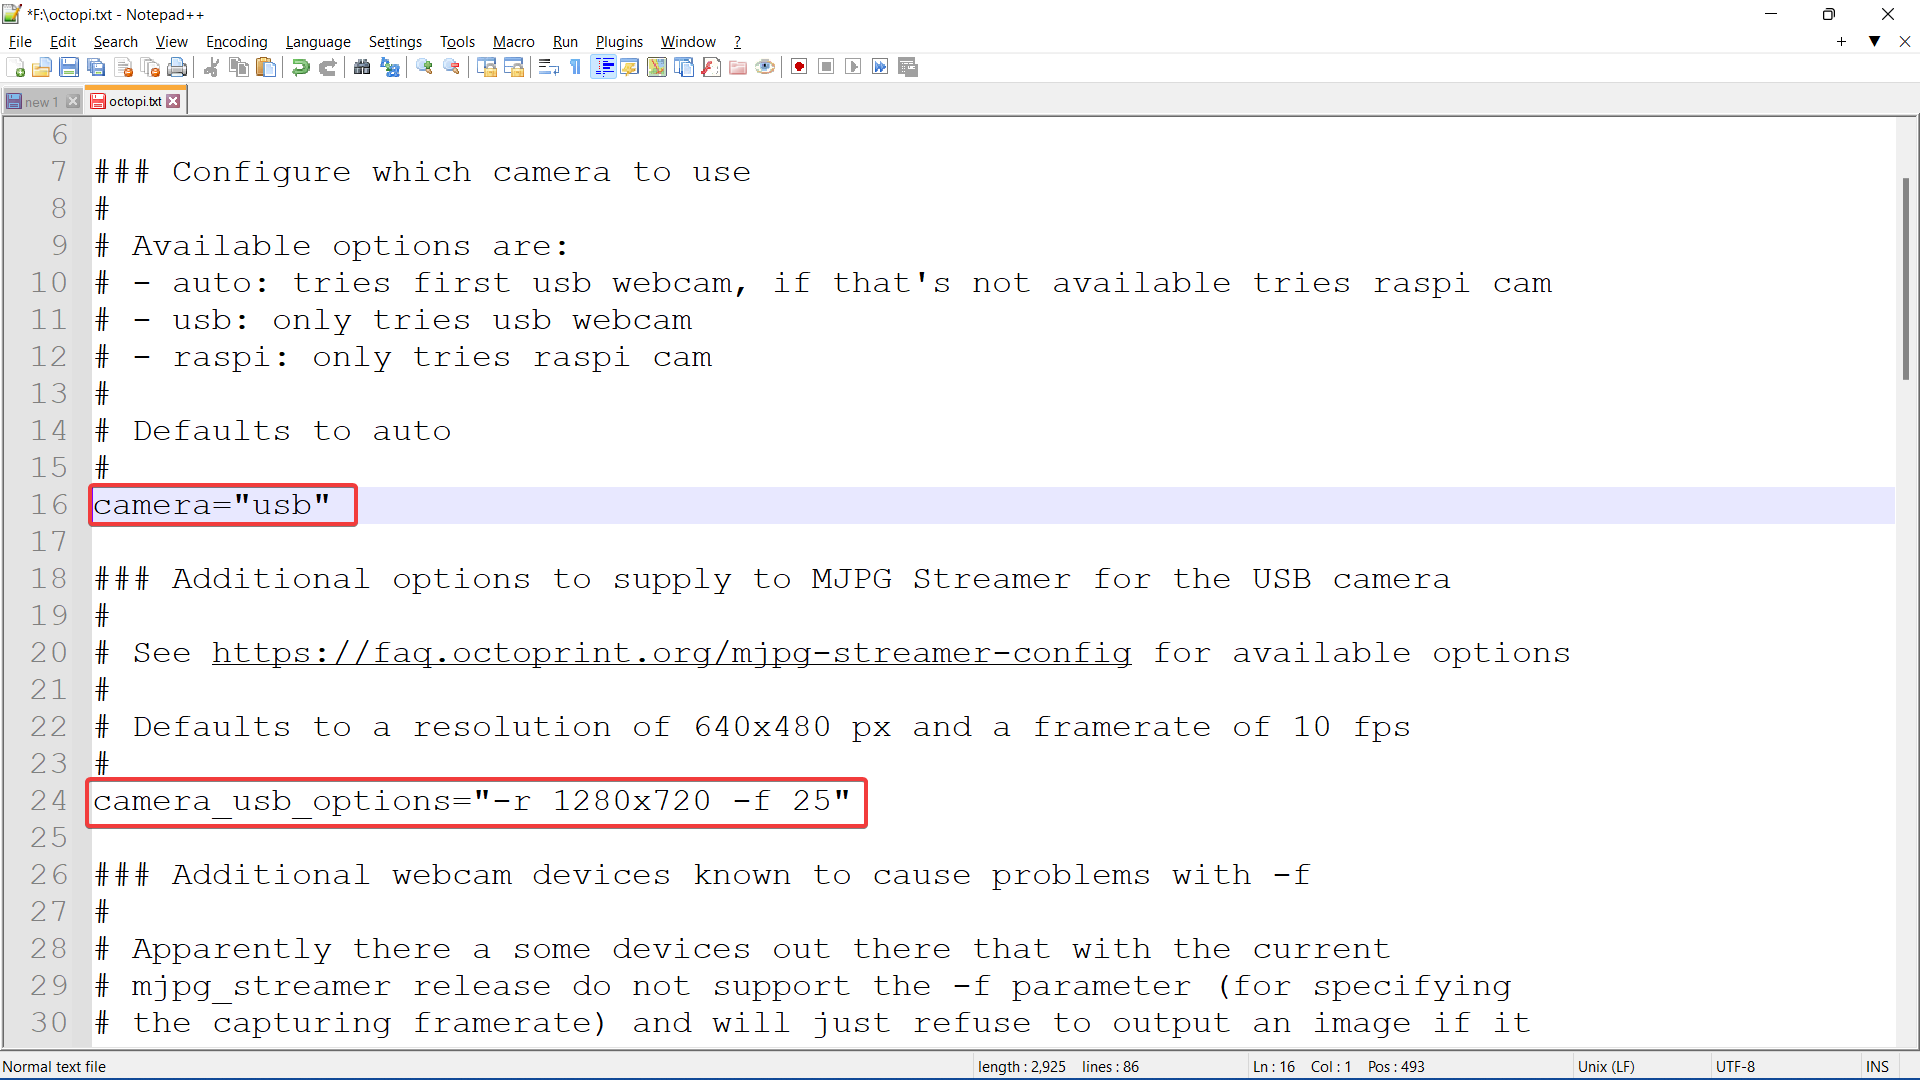
- Open this file in Notepad++ and edit the camera options command by removing the # symbol from line 16 and configuring it to a USB camera. The final version should look like this -
camera="usb"
-
If you're using a Raspberry Pi camera, you'll need to edit it to "raspi."
-
Set the resolution for your webcam in the following lines by uncommenting line 24, denoting camera resolution. You can find the resolution for your USB webcam on this website.
-
As C270 supports HD resolution, we've set ours to 1280x720 and the frame rate to 25.
-
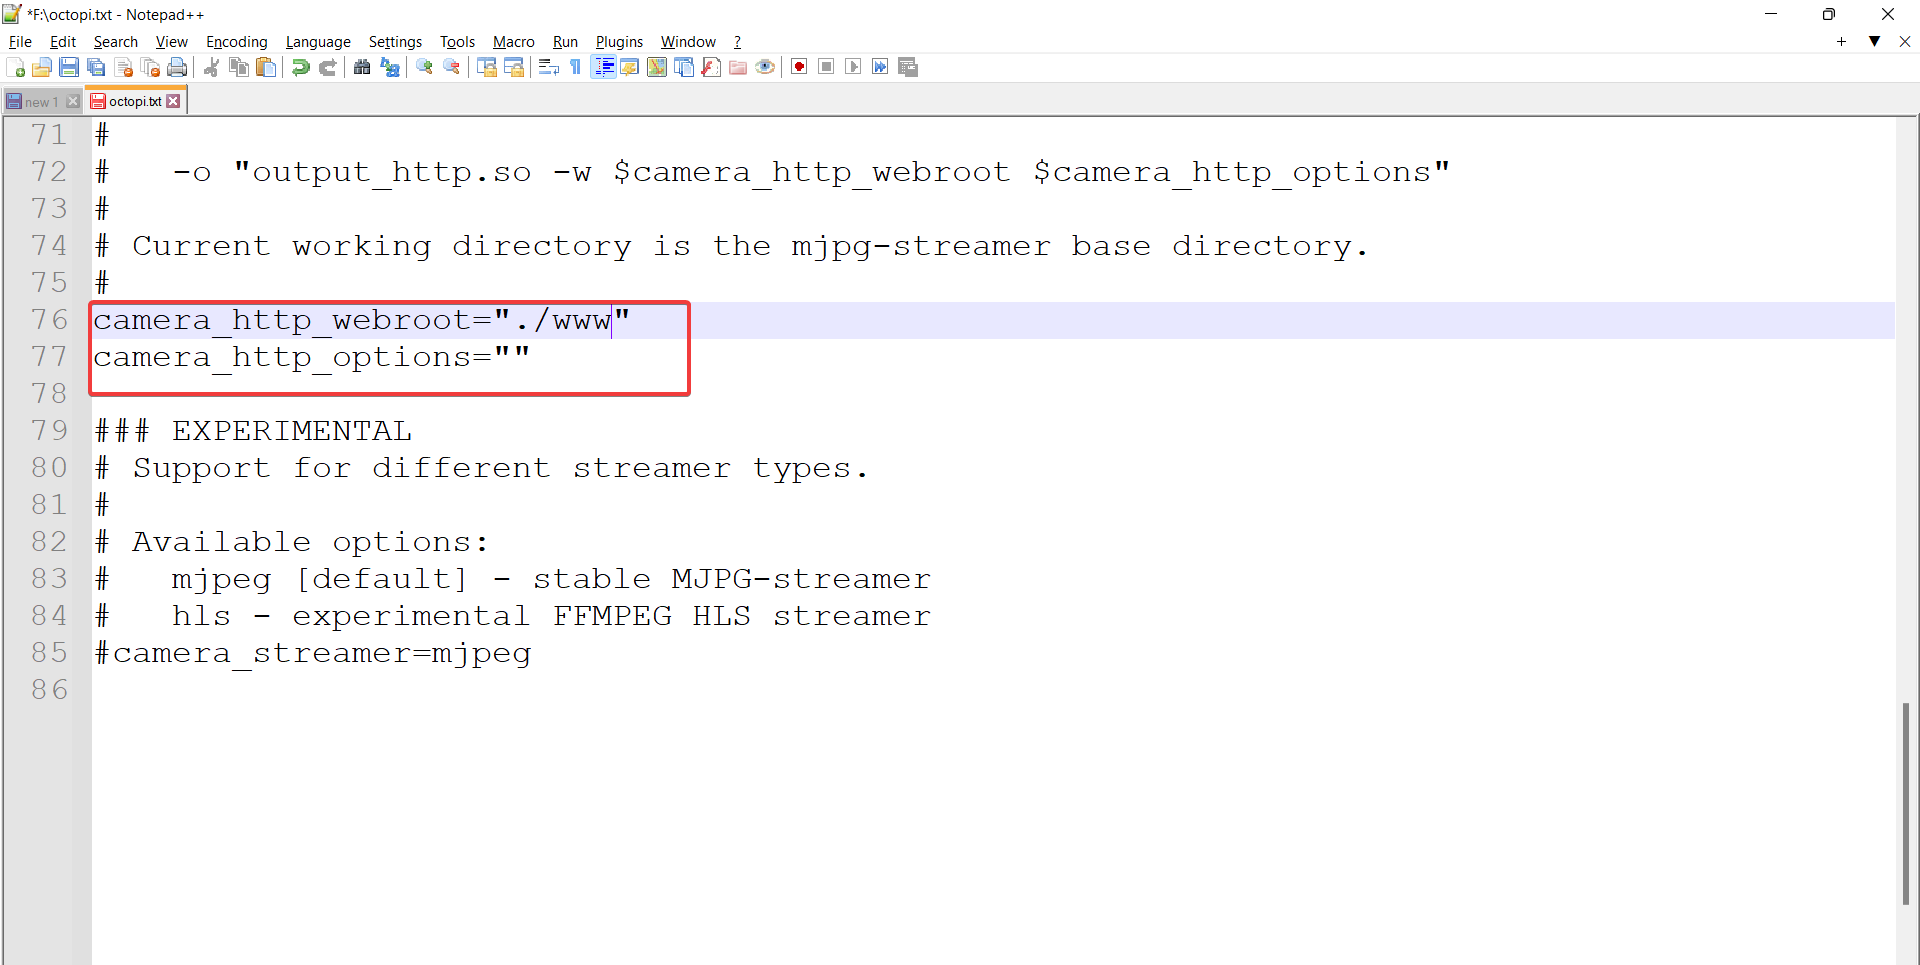
In the same file, navigate to line 76. We need to edit the two subsequent lines for customizing our video settings. By default, the lines should look like this -
#camera_http_webroot="./www-octopi"
#camera_http_options="-n"
- Change the above commands to this -
camera_http_webroot="./www"
camera_http_options=""
- Save the file, and eject the SD card.
- Reinsert the SD card in your Raspberry Pi and power it up.
Install Octolapse Plugin
After configuring the camera settings, you can begin installing the Octolapse plugin.
- Log onto your Raspberry Pi instance and open the main interface.
- Click on the spanner icon on the top-right of Octoprint's page. This will open the settings menu.
- Go to 'Plugin Manager' under the Octoprint section, and click on the 'Get More' tab.
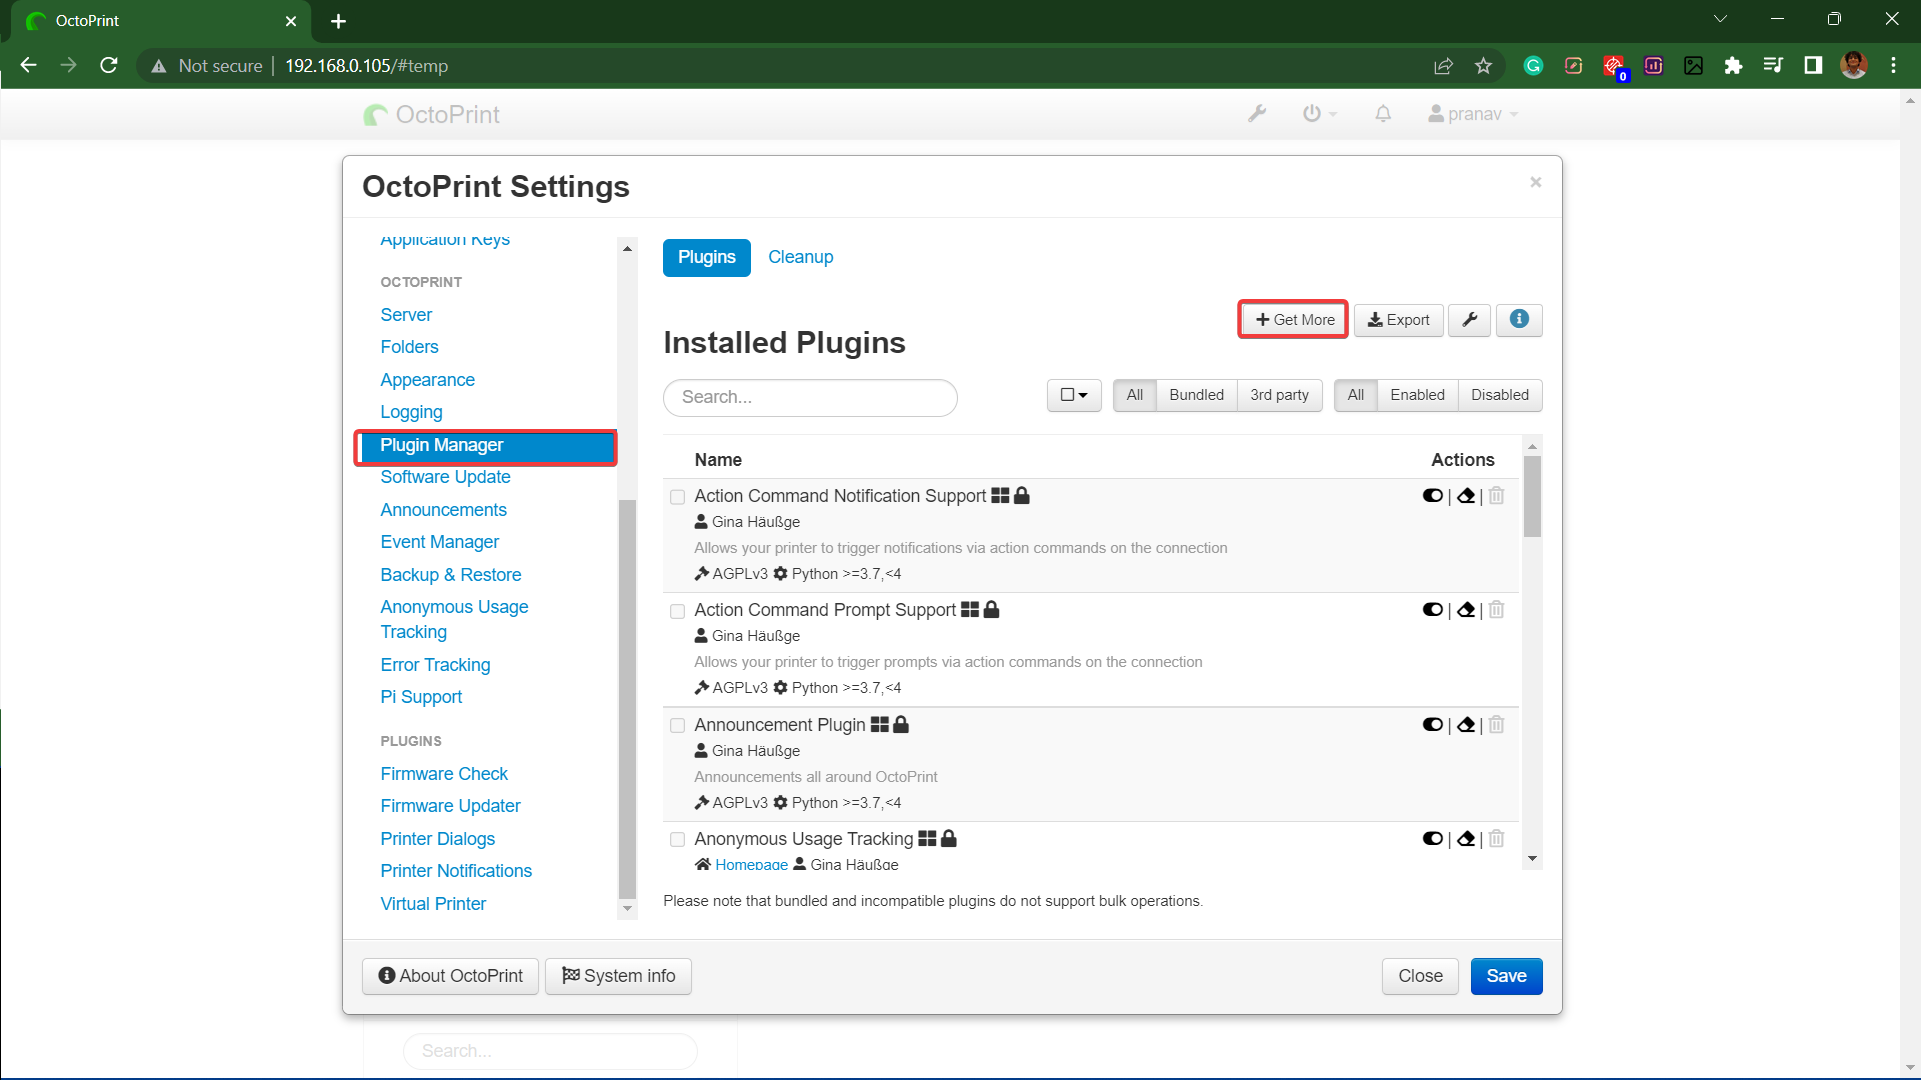
- Search for the Octolapse plugin and click the install button.
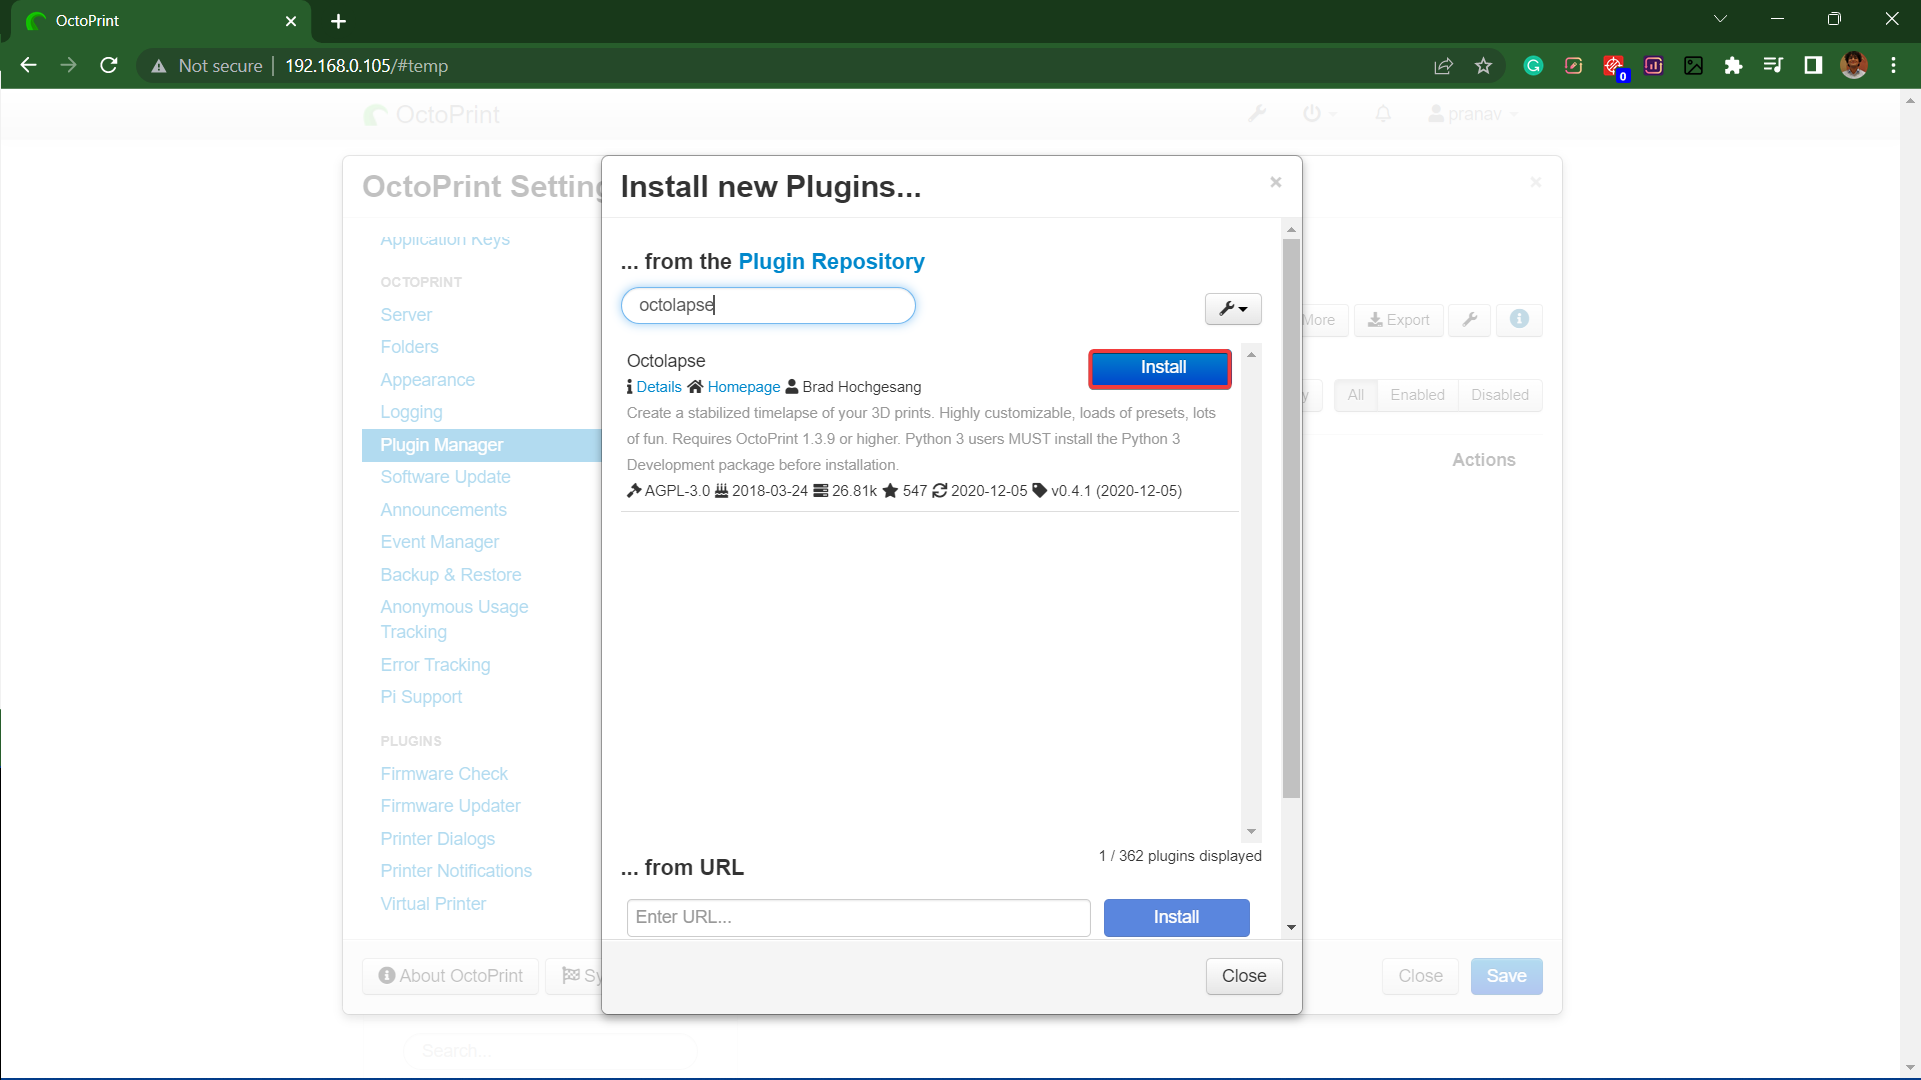
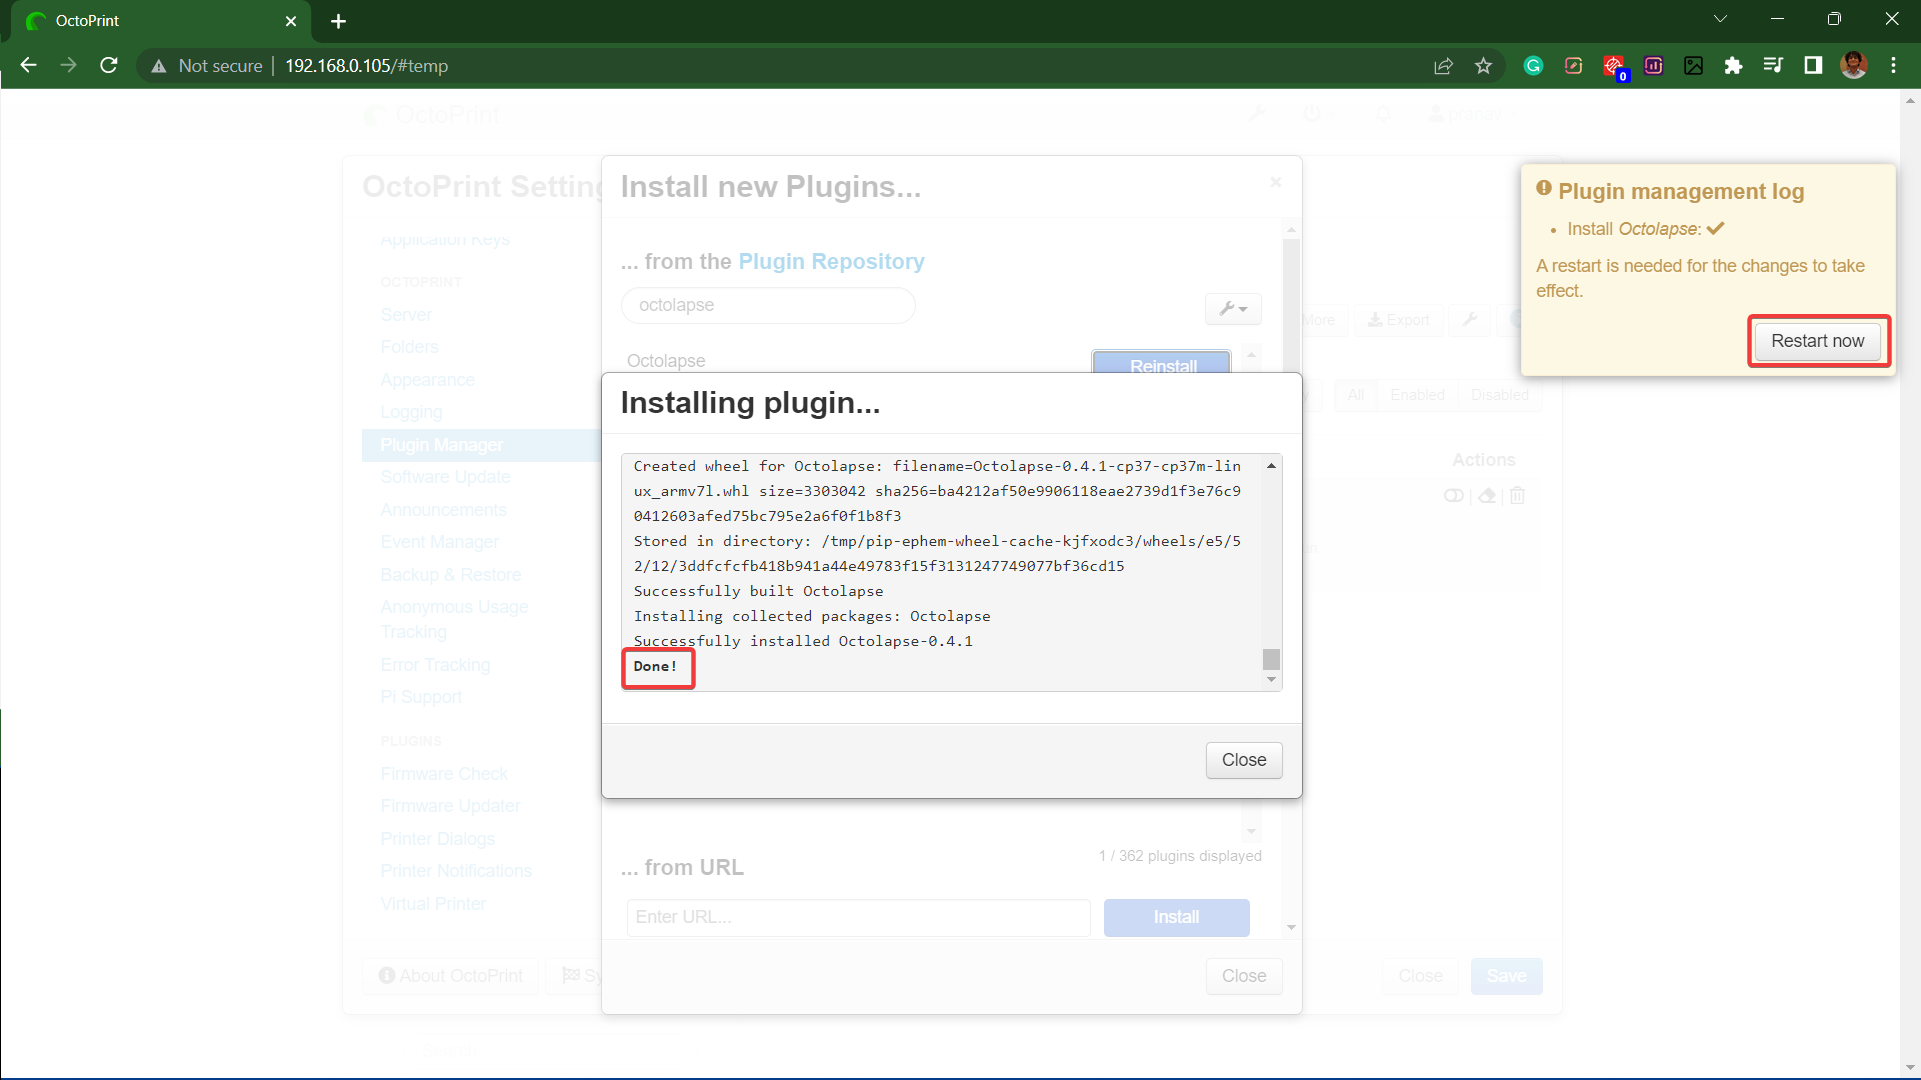
- The installation process will take some time. You'll get a notification indicating a successful installation if everything goes smoothly. You'll need to reboot the system to finish the installation process.
-
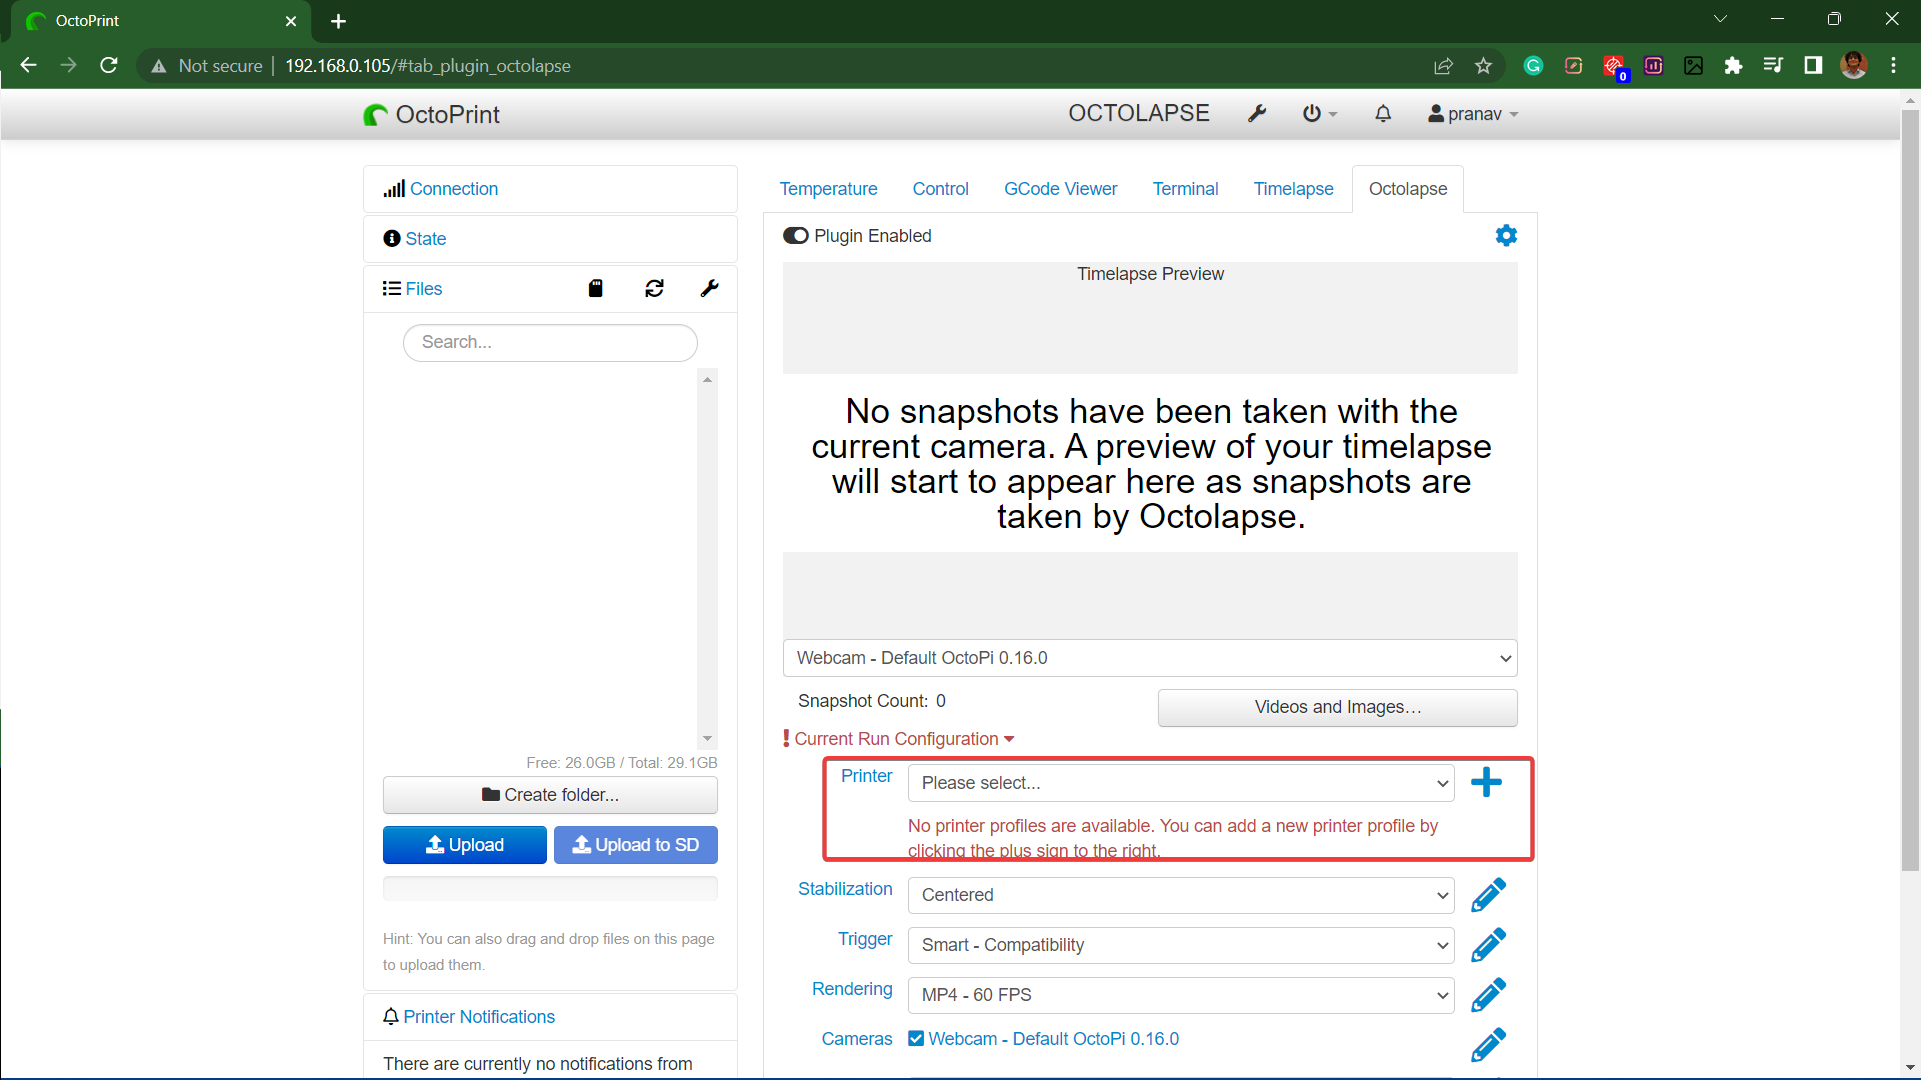
After the reboot, you'll notice an Individual Octolapse tab on the main UI.
-
Octolapse is now successfully installed on your Octoprint instance.
You can access the Octolapse settings and your time-lapse videos right from this tab. It will be the central hub for everything related to Octolapse. For Octolapse to run successfully, you'll need to configure it to match your slicer's settings.
Slicer Configuration
Octolapse needs to be aware of some of the vital slicer settings. It uses these settings as a reference point while taking a snapshot of your 3D model.
Octolapse has the provision for detecting your slicer settings automatically, but it might not be accurate every time. Therefore, it's better to configure these settings manually. We'll outline the process for Cura and PrusaSlicer with an Ender 3 3D printer.
Cura Slicer Configuration
- Open the Octolapse tab and click on the ' +' icon next to the Printer section. This will open up a new configuration window.
- Input your 3D printer's name, make and model in the respective sections.
- In the Slicer Type tab, select Cura 4.2 and the above option.
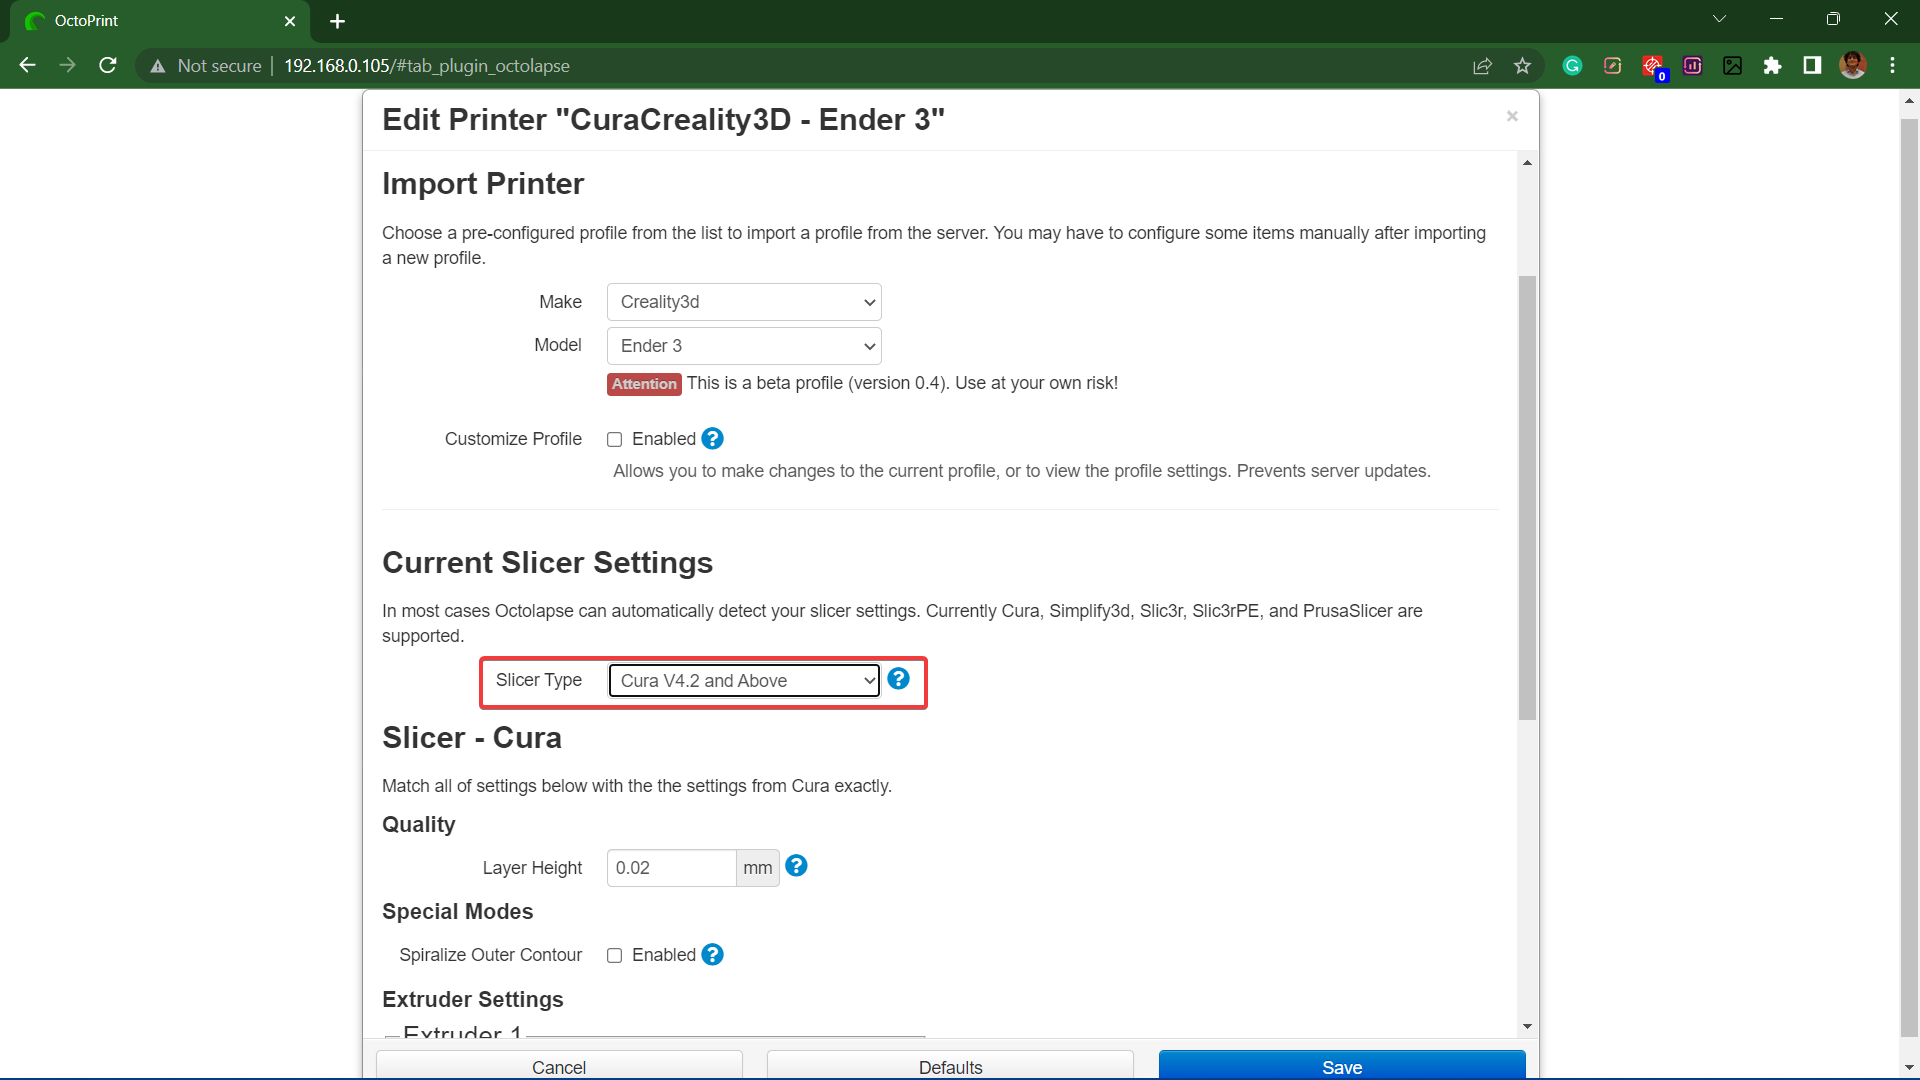
- Match all the settings as configured in your Cura slicer's profile.
- Fill up everything and click on the Save button and close the window.
If you want further customization, you can Enable the Customize Profile box in the printer section. This option will open up more settings you can personalize per your needs. These are highly experimental settings; you can leave them as they are if you plan to use Octolapse solely for primary purposes.
PrusaSlicer Configuration
- If you add the PrusaSlicer profile, the first two steps remain similar to the Cura slicer's configuration. Otherwise, click on the dropdown menu of the Printer tab, and continue with the Please select option. It'll show the ' +' sign on the right side, and you can begin adding the printer profile.
- In the Slicer Type tab, select the PrusaSlicer option.
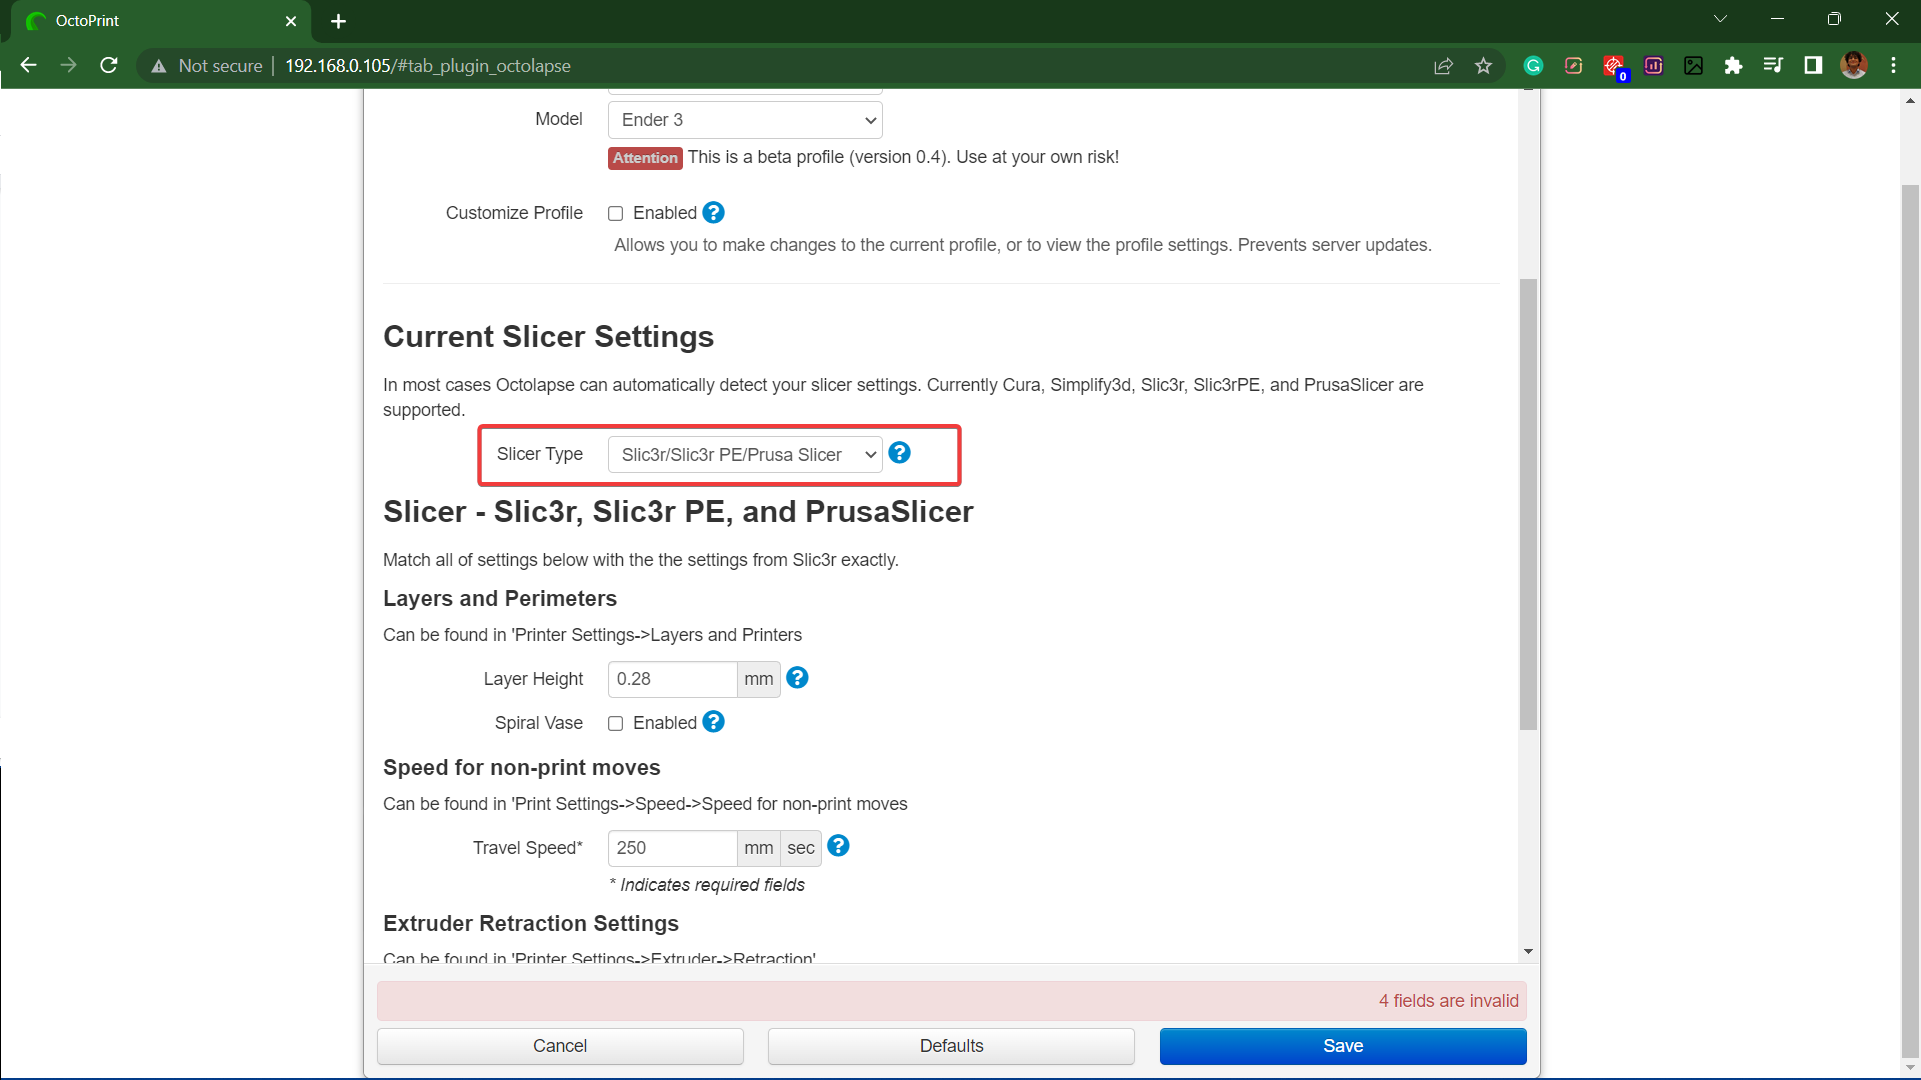
- Input all the required settings, and match them with your current profile settings from the PrusaSlicer.
- Save the settings and close the window.
Once you're done configuring the slicer settings, technically, you're ready to shoot your first Octolapse video. You can choose to go with the default parameters or customize some of these to get the required results. Let's understand some of the basic settings for our first Octolapse.
First timelapse settings
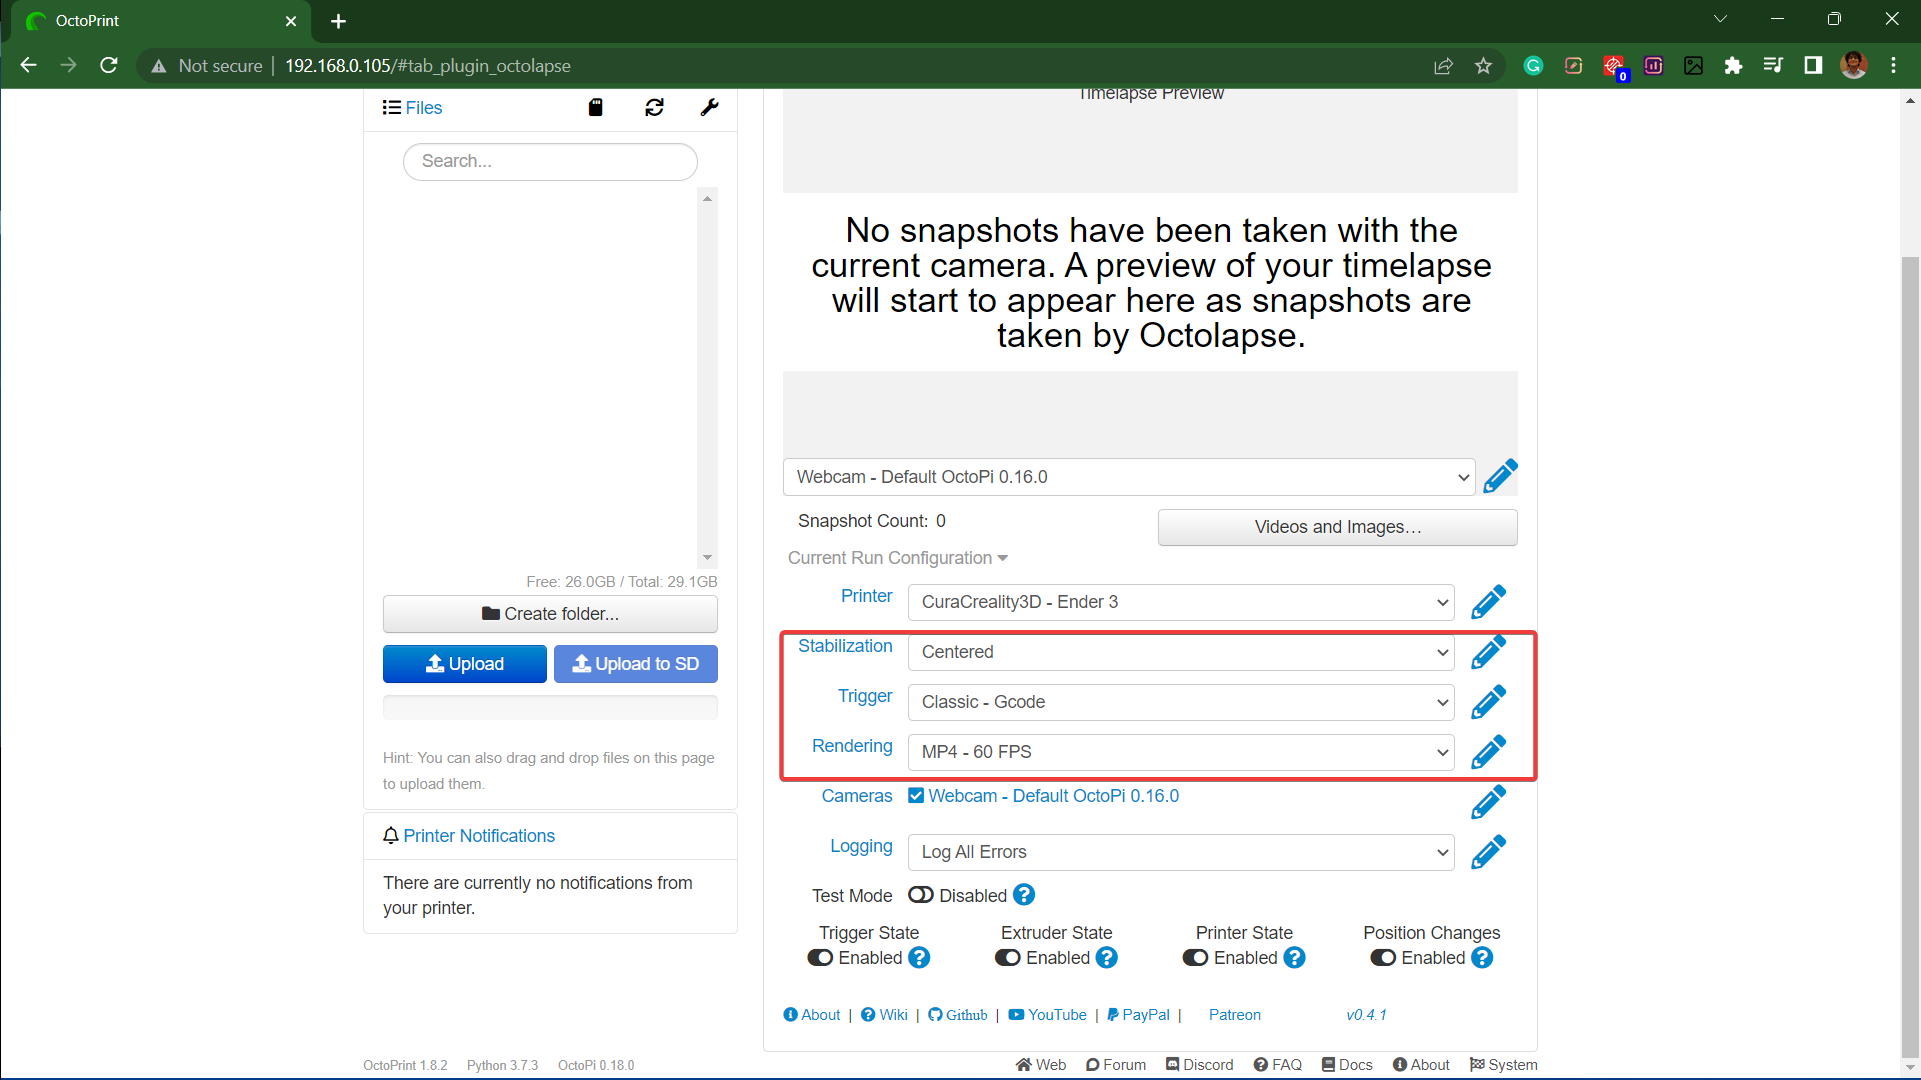
As it is, the standard settings of the Octolapse will give you good enough results, provided that your printing area is well-lit. You can modify the fundamental stabilization, trigger, and Rendering settings to alter the snapshot parameters for your Octolapse.
Let's look at these settings in brief.
Stabilization
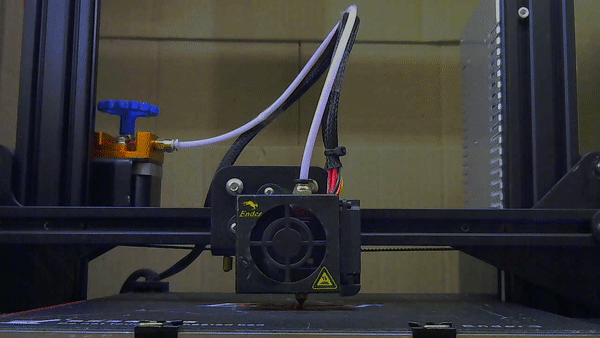
The stabilization parameter governs the positioning of the print head and the build plate while the camera takes a snapshot. For example, in the above image, you can see that the print head is positioned on the Back Left of the printer. This setting gives you an unobstructed and focused view of the model.
Similarly, you can alter these settings to fix the print head at various positions. You can choose a fixed place for your print head or an animated stabilization (see the image in the next section) option for a moving hot end.
Trigger
With the trigger set, you can inform the Octolapse plugin about the timing of the snapshot. You can set it at every layer or at fixed time intervals or even add custom snapshot commands to your Gcode that will trigger the webcam. This setting helps customize the moment of the snapshot and allows you to fine-tune the ideal moment for taking a picture.
By default, it's set to Smart Compatibility mode, which takes a picture during every layer change. It's a quick and reliable method and helps you get good results with Octolapse. You can hover around the other parameters to understand more about them and experiment with your choices.
Rendering
Rendering decides the final video length and frame rate. You can set it at a fixed length of five and ten seconds or choose a frame rate between 30 and 60 fps.
The 30 fps video will play 30 pictures in a single second, resulting in a slightly longer video but giving you excellent clarity regarding your print. In contrast, the 60 fps video will be fast and smooth but might be too short to enjoy the Octolapse properly.
Tips and tricks for getting the best Octolapse time-lapse videos
The above Octolapse was achieved with some basic settings and good lighting conditions. But, you can fine-tune your image quality and parameters to achieve high-quality videos within the Octolapse tab.
In the earlier step, when we uncommented the mjpg-streamer lines, we accessed root level settings to alter the camera's video output. Using these, you can adjust the brightness, contrast, sharpness, aspect ratio, and several other parameters.
Let's look at how you can set your custom image preferences.
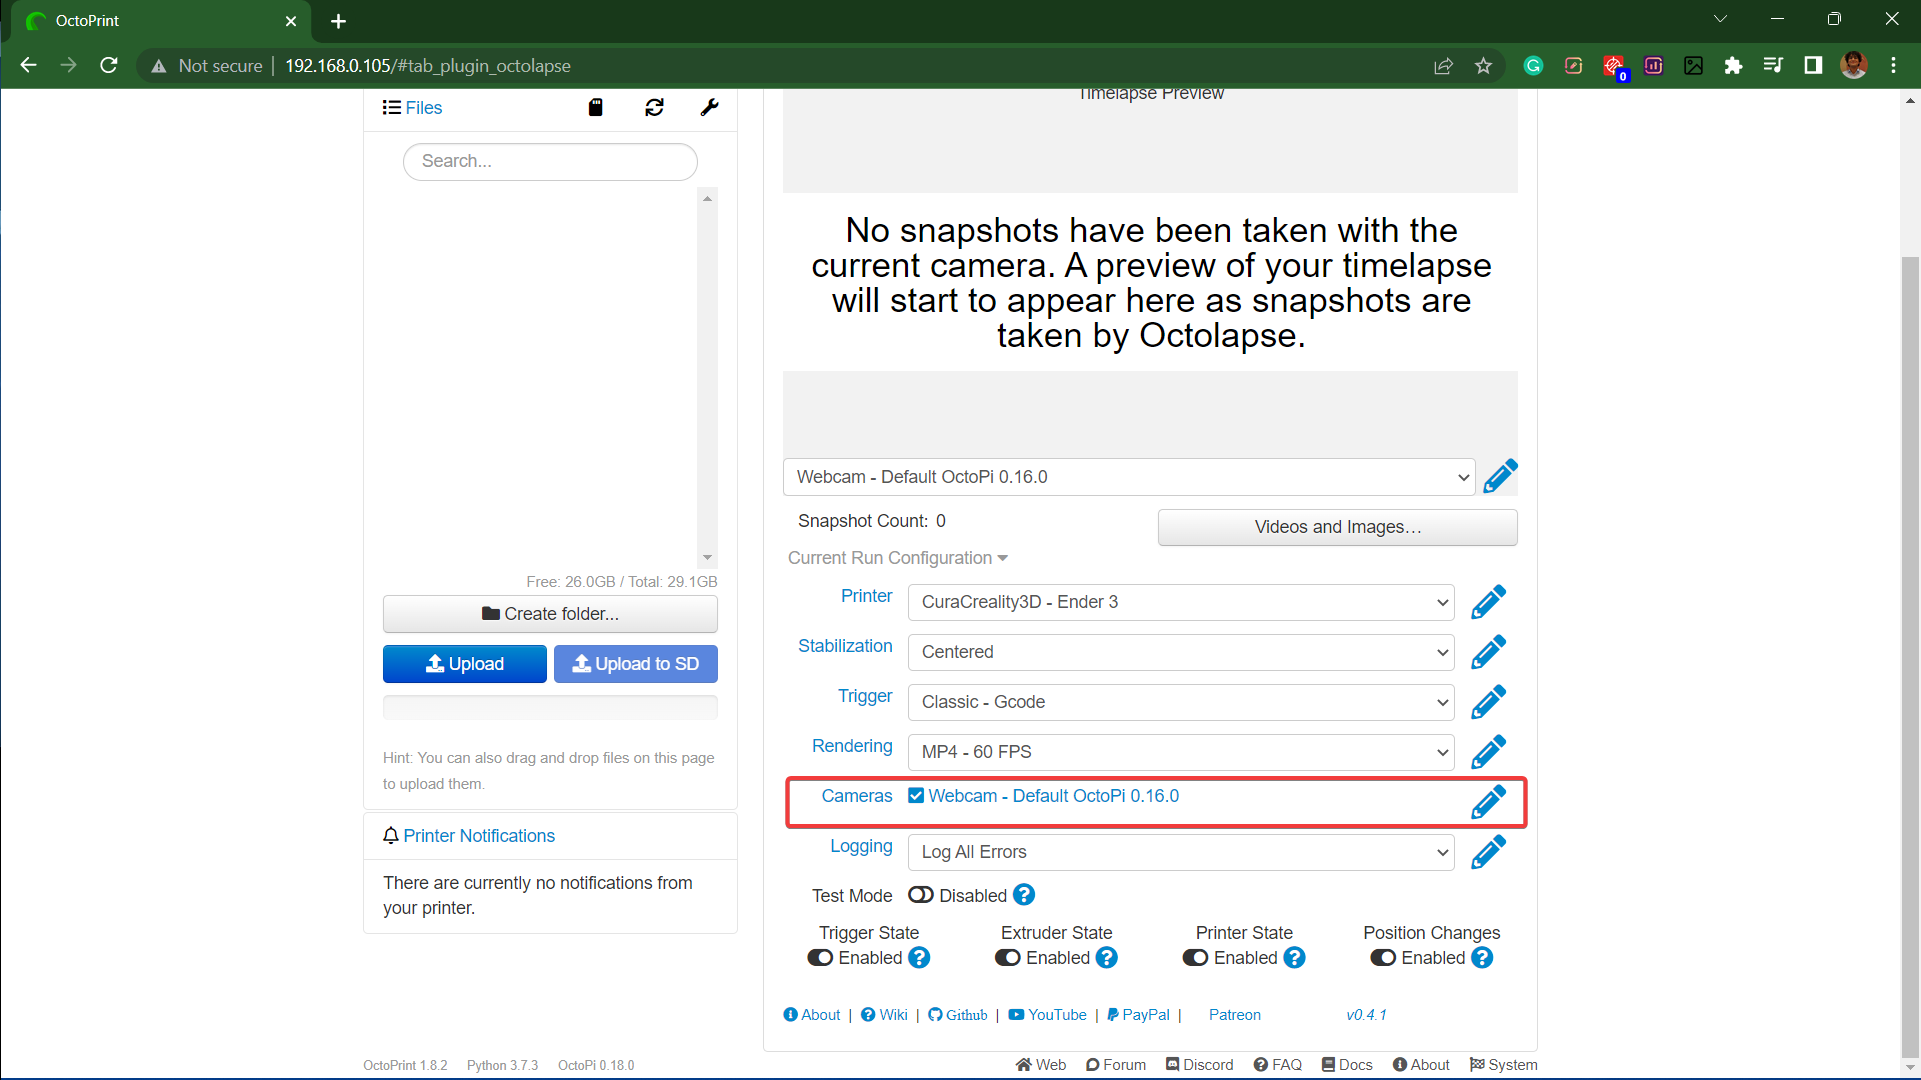
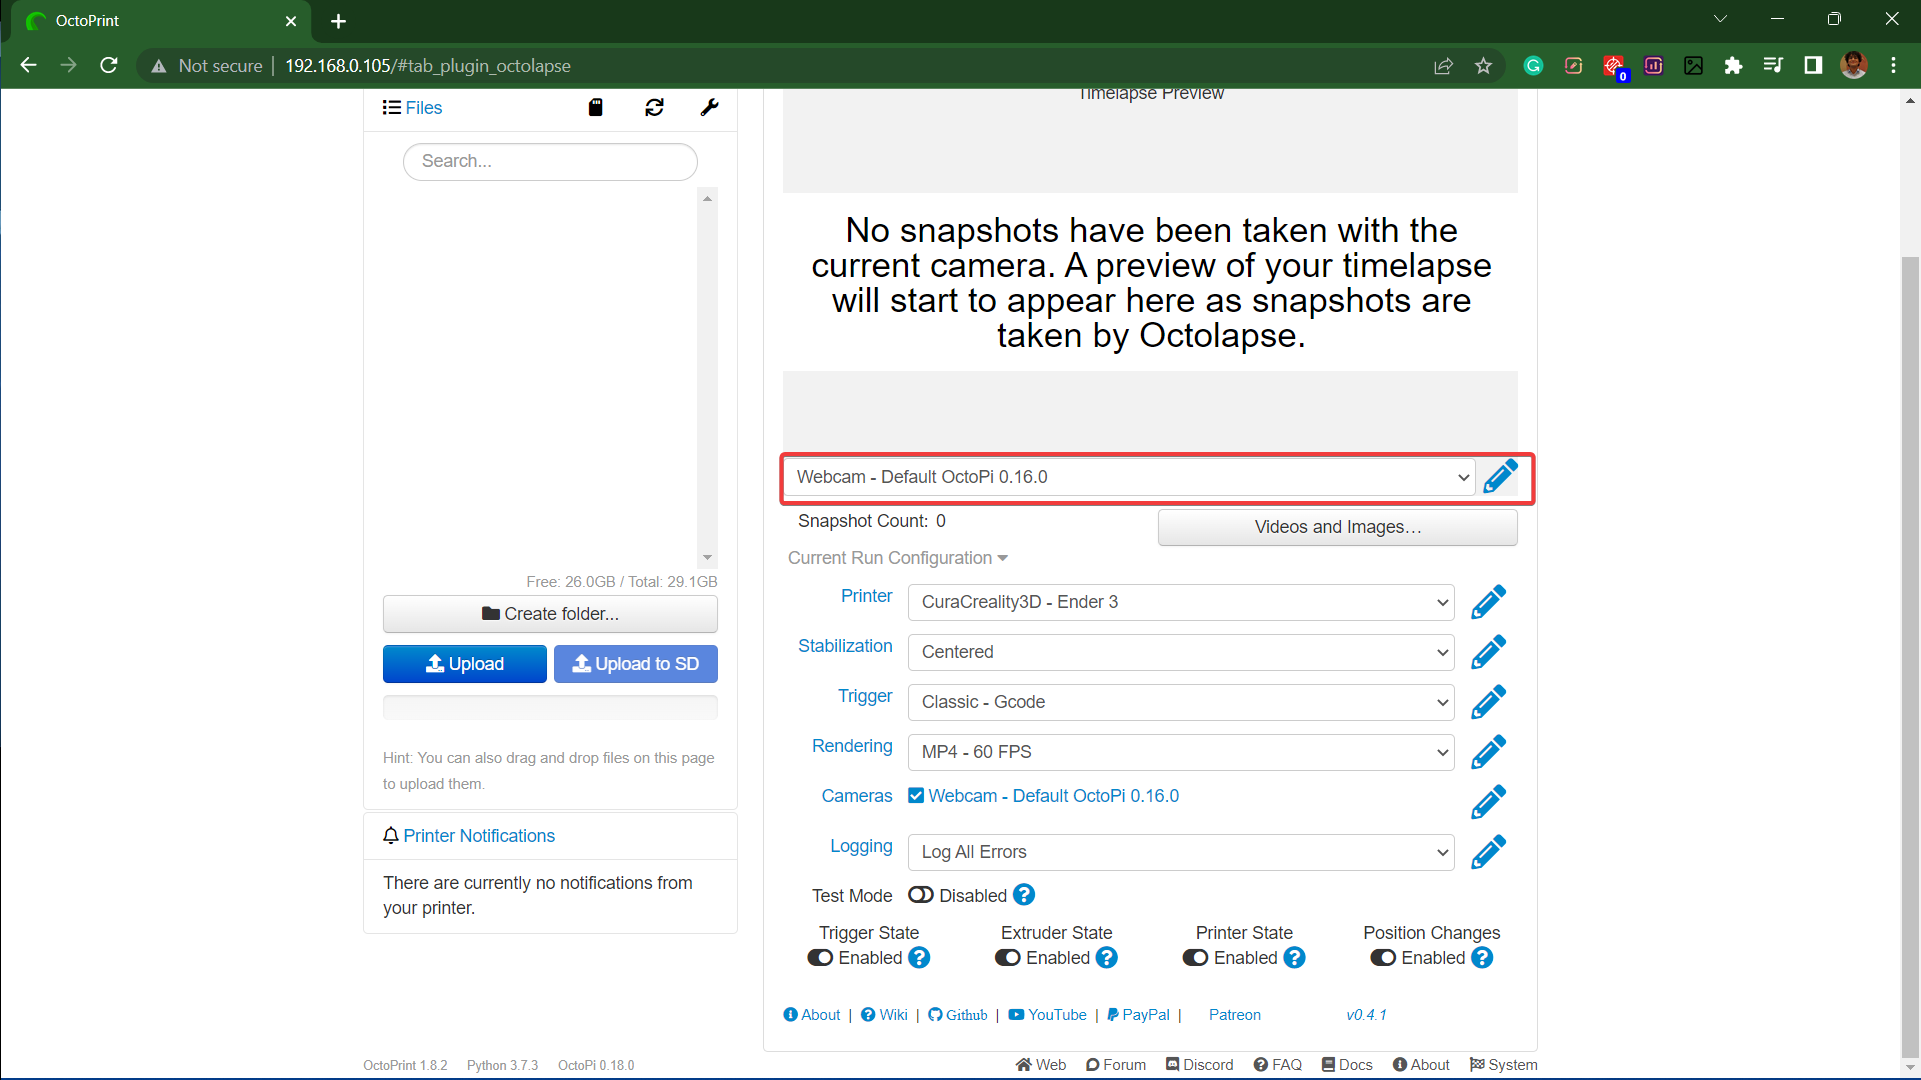
- In the Octolapse tab, click on the pencil icon beside the Camera section.
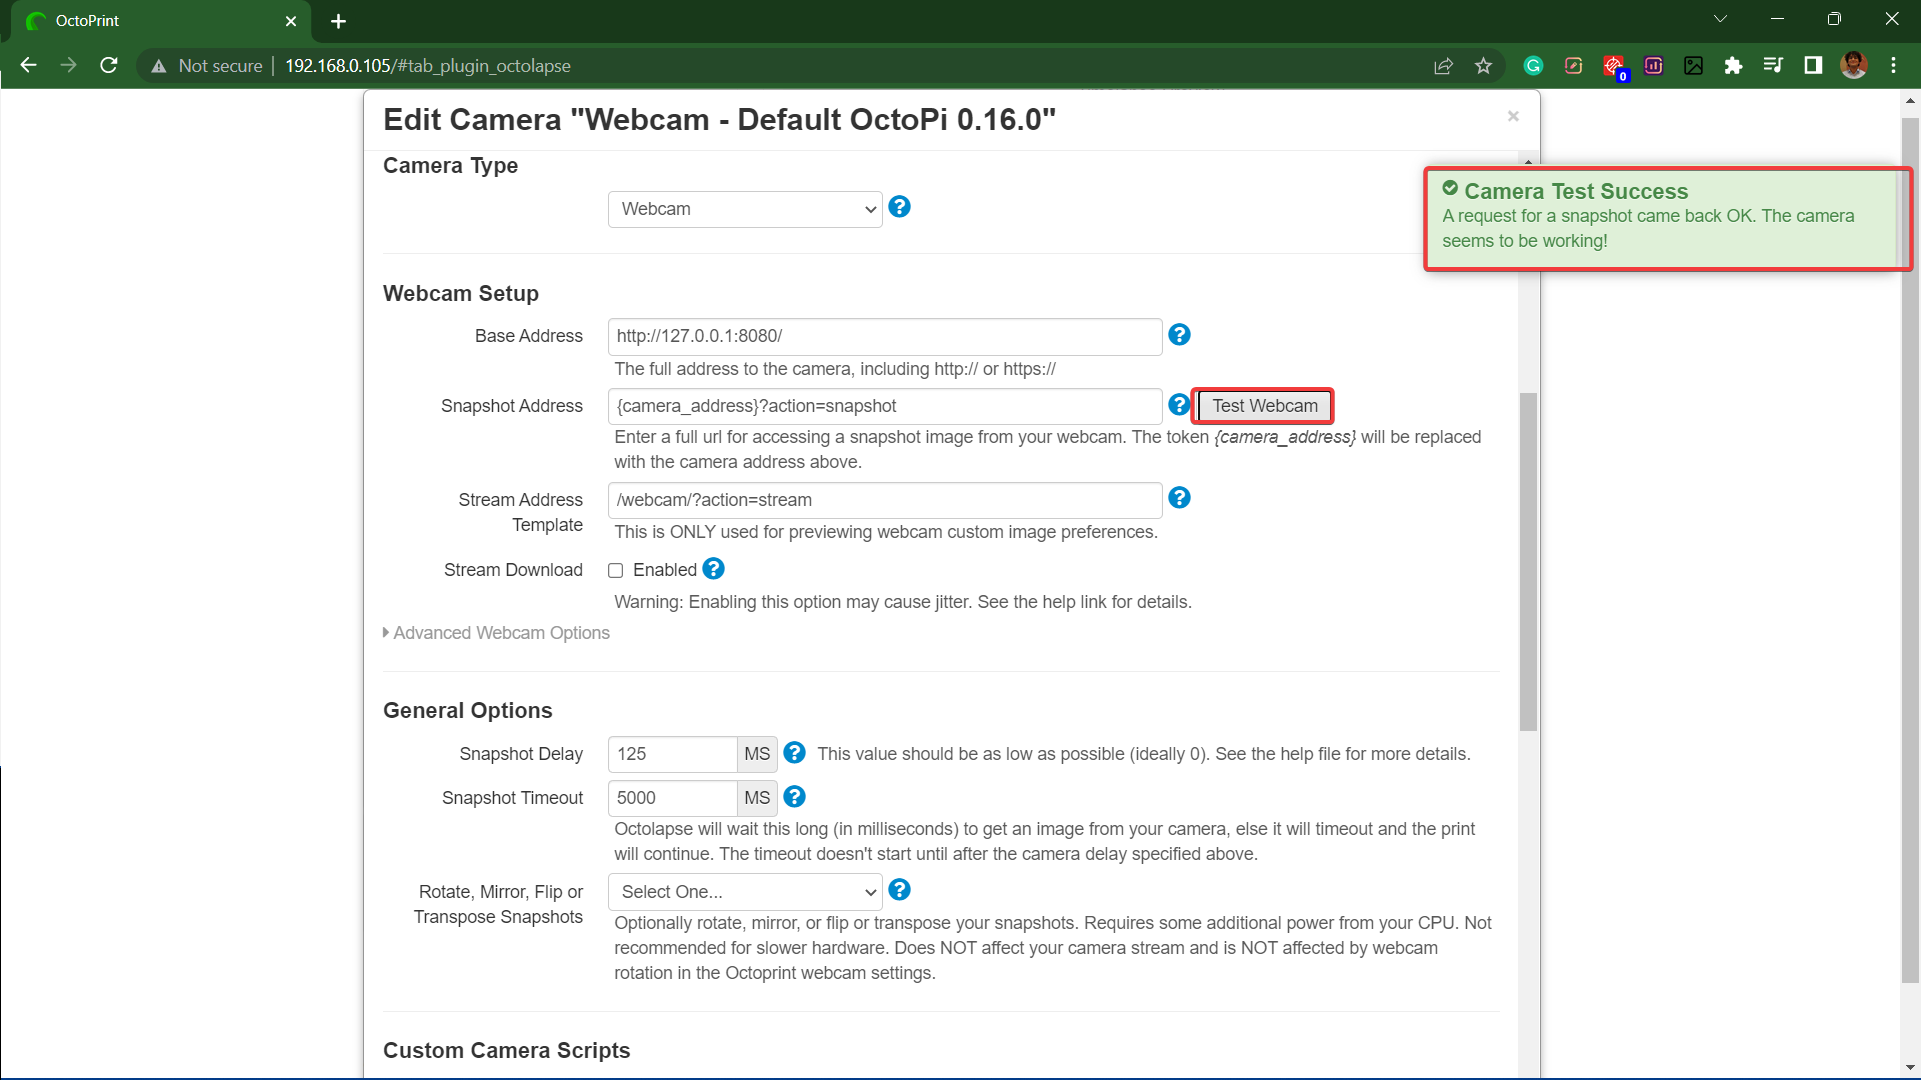
- You can check your webcam's connection by clicking on the Test Webcam button in the Webcam setup section. If everything's set up correctly, you should get a success message.
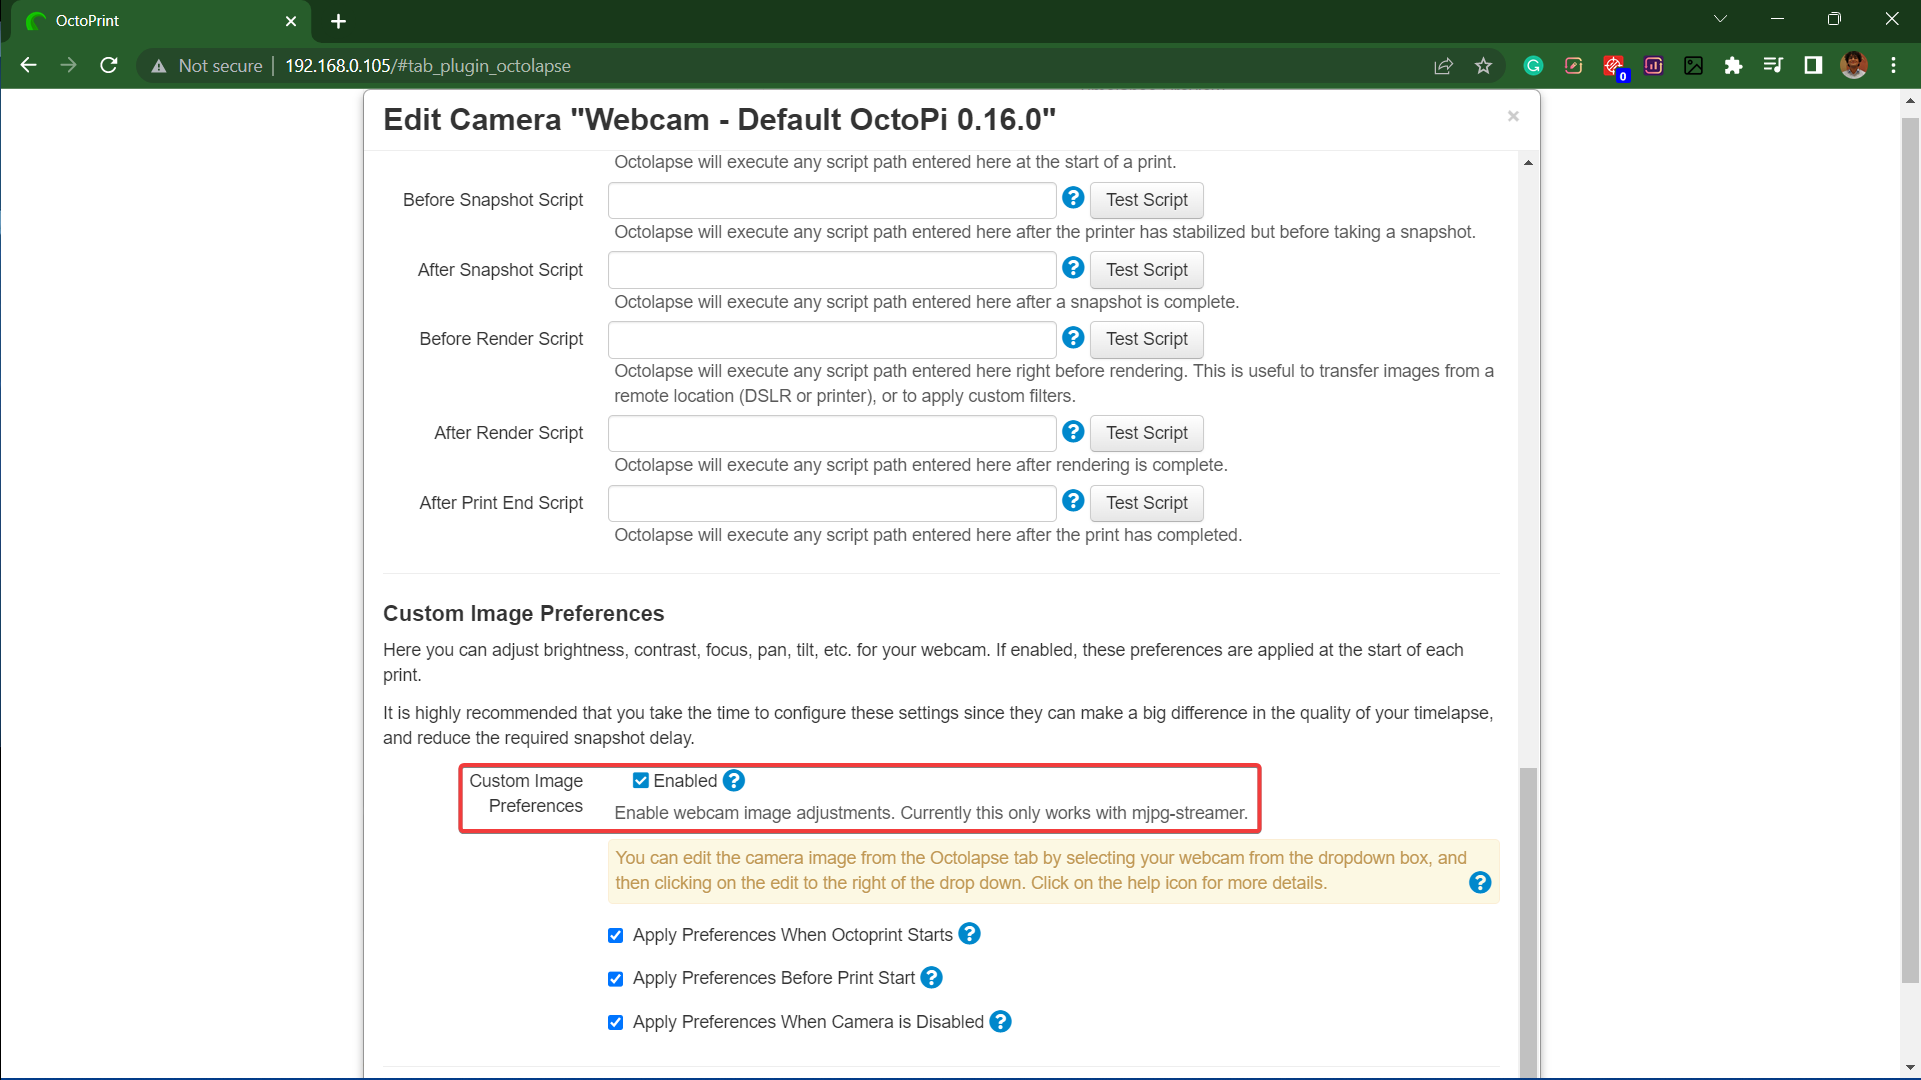
- Scroll down to the custom image preference section, and tick the Enabled box. Save the settings and close the window.
- In the main Octolapse tab, click on the pencil icon beside the section, which indicates the name of your webcam.
- It will open up a new window with various parameters for tuning your video output. You'll receive a live feed of your camera, and you can adjust these settings and view their effect in real time.
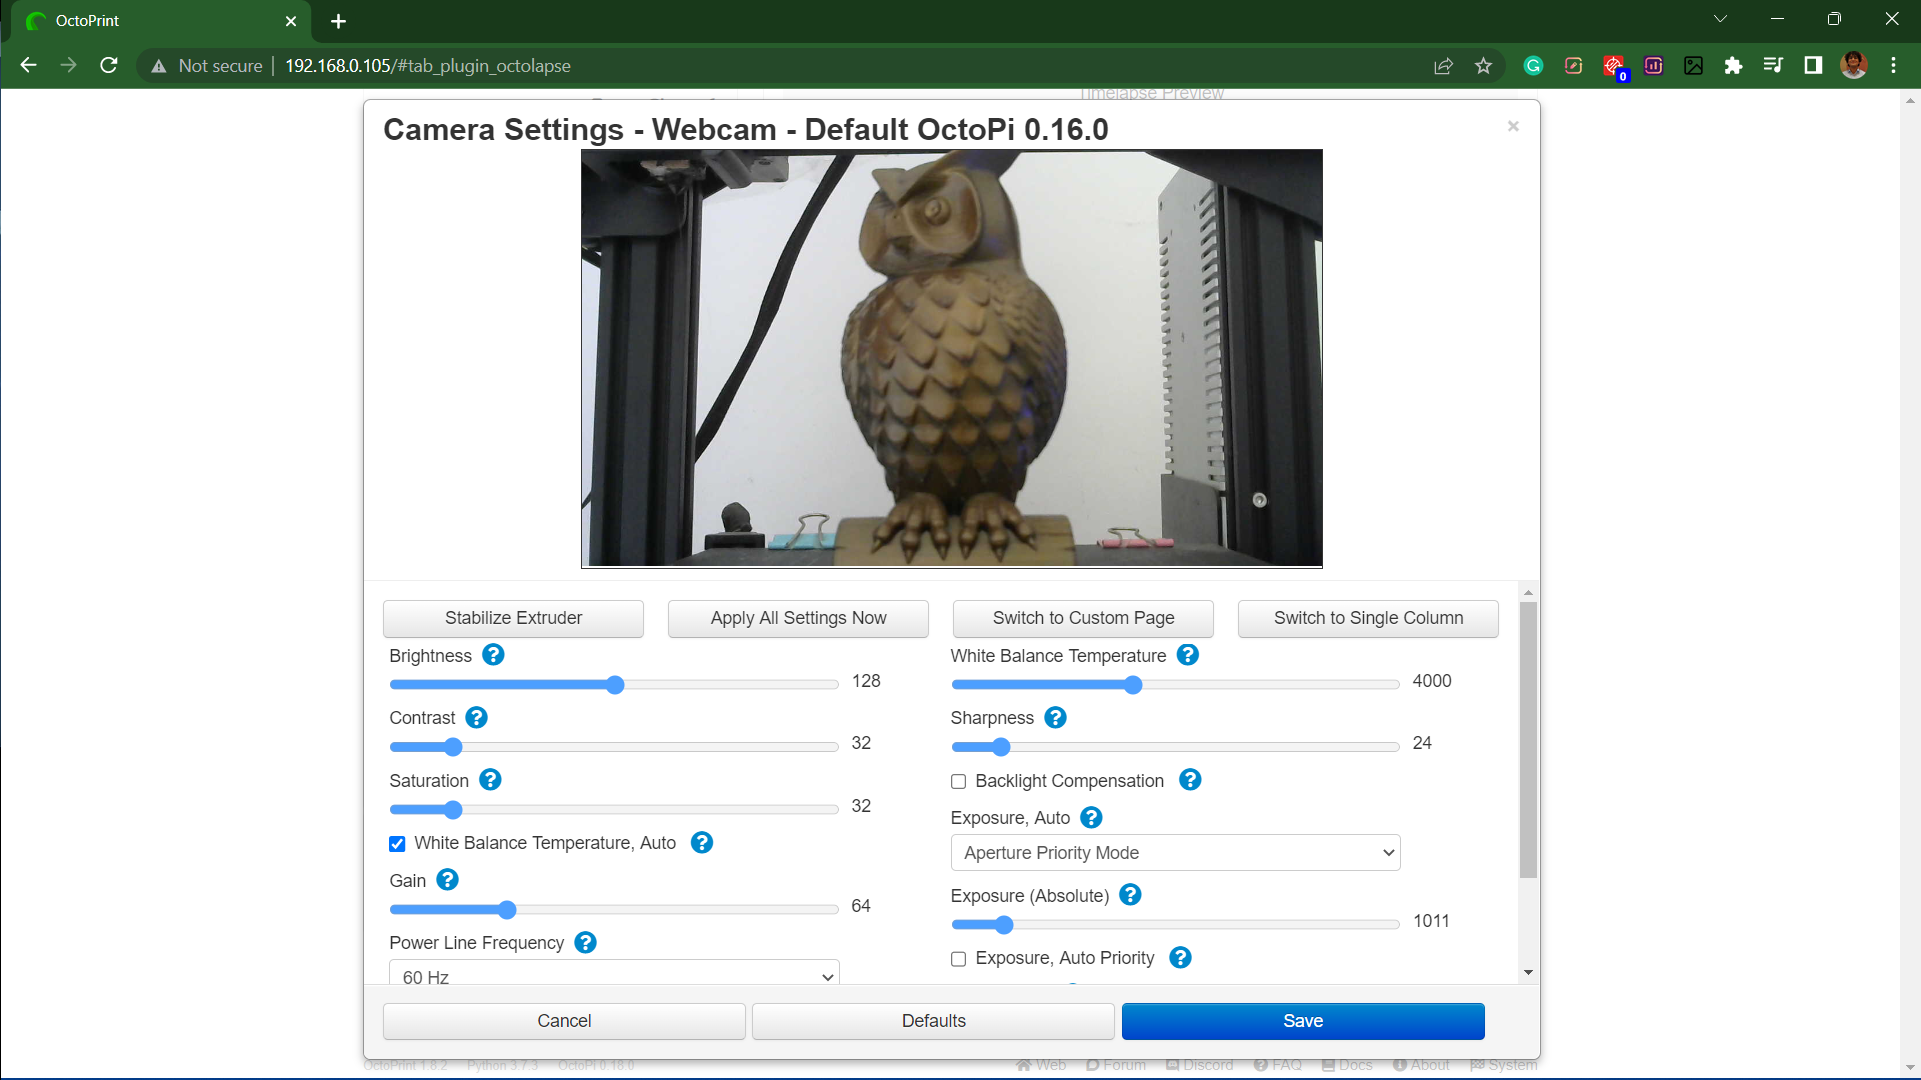
Each user's settings will vary according to their printing environment; hence, it's challenging to lay out detailed instructions for every parameter. You'll have to experiment by adjusting different settings and understanding how each affects the video quality.
You can refer to our detailed guide, which details setting up your camera with optimal lighting conditions and angles to help you achieve the best results.
That's it. You're now ready to record your Octolapse videos and showcase your 3D printing skills to your friends and the community.
Next Steps - Obico for Octoprint
Obico is another tool that can help you record 3D printing time-lapse videos of your models. It is a remote monitoring and 3D printer control tool that lets you access your 3D printer virtually anywhere in the world. And as you've already configured your webcam for Octoprint, setting it up with Obico will be a breeze.
Obico's forte is detecting print failure with the help of AI technology in real time. It utilizes the live feed of your webcam and analyzes it frame-by-frame to spot any loose filament, knocked-off parts, or failed prints.
If Obico notices any discrepancies in the webcam's feed, it instantly notifies you and lets you stop the print right from your smartphone, regardless of location. This feature helps you save considerable time, filament, and effort and comes in handy during long printing sessions.
You can check out our Obico for Octoprint guide to set up the Obico tool for your 3D printer. You can sign up for free and access some of Obico's features for free on your Octoprint-connected 3D printer.
If you have issues getting Obico installed for your 3D printer, check out the complete setup guide or join the Obico discord serverto get help.
Let us know your experience of using the Klipper for Ender 3. If you find Obico useful, please give us a star on GitHub, or leave us a review on our mobile app in the iOS App Store or Google Play Store!