Turn your Ender 3 into an Infinite 3D Printer

If you have been churning out face masks and other PPE for coronavirus, like us, you’ve likely started to wonder if it’s possible to turn your 3D printer into an infinite 3D printer. Pulling parts off the print bed is tedious, time consuming, and requires being home when each job finishes. In this guide we teach you how to automatically eject parts from the print bed of your Ender 3 so you can start the next print while no one is around!
Disclaimer: Follow this tutorial at your own risk. Your printer is not built to do automatic part ejection. While we’ve discovered a technique that has been fairly reliable for us, it’s possible that if you don’t tweak the GCODE commands to your specifications, you can cause your printer to smash into things and do damage. Don’t blindly copy and paste GCODE commands, make sure you understand what they will cause the printer to do first.
Do I need special hardware or modifications?
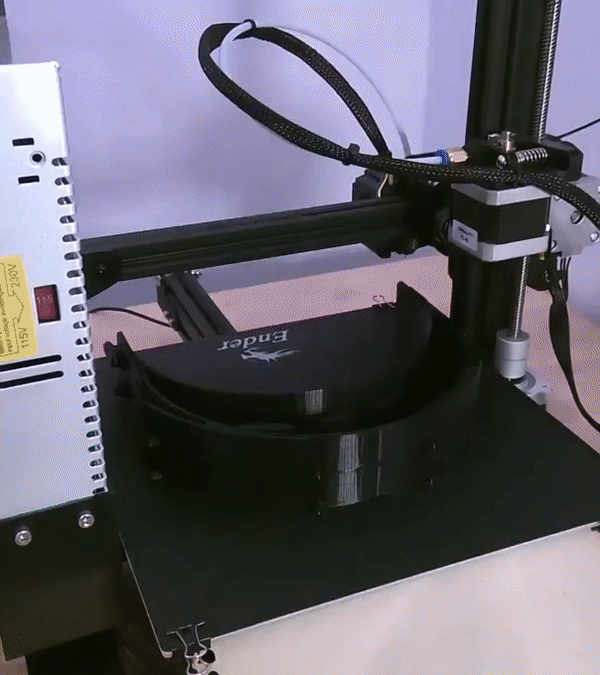
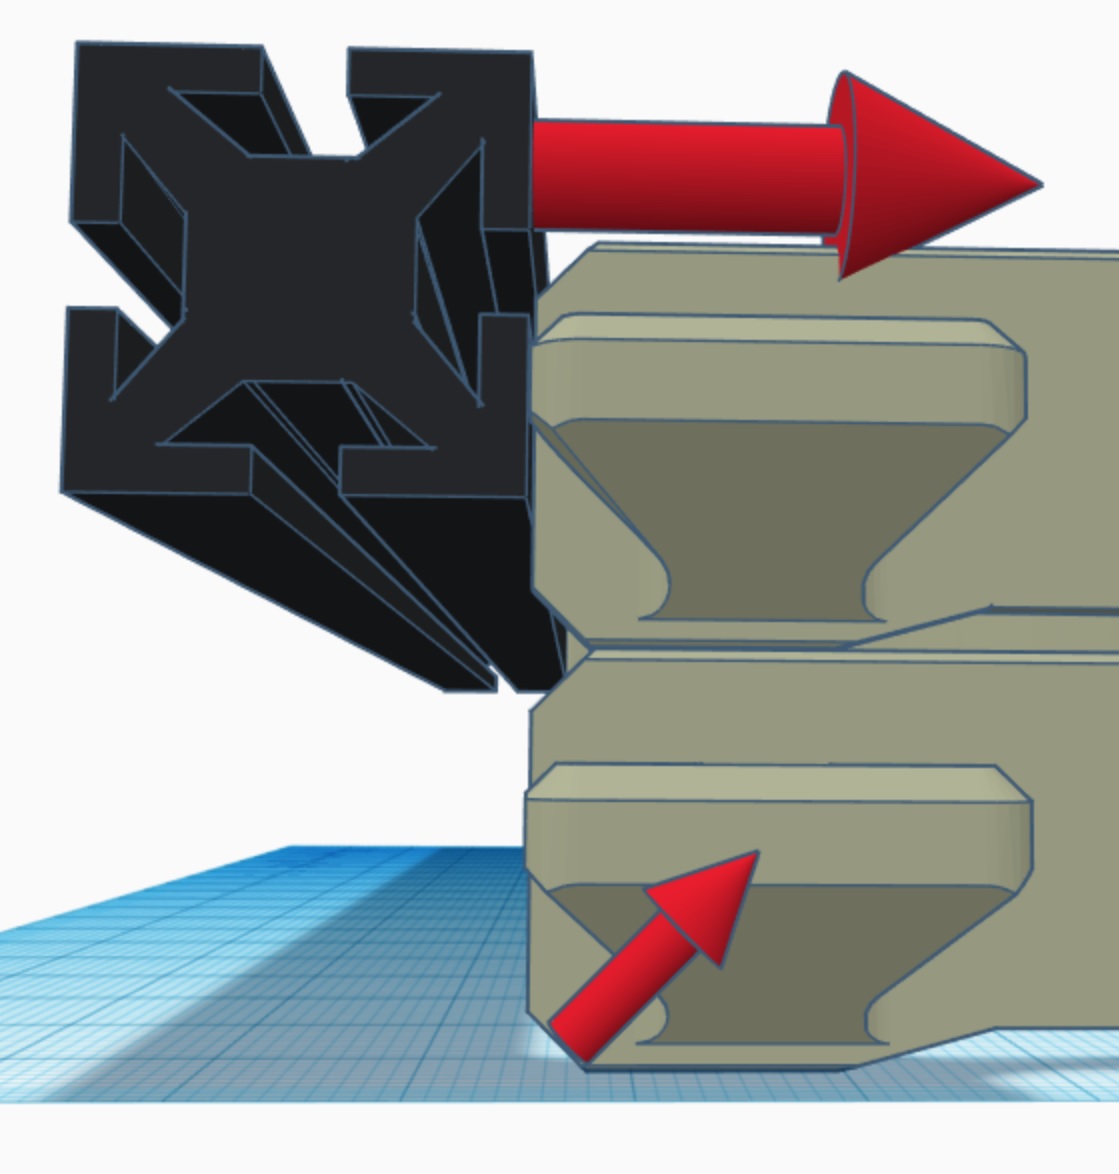
No! It can be a completely stock Ender 3 and no additional parts or hardware is needed to turn it into an infinite 3d printer. In our testing we’re using the economic Ender 3 (non-Pro). To accomplish this we use the back of the x-axis carriage, the horizontal aluminum extrusion bar holding the print head, to knock the print off the bed.
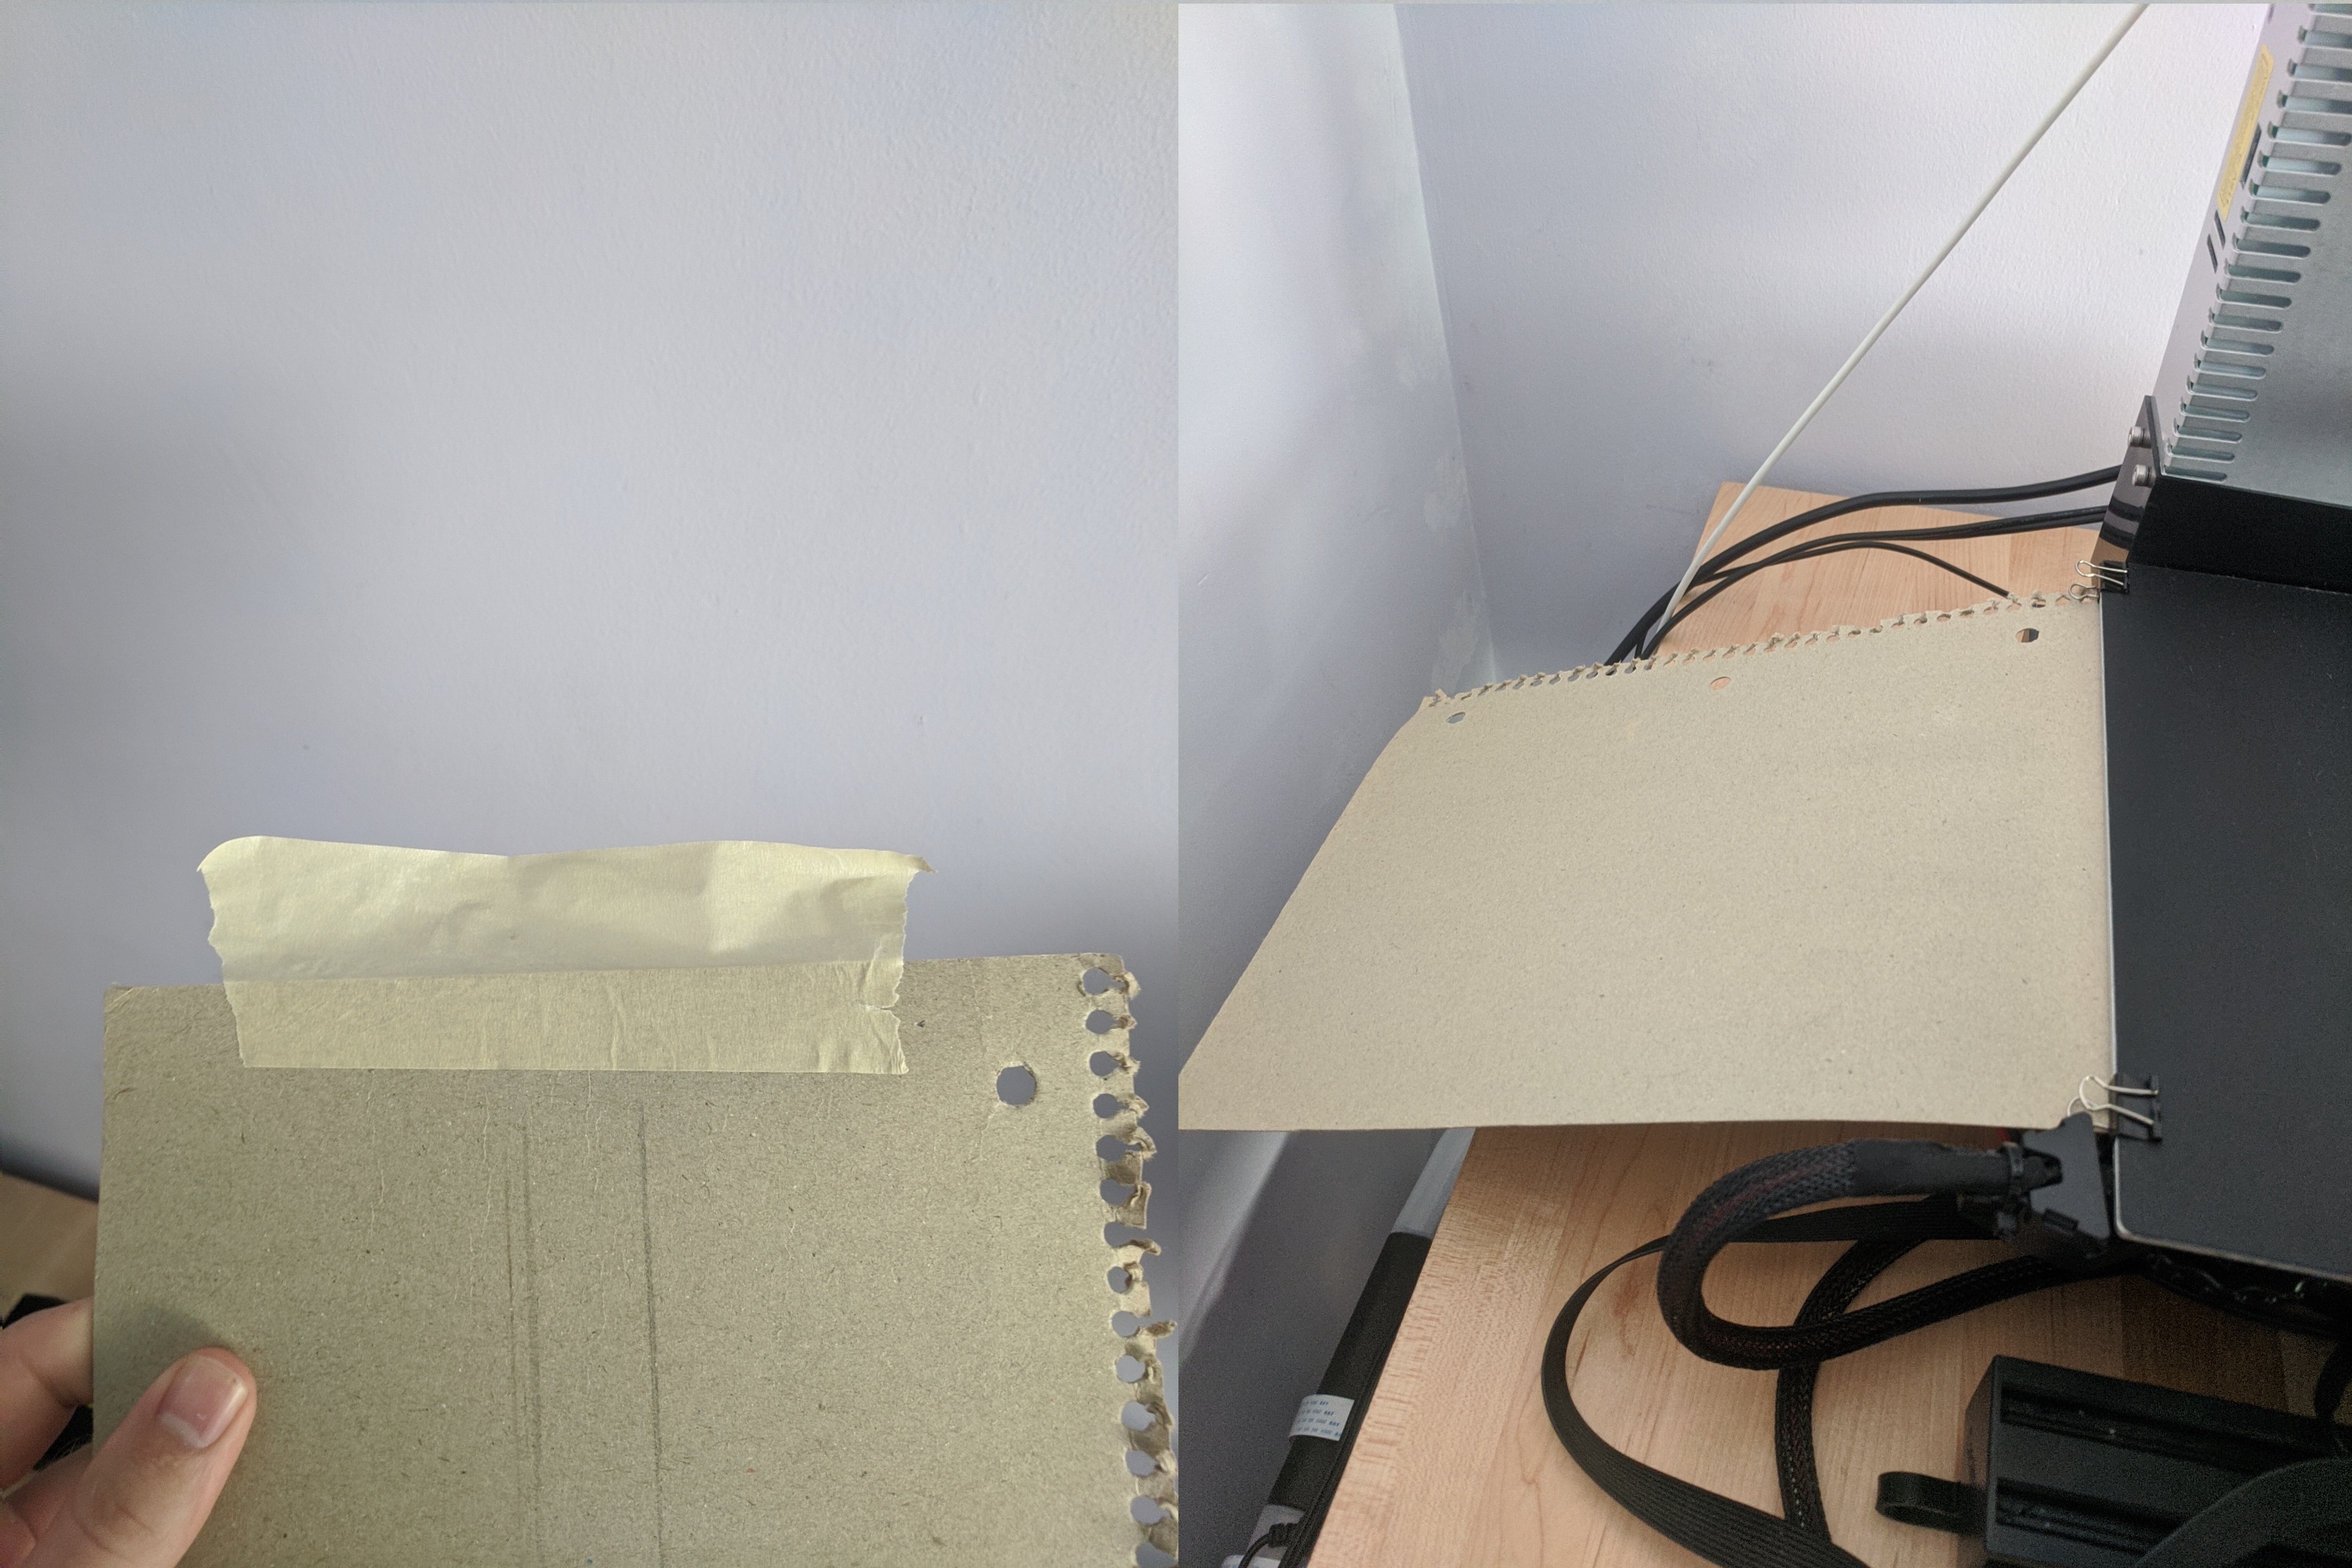
You will need to tape a piece of paper or cardboard to the back of the print bed to create a nice ramp for the part to slide down and out of the way, but that doesn’t count as hardware, right? :) Thicker card stock works best since it’ll need a bit of rigidity.
How do I trigger the auto-ejection?
Easy, you just open your gcode file in a text editor and add a short sequence of commands to the end. This will make the printer move in a way that will cause a collision and hopefully knock the print off the bed. Below is the simplest example we could come up with to try this on the Ender 3. This is not one size fits all and has a few requirements, but it gives you an idea of how it will work.
G4 P60000;Wait one minute. This is a good idea to let things cool off and fully solidify before bashing the part. Additionally, as the part cools it may detach a bit further from the bed naturally due to contraction as the plastic cools off.G28 X Y;Move the print head to the front of the bed by homing the X Y.G0 Z5;Lower the print head to 5mm off the print bed. Make sure your print is not placed in this front area or there will be a collision.G0 Y220;Try to move the print head to the back of the bed, knocking the print off in the process.
In theory that’s all you need, but sometimes if it’s really stuck to the bed trying from multiple sides can help. If you want to do this it’s important that you home the axes before doing further move operations. This is because if the part didn’t eject successfully and the motors skipped, the printer will think it made it to Y of 220 when really it’s at wherever it struck the print. Below we’ll home just the X Y then send it over the top of the part to try from the other side.
G28 X Y;Home the X Y axis to fix skew from motors skipping. Z should still be fine.G0 Z220;Raise the print head to 220mm. This is really slow, so you can change this to a lower height that will clear the top of your print.G0 Y220;Move to the back of the print bed.G28 Z;Home the Z axis. Sometimes the z-axis loses accuracy on the way up. Homing should fix this. Make sure no part is in this area of the print bed either or there will be a collision.G0 Z5;Move the print head up 5mm for safety.G0 Y0;Ram the part from the top, this may knock it off the other side, so maybe add a ramp on the other side as well if you want to try this.G0 Z220;Raise the print head to 220mm. This is really slow, so you can change this to a lower height that will clear your print.G28 X Y;Home the X Y axis.G28 Z;Home the Z axis once the print head is at the front corner.
If you want to really give knocking it off the best shot you can, you can chain these commands a few times in a row so the printer will alternate sides trying to work the printed piece loose.
Will this work for other printers?
Yes this general technique will work, but you may need to change the GCODE to make sure you’re striking the part with something solid on your printer and won’t damage anything weak on the print head. The Ender 3 is surprisingly a great infinite 3d printer out of the box because it’s x-axis carriage is a very sturdy part that is mounted securely on both sides to the vertical axis.
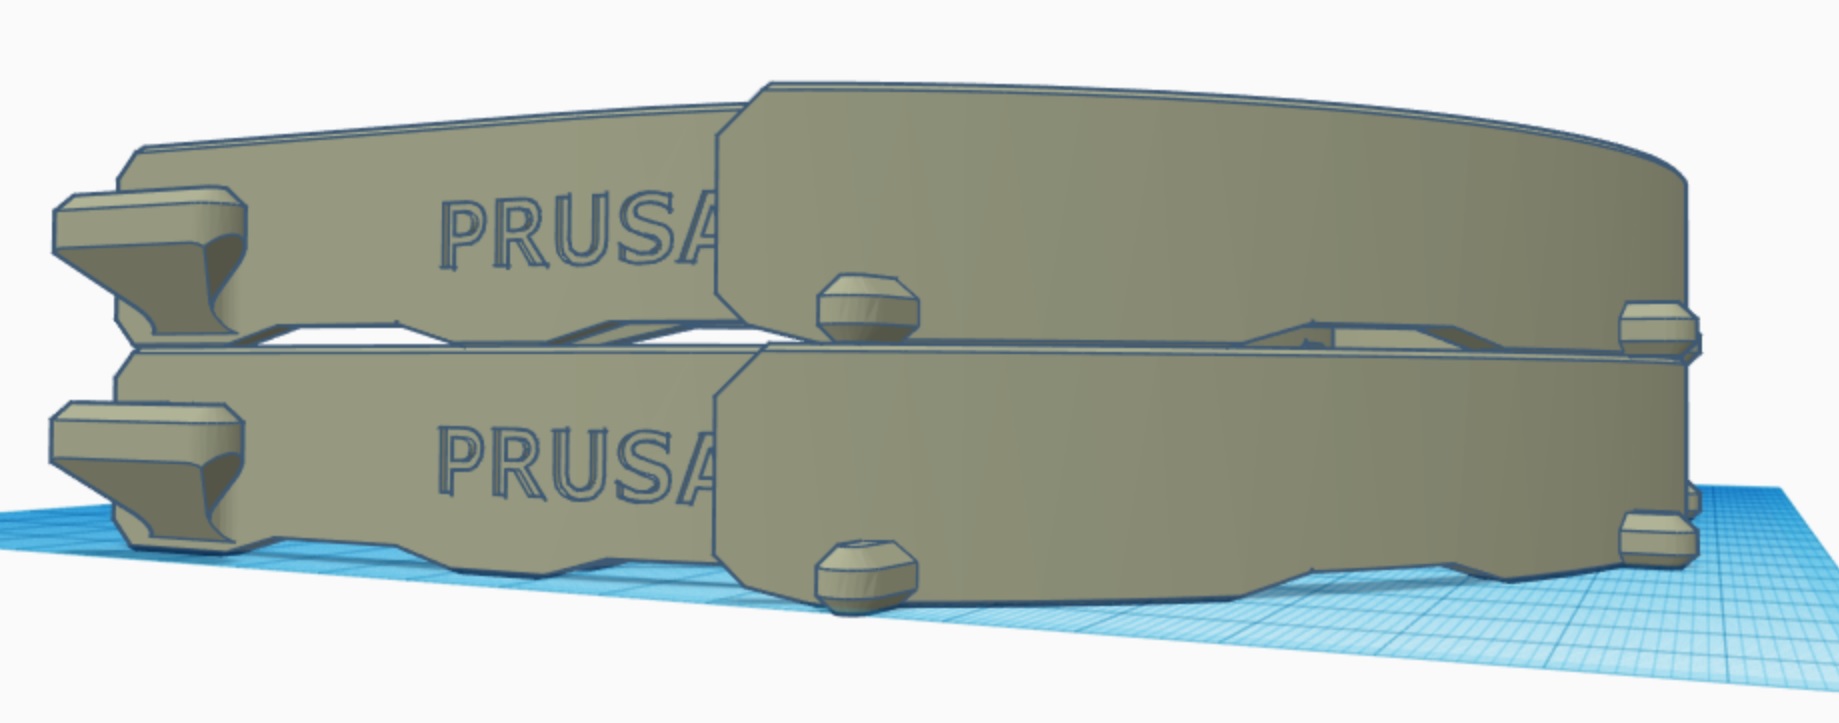
The Prusa MK3 on the other hand has a lot of delicate parts and loose cables on the print head, so you may need to print another plow piece that is more rigid and will transfer the force into the linear slide rods and not put pressure on the fans and sensors on the print head. That being said, with an additional print file to transfer the force, the linear bearings are much better for making an infinite 3d printer than track wheels like on the Ender 3. If you come up with a solution, shoot us an email and we’ll feature it here on our blog!
Does this work for any print file?
There are some restrictions to be able to use this technique, but you can likely make most print files work with some tuning.
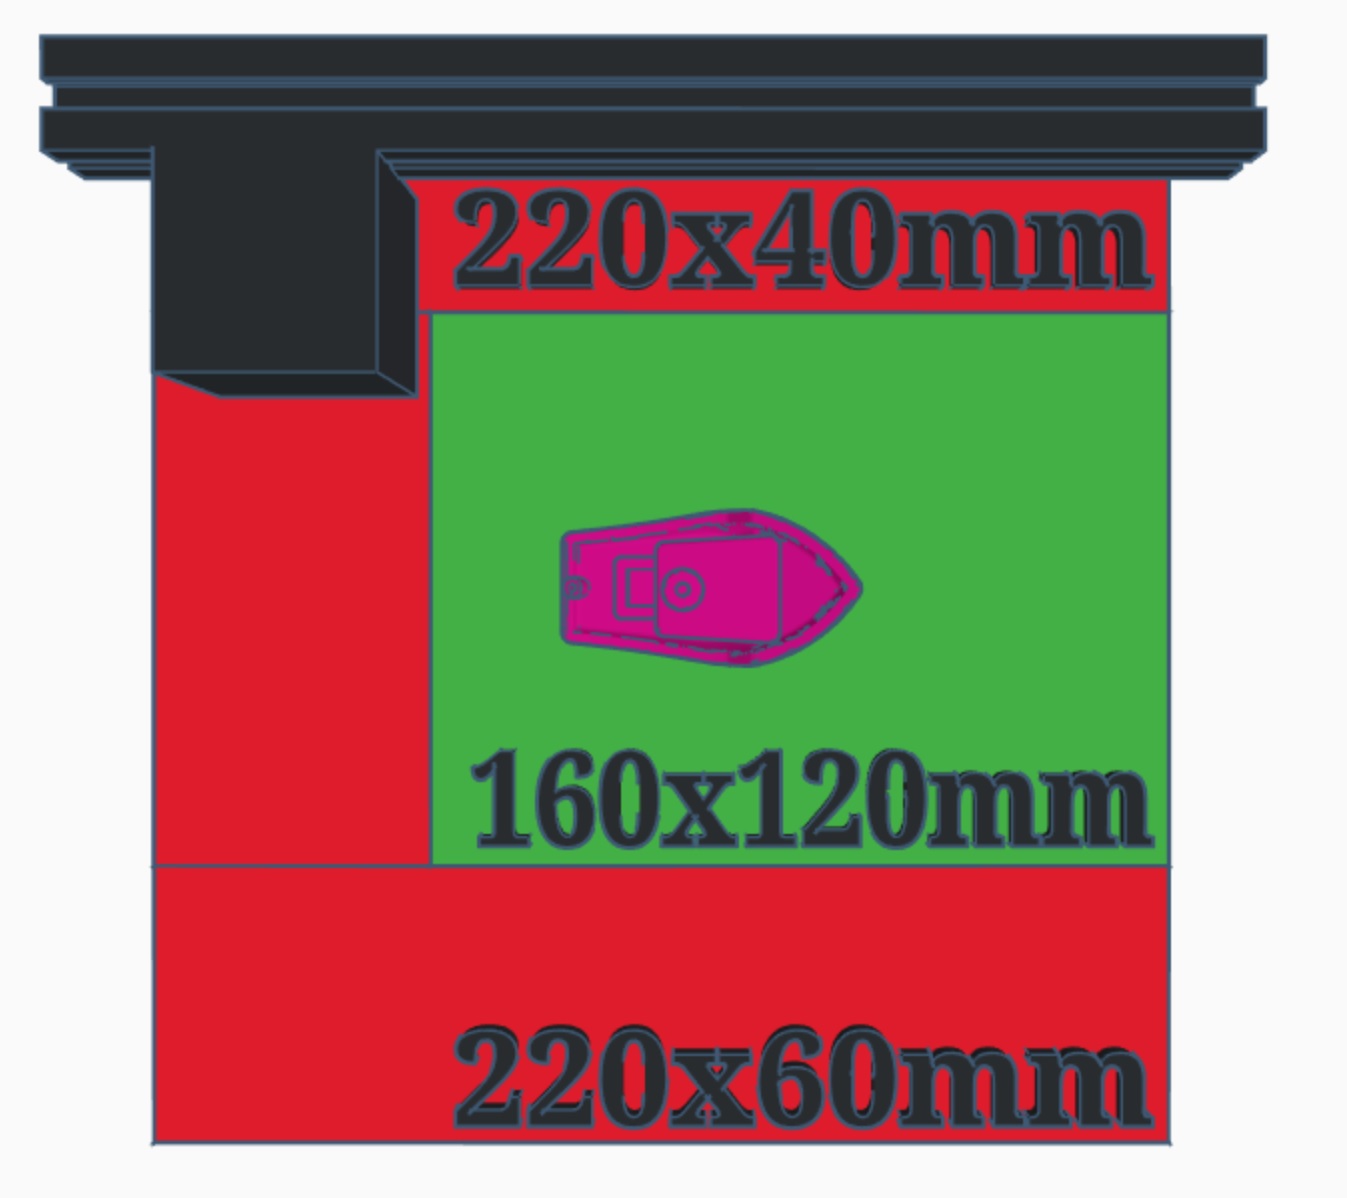
- You need to have enough room to lower the print head and carriage at least on the front side of the print. If you don’t then when you try to do this the print head will crash into part of the finished print when lowering down into the ramming position. This is bad, don’t do this.

-
You can’t have too much surface area adhering to the build plate. If you do, raming the printed part will just cause the motors to skip. In our experience if you do this with the back side of the x-axis carriage it’s likely fine. It will just make an angry noise for a short amount of time and then give up.
Be careful trying this from the other direction. Hitting the part with the printhead until the motors skip will put stress on a part that is not mounted nearly as sturdily as the x-axis carriage. We did it quite a few times, and while our printer didn’t break, it didn’t look pretty.
-
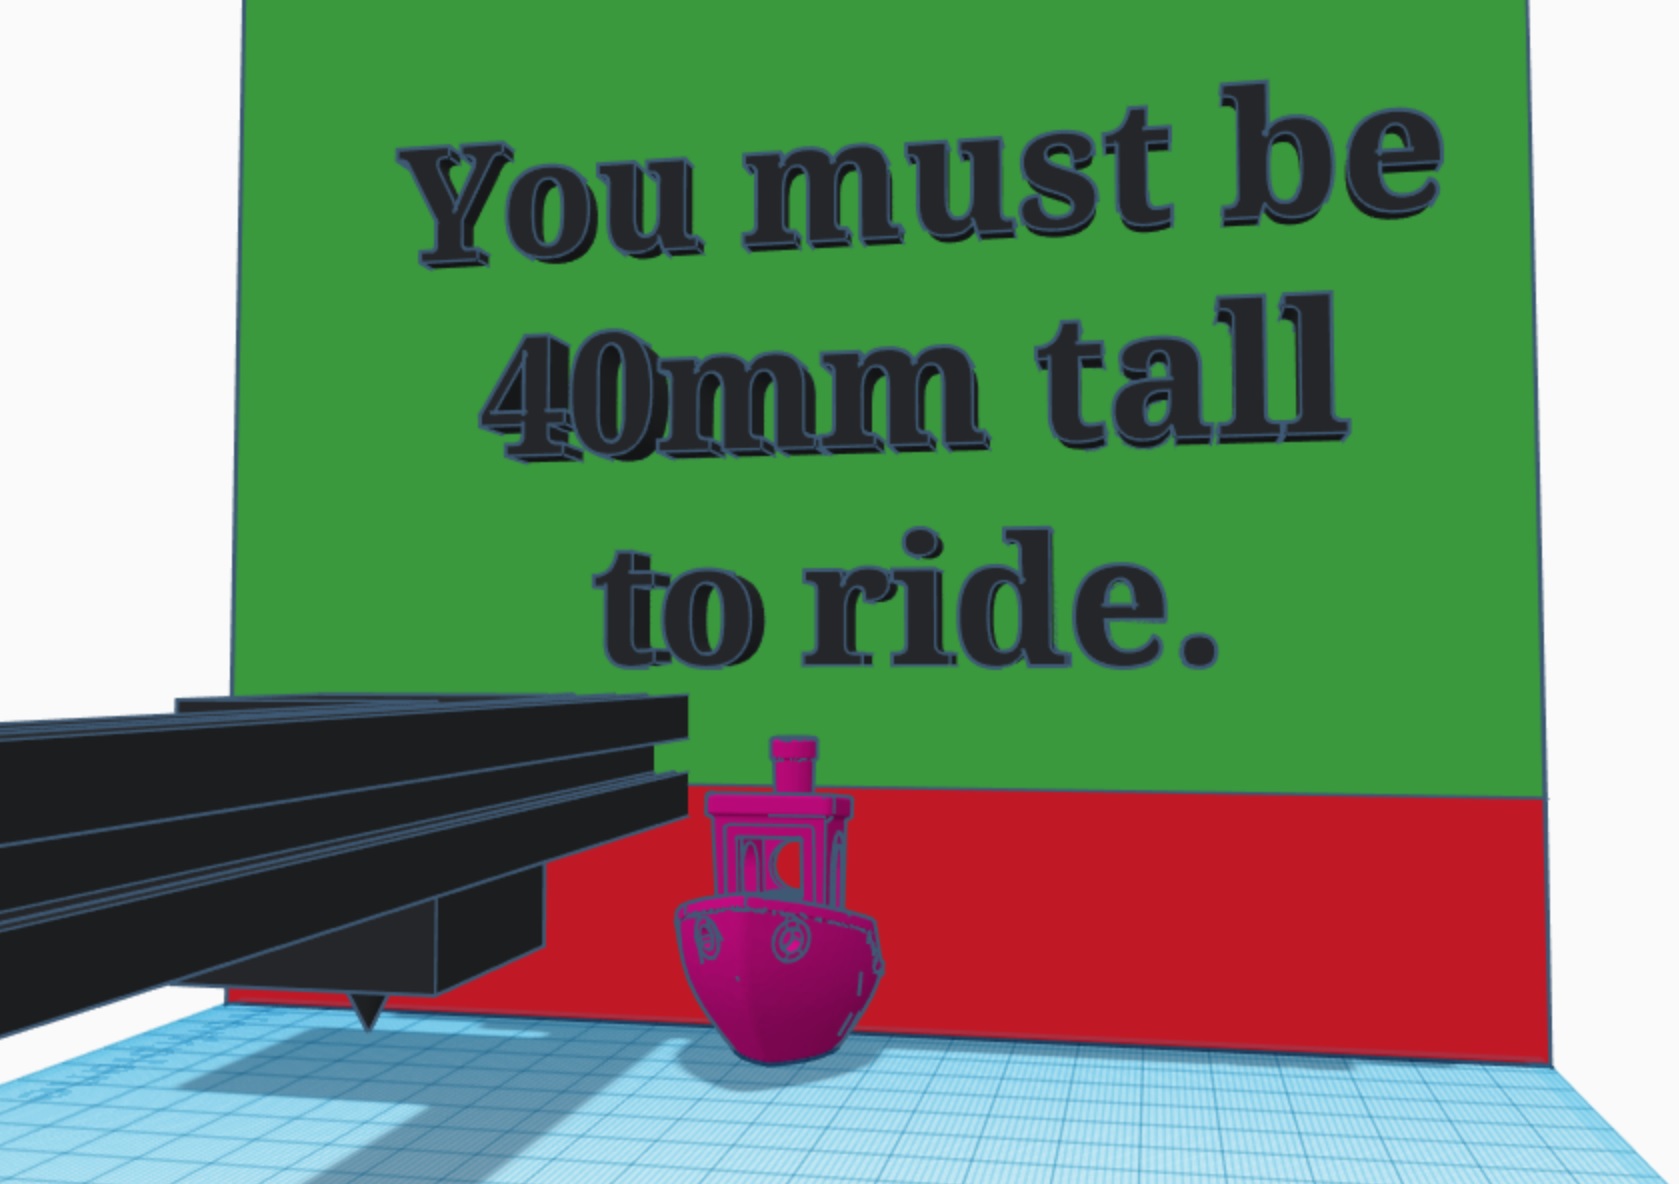
Your print has to be tall enough that it will get hit by the x-axis carriage when the print head is lowered to a safe height for moving (~5mm). This means your part needs to be at least around 40mm tall.
- The part where the x-axis carriage will hit the part needs to be sturdy. Sometimes it takes a bit of force to knock the piece off the bed, so make sure ramming this spot on the print will not damage your part.
Tricks to Improve Probability of Success
- If you can spare the build volume and try from the other side without ramming the print head, do it. Hitting it from one side will likely peel that side up but not the further side. Trying from multiple directions will increase the likelihood of detachment.
- Add an overhang on the side you’re trying to hit the print from. This will make the part start to lean away from where it’s being struck and turn the force into more of a “peel” force. If you’re striking completely perpendicular to a spot where the part is sturdily attached to the bed it’ll be less likely to break the bond.
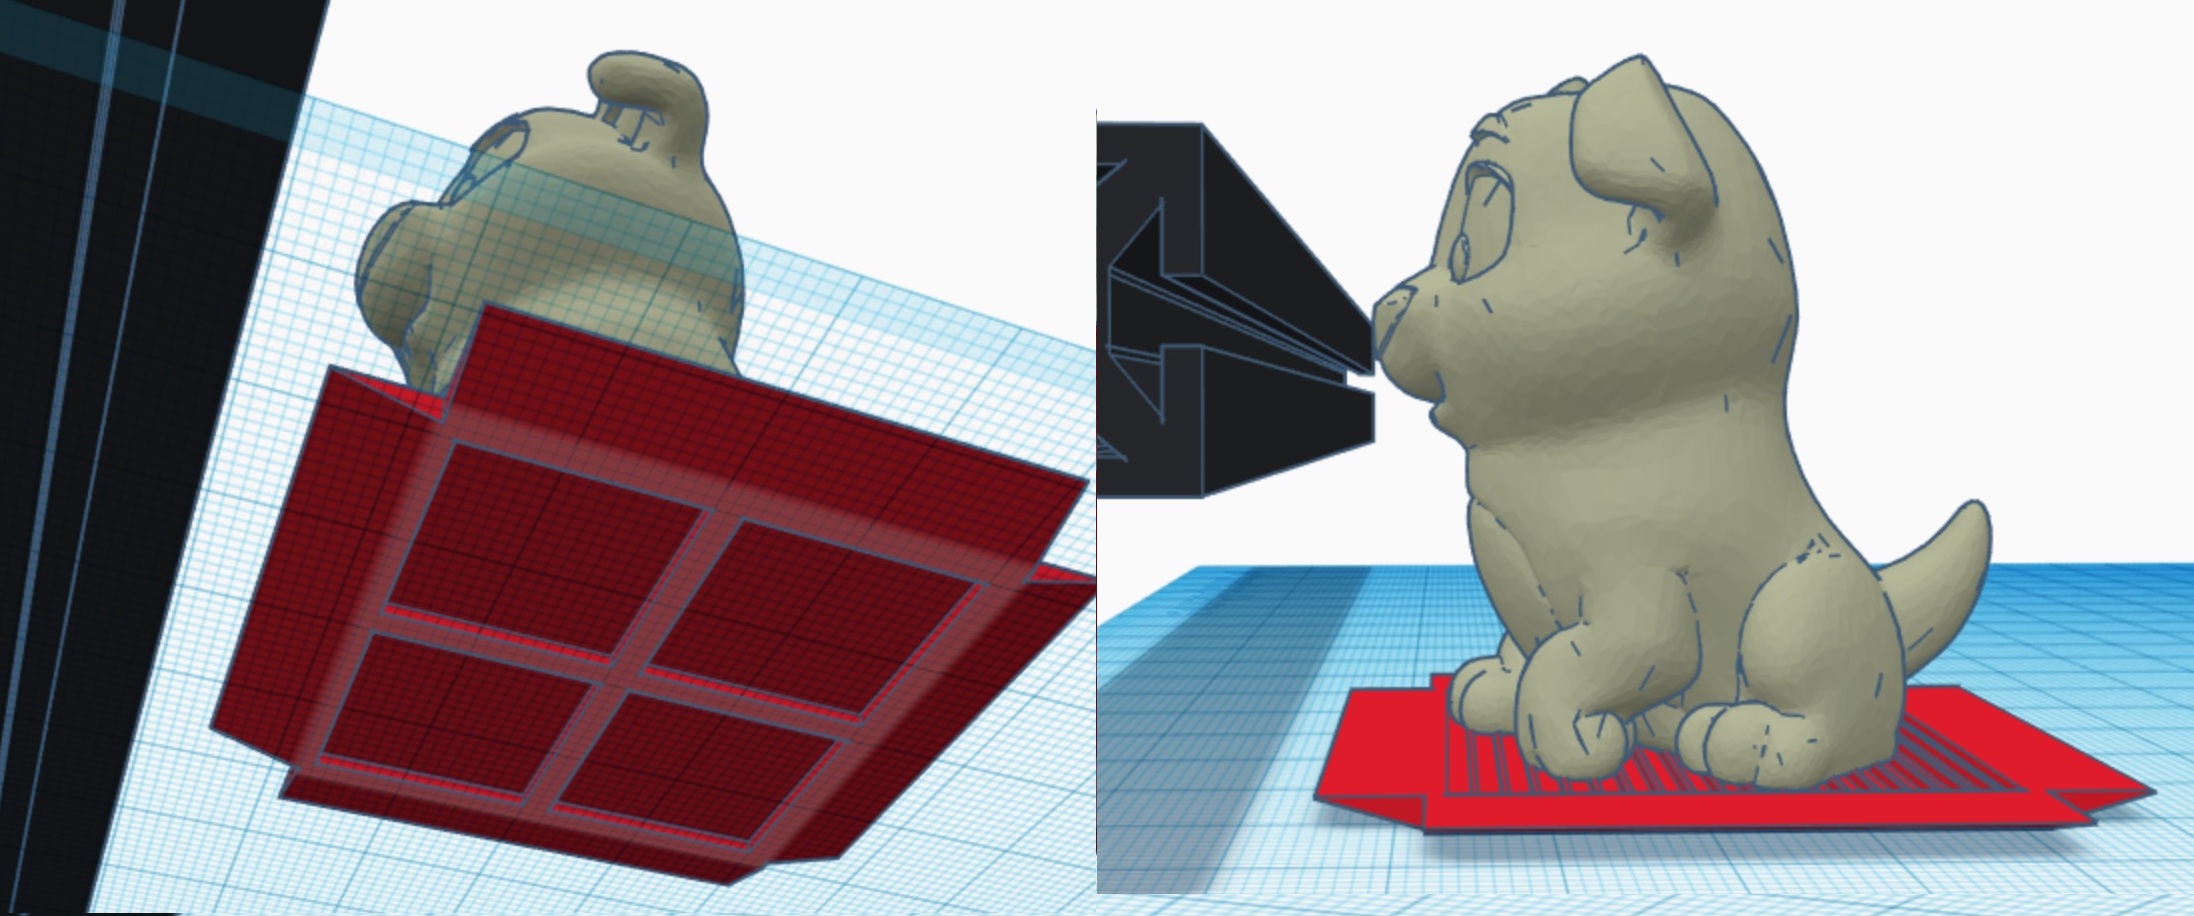
- Reduce the amount of material at the bottom few layers of the file if you can. In the case of the face shields, I cut out small slots at the bottom. This both reduces print time and dramatically reduces the surface area where the shields are attached to the print bed making it more likely you can knock the piece off. In this case it doesn’t change the functionality of the headband at all!
- I can’t modify my print file, it has to be exactly as it is! Fine, create what I call the upside down raft. You float your exact print file on top of a thin layer of material, and you support that thin layer of material with minimal contacts to the build plate. You get to design this detachable base, so you can add overhangs and tune it to be easily detachable.
- My print isn’t tall enough to be hit by the x-axis carriage! Use the technique described above but add triangles so that the raft will get struck by the x axis carriage. You’ll increase material usage and print time, but will get an infinite 3D printer in exchange!
Other Tips
How do I know I can automatically start the next print? Won’t it crush the prior print if it didn’t get ejected correctly?
Our suggestion right now is to add the ejection code to the end of the GCODE and use some form of remote monitoring and control plugin, like The Spaghetti Detective, that notifies you when the print finishes. When you get the alert that your print finished, check the feed to make sure the build plate is clear then just start the same print file again! Sure, you won’t be able to start the next print while you’re asleep (unless you’re really talented) but you’ll at least make the loop as easy as one click. Further you’ll be very confident you don’t try to squish the last print Mario-style.
In the future we plan to try to develop an AI algorithm that will detect when the build plate is clear so you don’t need to be awake for the printer to start the next print. If you really want this feature shoot us an email letting us know!
Resources
Sled Designs: https://www.tinkercad.com/things/1PxMnrdQBhP-ender-3-auto-ejection-sleds-public
Headband GCODE: https://drive.google.com/file/d/1Bon9Hc02dQsTIgzbGQ22HRsyRS8WSNWK/view?usp=sharing