Passa al contenuto principale

Sovol SV06 ACE - Klipper Remote Access and AI

· 10 minuti di lettura

If you've been using 3D printers for a while, you'll know there's a way to remotely control prints, check on progress, and perhaps even optimize your printer's movement for smoother running.

But how exactly can you do that?

It's impossible without getting slightly technical, but it's all worth the faster print times and advanced motion control. The quickest answer is–Klipper firmware.

Klipper is an open-source firmware based on Python developed to handle the advanced changes in 3D printing hardware. Normally, 3D printers come with a standard firmware hardcoded onto the on-board memory and any configuration change requires firmware installation, like solving a labyrinth. Instead, Klipper firmware can be edited, and modified and a simple device restart applies the changes.

It's compatible with many 3D printers and you can check the complete list here. Klipper pairs with these common printers:

  • Creality

  • Sovol

  • Pursa

  • Anycubic

    You have set up Klipper and the Moonraker API correctly, and it is connected to your printer. An interface such as Mainsail/Fluidd is highly recommended.

Sovol SV06 Ace - Klipper remote control and AI

What Is Remote Access Using Klipper?

Remote access or remote controlling your 3D printer allows you to monitor (in real-time), control, manage print files, and receive updates about your print from a distance. Remote access using Klipper works through a web-based interface requiring your phone or computer and a 3D printer connected to the internet.

That's slightly unsecure, but there are other ways like port forwarding and bots and then there's Obico.

Obico offers everything that comes with remote access plus, smart monitoring, AI error detection, print optimization, file management, and cloud-based storage. It's entirely open-source and you can even set up your own local server and have hybrid access or a fall-back option.

SOVOL SV06 ACE Klipper Integration

Previous Sovol printers like the SV06 are based on a Marlin control board which runs entirely on the printer's micro-controller. Marlin is the old architecture for 3D printers and faces performance issues because Marlin firmware does not meet the advanced hardware capabilities of printers.

There are ways to upgrade to a Klipper firmware which involves using a Raspberry Pi controller, or a tablet. However, now you can also use Klipper touchscreens such as the one provided by Sovol which simplifies the upgrade.

Sovol SV06 ACE comes with pre-installed Klipper integration, so you don't have to go through the Raspberry Pi guides found on the internet for your Sovol printer.

Klipper Integration

Download, Install, and Setup Bambu Studio – Step-by-Step Guide

· 6 minuti di lettura

What is Bambu Studio?

If you’re into 3D printing, or just dipping your toes into it, you’ve probably come across Bambu Studio.

But what is it, exactly?

In simple terms, Bambu Studio is a 3D printing slicer software that acts as the bridge between your creative ideas and your printer.

It’s designed to be user-friendly, so you don’t need anything like a PhD in 3D printing to get started. Yet, it’s packed with advanced features (like multi-material support) that will help you handle complex projects very easily. And its slicing engine? It’s not just fast, it’s also smart and is designed to ensure your prints come out just the way you envisioned them.

It’s also compatible with a variety of 3D printers, such as Bambu Lab’s X1 series and P1P, along with other popular models from brands like Creality and Prusa.

Let’s dive into how to get it up and running!

Installa Bambu Studio su Linux

· 9 minuti di lettura
suggerimento

Try JusPrin, the first GenAI 3D printing tool built on OrcaSlicer.

Bambu Studio, rilasciato nel 2022 insieme alla stampante 3D Bambu Labs X1, è un software slicer open source basato su PrusaSlicer (che a sua volta era basato su Slic3r).

È naturalmente l'arma preferita dalle stampanti 3D Bambu Labs in tutto il mondo, grazie alla sua perfetta integrazione con l'intera gamma di macchine Bambu Labs.

All'epoca del suo rilascio, era disponibile esclusivamente per computer con sistemi operativi macOS e Windows. Se si voleva eseguirlo su Linux, era praticamente impossibile farlo funzionare su un livello di compatibilità (come WINE) o su una macchina virtuale (si pensi a VMware o VirtualBox).

La buona notizia per alcuni utenti Linux è che da marzo 2023, Bambu Studio è disponibile solo per Ubuntu e Fedora. Quindi, se siete effettivamente utenti Fedora o Ubuntu e desiderate installare Bambu Studio sul vostro sistema Linux, continuate a leggere per informazioni su dove scaricarlo e come installarlo.

Ci sono due modi per installare Bambu Studio su Linux:

  • Installazione di Bambu Studio con Flatpak
  • Installazione di Bambu Studio su Ubuntu/Fedora da un'AppImage

Installazione di Bambu Studio con Flatpak

Innanzitutto, partiamo dall'opzione più semplice, ovvero l'installazione tramite Flatpak. Flatpak è ideale per chi non desidera installare una serie di dipendenze e compilare il software autonomamente. Questa potrebbe essere l'opzione migliore per la maggior parte delle persone, perché secondo i vari forum (GitHub e Reddit), l'installazione delle dipendenze e la compilazione possono produrre risultati alquanto variabili.

note

Important Note for Users of Ubuntu 23.10 and Upwards

With the release of Ubuntu 23.10 (and newer versions), the default app store is App Center, which does not support installing Flatpak apps. Installing the Flatpak plugin will automatically install the deb-based GNOME Software app as your new software center, which will enable you to use both Flatpak and traditional deb packages. The step to achieve this is described in the process below.

I seguenti passaggi sono necessari per installare Bambu Studio su Ubuntu / Fedora utilizzando FlatPak. Nota che FlatPak è già installato su Fedora, quindi puoi passare direttamente al passaggio 6. Gli utenti Ubuntu dovrebbero iniziare dal passaggio 1 se FlatPak non è già installato.

1) Installa Flatpak

Per prima cosa, devi installare FlatPak. Apri semplicemente l'app Terminale ed esegui:

sudo apt install flatpak

2) Installa il plugin GNOME Software Flatpak

Installando il plugin GNOME Software Flatpak potrai installare le applicazioni Flatpak tramite un'interfaccia grafica.

Esegui il seguente comando per installare il plugin:

sudo apt install gnome-software-plugin-flatpak

3) Aggiungi il repository Flathub

Ora che la tua distribuzione Linux può essere installata con Flatpak, avrai bisogno di un repository per trovare le tue app Flatpak. Flathub è il più comune.

Per abilitarlo, esegui:

flatpak remote-add --if-not-exists flathub https://dl.flathub.org/repo/flathub.flatpakrepo

Questo comando aggiunge Flathub come telecomando Flatpak, consentendoti di accedere a migliaia di app.

4) Riavvia il sistema

Per rendere effettive le modifiche, si consiglia di riavviare il sistema:

sudo reboot

5) Verifica l'installazione di Flatpak

Per assicurarti che Flatpak sia installato e funzionante correttamente, esegui il seguente comando:

flatpak --version

Dovresti vedere il numero di versione di Flatpak visualizzato nel terminale.

6) Installa Bambu Studio

Ora che i prerequisiti sono stati installati, puoi procedere e accedere a Bambu Studio tramite Flathub:

flatpak install flathub org.bambu.BambuStudio

7) Gestisci Bambu Studio

Dopo aver atteso l'installazione di Bambu Studio, puoi eseguirlo digitando quanto segue:

flatpak run org.bambu.BambuStudio

Ecco qui il modo più semplice ed efficace per installare Bambu Studio su macchine Linux. Naturalmente, un vantaggio dell'utilizzo della versione FlatPak è che è anche relativamente semplice da aggiornare.

Ecco come puoi assicurarti che la tua versione Flatpak di Bambu Studio sia aggiornata.

Aggiorna semplicemente tutte le tue app Flatpak con questo comando:

flatpak update

Oppure, se desideri aggiornare Bambu Studio autonomamente, digita quanto segue:

flatpak update com.bambulab.BambuStudio

Metodo alternativo per scaricare Bambu Studio

Puoi anche scaricare Bambu Studio da Elenco Flathub.

Un altro modo per installare lo slicer Bambu Lab è utilizzare i file di installazione ufficiali su Flathub. Seleziona il badge di verifica accanto al programma di caricamento e clicca su Installa.

Dopo aver scaricato i file di installazione di Bambu Studio, copia il nome del file di installazione e usa questo comando nel terminale della posizione in cui è stato scaricato.

sudo flatpak install <filename>

Installazione di Bambu Studio su Ubuntu / Fedora da un'AppImage

L'altra opzione (più complicata) per installare Bambu Studio sui sistemi operativi Ubuntu e Fedora è quella di utilizzare AppImage da Github.

Ci sono molte segnalazioni su vari forum secondo cui questo metodo a volte produce risultati meno desiderati, quindi ti consigliamo di optare per la versione Flatpak.

Tieni presente che la procedura è la stessa sia per Fedora che per Ubuntu, ma potrebbe essere necessario disabilitare SELinux su Fedora, poiché a volte può interferire con le installazioni di AppImage.

1) Ottieni l'AppImage

Per prima cosa, dovrai scaricare l'AppImage da Bambu Labs GitHub Qui.

Qui troverete diverse versioni di Bambu Studio. Potete anche trovare vecchie release delle AppImage di Bambu Studio ed effettuare il downgrade a una versione precedente. In questa risorsa troverete file per Mac, Windows e Linux. A seconda della vostra distribuzione, potete selezionare l'AppImage di Ubuntu o Fedora.

2) Sposta AppImage in una cartella adatta

Successivamente, dovrai posizionare l'AppImage in un posto comodo (ad esempio nella cartella ~/Applicazioni).

mkdir -p ~/Applications
mv ~/Downloads/BambuStudio-*.AppImage ~/Applications/

3) Rendi eseguibile l'AppImage

Esistono un paio di modi per rendere eseguibile la tua AppImage.

Per prima cosa, individua l'AppImage nella cartella in cui l'hai appena spostata. Quindi fai clic destro sull'AppImage e seleziona "Properties" dal menu a comparsa.

Quindi vai alla scheda "Permissions" nella finestra Proprietà e seleziona la casella "Allow executing file as a program". Chiudi la finestra Proprietà e vai al passaggio successivo.

Il secondo metodo consiste nell'utilizzare il Terminale per puntare alla cartella Applicazioni e poi renderla eseguibile.

cd ~/Applications
chmod +x BambuStudio-*.AppImage

4) Esegui l'AppImage eseguibile

Ora che l'AppImage è eseguibile, puoi semplicemente fare doppio clic su di essa per installarla oppure puoi utilizzare il terminale digitando la seguente riga:

./BambuStudio-*.AppImage

Ecco fatto. Speriamo che l'AppImage di Bambu Studio funzioni correttamente. Se non funziona, è possibile che al sistema manchino alcune dipendenze. In tal caso, dovresti ricevere un messaggio di errore che indica cosa manca e dovresti procedere con l'installazione delle dipendenze mancanti.

Passaggi aggiuntivi

Correzione di compatibilità per Ubuntu 24.x

Durante l'esecuzione di Bambu Studio AppImage, potresti riscontrare librerie mancanti. Bambu Studio richiede libwebkit2gtk, che potrebbe essere stata sostituita con altre versioni o potrebbe non essere disponibile sul tuo computer.

Per risolvere questo problema, è possibile creare collegamenti simbolici per queste librerie specifiche utilizzando questo comando nel terminale.

sudo ln -sf /usr/lib/x86_64-linux-gnu/libwebkit2gtk-4.1.so.0   /usr/lib/x86_64-linux-gnu/libwebkit2gtk-4.0.so.37
sudo ln -sf /usr/lib/x86_64-linux-gnu/libjavascriptcoregtk-4.1.so.0 /usr/lib/x86_64-linux-gnu/libjavascriptcoregtk-4.0.so.18

Poiché lo slicer della stampante 3D sta cercando libwebkit2gtk, verrà ora reindirizzato alla versione più recente della stessa libreria disponibile in Ubuntu 24.x

Impostazione dello studio Bambu

Dopo aver eseguito correttamente Bambu Studio, devi ancora collegare la tua stampante 3D, installare i plugin di rete e accedere al tuo account.

Seleziona la tua stampante 3D

Bambu Studio offre una gamma di stampanti 3D che puoi abbinare a questo slicer, ma funziona al meglio con le stampanti Bambu Lab. Puoi selezionare la stampante e gli ugelli che possiedi in questa fase.

Selezione del filamento

A seconda della stampante, è possibile selezionare tutte o solo alcune opzioni di filamento. Se si dispone di una stampante a fibra di carbonio, come la Bambu Lab X1 Carbon, è possibile selezionare anche il carbonio insieme alle opzioni PLA, Matte e Silk.

Completa la configurazione

Dopo aver completato le scelte iniziali, il tuo Bambu Studio dovrebbe apparire così. Per completare la configurazione della stampante, vai alla scheda "Prepara".

Puoi anche selezionare il tipo di PLA dalla barra laterale e creare un preset personalizzato che potrai salvare per stampe ripetute in seguito.

Calibrazione della stampante

Le stampanti Bambu Lab funzionano benissimo fin da subito, ma è generalmente buona norma calibrarle prima di stampare il primo pezzo. Puoi seguire questa guida per calibrare la stampante. Illustra il livellamento del letto, la calibrazione della portata e molti altri suggerimenti per iniziare.

Domande frequenti

Bambu Studio è gratuito?

Bambu Studio è un software di slicing gratuito come Cura e offre profili personalizzabili e gestione della stampa 3D.

Come faccio a scaricare una versione precedente di Bambu Studio?

Per scaricare una versione precedente di Bambu Studio, puoi consultare il repository GitHub e trovare la versione precedente che stai cercando. Puoi scaricare il file eseguibile ed eseguire una nuova installazione.

Esiste un'app Bambu Lab?

Bambu Lab ha un'app mobile, diversa da Bambu Studio, ma permette di regolare la portata, ricevere notifiche e avviare e mettere in pausa le stampe. Bambu Studio può funzionare con altre stampanti 3D, ma l'app mobile è specifica per le stampanti Bambu Lab.

Quali tipi di file supporta Bambu Studio?

Bambu Studio supporta file G-code standard, i file .bambu e .3mf. Lo slicer può lavorare con una vasta gamma di file di parti 3D come STL, OBJ, FPP e AMF.

Osservazioni finali

Alcune funzionalità di Bambu Studio richiedono componenti Windows nativi per funzionare (come la Riparazione Mesh). Quando si riparano file STL in Bambu Studio su un computer Windows, il software utilizza Windows 3D Builder per verificare la presenza di errori e correggerli. Questa funzionalità non sarà disponibile su un sistema basato su Linux.

Potrebbero mancare anche altre funzionalità, ma se può consolarvi, anche agli utenti Mac mancano alcune di queste funzionalità.

Se desideri compilare Bambu Studio da zero, puoi trovare una pratica guida su questo collegamento, ma ti consigliamo di usare il metodo Flatpak: è più facile da installare e anche da aggiornare.

Purtroppo Bambu Labs non ha pubblicato una guida completa per l'installazione su computer basati su Linux, ma speriamo che la nostra piccola guida ti aiuti a iniziare.

Buona fortuna e buon divertimento con il tuo nuovo slicer su Linux!


Also available in: Deutsch | English | Español | Français | Nederlands | Polski | Português | Русский

Input Shaping: What it is and How to Use it

· 5 minuti di lettura

Over the past decade, the hobbyist 3D printing community has seen several technological advances that have increased the quality and speed of hobby-level printing by leaps and bounds. One of these advances has been input shaping. Input shaping has the ability to make your 3D printer faster and more accurate, and the best part of all is that it’s incredibly cheap and easy to implement! In this article we’ll discuss what input shaping is, as well as how to use it.

A photo showing two 3DBenchys

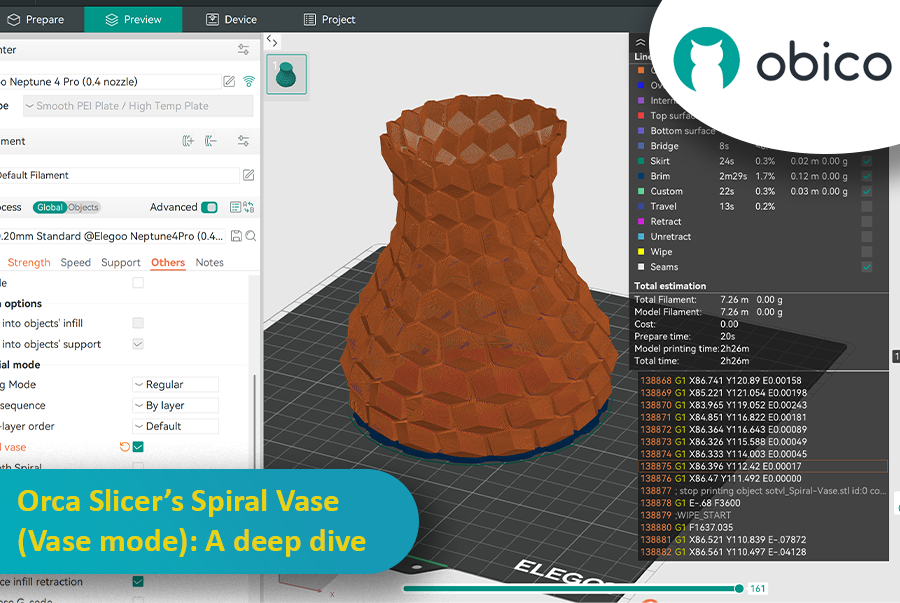
Orca Slicer’s Spiral Vase (Vase Mode): A Deep Dive

· 17 minuti di lettura

Introduction

If you’ve ever wondered how people create those gorgeously smooth, hollow prints that look like ceramic vases straight from an artisan’s studio, you’re about to discover their secret. It’s called Spiral Vase Mode, and it can turn your 3D printer into a wizard of single-wall printing. Picture your extruder gliding in one continuous loop around a shape, steadily building a spiral from the bottom up. Gone are the days of multiple perimeters, infill grids, and cluttered top layers. In their place, you’ll find a single, graceful helix of filament that forms a delicate but surprisingly impressive object.

Orca Slicer’s Spiral Vase (Vase Mode): A Deep Dive

For many 3D printing enthusiasts, vase-mode prints represent a sweet spot between practicality and artistry. They can be quick to produce, visually striking, and mesmerizingly smooth on the surface. In short, they’re different from your average print. And thanks to Orca Slicer—a slicer admired for its user-friendly design and flexible feature set—accessing Spiral Vase Mode has never been simpler.

This guide will walk you through everything you need to know about Spiral Vase Mode in Orca Slicer. We’ll talk about what it is, why it’s so popular, and how to set it up. We’ll also cover vital details about nozzles, layer heights, water-tightness, tricky designs, and the all-important calibration steps. By the end, you’ll be ready to bring your own vase-mode dreams to life. Whether that’s a lamp, a prototype shell, a decorative piece, or an actual vase you can put flowers in, is entirely up to you.

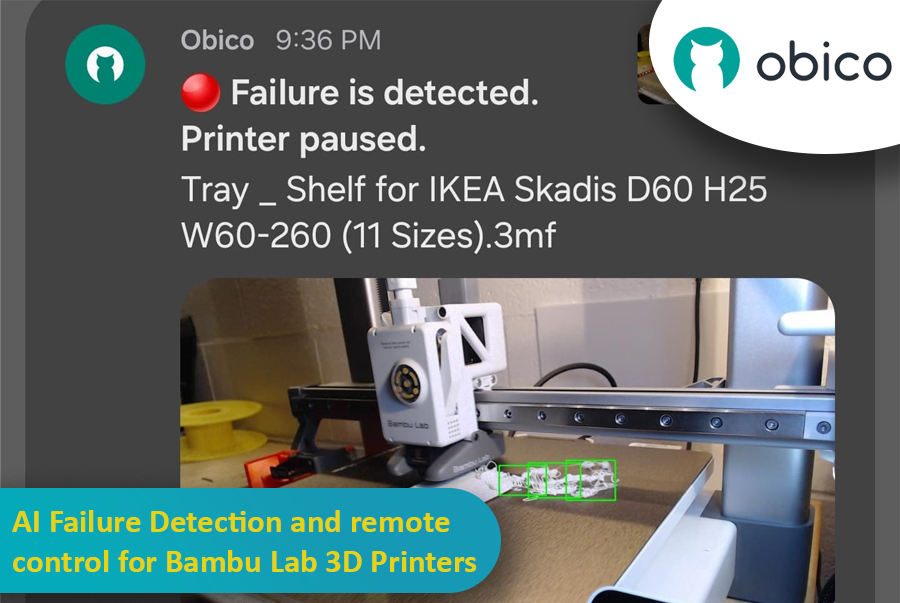
AI Failure Detection and Remote Control for Bambu Lab 3D Printers

· 17 minuti di lettura

So, you’ve got a Bambu Lab 3D printer—maybe a fancy X1 Carbon, or maybe a more modest A1 or P1P—and you’re absolutely in love with how quickly and smoothly it prints. These machines are kind of like the Ferraris of the consumer 3D printing world, right? Super-fast, often come with neat features like built-in cameras, enclosed builds, multi-color printing capabilities, and even some AI-based magic that tries to detect when your print turns into the dreaded “spaghetti monster.” You know what I’m talking about: that moment when your once-promising print becomes a pile of tangled filament resembling something you’d serve with meatballs.

 AI Failure Detection and Remote Control for Bambu Lab 3D Printers

But here’s the catch: Not all Bambu Lab printers have the same level of AI detection built in. Models like the Bambu X1 Carbon are decked out with advanced AI spaghetti detection and even LiDAR to inspect that first layer. Meanwhile, other models—like the Bambu A1 series or the P1P—lack AI features altogether. Maybe you went from a Creality printer that you’d meticulously set up with OctoPrint and had all sorts of plugins running, including advanced failure detection. Then you jumped ship to a Bambu Lab machine and realized you miss that robust ecosystem. Or maybe you just love tinkering and want to integrate Obico’s AI-based spaghetti detection and remote monitoring into your Bambu workflow.

Well, good news: With a bit of creativity, a spare single-board computer (like a Raspberry Pi or Orange Pi), a camera (such as a trusty old Logitech C920), and some software tweaking, you can get AI failure detection working via Obico on your Bambu printer—no matter which model you have. This can transform your Bambu printer setup into something that feels both luxurious and smart, catching failures before they waste days of print time and tons of filament.

In this “case study” or super-long how-to, I’ll walk you through a scenario: Let’s imagine you have a Bambu A1 printer. You love it, but you want AI failure detection similar to what you might have had with other printers integrated with Obico. We’ll talk about using OctoPrint as a virtual “bridge,” installing plugins, setting up a camera, and linking everything to Obico’s cloud so you can watch your prints from anywhere, get notifications if something goes wrong, and even pause or stop the printer remotely. And if you’re on a higher-tier Bambu like the X1 Carbon, you might not need this as much—but it’s still super cool to have another layer of AI detection from Obico’s machine-learning setup.

I’ll also share some links to relevant GitHub repos, documentation pages, and other helpful guides.

QIDI Plus4 - Klipper Remote Access and AI

· 15 minuti di lettura

The QIDI Plus4 is not just a 3D printer; it’s a game changer for those who want precision, reliability, and advanced features. Whether you are a hobbyist or a professional, the QIDI Plus4 has features that will take your entire printing experience to the next level. Pre-installed with Klipper firmware, equipped with a heated chamber, and packed with intelligent monitoring capabilities, this amazing 3D printer ensures that your prints are accurate, consistent, and efficient.

QIDI Plus4 3D printer in action with remote and AI capabilities

In this article, we will go in-depth on the QIDI Plus4 features and guide you through setting up remote access and AI monitoring with Obico.

Introducing the New Prusa CORE One: A Revolutionary 3D Printer

· 12 minuti di lettura

The 3D printing world has just got a new game changer: the Prusa Core One. This is not just a new printer; it’s a leap forward in design, functionality, and performance. The new CORE One printer offers a CoreXY design, active chamber temperature control, and a host of user-focused innovations. It combines speed, precision, and versatility in a sleek, compact package.

Prusa Core One: The Revolutionary 3D Printer

Whether you are a hobbyist looking to expand your creative possibilities, a professional engineer in need of reliable prototypes, or a teacher exploring 3D printing, the Prusa CORE One has something for everyone.

Let’s take a closer look together at what makes this new printer a true standout.

Orca Slicer Filament Profiles and How to Make Your Own

· 15 minuti di lettura

3D printing is more than a hobby; it’s a tool for innovation, design, and creativity. As technology gets better, the tools we use to optimize the print process get better. Orca Slicer is one of the best slicing software options out there for users who want precision, efficiency, and customization. One of its many features is the ability to create and manage your own filament profiles, and that’s a game changer for getting great results every time.

Orca Slicer Filament Profiles and How to Make Your Own

In this article we’ll go deep into filament profiles in Orca Slicer, what they are, why they matter, and how you can create, fine-tune, and optimize your own custom profiles for your material.

JusPrin - The first GenAI 3D printing app

· 3 minuti di lettura

Back in 2019, I built The Spaghetti Detective. It was the first AI tool made specifically for the 3D printing community. Fast forward a few years, and we’re in the GenAI era. But there have been no GenAI apps for the 3D printing.

Well, that’s about to change. Meet JusPrin, the first GenAI app for 3D printing. No slicing. Just print.