Aller au contenu principal

Creality Ender 3 Webcam Setup for OctoPrint and The Spaghetti Detective

· 4 minutes de lecture
astuce

Can't find a Raspberry Pi? Check out Orange Pi for OctoPrint. Boards and complete kits are available now!

Creality Ender 3 is one of the most solid and affordable 3D printers you can get. And OctoPrint is undoubtedly the best solution for monitoring your prints with a webcam.

This brief tutorial is meant to help someone who is interested in using a camera with their 3D printer to take advantage of OctoPrint's amazing monitoring capability with an inexpensive Pi Camera. This setup will work perfectly for The Spaghetti Detective too.

The first thing I realized soon after I owned a 3D printer was that prints can take a long time. The second thing I learned was that they can fail. I was concerned about leaving the house while a print was in progress and quickly discovered that others had recognized this problem and solved it. There are several methods to achieve this, I am going to describe what seemed to be the best solution for me. I will mention the software and hardware that is needed but defer to the many excellent YouTube videos available on the actual implementation of these. The focus here will be to document the steps and provide some tips that I learned in getting it all working. The printed parts were specifically for the Ender 3 V2 printer but most of the information is not printer specific.

The solution I chose involved purchasing a Raspberry Pi computer and installing OctoPi on it. This allows you to use OctoPrint to control the printer from your computer. OctoPi is an image that is put on an SD card and resides in the Raspberry Pi computer and provides the link between your computer and your printer. The Spaghetti Detective is a plugin available to be installed in OctoPrint. While it will work on older versions, I purchased a kit that included the Raspberry Pi 4B. The Raspberry Pi has a port for a “native” camera and USB ports where you could plug some other webcam in. I chose the Raspberry Pi Camera Module V2 as it was inexpensive but had decent specs. I mounted the camera on the z-axis cross beam which meant I needed a longer cable to insure it reached the top of the printer. All the mounting hardware was printed from items I found on Thingiverse (or to be honest were links in the YouTube videos I watched).

20 Million Hours And Going Strong

· 2 minutes de lecture

The Spaghetti Detective came out of beta about 1 year ago. Since then, The Detective has watched more than 19 million print hours for the 3D printing hobbyists. That is on average 49,625 hours a day!

And sometimes next week, we will cross the mark of 20 million watched print hours.

Those who joined TSD family early enough would probably remember we had a celebration (socially distanced and perfectly safe😉 ) when we crossed 10 million hours back in April. We will do a similar one this time too. This means the chance to get 50% discount off Pro account but you need to work for it. We will make the rules simpler than last time:

20 Million Hours And Going Strong

OctoPrint Tunneling is now in beta testing

· 3 minutes de lecture
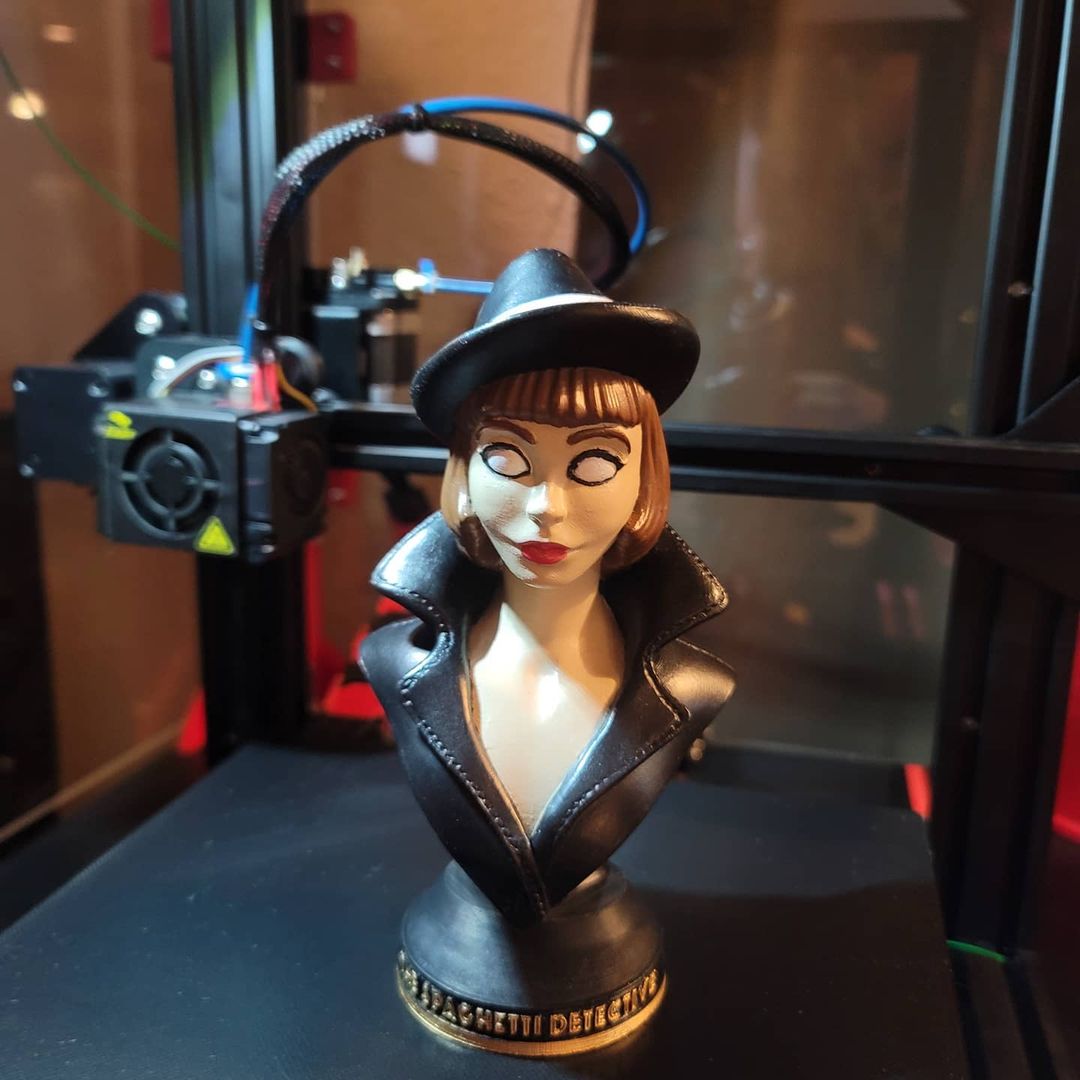
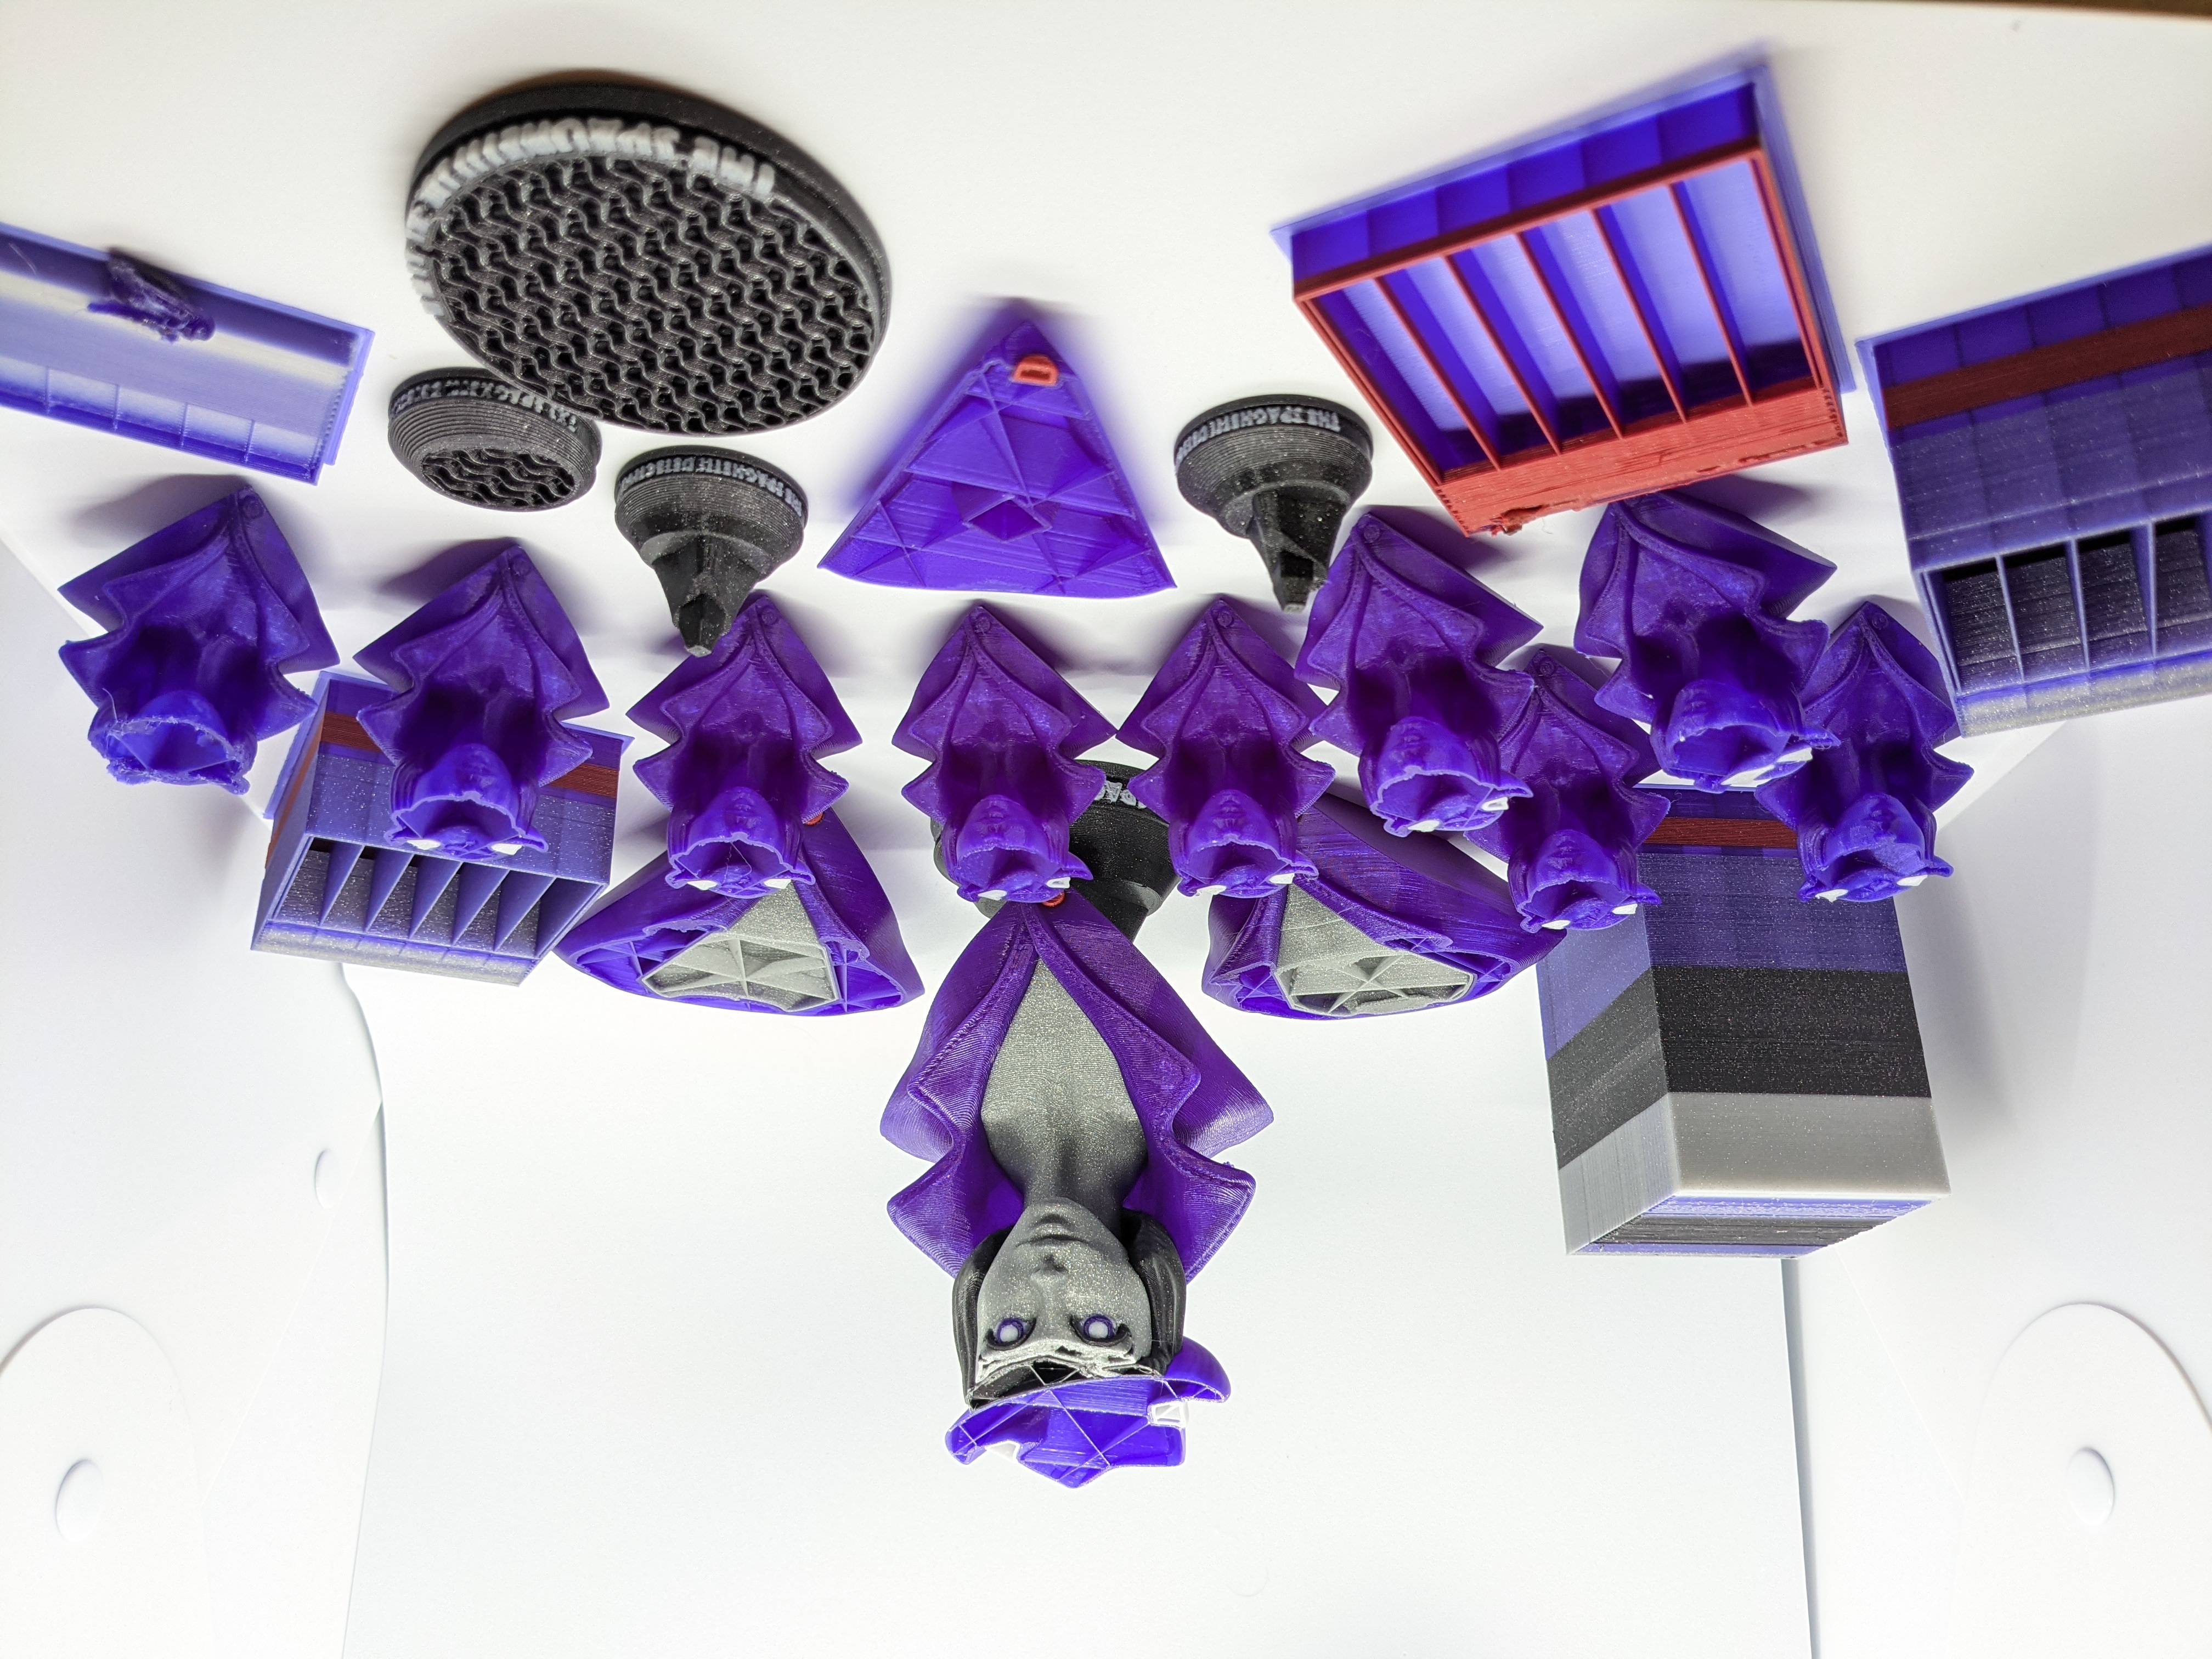
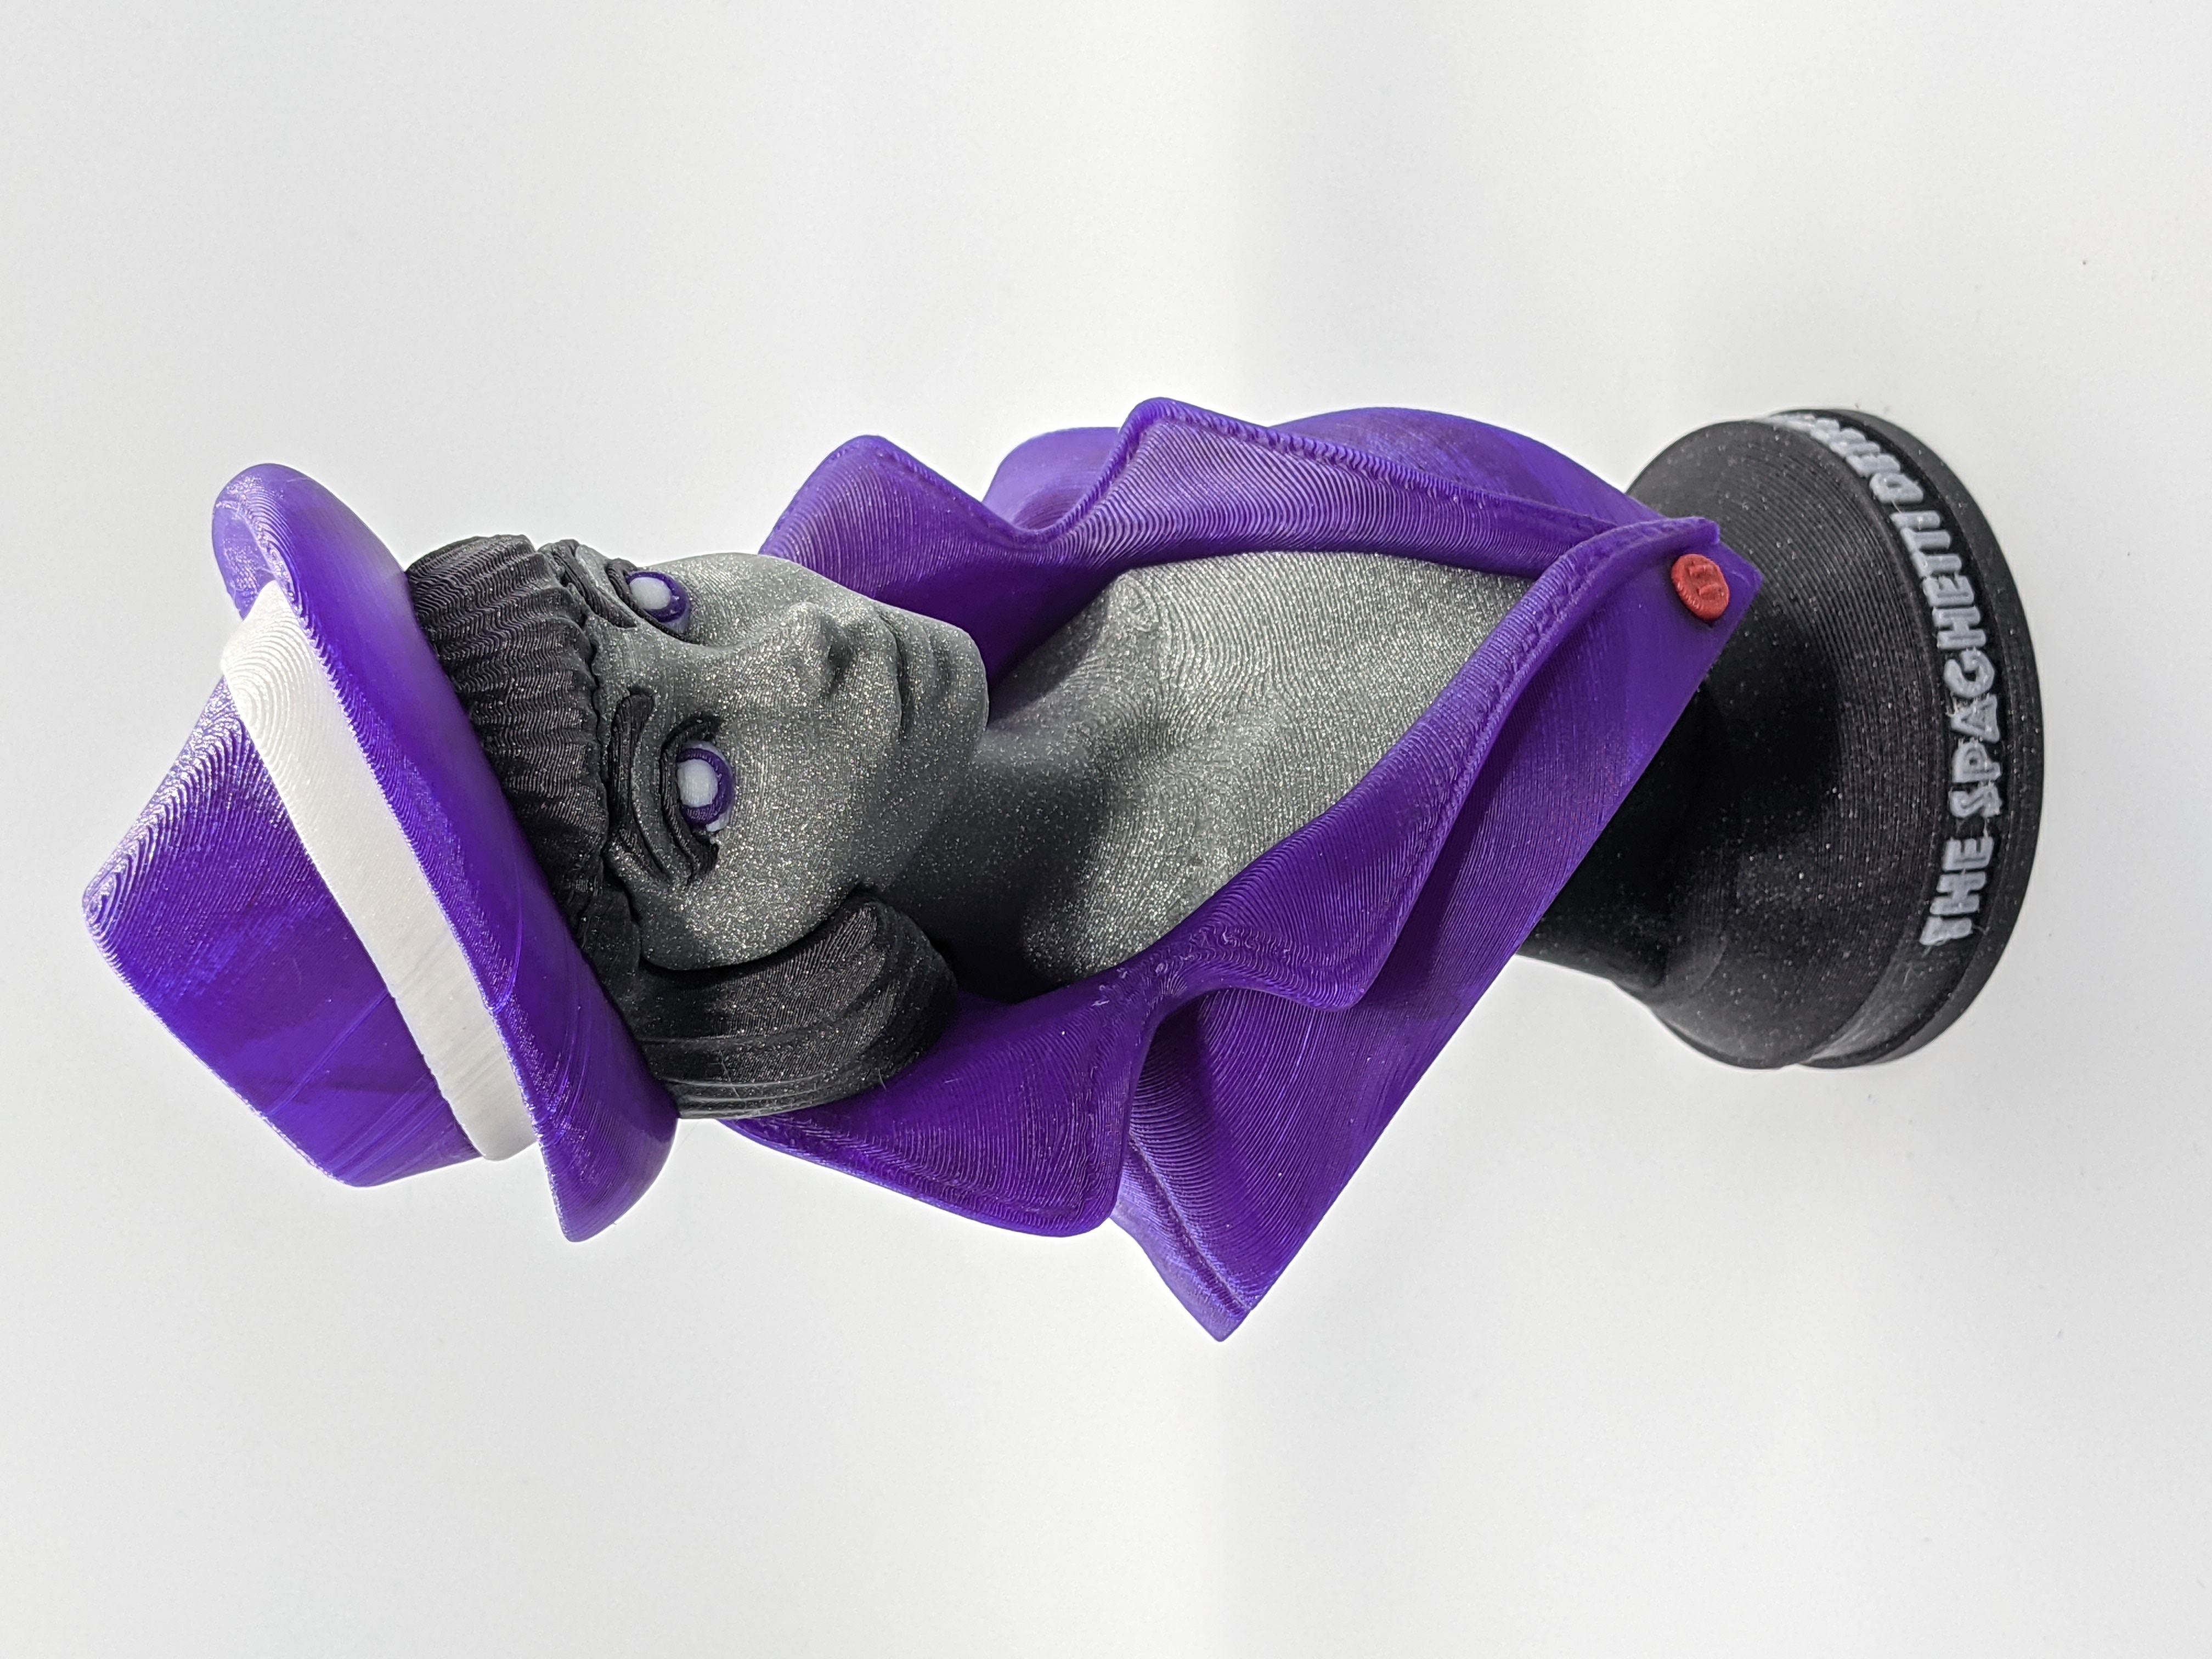
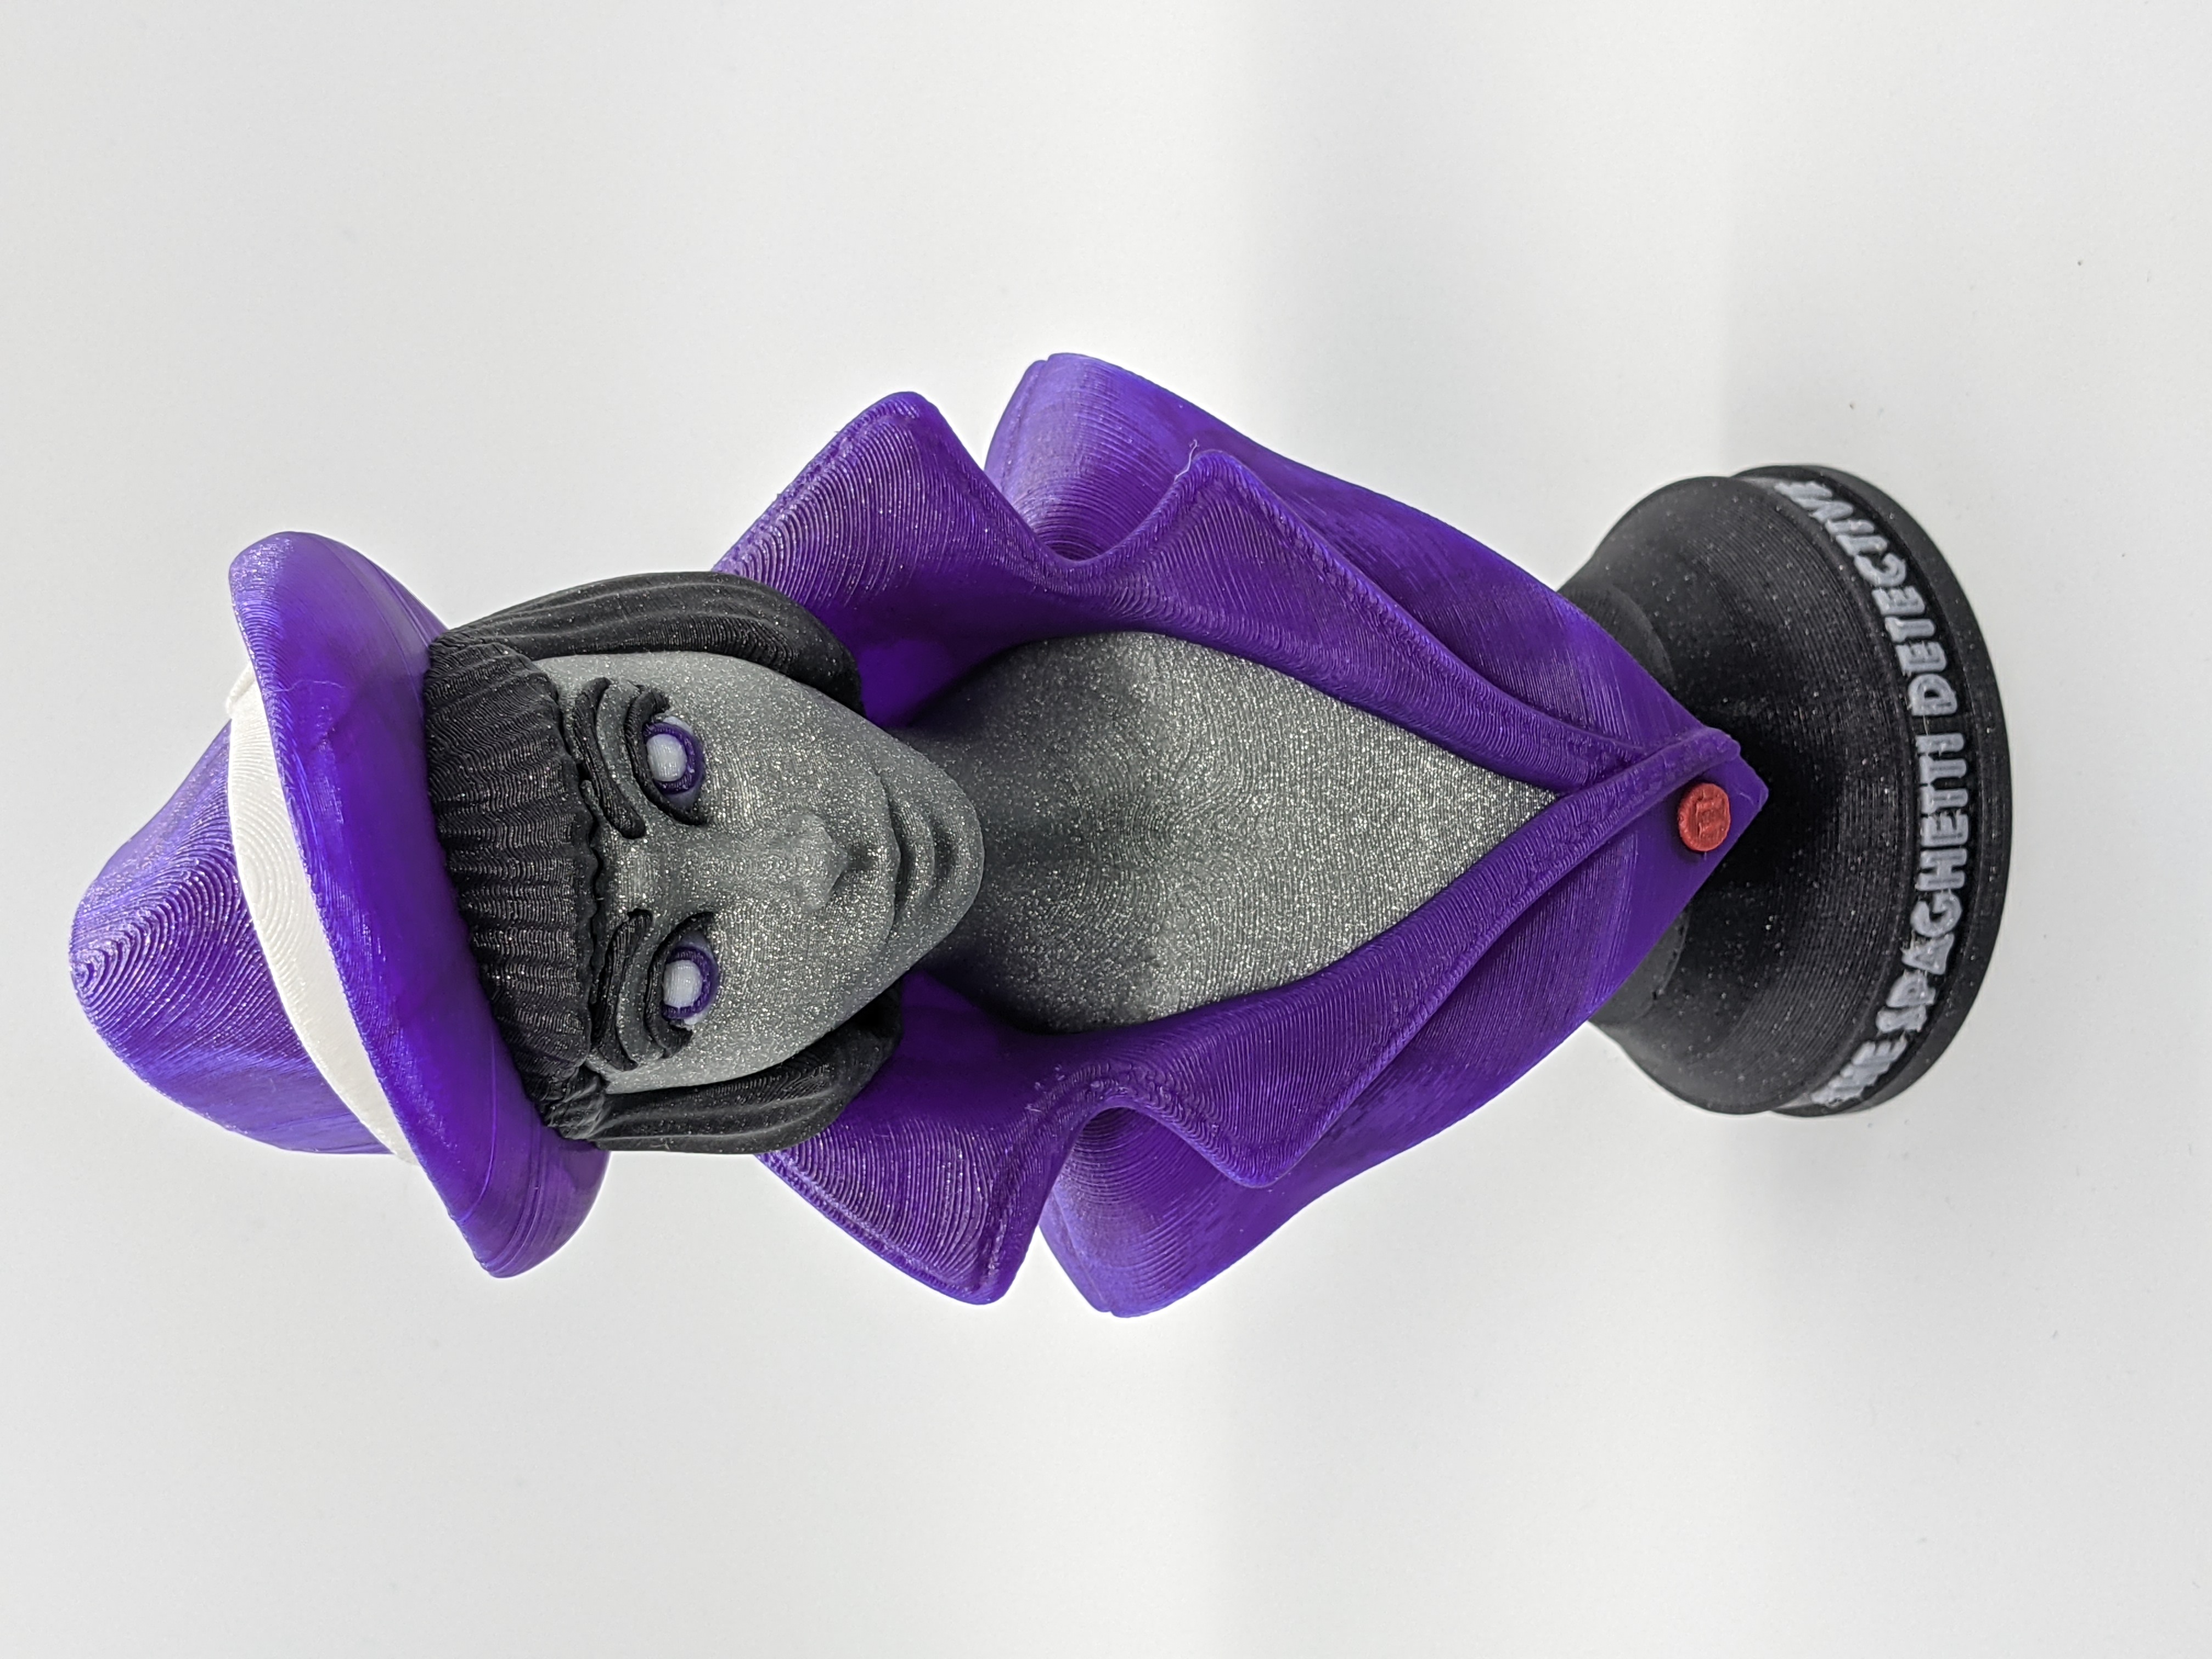
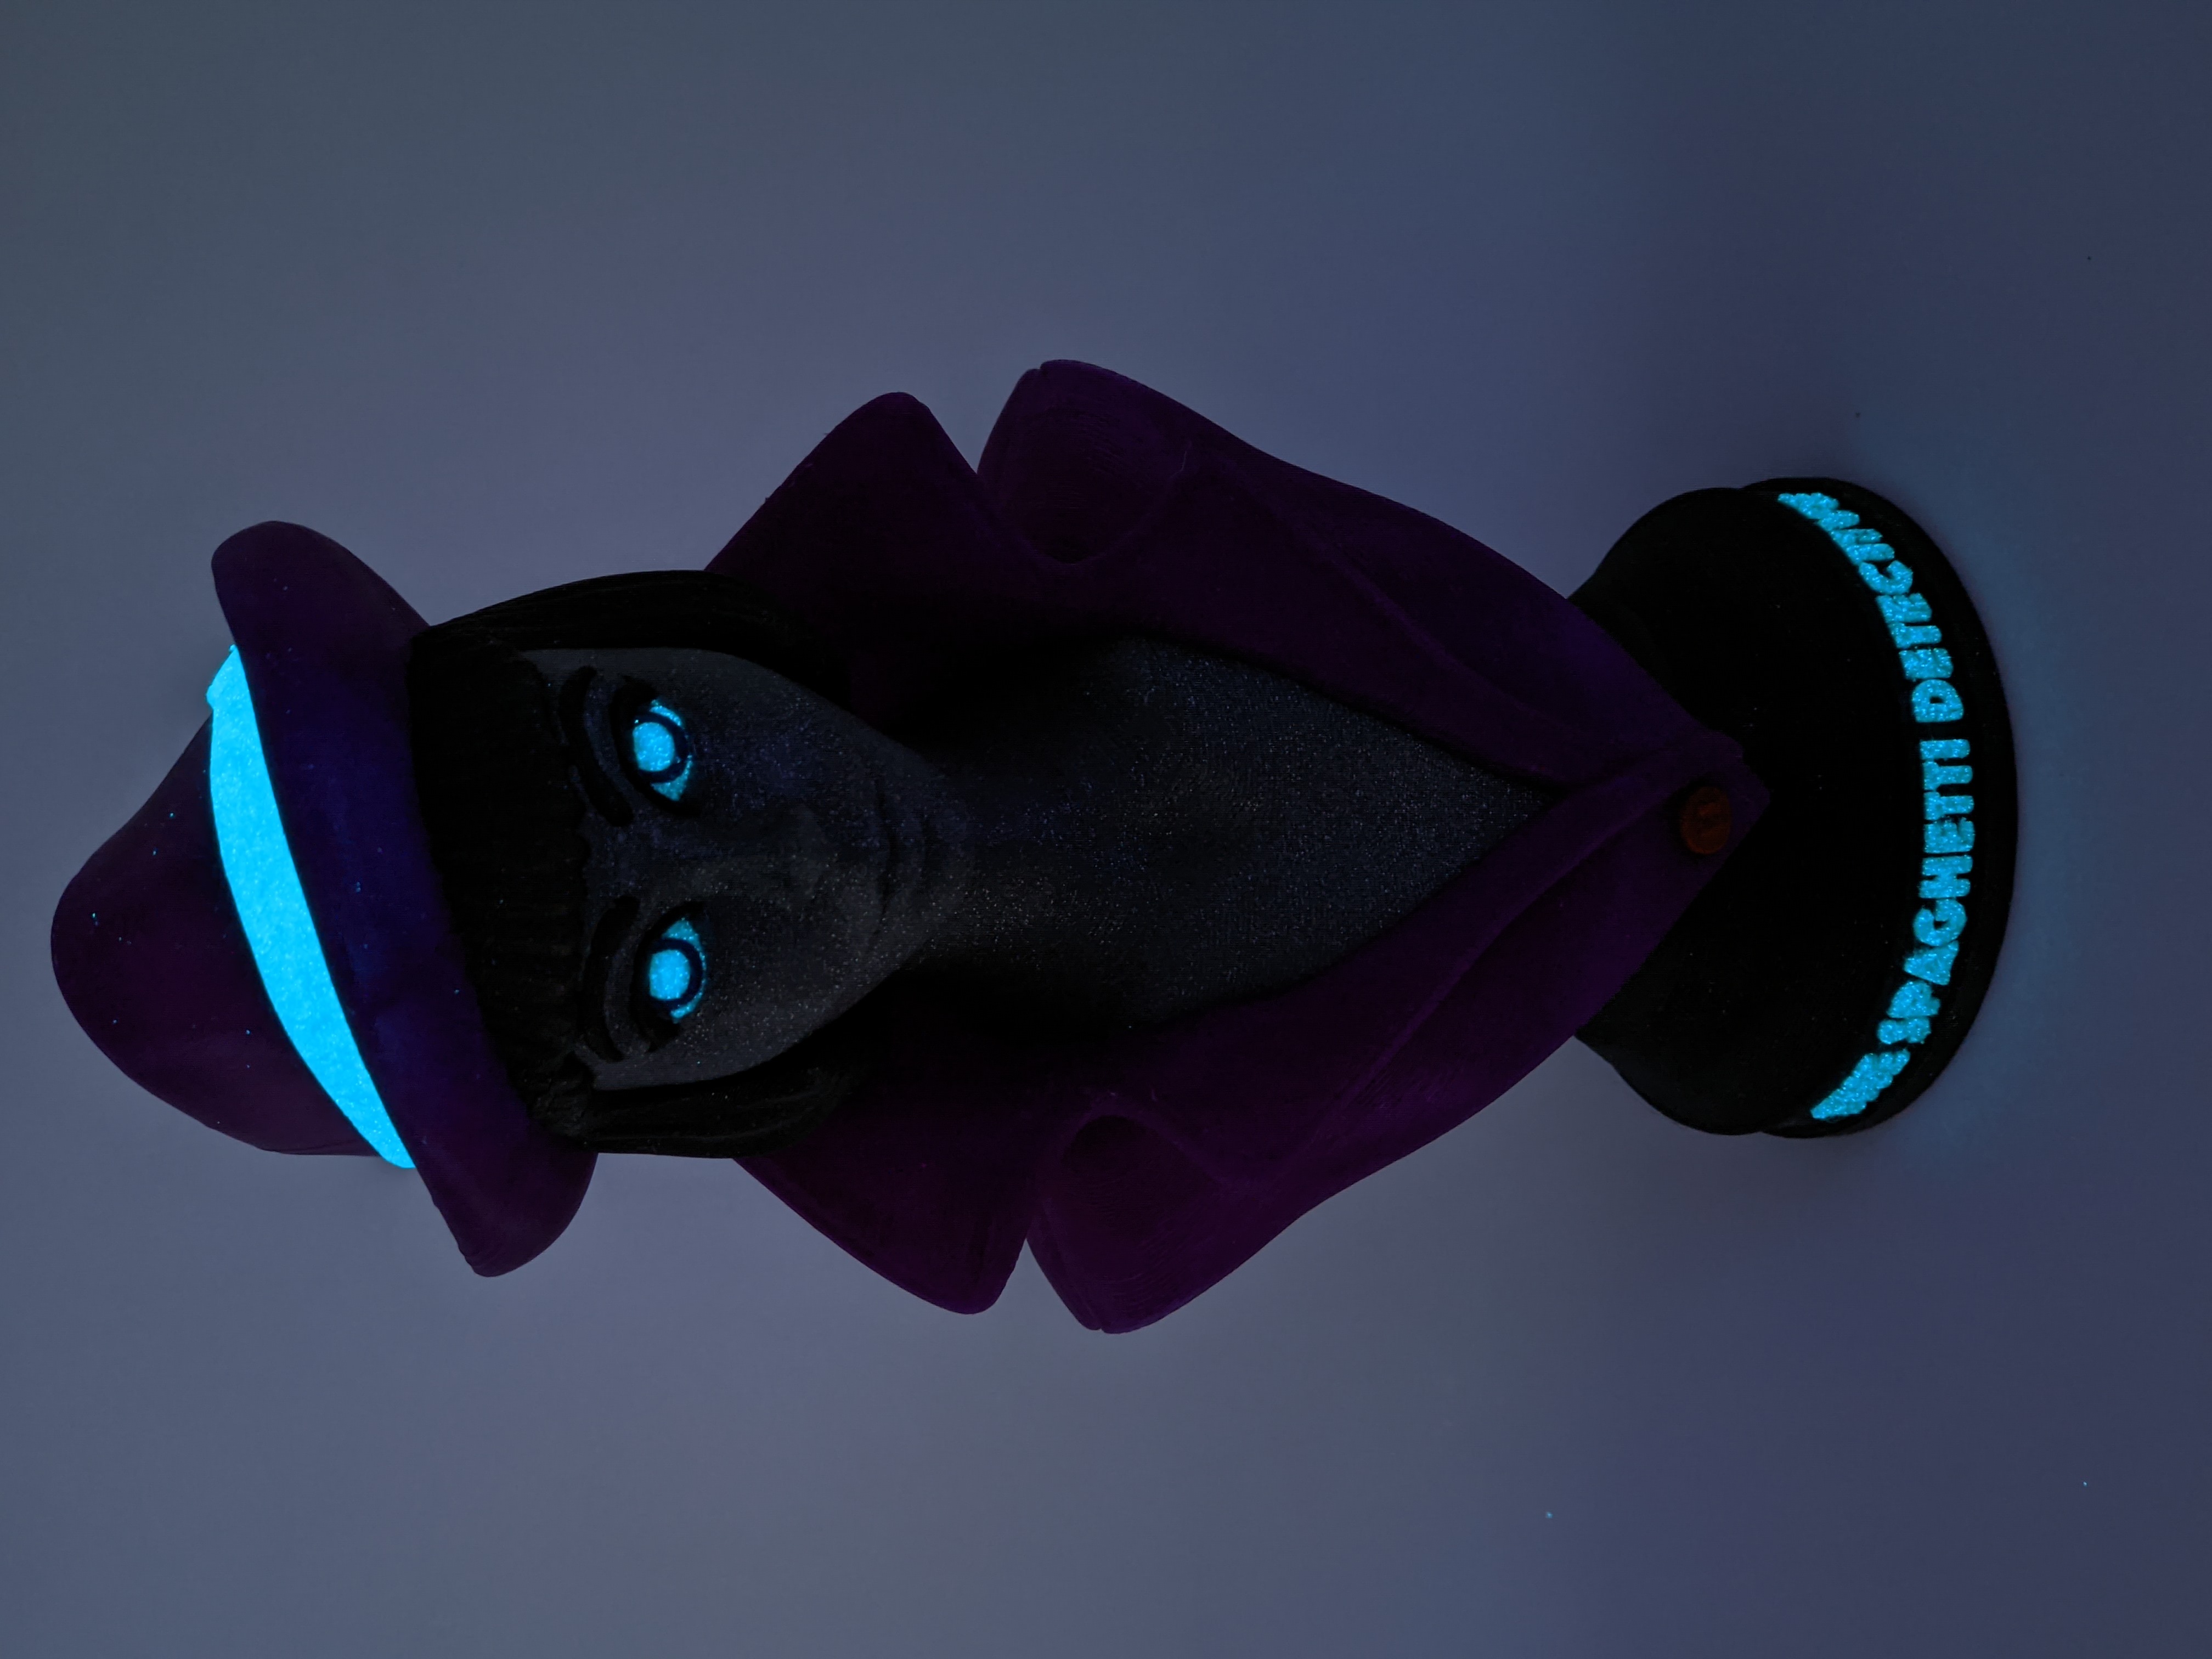
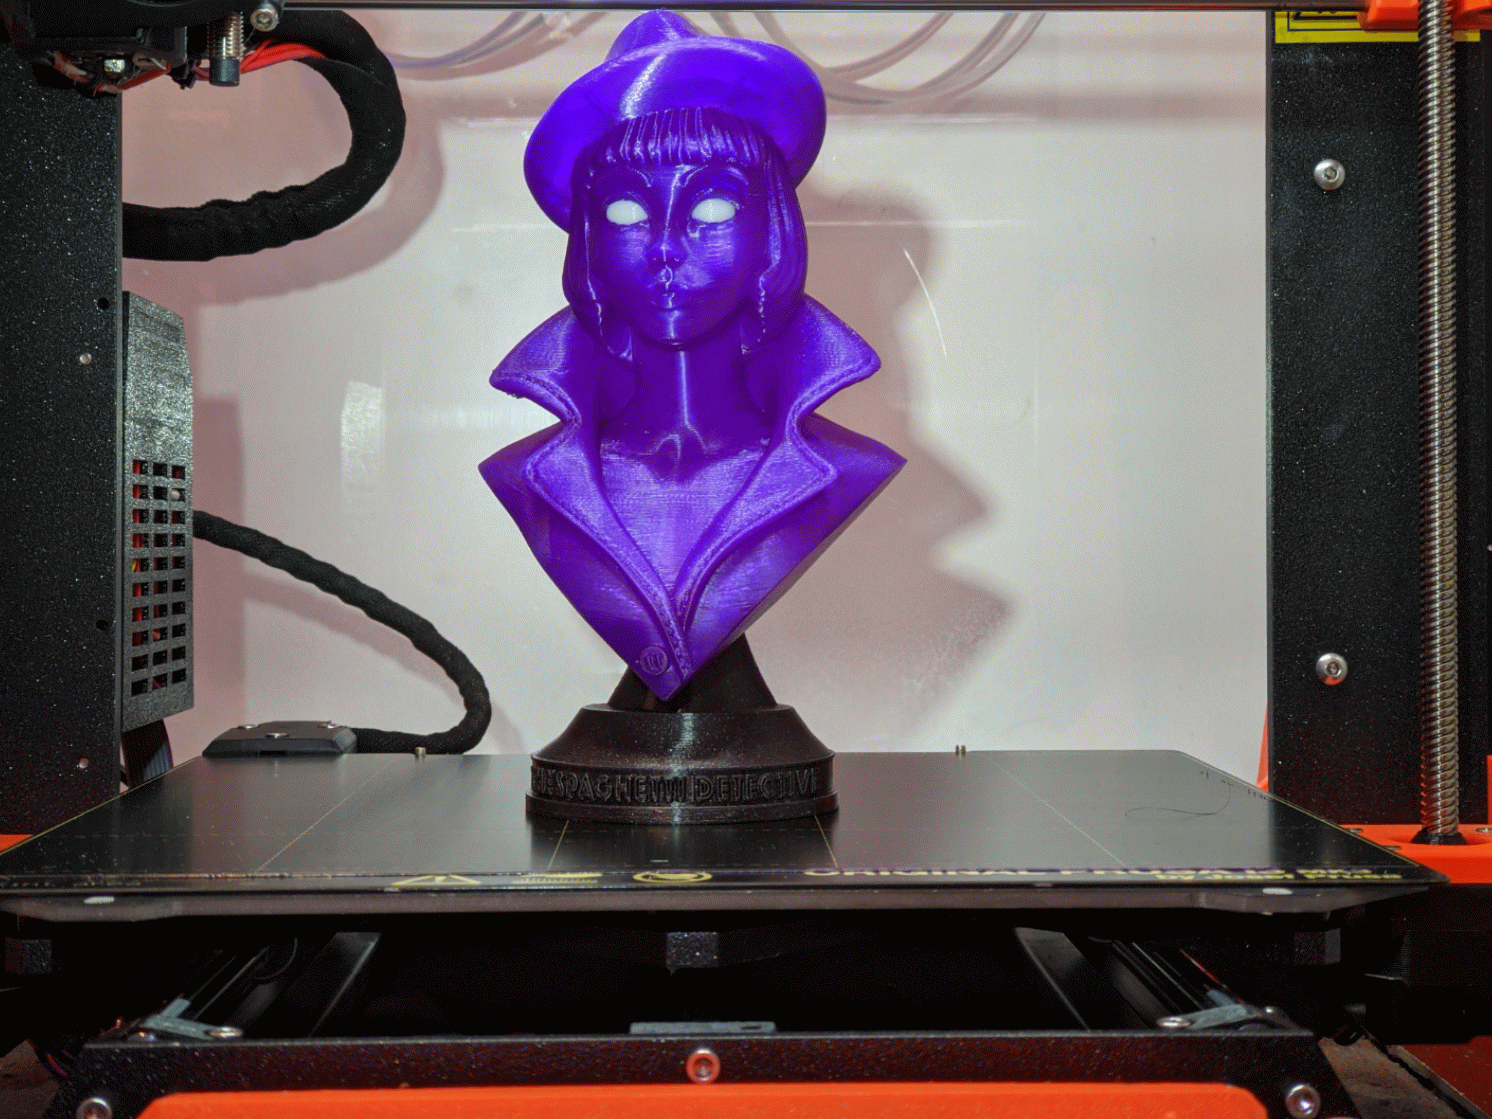
What is OctoPrint Tunneling?

OctoPrint Tunneling is a secure way to access the full OctoPrint UI even when you are not on your home network.

The Spaghetti Detective provides the access to the most critical functions - webcam feed, pause/cancel, changing heater temperature, etc. However, we understand there are times when you want to access other OctoPrint functions while you are not home, such as using its PSU plugin to turn on/off power supply to your printer.

So we built OctoPrint Tunneling to make it possible for you. 🚀🚀🚀

Is OctoPrint Tunneling secure?

OctoPrint Tunneling is now in beta testing

The Spaghetti Detective Mobile App Is Coming! And It'll Be FREE!

· 4 minutes de lecture

Many TSD users have made it clear in their survey responses (big shout-out to everyone who gave us your feedback by filling out the survey) that the next cool thing they want the most is a The Spaghetti Detective mobile app.

So this is exactly what we will do. We will build a TSD mobile app! And we will make it available on both Android and iOS!

Features included in the TSD mobile app

The Spaghetti Detective Mobile App Is Coming! And It'll Be FREE!

Turn your Ender 3 into an Infinite 3D Printer

· 10 minutes de lecture

If you have been churning out face masks and other PPE for coronavirus, like us, you’ve likely started to wonder if it’s possible to turn your 3D printer into an infinite 3D printer. Pulling parts off the print bed is tedious, time consuming, and requires being home when each job finishes. In this guide we teach you how to automatically eject parts from the print bed of your Ender 3 so you can start the next print while no one is around!

Disclaimer: Follow this tutorial at your own risk. Your printer is not built to do automatic part ejection. While we’ve discovered a technique that has been fairly reliable for us, it’s possible that if you don’t tweak the GCODE commands to your specifications, you can cause your printer to smash into things and do damage. Don’t blindly copy and paste GCODE commands, make sure you understand what they will cause the printer to do first.

Turn your Ender 3 into an Infinite 3D Printer

The Spaghetti Detective Integrates with 3D Geeks Mobile App for Better User Experience

· 2 minutes de lecture

The Spaghetti Detective is partnering with 3D Geeks, one of the most popular 3D printing apps, to bring mobile push notifications to our users.

What does it do

When you have 3D Geeks app integration activated, you will receive push notifications on your phone for the same failure alerts and print job notices as the ones you receive in your email. In addition, you will also receive push notifications for print job progress (25%, 50%, and 75%).

How to Get Started 3D Printing

· 5 minutes de lecture

Many people who know very little about 3D printing think the barriers to entry are extremely high, but the truth is that these days it’s extremely cheap and easy to get started. In this article we’ll walk through some of the myths and misconceptions then talk about how you can get started with 3D printing as a beginner.

Myth #1: Technical Expertise Required

Many people think you need to be a programmer or engineer to learn to 3D print, but in reality you only need a few tools and almost no expertise to get started! The biggest skill that is required to 3D print is being able to Google things and follow instructions. With so many people entering this hobby, there is almost always a YouTube step by step guide for anything you want to do. This means you don’t need to be an expert, when you encounter an issue you can just Google it and follow instructions to problem solve.

3D Print Quality Guide

· 7 minutes de lecture

Today we're here to teach you about 3D print quality and some of the easy ways you can improve surface finish with minimal effort. Above are two 3D prints of the same exact GCODE done back to back on the same printer with the same filament. In this article we'll discuss what caused surface blobs seen on the left and how you can avoid this in your prints!

Pricing adjustment for the monthly Pro plan

· 2 minutes de lecture

We will be making some pricing adjustments on the monthly Pro plan as of July 8th, 2020.

  • The monthly Pro plan for the first printer will be adjusted from $5.5 per month to $6 per month.

  • For each additional printer, the monthly Pro plan will be adjusted from $2.75 per month to $3 per month.

  • Nothing else changes.

Why these changes?

Pricing adjustment for the monthly Pro plan