Ender 3 V2 - All You Need to Know

Introduction
In the ever-evolving landscape of 3D printing, certain models stand out and make their mark on the industry. One such model is the Ender 3 V2. A successor to the hugely popular Ender 3, this updated version promises enhanced features and better user experience, making it one of the go-to choices for both beginners and seasoned 3D printing enthusiasts. As 3D printing becomes more mainstream, understanding what makes the Ender 3 V2 stand out in a sea of competitors is vital. This article delves deep into the world of the Ender 3 V2, comparing it to other similar 3D printers and highlighting why it has garnered such a high level of popularity. Stay tuned as we unpack the technical specifics, benefits, and potential drawbacks of the Ender 3 V2, giving you a comprehensive overview to aid your 3D printing decisions.
A Comparative Analysis with Similar 3D Printers
In the realm of budget-friendly 3D printers, the competition is fierce, with many brands vying for the top spot. The Ender 3 V2, produced by Creality, is one of the heavyweights in this category. But how does it stack up against its rivals? Let's dive in and compare the Ender 3 V2 with other similar 3D printers in its class.
-
Build Volume: One of the first things enthusiasts look at in a 3D printer is its build volume, the maximum size of an object it can print. The Ender 3 V2 boasts a respectable 220 x 220 x 250 mm. While this is in line with many printers in its category, there are others like the Artillery Sidewinder X1 that offer a slightly larger build volume.
-
Print Quality: While the original Ender 3 was known for its impressive print quality, the V2 takes it a notch higher with tighter tolerances and smoother prints. Compared to competitors like the Anet A8 or the Geeetech A10, the Ender 3 V2 often has the edge in terms of consistent print quality.
-
User-Friendly Features: This is where the Ender 3 V2 truly shines. It comes with a new 4.3-inch color screen, a significantly quieter printing operation thanks to its TMC2208 stepper motor drivers, and a glass bed for better print adhesion. Many other printers in its price range do not offer all these features in one package.
-
Upgradability: One of the Ender 3 V2's strongest selling points is its upgradability. Users can easily add a BLTouch for auto bed leveling, a direct drive extruder, or other modifications. While other printers like the Prusa MK3 offer a plethora of upgrade options out of the box, the Ender 3 V2's affordability combined with its modifiability makes it a top choice for tinkerers.
The Ender 3 V2 Experience: Features to Know
The Ender 3 V2, an upgrade from its predecessor the Ender 3, has become a staple in the 3D printing community, and for good reasons. This machine brings forth a blend of affordability and performance, making it a prime choice for both beginners and experienced users. Let's delve into its features to understand why it's so revered:
-
Build Volume: The Ender 3 V2 boasts a build volume of 220 x 220 x 250 mm. This offers a decent workspace for a variety of projects, from small intricate designs to larger functional parts.
-
Carborundum Glass Platform: The print bed of the Ender 3 V2 is a carborundum glass platform, providing excellent adhesion for prints. The smooth surface ensures an easy removal process once the print is completed, reducing the chances of damage.
-
Print Speed and Precision: The printer can achieve a standard printing speed of up to 180mm/s, though for higher quality prints, a more moderate speed of 40-80mm/s is recommended. With a layer resolution ranging from 0.1mm to 0.4mm, it can produce detailed prints with ease.
-
Temperature Capabilities: The heated bed can reach temperatures up to 100°C, making it suitable for a variety of filaments that require a heated platform. The hotend, on the other hand, can achieve temperatures up to 255°C, allowing users to print with a wide range of materials including PLA, ABS, TPU, and PETG.
-
Quiet Printing: Thanks to the TMC2208 stepper motor drivers, the Ender 3 V2 operates much more silently compared to its predecessor and many other printers in its category. This reduces noise disturbances, especially during long prints.
-
User Interface: The Ender 3 V2 is equipped with a 4.3-inch color display, offering a more intuitive user experience. The touch screen interface makes navigating settings and print files easier.
-
Resume Printing Function: Power outages or unexpected disruptions are less of a concern with the Ender 3 V2. It comes with a resume printing feature, allowing the printer to continue from where it left off once power is restored.
-
Integrated Toolbox: A convenient addition to the Ender 3 V2 is the integrated toolbox situated at the base. This provides handy storage for essential tools and accessories, ensuring they are within reach when needed.
-
Manual and Auto-Leveling: While the printer comes with manual bed leveling, users have the option to install a BLTouch or similar auto-bed leveling sensors, streamlining the calibration process and ensuring consistent print quality.
Ender 3 V2 3D Printing Experience
The Ender 3 V2, as with many 3D printers, has its unique set of characteristics that can influence a user's overall experience. Here's an overview of what one can expect when setting up and printing with this popular machine:
-
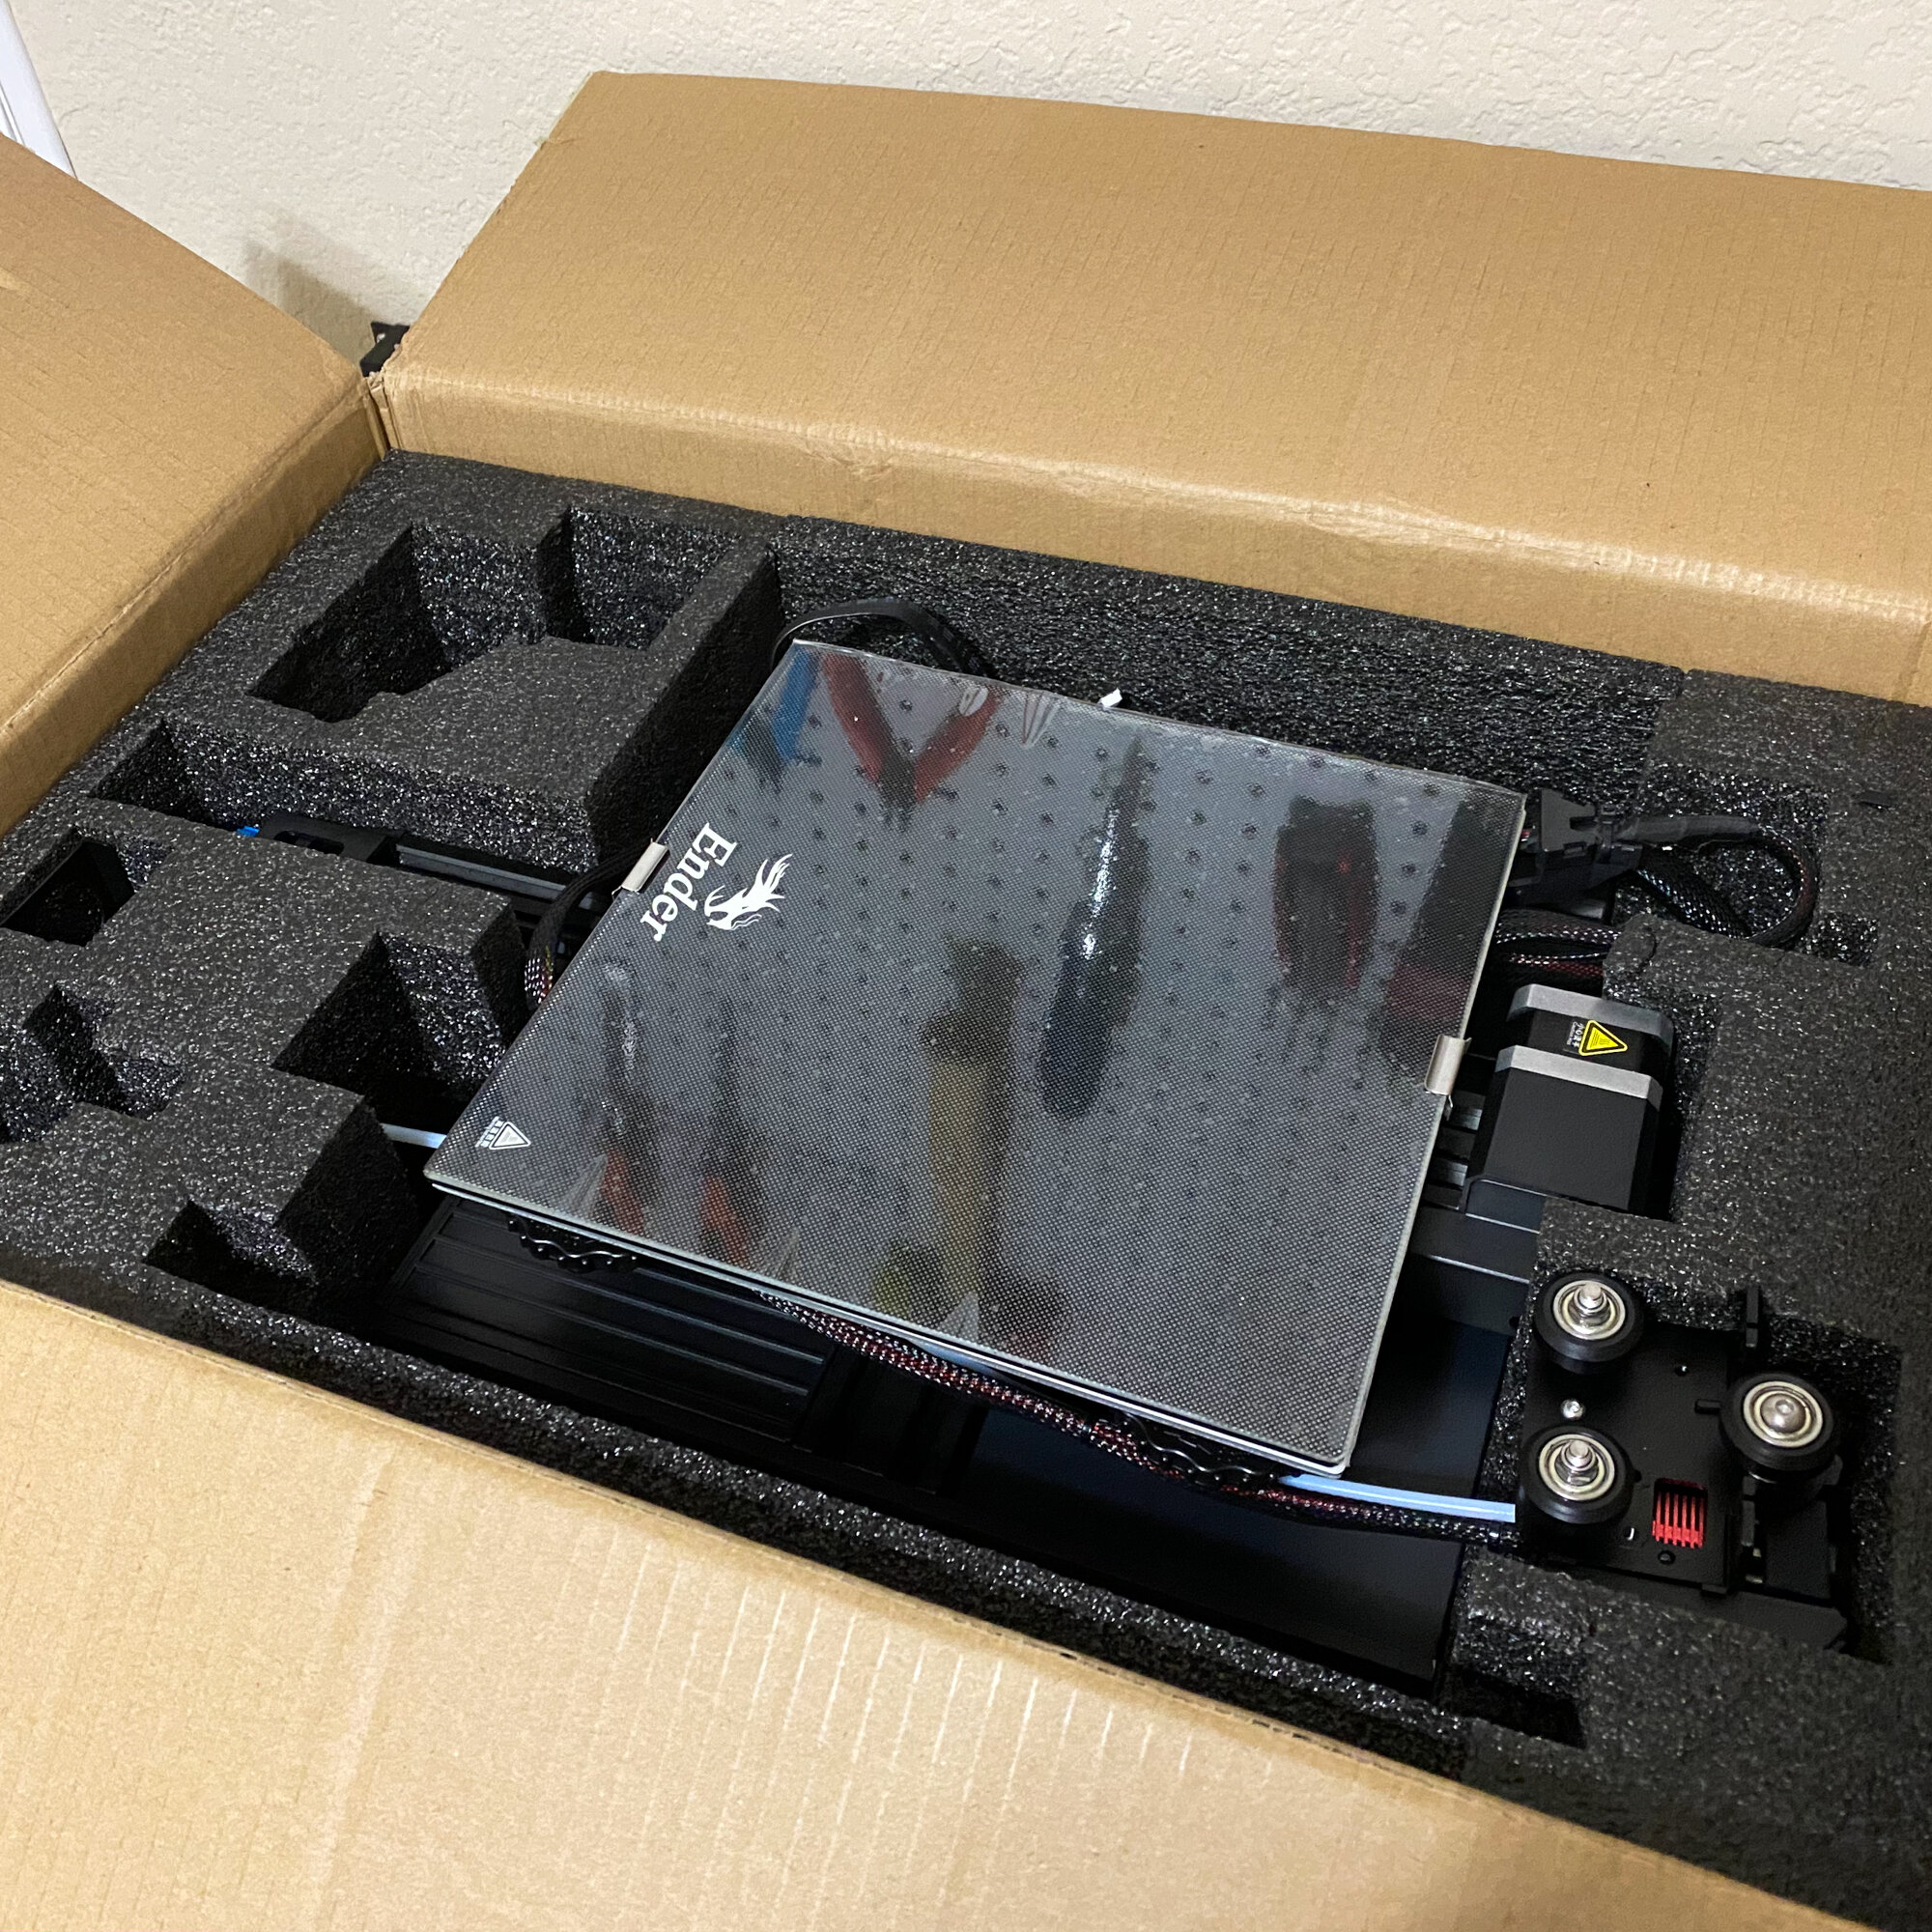
Initial Setup: Straight out of the box, the Ender 3 V2 comes semi-assembled, meaning there's some DIY effort required. For those familiar with 3D printers, the assembly can take roughly 1-2 hours. Newcomers might need a little longer. The instructions provided are generally clear, but there are plenty of online tutorials and videos that can help guide the process.
-
Calibration and Leveling: Once assembled, the next crucial step is bed leveling. While it offers manual leveling, users can upgrade to an auto-bed leveling system. Manual leveling might be intimidating for beginners, but with practice and patience, it becomes a routine task. Remember, proper bed leveling is essential for print quality.
-
User Interface: The 4.3-inch color touch screen is one of the notable upgrades from the original Ender 3. The interface is straightforward, with icons guiding users through heating, filament loading, printing, and other settings. The menu is intuitive, even for those new to 3D printing.
-
First Print: For many, the first print serves as a "test run" to ensure everything is calibrated correctly. The printer typically comes with a pre-loaded test model (like a dog or a cat), which can be a good starting point. Once the first print is successful, users gain more confidence to experiment with different models and settings.
-
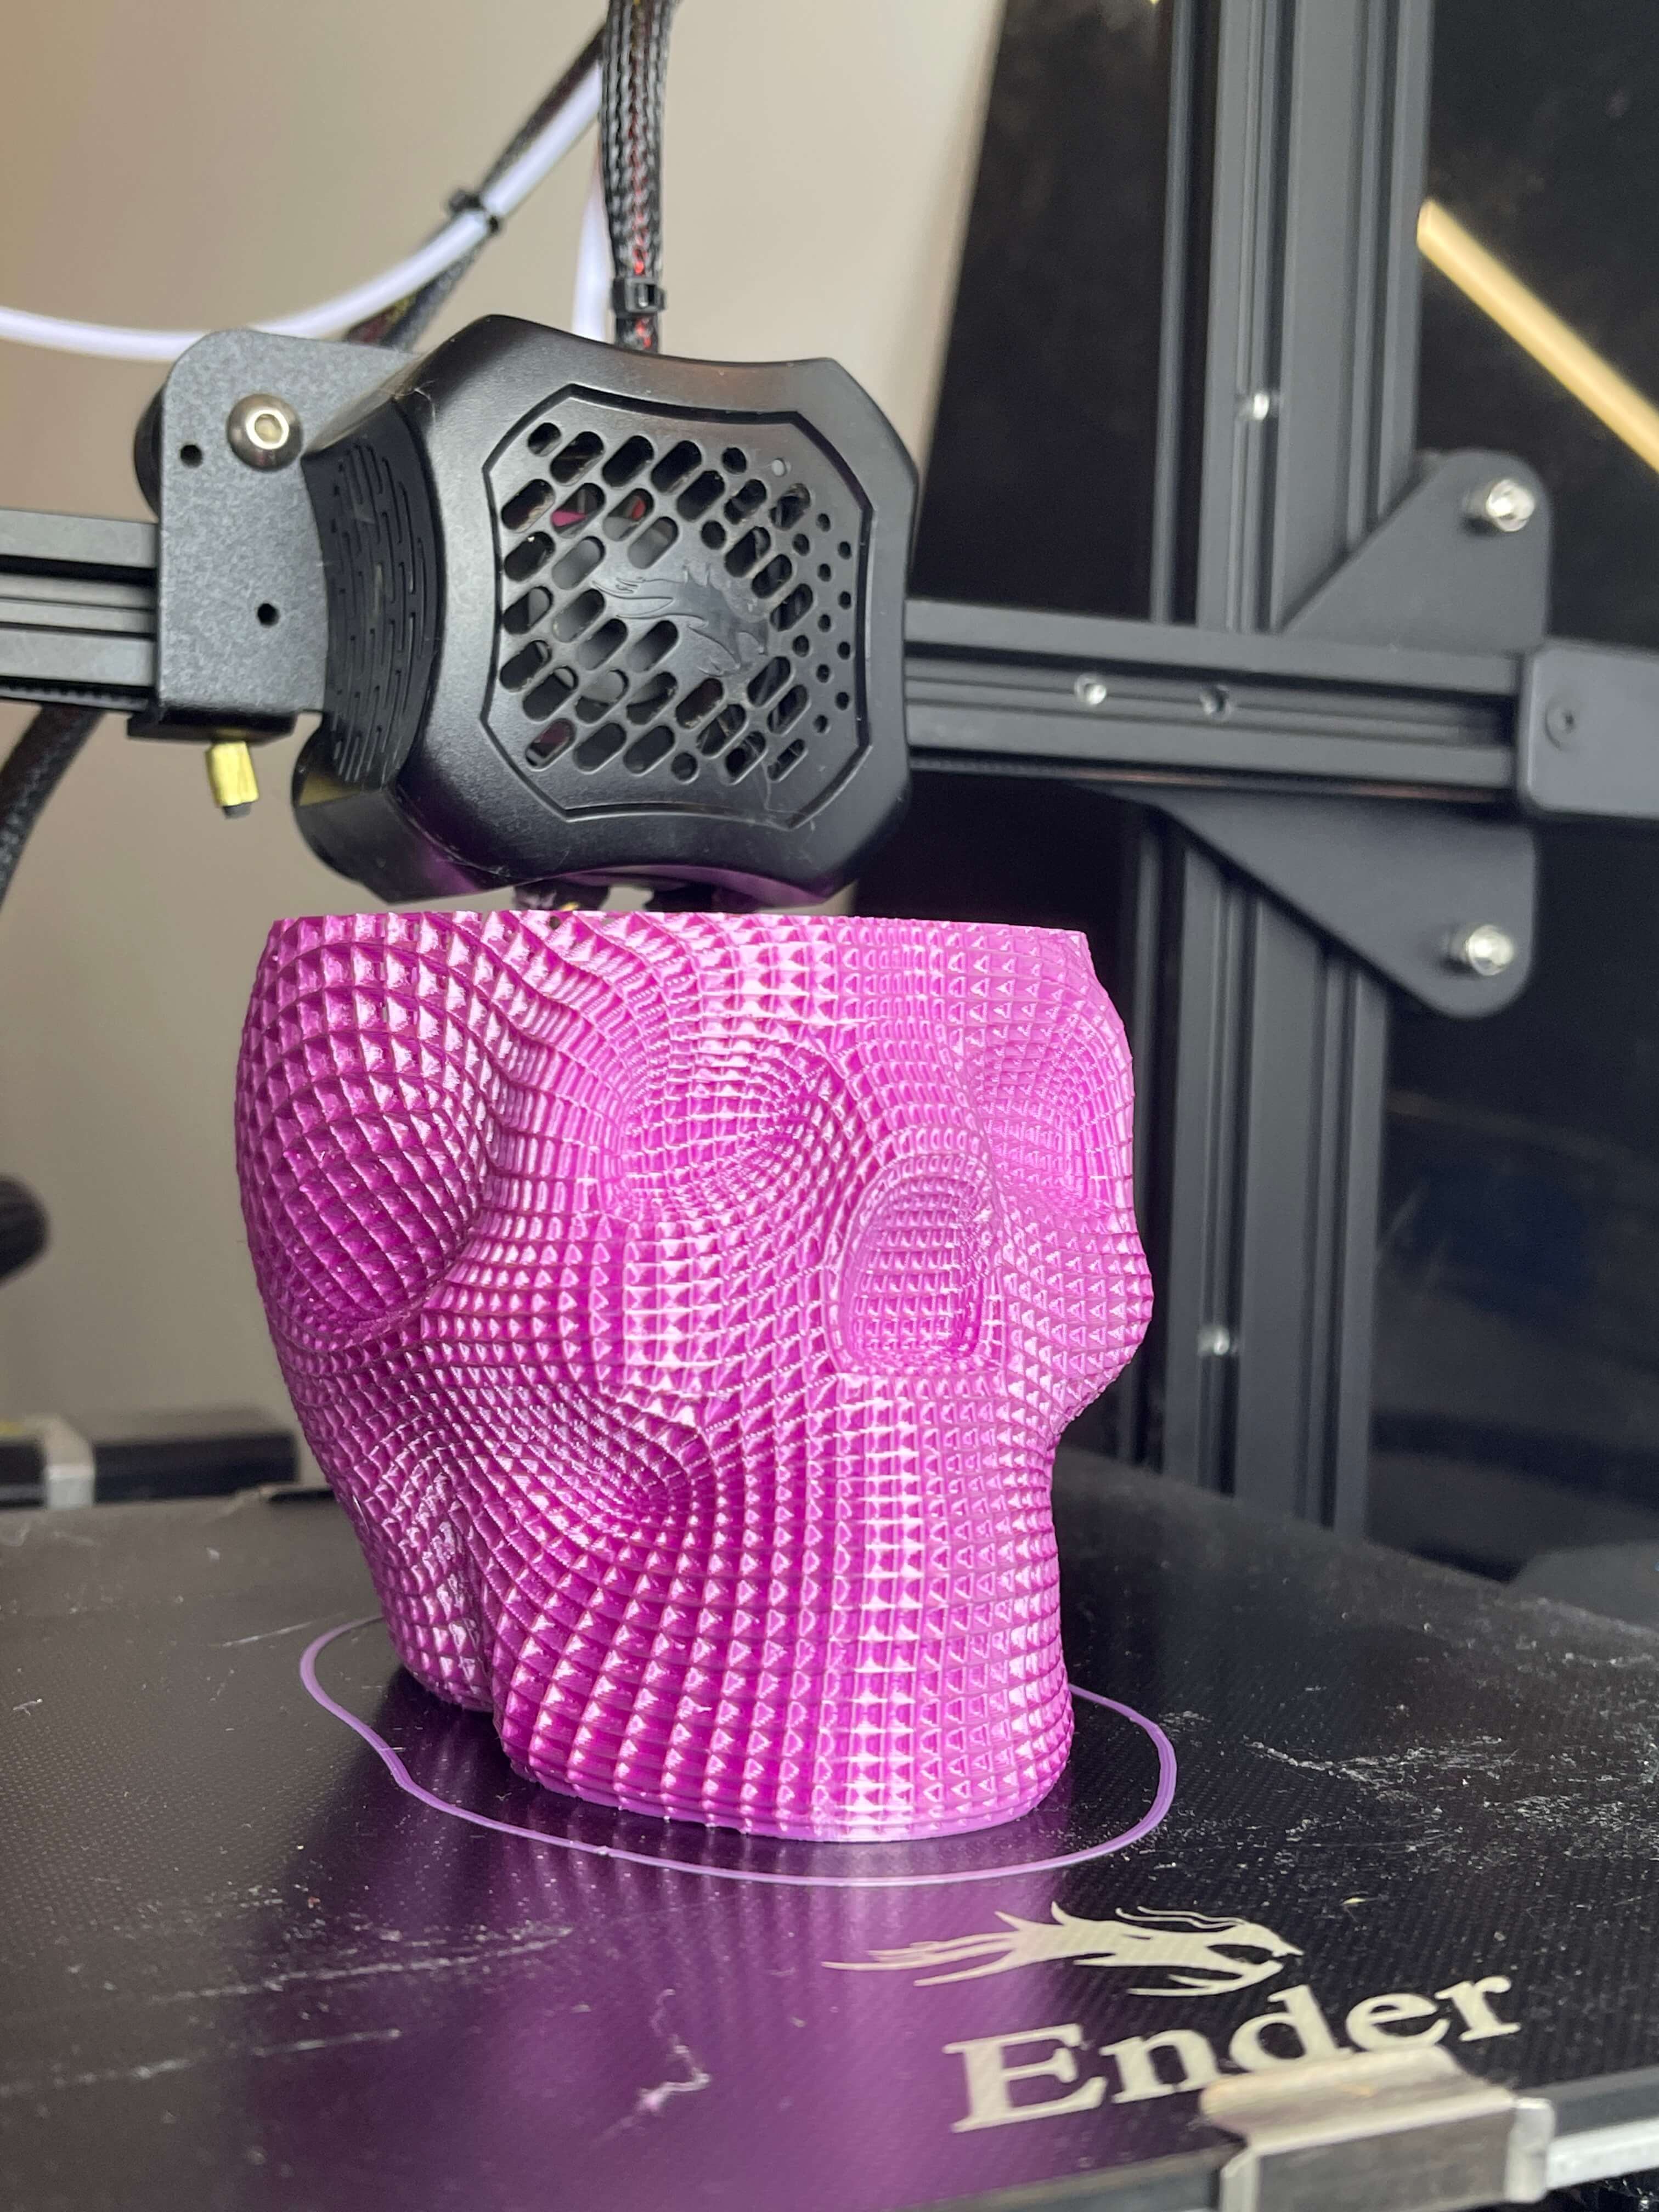
Printing Experience: With its robust set of features, the Ender 3 V2 delivers a consistent and reliable printing experience. The carborundum glass bed ensures good print adhesion, and the quiet operation means you can print without much disturbance. Users can expect detailed and quality prints, especially when optimal settings are dialed in.
-
Material Flexibility: Given its temperature capabilities, users can explore various filament types, from the standard PLA to more challenging materials like ABS, TPU, and PETG. This offers a versatility that's appreciated by both hobbyists and professionals.
-
Maintenance and Troubleshooting: Like all mechanical devices, the Ender 3 V2 requires periodic maintenance. This includes cleaning the nozzle, ensuring the belts are taut, and occasionally lubricating the rods. Thankfully, the 3D printing community is vast, and there's no shortage of troubleshooting guides, forums, and videos to help users address any hiccups they encounter.
Price Points and Purchase Locations
The Ender 3 V2, produced by Creality, has quickly gained popularity due to its blend of features, reliability, and affordability. Here's a closer look at its cost and where potential buyers can get their hands on one:
-
Cost of Ender 3 V2: The Ender 3 V2 generally retailed between $200 to $300 USD, depending on the region, sales, and retailer. Prices can fluctuate based on factors like shipping costs, import taxes, and available promotions.
-
Comparing with Similar Printers: When comparing the Ender 3 V2 to other 3D printers in its category, it stands out as an affordable yet feature-rich option. While there are cheaper models available, they often lack some of the enhancements that the V2 boasts. On the other hand, higher-end models might offer additional features like dual extrusion or larger print volumes but come with a notably higher price tag.
-
Where to Buy: • Official Creality Website: It's always a good idea to start with the manufacturer's official website. They often run promotions and might offer bundles that give you more value for your money. • Amazon: As one of the largest global marketplaces, Amazon stocks the Ender 3 V2, and purchasing here might come with benefits like faster shipping (especially for Prime members) and easy returns. • Local Electronic or Hobby Shops: Depending on your location, local stores might carry the Ender 3 V2. This option allows you to support local businesses and potentially get hands-on guidance or after-sales support. • Online Specialty Retailers: Websites like Banggood, Gearbest, and MatterHackers specialize in electronics and 3D printing equipment. They might offer competitive pricing or bundled deals. • eBay: For those open to purchasing used or refurbished units, eBay can be an option. However, always exercise caution and ensure you're buying from a reputable seller.
-
Considerations When Buying: • Warranty: Check the warranty period and what it covers. Some retailers or regions might offer extended warranties. • Shipping Costs: Especially when ordering from international sellers, be mindful of shipping fees, which can significantly impact the final price. • After-Sales Support: It's beneficial to purchase from a seller that offers good after-sales support, given that 3D printers can require troubleshooting or parts replacement.
What Can You Make with This 3D Printer?
The Ender 3 V2, with its combination of affordability, precision, and versatility, has become a favorite in the 3D printing community. Whether you're a hobbyist, artist, educator, or engineer, the possibilities with this printer are virtually endless. Here are some popular applications and use cases for the Ender 3 V2:
1. Hobbyist Projects:
- Toys and Figures: From intricate dragons and superheroes to board game pieces, the Ender 3 V2 can bring imaginative designs to life.
- Decorative Items: Create customized decor items for your home like vases, wall art, or even intricate lamp designs.
- Cosplay: Design and print costume parts, masks, and props to enhance your cosplay creations.
2. Educational Uses:
- Teaching Tools: Teachers can create 3D models of biological specimens, geometric shapes, historical artifacts, and more to make lessons interactive and engaging.
- Student Projects: Students can materialize their ideas, be it innovative gadgets, architectural models, or science projects.
3. Engineering and Prototyping:
- Component Models: Engineers and designers can quickly prototype parts, fixtures, or assemblies to test fit, function, and design.
- Custom Tools: Print specialized tools or jigs that might not be readily available in stores.
4. Artistic Creations:
- Sculptures: Artists can bring their digital sculptures to the physical world, crafting unique pieces of art.
- Jewelry: Design and print intricate jewelry designs, which can be used as molds or as the actual piece after post-processing.
5. Everyday Utilities:
- Household Tools: From custom hooks to kitchen gadgets, create everyday tools tailored to your specific needs.
- Repair Parts: Instead of discarding broken items, print replacement parts. This is particularly useful for older products where parts are no longer sold.
6. Personal Accessories:
- Phone Cases: Customize and print phone cases to fit your style or specific needs.
- Keychains and Badges: Create personalized keychains, badges, or other personal items that are unique to you.
7. Medical and Therapeutic Uses:
- Anatomical Models: Medical professionals and students can print detailed anatomical models for study or patient demonstrations.
- Assistive Devices: Design and print custom-fit devices like prosthetics, orthotics, or adaptive tools for individuals with disabilities.
8. DIY Projects and Customizations:
- Gardening: Print plant holders, gardening tools, or even unique flower pot designs.
- Electronics: Create custom enclosures for DIY electronics projects or modify existing devices.
Ender 3 V2 Popular Upgrades
The modular nature of the Ender 3 V2, combined with its vast and passionate user base, means there's a plethora of upgrades available. These modifications range from simple tweaks for enhanced performance to comprehensive overhauls for specialized applications. Here are some of the most popular upgrades for the Ender 3 V2:
1. Upgraded Bed Springs:
- Description: One of the first upgrades many users consider is replacing the stock bed springs with stiffer, yellow ones. These upgraded springs maintain bed leveling for more extended periods, requiring less frequent adjustments.
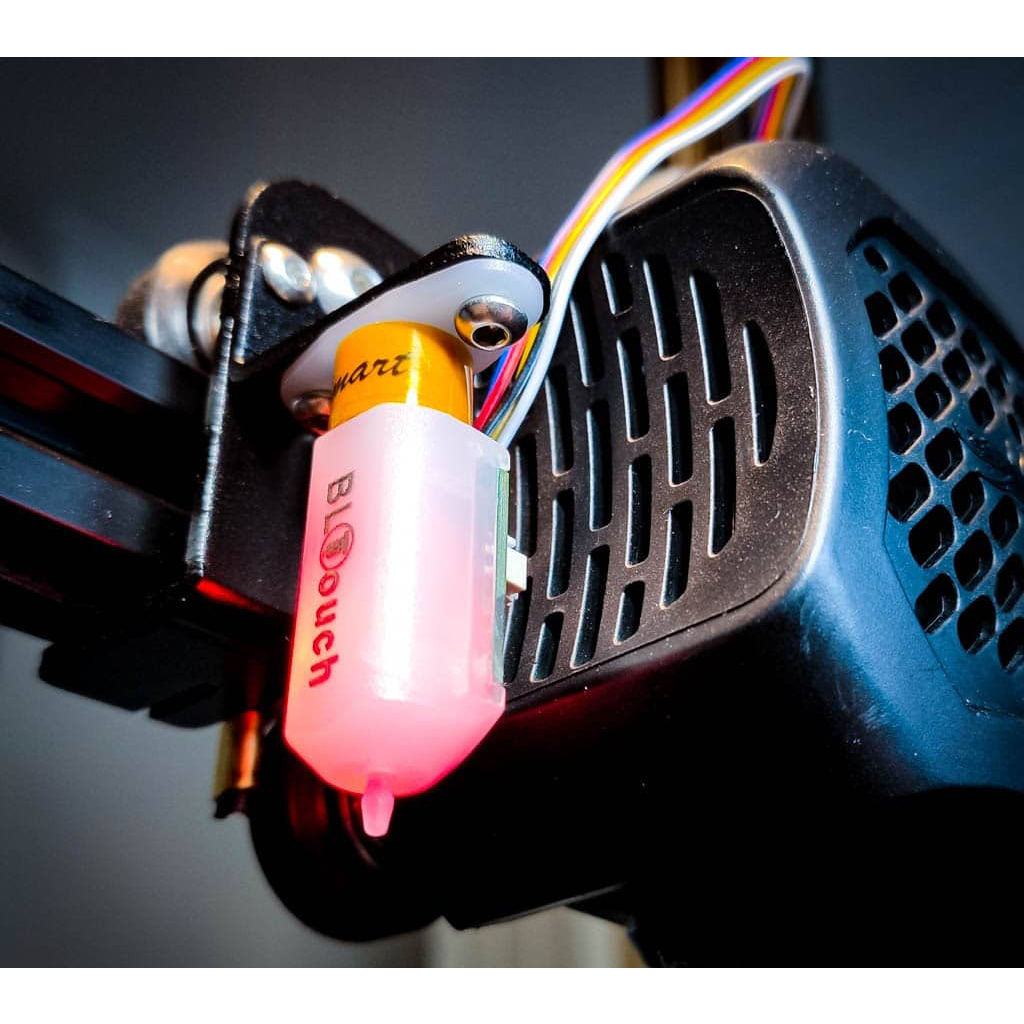
2. Auto Bed Leveling (ABL):
- Description: Installing an ABL system, like the BLTouch, can automate the bed leveling process. It uses a probe to map the bed surface and adjusts the Z-axis during printing to maintain a consistent first layer across the entire build plate.
3. Silicon Bed Spacers:
- Description: Replacing the springs entirely with silicon bed spacers can make the bed more stable, although it might make manual leveling slightly more challenging.
4. OctoPrint and Obico:
- Description: Installing OctoPrint on a Raspberry Pi allows for wireless control and monitoring of the Ender 3 V2. With the addition of Obico for OctoPrint, a cloud-based platform, users can further enhance remote access, manage multiple printers, and gain access to advanced analytics.
5. Klipper Firmware with Obico:
- Description: Klipper is a 3D printer firmware that offloads the printer's motion planning to a Raspberry Pi, which can compute movements faster and with higher precision. Pairing Klipper with Obico for Klipper can significantly improve print speeds, accuracy, and overall printer management.
6. Upgraded Fans:
- Description: Noctua fans or other silent fans can be installed to reduce printer noise.
7. Capricorn PTFE Tubing:
- Description: This upgrade offers a tighter tolerance and higher temperature resistance compared to the stock Bowden tube. This can result in more consistent filament feeding and is especially useful when printing with materials that require higher temperatures.
8. Glass or PEI Bed:
- Description: While the Ender 3 V2 comes with a carborundum glass bed, some users prefer adding a PEI sheet for even better adhesion and ease of print removal.
9. Dual Z-Axis:
- Description: By adding a second Z-axis stepper and lead screw, users can ensure better stability and consistency, particularly for taller prints.
10. Enclosure:
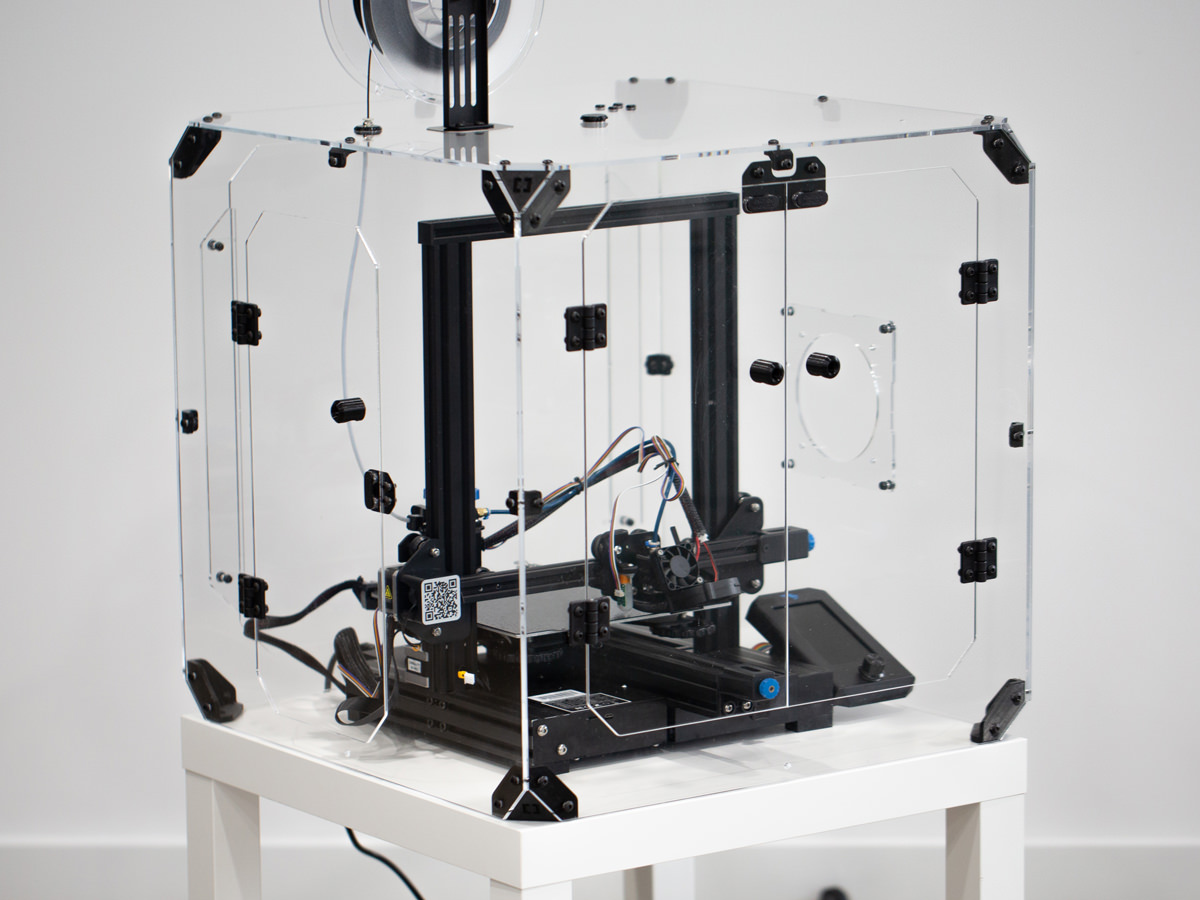
- Description: Perfect for printing with exotic filaments that require consistent temperatures. The enclosure has an inner aluminum layer, serving to retain heat. This layer also acts as a flame-retardant, smothering potential fires rather than allowing them to spread.
11. Tungsten Nozzle:
- Description: This nozzle variant is incredibly durable compared to the standard hardened steel ones. It's especially beneficial when printing with filaments infused with additives like wood or metal.
12. Z-axis Extension:
- Description: For those who find the Z-axis print volume limiting, this upgrade extends the print volume by an additional 100 mm.
13. LED Strip:
- Description: This lighting solution illuminates the Ender 3 V2's print area. The white LEDs offer clear visibility, especially beneficial in low light conditions or when using an enclosure.
Frequently Asked Questions
The Ender 3 V2, with its popularity in the 3D printing community, inevitably attracts a range of questions from enthusiasts, beginners, and potential buyers alike. We understand the importance of addressing these queries, and in an effort to provide comprehensive information about the Ender 3 V2, we've compiled a list of popular questions frequently asked:
How big is the Ender 3 V2 build volume?
The Ender 3 V2 offers a build volume of 220 x 220 x 250 mm, providing ample space for a wide variety of printing projects.
What is the difference between the Ender 3 V2 and the Ender 3 V2 Neo?
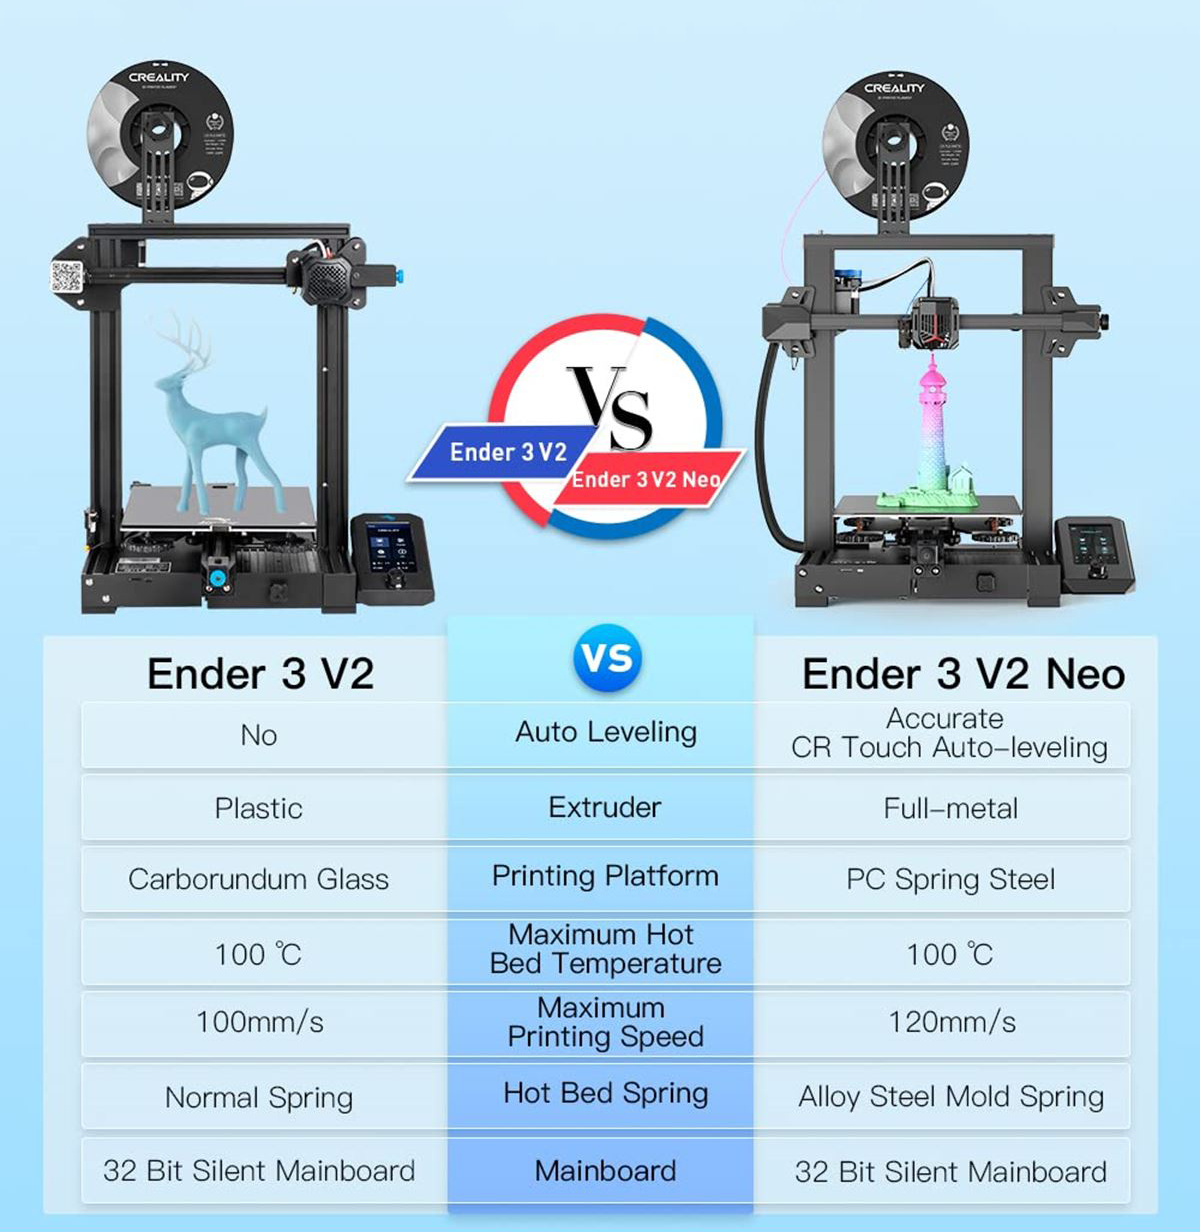
The Ender 3 V2 Neo is the latest addition to Creality's well-known Ender 3 series. But how does it stack up against its predecessor, the Ender 3 V2? We've broken down the key similarities and differences to help you decide which printer is right for you.
Shared Features
- Build Volume: Both printers offer a 220 x 220 x 250 mm printing volume.
- Temperature Capability: Nozzle temperatures can hit 260°C, and the bed reaches 100°C.
- Mainboard: While branded differently, the mainboard in the Ender 3 V2 Neo is effectively the same as that in the Ender 3 V2.
- Chassis/Kinematics: Both models have the same Cartesian-XZ-head mechanical arrangement.
- Additional Modern Features: Both printers feature power recovery and silent stepper drivers. Neither has a Filament Runout Sensor.
Ender 3 V2 Neo Exclusive Features
- Full Metal Extruder: The V2 Neo sports a durable metal extruder, which outclasses the plastic variant in the Ender 3 V2.
- Bed Material: The V2 Neo introduces a powder-coated (PC) flexible magnetic spring steel build plate. While it provides better adhesion, some users might find print removal a bit tricky.
- UI Improvements: The V2 Neo comes with a Preview feature on its 4.3-inch color screen, enhancing user convenience.
- Automatic Bed Leveling: The inclusion of the CR-Touch auto-leveling system is a significant improvement, making the leveling process automatic and hassle-free.
- Ease of Assembly: The Ender 3 V2 Neo is more beginner-friendly, as it arrives almost entirely assembled and requires just a few steps to set up.
- Reliability: Several enhancements, like the metal extruder, redesigned heat sink, and improved coupler, bolster the printer's reliability.
Verdict The Creality Ender 3 V2 Neo, with its slew of upgrades and improvements, offers more bang for the buck than its predecessor. Its price tag, about $50 more than the Ender 3 V2, seems justified given its array of enhanced features, especially if you consider the utility of auto bed leveling. However, if you're on a budget, the Ender 3 V2 still remains a viable option, and potential price drops could make it an even more attractive choice for newcomers to 3D printing. For a detailed, side-by-side comparison, you can visit the product pages on Amazon or use our 3D Printer Comparison Tool for broader options.
Is the Ender 3 V2 easy to set up?
Yes, the Ender 3 V2 is designed with user-friendliness in mind. It comes semi-assembled, and most users can complete the setup in 1-2 hours. The printer also comes with clear instructions, and there are numerous online resources, tutorials, and videos to assist with the assembly.
What is the best slicer for the Ender 3 V2?
The choice of slicer software often comes down to personal preference. Popular options include Cura, PrusaSlicer, and MatterControl. Cura, in particular, is frequently recommended for beginners due to its user-friendly interface and the availability of pre-configured profiles for the Ender 3 V2.
How to change filament on the Ender 3 V2?
- Preheat the nozzle to the melting point of the current filament.
- Retract the filament using the printer's control panel.
- Once the filament is out of the extruder, insert the new filament.
- Push the new filament until you see it coming out of the nozzle.
- You're now ready to resume printing with the new filament.
What materials can you print with on the Ender 3 V2?
The Ender 3 V2 primarily supports PLA, PETG, and TPU. With additional modifications, like an all-metal hotend, it's possible to print with more advanced materials like ABS, Nylon, and more.
Does the Ender 3 V2 come with an enclosure?
No, the Ender 3 V2 does not come with a stock enclosure. However, there are many DIY solutions and third-party enclosures available for those who wish to print with materials that benefit from a controlled environment.
Does the Ender 3 V2 have automatic bed leveling?
The stock Ender 3 V2 does not come with automatic bed leveling. However, it is compatible with upgrades like the BLTouch sensor, which can be installed to add auto bed leveling functionality.
Taking the Next Step: Harnessing Remote Access and AI Failure Detection
Congratulations on securing your 3D printer! As you embark on this exciting journey of creation and innovation, it's essential to consider how you can maximize the efficiency and safety of your new machine. One of the most popular and advanced tools that has taken the 3D printing community by storm is Obico.
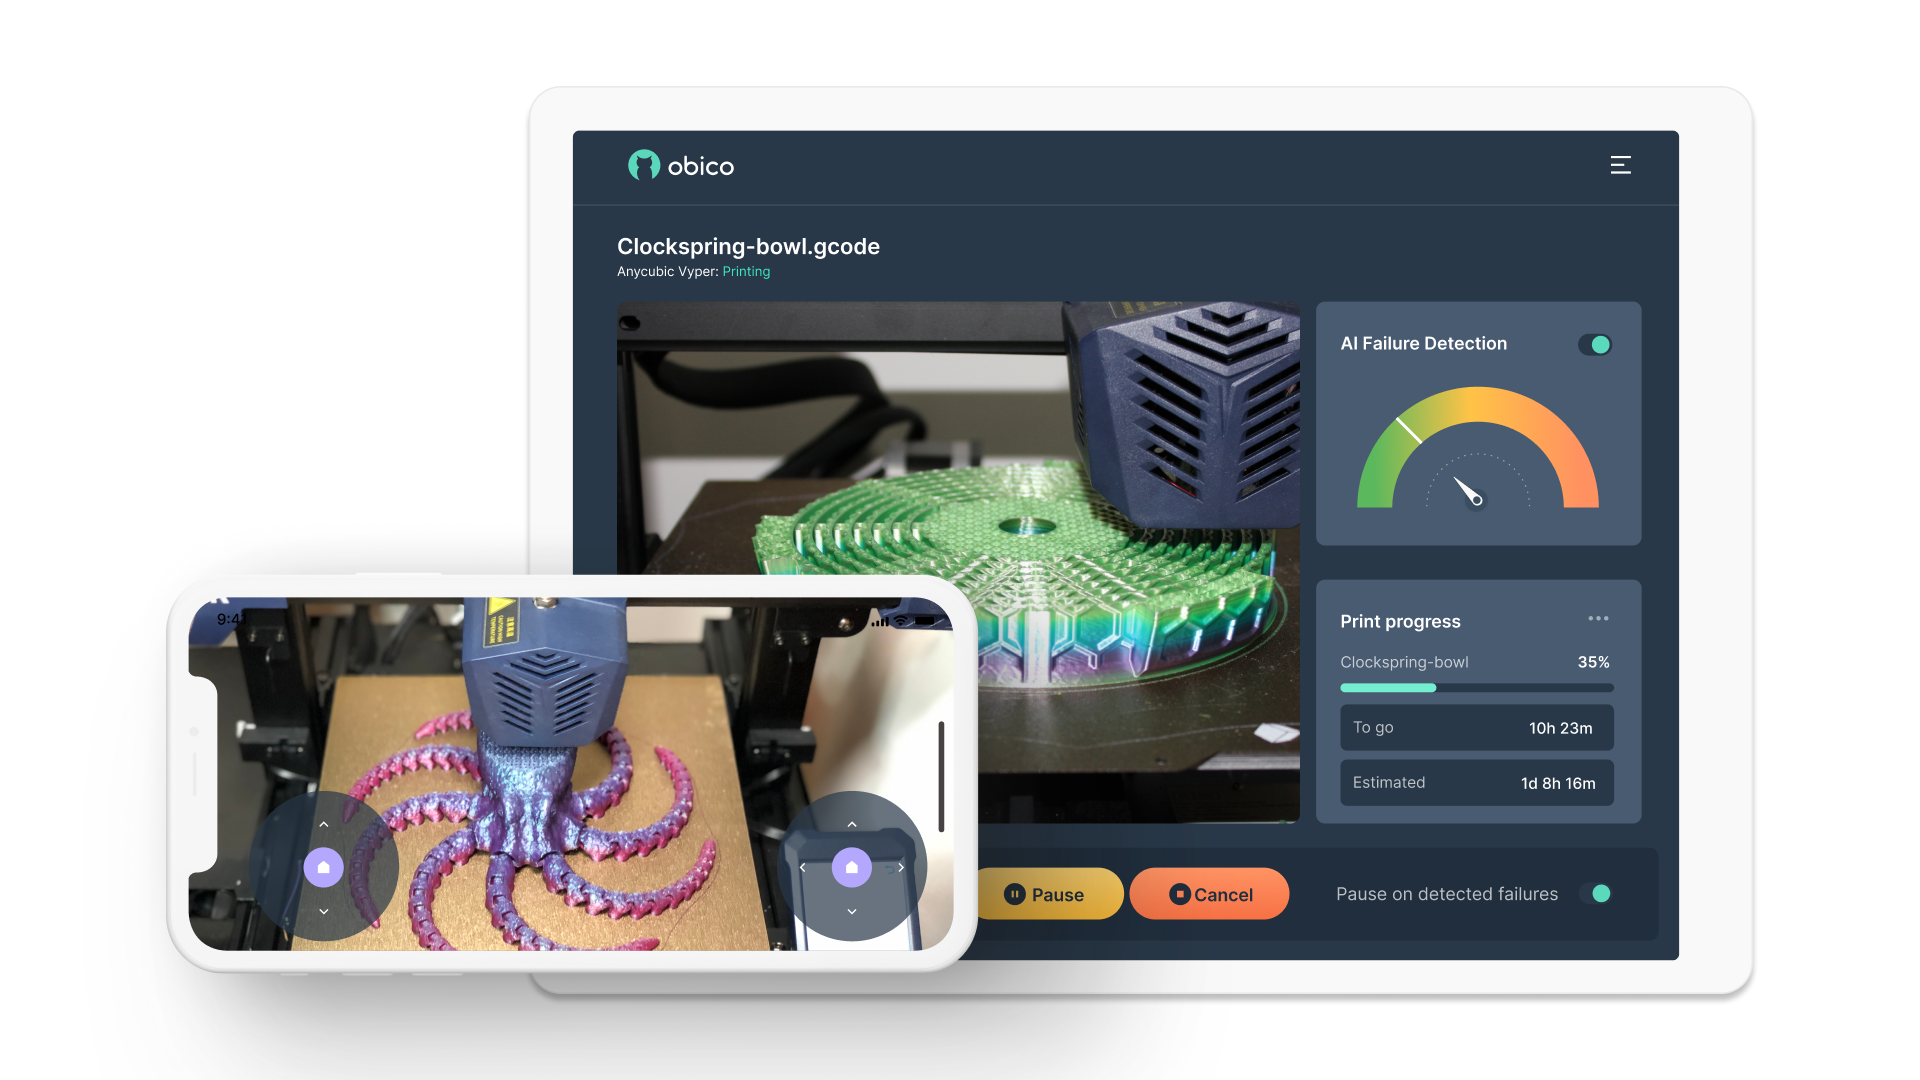
Remote Access with Obico:
Being physically present near your 3D printer every time you start a print job isn't always feasible. Whether you're at work, traveling, or simply in another room, Obico provides you with seamless remote access to your 3D printer. This not only enables you to start, pause, or stop print jobs from anywhere in the world but also ensures you can monitor the printing progress in real time. Obico is fully compatible with both OctoPrint and Klipper, so you can
AI-Powered Failure Detection:
3D printing, while revolutionary, isn't without its potential hitches. There could be filament jams, print detachments, or other unexpected failures. Obico's sophisticated AI algorithms are designed to recognize such issues in their early stages, often before they become critical. This means you get alerted instantly if something goes amiss, allowing you to intervene and save both time and resources.
Added Peace of Mind:
With remote access and AI-based failure detection, Obico not only maximizes the productivity of your 3D printing endeavors but also ensures a safer printing experience. No more constant manual monitoring or dealing with failed prints that went unnoticed for hours. With Obico, you can be confident that your projects are on track and that you'll be the first to know if they aren't.
To delve deeper and optimize your experience, don't forget to follow the user guide.
Conclusion
3D printing offers a vast array of applications, from creating intricate art pieces to practical everyday tools, and the Ender 3 V2 stands out as a popular choice among enthusiasts for its modularity and upgrade potential. By integrating advancements like the Obico platform, users can further enhance their printing experience, combining innovation with efficiency, safety, and convenience. Whether you're a novice or an expert, the fusion of cutting-edge hardware and software paves the way for a more streamlined, productive, and rewarding 3D printing journey.