Download and Setup OctoPrint for Orange Pi
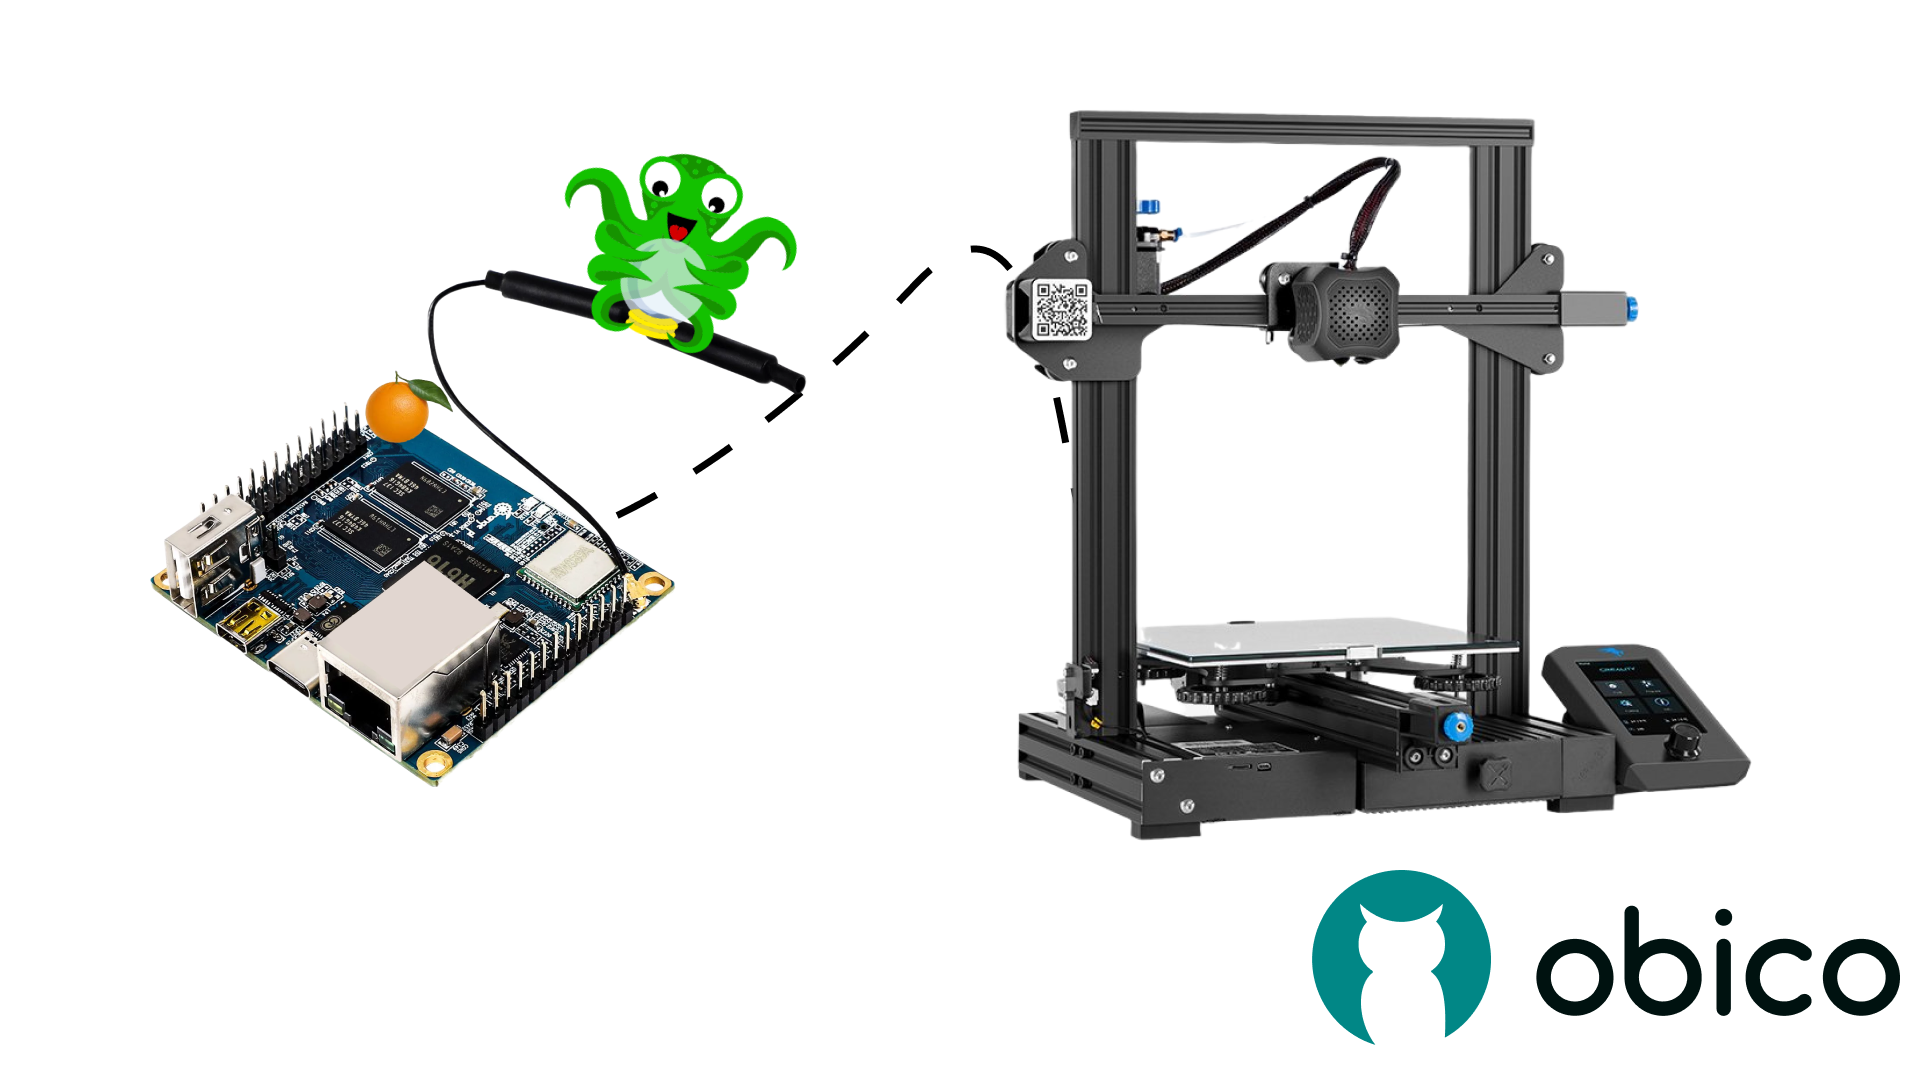
The Orange Pi for OctoPrint SD card images are built and maintained by the Obico team, and supported by the Obico community. Please come to our discord server in case you run into any issues with it.
Orange Pi has become a popular choice to run OctoPrint, especially nowadays it's harder to buy a Raspberry Pi at a reasonable price than to make your in-laws happy. However, many steps and familiarity with Linux commands were required to run OctoPrint on an Orange Pi.
Until now. The Obico team has decided to take stab at this problem by figuring all it takes to build an image that you can just download and flash to an SD card to get OctoPrint up and running. This makes it just as easy to run OctoPrint on an Orange Pi as it's on a Raspberry Pi.
Hardwares required
- An Orange Pi board. You can source the board from Orange Pi's official website yourself. If you are located in North America, you can also buy an Orange Pi kit from us, which will come with 1-year Obico AI Premium plan as well as warranty and technical support from the Obico team.
- A high quality SD card (class 10 or better) with at least 8GB of storage
- An Ethernet cable
- USB cable to connect your 3D printer to the Orange Pi (comes with most printers)
Currently only Orange Pi 3 LTS (recommended) and Orange Pi Zero 2, the 2 most-used boards, are supported. If you have a different board and you want us to build an image for it, please make suggestions in our discord server.
Steps to set up OctoPrint on an Orange Pi
1. Download the OctoPrint for Orange Pi SD card image
- If you have an Orange Pi 3 LTS, download it here.
- If you have an Orange Pi Zero 2, download it here.
2. Download Raspberry Pi Imager
- Go to https://www.raspberrypi.com/software/
- Download the Raspberry Pi Imager software (available for Windows and Mac)
- Unzip the file

3. Flash the SD card
-
Open up the Raspberry Pi Imager
-
Click Choose Operating System
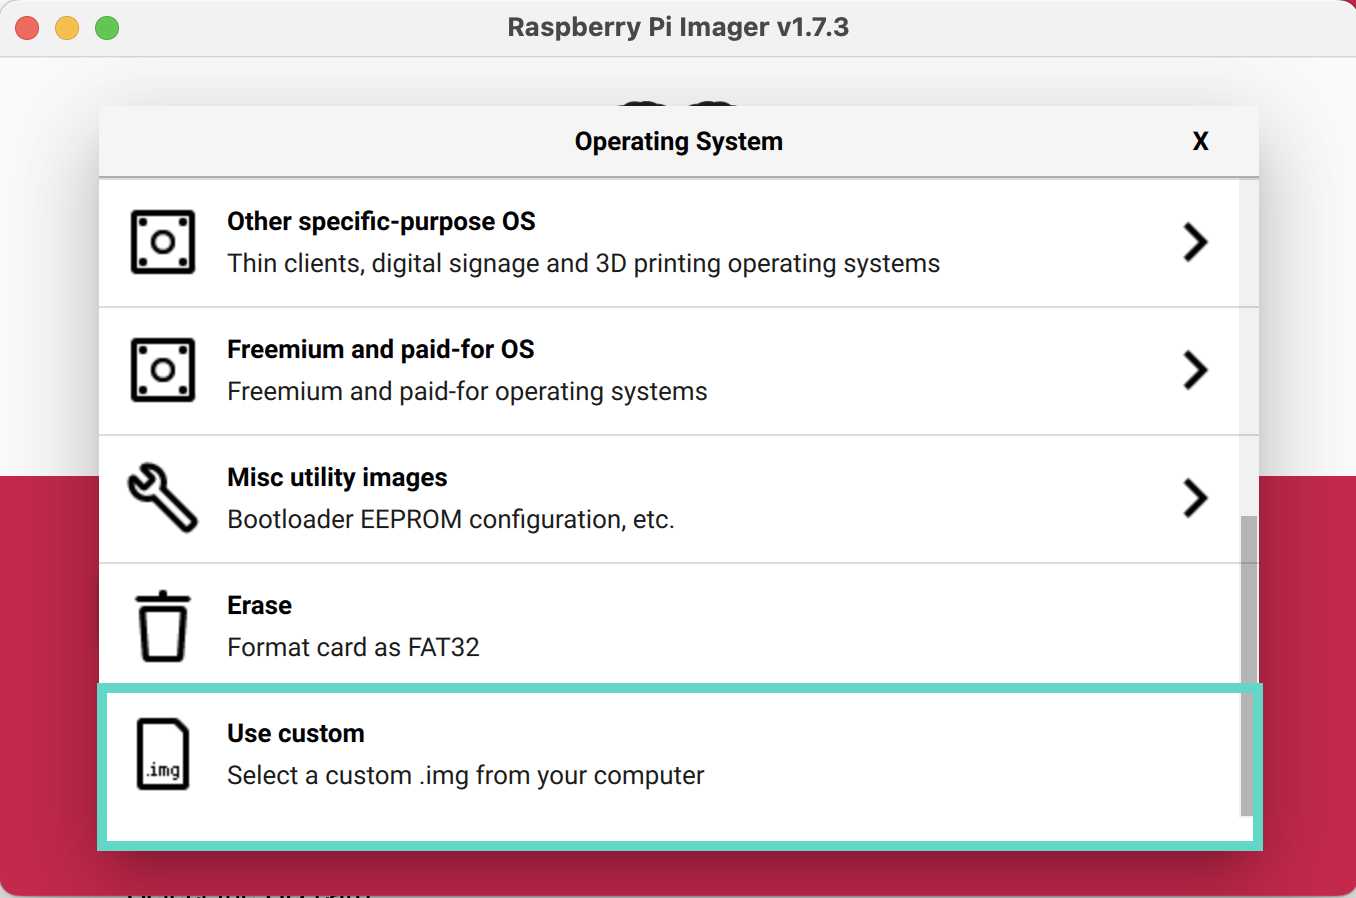
- Select Use Custom at the bottom of the menu
-
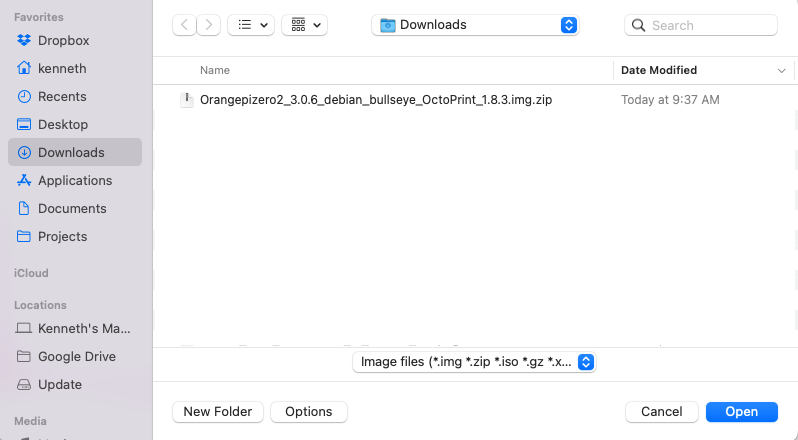
Locate the file that you previously downloaded and unzipped and select it.
-
Insert your SD card into the computer.
Use a high-quality, class 10 or better SD card with at least 8GB of storage. If you plan on creating a lot of time-lapses, more storage is recommended.
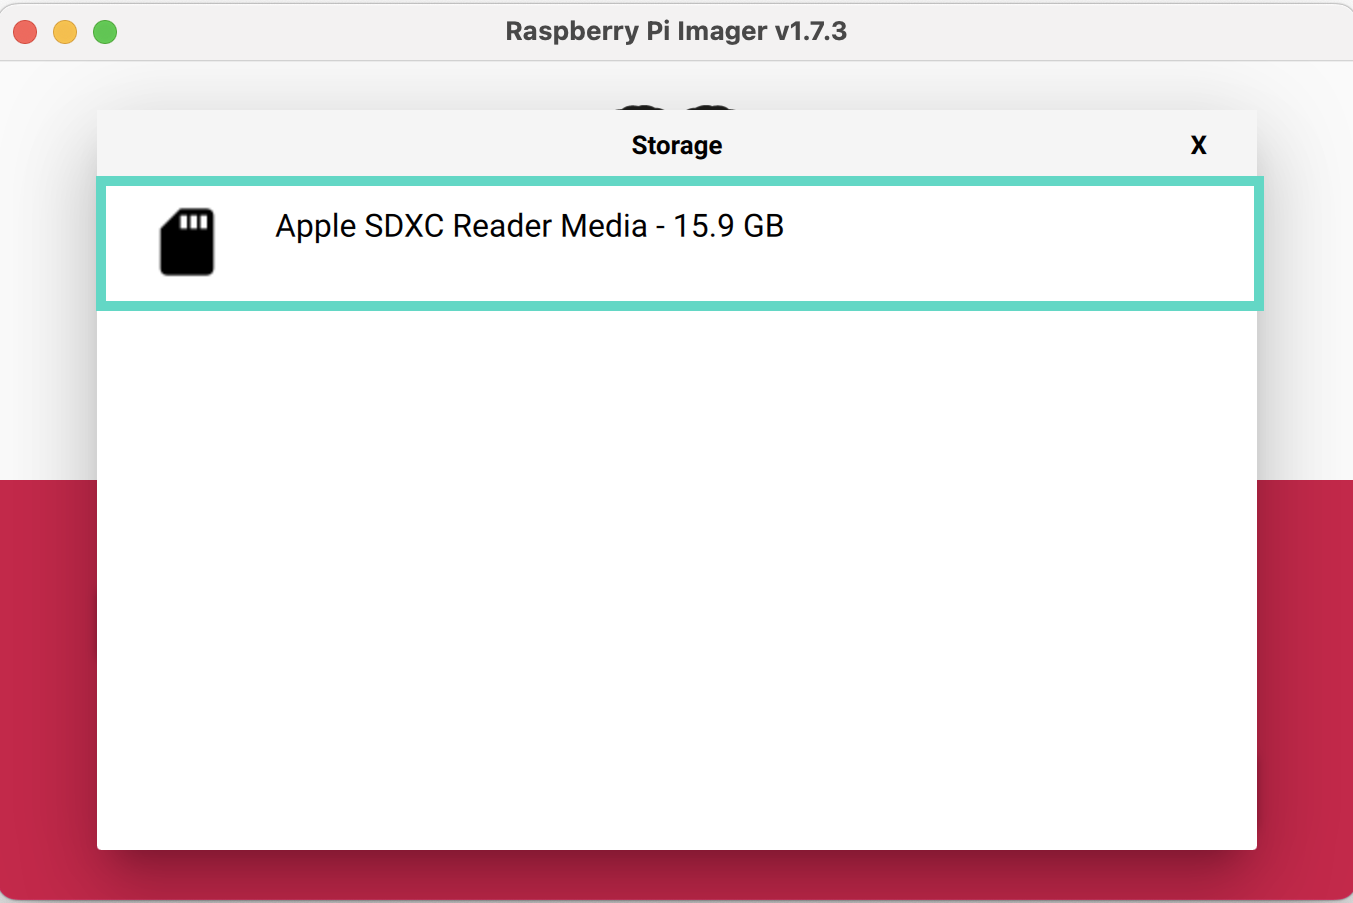
- Select the SD card
The SD card will be wiped, so be sure there are no important files on the card.
- Click Write:
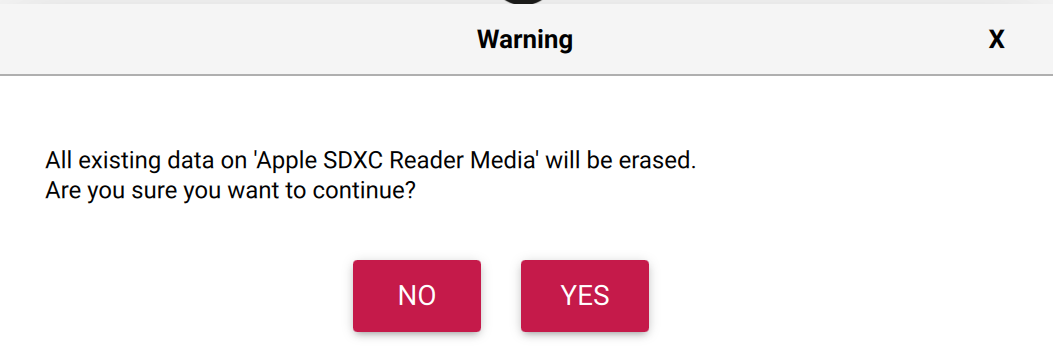
- Confirm that you are aware the SD card will be erased. You may be asked to enter your administrator password for your computer as well.
The file is large, so it may take a while (up to 40 minutes but likely less) for the software to be installed on the SD card. Grab a coffee, and get the rest of the kit setup while the software is installed on the SD card.
Connect to OctoPrint
1. Access the OctoPrint User Interface
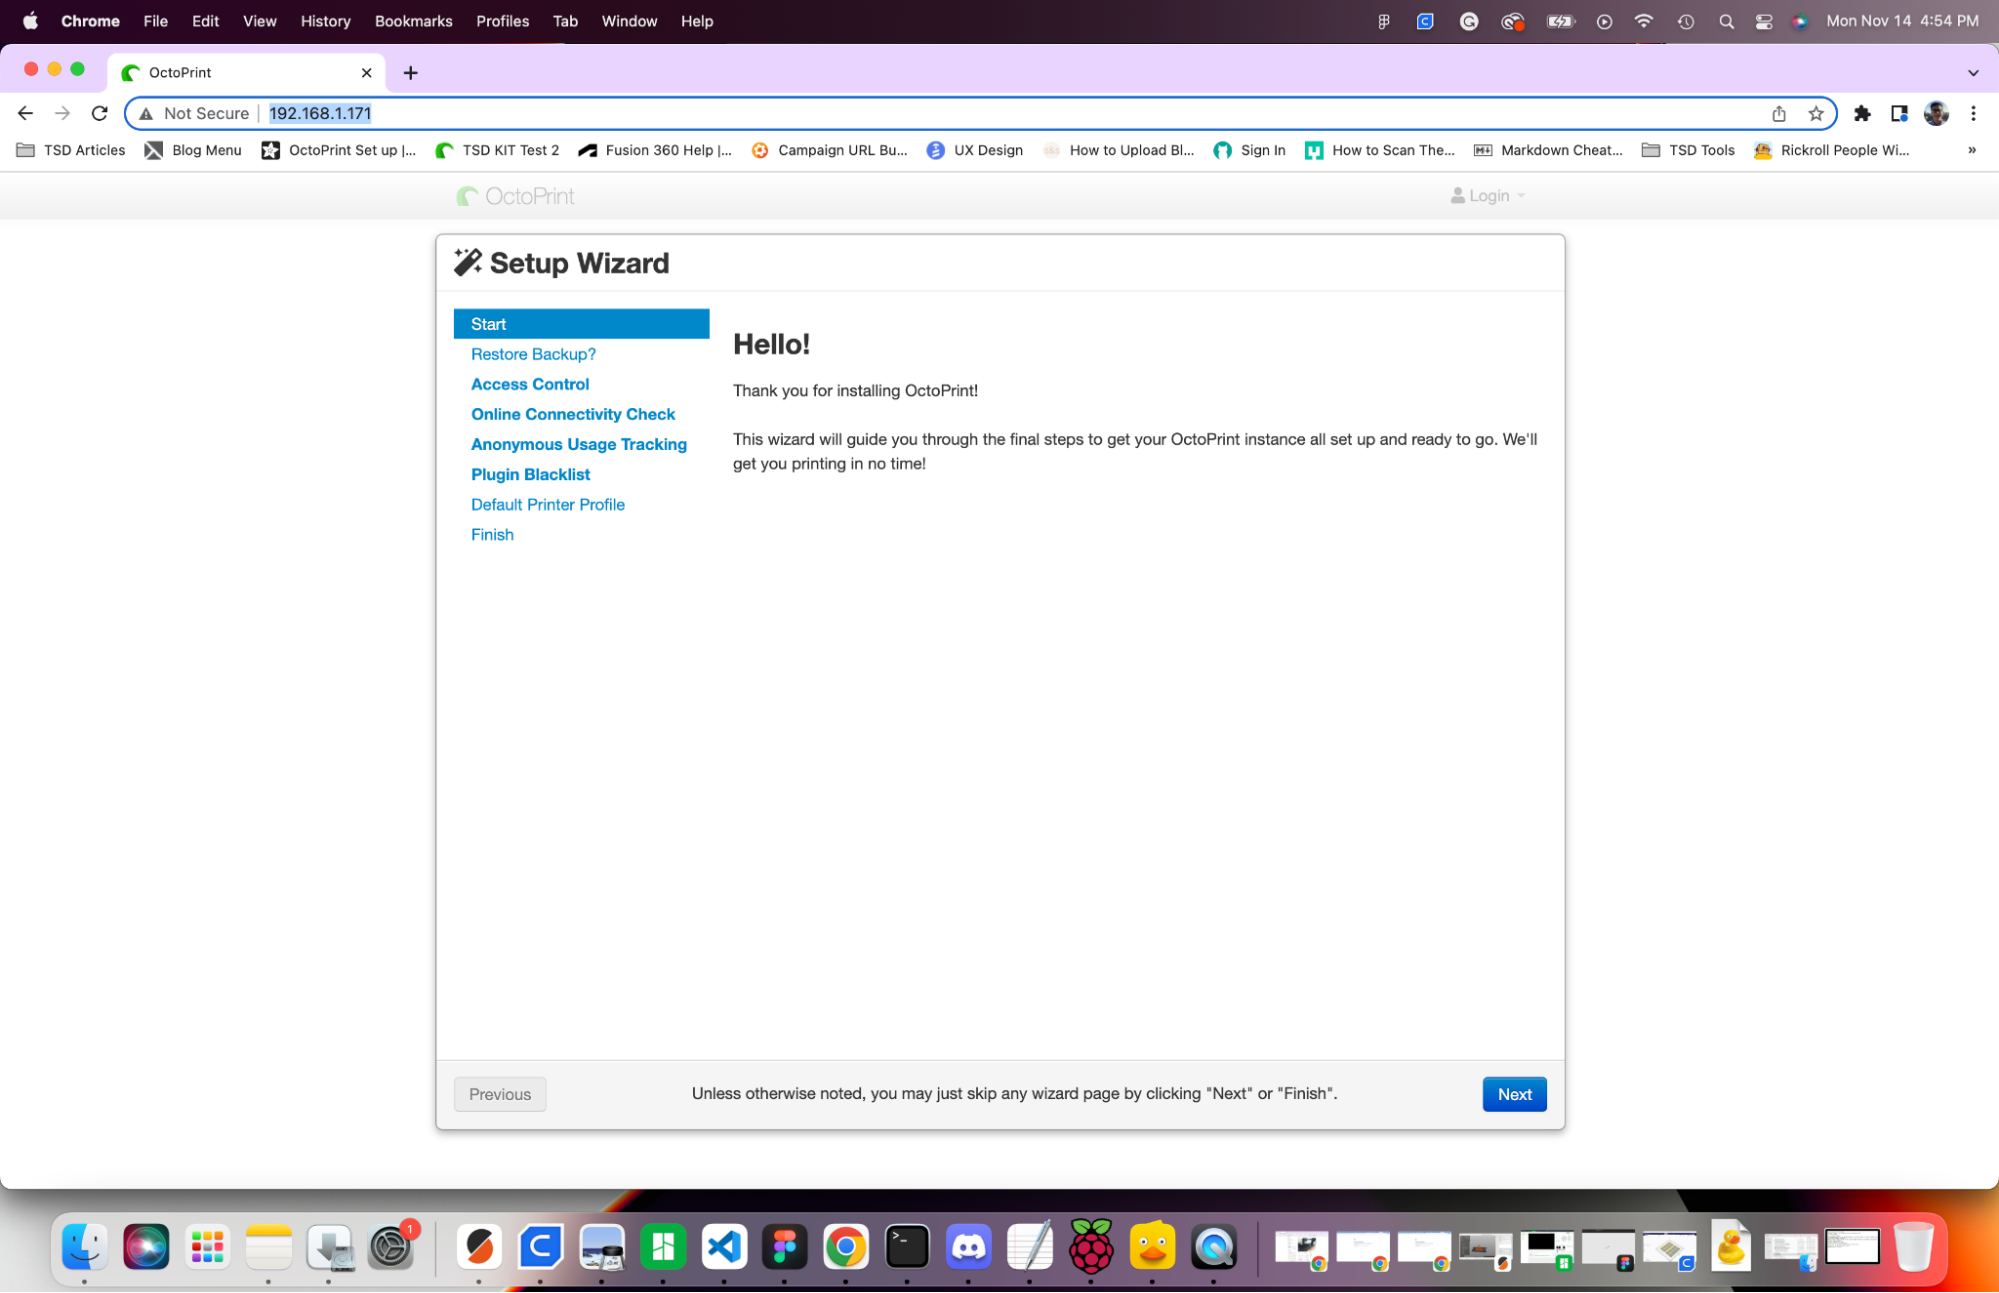
- Open an internet browser and enter the IP address you just found into the URL bar. You will be greeted with the OctoPrint Setup Wizard.
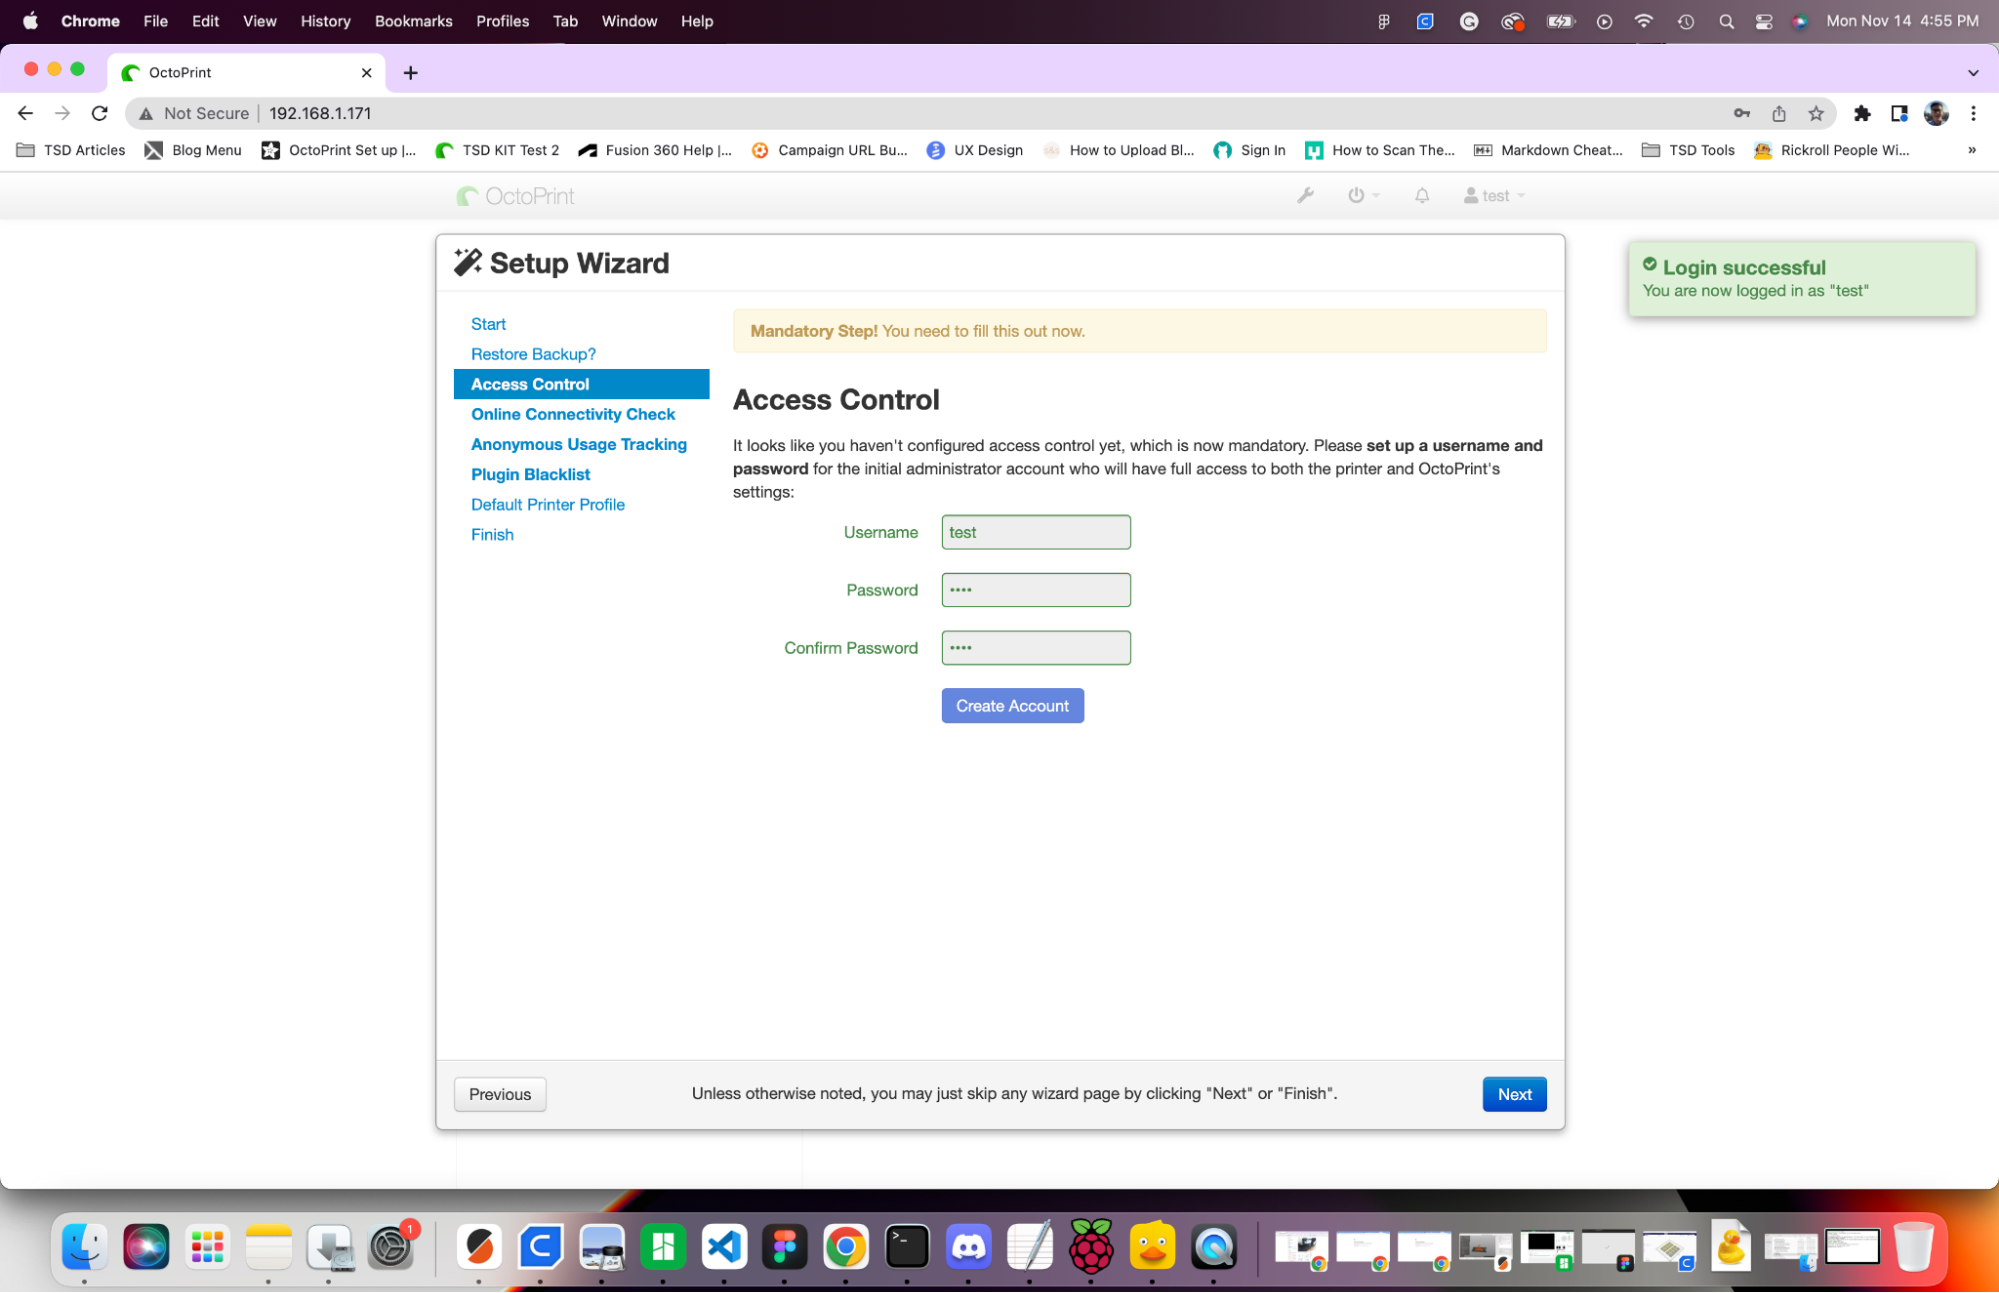
2. Complete the Setup Wizard
- Follow the instructions on the screen to complete the setup wizard such as creating an account.
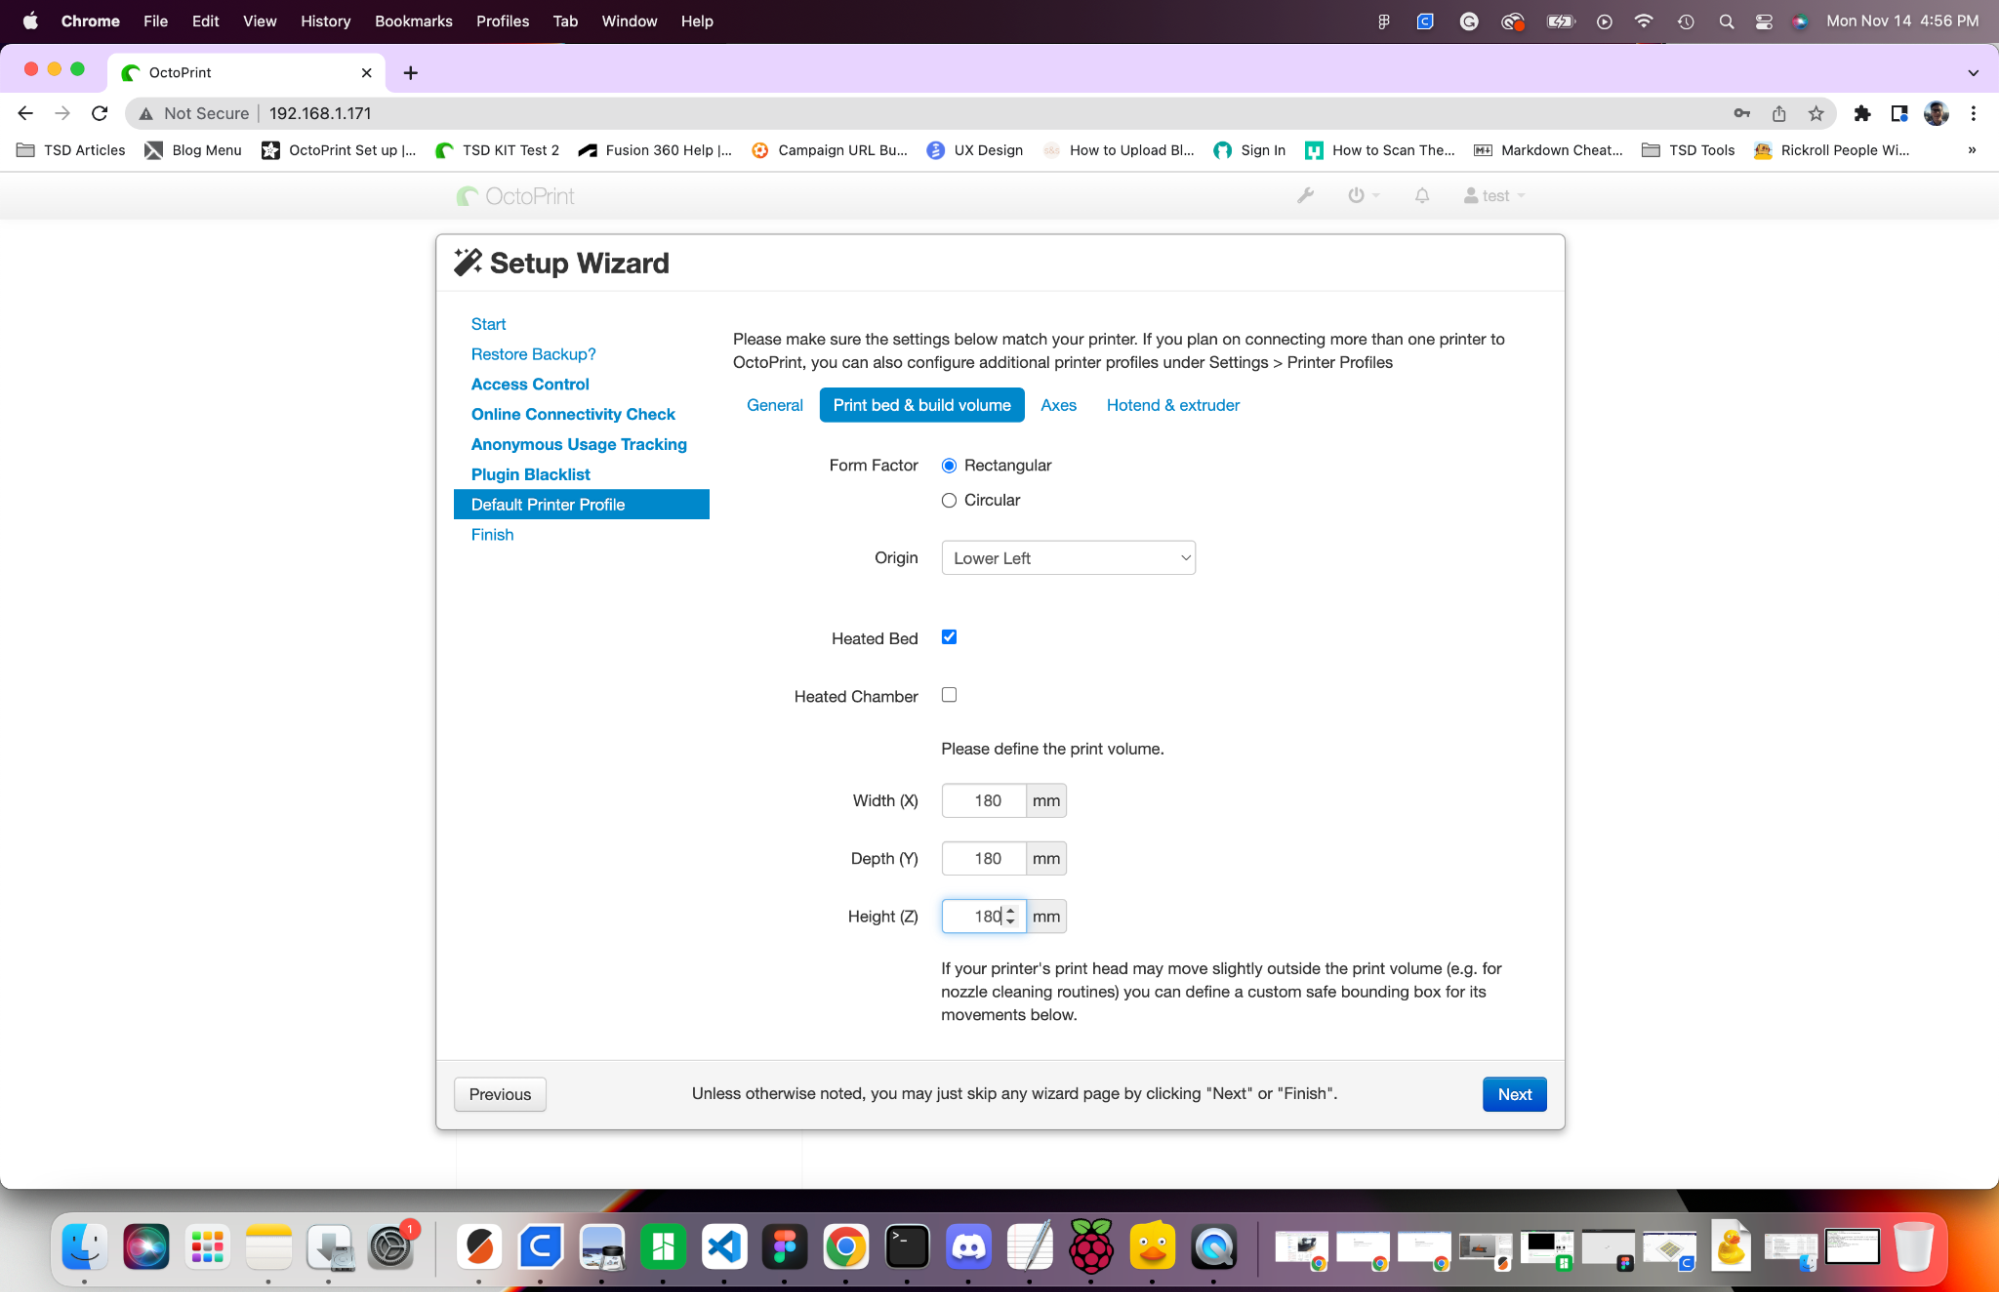
- Under Default Printer Profile, enter the origin location (usually lower left), whether or not it has a heated bed, and the size of your printers build volume. These settings won't affect your prints, but they help enhance the overall user experience.
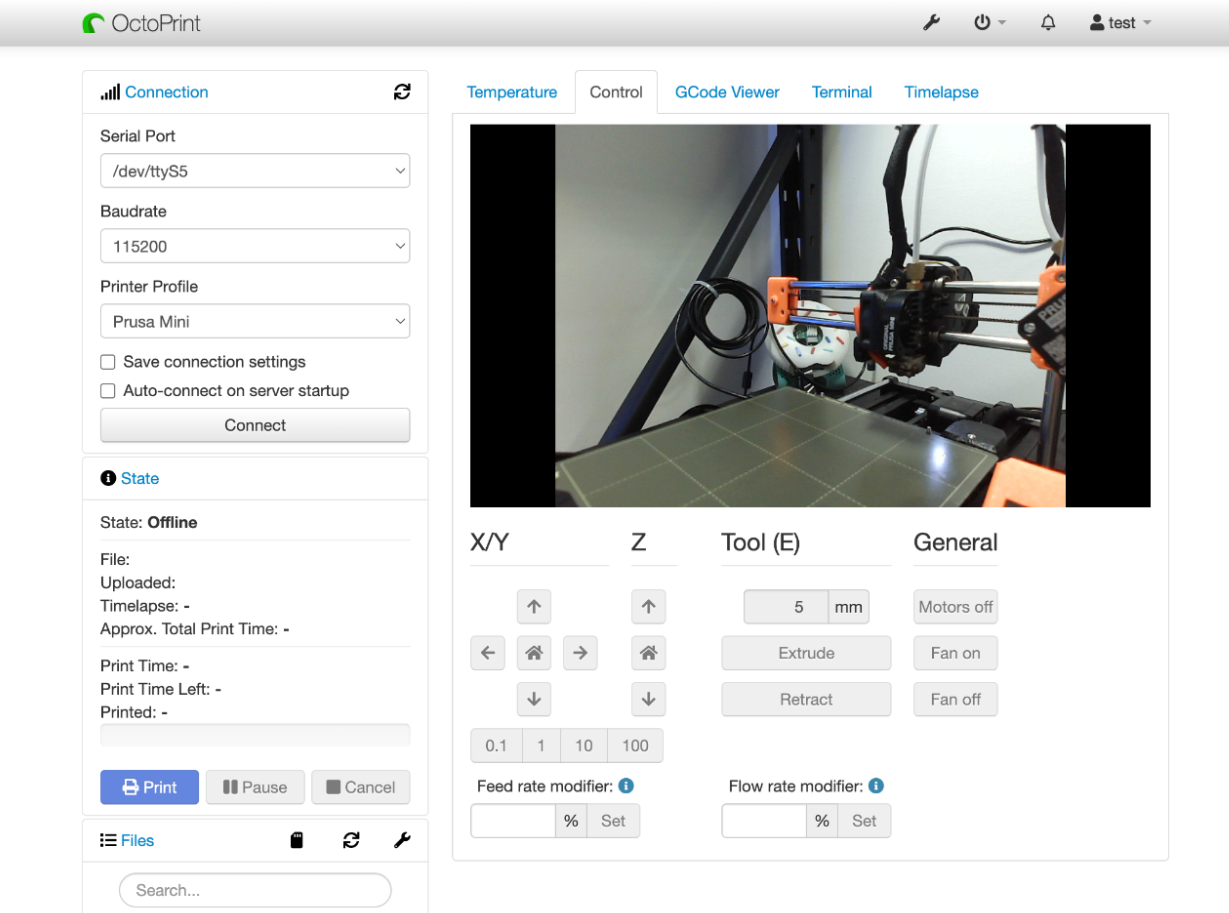
- Click Finish, and you will be sent to the OctoPrint User interface.
- Click Connect on the left to connect your 3D printer to your Orange Pi Zero 2.
- Click Control on the upper tab to see your webcam view.
That's it! You have successfully connected to OctoPrint!
Useful tips (not required by highly recommended)
Install the heat sink
It's almost always a good idea to install the heat sink on SBCs so that they won't overheat easily. If you bought an Orange Pi kit from us, the heat sink will be included.
Put the Orange Pi in a case
While putting your Orange Pi is not required, it is recommended to help keep it clean and safe.
We don't recommend to use the official Orange Pi case, due to its pour cooling capabilities. You can print the case we designed. If you prefer a different case, we also made a collection on Printables with a few other options that have been tested.
Connect a Camera
You can mount your camera in many different ways depending on your printer. The best mounting solution depends on how you plan to use the camera with your 3D printer.
For example, If you are simply interested in casually monitoring your 3D prints with a camera, you don't have to consider any extra factors. Simply position your camera any way you like. If you are planning to use your webcam to record timelapse videos or take advantage of Obico's Ai failure detection, you may want to consider the angle of the camera further, it's focus and the lighting conditions. Here are a couple of options for mounting your camera:
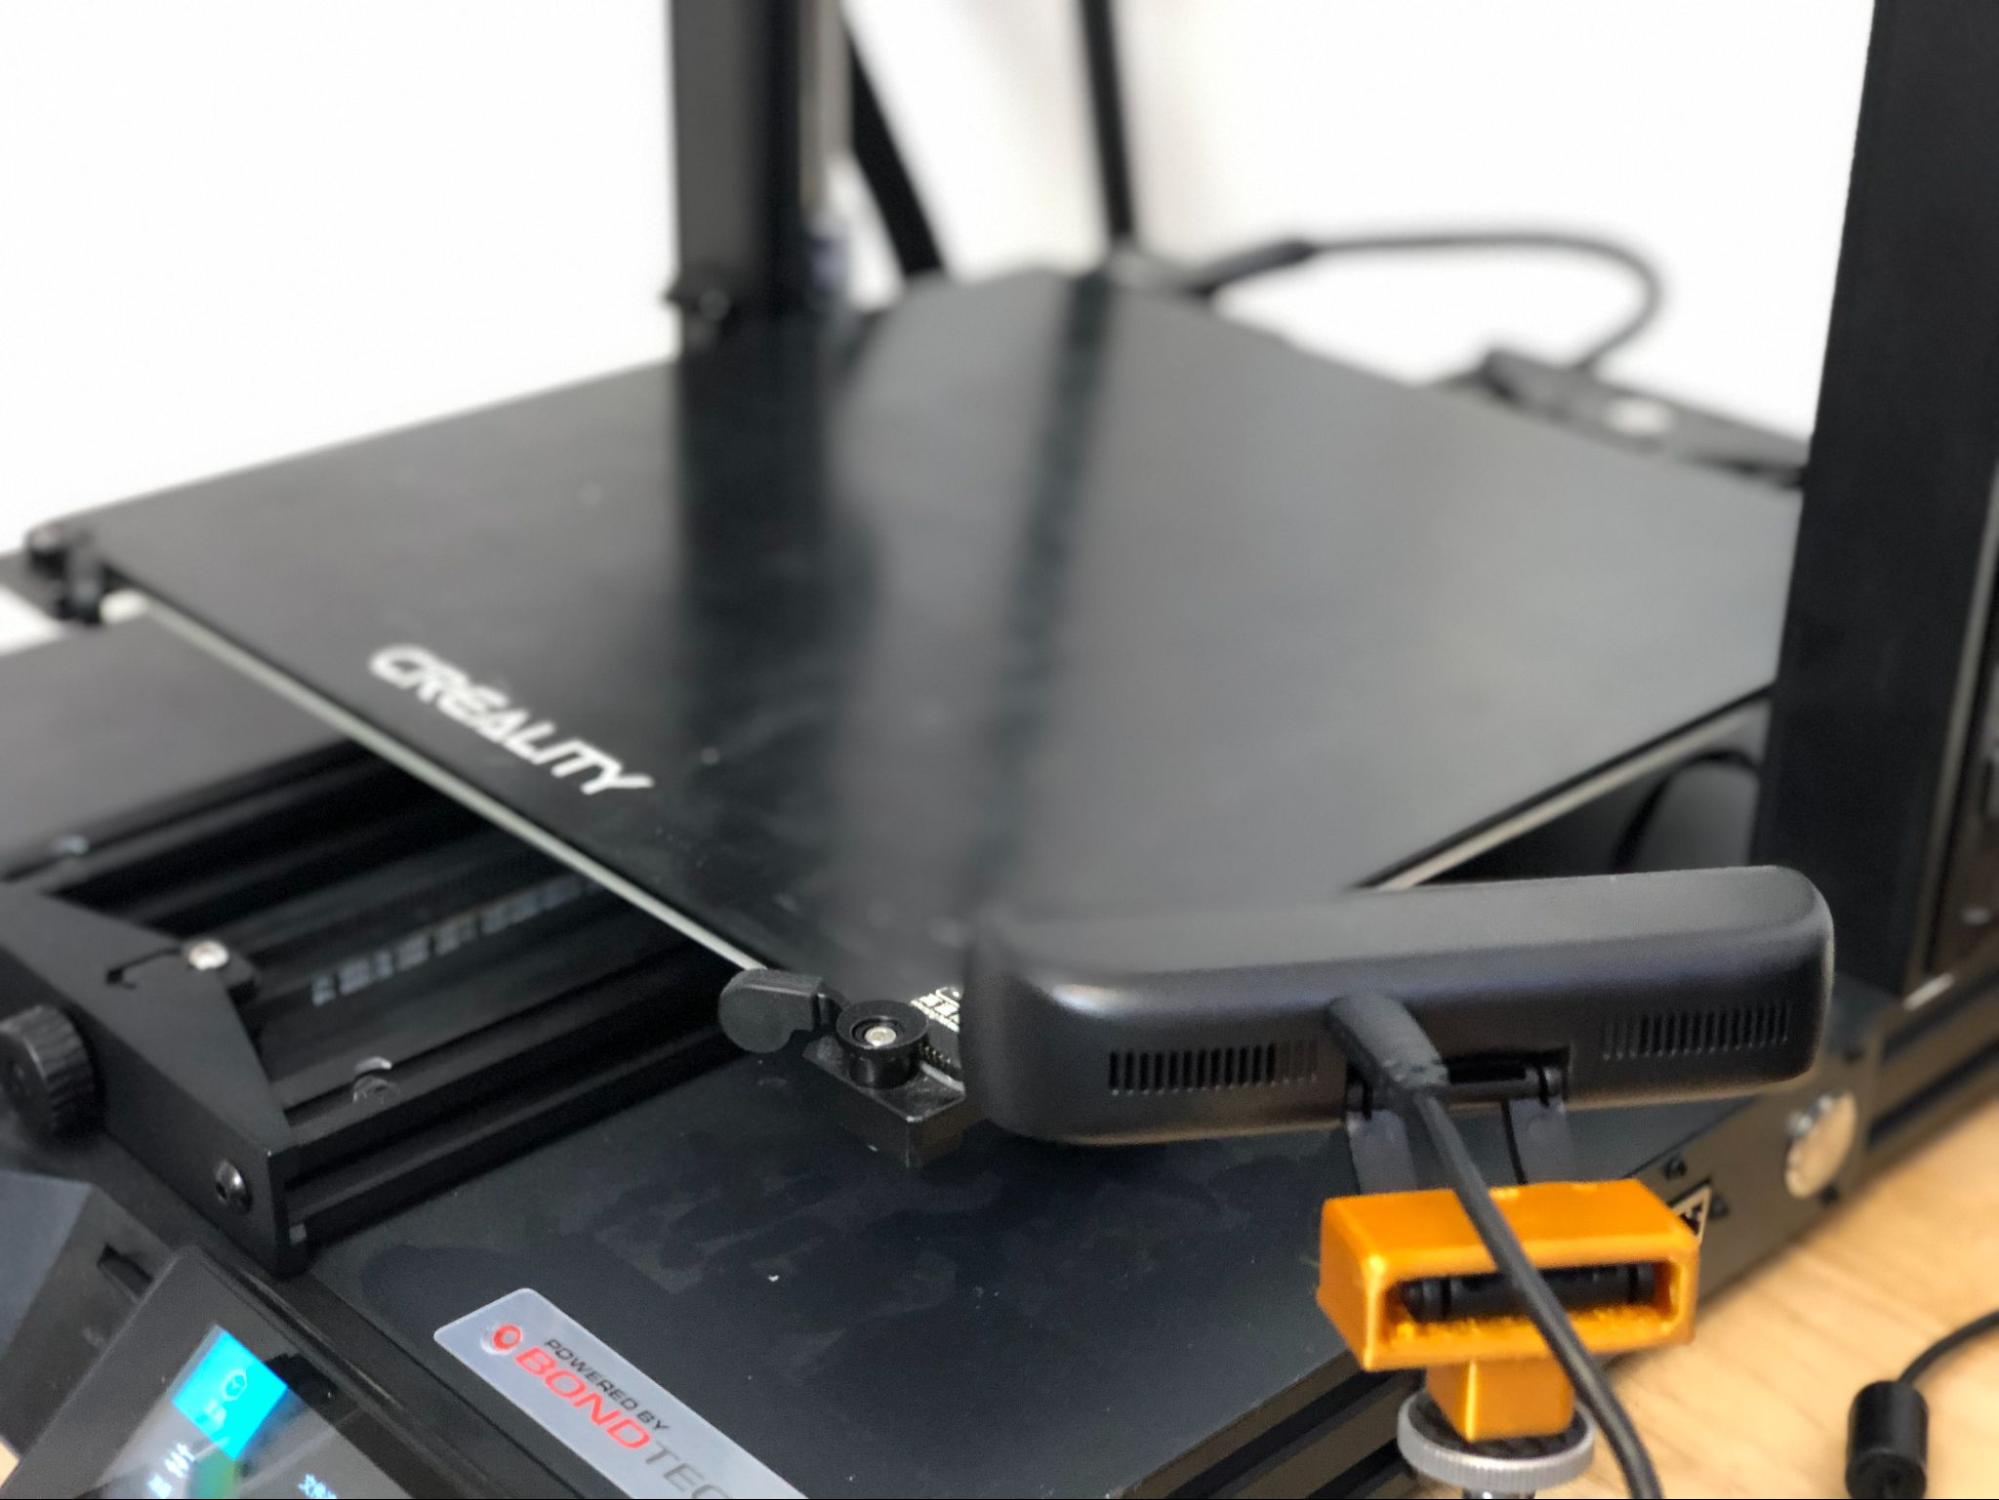
- Print a mount: 3D printing a mount is a great option. Here are a few mounts tested to work with the camera included with the kit.
| Webcam Mount | Description |
|---|---|
| Tripod adapter for all webcams | General tripod-mount (¼-20 thread) |
| 20-20 Extrusion Webcam Mount | Works with printed adapter |
| Ender 3 S1 Mount | Works with printed adapter |
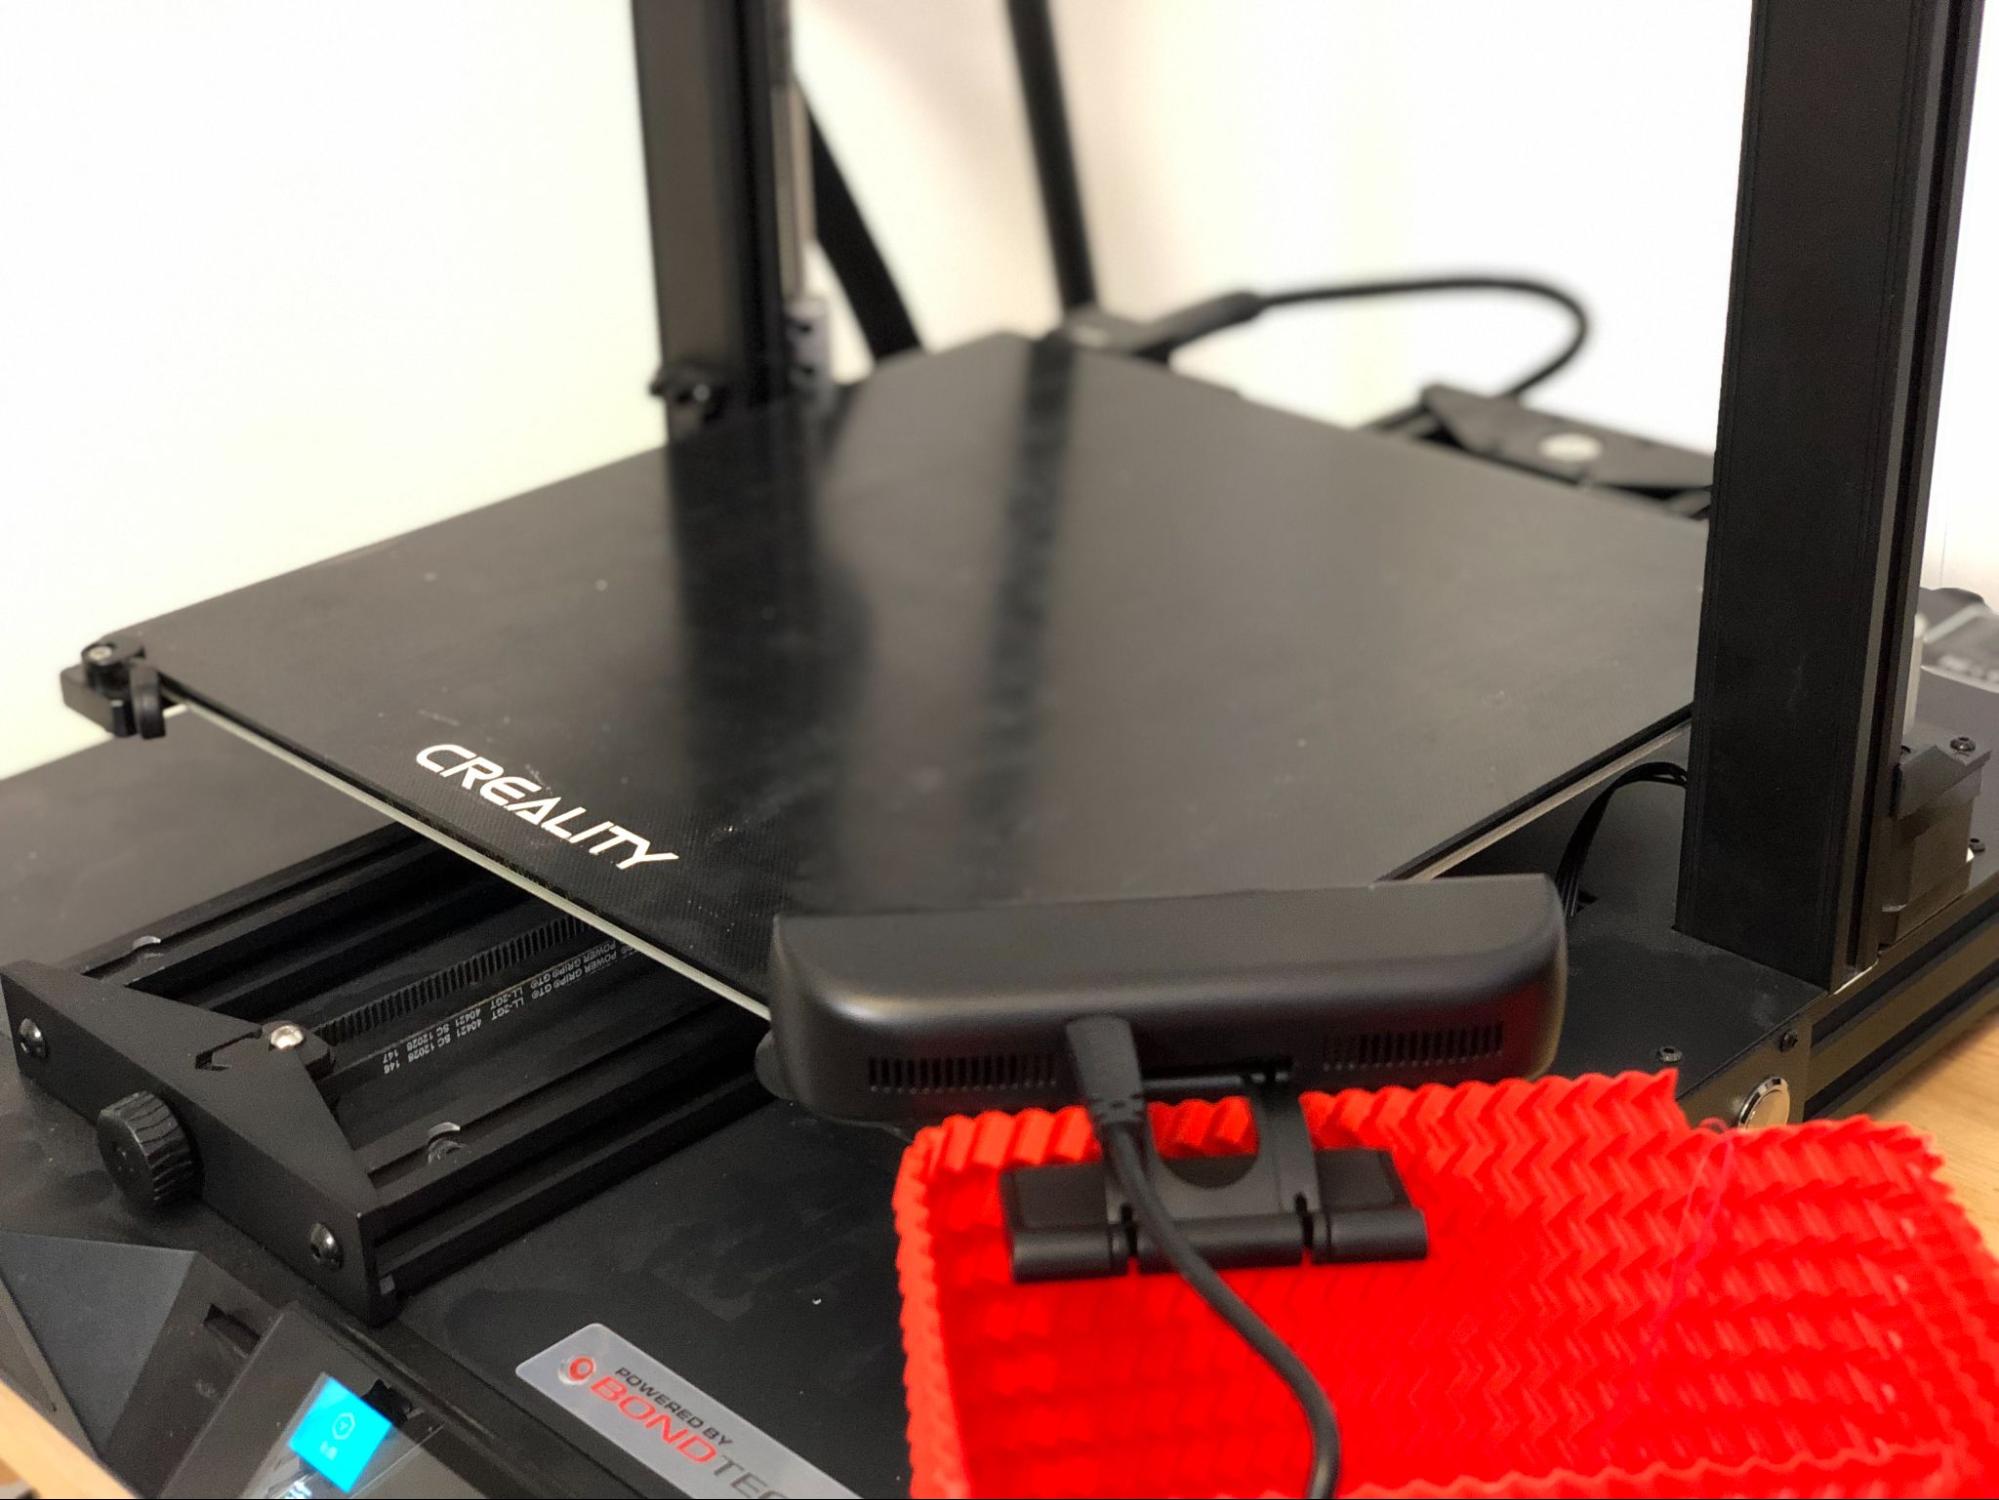
- Use a box, cup, or another surface to elevate the camera. Even a box can provide a nice camera view.
Configure Wifi
Once the Raspberry Pi Imager has finished flashing the OctoPrint software to your SD card, you can remove it from your computer and insert it into the Orange Pi.
1. Connect the Orange Pi to your router.
We will assume most users will be connecting via Wifi although connection via ethernet is recommended whenever possible.
- Connect one end of an ethernet cable to the Orange Pi, and connect the other end to a port on your wireless router. Assuming you will connect to wifi, this is only temporary, so do not worry if this is not where you plan to keep the device.
- Connect the included power supply to the Orange Pi and plug it into an electrical outlet.
2. Find the Pi's Ip Address
- Now, you will need to find the IP address of your Orange Pi. This can be done in multiple ways. The easiest way is to connect to your router's admin portal.
If you have an internet provider such as Verizon or Xfinity, instructions for connecting are on the router. In this example, I will access the Verizon wireless router settings by entering the admin username and password found on my router at mynetworksettings.com. The admin username and passwords are often different from the wifi username and password.
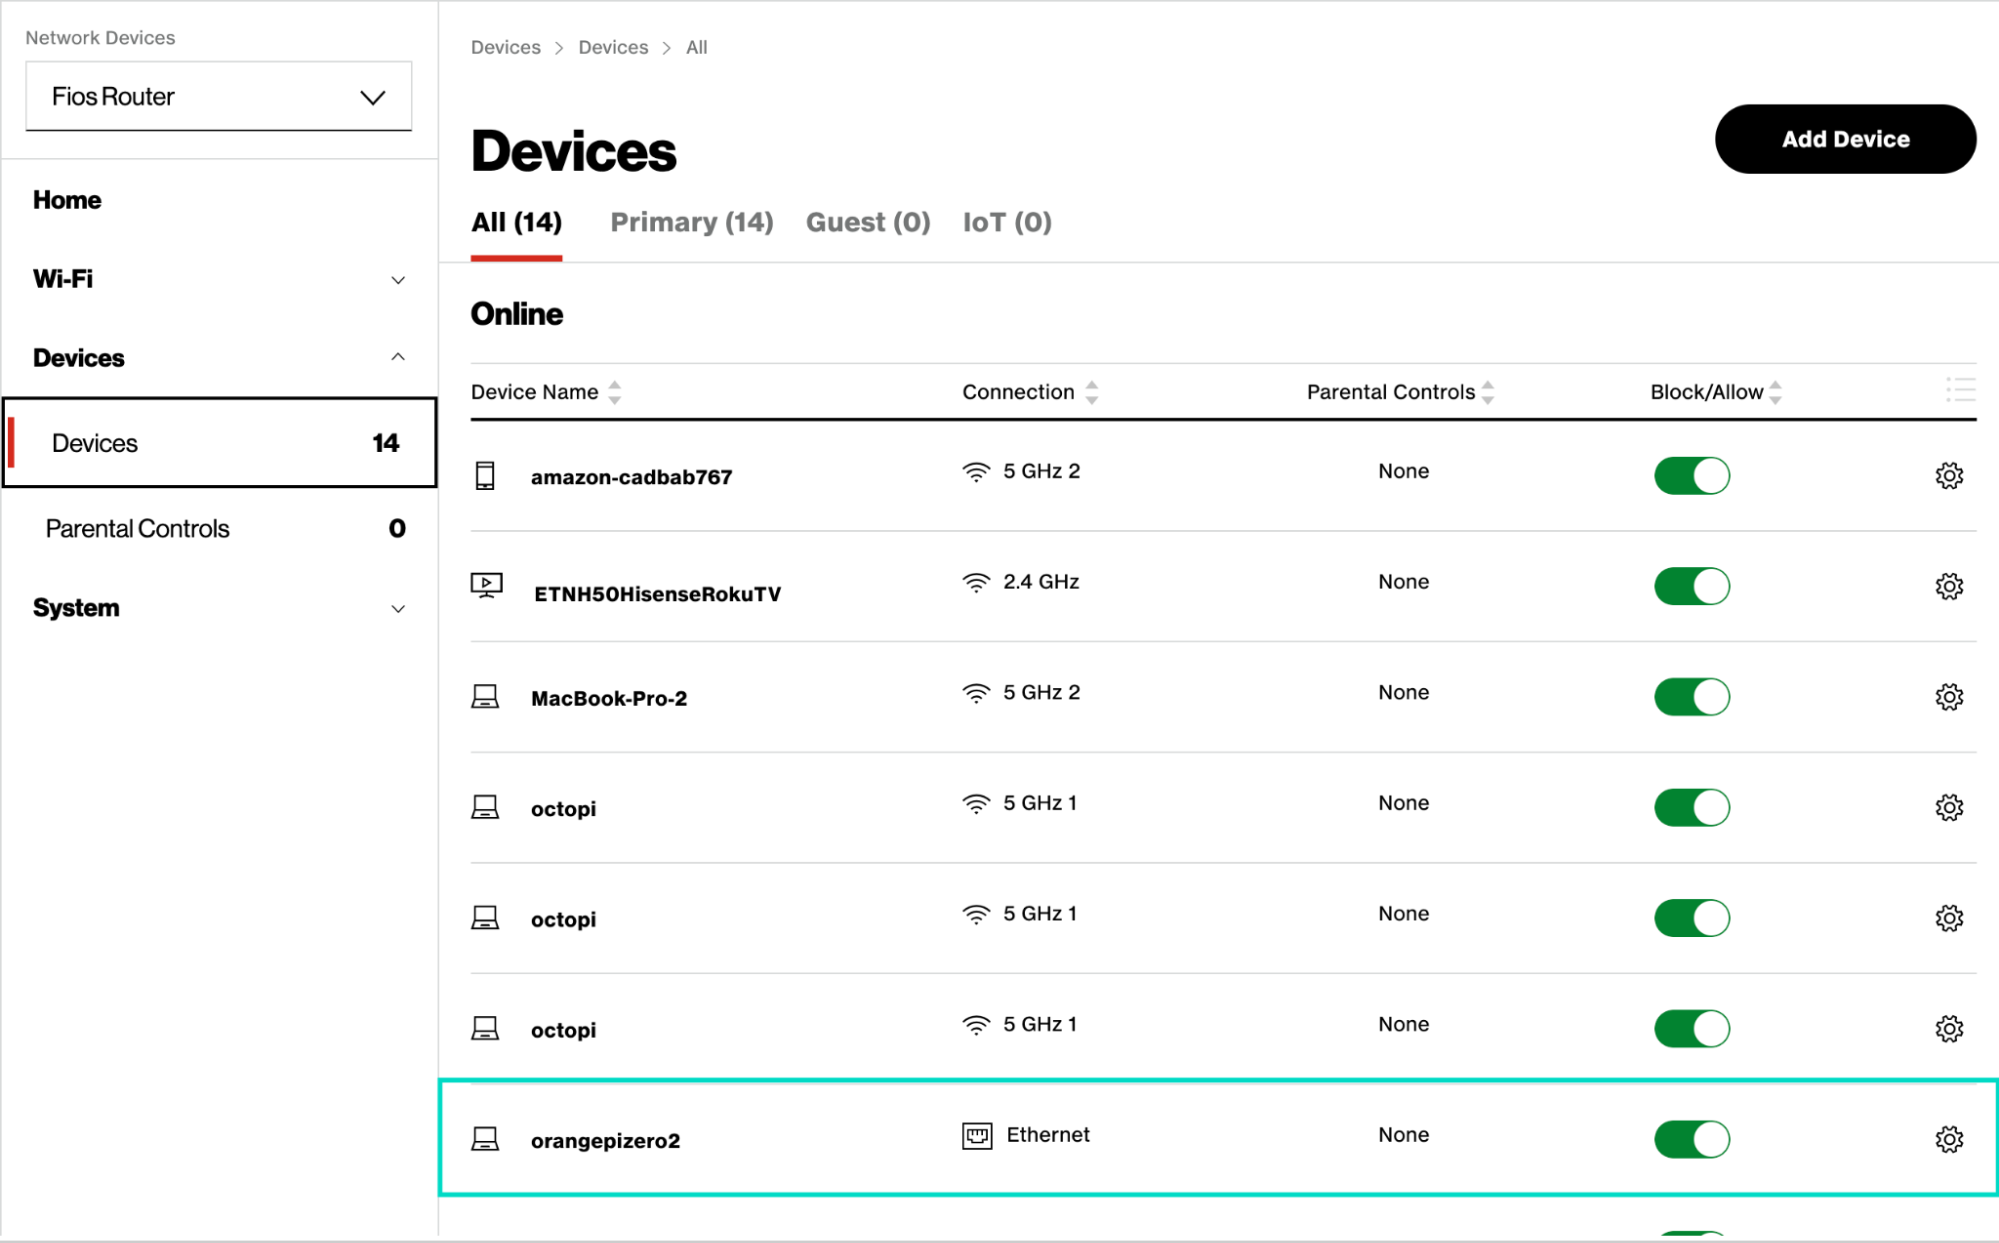
- Under Devices, find the device named orangepizero2. For Verizon routers, the IP address can be found by clicking the gear icon for a particular device.
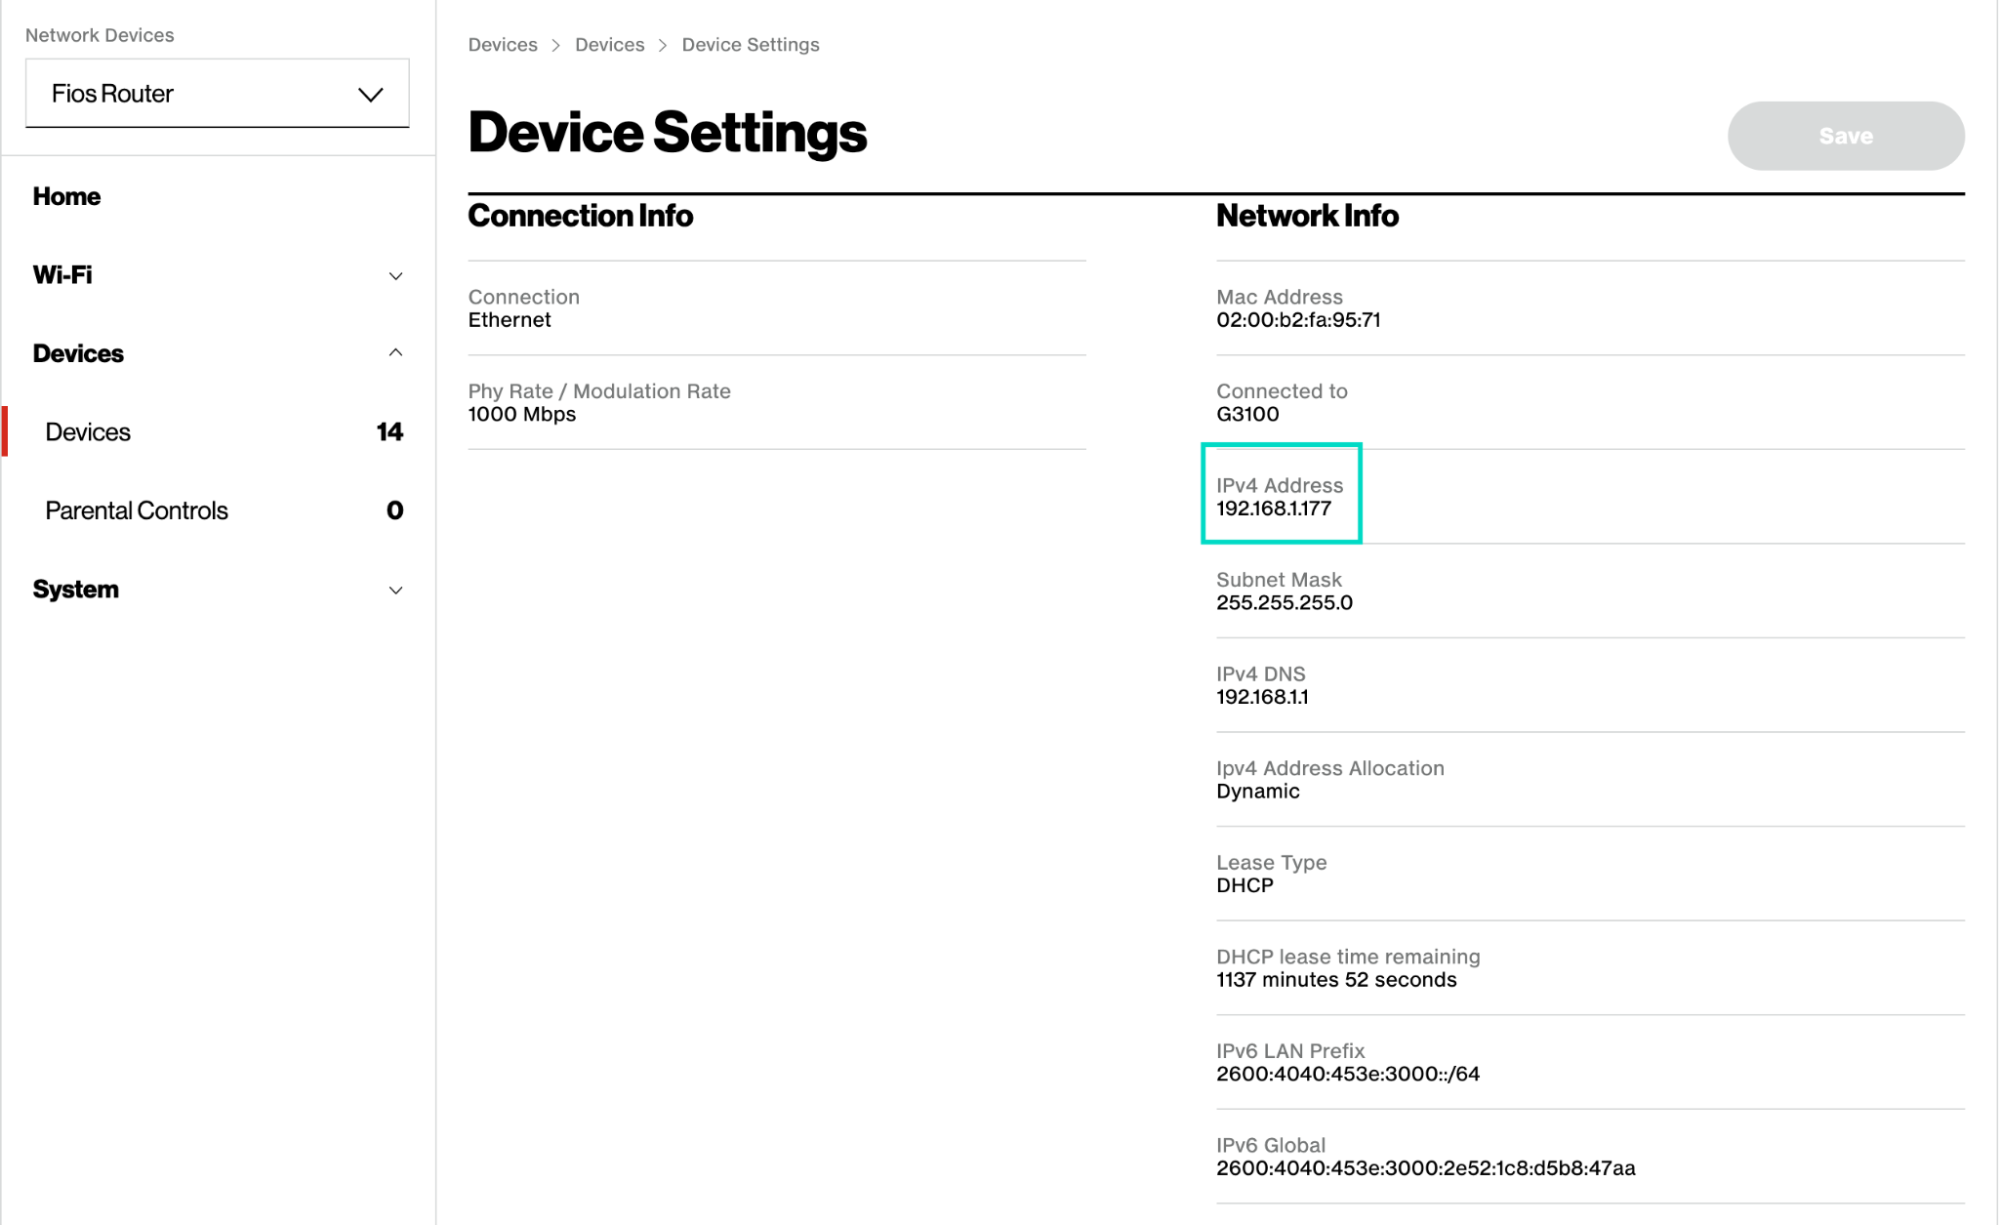
- You are looking for the IPv4 Address. Once you have found it, write it down or copy and paste it into your notes for easy reference.
If you are having trouble finding the IP address for your Orange Pi, there are a few other ways to find it.
-
For Windows users, download Angry IP Scanner, a free software, and use it to scan for IP addresses. You are looking for the one that says orangepizero2
-
Mac users can follow a similar process by downloading Lan Scan, a free IP scanner for mac.
If you are not planning to configure wifi, you can skip the rest of this section and go to the Connecting to OctoPrint section.
3. SSH into Your Orange Pi
-
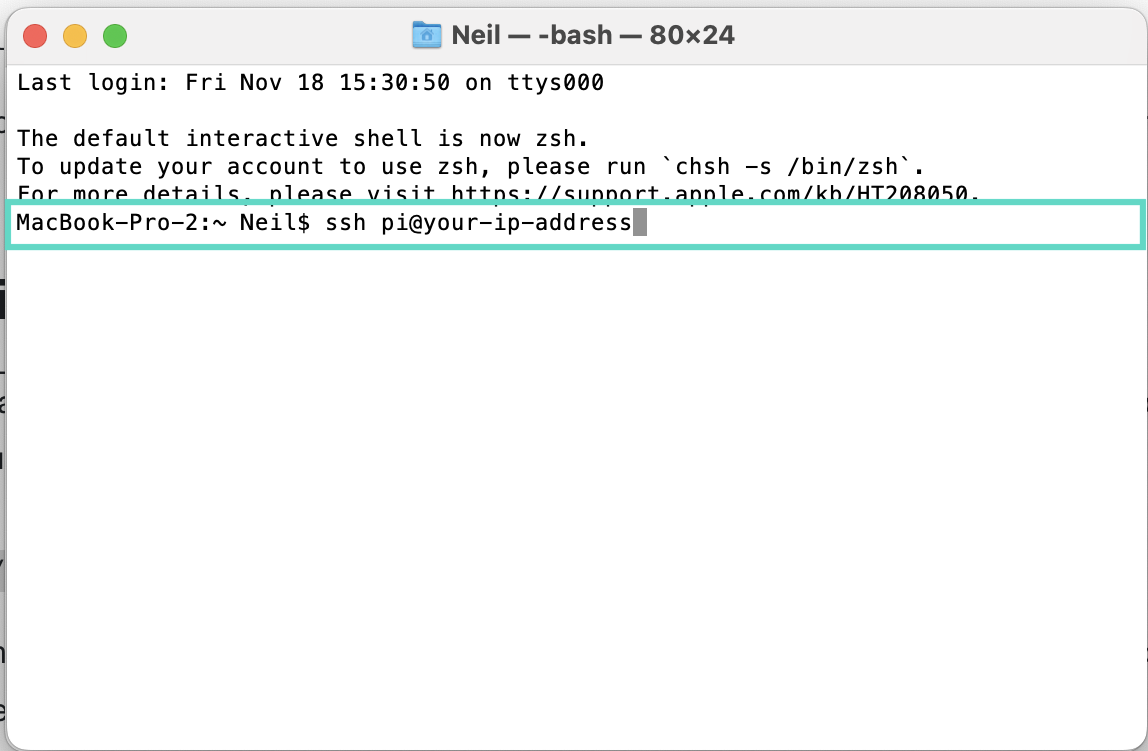
Now, open a terminal window. For Mac users, Terminal can be found in your applications Windows users will find the Command Prompt in programs.
-
SSH into your Orange Pi. SSH is a secure way to access network services securely over an unsecured network. Type the following command:
ssh pi@your-ip-address
- Enter the password. The password is orangepi. You will not see the letters as you type the password, but they are still being entered.
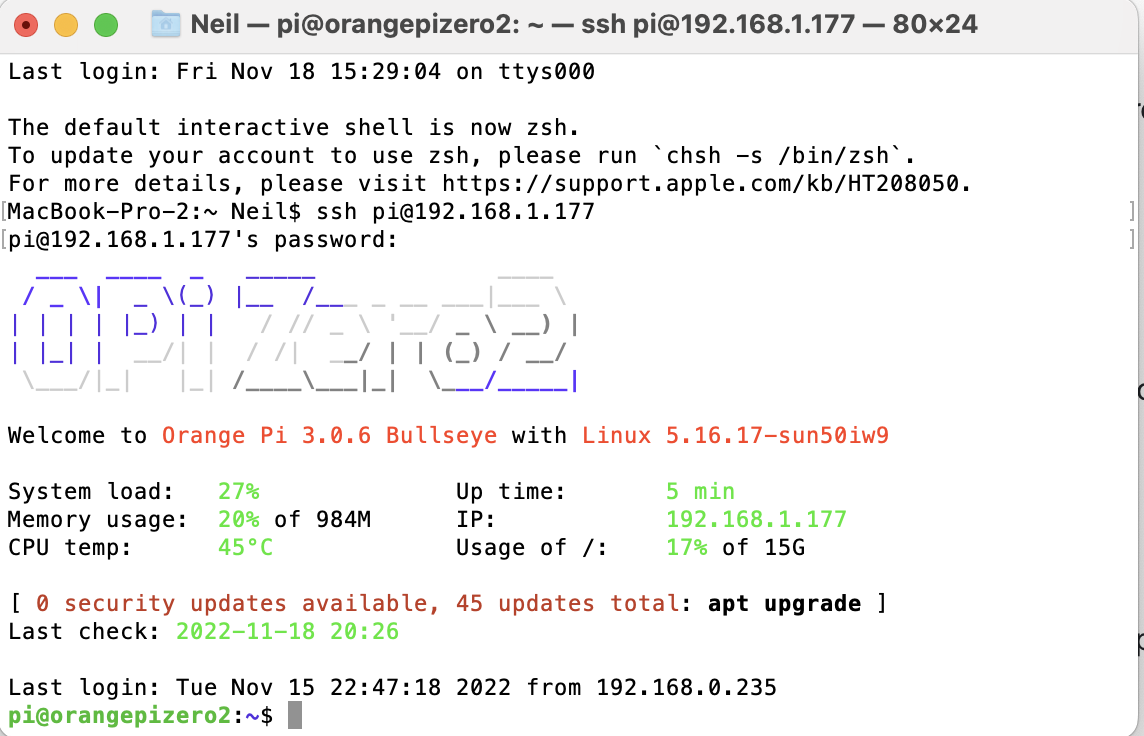
- Hit enter to confirm the password. You will then be greeted with the Opi Zero2 logo confirming you are logged in.
4. Connect to your wireless network
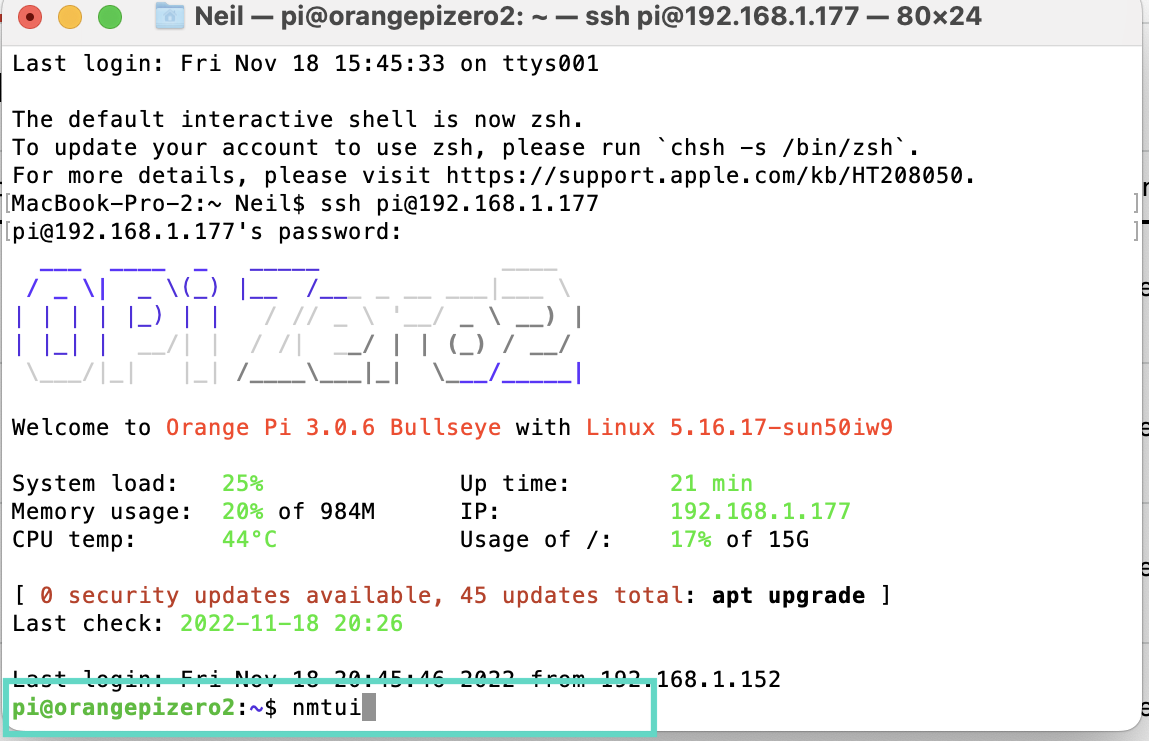
- Enter the following command to open up the network configuration menu. You can simply copy and paste the command into the terminal and then hit enter on your keyboard to execute the command.
nmtui
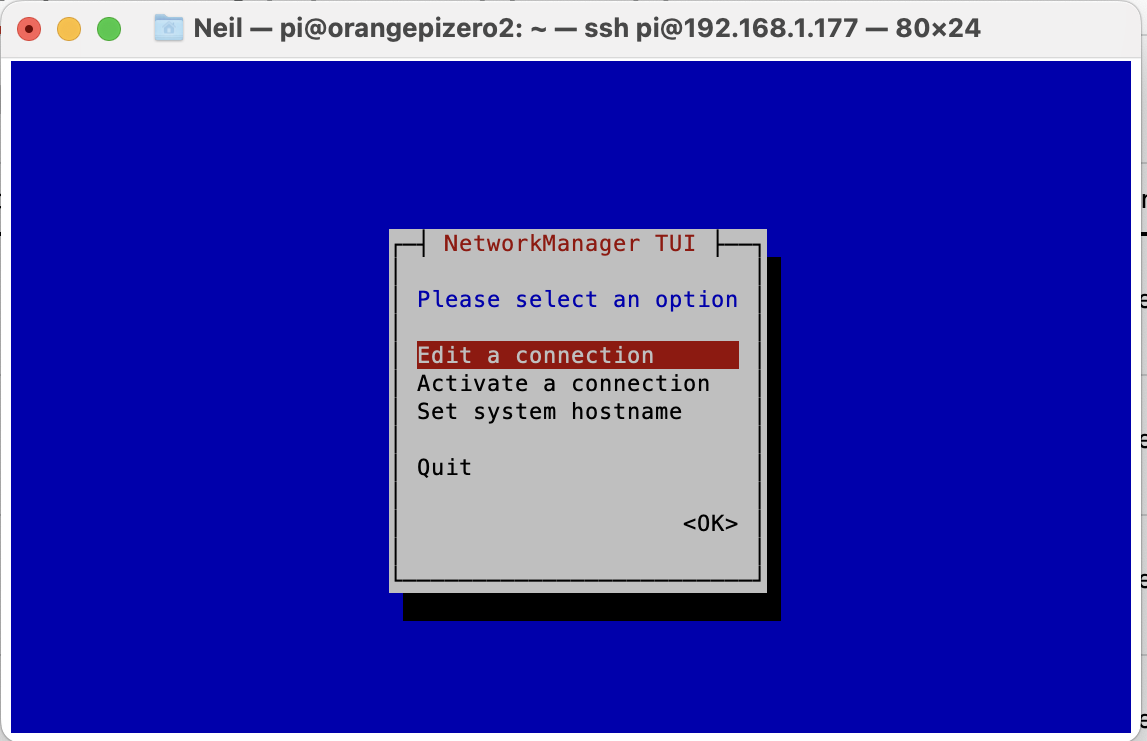
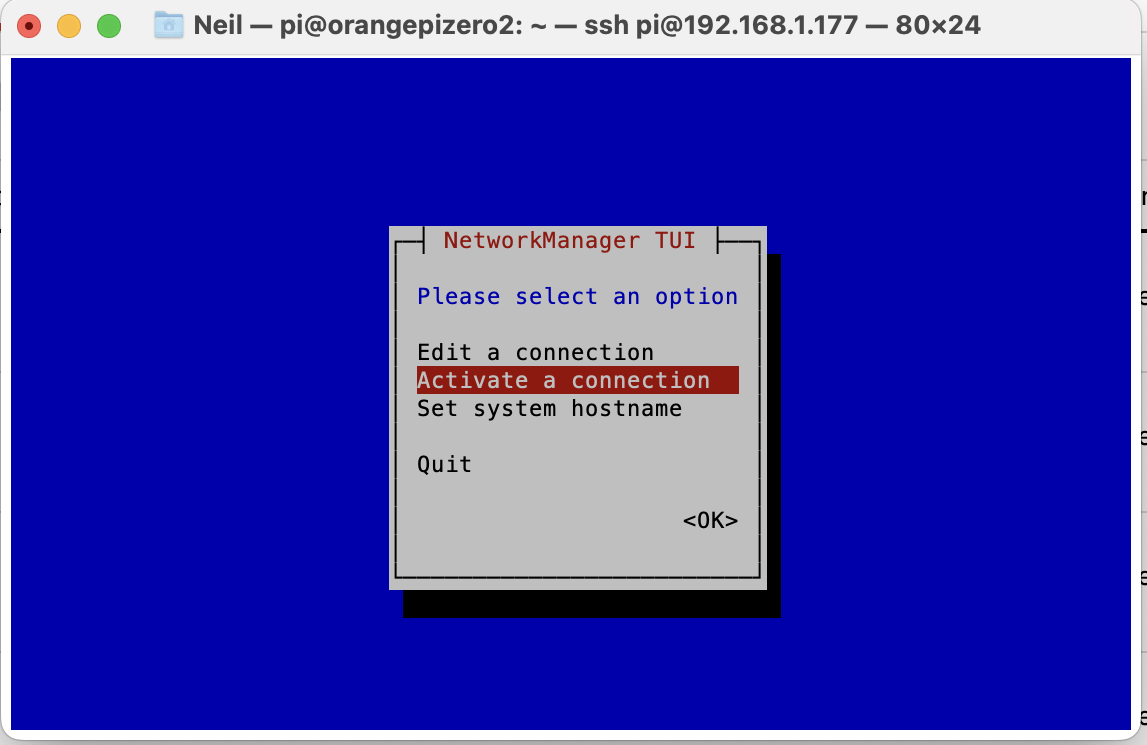
- Use the arrow keys on your keyboard to highlight Activate a connection and then use the cursor to highlight OK and click enter.
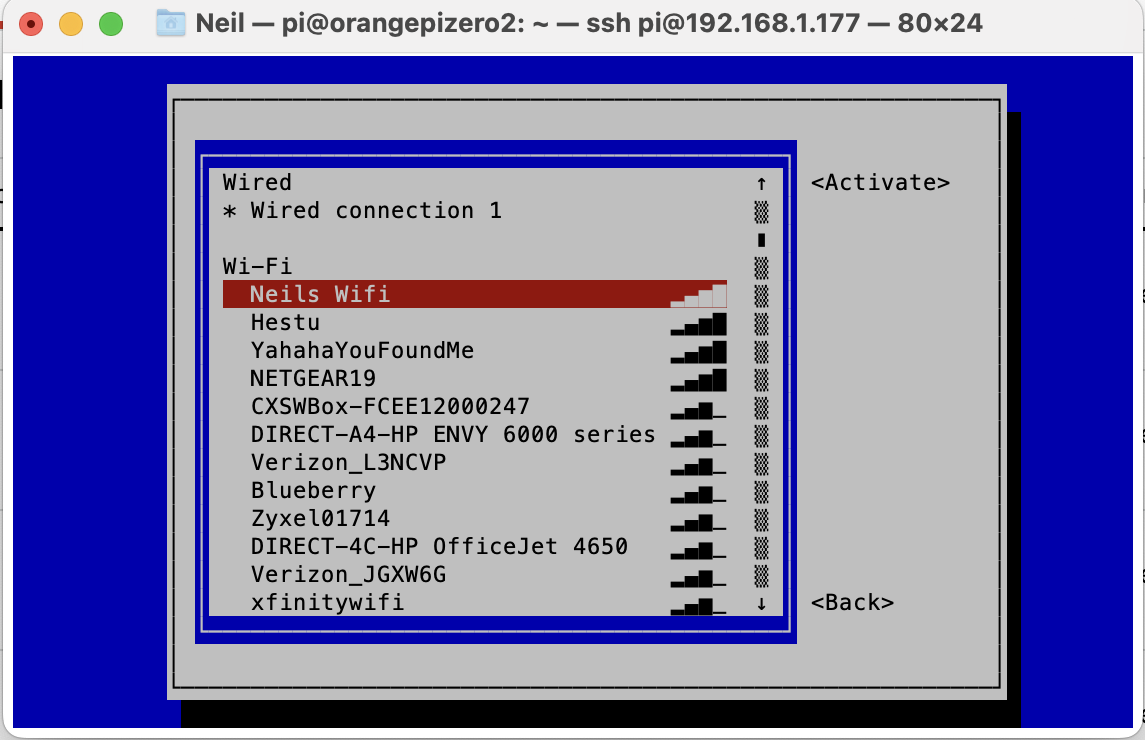
- Use the arrow keys again to highlight your wifi address name, and then hit enter on your keyboard.
- Enter the password for your wifi as it appears on your router. Hit enter to confirm.

- You can verify your wifi has been connected successfully when the upper right indicator switches from <activate> to <deactivate>. Once confirmed, move the arrow key to back and hit enter.
5. Find your Wireless IP address
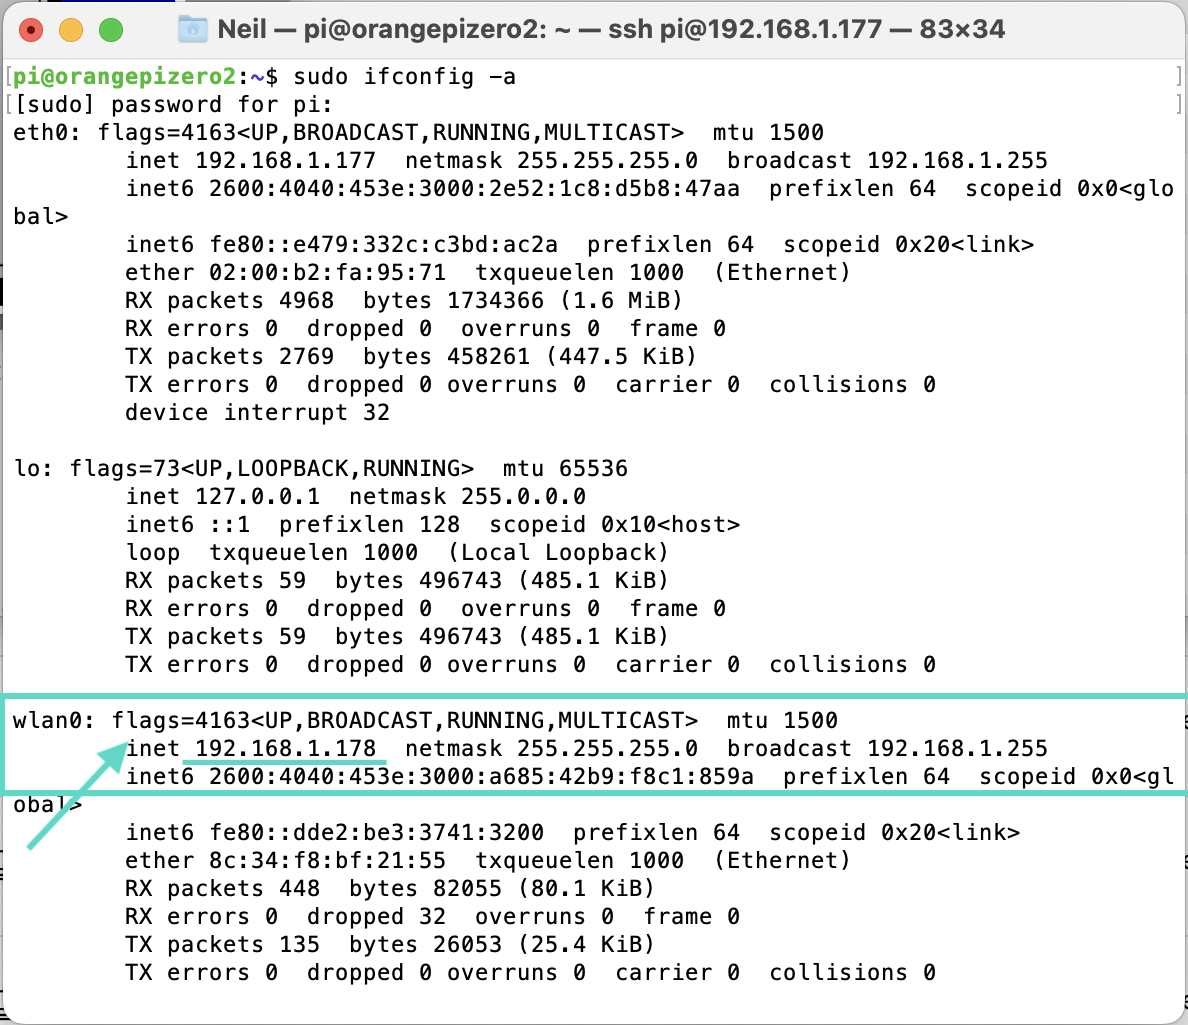
- Next, lets get the wireless ip address that was assigned to your orangepi. Enter the following command and hit enter.
sudo ifconfig -a
- In the output, find the line that starts with wlan0: and note the IP address next to inet. Write it down or store it in your notes for easy reference.
Configure Obico for OctoPrint - optional but encouraged :)
Obico for OctoPrint extends OctoPrint's capabilities:
- Monitor and control your 3D printer from anywhere on any device - Use the Obico mobile app on the go, or access the full OctoPrint interface from anywhere with Obico's Tunneling feature.
- Get added peace of mind with Ai failure detection. Obico watches your prints for you and can alert you through your favorite notification service when a failure is detected. Fully configurable to get notified or pause the print when a failure is detected.
- Start, stop pause and cancel prints on the go from anywhere.
- Check in on your prints on the go with high quality webcam streaming
This guide assumes you are connecting to the Obico Cloud. If you are connecting to a self-hosted Obico Server, you will need to use the address of your self-hosted server.
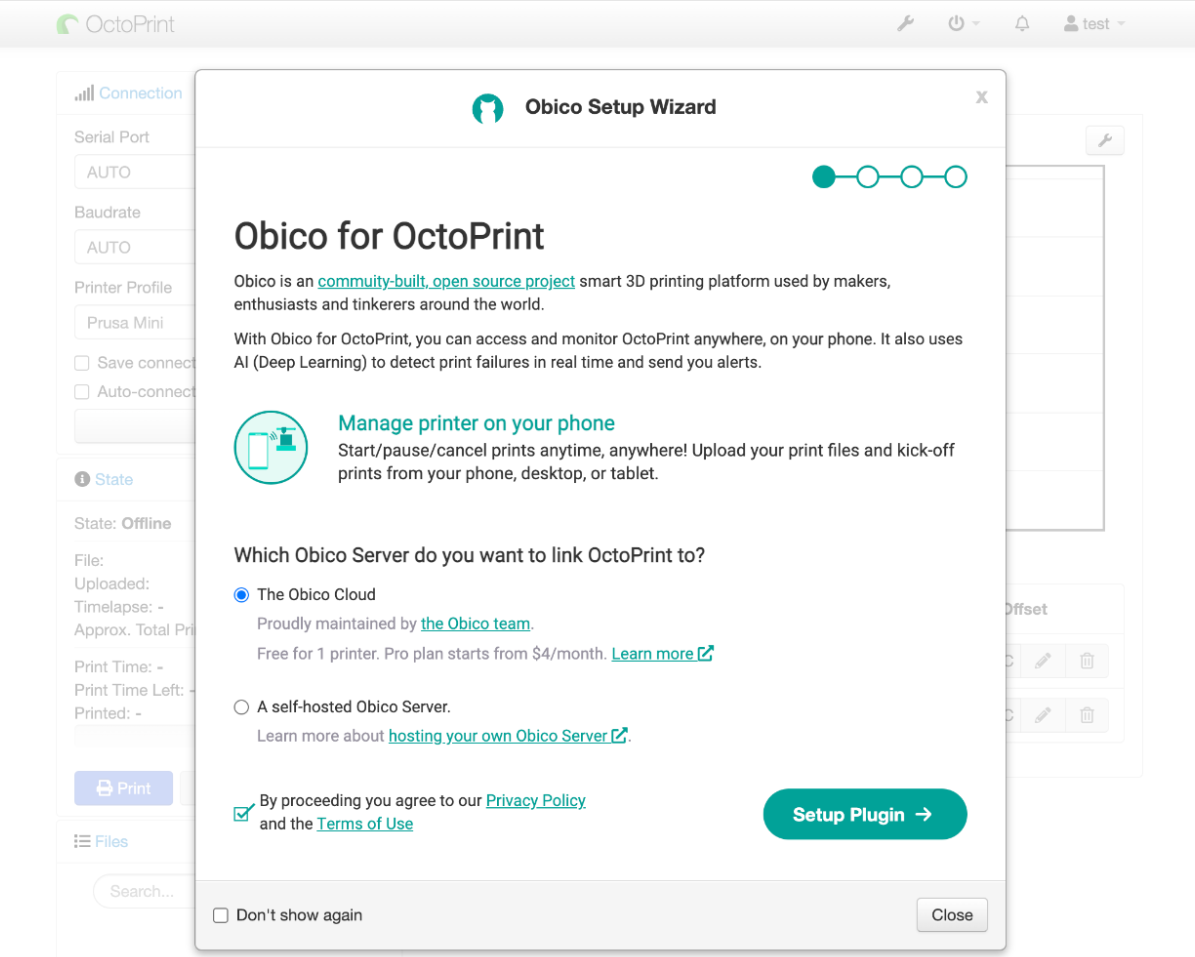
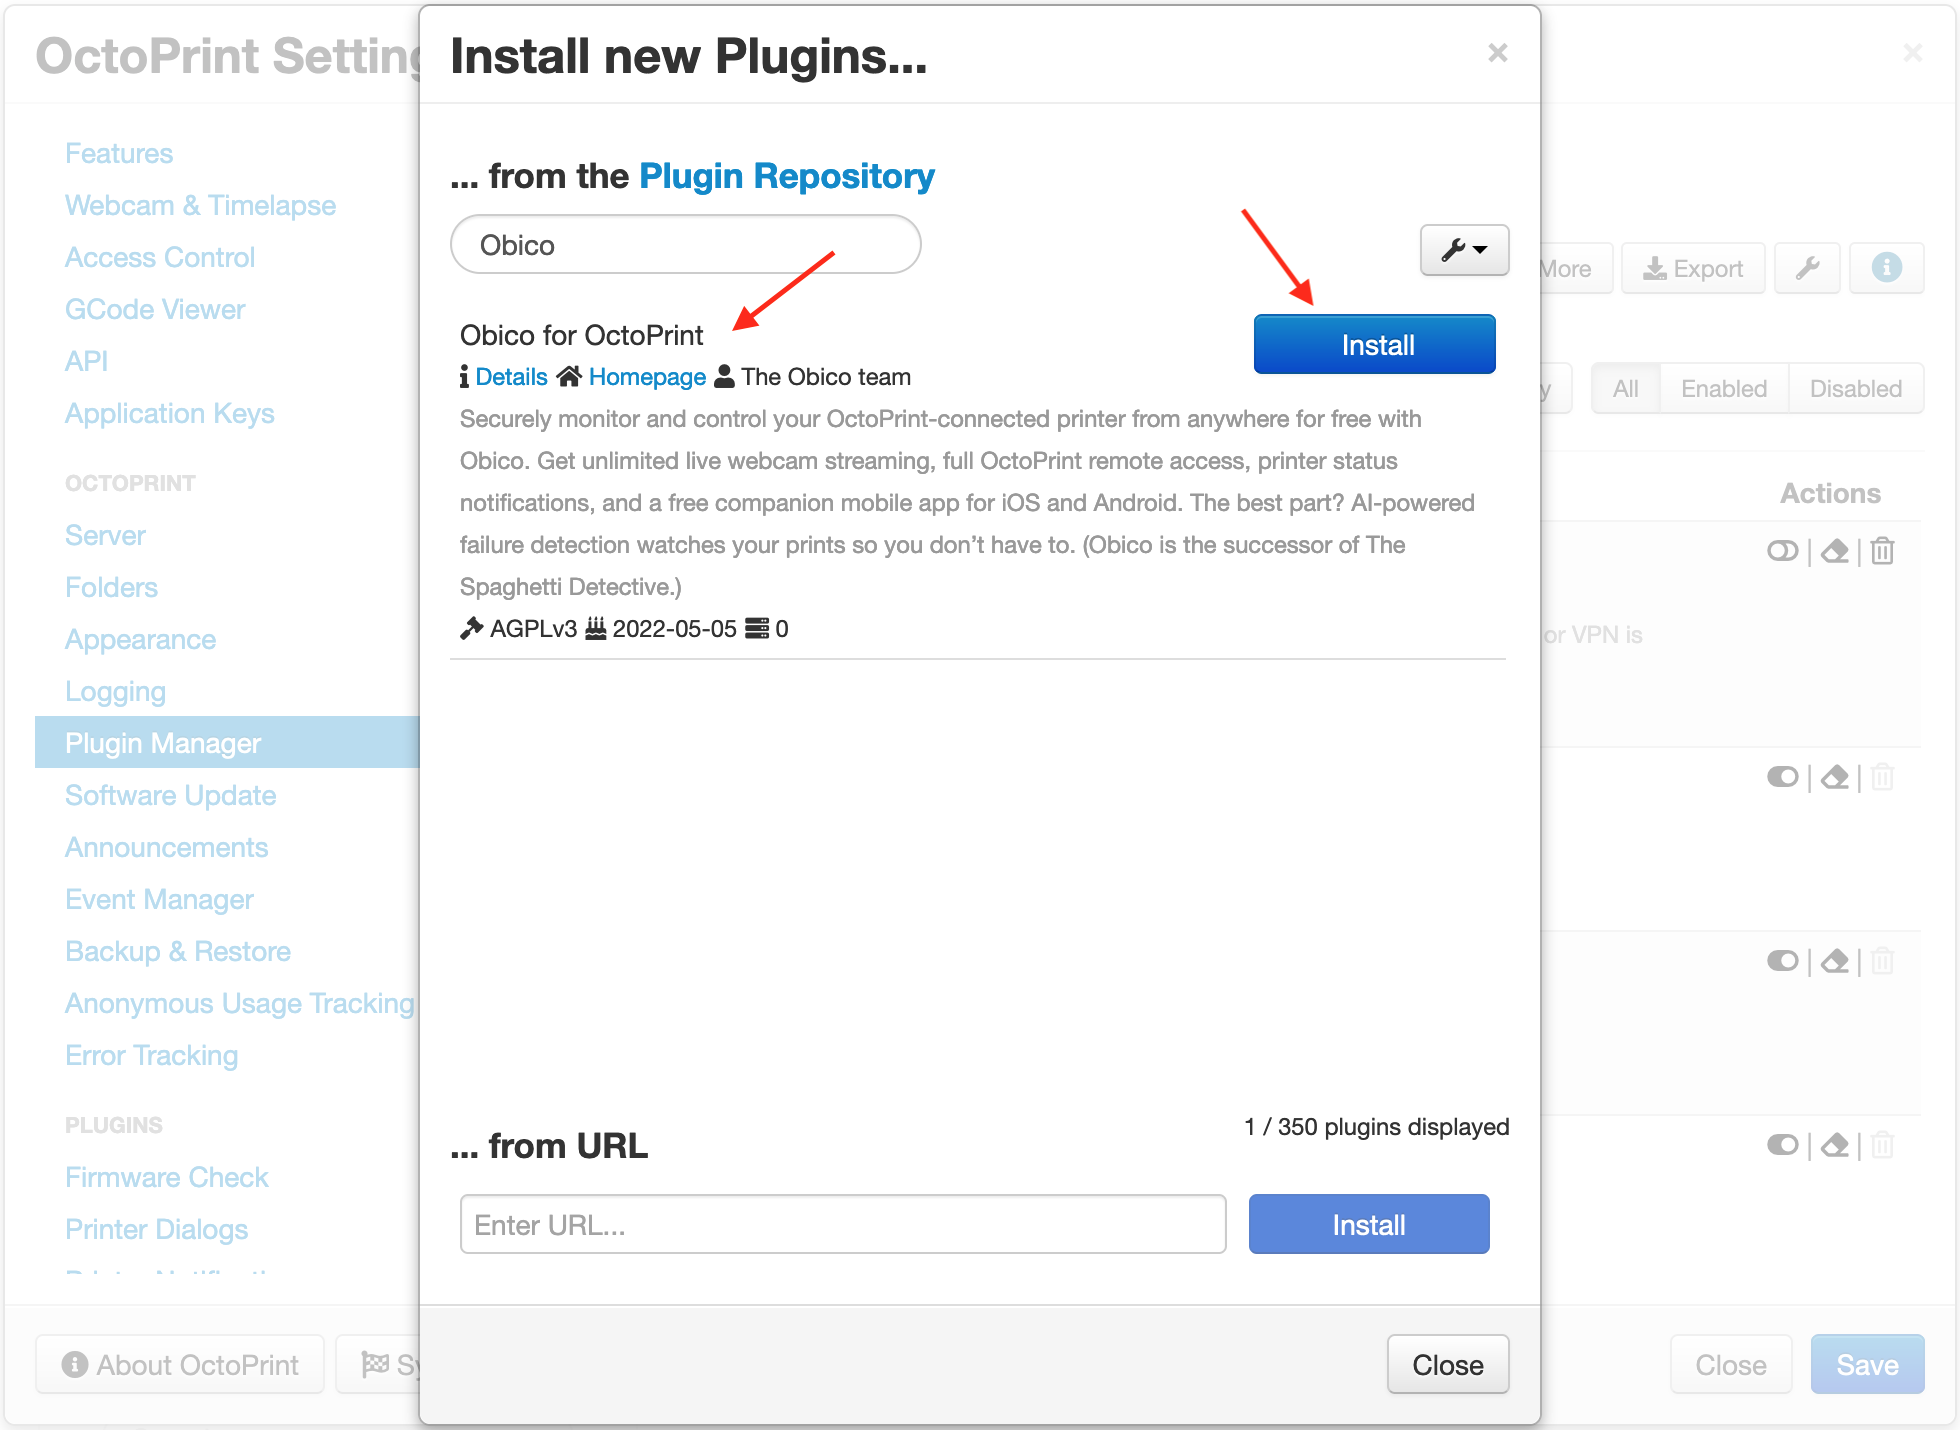
Step 1: Access "Obico for OctoPrint" plugin wizard.
- Restart OctoPrint by clicking the power button
- Click Restart OctoPrint. Wait for OctoPrint to reload. 1.The Obico plugin setup wizard should popup once OctoPrint reloads. If it doesn't open automatically, open up the OctoPrint settings menu by clicking the gear icon. Then find Obico for OctoPrint in the menu, and click run setup wizard
Step 2: Sign up for an Obico account.
Follow instructions in the "📱 Mobile App" tab if you are using the Obico mobile app, or the "🌐 Web App" tab if you are using the web app.
Your Obico account is the same for the mobile app and the web app. If you sign up for an account using the mobile app, you can sign in to the web app later with the same email and password. And vice versa.
All functions are available equally in the mobile and the web app. However, with the mobile app, you can receive push notifications on your phone to easily track the print progress, and get alerted in case a failure is detected.
- 📱 Mobile App
- 🌐 Web App
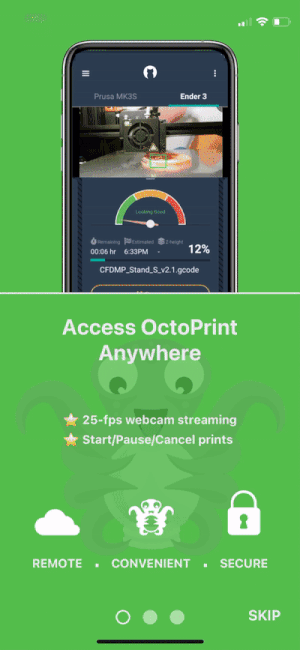
- Download the Obico app from the Apple App Store or Google Play Store.
- Open the mobile app. Click through the first time tour and then tap “Let’s Go!”.
- Simply tap "YES!" on the "Hardware Required" screen.
- Tap "Sign Up/Sign In" button to proceed to the sign up/sign in screen.
- Sign up with your email, Google or Facebook account. If you have already registered, click the "Sign In" button and sign in to your account.
If you are connecting to a self-hosted Obico Server, press the wrench icon (🔧) on the top-left corner of the sign-up screen to change the server address.
- Open the Obico Server sign up page in a new browser tab.
- Sign up with your email, Google or Facebook account. If you have already registered, click the "Sign In" button and sign in to your account.
Step 3: Launch the "Link Printer" wizard in the Obico app
If you are phone or computer is one the the same local network as your OctoPrint is, the Obico app can find your OctoPrint automatically. This is the easiest way to link printer to your Obico account.
- 📱 Mobile App
- 🌐 Web App
- Press "Link Printer" button on the welcome screen. If you don't see that screen, tap the menu icon (☰) on the top-left corner, and select "Link New Printer".
- Choose "OctoPrint" on the next screen.
- Assuming you have followed the previous steps and installed the plugin, you can simply click the "Yes, plugin is installed" button.
- The app will start scanning for the OctoPrint connected to the same local network.
- If the OctoPrint is found, simply click the "Link" button and the app will do the rest for you.
tip
If, however, the app can't find your OctoPrint after 1 minute of scanning, you need to follow the Manual Setup Guide to link your OctoPrint using a 6-digit code.
- Optionally, you can now give your printer a name. If you skip this step, your printer will have the default name "My Awesome Cloud Printer".
- On the welcome page, click the "Link Printer" button.
- Click "OctoPrint" on the page that asks you to select a platform.
- Assuming you have followed the previous steps and installed the plugin, you can simply click the "Next" button.
- The app will start scanning for the OctoPrint connected to the same local network.
- If the OctoPrint is found, simply click the "Link" button and the app will do the rest for you.
tip
If, however, the app can't find your OctoPrint after 1 minute of scanning, you need to follow the Manual Setup Guide to link your OctoPrint using a 6-digit code.
- On the message dialog, click the "Link Now" button. This will open a new browser tab for a few seconds. This new browser tab is needed to finish a "handshake" with your OctoPrint. If the handshake fails, you will need to switch to the Manual Setup Guide to link your OctoPrint using a 6-digit code.
- Optionally, you can now give your printer a name. If you skip this step, your printer will have the default name "My Awesome Cloud Printer".