General instruction for recompiling the firmware to enable HOST_ACTION_COMMANDS for printers with a 32-bit mainboard
Step 1: Install required software
First, lets install all of the necessary programs. All of these programs have Mac and Windows versions available.
-
Install Python.
-
Install Microsoft Visual Studio Code and open it.
-
In VSCode, install the Auto Build Marlin extension.
-
Click the extensions button on the left side of VSCode and type ‘Auto Build Marlin’ and click to install it. Platform.io will also be installed at this time.
-
Close and reopen VSCode to ensure the extensions you just installed are active.
Step 2: Download the latest Marlin source code and configure it
-
Download Marlin. Most likely, you will want the latest version, which is 2.0.9.3 at this time. Make sure you download the both “Marlin-2.0.x.zip” and “Configurations-release-2.0.x.x.zip”.
-
After downloading, extract the zip file.
-
Find the configuration.h and configuration.adv files for your printer.
-
Copy and paste the files into the .\Marlin folder that is in the Marlin 2.xx folder that you unzipped in the previous step.
-
When prompted, choose to overwrite the two files that are already there.
Step 3: Set the correct Environment
- Click the home symbol on the bottom left of the screen to open Platform.io.
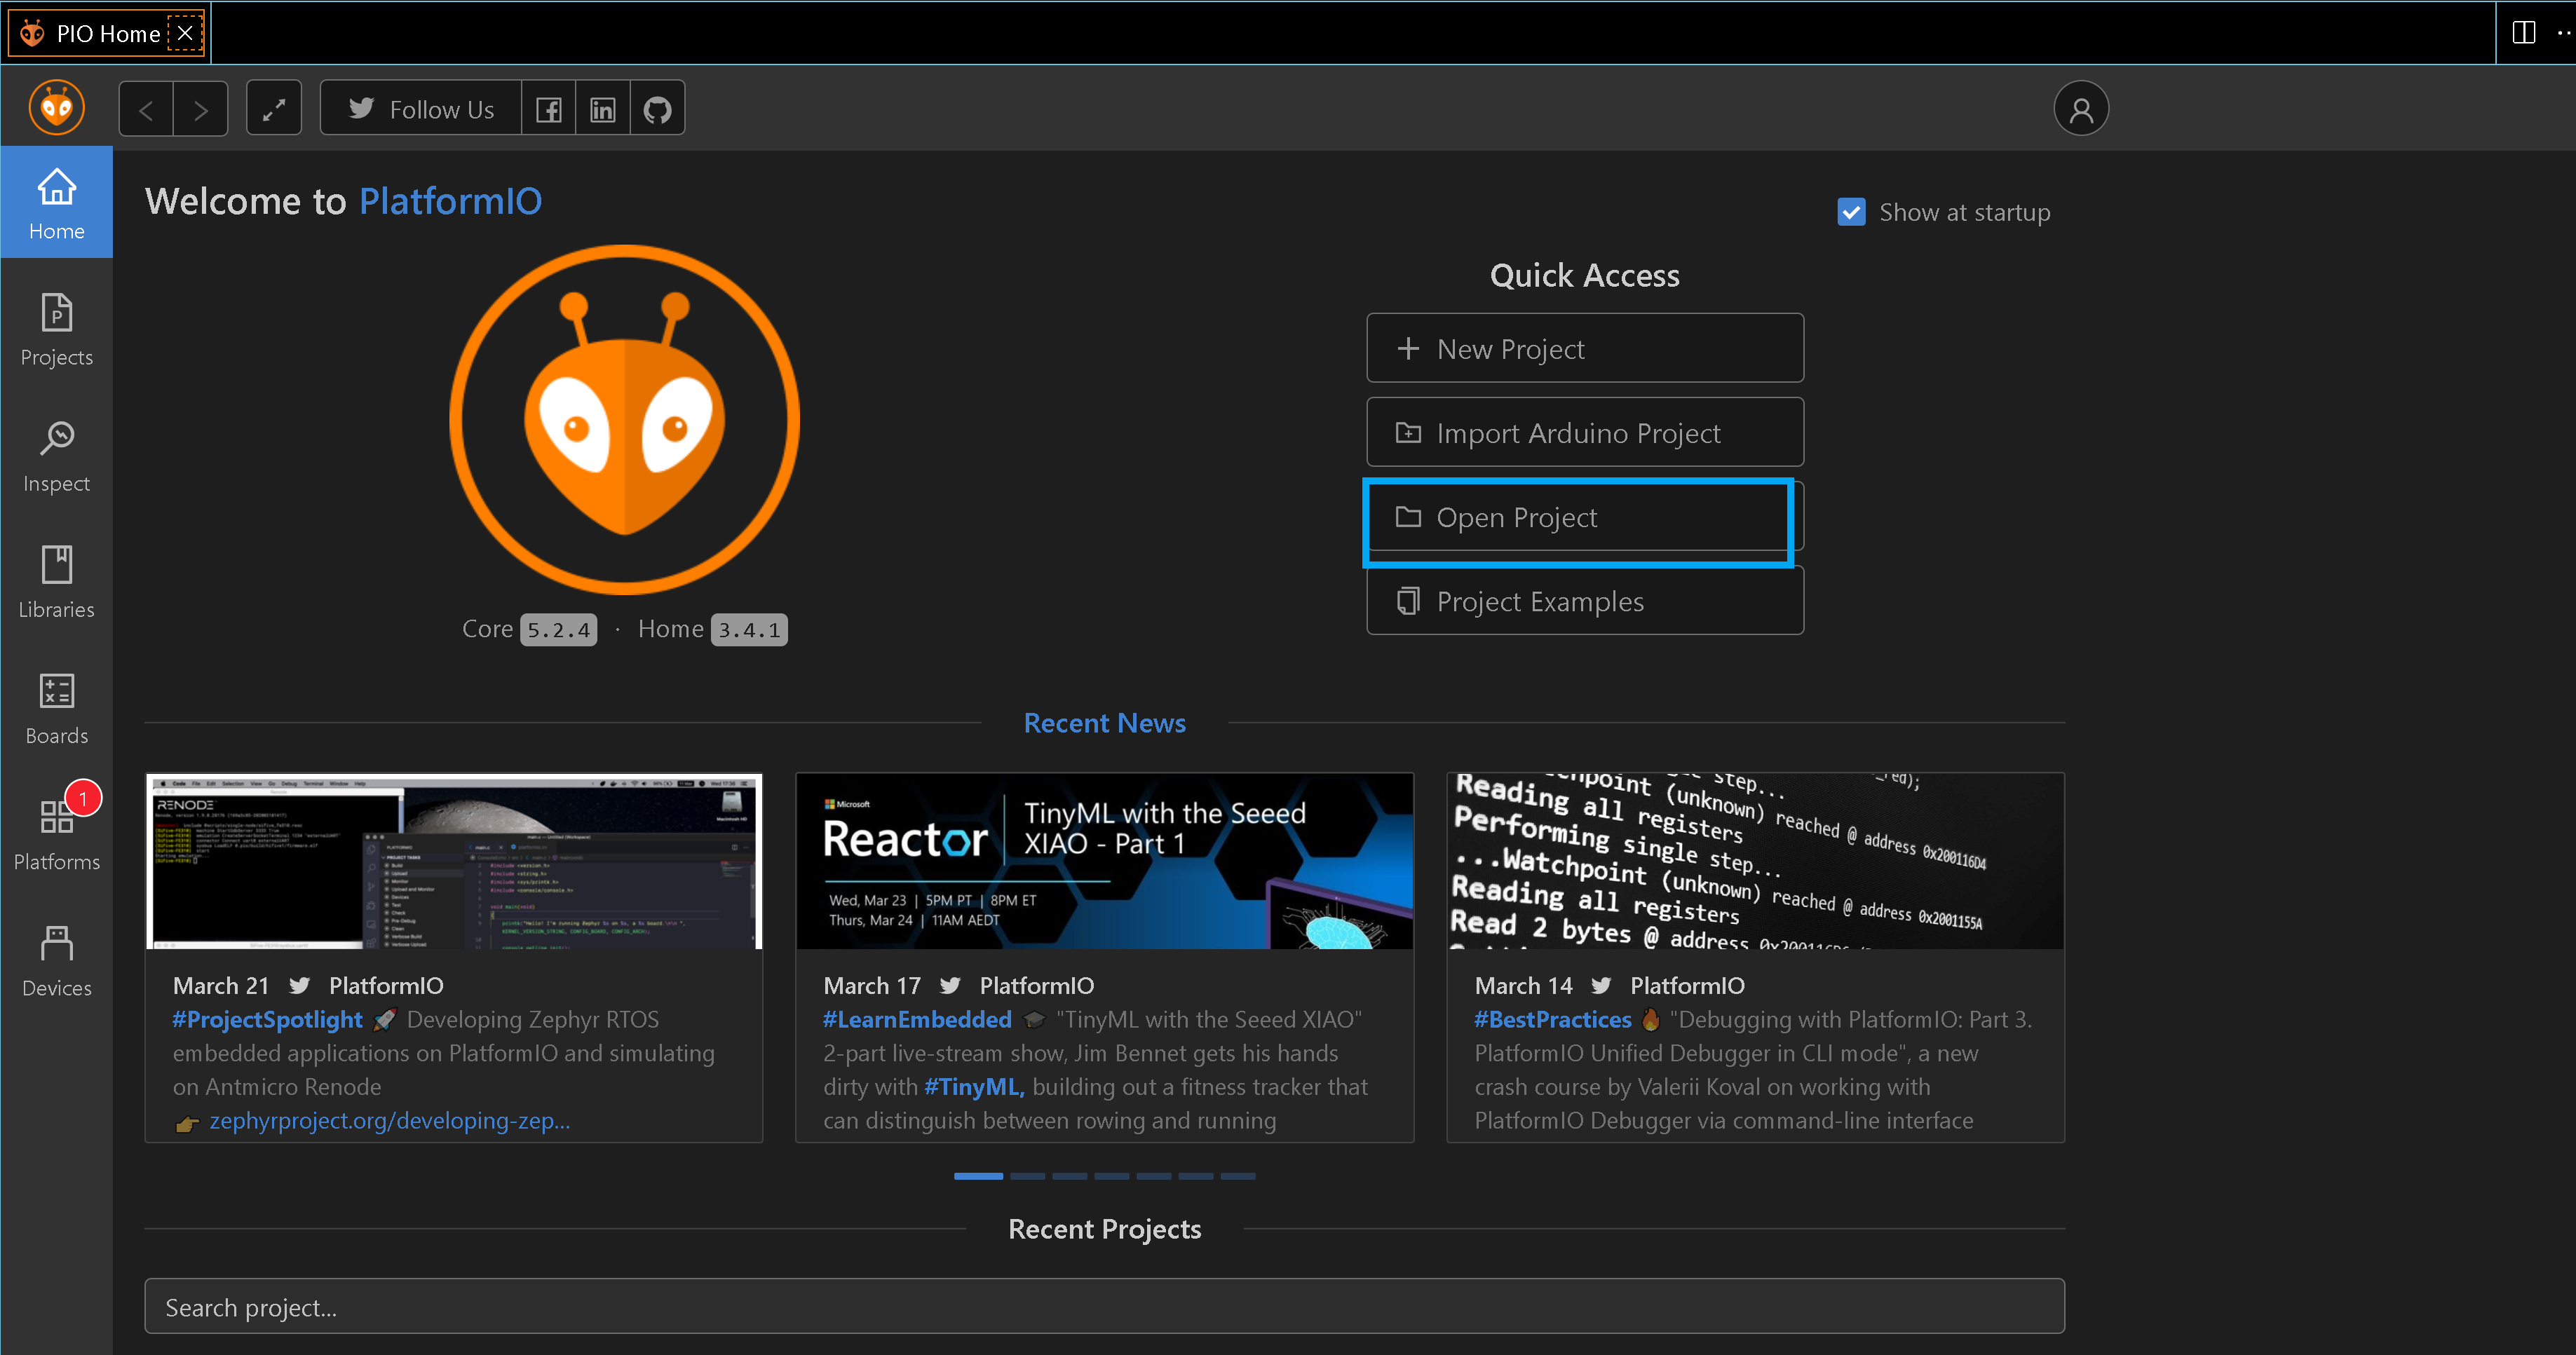
-
Click the Open Project button.
-
Find the unzipped Marlin folder and click Open
-
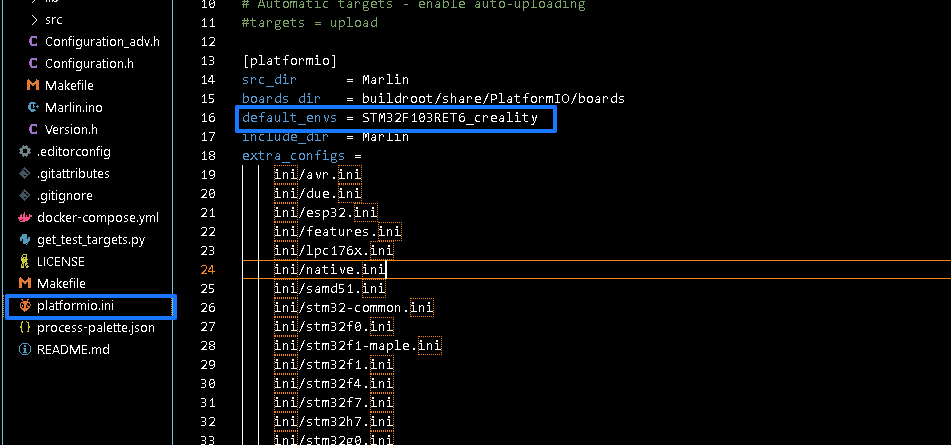
Click the Explorer button on the left side, and click the platform.ini menu
-
Navigate to the Marlin Folder on the left side of the screen.
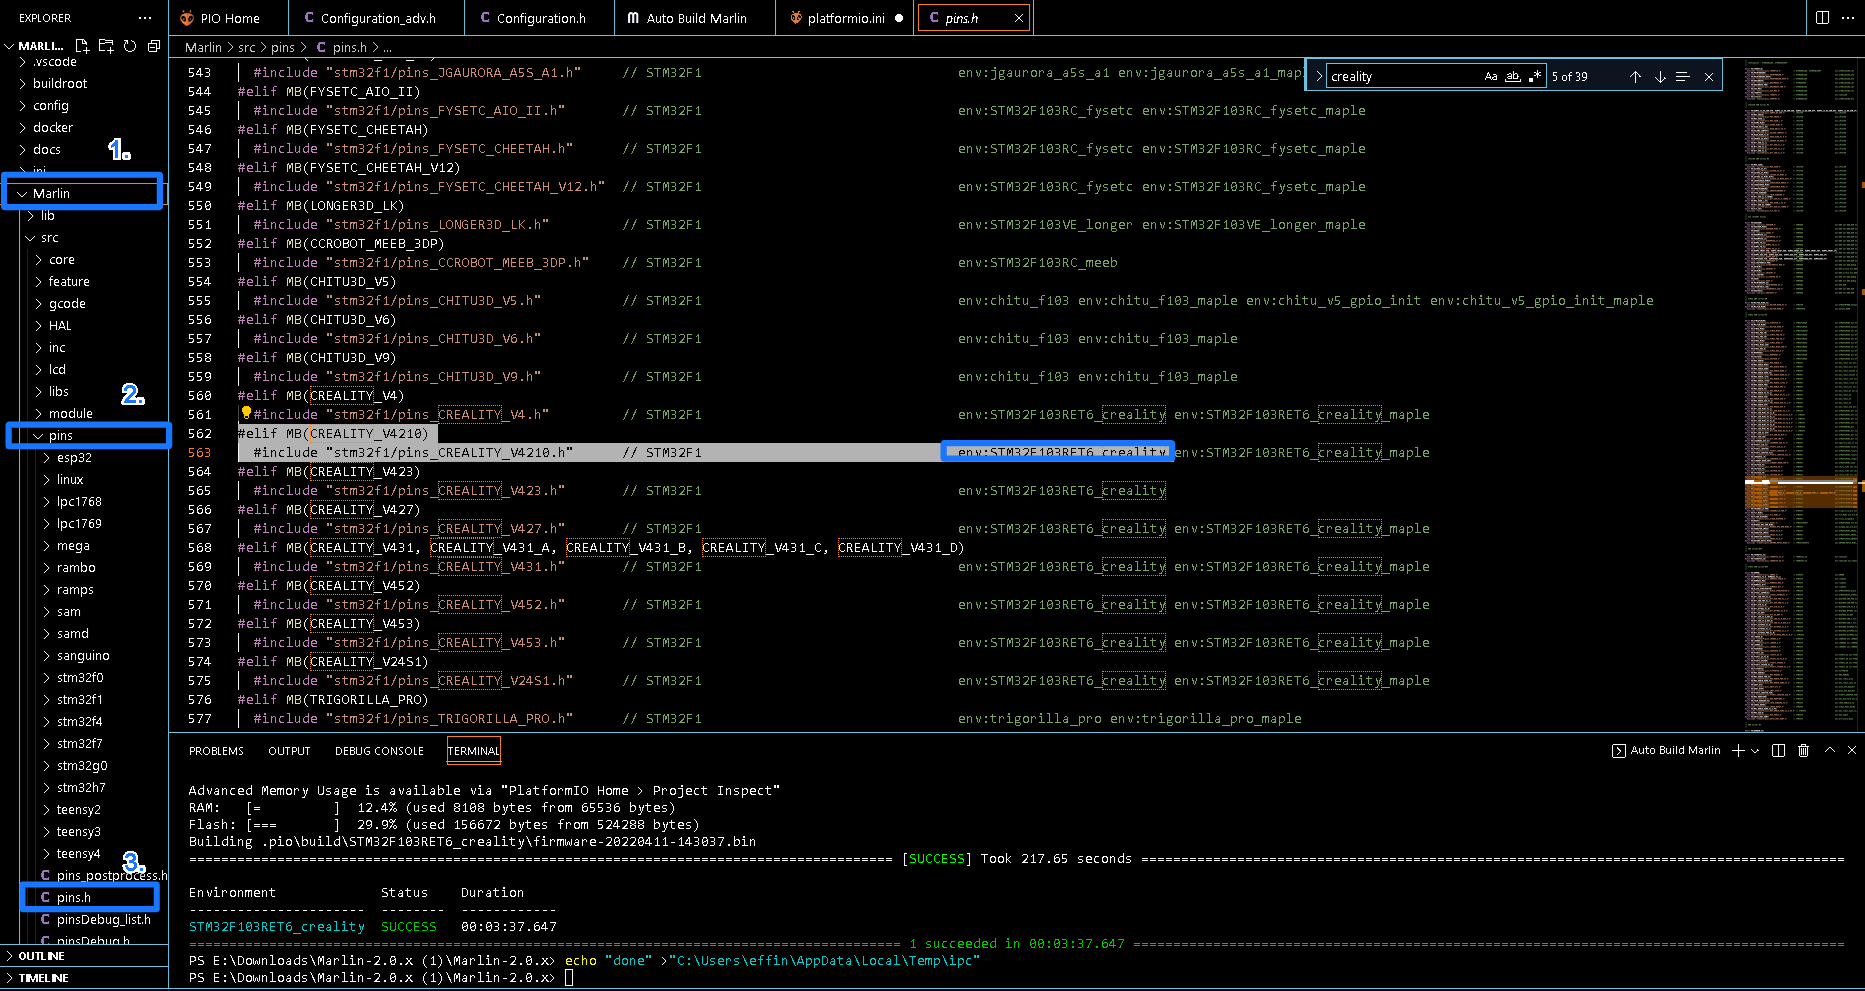
-
Select the Marlin folder. Select pins. Select pins.h
-
Type control-f and then search for your mainboard manufacturer and find the name of the mainboard on your printer. If you do not know which mainboard is equipped with your printer, reach out to the manufacturer and ask them which mainboard your printer has and which environment you need to use to recompile Marlin. For example, the creality ender 3V2 uses the Creality 4.2.2 mainboard but every printer is different.
-
Copy the environment corresponding to your board.
-
Replace the default_envs with the environment you found in the previous step.
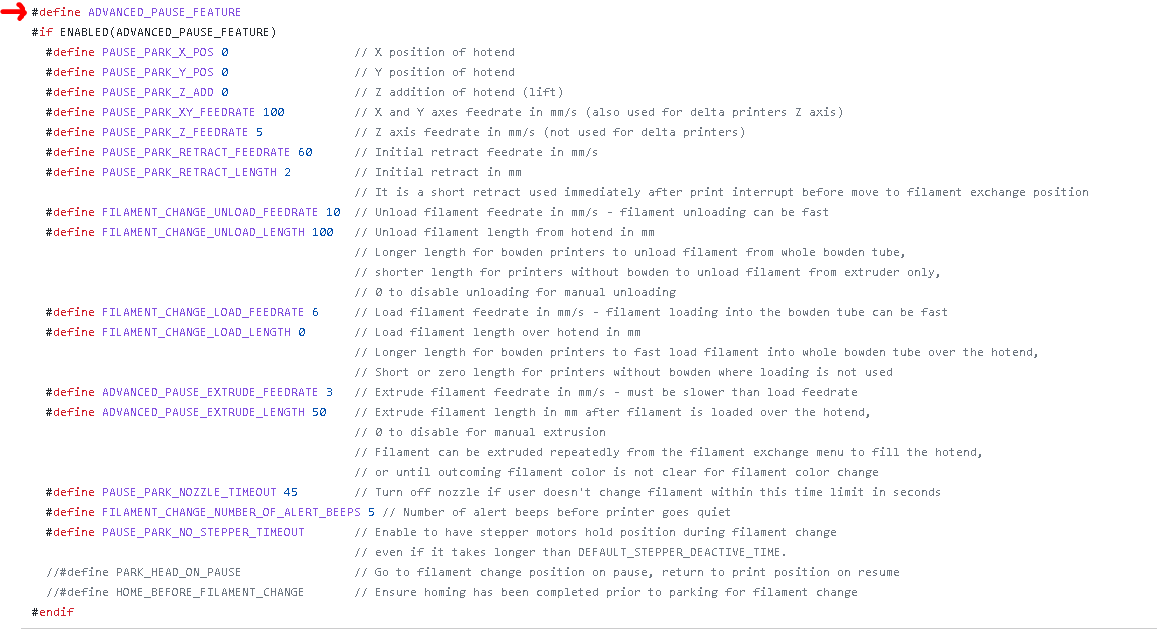
Step 4: Enable HOST_ACTION_COMMANDS and M600
- Click the home symbol on the bottom left of the screen to open Platform.io.
-
Click the Open Project button.
-
Find the unzipped Marlin folder and click Open
-
Click the Explorer button on the left side and edit the configuration_adv file in the Marlin folder.
-
To enable the M600 command, type control-f on your keyboard, and search for M600 to find where it is listed in the file.
-
Delete the two
/symbols in front of#define ADVANCED_PAUSE_FEATURE
-
To enable Host Action Commands Type control-f again and search for host action command. Scroll down until you see Host Action Commands
-
Delete the
/symbol in front of#define HOST_ACTION_COMMANDS
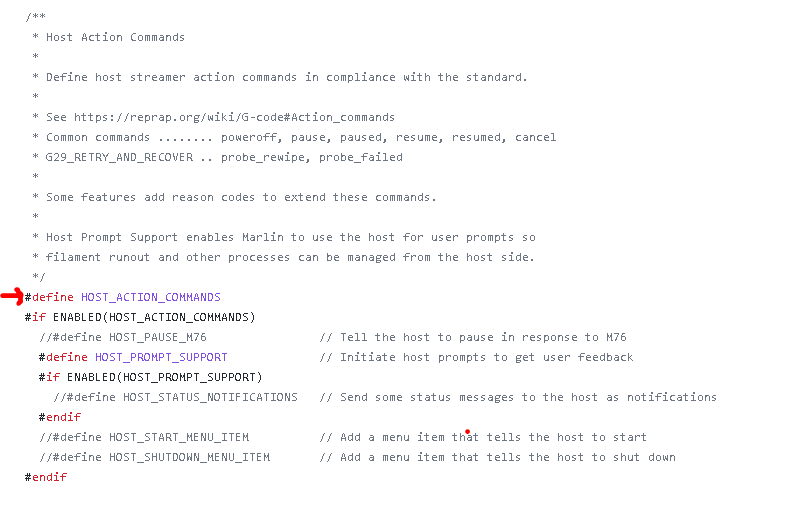
- Save the file
Step 5: Compile the firmware
- Hover over the build section on the top left side of the screen and you will see a hammer icon. Click this icon and click Build on the right to start building the firmware.
Be patient, compiling the firmware can take as long as ten minutes.
- At the end of the terminal, you should see a list of boards, with most of them saying Ignored, and your board listed as Success.
Step 6: Flash the new firmware
-
Go to the folder where you extracted Marlin, and under, ..pio\build\TheNameOfYourBoard. You should see a firmware.bin file. This is the file you will flash to your 3D printer.
-
As flashing the actual firmware varies from printer to printer, we will not cover this process, but google searching “How to flash [your printer’s name] firmware” should yield plenty of applicable tutorials.