Recompile the firmware to enable HOST_ACTION_COMMANDS for Creality Ender 3 V2, or Ender 3 V1 upgraded to a 32-bit mainboard
What you need
Thanks to the new mainboard on the Ender 3 V2, you won’t need much to update its firmware:
- A Micro SD card.
- A laptop or a desktop computer. Either Mac or Windows will work.
Step 1: Install required software
First, lets install all of the necessary programs. All of these programs have Mac and Windows versions available.
-
Install Python.
-
Install Microsoft Visual Studio Code and open it.
-
In VSCode, install the Auto Build Marlin extension.
-
Click the extensions button on the left side of VSCode and type ‘Auto Build Marlin’ and click to install it. Platform.io will also be installed at this time.
-
Close and reopen VSCode to ensure the extensions you just installed are active.
Step 2: Download the latest Marlin source code and configure it
-
Download Marlin. Most likely, you will want the latest version, which is 2.0.9.3 at this time. Make sure you download the both “Marlin-2.0.x.zip” and “Configurations-release-2.0.x.x.zip”.
-
After downloading, extract the zip file.
-
Find the configuration.h and configuration.adv files for your the Creality Ender 3V2.
If you don't have a Creality Ender 3V2, go to our general guide for 32 bit boards
-
In the examples folder, select Creality. then select Creality Ender 3V2. You will see
-
Copy and paste the files into the .\Marlin folder that is in the Marlin 2.xx folder that you unzipped in the previous step.
-
When prompted, choose to overwrite the two files that are already there.
Step 3: Set the correct Environment
- Click the home symbol on the bottom left of the screen to open Platform.io.
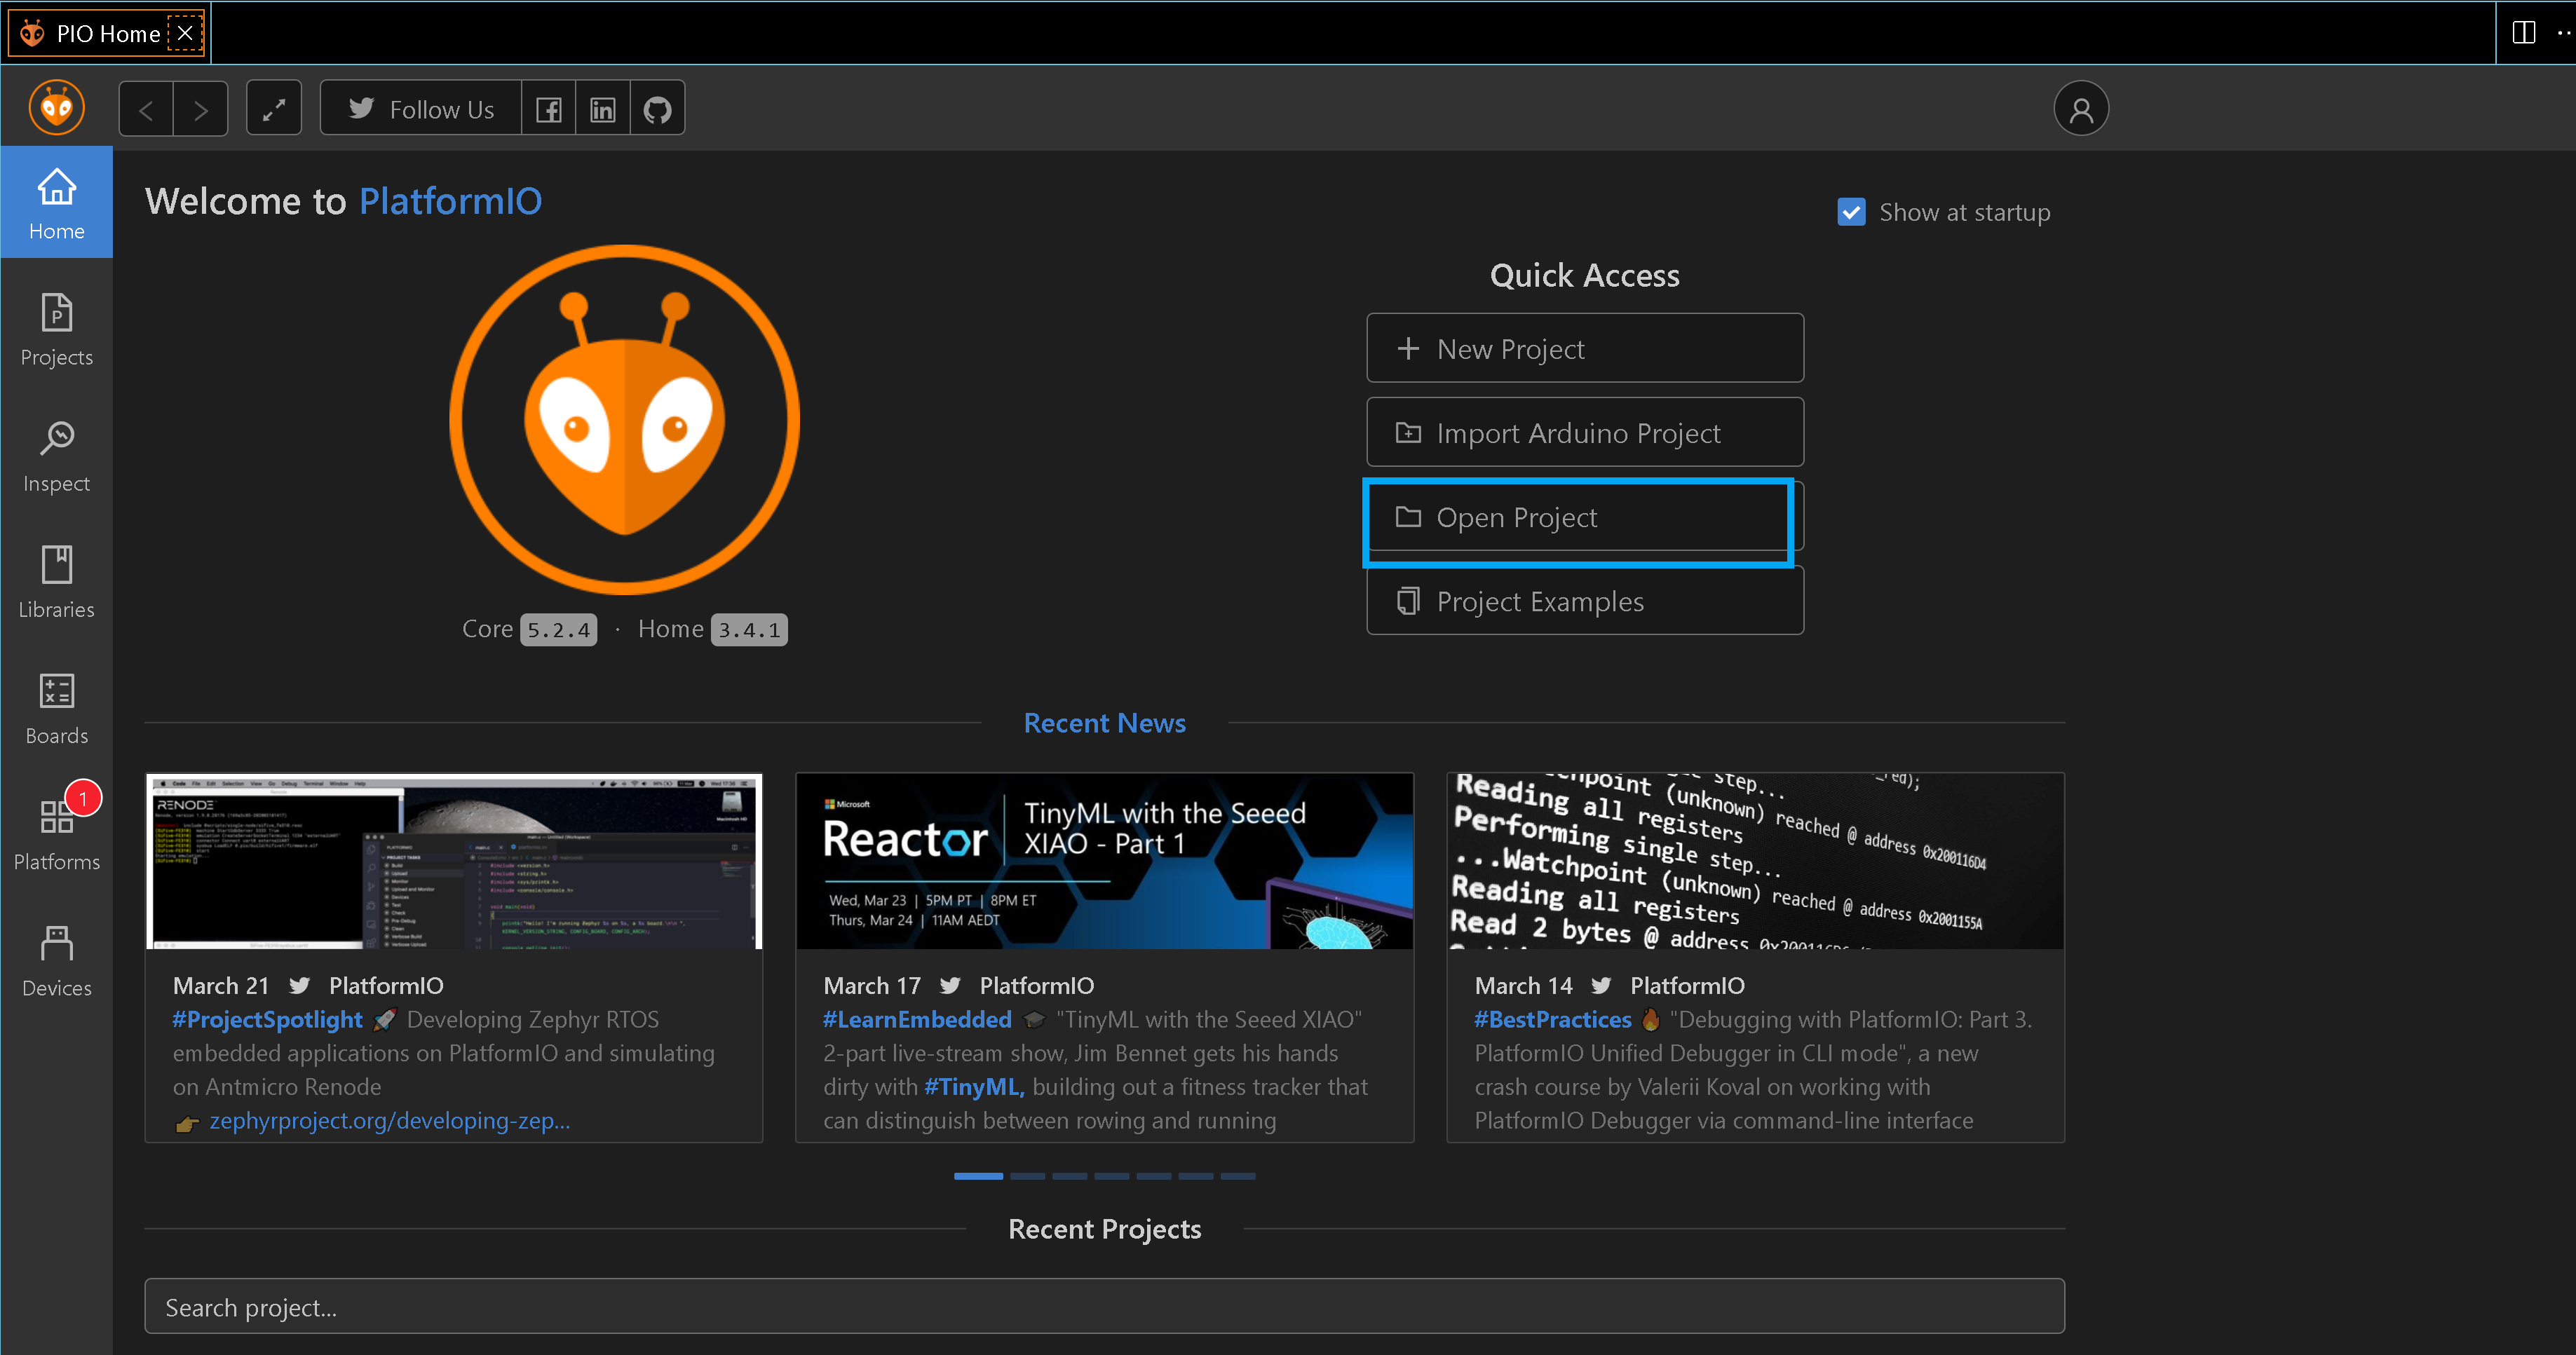
-
Click the Open Project button.
-
Find the unzipped Marlin folder and click Open
-
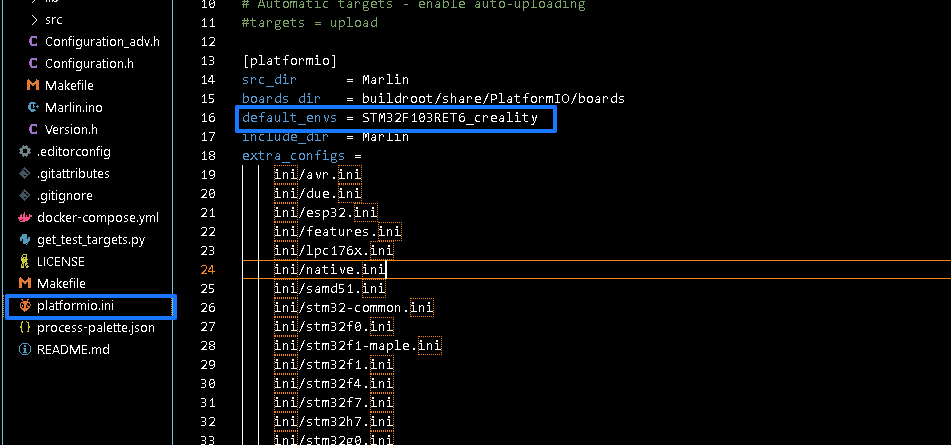
Click the Explorer button on the left side, and click the platform.ini menu
-
Navigate to the Marlin Folder on the left side of the screen.
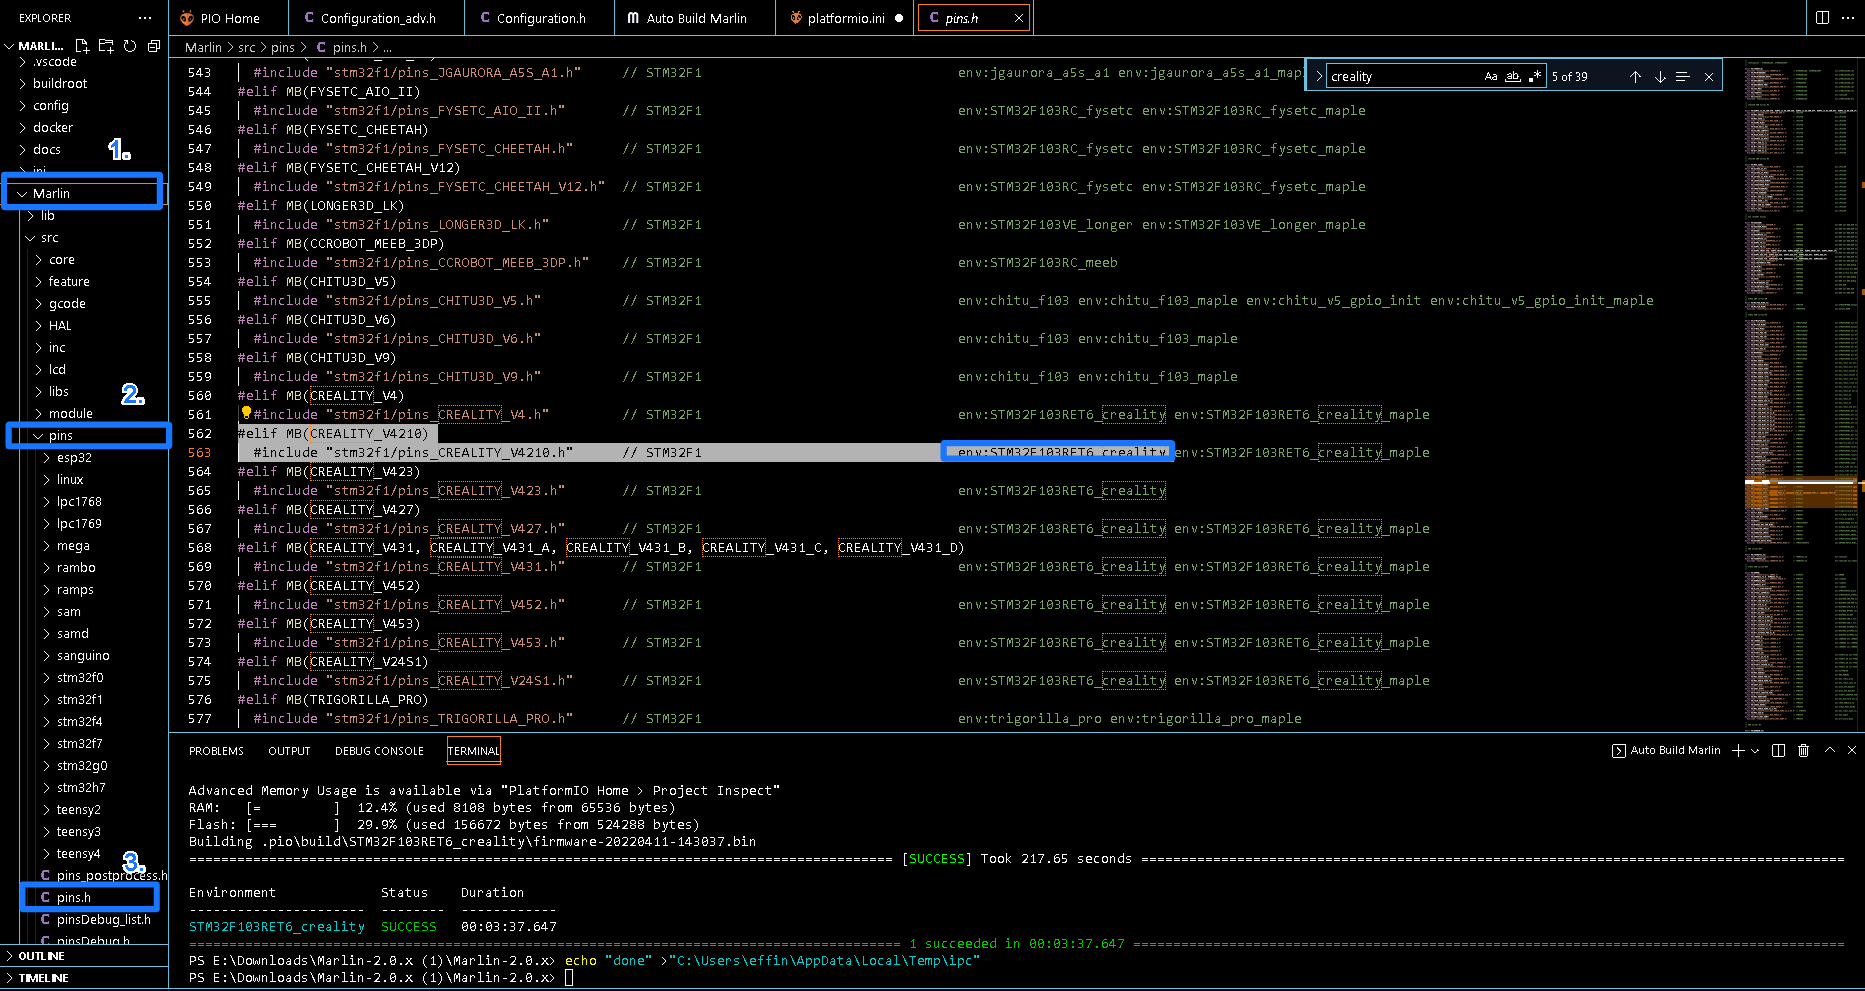
-
Select the Marlin folder. Select pins. Select pins.h
-
Type control-f and then search for your mainboard manufacturer. The Ender 3 V2 comes stock with a Creality 4.2.2 32-bit mainboard.
- Copy the environment corresponding to your board as shown.

- Replace the default_envs with the environment you found in the previous step. For the Creality Ender 3 V2 with the 4.2.2 32-bit mainboard, it the value is: default_envs = STM32F103RET6_creality
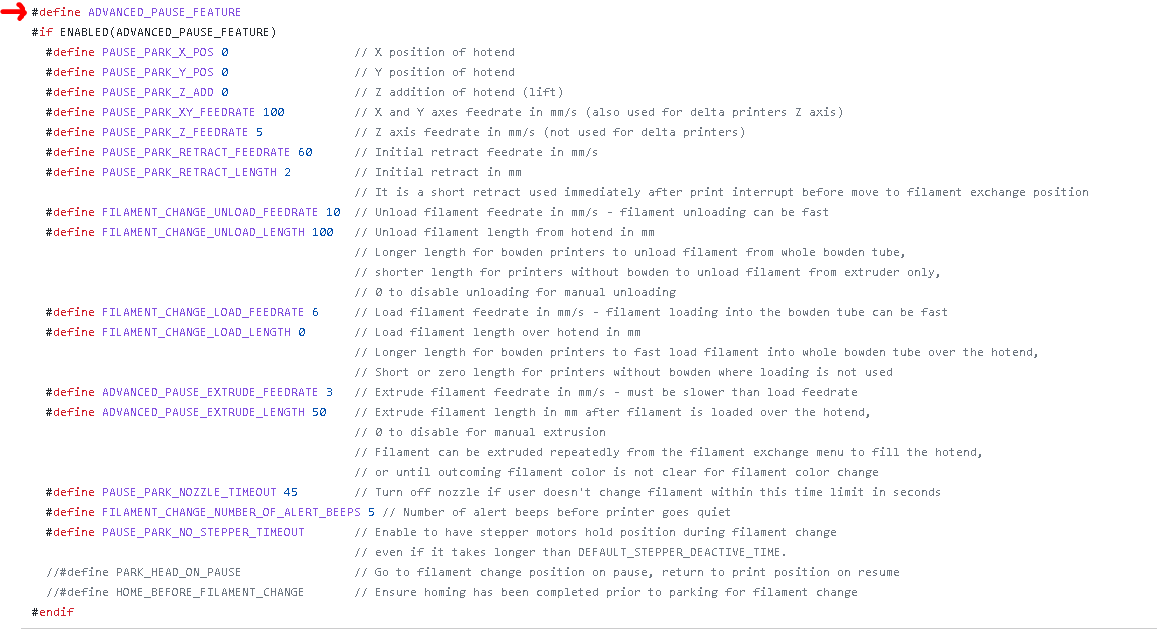
Step 4: Enable HOST_ACTION_COMMANDS and M600
-
Click the Explorer button on the left side and edit the configuration_adv file in the Marlin folder.
-
To enable the M600 command, type control-f on your keyboard, and search for M600 to find where it is listed in the file.
-
Delete the two
/symbols in front of#define ADVANCED_PAUSE_FEATURE
-
To enable Host Action Commands Type control-f again and search for host action command. Scroll down until you see Host Action Commands
-
Delete the
/symbol in front of#define HOST_ACTION_COMMANDSand any other necessary symbols so yours looks identical to the image shown below.
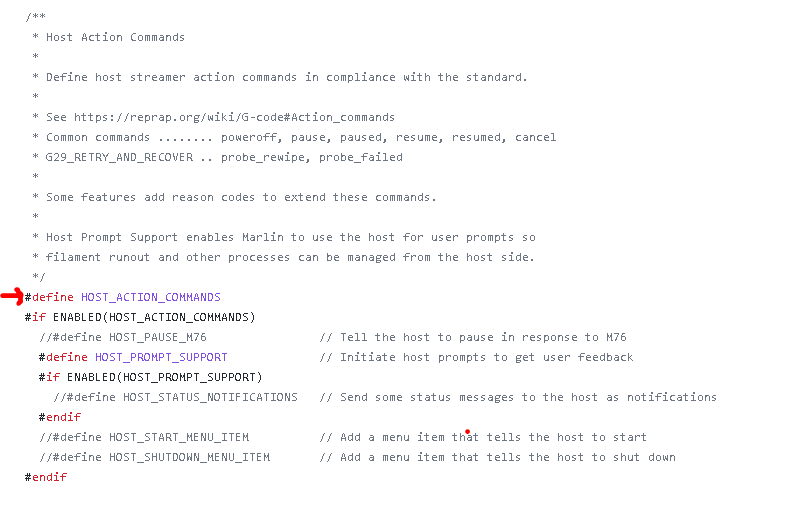
- Save the file
Step 5: Compile the firmware
- Click the Marlin icon on the left side of the screen and hover over the build section on the top left side of the screen and you will see a hammer icon. Click this icon and click Build on the right to start building the firmware.
Be patient, compiling the firmware can take as long as ten minutes.
- At the end of the terminal, you should see a list of boards, with most of them saying Ignored, and your board listed as "Success".
Step 6: Flash the new firmware
-
Go to your “Marlin-2.0.x” folder,
-
Go to the folder where you extracted Marlin, find and open the “.pio” folder.
-
Open the build folder and then open the folder with a name beginning with “STM32” (names might vary depending on the mainboard).
-
Find the most recent (by time) BIN file. You must change the name to a unique name other than "firmware.bin." For example, a suitable name would be "mfirmware.bin" Once you have changed the name, copy the .bin file.
-
Plug in your mainboard’s Micro SD card into your device.
-
Clear (delete or move) everything on it.
-
Save the BIN firmware file to the Micro SD card.