Orca Slicer Vs Cura: Head To Head
When starting your 3D printing journey, many people stick to the slicer that comes with their 3D printer. Whether you're a new user just getting started or an experienced maker weighing your options, the choice of slicer impacts your 3D printing experience and print quality.
Two popular options are Orca Slicer and Cura, both offer a unique solution to slicing and print management. In this blog you'll quickly learn which one to select for your needs.
Cura
Cura by Ultimaker is one of the older slicing software available to download. First released in 2014, it has been receiving updates for more than 10 years and remains open-source with many customization options.
Since it's been in the 3D printing community longer than Orca, it has many plug-ins and printer profiles. Cura is available on all platforms, including Linux and has a long history of stable and reliable printing.
Orca Slicer
Orca is a more recent slicer which is essentially a fork of Bambu Studio (Bambu Lab's slicer). Release in 2022, Orca has easily become one of the most popular 3D printing slicers, mainly because it brings Bambu Studio features to other printer brands like the Maker World.
Orca Slicer has some of the most advanced slicing features and is a beginner-friendly 3D printing slicer.
System Requirements
The system requirements for both slicers are minimal. Ultimaker Cura specifically is lightweight and both have similar requirements. The CPU and GPU usage largely depends on the size and complexity of the 3D model.
Ultimaker Cura requires
- 4 GB of RAM
- 550 MB of space
- Open GL 2 compatible graphics card
Orca Slicer requires
- 4 GB of RAM
- 500 MB of space
- Graphic compatibility with DirectX 11
These requirements are the minimum to run both slicers, but in reality you'd need higher processing power and graphics, for loading multiple prints and plates in the 3D viewer.
User Interface and User Experience
Cura UI and UX
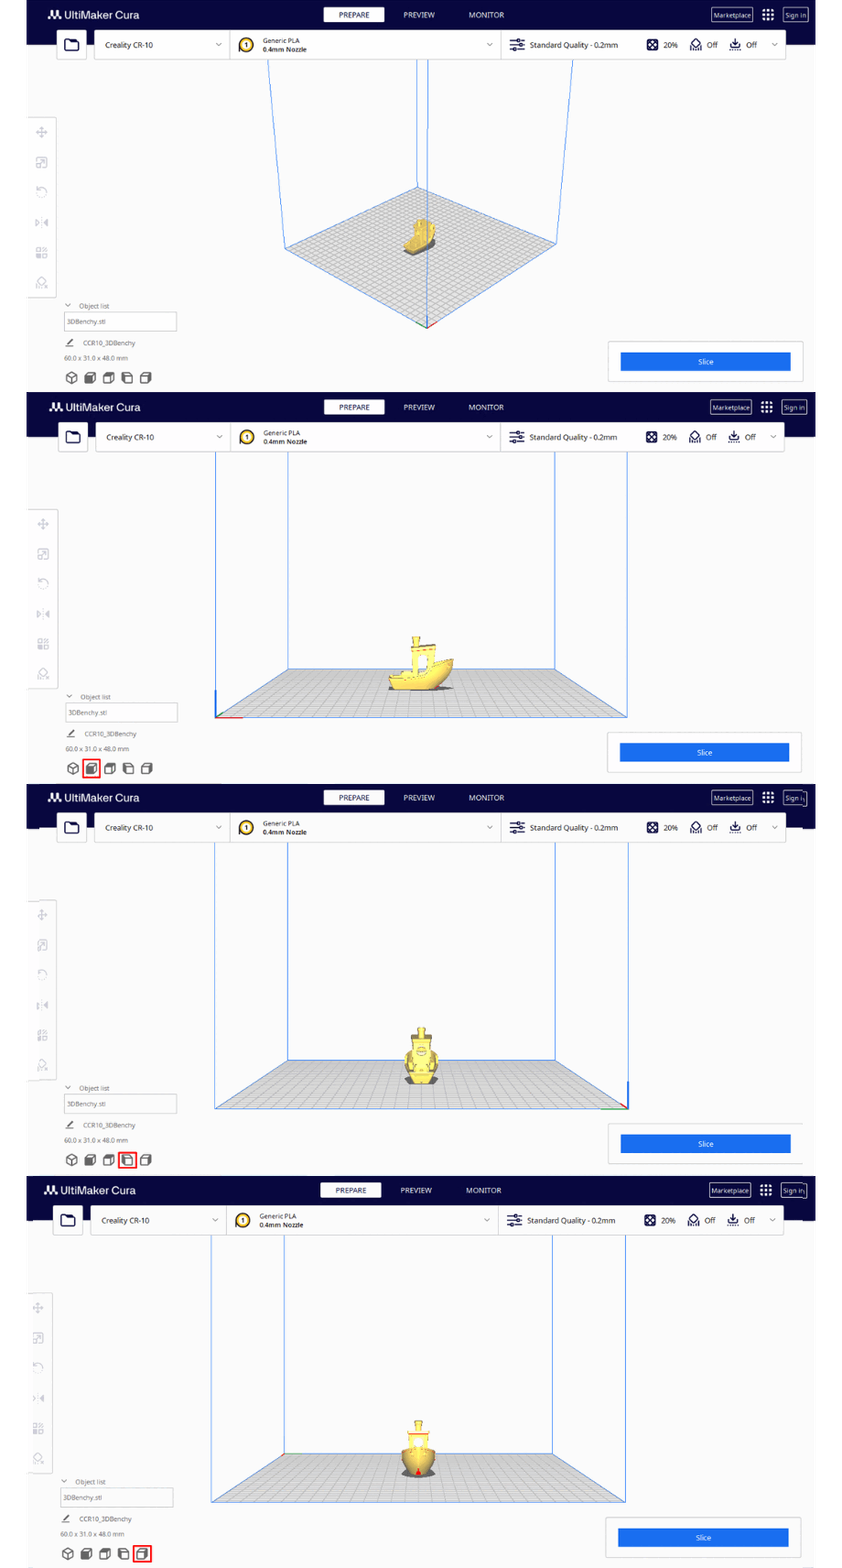
Cura has a very neat interface with most of the settings tucked away under drop-down menus. There's a main window with 3D viewer and print settings on top, and a preview window which shows the sliced layers before printing.
The main window has a sidebar to adjust position and orientation of your 3D model and different views that you can toggle at the bottom. In the sidebar you can also scale and mirror your model.
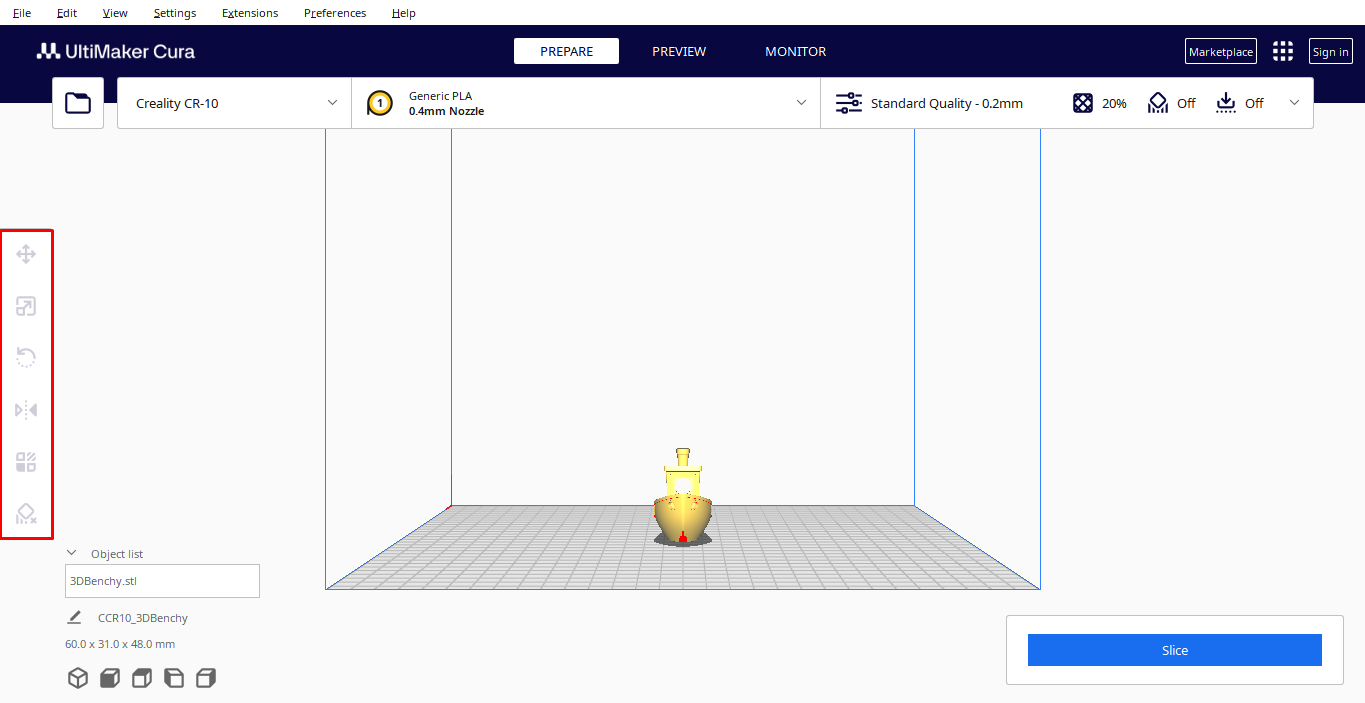
The sidebar menu becomes clickable and editable once you select your model, which prevents unnecessary misalignments and adjustments. This user experience alone is why many beginners prefer Ultimaker's Cura.
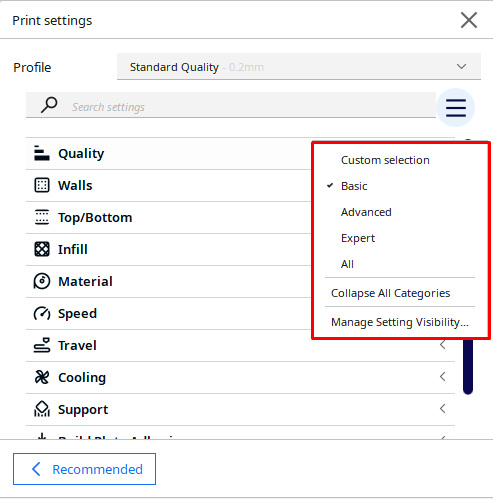
The print settings are clustered into four groups.
- Basic
- Advanced
- Expert
- All
Each profile unlocks or hides some features depending on the experience level of most users. For instance, mesh fixes, experimental, and special modes are only available when you select expert profile.
Cura also gives users control over setting up their own custom profiles which hide settings that are not used a lot.
Cura has one of the more unique user interfaces, which is unlike other 3D printing slicers, and if you're migrating from another slicer, it might take some time to adjust to the new layout. This is not the case with Orca Slicer, as it has a layout similar to Prusa and Bambu Studio.
Orca UI and UX
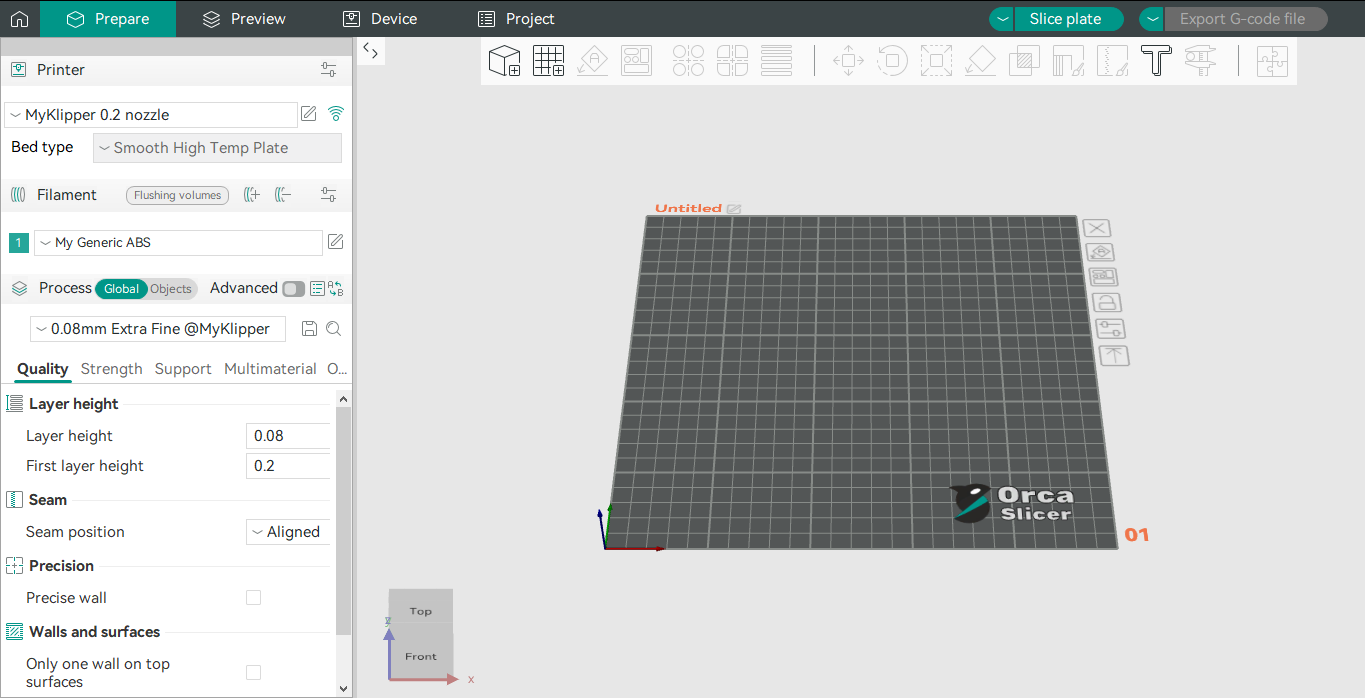
For people already using Bambu Studio or Prusa Slicer, Orca's UI might look familiar. This is because Orca is based on both of these slicers. The UI is intuitive and beginner friendly. It has a well-organized menu with easy navigation and settings, making the learning curve smaller.
Orca shows you many settings as soon as you open the slicer. There's part manipulation, orientation, text embossing, and instances button on top, and all the print related settings are in the sidebar.
You can adjust the layer height, change seam settings, and adjust the print around walls in these settings.
You can also use the advanced toggle switch to open more settings, but most people prefer Orca's automatic nature. This takes care of supports, orientation, height adjustments, and infills. Orca Slicer is more beginner friendly and the user experience is enhanced by its dark mode, tooltips, and visual previews.
Feature Comparison
Both Cura and Orca offer some of the newest features in 3D printing, like plug-in support, G-code previews, and model preview. However, Cura offers more control of advanced features.
Cura
Cura offers deeper settings for parameters that affect print quality. You can tap into a host of settings like cooling, plate adhesion, travel speed, wall settings, infill patterns, etc. Arguably, Orca also offers these settings but in Cura's menu, the travel alone has more than 20 adjustments, like 'retraction prime speed', 'retraction count', 'avoid support' and this gives more control to experienced users.
You can choose from 15 infill patterns and adjust even more infill settings like wipe distance and layer distance. Cura simply offers more flexibility in advanced options and even has a section for experimental adjustments.
Many other features have made Cura's community more than a million strong.
- Plug-in Support
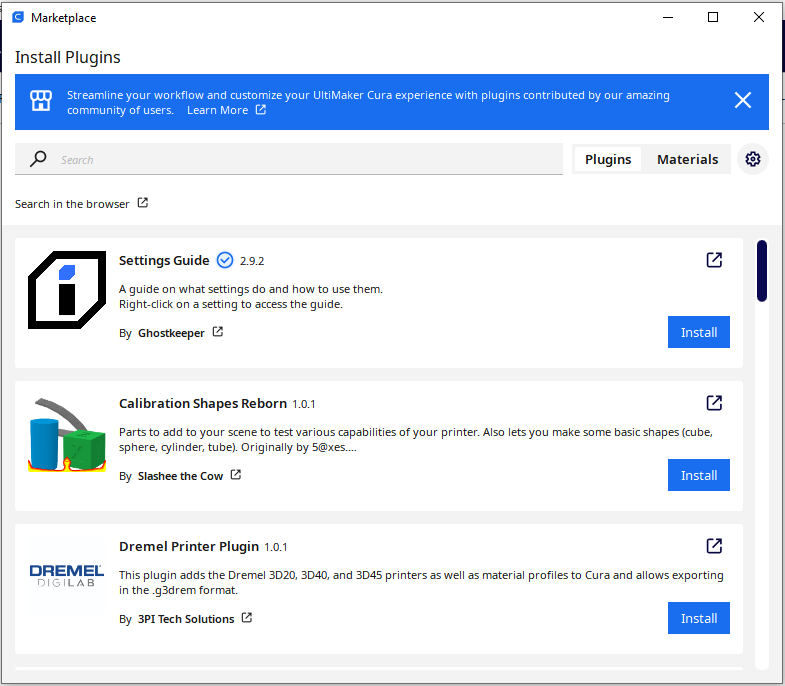
Cura has a marketplace for plugins by community and companies which help you expand your printing experience. There are different GUIs you can download and cloud integration plug-ins that prove useful.
- X-ray mode: Starting a 2-hour print and returning to a mid-way failure will have you questioning your entire 3D printer's reliability. Cura has come up with an X-ray mode that can detect mesh holes, overlapping faces and missing walls, potentially reducing failure.
- Thingiverse is Cura's marketplace for 3D designs. You can find user submitted designs of common objects and art.
- Cura comes with a library of material presets.
Orca Slicer
Orca slicer has most of the print settings on auto mode, but it also offers advanced features similar to Prusa and Bambu Studio.
- Calibration option in Orca works great with different filaments and materials. In 3D printing, many times you have to calibrate your printer when changing filament, which can require manual calibration. Orca's auto calibration works well with most materials with a single script.
- Auto bridge settings in Orca take care of most of the bridging and you can adjust the first bridge layer but not other layers. This is not ideal for fast prints, but most users prefer the auto control.
- Orca slicer has AI print failure detection for compatible printers. With Bambu Lab printers you can set up network printing and remote monitoring which saves material and costs in the long-run.
- Orca does support painting. You can paint over supports in Orca Slicer, which is extremely handy for complex models with mid-air features.
Comparing Slicing Engine Performance
Cura uses Arachne engine, which is better suited for walls and extrusion paths. While Orca inherits its engine from Bambu Studio, which prioritizes efficiency.
Layer Generation
Orca Slicer uses a variable layer height algorithm, allowing different parts of your 3D model to have variable layer height for efficiency. Cura, on the other hand, uses adaptive line width which adjusts extrusion width to optimize wall.
It is possible to manually select different layer heights for different regions of a model and generate an adjustment graph to tune transition with Orca Slicer.
Support Structure
Cura uses tree support, which has the advantage of saving material, and auto support generation, which produces great results, but offers lesser control. Orca Slicer has Prusa's paint on support feature, which is more practical and grid support, which is easier to remove in post-printing.
Infill Algorithm
Cura uses extrusion paths which have better transitions in infills and there's a fuzzy skin option for any textured elements in the model. Orca Slicer uses cubic infill, which has great strength and adaptive infill can moderate the infill density according to the model height.
Flow Rate
Orca Slicer has dynamic flow rate adjustment which comes in handy for bridging, overhangs, and tiny details in the print. This means the resulting print has fewer issues like over-extrusion and stringing.
Cura uses flow rate compensation. This is a static or an averaged response to the overall extrusion. It uses a correction factor in its algorithm to adjust the overall extrusion.
Arc Segmentation
OrcaSlicer has a more optimized G-code generation technique. Instead of G1 commands (curve approximation), it supports G2/G3 commands making smaller G-code files, reducing jitter and faster print speeds.
Cura does not have a native arc support. It uses a cluster of straight lines to approximate the path of a curve, resulting in more visible line segments on a 3D print.
Compatibility

Cura supports printer profiles for almost all printers on the market. You can even create your profile for a custom printer. On top of this, it has support for Marlin, Klipper, RepRap and other firmwares.
Cura has cross-platform compatibility and works with Mac, Windows, and Linux. In terms of material compatibility, you're only limited by your printer's capabilities. It has a never-ending list of filament profiles and the slicing engine offers detailed control over the model.
The one downside can be its tweaky support for AMS, but it works well with OctoPrint and Duet.
Orca Slicer primarily supports Bambu Lab printers and Prusa printers with support for third party manufacturers like Creality and other popular brands. It's optimized for Bambu Lab and Marlin based printers.
Orca is also available on Mac, Windows, and Linux. It has a wide variety of filament support but not as extensive as Cura. The slicing engine is optimized for fast prints and lightweight, efficient running while Cura is optimized for control.
Orca has limited support for 3rd party plug-ins and it works perfectly well with Bambu Lab's AMS system.
Which One Should You Choose?
The choice of 3D printing slicer can be concluded by looking at your printer. If you won a Bambu Lab or Prusa printer and require efficient, high-quality prints with no plans to add any other printer to your network, Orca Slicer is as good as possible.
For advanced users looking for more control and optimizing their quality down to the narrowest seams, Cura has the most extensive manual control over parameters for printing.
