Fixing Z Banding/Wobble: A Comprehensive Guide
Introduction
Imagine you've spent hours waiting for a 3D print to finish, only to find it has these unexpected and unwanted stripes or lines across it. This issue, known as Z banding, is a common headache in 3D printing. It's like when you're drawing a straight line but your ruler keeps slipping, leaving you with a jagged line instead of a smooth one. Z banding can make your 3D printed objects look striped instead of having a smooth, even surface.
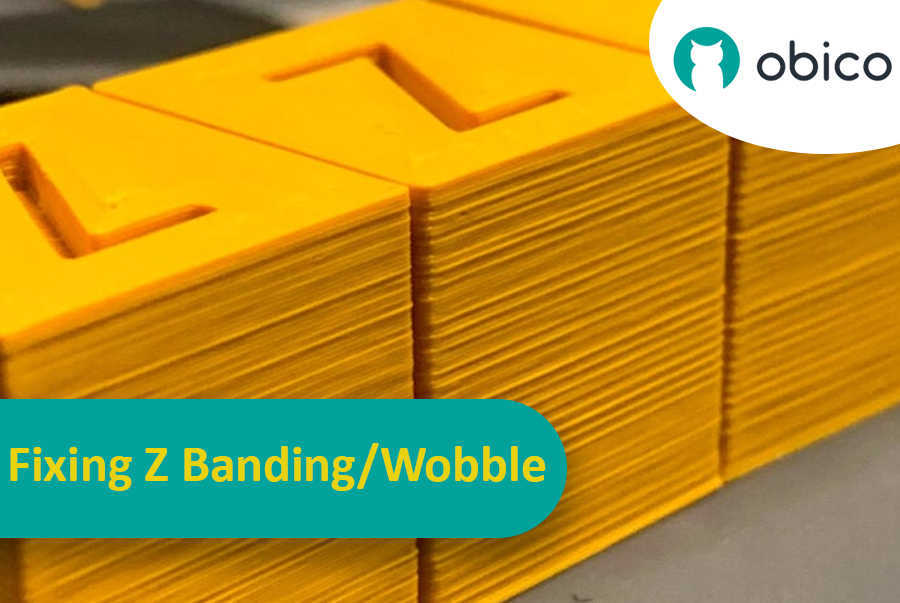
But why should we care about fixing this? Well, these lines are not just a cosmetic problem. They can make your 3D printed items weaker and less functional. Think of it like building a tower with blocks; if the blocks aren't lined up properly, the tower won't be as strong. That's why it's important for anyone using a 3D printer, whether you're a hobbyist or a professional, to understand how to tackle this issue. This guide is here to help you do just that, turning those frustrating lines into a thing of the past and helping you get the best results from your 3D printing projects.
Understanding Z Banding and Z Wobble
What is Z Banding?
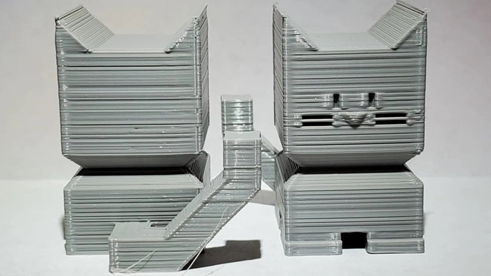
Imagine you're printing a 3D object, and you notice it has these horizontal lines or bands running across its surface. These lines make the surface feel rough and look like it's got ribs. That's what we call Z Banding. It's like when you're painting a wall, and instead of a smooth finish, you end up with streaks that show each brushstroke. In 3D printing, Z Banding happens when the layers of your print don't line up perfectly, creating those noticeable lines.
What is Z Wobble?
Now, think about why those lines might be showing up. One common reason is something called Z Wobble. This is more about the printer than the print. The Z-axis in your printer is what moves the printer head up and down. If this axis is a bit off-kilter – imagine a slightly wobbly ladder – the movement isn't going to be perfectly straight. This wobble can cause the layers of your print to be uneven, a bit like trying to stack plates on a slightly tilted table.
Differences Between Z Banding and Z Wobble
So, how do Z Banding and Z Wobble differ? Well, Z Banding is the issue you can see in your finished print – those annoying lines or bands. It's the outcome or the symptom of a problem. On the other hand, Z Wobble is more about the cause. It's a mechanical hiccup in your printer, specifically in the part that moves up and down (the Z-axis). When the Z-axis isn't moving smoothly, it can lead to those visible bands in your print.
Causes of Z Banding and Z Wobble
Mechanical Issues in Z-Axis
Imagine the Z-axis in your 3D printer like a precision elevator in a skyscraper. It's responsible for moving the print head up and down with pinpoint accuracy, laying down each layer of your design. But if something's off with this elevator, say it starts jerking or doesn't stop exactly at the floor it should, your print will have those same kinds of hiccups, resulting in those unwanted lines or Z Banding.
Stepper Motor Problems
The stepper motor in this context is like the motor of the elevator. If this motor starts acting up - maybe it's not running smoothly or has a bit of a stutter - then the elevator won't move as it should. It’s like trying to draw a straight line when your hand is trembling. The result? Your layers won’t line up perfectly, leaving you with uneven printing.
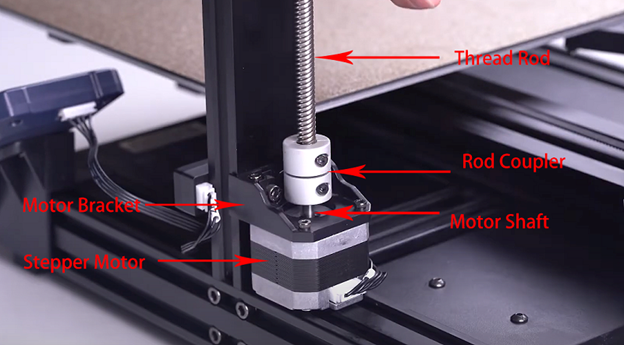
Lead Screw and Rod Coupler Defects
Next, think of the lead screw as the guide rails for the elevator. These rails are supposed to keep everything on track, moving straight up and down. But if these rails are even slightly bent or misshapen, your elevator – or in our case, the printer head – won’t move straight, leading to those uneven layers.
The rod coupler, on the other hand, is like the coupling that connects the elevator to its cables. If this coupling isn’t tight or aligned properly, the elevator might wobble or shake as it moves, adding to the unevenness and inaccuracies in your print.
So, in a nutshell, for a smooth 3D printing experience, it's crucial to ensure that your 'elevator' (the Z-axis) and all its components (the motor, guide rails, and coupling) are in perfect working order. This way, your printer can accurately layer your design, just like a smoothly running elevator gliding to the correct floor.
Extrusion Inconsistencies
When we talk about extrusion inconsistencies in 3D printing, think of it like a baker icing a cake. The icing needs to come out of the piping bag smoothly and consistently to make a perfect design. If the icing is lumpy or the flow is uneven, the design will be messy. That's similar to what happens when your 3D printer has trouble laying down the filament.
Clogged Nozzles
A clogged nozzle is like a piping bag with a blocked tip. Just as a baker can't get icing out smoothly if the tip is clogged, your printer can't lay down a smooth layer of filament if the nozzle is blocked. This can lead to gaps or blobs in your print, much like an unevenly iced cake.
Filament Quality and Feeding Issues
The quality of your filament and how it feeds into the printer is super important. Imagine you're using low-quality or tangled yarn for knitting. It’s going to be frustrating, with knots and uneven thickness affecting the final product. The same goes for 3D printing. If the filament is of poor quality or it’s not feeding into the printer correctly, your print is going to have all sorts of problems.
Temperature Fluctuations
Lastly, let's talk about temperature. Just like baking a cake at the right temperature is crucial, the temperature settings in 3D printing need to be just right. If the temperature is too high or too low, or if it keeps changing, it's like trying to bake a cake in an oven that can't maintain a steady temperature. You're going to end up with parts that are undercooked or burnt, and in 3D printing, this means parts of your print might be too soft or too hard.
Diagnosing Z Banding and Z Wobble
Identifying Z Wobble Sources
Picture yourself as a detective trying to solve a mystery, but in this case, the mystery is why your 3D print isn't coming out perfectly smooth. To crack the case of Z Wobble, you need to look at the usual suspects – the components of your printer's Z-axis. It’s like checking the wheels and suspension of a car when it doesn’t drive straight.
Check the Stepper Motor: Is it moving smoothly, or does it have a stutter? A motor glitch can throw off the entire movement.
Examine the Lead Screw: Think of this as the backbone of the Z-axis. If it's bent or warped, your prints will show those wobbles as irregular layers.
Inspect the Rod Coupler: This is the piece that connects the motor to the lead screw. If it’s loose or off-kilter, it's like having a loose hinge on a door – things won't move as they should.
Recognizing Extrusion-Related Issues
Now, shift your focus to extrusion - this is about how the printer lays down the filament. It's like a baker squeezing icing out of a nozzle. If the flow isn't just right, the cake design won’t look good.
Check for Clogged Nozzles: A clogged nozzle is like a blocked icing tip – it disrupts the flow, leaving you with an uneven print.
Assess Filament Quality: Poor-quality filament can lead to all sorts of printing issues. It’s like using low-grade ingredients in a recipe – the end product won’t be up to par.
Monitor Temperature Settings: Consistent temperature is key. Fluctuations can mess with how the filament melts and sets, much like an oven that can’t maintain the right baking temperature.
Solutions to Fix Z Banding and Z Wobble
Fixing Z Wobble
Fixing Z Wobble involves a few key steps, each targeting a specific component of your 3D printer.
Securing and Replacing Stepper Motor: The stepper motor is crucial for accurate movement. If it’s not firmly secured, or if it's malfunctioning, it can lead to uneven layering. Tightening its screws might do the trick. However, if the motor is damaged or worn out, replacing it will get things back on track.
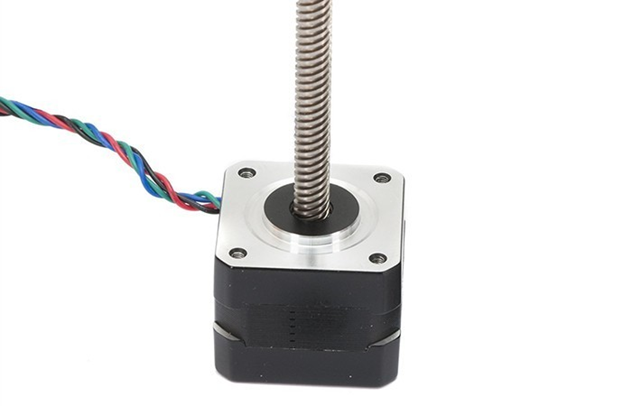
Aligning and Replacing Lead Screw: The lead screw guides the printer head's vertical movement. A misaligned or bent lead screw disrupts this motion, causing banding. It's important to ensure the lead screw is perfectly straight. If it's bent, a new lead screw is necessary for that smooth vertical motion.
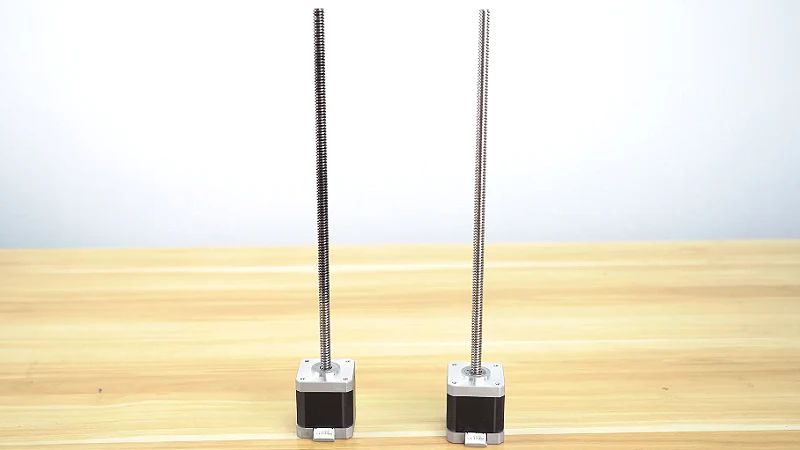
Tightening Rod Couplers: The rod couplers connect different parts of the printer’s movement system. Loose couplers can introduce unwanted movement or wobble. Tightening these couplers ensures a more stable and controlled motion, which is essential for consistent printing quality.
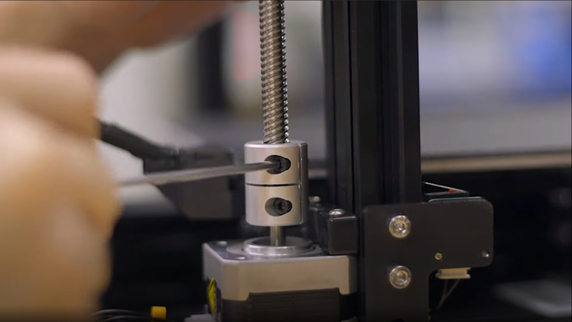
By addressing these components - the motor, lead screw, and rod couplers - you can effectively reduce or eliminate Z Wobble. This results in cleaner, more precise prints without the unwanted banding.
Addressing Extrusion Problems
To fix issues with extrusion, which can lead to Z Banding, it's important to focus on three key areas: the nozzles, the printing temperature, and the filament quality.
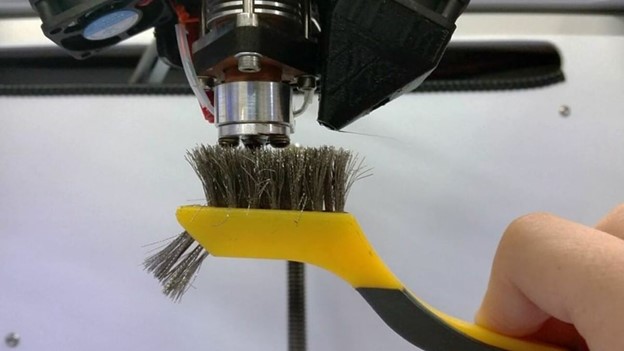
Cleaning and Replacing Nozzles: The nozzle of your 3D printer is where the filament comes out, much like the tip of a pen. If it gets clogged, your prints will be inconsistent. Regularly cleaning the nozzle can prevent this. Think of it as clearing a blockage in a pen tip or a garden hose. If cleaning doesn't work and the nozzle is too clogged or worn out, replacing it is like getting a brand new pen – it can make a world of difference to your printing.
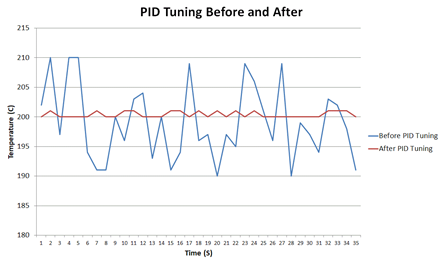
Stabilizing Printing Temperature: The temperature at which your printer operates is like the heat in an oven when baking. If it's too hot or too cold, or if it keeps changing, your prints won't come out right. Keeping the temperature stable and consistent is key. This might involve adjusting your printer settings or making sure your printing environment isn't too cold or drafty.
Choosing High-Quality Filament: Finally, the quality of filament you use is crucial. Using low-quality filament is like using cheap, watery paint – it won't give you the results you want. High-quality filament ensures smooth extrusion and consistent results. It's worth investing in good filament to avoid issues like uneven layers and poor adhesion.
Preventive Measures and Regular Maintenance
Maintaining a 3D printer is similar to taking care of a car – regular checks and tune-ups are key to ensuring everything runs smoothly.
Routine Checks and Calibration
Regularly inspecting your printer is like a regular health check-up. It's about catching any potential issues before they become big problems. This involves checking all the moving parts, ensuring they’re aligned, and calibrating your printer for accuracy. Calibration is like making sure your scales are correctly balanced – it ensures that your prints come out just as you intended, both in size and detail.
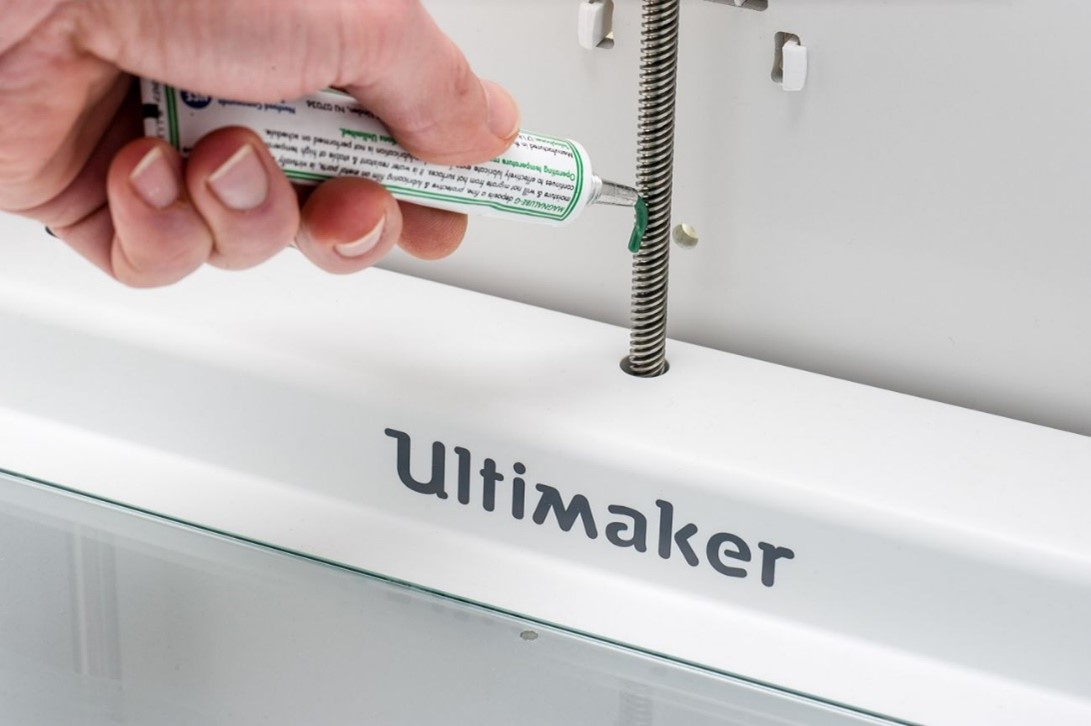
Importance of Regular Lubrication
Think of lubrication as the oil in your car's engine. Just as oil keeps the engine running smoothly, regular lubrication of your printer's moving parts prevents wear and tear. It keeps everything moving effortlessly and quietly, reducing the risk of mechanical failures. A well-lubricated printer is less prone to issues like Z Wobble and ensures longevity of the parts.
Maintaining Consistent Temperatures
Keeping a stable temperature during printing is like baking a cake at a steady heat. If the temperature fluctuates too much, it can affect the quality of your prints – much like how an uneven oven temperature can ruin a cake. This is particularly important in environments that are either too cold or too hot. Consistent temperature control helps in achieving uniform extrusion and adhering to the print bed properly.
Conclusion
To sum up, tackling Z Banding and Z Wobble in 3D printing is all about understanding your printer's mechanics and maintaining its optimal condition. By identifying and addressing issues related to the Z-axis alignment, extrusion inconsistencies, and ensuring regular maintenance like calibration and lubrication, you can significantly improve the quality of your prints. Regular check-ups and using quality materials are key to smooth, problem-free 3D printing. Remember, a little attention and care for your printer can lead to consistently great results in your 3D printing endeavors.