Passa al contenuto principale

JusPrin 2

The AI slicer that helps you get better prints Out now

JusPrin 2, the AI slicer

55 post etichettati con "3D Printing"

Guarda tutte le etichette

Introduction​

3D printing is a fast-moving field, with new developments constantly pushing the boundaries of what is possible. One such development is the partnership between Obico and BigTreeTech (BTT), which brings Obico's advanced AI capabilities within reach of 3D printer enthusiasts through the BTT Pi 2.

Installing and configuring Klipper on BTT Pi 2 with Obico AI Integration

This guide gives complete step-by-step instructions on how to install Klipper onto your BTT Pi 2 and then integrate Obico AI onto it. It includes detailed instructions for setting up an Ender 3 V2 3D printer as an example. Additionally, we will provide guidance on configuring other printer models to ensure all users can benefit from this setup. Whether you're a novice or an experienced user, this guide aims to simplify the process and enhance your 3D printing experience.

Introduzione​

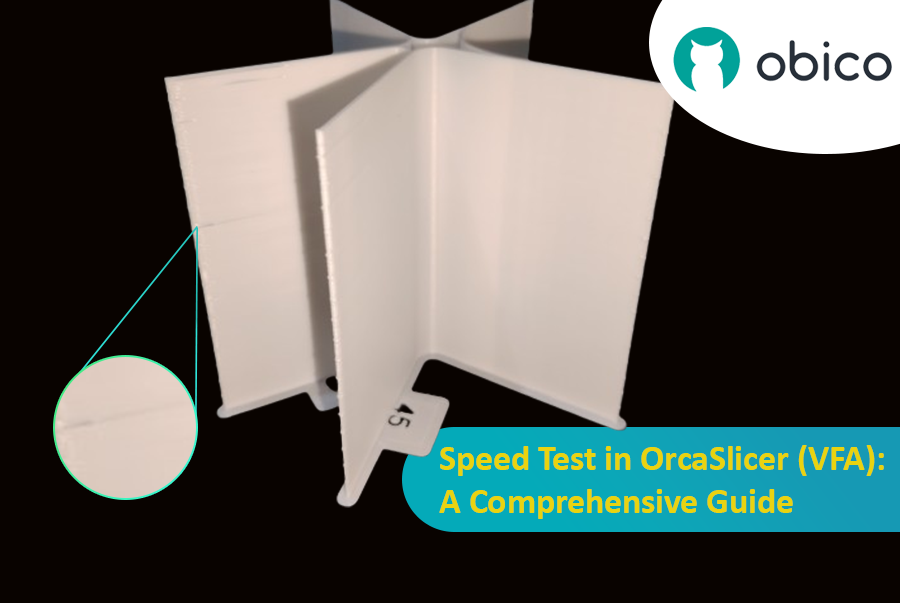
La stampa 3D è una tecnologia straordinaria che trasforma i progetti in oggetti reali, ma individuare la velocità di stampa ottimale può essere complicato. Se si procede troppo velocemente, la qualità potrebbe essere compromessa; se si procede troppo lentamente, il processo potrebbe richiedere un'eternità.

Test di velocità in OrcaSlicer (VFA): una guida completa

In questa guida ti mostreremo come usare OrcaSlicer per determinare la velocità di stampa perfetta per la tua stampante 3D. Al termine, saprai come ottenere stampe eccellenti in tempi rapidi, mantenendo una buona qualità.

Cominciamo!

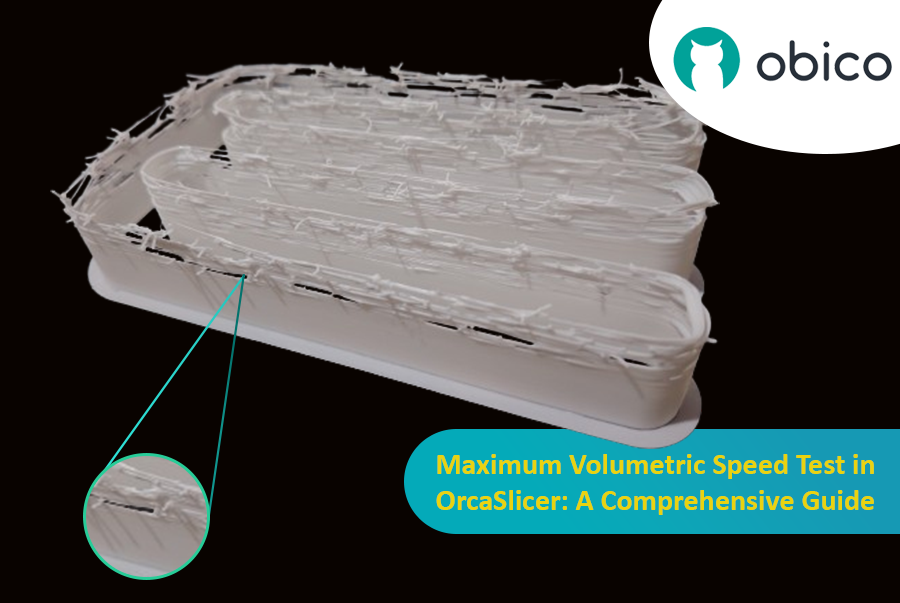
Hello there! Welcome to our easy-to-understand guide on how to control the OrcaSlicer maximum volumetric speed test for 3D printing enthusiasts. If you’re looking forward to enhancing print quality and efficiency, then this is the best place for you. This tutorial will help you optimize your printer’s volumetric speed that determines at what speed you can print without compromising on quality.

Maximum Volumetric Speed Test in OrcaSlicer: A Comprehensive Guide

Volumetric speed knowledge is crucial in 3D printing because it enables one understand how fast a printer can produce objects with accuracy. If this speed is tested and adjusted, under extrusion among other common problems while printing can be avoided thus ensuring that all your prints are good-looking even at higher speeds.

Introduction​

3D printing has revolutionized the way creators, engineers, and hobbyists bring their ideas to life. However, the transition from a digital model to a tangible object isn’t always straightforward. One key challenge is ensuring parts fit together seamlessly. In this comprehensive guide, we’ll delve into the world of tolerance testing using OrcaSlicer, a valuable tool for 3D printing. We will understand together how to know the right tolerances value to design successful prints which fit together well.
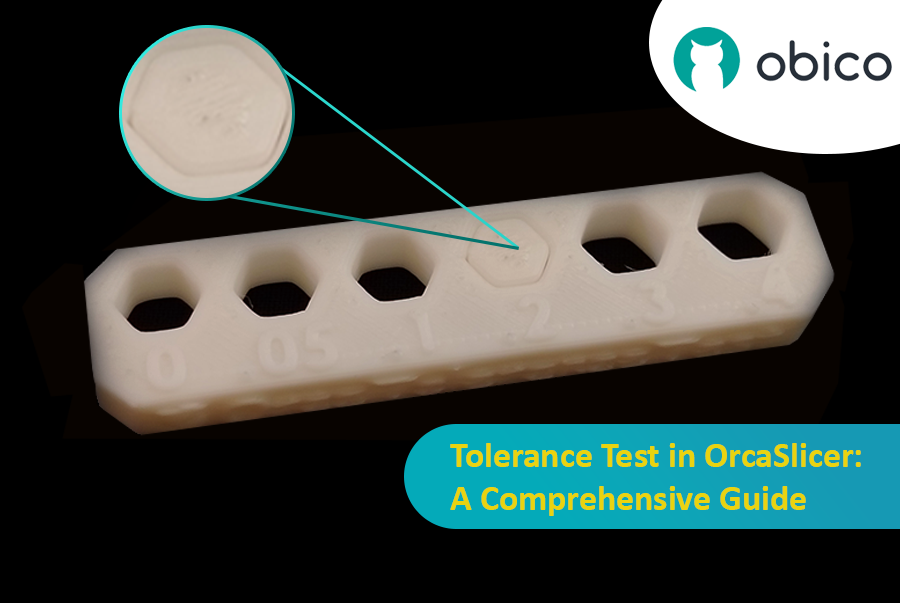
Tolerance Test in OrcaSlicer: A Comprehensive Guide

But before we get started testing our 3D printer, let’s understand some important related topics.

The Importance of Tolerance in 3D Printing​

In the world of 3D printing, tolerance is all about precision. It's the measure of how accurately a 3D printer can replicate the dimensions specified in your digital design. Imagine you're creating a puzzle; if the pieces are too big or too small, they won't fit together. Similarly, for 3D printed parts to function and fit together as intended, the printer must be able to accurately produce parts within very tight dimensional limits. Good tolerance affects everything from how smoothly moving parts interact to the overall look and strength of the finished product.

But why do you need to make the tolerance test?

Well, in 3D printing things do not always go right. Every filament type has its own shrinkage coefficient and this affects how your print turns out. Different printers, with their unique mechanics and settings, can also produce varied results. That's why testing for tolerance is crucial - it helps you understand how your specific printer and chosen filament behave together, allowing you to adjust the tolerances in your design for the perfect print.

suggerimento

Try JusPrin, the first GenAI 3D printing tool built on OrcaSlicer.

Panoramica di Pressure Advance​

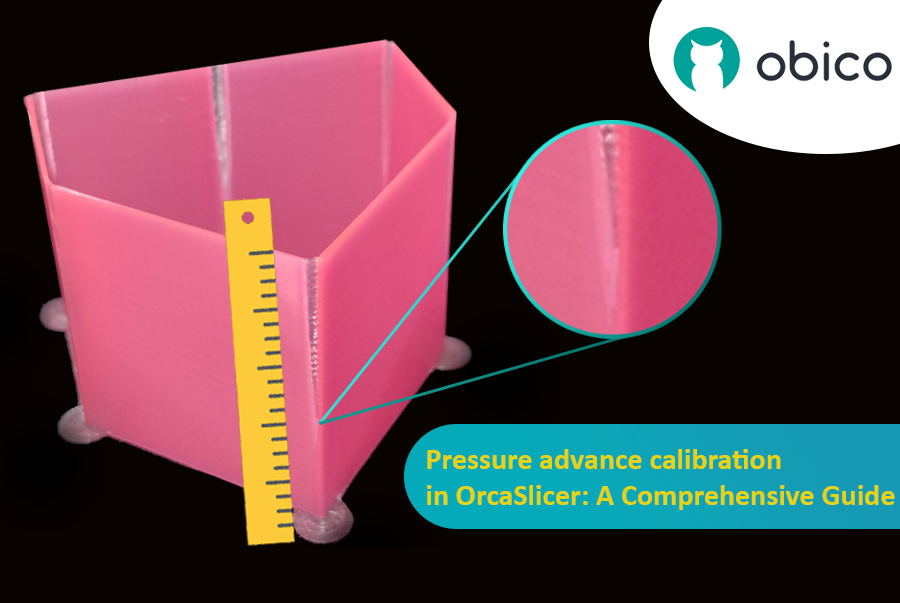
Immagina di disegnare con una penna che a volte perde troppo inchiostro e altre volte pochissimo. Nella stampa 3D, qualcosa di simile potrebbe accadere quando la stampante si muove velocemente e cambia la sua velocità: può compromettere la quantità di plastica estratta.

Calibrazione dell'anticipo di pressione in OrcaSlicer: una guida completa

Ma perché a volte la stampante non calcola correttamente la quantità di plastica che esce?

In una stampante 3D, il filamento fuoriesce in base alla pressione presente all'interno dell'ugello. È come un tubo da giardino: serve una pressione idrica sufficiente prima che l'acqua fuoriesca. Quando la stampante accelera o rallenta, ad esempio in curva, ci vuole un po' prima che la pressione dell'ugello si adatti. Se la stampante si muove troppo velocemente e troppo presto, non esce abbastanza filamento. E se rallenta troppo velocemente, ne esce troppo. Questo può rendere gli angoli della stampa un po' disordinati perché la stampante non ha regolato correttamente il flusso del filamento in base alle variazioni di velocità.

Ed è qui che entra in gioco Pressure Advance. È una funzione intelligente che compensa queste variazioni, garantendo che venga estrusa la giusta quantità di filamento quando la stampante accelera o rallenta. Con Pressure Advance, la stampante può gestire meglio le transizioni di velocità, ottenendo stampe più fluide e nitide, soprattutto negli angoli più difficili.

Introduzione​

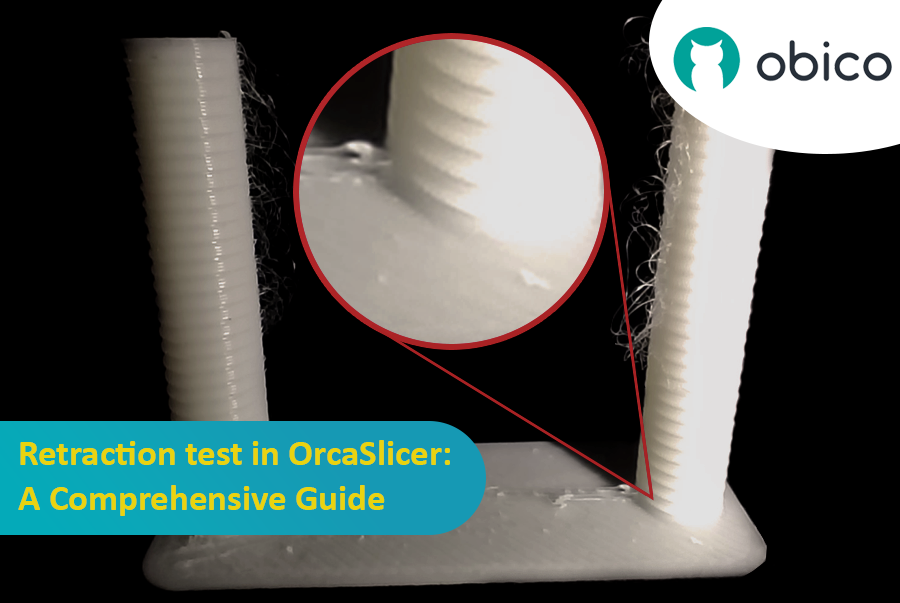
La stampa 3D è una tecnologia affascinante che permette di creare praticamente qualsiasi cosa si possa immaginare. Tuttavia, presenta anche alcune sfide e limitazioni, come la qualità dei pezzi stampati. Uno dei problemi più comuni che influiscono sull'aspetto e sulla funzionalità delle stampe 3D è la presenza di residui di materiale indesiderati, come fili, macchie e brufoli.

Test di retrazione in OrcaSlicer: una guida completa

Fortunatamente, esiste un modo per ridurre o eliminare questi artefatti utilizzando una funzionalità chiamata retrazione. Ma cosa significa retrazione?

Analizziamolo nel dettaglio:

Che cosa sono la retrazione e il test di retrazione?​

Il test di retrazione è una procedura di calibrazione che mira a ridurre o eliminare i problemi di filamento e trasudamento che possono verificarsi durante la stampa 3D. Filamenti e trasudamenti sono causati dal materiale in eccesso che fuoriesce dall'ugello quando l'hotend si sposta da una parte all'altra del modello senza estrudere. Ciò si traduce in filamenti o grumi indesiderati sulla superficie o tra le parti del modello, compromettendo la qualità e l'aspetto della stampa.

suggerimento

Try JusPrin, the first GenAI 3D printing tool built on OrcaSlicer.

Introduzione al test della torre di temperatura con OrcaSlicer​

La stampa 3D è una tecnologia affascinante che permette di creare oggetti fisici a partire da modelli digitali. Tuttavia, per ottenere i migliori risultati, è necessario ottimizzare le impostazioni della stampante e i parametri del filamento. Uno dei fattori più importanti che influenzano la qualità delle stampe è la temperatura.

La temperatura influisce sulla fusione, la fluidità e l'adesione del filamento agli strati precedenti. Se la temperatura è troppo bassa, il filamento potrebbe non essere estruso correttamente, causando sottoestrusione, scarsa adesione e parti deboli. Se la temperatura è troppo alta, il filamento potrebbe trasudare, formare filamenti o deformarsi, causando sovraestrusione, formazione di grumi e deformazioni.

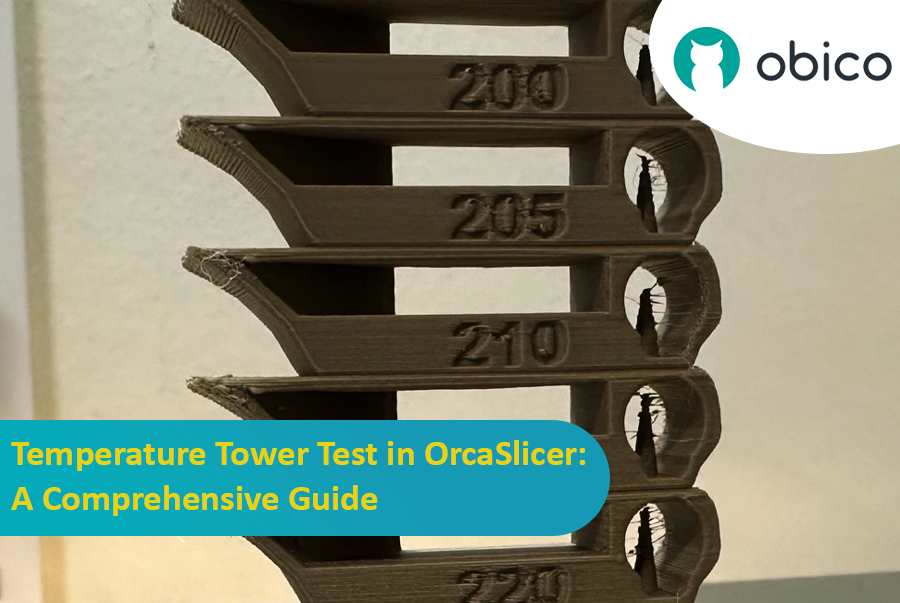
Test della torre di temperatura in OrcaSlicer: una guida completa

Per individuare la temperatura ottimale per il filamento, è necessario eseguire un test della torre di temperatura.

suggerimento

Try JusPrin, the first GenAI 3D printing tool built on OrcaSlicer.

Introduzione​

La calibrazione della portata è un passaggio fondamentale per ottenere stampe 3D di alta qualità. Una portata adeguata garantisce una deposizione uniforme degli strati, superfici più lisce e dettagli migliori. In questo articolo, che fa parte di una serie dedicata alla calibrazione di OrcaSlicer, esploreremo il processo di calibrazione della portata utilizzando OrcaSlicer, un software di slicer open source progettato per le stampanti 3D FDM (Fused Deposition Modeling).

Calibrazione della portata in OrcaSlicer: una guida completa

Prima di approfondire il processo di calibrazione della portata in OrcaSlicer, fermiamoci brevemente a capire di cosa si tratta e quali sono le sue caratteristiche principali.

OrcaSlicer: un'opzione potente e flessibile per lo slicing della stampa 3D​

OrcaSlicer è un software open-source per la creazione di slicer per la stampa 3D, progettato per stampanti FDM. È progettato principalmente per stampanti compatibili con i firmware Marlin, Klipper e Bambu Lab. Supporta diversi modelli popolari di marchi come Creality, Prusa, Elegoo e persino la Voron open-source.

Albero genealogico di OrcaSlicer:​

OrcaSlicer si basa su Bambu Studio, che a sua volta deriva da PrusaSlicer. PrusaSlicer, a sua volta, si basa sulla soluzione open source Slic3r.

Introduction: Welcoming You to the Sovol SV06 Series​

Hey there! Let's jump into the world of the Sovol SV06. This printer is getting a lot of buzz for being budget-friendly while still offering some pretty cool features. If you're thinking about getting into 3D printing without spending a ton, the Sovol SV06 is a solid choice. It gives you a lot for its price, similar to more expensive printers like the Prusa MK3S+, but at a fraction of the cost. With neat features like dual Z-axis motors, automatic bed leveling, and the ability to reach up to 300 °C, it really stands out in the budget printer crowd.

Introduction: Welcoming You to the Sovol SV06 Series

Introduction​

Tackling the Challenge of Under Extrusion in 3D Printing​

Welcome to the world of 3D printing! In this amazing realm where we bring ideas to life layer by layer, there’s a common hiccup known as under extrusion that can sometimes throw a wrench in our creative works. But worry not! Understanding and fixing this issue is easier than you might think.

Optimizing Extrusion Rates: A Guide to Correcting Under Extrusion