3D Printer Issues and How to Troubleshoot them

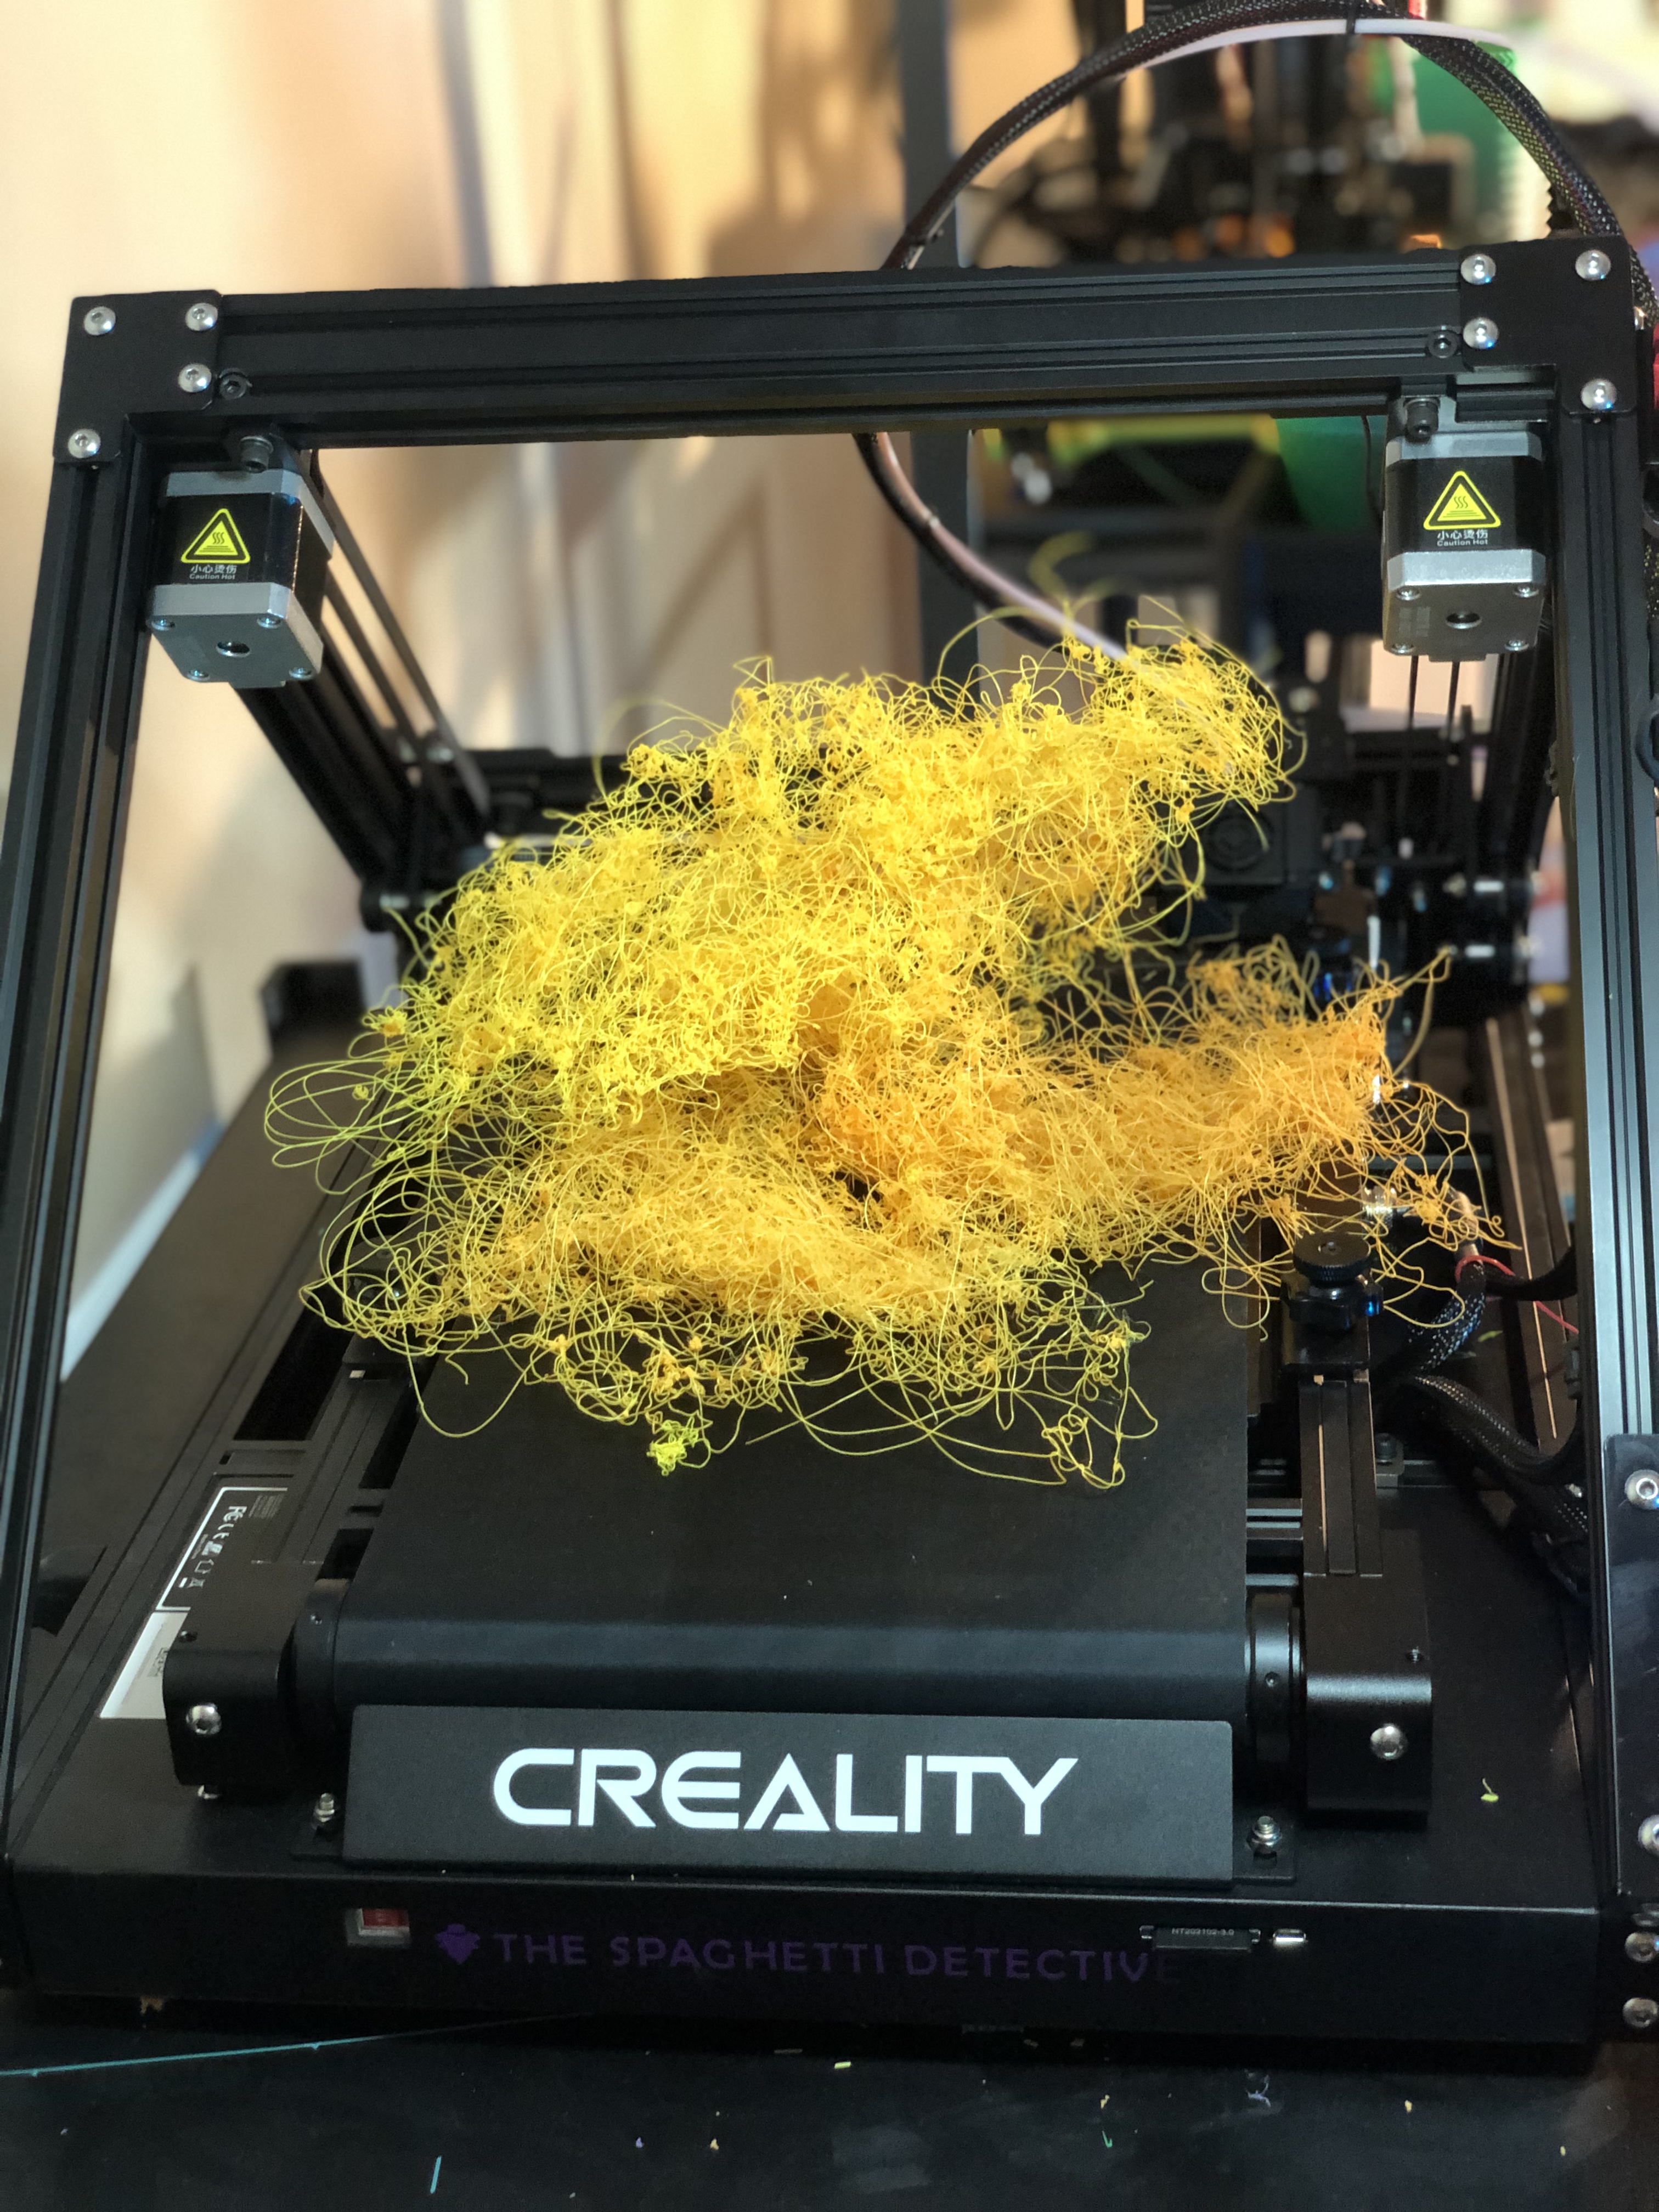
Failed 3D print/Source: The Spaghetti Detective
3D printing is still a technology that relies heavily on trial and error. It's nearly impossible to master the technology without getting your hands dirty. As there are no globally recognized standards in the 3D printer, material, or software manufacturing, it is vulnerable to a variety of printing problems. A multitude of 3D printer issues results in failed prints, which leads to a loss of business, if not your interest in the technology.
To make sure you don’t feel bogged down by the problems and abandon this revolutionary technology, we list down the most popular 3D printer problems and ways to troubleshoot them.
Top 10 3D Printer Problems
-
First Layer Adhesion
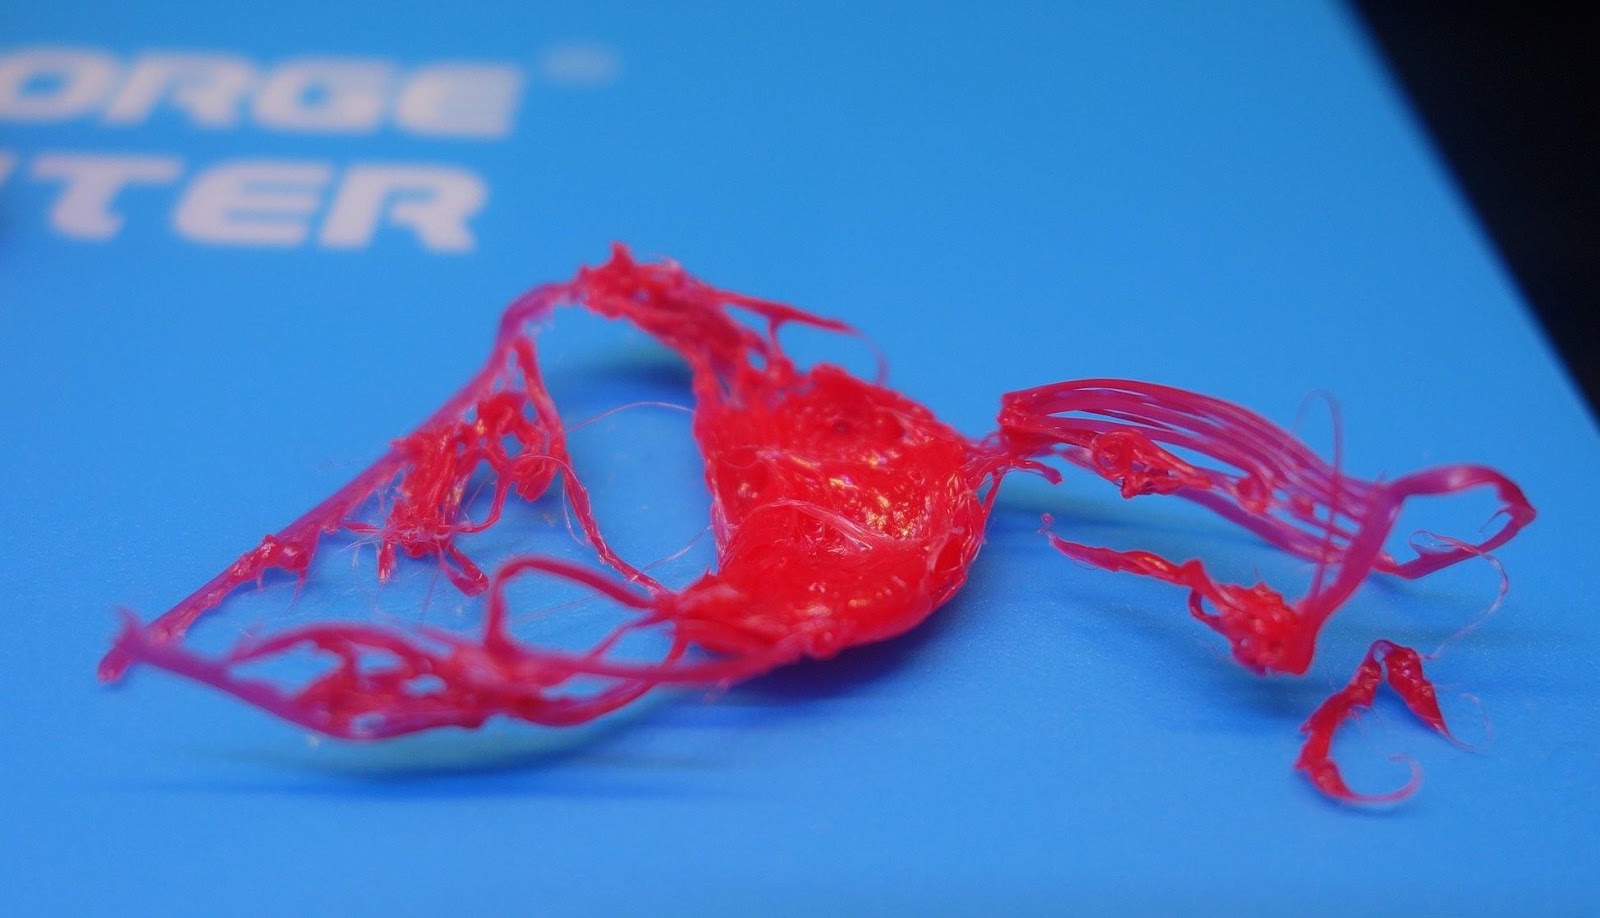
Result of poor first layer adhesion/Source: Hubs
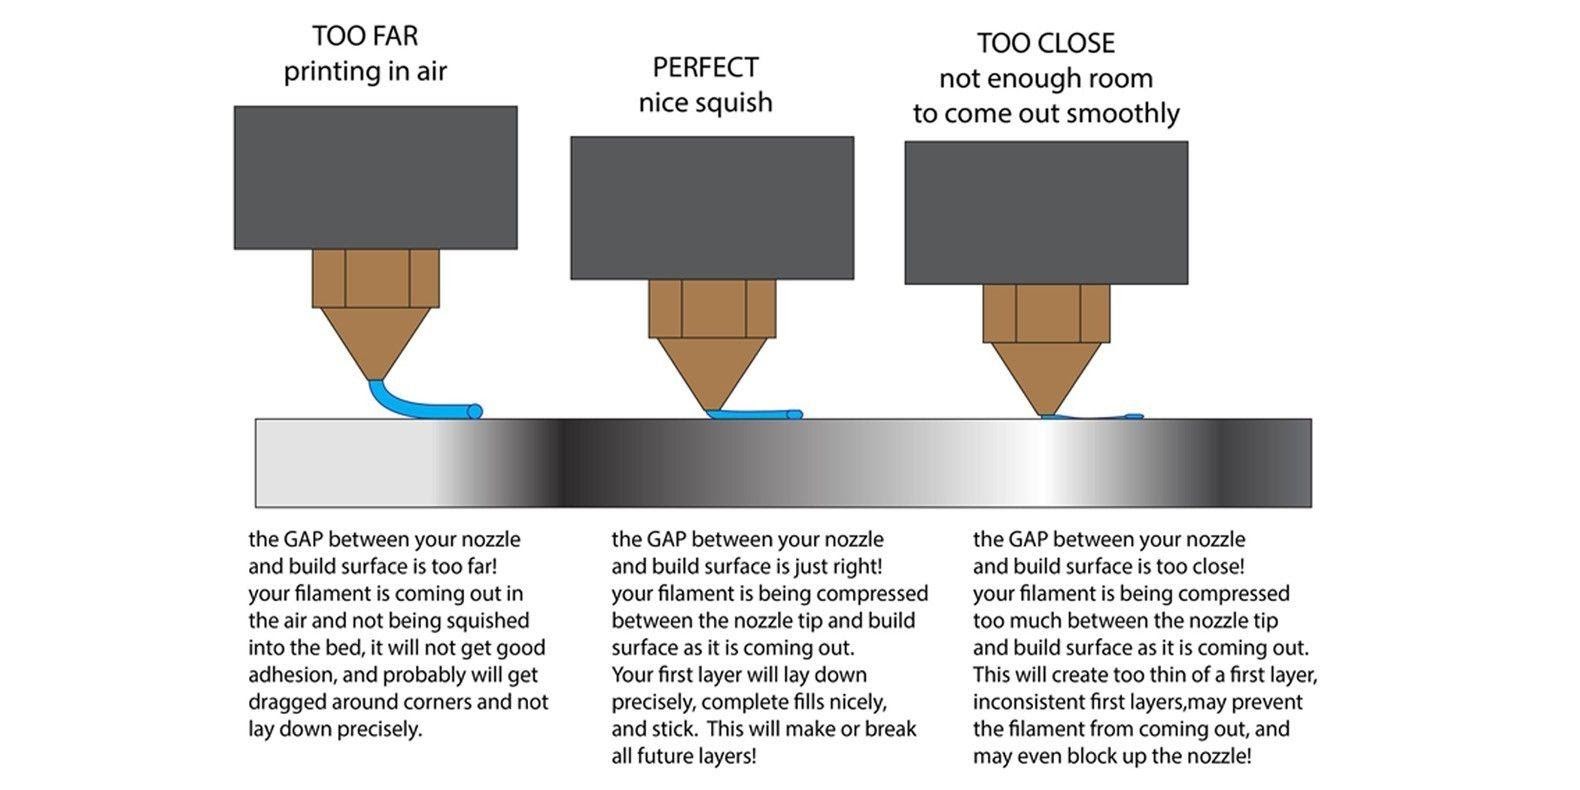
Guideline for the ideal nozzle height/Source: Peter Solomon
A first layer adhesion problem occurs when the first layer of a print does not adhere to the bed. It is one of the most common 3D printer issues that you all have encountered. It goes without saying that if the first layer is not secure, the rest of the print will fail. As a result, resolving this issue becomes even more critical. However, the problem is not too difficult to solve, and by understanding the causes, each one of you can avoid first layer adhesion issues.
3D Printer Troubleshooting
Bed leveling
This is the most common cause of layer adhesion issues. The most basic 3D printer troubleshooting is to level the print bed. The print bed is typically manually leveled, or if lucky, your printer may have an auto bed leveling feature.
It is difficult to achieve successful prints without a level bed, so you should ensure that the proper bed leveling procedure is followed to avoid any 3D printer issues, particularly first layer adhesion.
Bed temperature
If you work with PLA, you may never have encountered layer adhesion issues; however, if you try to print ABS or Nylon, you will almost certainly encounter layer adhesion issues. To troubleshoot the issue with such materials, you should use a heated bed and set the bed temperature according to the material manufacturer's recommendations.
Print speed
If you are in a hurry to print certain parts and set a high print speed, you will most likely encounter a problem with first-layer adhesion. Make sure you stay within your 3D printer's print speed limits to ensure strong first-layer adhesion.
Fan speed
The stickiness of the first layer is also affected by fan speed. For materials that require a heated bed, keep the fan speed low or turn it off entirely for the first few layers.
Nozzle height
If all other solutions are tried but the problem persists, the height between the nozzle and the print bed is most likely too low or too high. In both cases, the first layer will not adhere to the bed, resulting in a failed print. Ensure the nozzle height is perfect. You will have to do a lot of trial and error here.
Bed adhesion tools
The bed adhesion tools (brim and raft) are offered in almost all slicing applications for a reason. It is recommended to use bed adhesion tools as a default for all prints. Even with non-warping materials like PLA.
-
Nozzle not extruding material
Nozzles stopped extruding mid-print/Source: Simplify3D
As the name implies, the nozzle does not always dispense material while printing. There's a good chance you've encountered this 3D printer issue as well. If the nozzle does not extrude material entirely or intermittently, it only results in one possibility – a failed print. This problem is also simple to troubleshoot, and we have provided a list of methods for identifying and resolving it.
3D Printer Troubleshooting
Nozzle clogging
The most obvious reason for the nozzle failing to extrude material is clogging. The nozzle accumulates a lot of dust and dirt particles over time. It may also accumulate material residue, causing the nozzle passage to become clogged with debris. To avoid this problem, you should unclog the nozzle regularly.
Priming of nozzle
It is critical to prime the nozzle before beginning a print. The material from your previous print is still present in the nozzle. This residual solidified material begins to ooze out once the nozzle is preheated for your next print. The material continues to ooze due to the time lag between the heating of the nozzle and some subsequent steps such as bed leveling and nozzle travel. As a result, it creates a void in the flow. Due to this void, for a short period, it may appear that the nozzle is not extruding material, in which case priming is required.
Priming is the act of pushing in extra material after the bed is leveled and before a print starts. This ensures a continuous flow of material.
Nozzle height
Nozzle height is also important in troubleshooting the problem. If the nozzle is too close to the print bed, the nozzle may be unable to extrude enough material, resulting in a poor print. As a result, you should ensure that the nozzle height is set to an optimal level.
Filament issues
3D printer problems do not always emerge from the printers. In some cases, the filament itself may be the culprit. If you use a low-quality filament, the filament may not have a consistent density, causing gaps while extruding material and leading you to believe that the nozzle is not extruding material.
Moisture Issues��
Continuing with the filament issue, if the filament absorbs moisture, moisture bubbles will form inside the filament. This means that when the filament is melted, the bubbles burst, creating a void and resulting in intermittent material flow. To avoid this problem, store the material in a cool and dry place. Alternatively, you can use dryers to dry the filament or heat it in an oven (please check this article to read more on how to dry filament)
-
Stringing
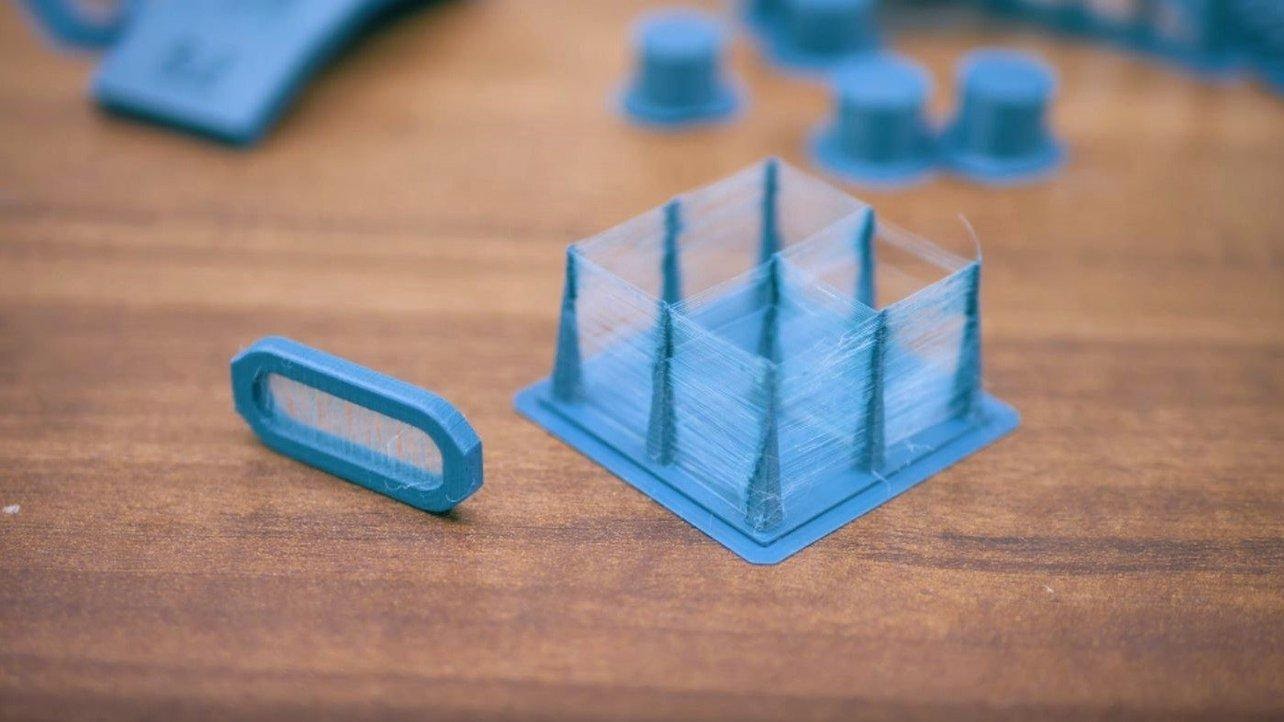
Severe stringing issues/Source: All3DP
This is yet another common 3D printer issue that many beginners face. Stringing is a problem that occurs when thin strings of material, similar to whiskers, remain on the surface of a 3D printed part, affecting the print's surface finish. It increases post-processing effort and is an unfavorable element.
3D Printer Troubleshooting
Retraction speed
Retraction is a critical parameter that influences stringing. Retraction, by definition, is the reverse movement of the filament to prevent excessive oozing of the melted filament.
The speed of the retraction is one aspect of it. To find the best parameters, you'll have to do a lot of trial and error. If the retraction speed is too slow, the material may get more time to ooze out. If the speed is too fast, the melted filament may break away, resulting in a gap in the deposition.
Retraction distance
In printing, the retraction distance is extremely important. If the distance is too great, the filament may not be available for printing; if the distance is too small, the retraction may not be effective in stopping stringing. As a result, you should conduct trial and error experiments to determine the ideal distance. But once you find the ideal distance, you will eliminate the stringing issue.
Extruder Temperature
As a user, you should be aware of the optimal printing temperatures for the filaments you use. The temperature also varies slightly depending on the manufacturer, and this should be considered to ensure that the temperature does not become too high and cause the material to drip out of the nozzle. (Or too low to cause other problems).
Travel speed
Print speed is also taken into account when removing stringing. Stringing may occur if the print speed is slow because the filament continuously oozes out of the nozzle and forms a string. As a result, the nozzle should move faster from one location to the next, giving the filament less time to form strings. However, a faster travel speed may cause jerks in the extruder assembly, affecting its accuracy over time, so a fast travel speed is also not recommended. To ensure stringing is eliminated, you must experiment with the printing process at various travel speeds and find the ideal speed for your 3D printer.
Long free nozzle travel
To keep the nozzle from oozing out material, avoid long free nozzle travel. The free movement of the nozzle can be adjusted and controlled through the slicer settings. Ascertain that the nozzle takes the shortest possible path to the next printing point.
-
Spaghetti
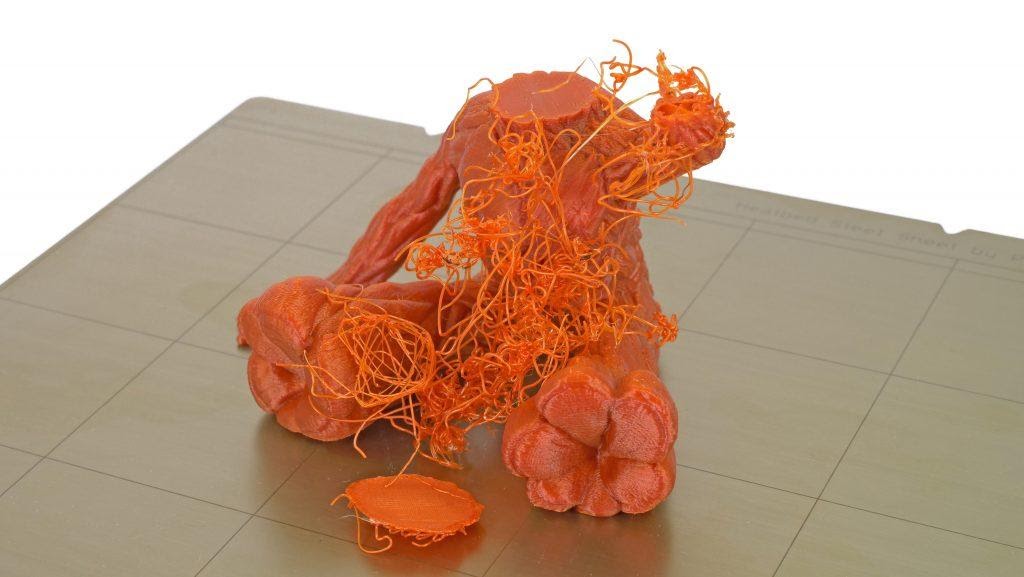
Spaghetti mess while 3D printing Groot/Source: Prusa3D
This 3D printer issue is exactly what its name implies. The print results in a jumbled mess of filament strings that resemble spaghetti. This spaghetti mess accumulates in and around the print due to a variety of factors such as print detachment from the bed, the collapse of printed objects, or even issues such as erroneous G-code. However, this is one issue that you can eliminate if you are using OctoPrint. By using The Spaghetti Detective OctoPrint plugin, you can easily detect and stop the print as it starts to form spaghettis thereby reducing the material wastage. This plugin includes an AI-powered detection engine that detects the formation of spaghetti and immediately sends a message to your 3D printer to stop printing. On a more comical note, if you enjoy the cringe-worthy spaghetti picture above, check out The Spaghetti Detective's Spaghetti Gallery- a compendium of videos of failed 3D prints caught in action by The Detective's AI.
3D Printer Troubleshooting
Layer Adhesion
Poor layer adhesion is a major contributor to this 3D printer issue. You can completely avoid it by ensuring that the layer adhesion remains intact throughout the print. You can improve the print bed surface by using glue or ABS slurry, or you can use bed adhesion tools such as brim and raft.
Bed Temperature
The temperature of the bed also plays an important role in this. If your printer has a heated bed, heat it to the temperature recommended by the printing material. This ensures that the print remains in contact with the print bed thereby safeguarding it from forming spaghettis.
G-Code errors
Most of the time, you rely on downloaded designs without verifying the model or whether it is printable. It is always a good idea to double-check the generated G-code and preview the model in the slicer software to ensure that the model can be printed. If the model has any geometrical errors, then avoid printing or find alternatives for the same design.
-
Warping and Curling
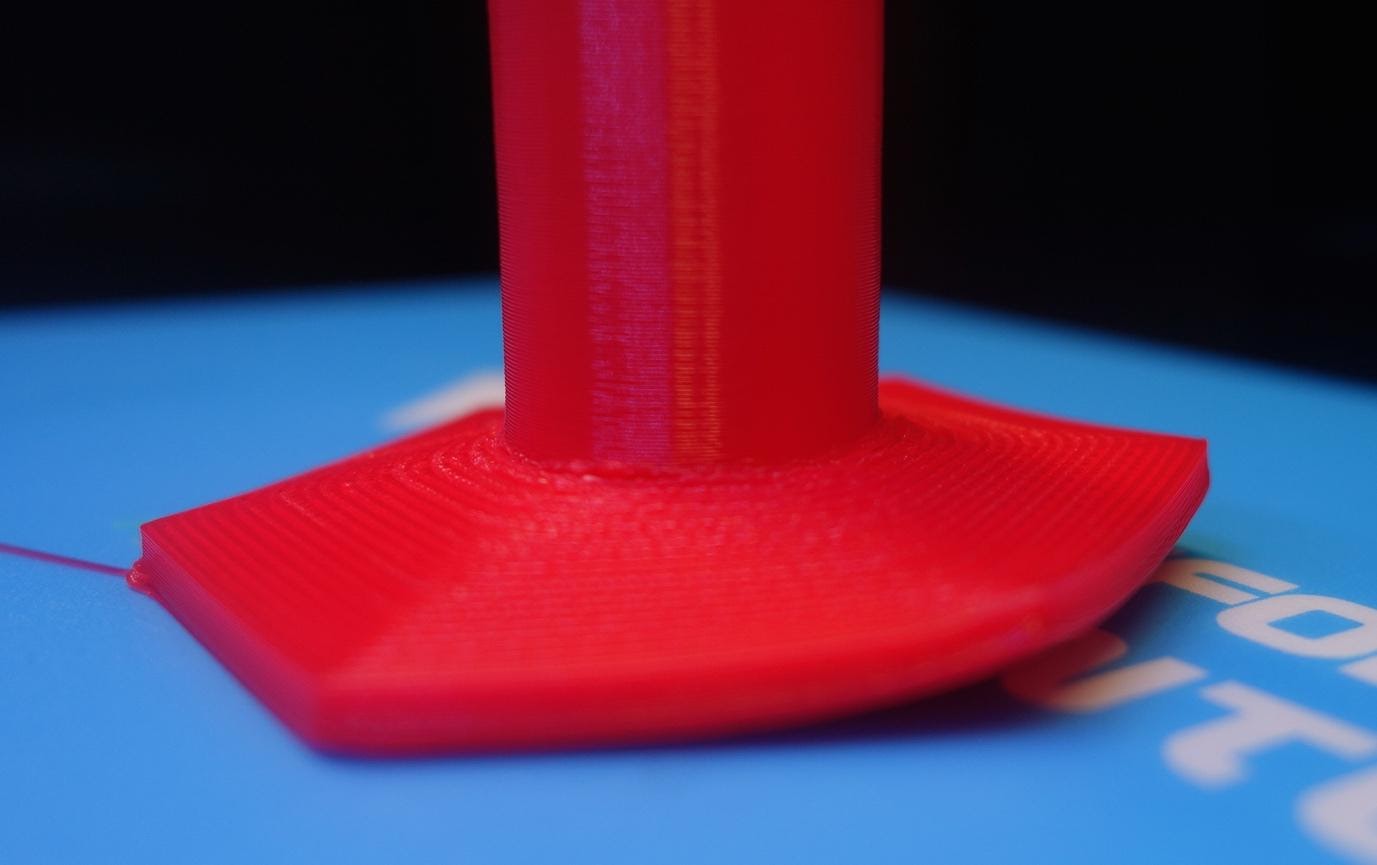
Warping effect on one side of the 3D print/Source: Hubs
Warping and curling are two common 3D printer problems that beginners should be aware of. It refers to the bending of the print edges that come into contact with the print bed. It happens as a result of poor first layer adhesion. When the first layer of a print cools down it contracts. This contraction causes the layer to move away from the bed surface, causing it to warp.
Some materials, such as ABS, Nylon, and others, are more prone to warping and curling, whereas others, such as PLA, are unlikely to warp. However, care should be taken to ensure that the first layer adheres well to the bed to ensure a successful print.
3D Printer Troubleshooting
Heated Bed
A heated bed should be used to ensure good first-layer adhesion. Set the ideal bed temperature after consulting with the filament manufacturer. This ensures that the print remains warm and sticky throughout the printing process.
Heated Enclosure
Using a heated enclosure is another safety precaution. Such a feature is now available on a wide range of printers. The heated enclosure adds warmth and heat to the entire print while also acting as a second layer of protection against warping.
Disable Fan
To prevent the cooling of the initial layers of the print, one troubleshooting method is to turn off the fan. At the very least, follow this advice for the first few layers while printing materials like ABS, Nylon, and so on.
Bed Adhesion Tools
You may be familiar with the bed adhesion tools found in all popular slicers. Rafts and brims are tools that are specifically designed for this purpose.
A raft is a horizontal sheet of filament upon which the actual model is 3D printed. This ensures that the print is not attached to the print bed.
A brim is similar to a raft but is only attached to the outer edges of the print and not beneath it. It adds an added layer of material around the model to hold it down on the print bed.
Make use of both these tools to increase layer adhesion and avoid warping issues.
-
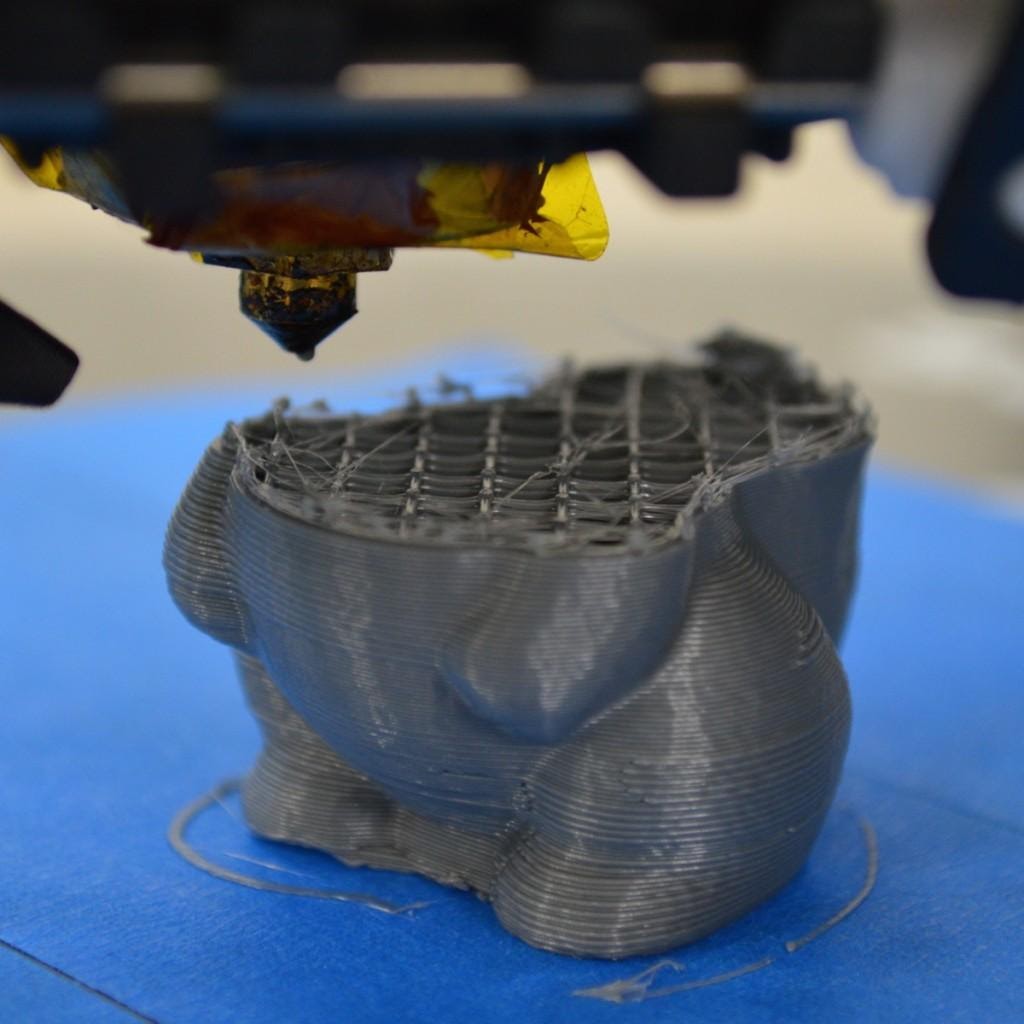
Gaps in Top Layers
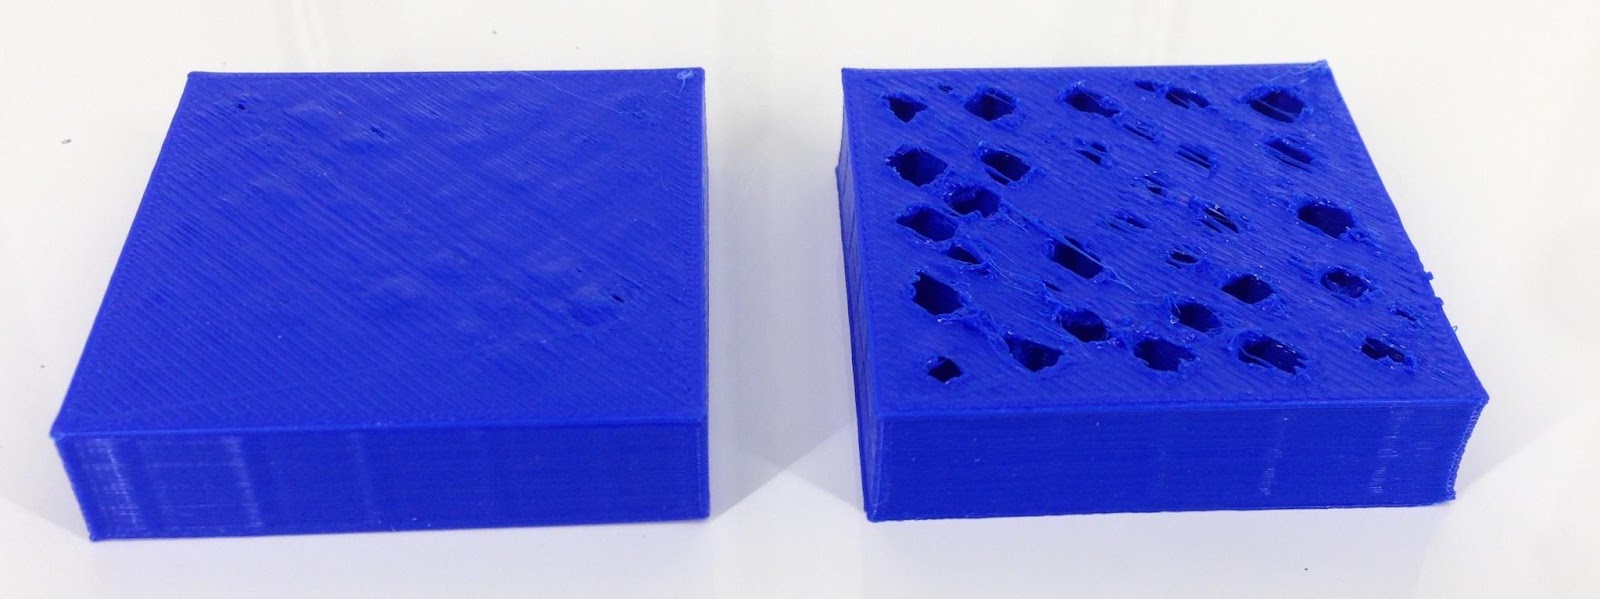
(Right) Huge gaps in top layer is seen on the 3D printed model/Source: Hestay
This 3D printer problem is an uncommon one, and some of you may have never heard of or experienced it. Some of you may have experienced this as well, but unknowingly resolved it.
This is an odd problem that is only noticed near the end of the print. The top layer of the print has visible gaps. There appear to be holes or gaps between adjacent layers on the top surface. While the rest of the print will be flawless, the top layer will cause the print to fail.
3D Printer Troubleshooting
Top Solid layers
The most basic 3D printing troubleshooting solution for this issue is to increase the number of top solid layers. This will fill in any visible gaps and make the print look flawless.
Infill
The use of sparse infill can cause a gap in the top layers. A low-density infill indicates that there is a large gap inside the model, and the deposited material falls into the infill gaps instead of forming the top layers. As a result, the top layer has gaps or holes. Even in this case, you can try the first solution to compensate for the poor infill. For such an issue, you need to increase the infill percentage.
Under extrusion
If you tried both of the above-mentioned methods but the issue persists then you most likely have an under-extrusion problem. This problem can be solved by following the troubleshooting steps outlined in the next Over Extrusion & Under-Extrusion section of this article.
Filament Size
This problem is most frequently encountered by those of you who use smaller filament diameters (1.75mm). If none of the above solutions work for you, you can try using a 2.85mm (also referred to as 3mm) diameter filament.
-
Over-Extrusion and Under-Extrusion
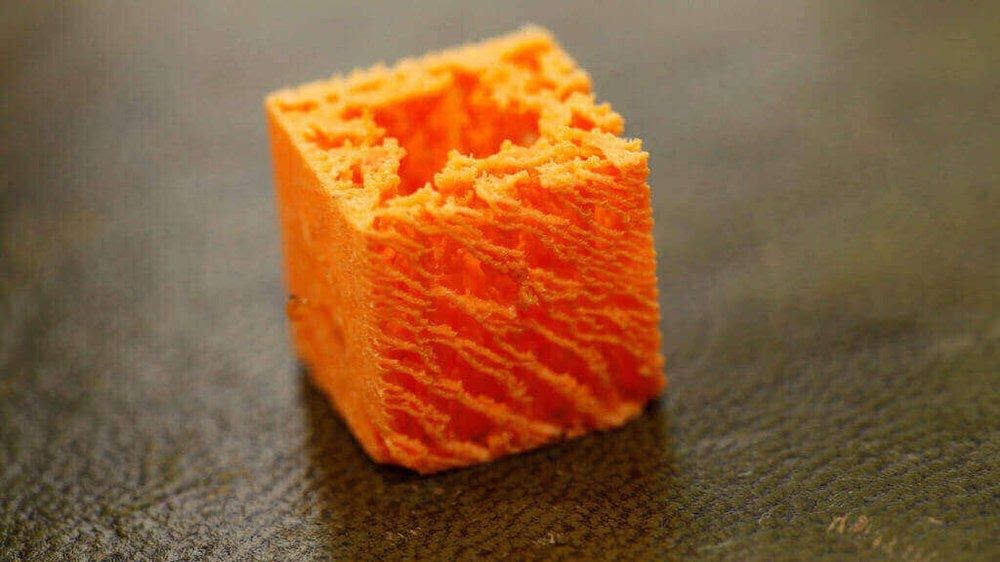
Severe under-extrusion on display/Source: All3DP
Over-extrusion occurs when your printer extrudes more material than is ideal, while under-extrusion occurs when it extrudes less material than is ideal. Both these conditions are detrimental to the 3D print and can lead to failure, in addition to wasting material, time, and effort.
The intriguing aspect is that both of these problems have similar solutions. Both problems can be avoided if the parameters are set correctly.
3D Printer Troubleshooting
Filament Diameter
There are two sizes of filament available, and if you use the incorrect filament for printing, one of two issues will occur. If you slice a model considering a smaller filament diameter instead of the larger filament that is actually in use, it will result in over-extrusion and vice versa. As a result, it is critical to use the appropriate diameter filament and slice the model appropriately.
Print Temperature
The flow of the material is affected by the print temperature. Lower the temperature and the flow of material will be reduced, resulting in under-extrusion. The effect of this can be seen in the print, where gaps in printed layers can be seen. Furthermore, a higher temperature will result in over-extrusion, so you must take care to set a balanced print temperature to avoid both issues.
Extrusion Multiplier
The rate at which material flows through a 3D printer's extrusion system is defined by the extrusion multiplier. The higher the material flow, the greater the extrusion multiplier. If you notice under-extrusion while printing, then increase the extrusion multiplier to ensure proper printing.
-
Layer Splitting and Separation
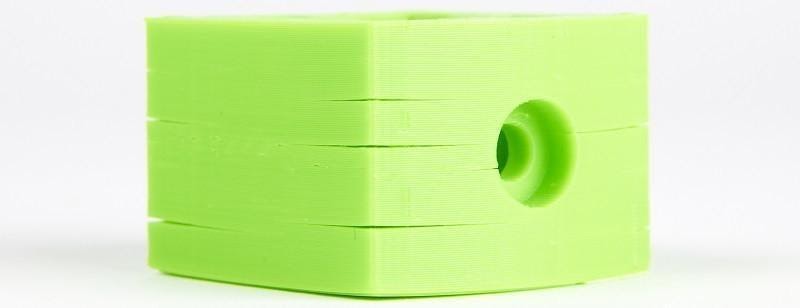
Visible layer splitting seen at multiple locations/Source: SelfCAD
As you are all aware, an object is built-in 3D printing by laying down layers of material one on top of the other. This is only possible if a strong bond between successive layers is formed. If the bond is weak, the layer has a high chance of splitting or separating from the rest of the print.
3D Printer Troubleshooting
Layer Height
In 3D printing, the layer height is determined by the nozzle diameter. The ideal layer height, as a rule of thumb, should be 80 percent of the nozzle diameter. As a result, if you use a 0.4mm nozzle diameter, the ideal layer height is 0.32mm. This ensures that each new layer bonds to the previous layer. If the layer height is increased beyond this ideal range, there is a good chance that you will encounter layer splitting and separation problems.
Printing temperature
The ideal printing temperature is always specified by the filament manufacturer. If the printing temperature is kept low for any reason, the successive layers may not be warm enough to bond with each other. Layer binding issues will also arise as a result of this. In this case, try increasing the temperature slightly and monitoring the results until ideal layer bonding is achieved.
-
Bridging issues

Example of poor bridging/Source: Prusa3D
The horizontal span between two raised points in a design is referred to as a bridge in 3D printing. For reference you can look at any real-world infrastructural bridge you might see in your town or city. Bridging is a serious printing issue that affects many beginners. Care must be taken, therefore, to ensure that the bridge is not too long or it will fall to the ground.
3D Printer Troubleshooting
Small Length or Supports
Eliminating long bridges is the obvious solution to avoiding bridging issues. However, it is easier said than done. It is sometimes necessary to have a long bridge, which causes headaches for those of you who want to print it.
Another option is to add supports to the bridge through slicing software. A bridge can be efficiently printed by strategically placing supports along the span of the bridge.
Print Speed
Printing at slow speeds can help to reduce bridging issues. Slower speeds ensure that the deposited material has enough time to cool. It also allows the previously deposited layer to bond with the newly deposited layer later on.
-
Weak Infill
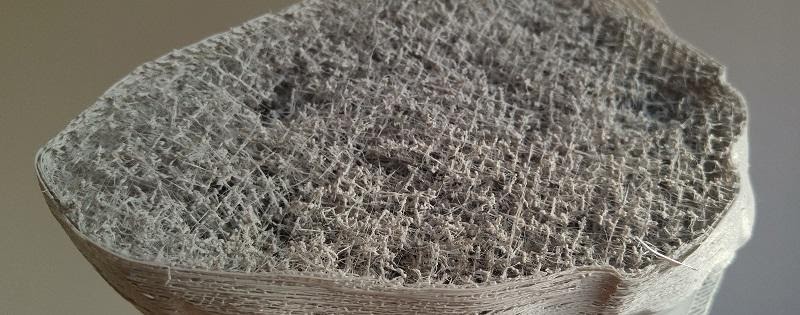
3D print with a weak infill/Source: Rigid Ink
The ability to control the infill percentage of a part is uniquely provided by 3D printing. It is a distinct feature that, if carefully managed, can be extremely beneficial. But it also has the potential to cause printing issues if it is exploited. One such issue is insufficient infill or weak infill. It refers to the problem of using an infill density and pattern that is inappropriate for the object being printed.
3D Printer Troubleshooting
Infill Density
The obvious solution for this 3D printer issue is to increase infill density. The higher the fill percentage, the stronger the infill and the overall print. While you want every print to be strong, you don't want every print to have a lot of infill. Bulking on the infill adds unnecessary weight to the print, wastes excess material, and increases print time. You can manage the infill based on your part requirements, to conserve material, reduce print time, and save money.
Infill Pattern
The part strength is not entirely determined by the infill percentage. The strength can also be defined by the infill pattern. The honeycomb infill pattern is one of the most effective and strong infill patterns. Even when the density is low, this pattern can add a significant amount of strength to the part. So, when dealing with a weak infill, try to use a pattern that increases strength even with a low infill percentage.
Print Speed
Even if you choose the best pattern and density, the print speed can also have an impact on the infill strength. Infill should not be regarded as an unwelcome addition to the print. It is the foundation of the part's strength. So, give it the attention it deserves and print infill like an integral part of the model. Avoid printing at higher speeds as it can result in poor infill. Print is at regular speeds.
Extrusion Width
The width of the extrusion is like a secret trick. Many of you may not even be considering this parameter to print infills. If you take control of the slicer settings and print the infill with a wider extrusion width, you can increase the strength of the infill. However, it is important to note that this troubleshooting method should only be used on large prints and not on smaller prints. Small prints do not have enough infill, so it will be ineffective or, in some cases, even detrimental to the print.
Outro
Although 3D printing brings with it a plethora of 3D printer issues, you can troubleshoot all problems in a variety of ways. Some of these issues can be efficiently avoided by using OctoPrint and its plugins. If you're new to OctoPrint and haven't yet installed it, you can read our guide on how to set up OctoPrint and take advantage of its many features. You will be surprised at how easy 3D printing feels with OctoPrint.