Obico Reverse Proxy with NGINX Proxy Manager
Security Warning: The guide below only cover the basic steps to set up a reverse proxy for self-hosted Obico Server. The setup required to properly secure your private network is too complicated to be covered here. Please do your own research to gather the necessary info before you proceed.
This is a community-contributed guide. This guide is based on certain Obico community members' own setup and hence may not work for you.
If this guide doesn't work for you, you can try your luck by following another community-contributed guide to set up NGINX reverse proxy.
Assumptions for this guide
- FQDN of the Obico public server: obico.domain.com
- Obico Self-Hosted server IP: 192.168.2.10
- NGINX Proxy Manager IP address: 192.168.2.100
- Available public IP address which is either fixed if DHCP is used a DDNS mechanism is in place to update the DNS record of the firewall FQDN
- Full access to the DNS server in setting up DNS records in order to get certificate issued automatically via NGINX Proxy Manager. In this example Cloudflare is used as the DNS server
- Obico Self Hosted server Django site name has been set to : obico.domain.com
- The
.envfile has the following environment variable set to:
SITE_USES_HTTPS=True

# set it to True if https is set up

SITE_IS_PUBLIC=True
# set it to True if the site configured in django admin is accessible from the internet
Setting up the DNS server
DNS server for domain.com requires the following record:
obico A [public IP address]
This next record is required to enable the tunnel within the Obico apps or web gui.
*.tunnels.obico A [public IP address] ( this can also be a CNAME record pointing to the obico A record)
In Cloudflare you will need to create an API token to allow updates since Let’s Encrypt in NGINX Proxy Manager will need to insert some TXT DNS record to verify you have control of domain.com.
https://developers.cloudflare.com/fundamentals/api/get-started/create-token/
Select your domain and give it the Edit permission.
Make sure to write down the API Token as it will be needed in NGINX later and you can’t go back, and view again once created. You would have to delete and recreate a new one.
Configuring the firewall
Port Forwarding:
Port 80 and 443 requires to be forwarded to the NGINX Proxy Manager internal IP address 192.168.2.100
Setting up NGINX Proxy Manager on docker
I have used the following to setup NGINX Proxy Manager:
The docker file docker-compose.yml contains the following:
version: '3.8'
services:
  app:
    image: 'jc21/nginx-proxy-manager:latest'
    restart: unless-stopped
    ports:
      - '80:80'
      - '81:81'
      - '443:443'
    volumes:
      - ./data:/data
      - ./letsencrypt:/etc/letsencrypt
Required SSL certificates for using NGINX Proxy Manager and the Obico self-hosted server
In order to have the Obico self-hosted server available from a public facing IP address and also having the tunnels being created to access the printer WebUI a minimum of 2 certificates will be required:
For the main website obico.domain.com you will need to create a Let’s Encrypt certificate.You can either create a wildcard certificate *.domain.com or obico.domain.com or a certificate that covers both.
You will also need to create one more wildcard for *.tunnels.obico.domain.com. You have to create this one by itself as wildcard certificate can only use one subdomain therefore a *.domain.com would not cover the tunnels.obico subdomain. Failing to do so will prevent the tunnels from being created.
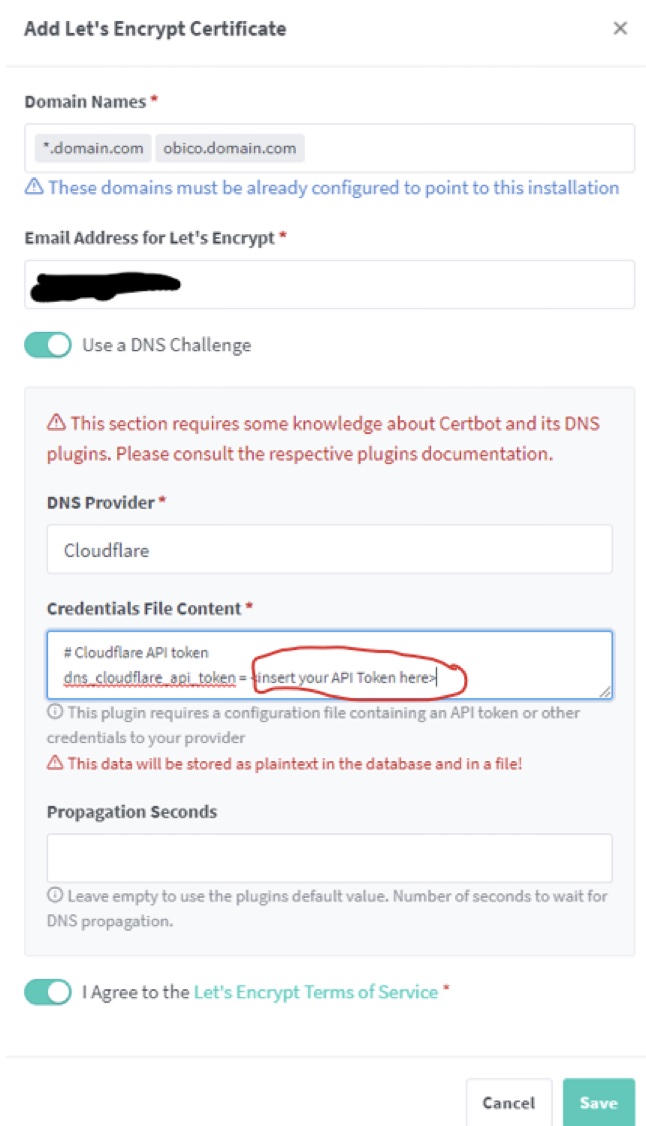
In the NGINX Proxy Manager webgui under SSL Certificates click “Add SSL Certificates”
Make sure to use “DNS Challenge” inserting your previously created API token in the required field.
Firewall port forwarding must be enable for port 80 to the NGINX Proxy Manager host 192.168.2.100 for the DNS Challenge to work.
Create both certificates using the following settings:
Once completed you should have under SSL certificates the following:
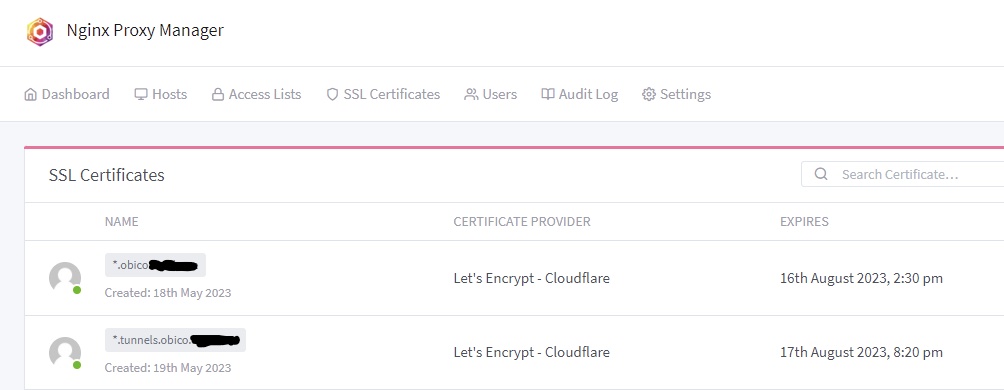
The hidden part should be domain.com
In the “Hosts” section you will need to create to port forwarding to the Obico self-hosted server at 192.168.2.1 and port 3334 for *.tunnels.obico.domain.com
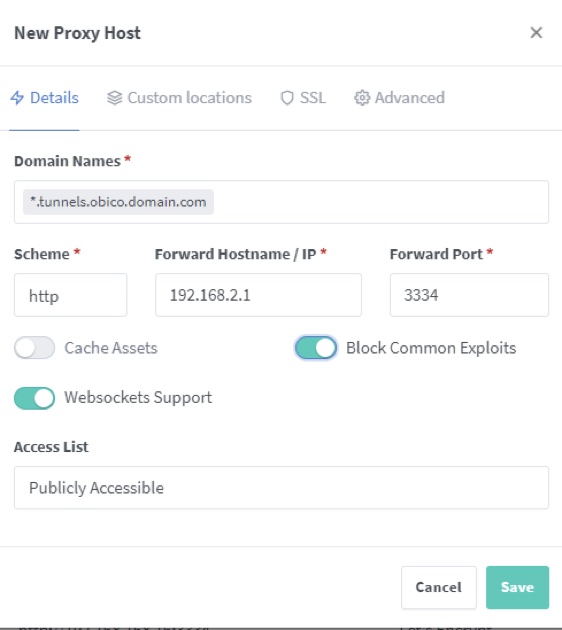
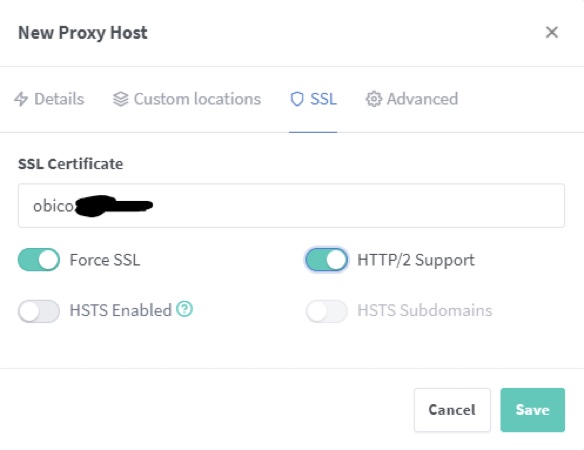
In the SSL Option you will need to select the wildcard SSL certificate previously created for the *.tunnels.obico.domain.com with these settings.
Click Save.
A second proxy host needs to be created for the main site obico.domain.com with the same process this time selecting the other wildcard or dedicated SSL certificate.
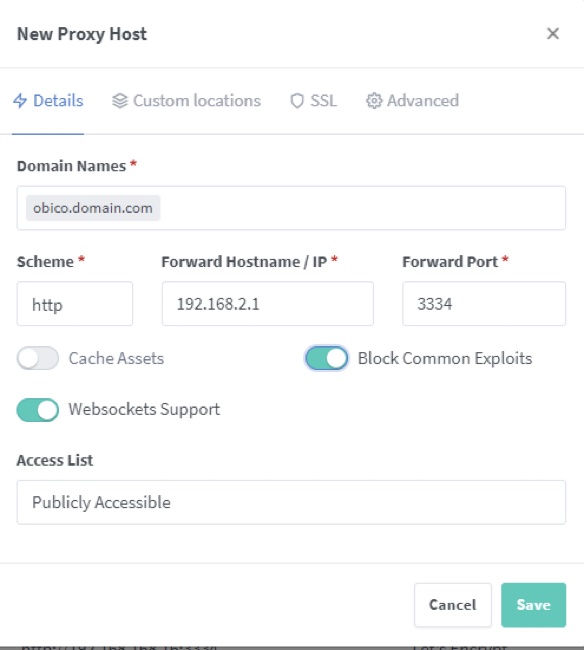
Once these are created you should now be able to access your self-hosted Obico Server from the url https://obico.domain.com and activate the tunnel to your printer WebUI.