How to Setup a 3D Printer in OrcaSlicer
OrcaSlicer is quickly rising as one of the most popular slicers in the 3D printing community. Its range of useful features, calibration tests, and wide printer compatibility all help this slicer stand out from the rest.
It is a relatively new slicer when compared to PrusaSlicer and Cura. While the initial configuration process is straightforward, it can be challenging for first-time 3D printer users to understand, especially when it comes to adding custom 3D printers and creating unique printing profiles.
This piece will guide you through the entire process of adding 3D printers, creating their profiles, and setting up the printer for your first 3D print. It’ll help you understand the core functions of OrcaSlicer and improve your initial setup experience.
Ready to dive in? Let's get kraken with OrcaSlicer!
How Do You Add a 3D Printer to OrcaSlicer?
OrcaSlicer comes with hundreds of preloaded 3D printer profiles. These profiles include printers from Creality, Elegoo, Prusa, Bambulab, and several other prominent manufacturers. You can simply select your printer from its list, choose the nozzle size, and start configuring the slicing settings.
In addition to the preloaded printer profiles in OrcaSlicer, you also have the option to add a custom 3D printer. You can configure a completely custom 3D printer from its firmware, bed size, shape, and nozzle to dimensions. This feature makes OrcaSlicer useful even if you don’t find a profile for your 3D printer.
Let’s take a look at both the methods using which you can add a 3D printer to OrcaSlicer.
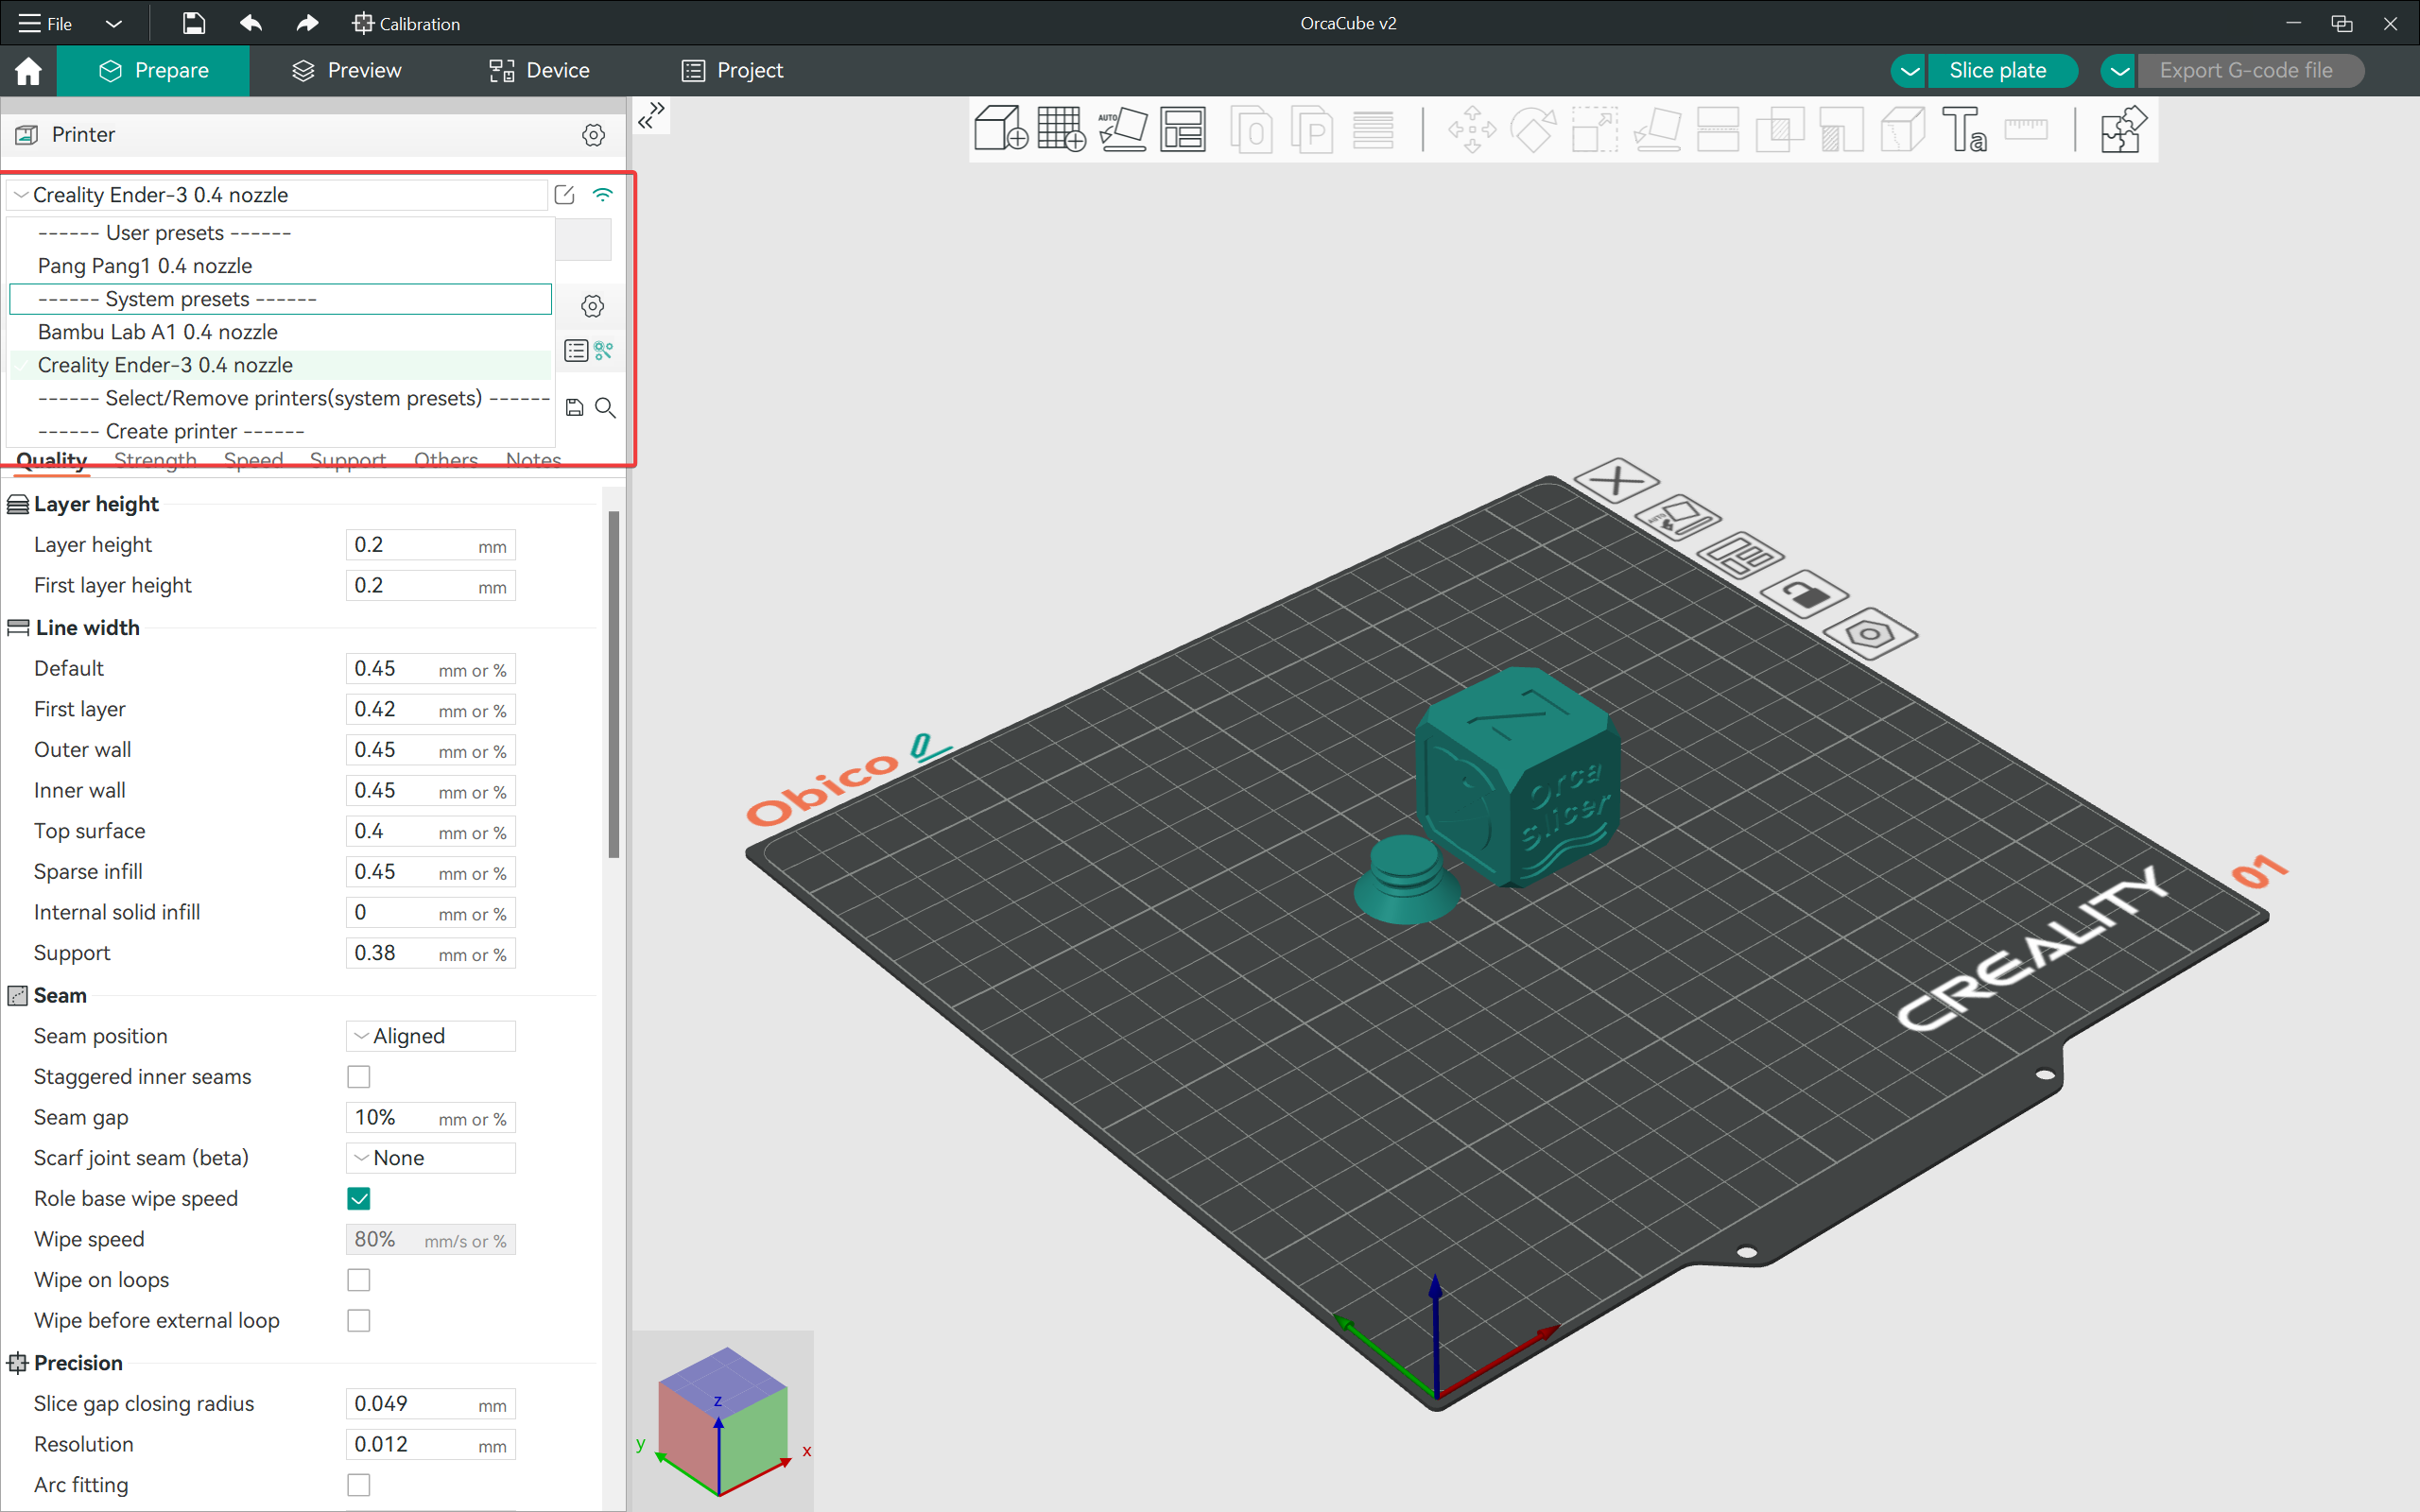
Adding a Default 3D Printer Profile
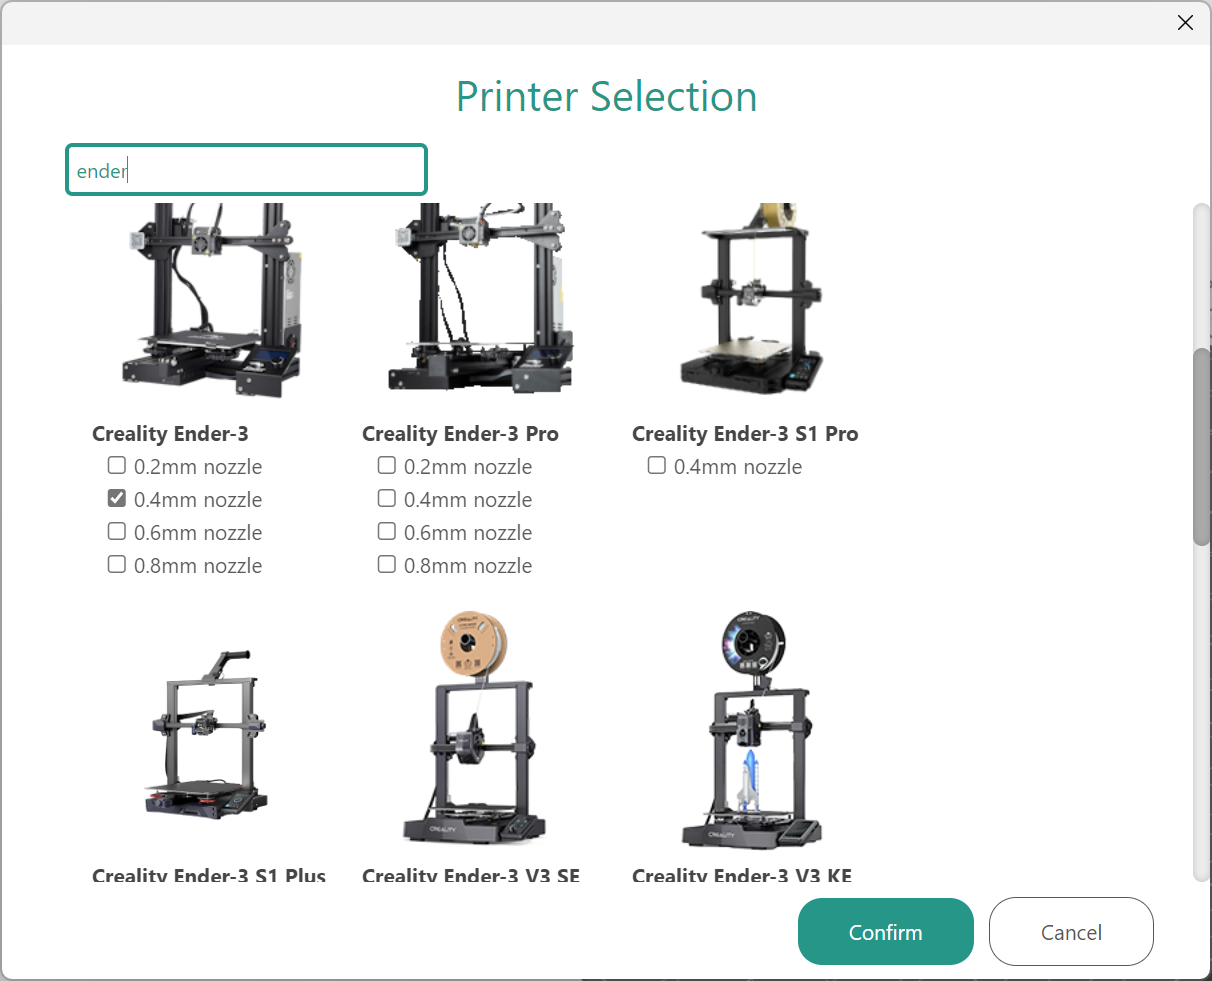
Open OrcaSlicer: Launch OrcaSlicer and click on the gear icon next to the Printer tab.
Navigate to Printer Options: Search for your 3D printer from the list in OrcaSlicer.
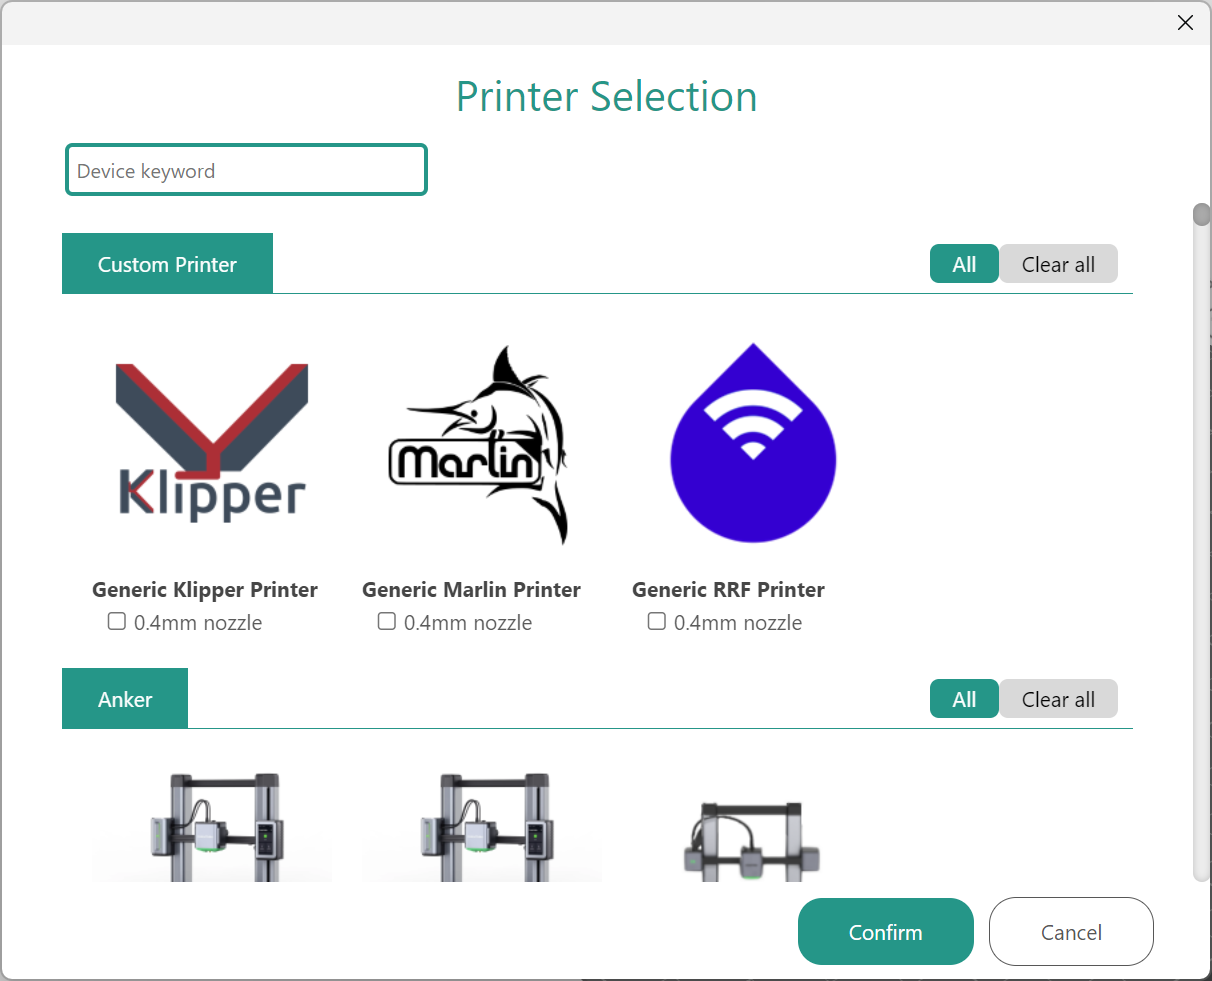
Add a New Printer: Check the box below the preferred printer and click on confirm button.
That’s it! You’ll notice the name of your 3D printer under the printer section.
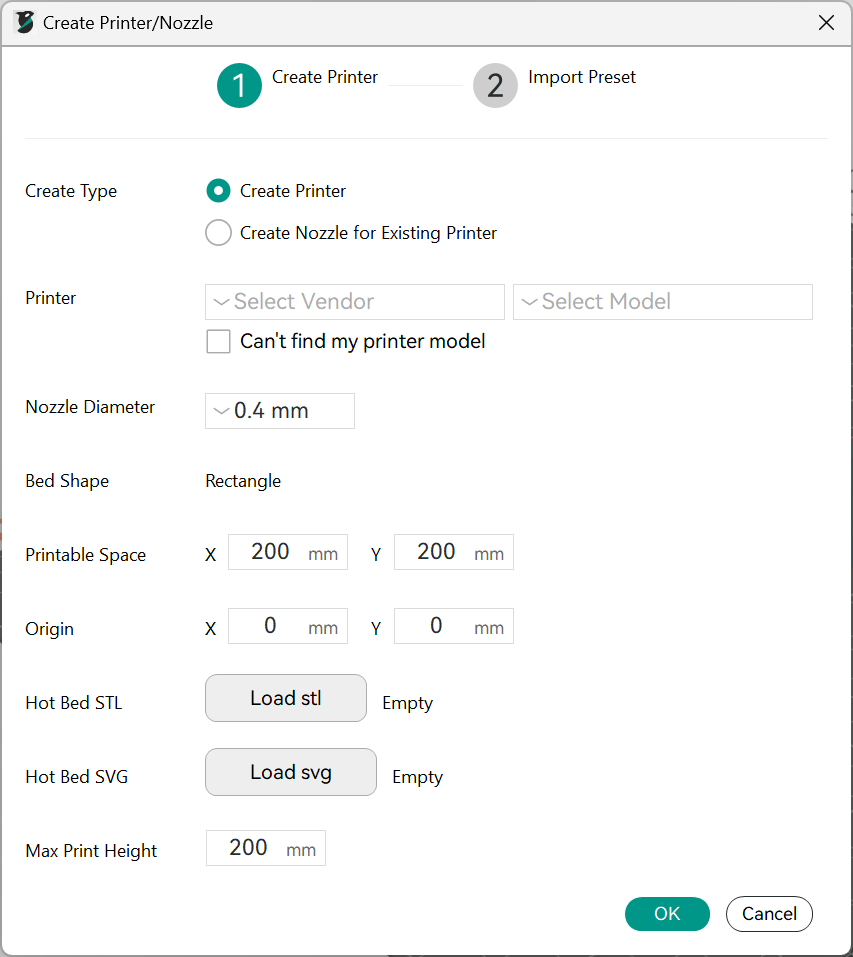
Adding a Custom 3D Printer Profile
Open OrcaSlicer: Launch OrcaSlicer and click on the new project icon.
Open custom 3D printer profile: Click on the dropdown menu in the Printer section and click on Create 3D printer.
Create custom 3D printer profile: Input the 3D printer’s various parameters like nozzle size, bed dimensions, and any image. Select OK when done.
Configure Printer and Filament Presets: Create printer presets based on the preloaded profiles in OrcaSlicer. Select the filaments you’d want to print with and the process preset. Finally, click the Create button.

OrcaSlicer will now feature your custom 3D printer in the Printers section. You can further edit this printer’s settings, such as start and end gcodes, bed leveling, G-code flavor, and extruder configuration. More on this in the next section.
Customizing a Preloaded and DIY 3D Printer Profile in OrcaSlicer
OrcaSlicer lets you customize the 3D printer profile, custom or preloaded, once you’ve added it to the project. Using this feature, you can add specific bed leveling sequences and edit the layer height limits and printer speeds. Let’s go over the step-by-step process.
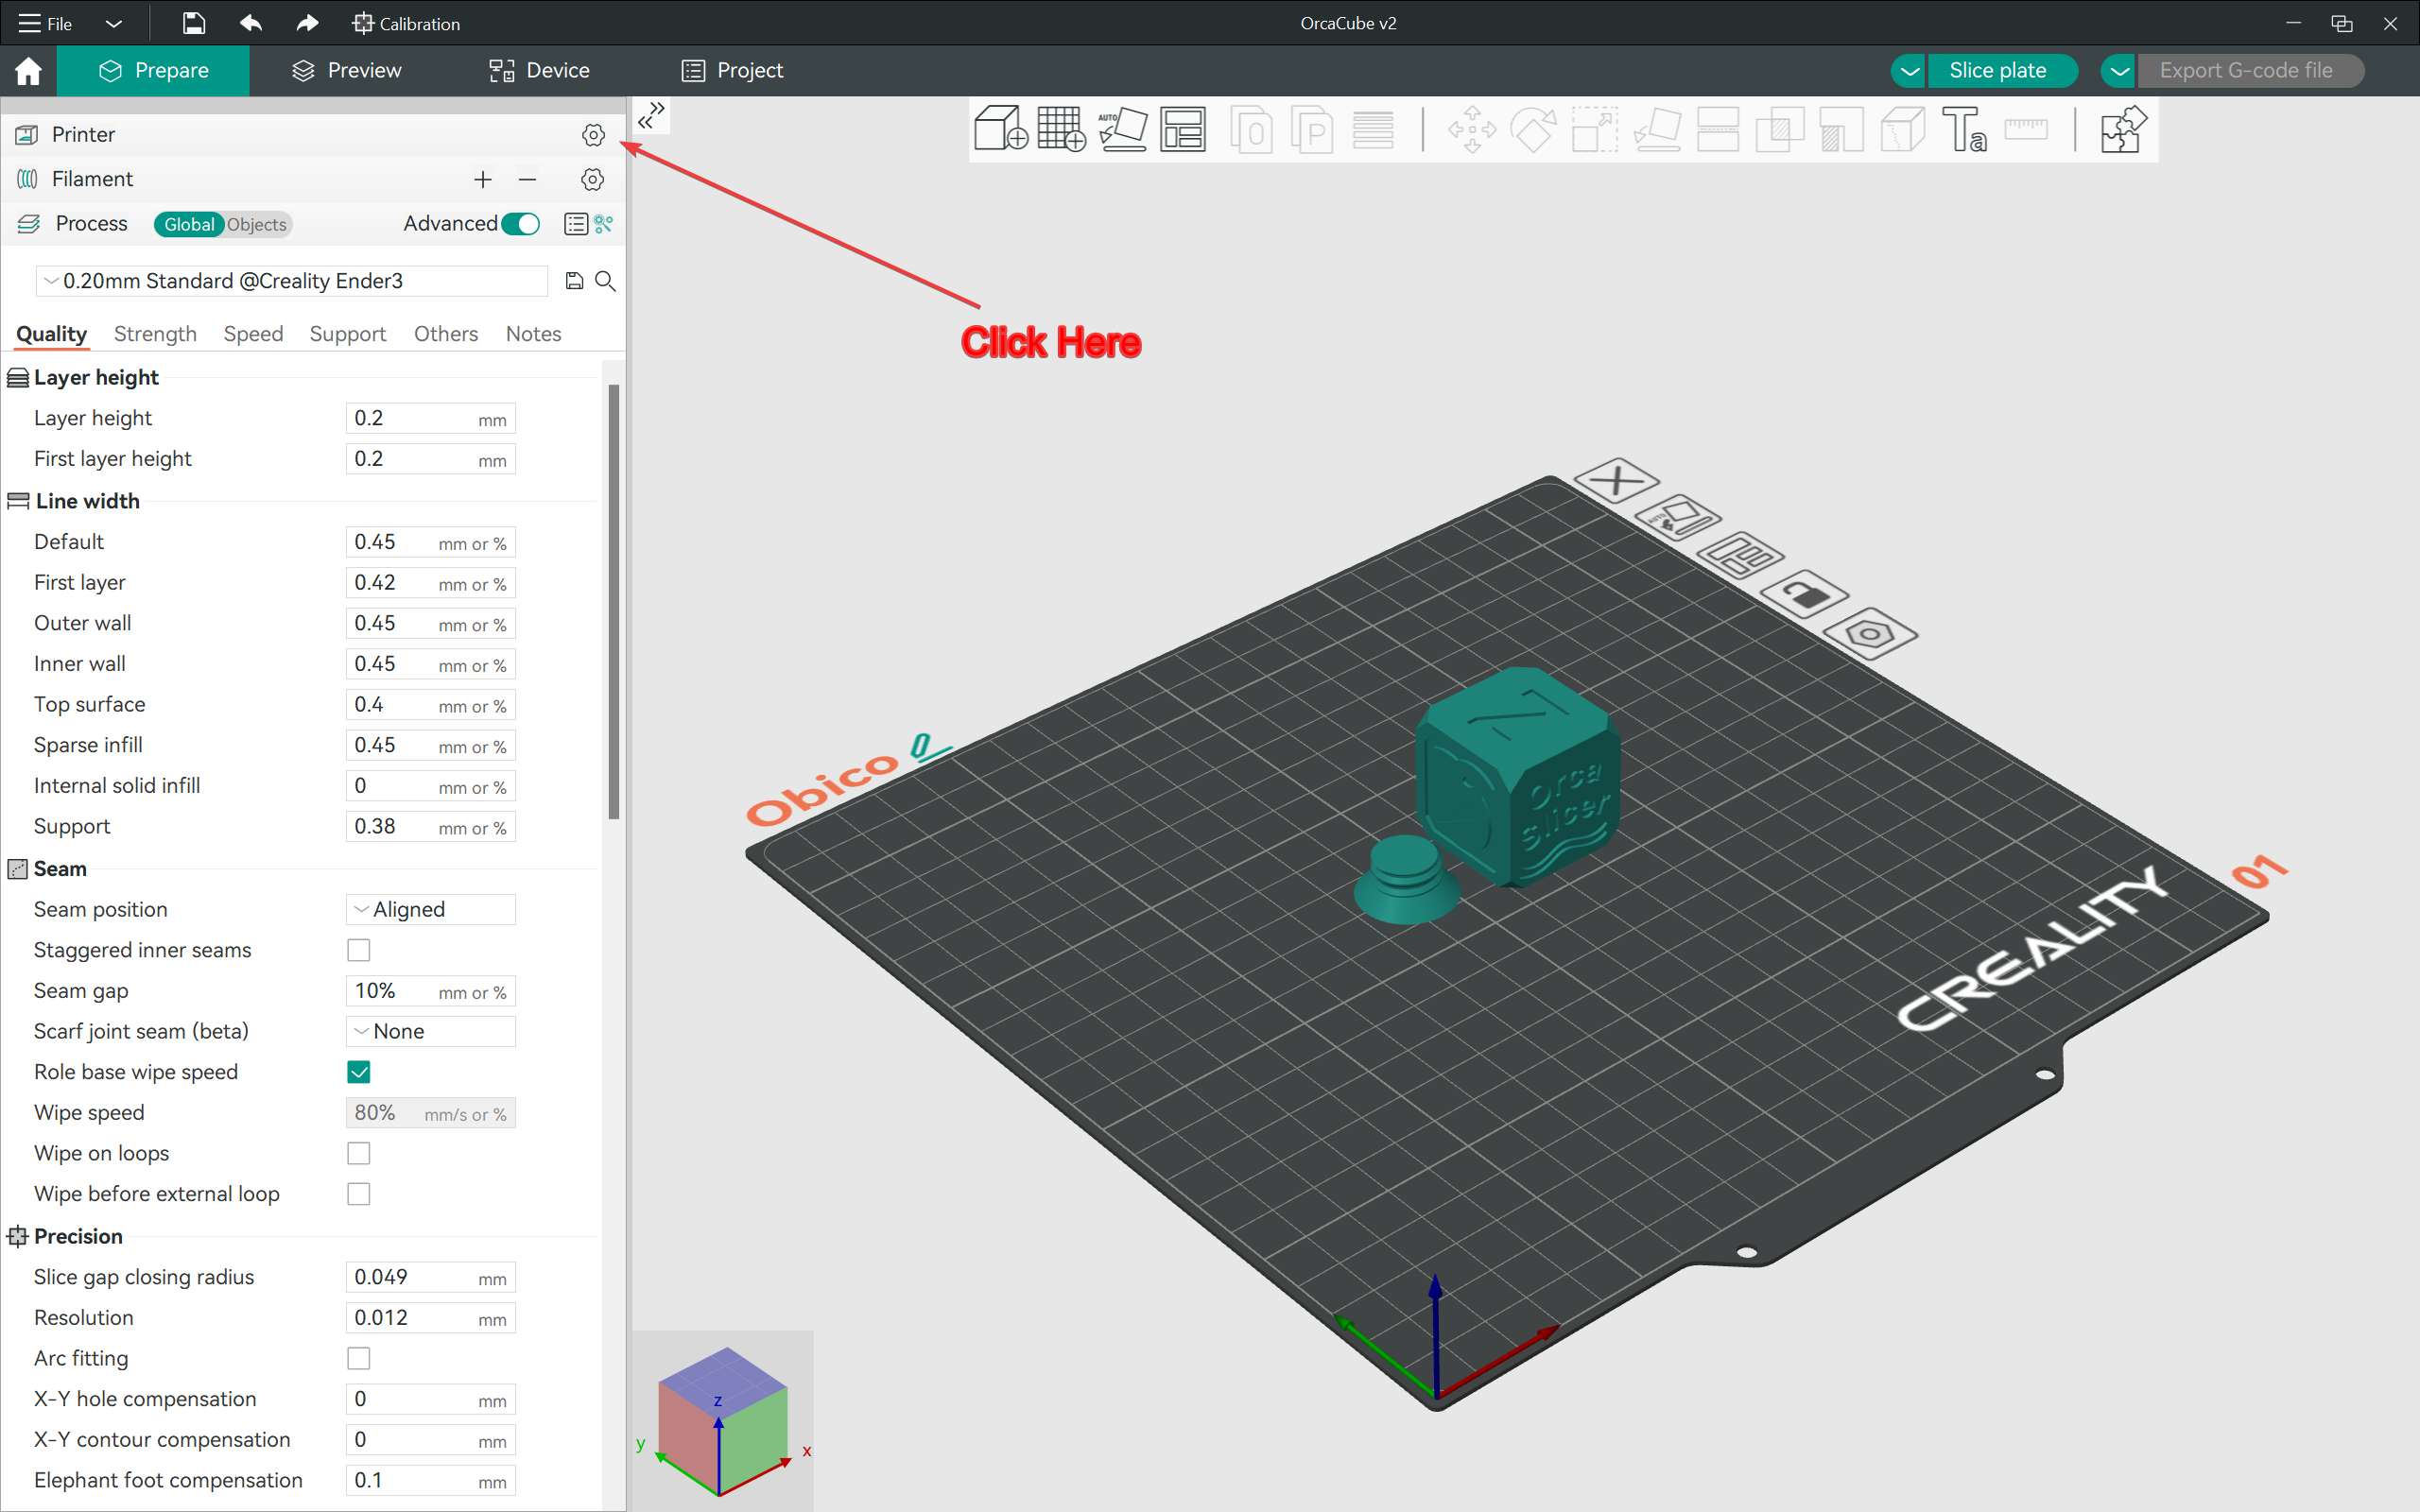
Open Printer Settings: In the printer section, select the printer you want to edit from the drop-down menu. Click on the notepad-style icon on the right to open the specific printer settings. Once the window opens, toggle the advanced settings button.
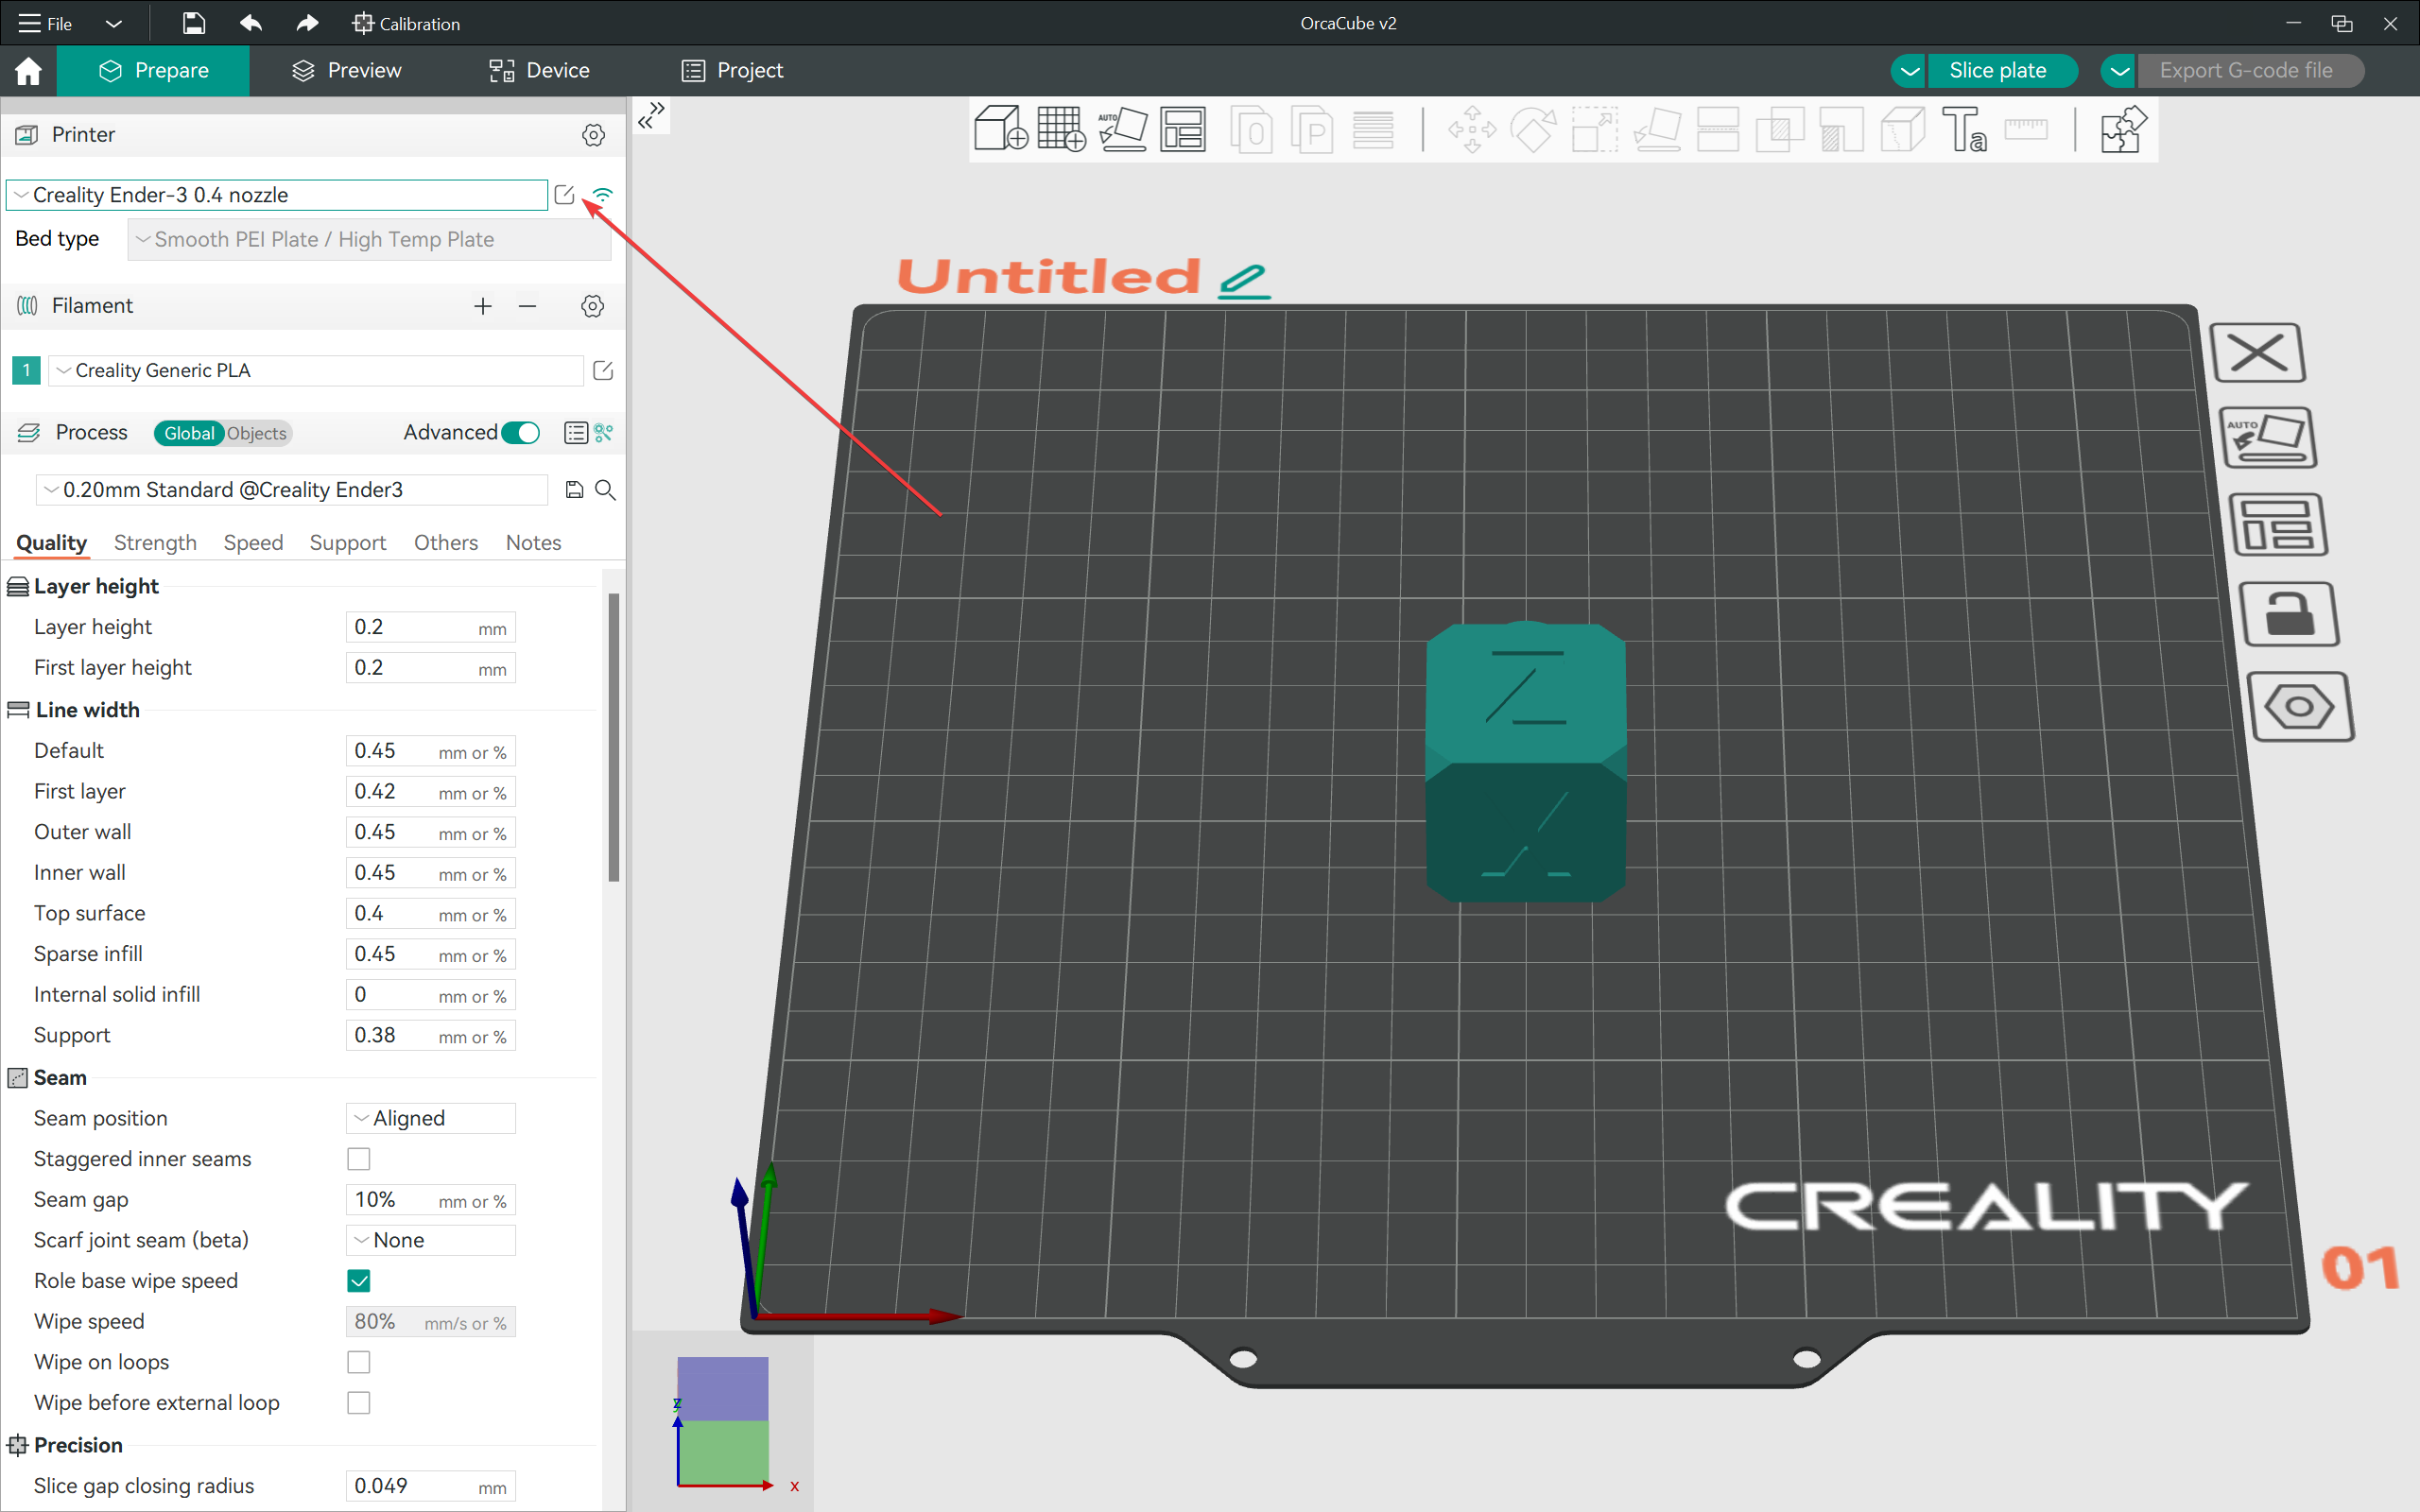
Customize the Basic Information: Set the printable area, print height, and G-code flavor. The image below shows how to edit the extruder clearance values for your 3D printer. These parameters are helpful when printing objects in sequence.

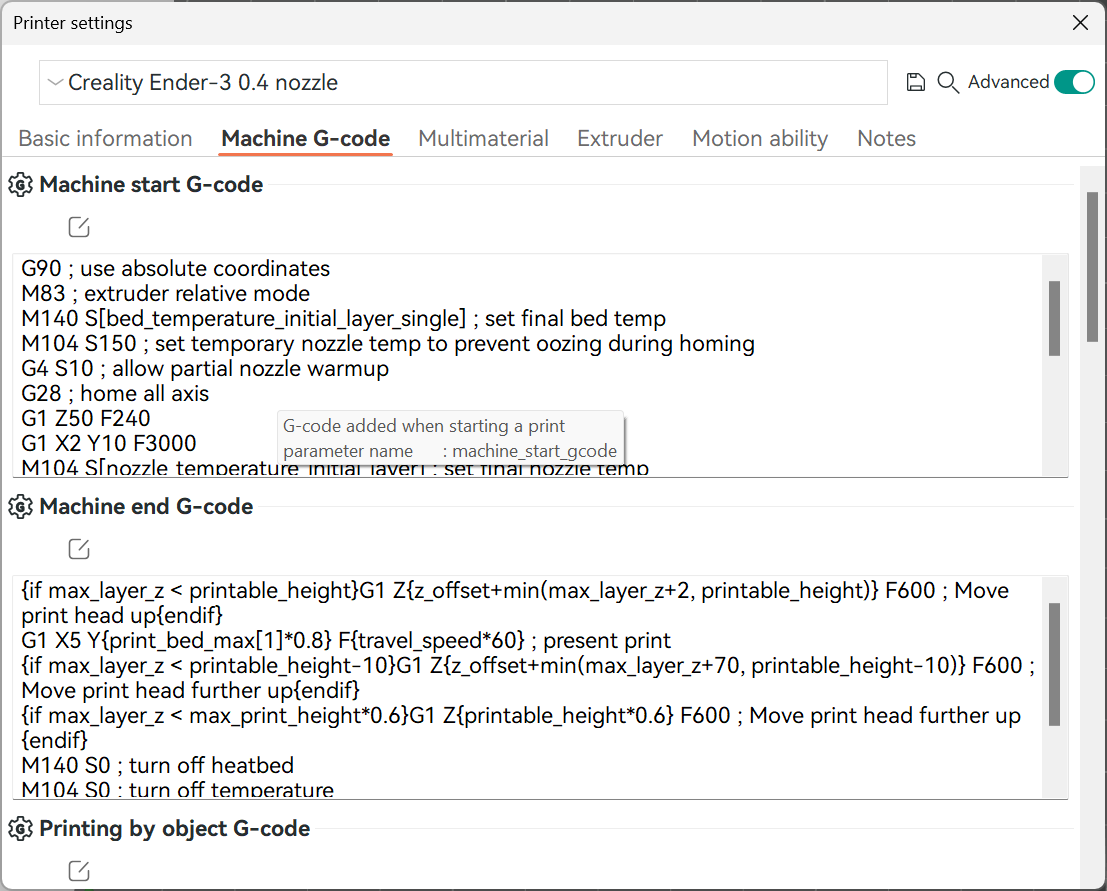
Set the Machine G-code: If you’re familiar with the G-code language, edit it per your preferences in this section.
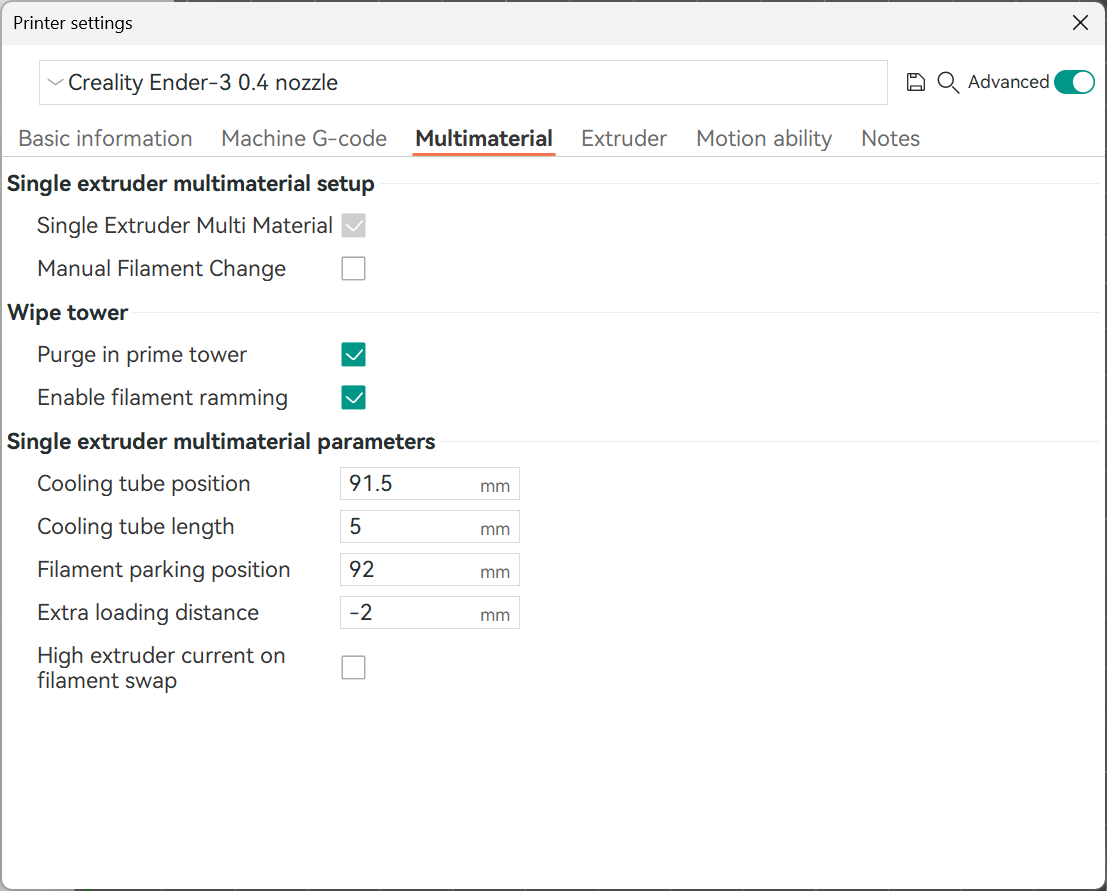
Edit multi-material printing: This section lets you customize the purge tower settings for printing with more than one filament.
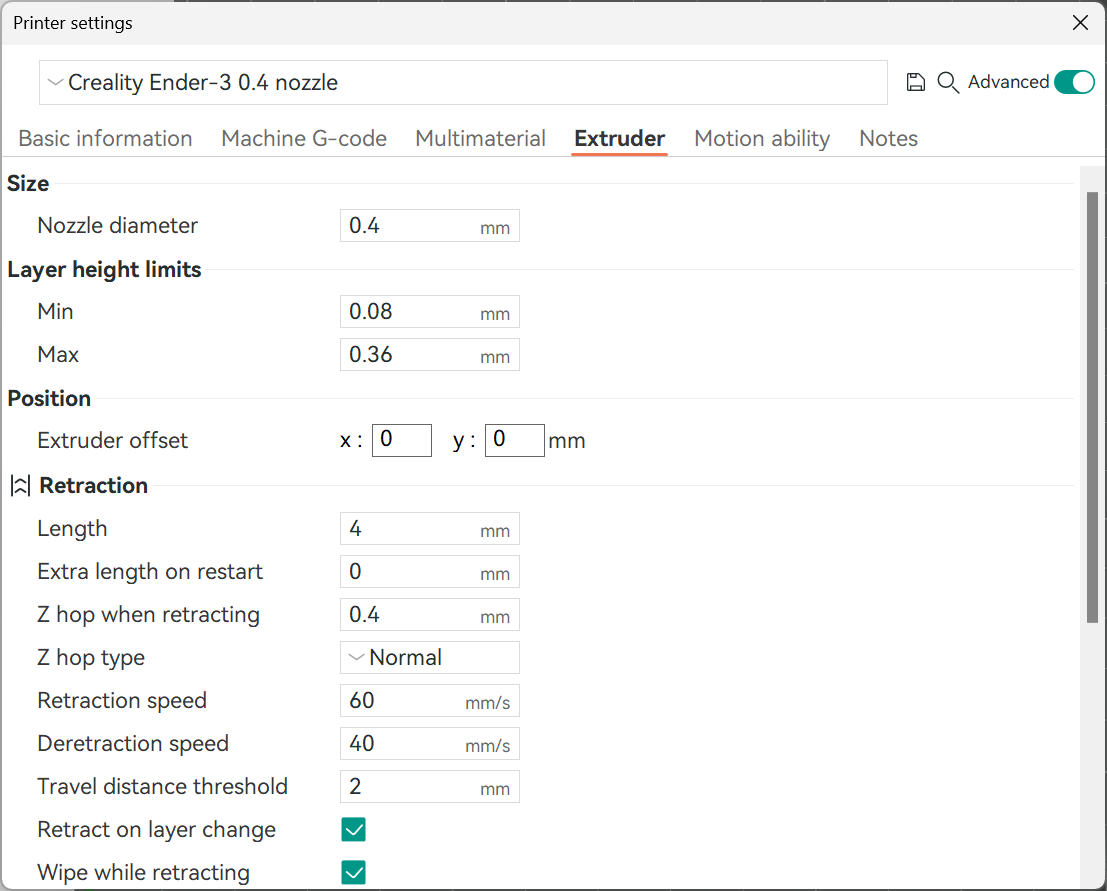
Set the extruder parameters: This section lets you set the nozzle diameter and minimum and maximum layer heights. It also lets you adjust the retraction settings for your 3D printer. Follow this Retraction Test Guide to calibrate your specific settings.
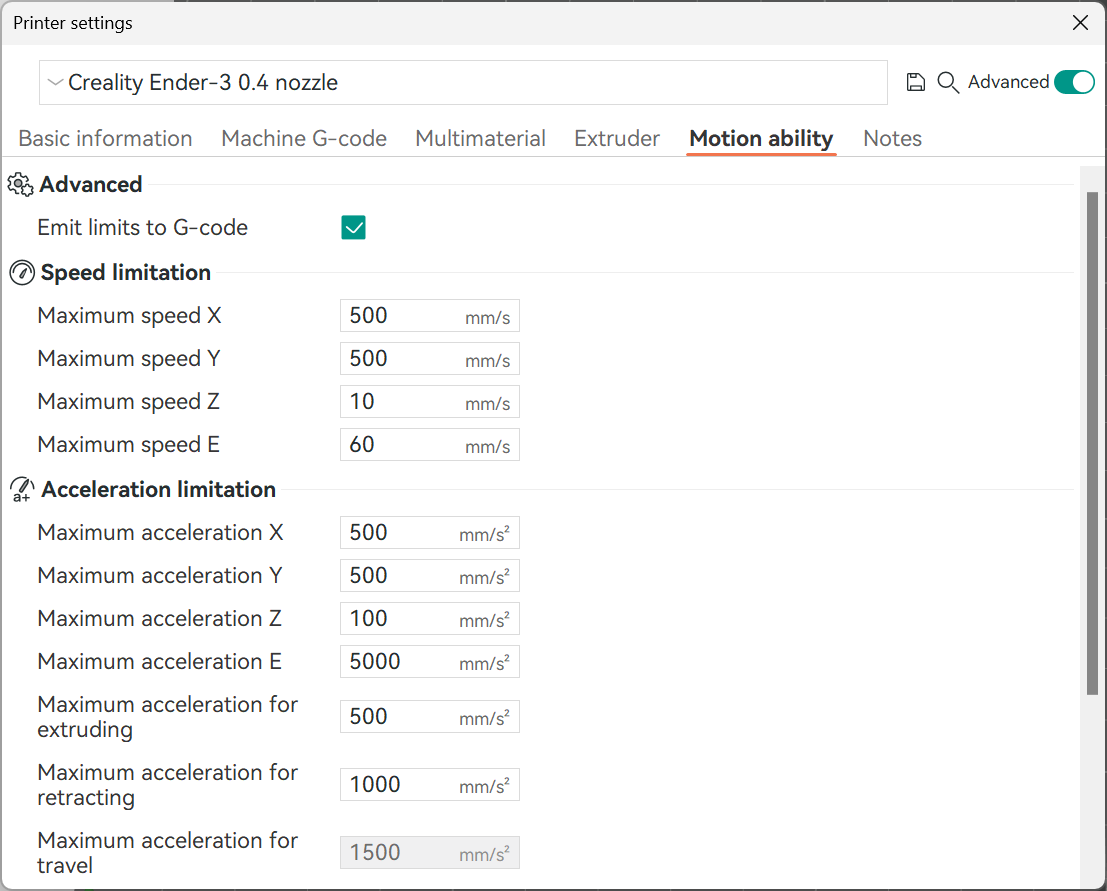
Adjust Printer Speeds: This section allows you to adjust the printer’s acceleration, speed, and jerk settings.
Whenever you change the nozzle, alter the printer’s geometry, or want to modify its motion abilities, this is where you do it. Now, onto the filament settings part.
Configuring Filament Settings for 3D Printers
Each 3D printer is configured to print with certain filament types. 3D printers with all-metal hot ends can print exotic materials like Polycarbonate, PolyPropylene, and Nylon. While others with PTFE-lined hot ends are limited to PLA, TPU, PETG, and ABS.
OrcaSlicer lets you configure the filament settings for your specific 3D printer in its filament section. These settings are useful to quickly switch between materials and preset their printing temperature and diameter values. Let’s understand the filament configuration process in OrcaSlicer.
Select a filament: Open the dropdown menu in the filament section and choose a filament.
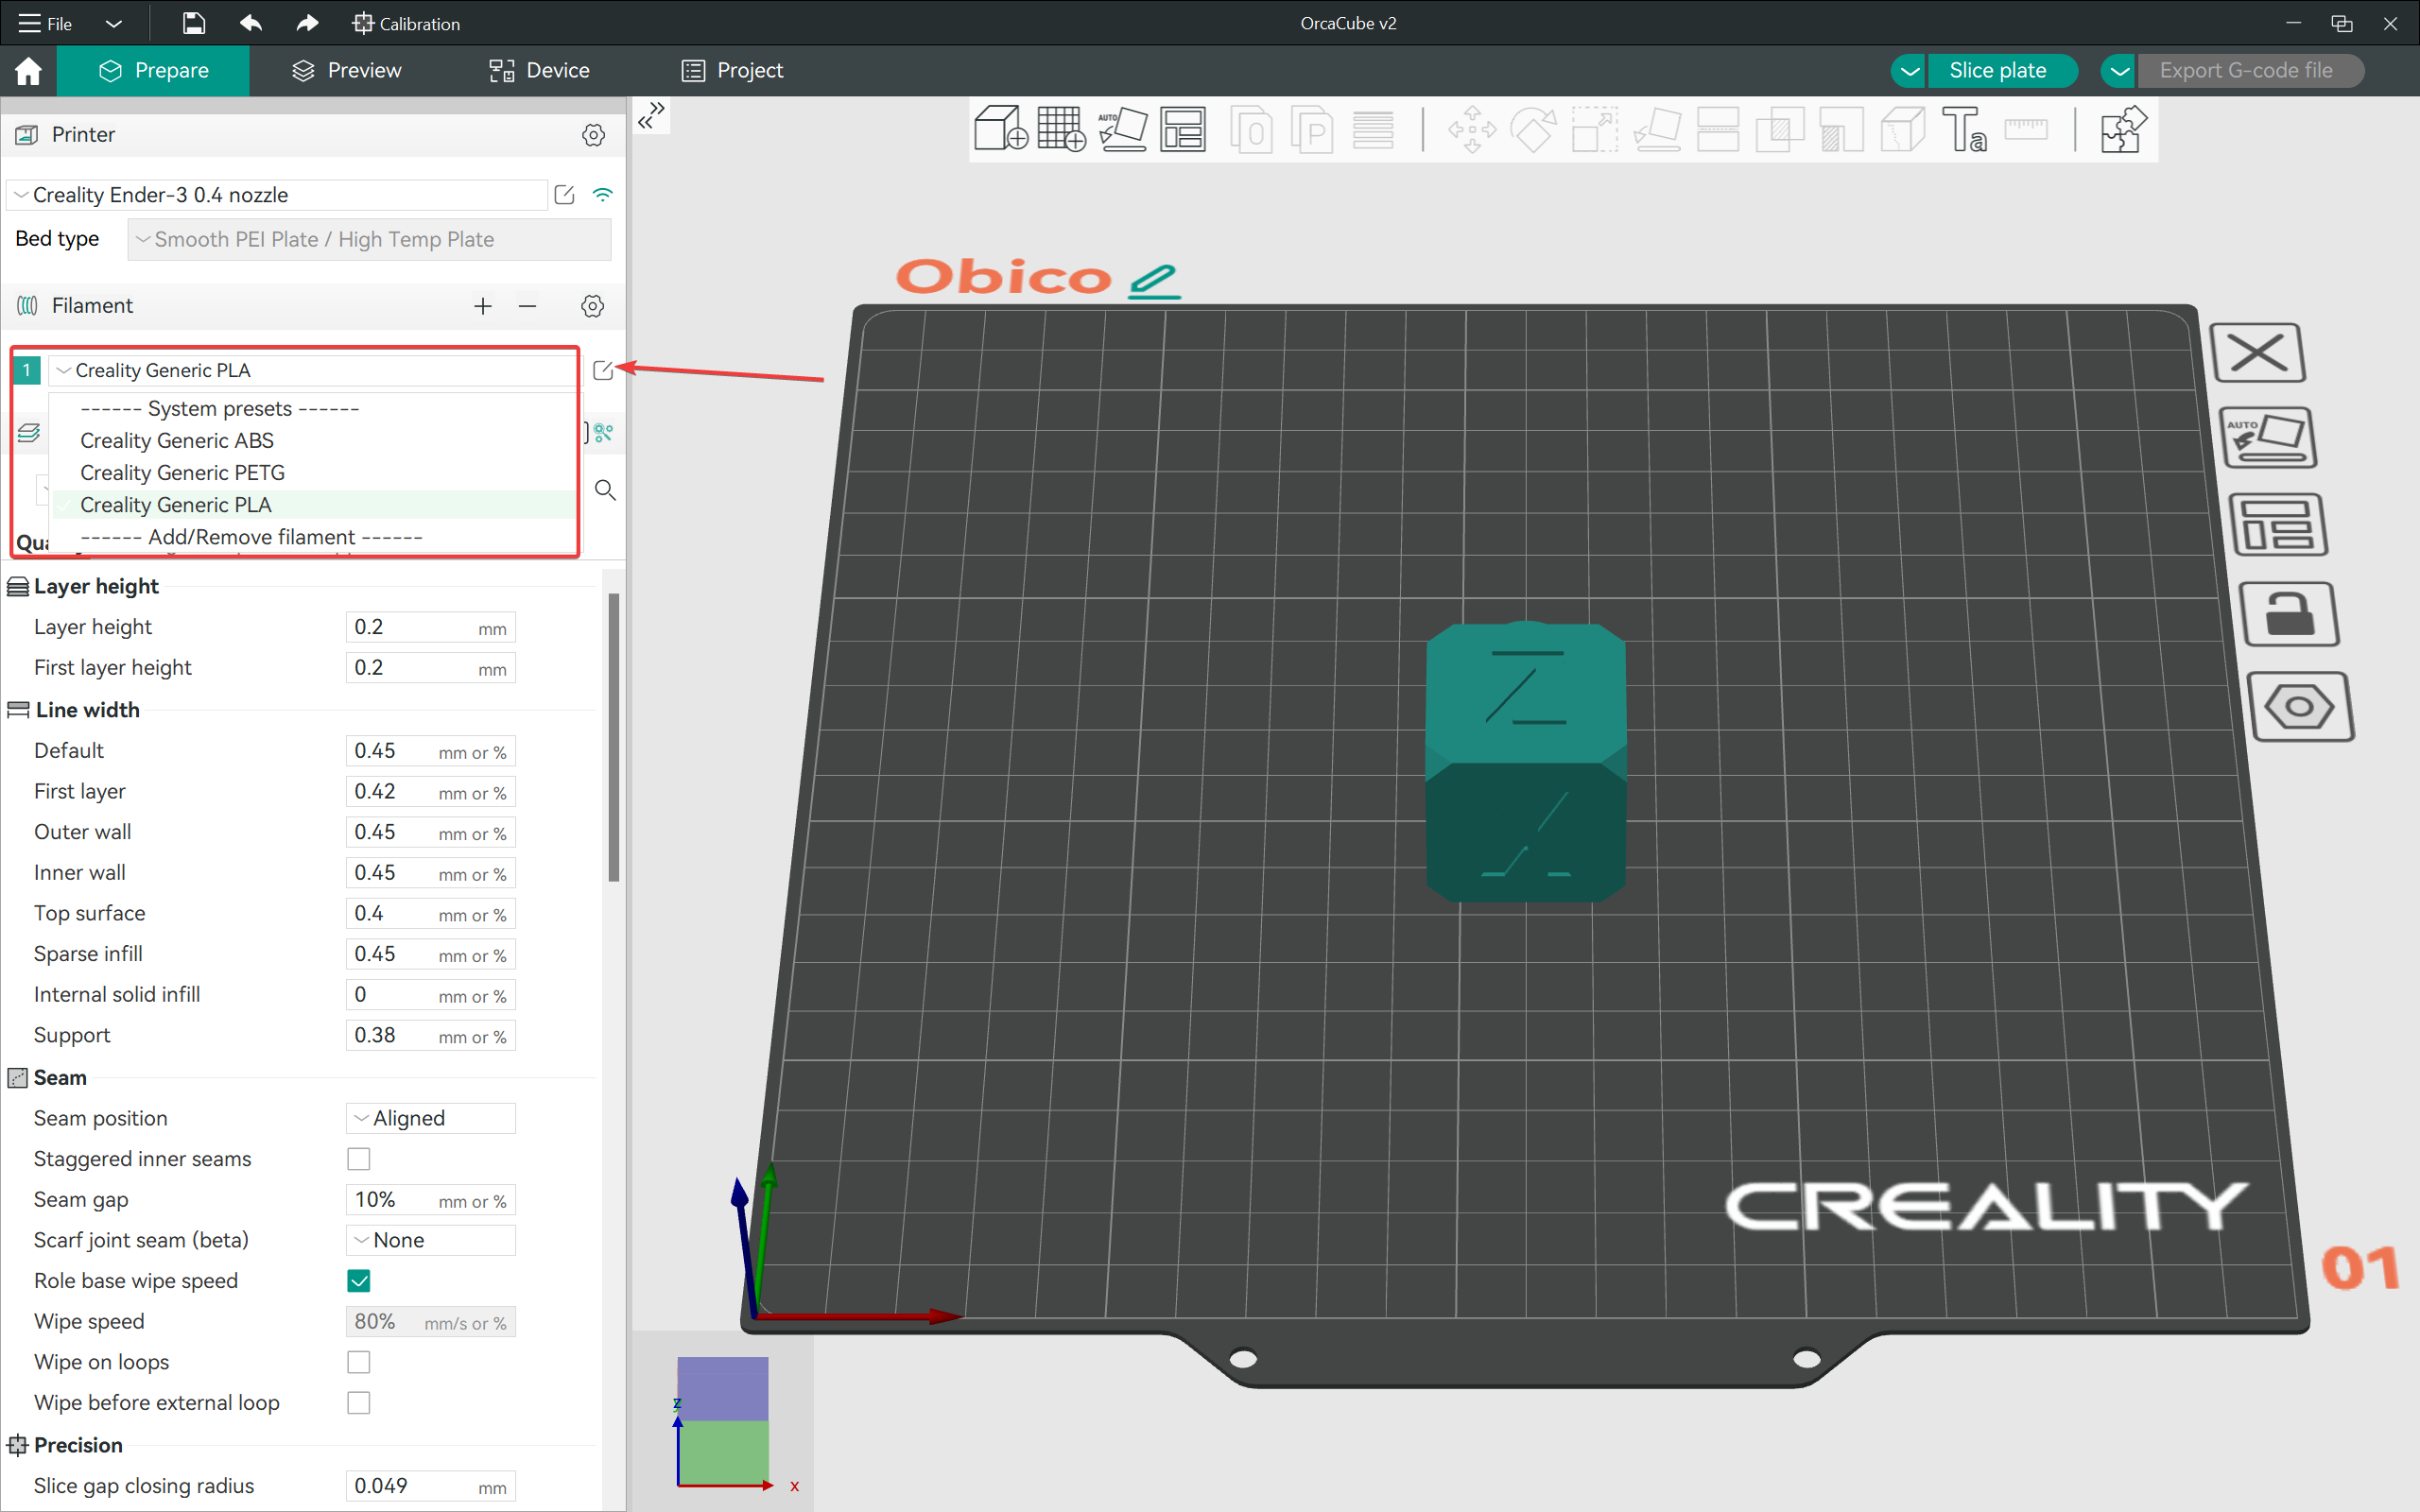
Open filament settings: Click on the notepad style icon beside the filament name to open the filament settings tab.
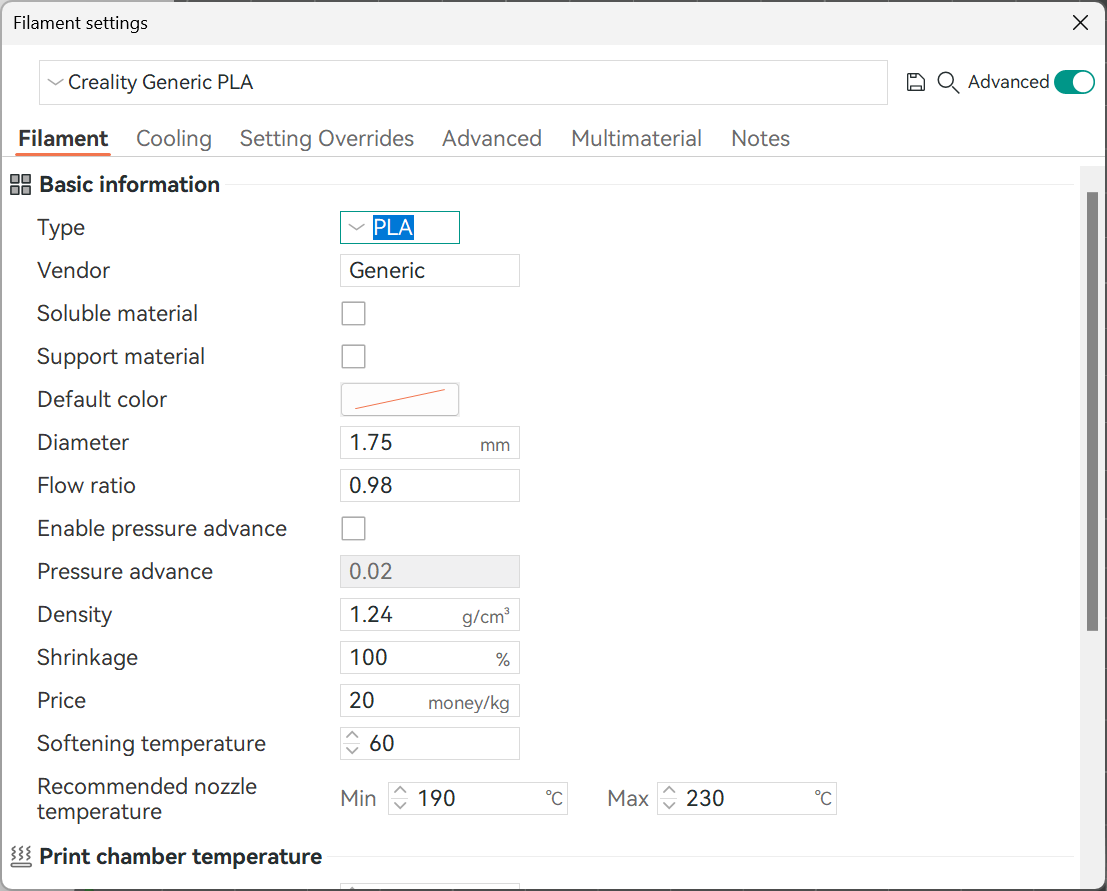
Configure basic filament parameters: In this tab, set the filament type, vendor, color, diameters, and printing temperatures. You also have the flow ratio and Pressure advance settings in this section.
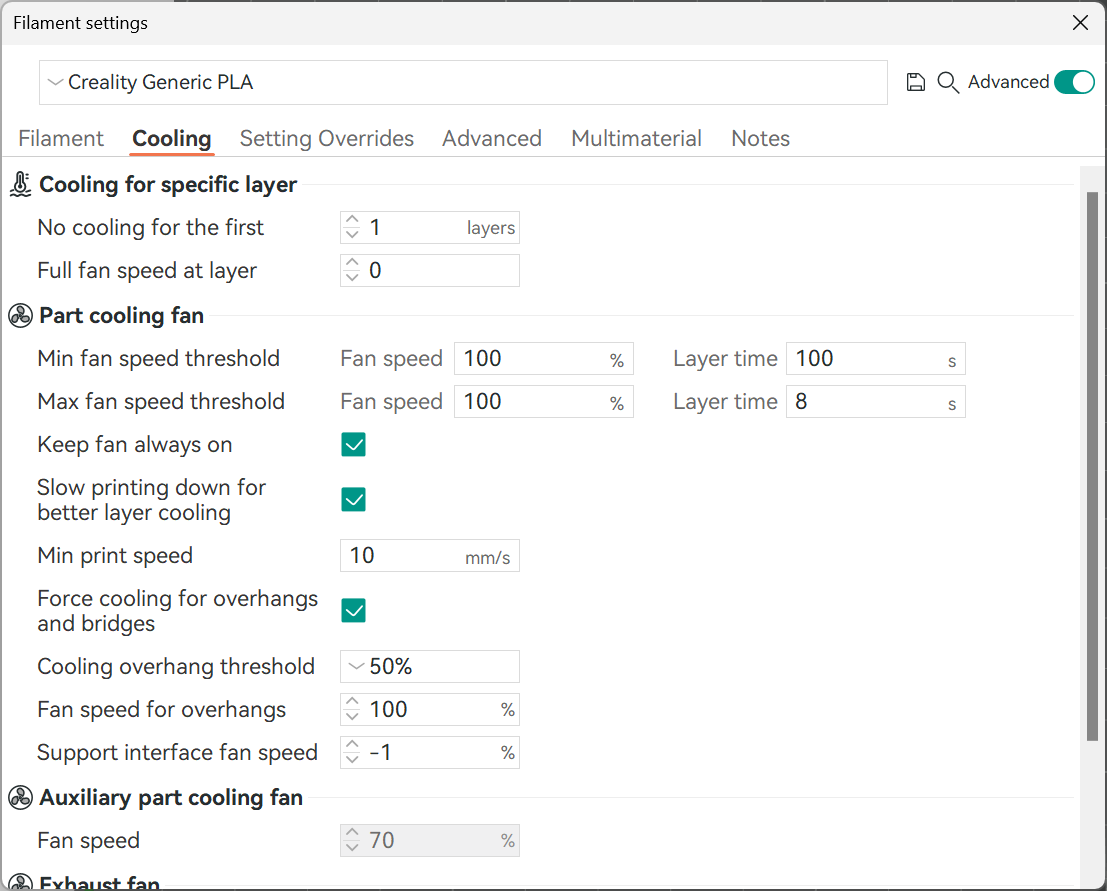
Set cooling speeds: Set the cooling speeds according to your filament type. Switch off the fans for the first few layers and gradually turn up the speeds.
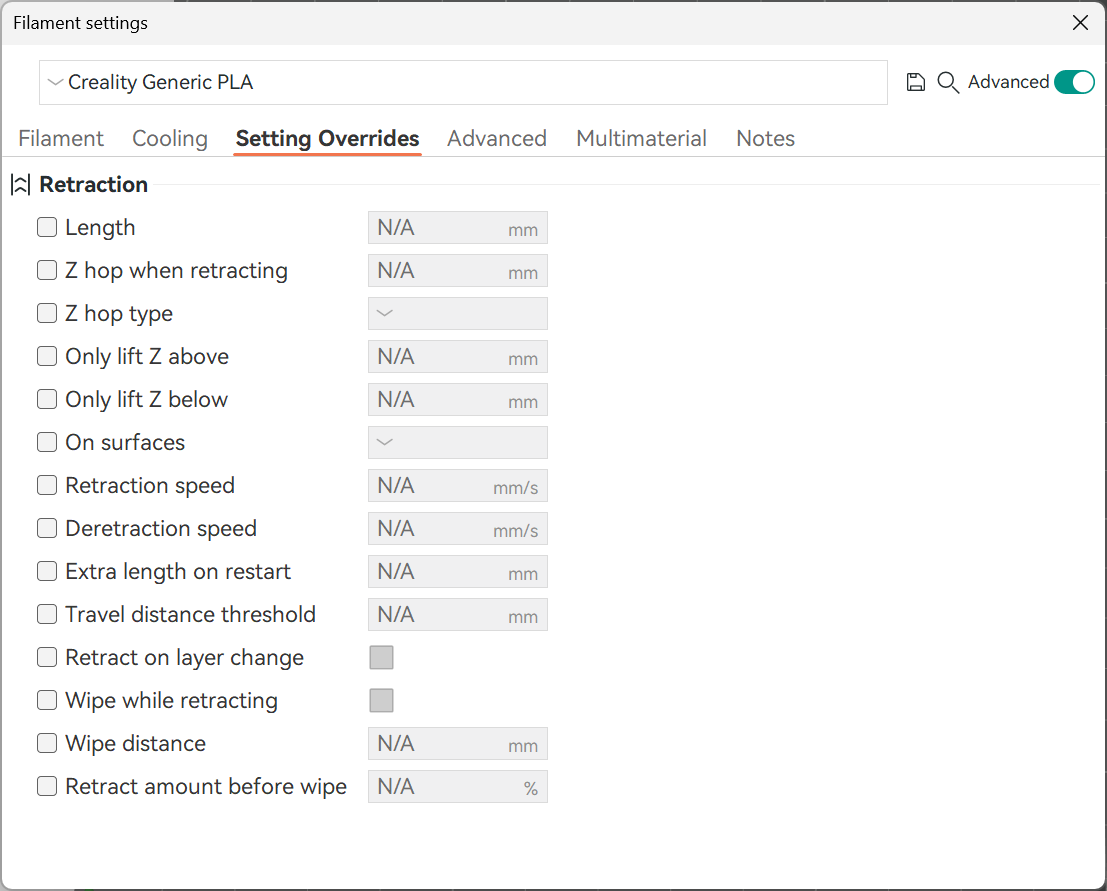
Calibrate the settings override section: This tab allows you to set the specific retraction settings for a filament. It comes in handy when you’re printing with different filaments and have different printing needs on the same 3D printer.
These instructions will help you configure the profiles for all the filaments you’ll be using with the printer. If you have more than one 3D printer, you can also match the filament profiles between the printers.
Setting the Slicing Parameters
The slicing settings will be different for everyone based on their 3D printer, printer configuration, filament settings, and model itself. The objective of this section is to give you a brief idea of the major slicing parameters and how they affect the printing quality.
Print Quality Settings
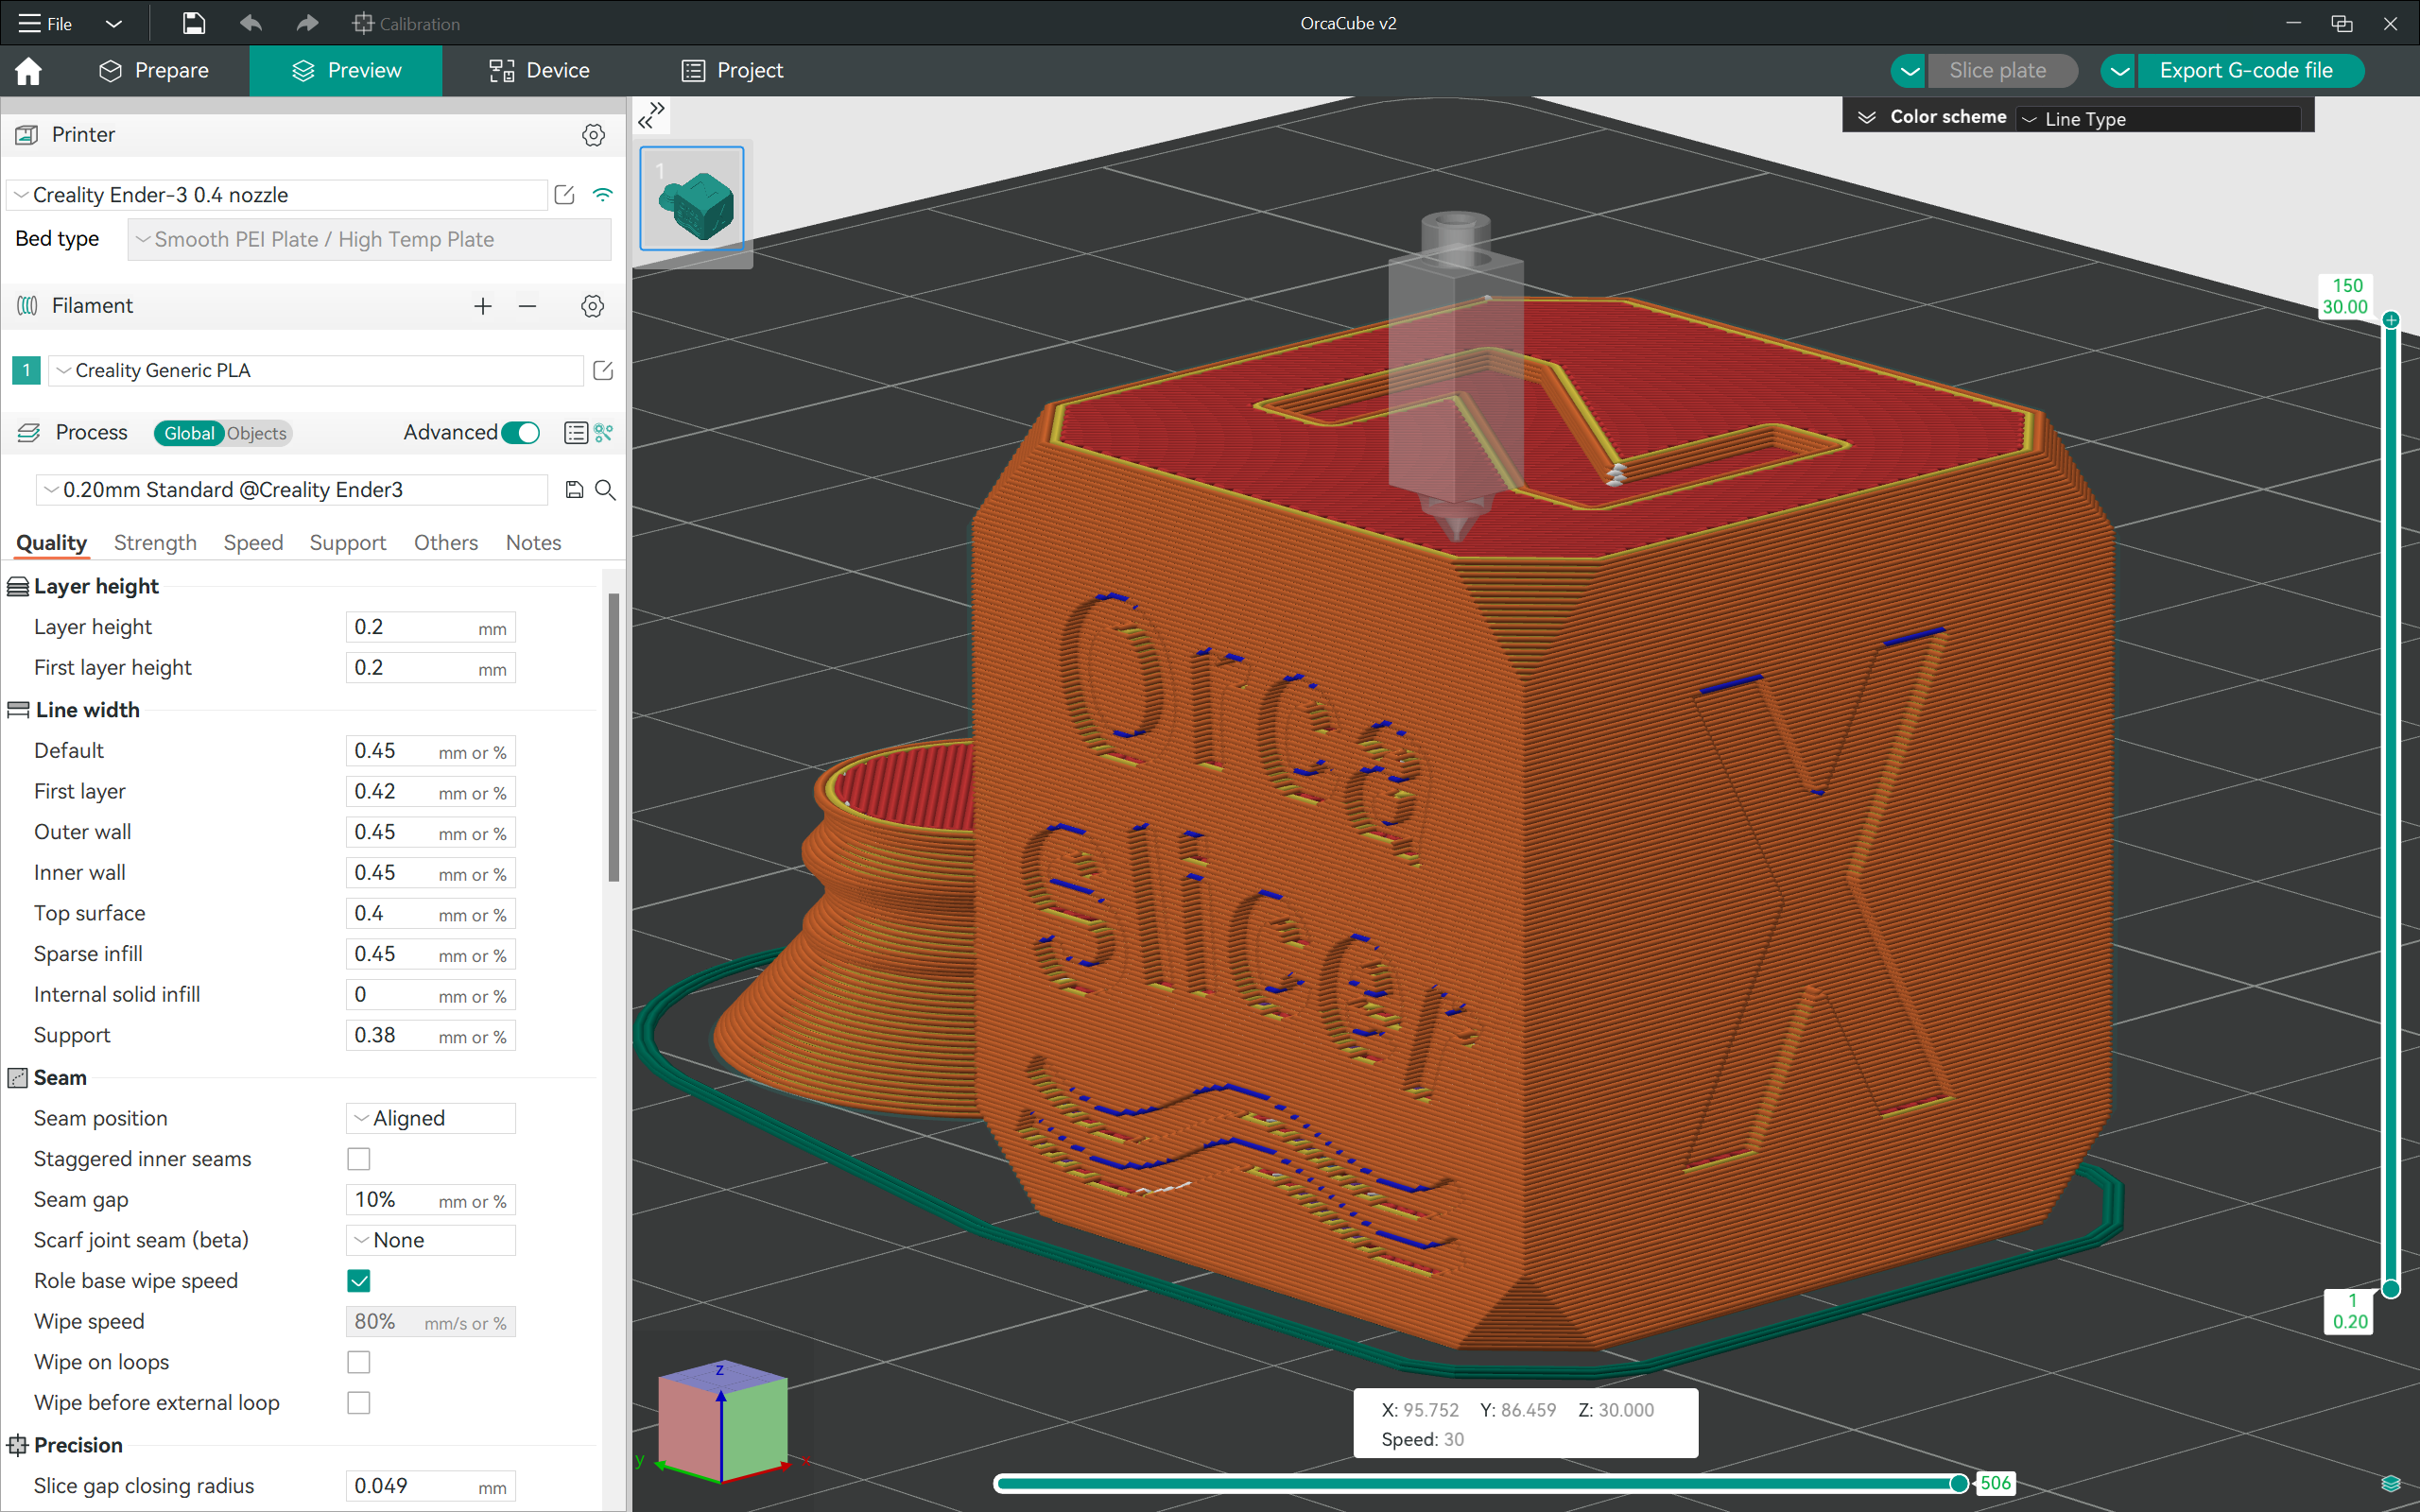
These settings determine the finish and overall appearance of your 3D-printed part. In this section of OrcaSlicer, you can adjust the layer height, flow rates, seam positions, and line widths.
Layer Height: A lower layer height gives you a fine print quality but increases the print time. In contrast, a higher layer height reduces the print time, but the part has visible layers on the surface. Use a low layer height for aesthetic 3D prints and a higher number for parts where surface quality is secondary.
Line Width: Keep the line width slightly higher than the nozzle diameter. It’ll produce thicker walls and give more strength to the printed part. For starters, you can use the default values in OrcaSlicer.
Seam Position: A seam line denotes the start and end extrusion points in a layer. These small blobs can detract from the finish of the 3D print. Keep this setting Random or at the Back to minimize their visible effect on the part.
Ironing: This setting gives the top surfaces in your 3D prints a smoother finish. It passes the nozzle over the top surface and melts it slightly to smooth the extrusion lines. Ironing increases the print time considerably, so use it only if your print needs a higher aesthetic appeal.
Overhangs: Overhangs are the portions of your 3D print that extend beyond a certain angle in the geometry. Check the Detect Overhang Walls option to use specific speed and support settings in your 3D prints.
Strength Settings
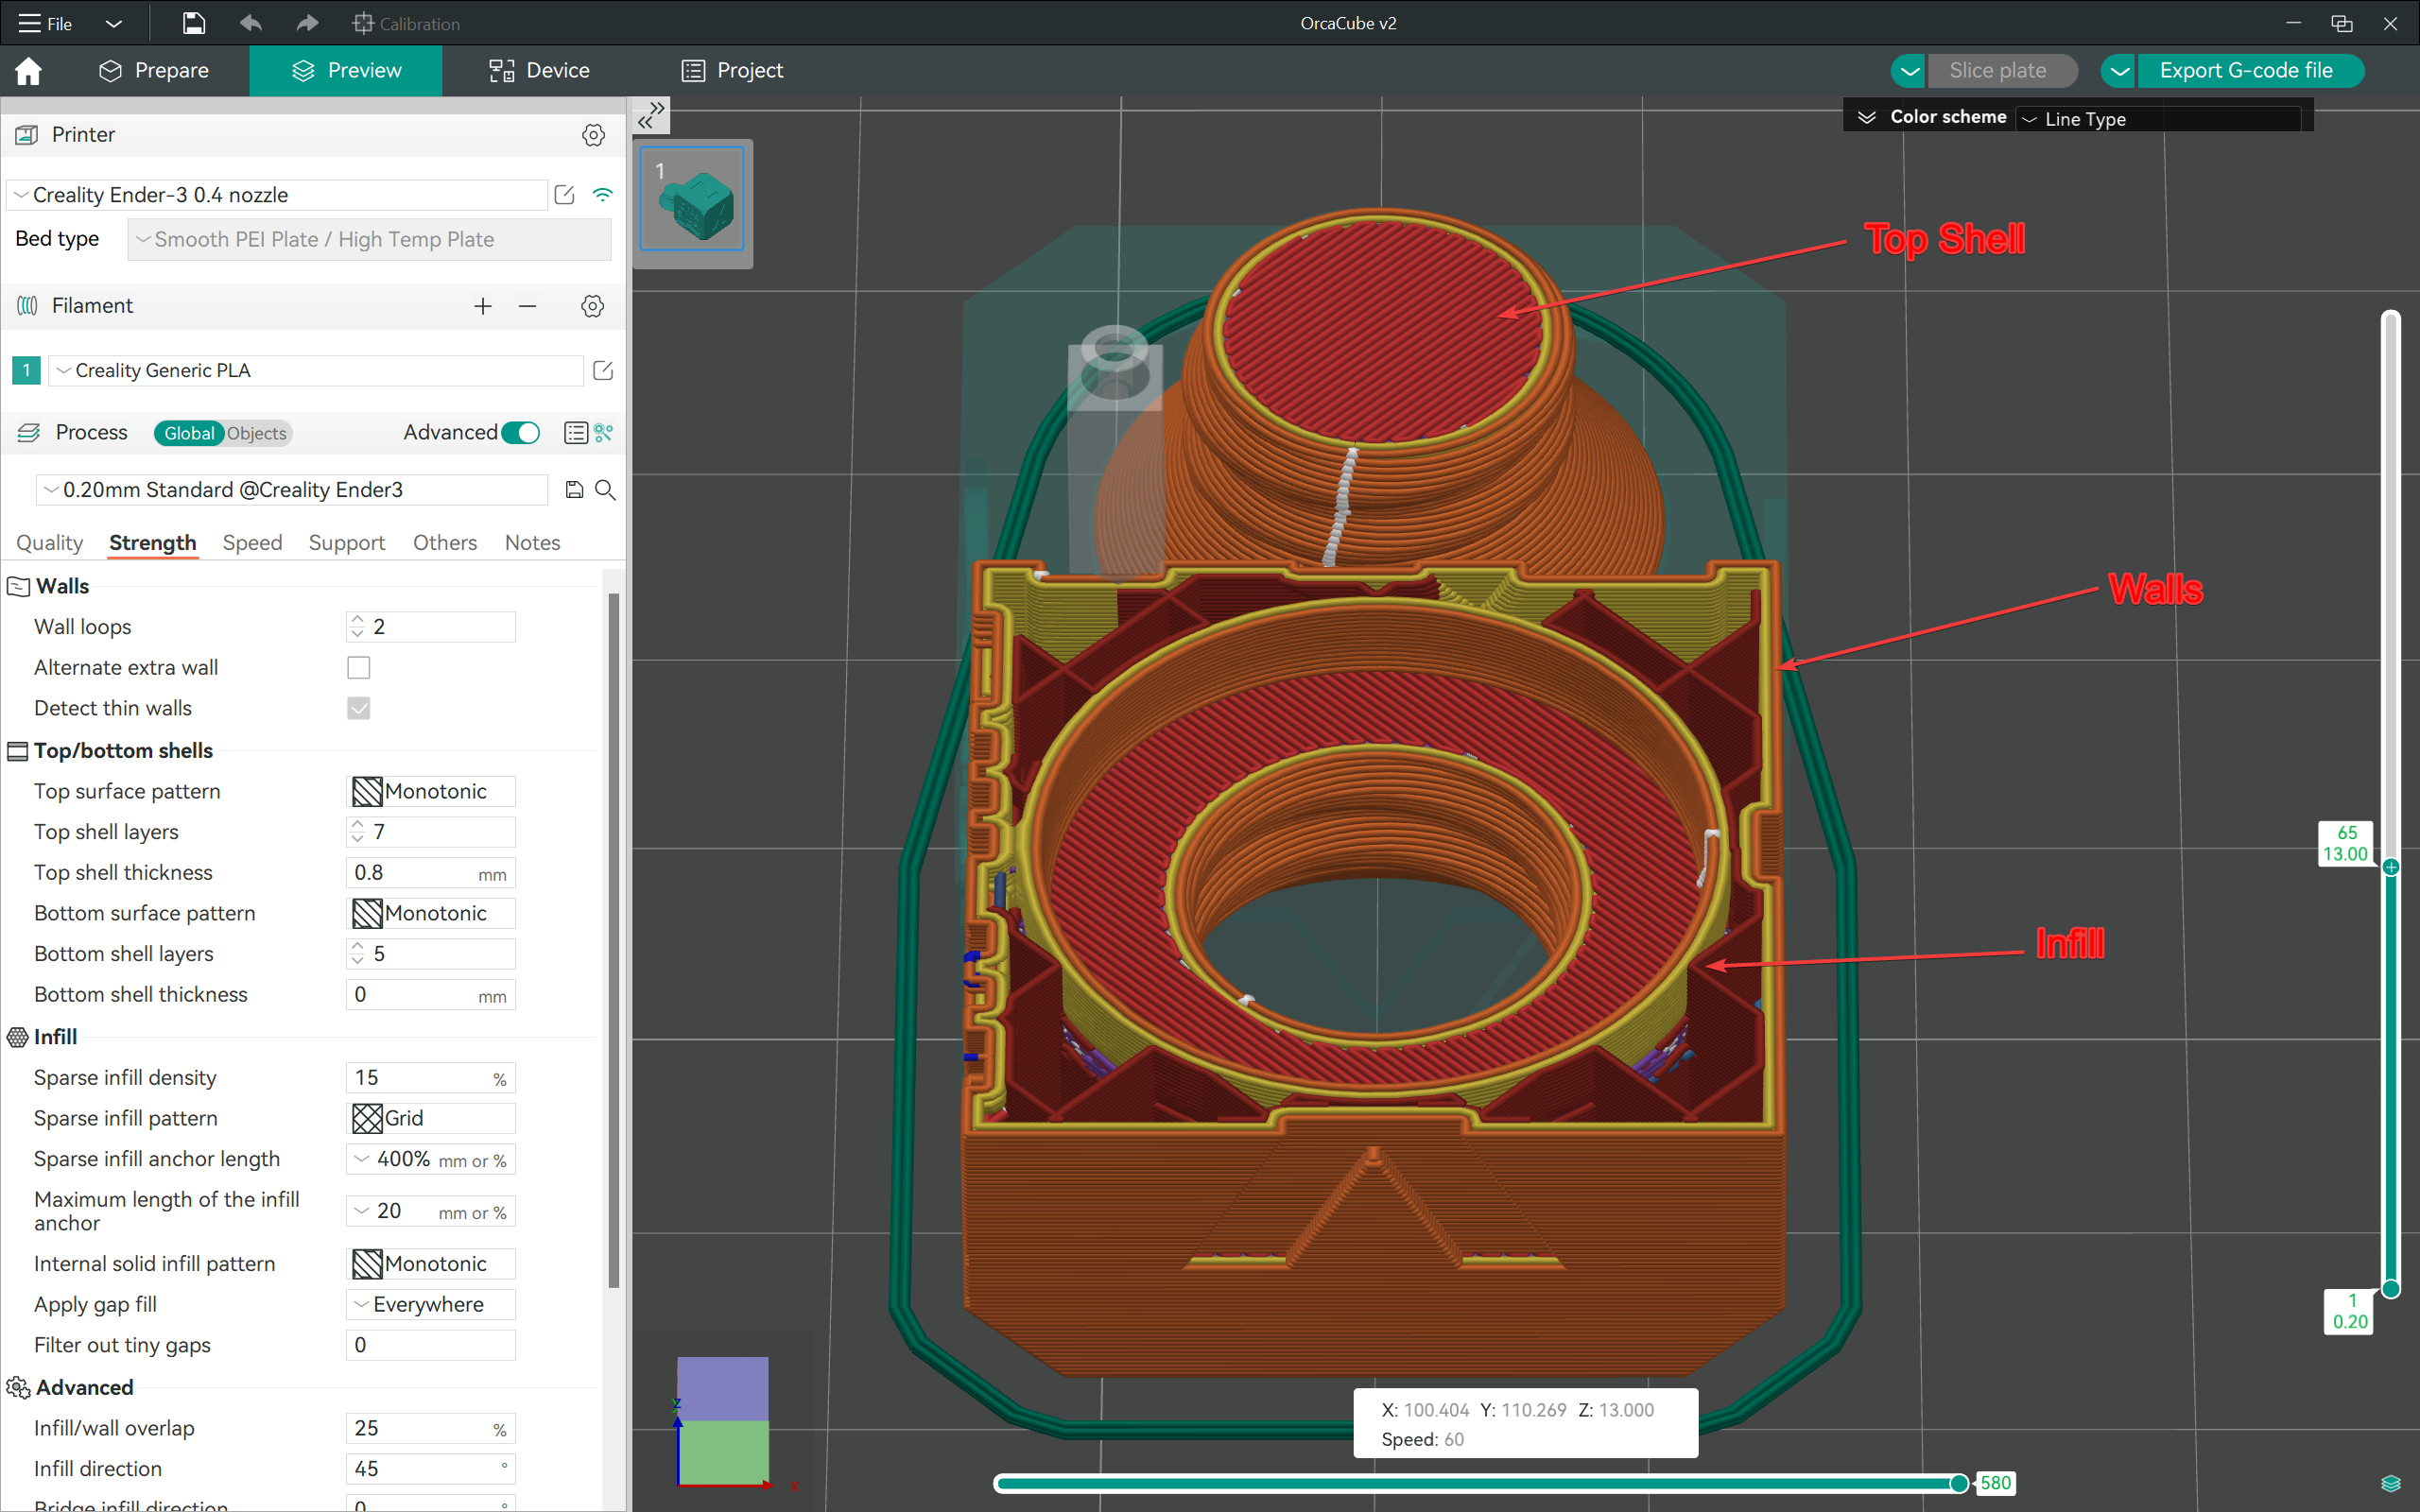
Using the strength settings in OrcaSlicer, you can set the infill type and percentage, the number of walls, and the top and bottom shells. These factors influence the overall strength of your 3D-printed part and are crucial when printing functional 3D prints.
Walls: This parameter determines the number of perimeters or walls your printed parts will have. Use at least three walls, and increase the number for more strength.
Top and Bottom Shells: Use a minimum of four shells at the top and bottom. It’ll give your parts a clean finish at the top and bottom and reduce the chances of infill showing up.
Infill: A 15-30% infill density is enough to give your parts enough strength while balancing the print time and material. Any higher, and you’re better off using more walls than infill. If you want to reduce the printing time, use a simple infill type like the Grid or Line. Otherwise, use Honeycomb, Gyroid, or Tri-Hexagon patterns for better part strength.
Print Speed Settings
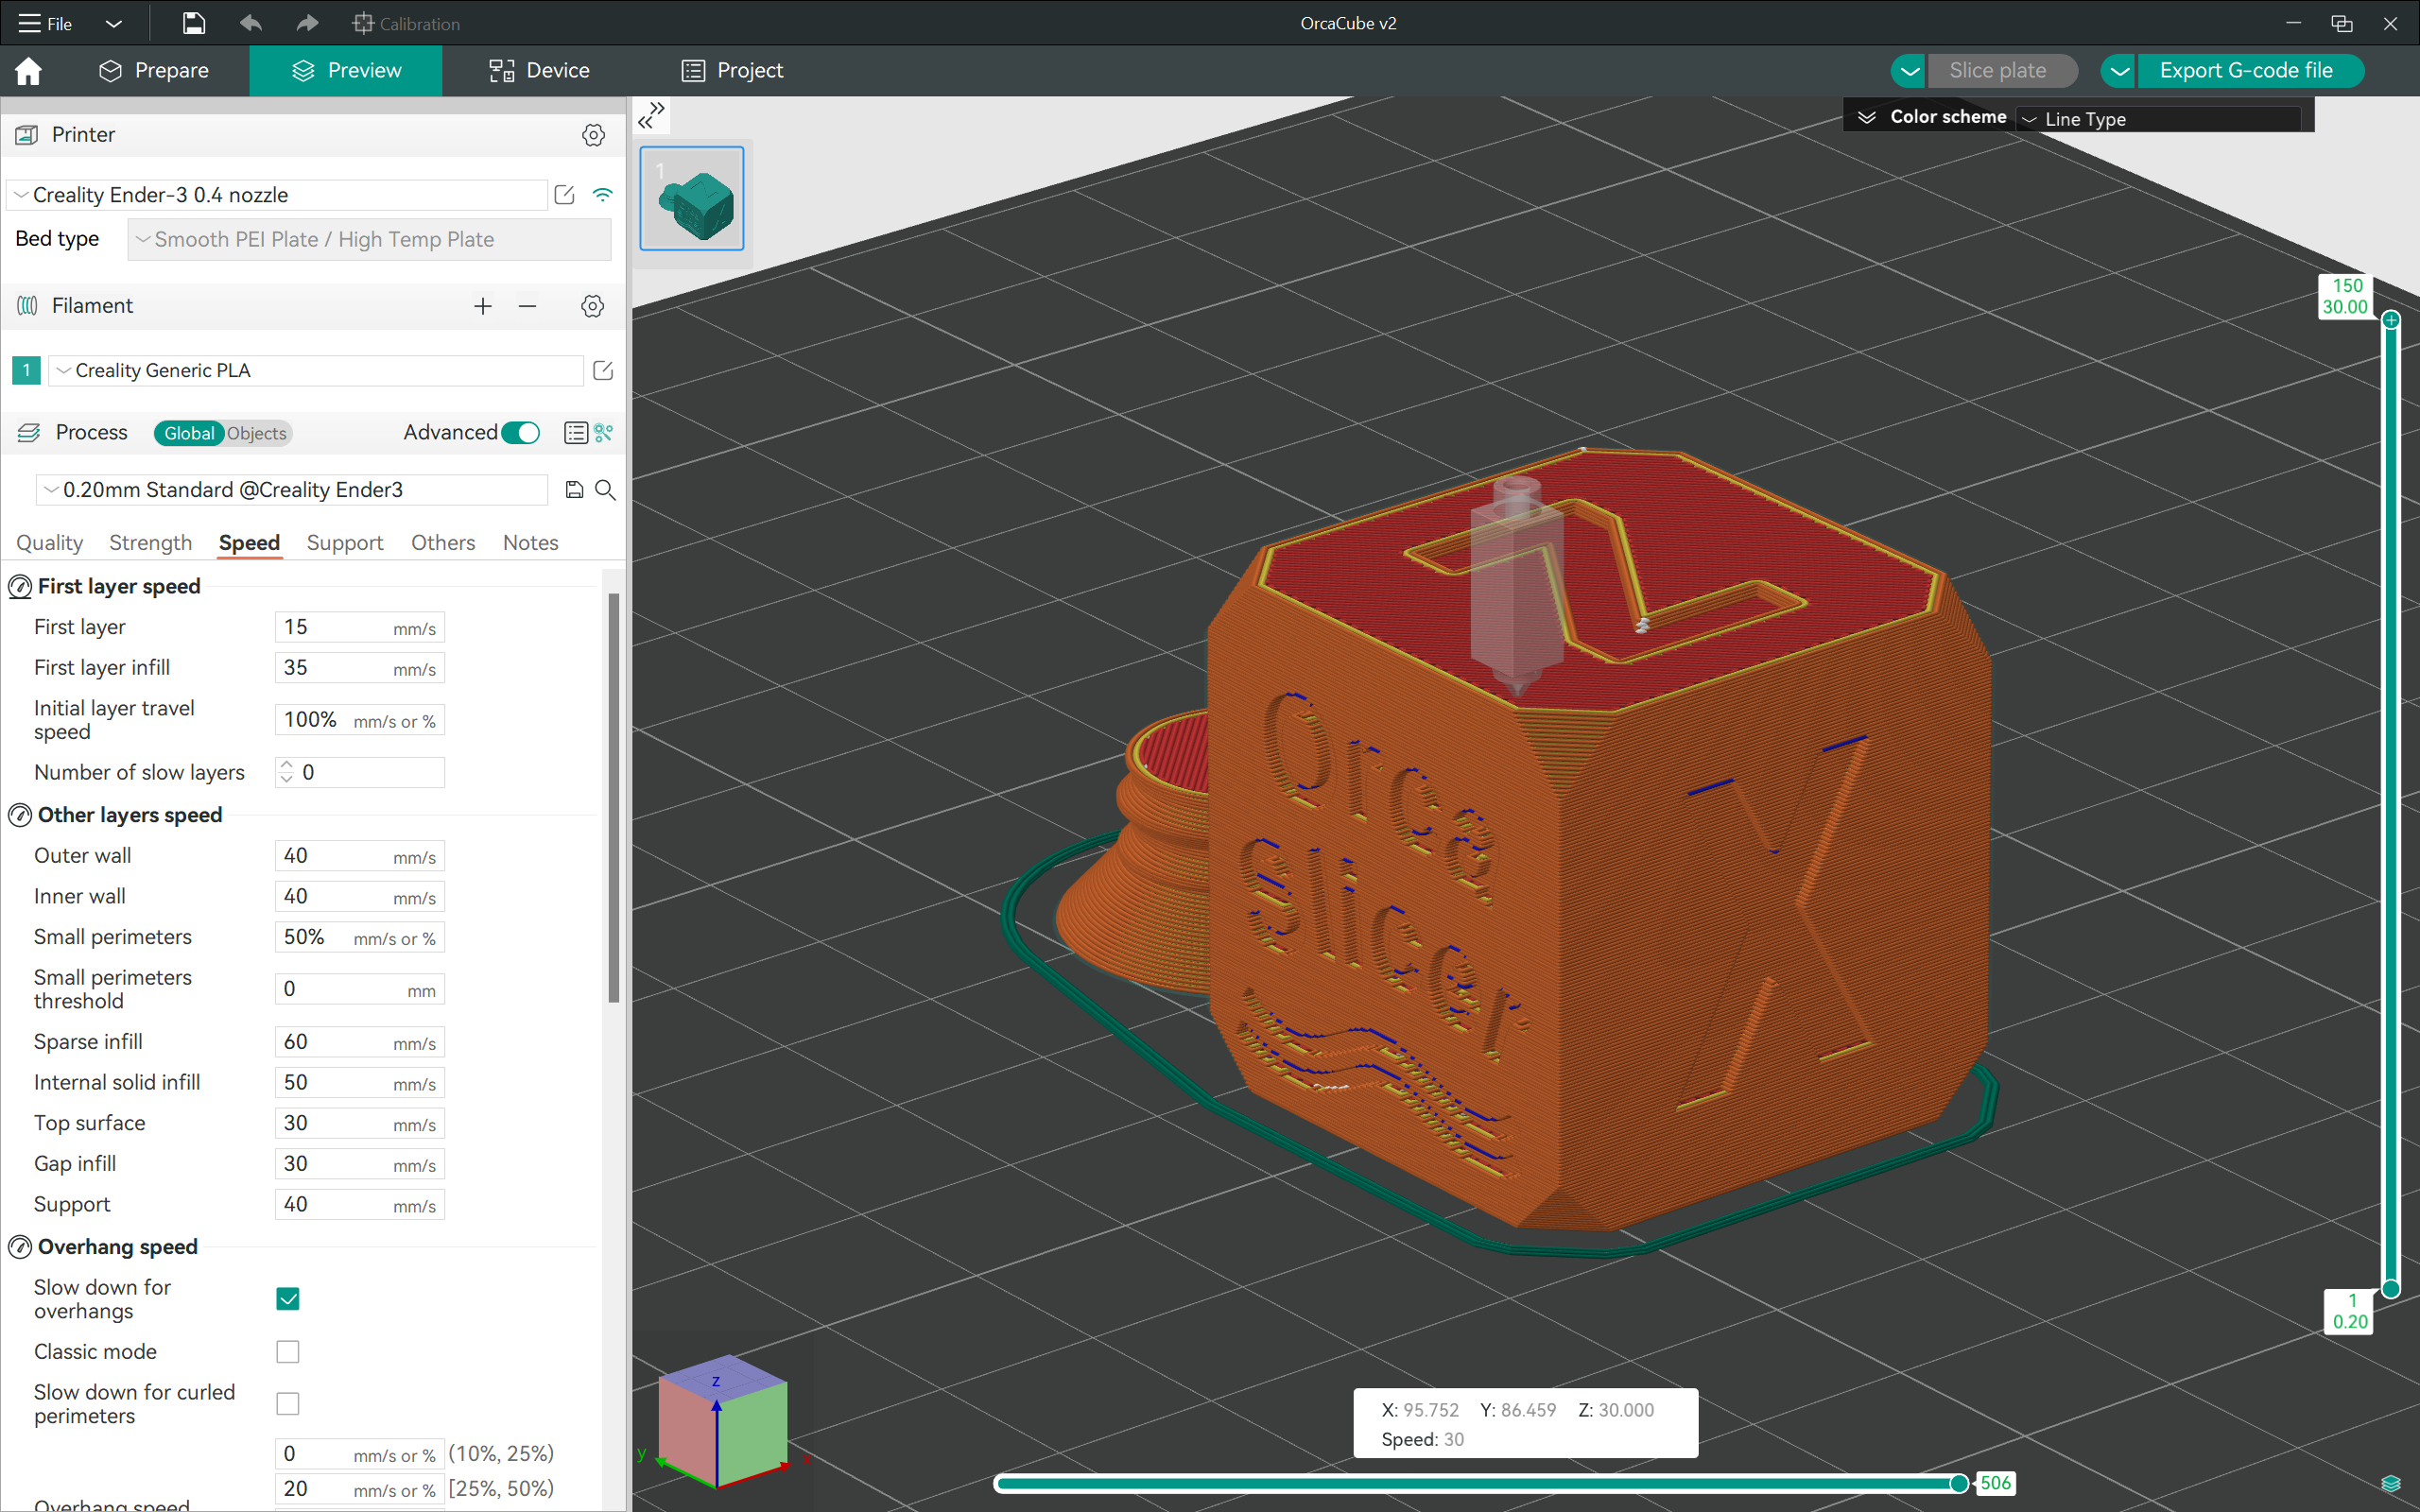
The print speed influences the quality of your printed part and the efficiency of your production process. If you’re running a business, balancing print time with speed is crucial to reducing printing costs. This setting is also largely dependent on your 3D printer, and use the following recommendation only as a reference for your specific speed settings.
First Layer Speed: A good first layer is vital to the success of your 3D print. Keep the first layer print speeds around 30-50 mm/s to ensure good layer adhesion and a solid foundation for the upper layers.
Other Layers Speed: These print speeds are too diverse to quantify in terms of numbers. Use the default values for your 3D printer in OrcaSlicer. Print a Speed calibration test to get the exact numbers and adjust the values accordingly.
Support Settings
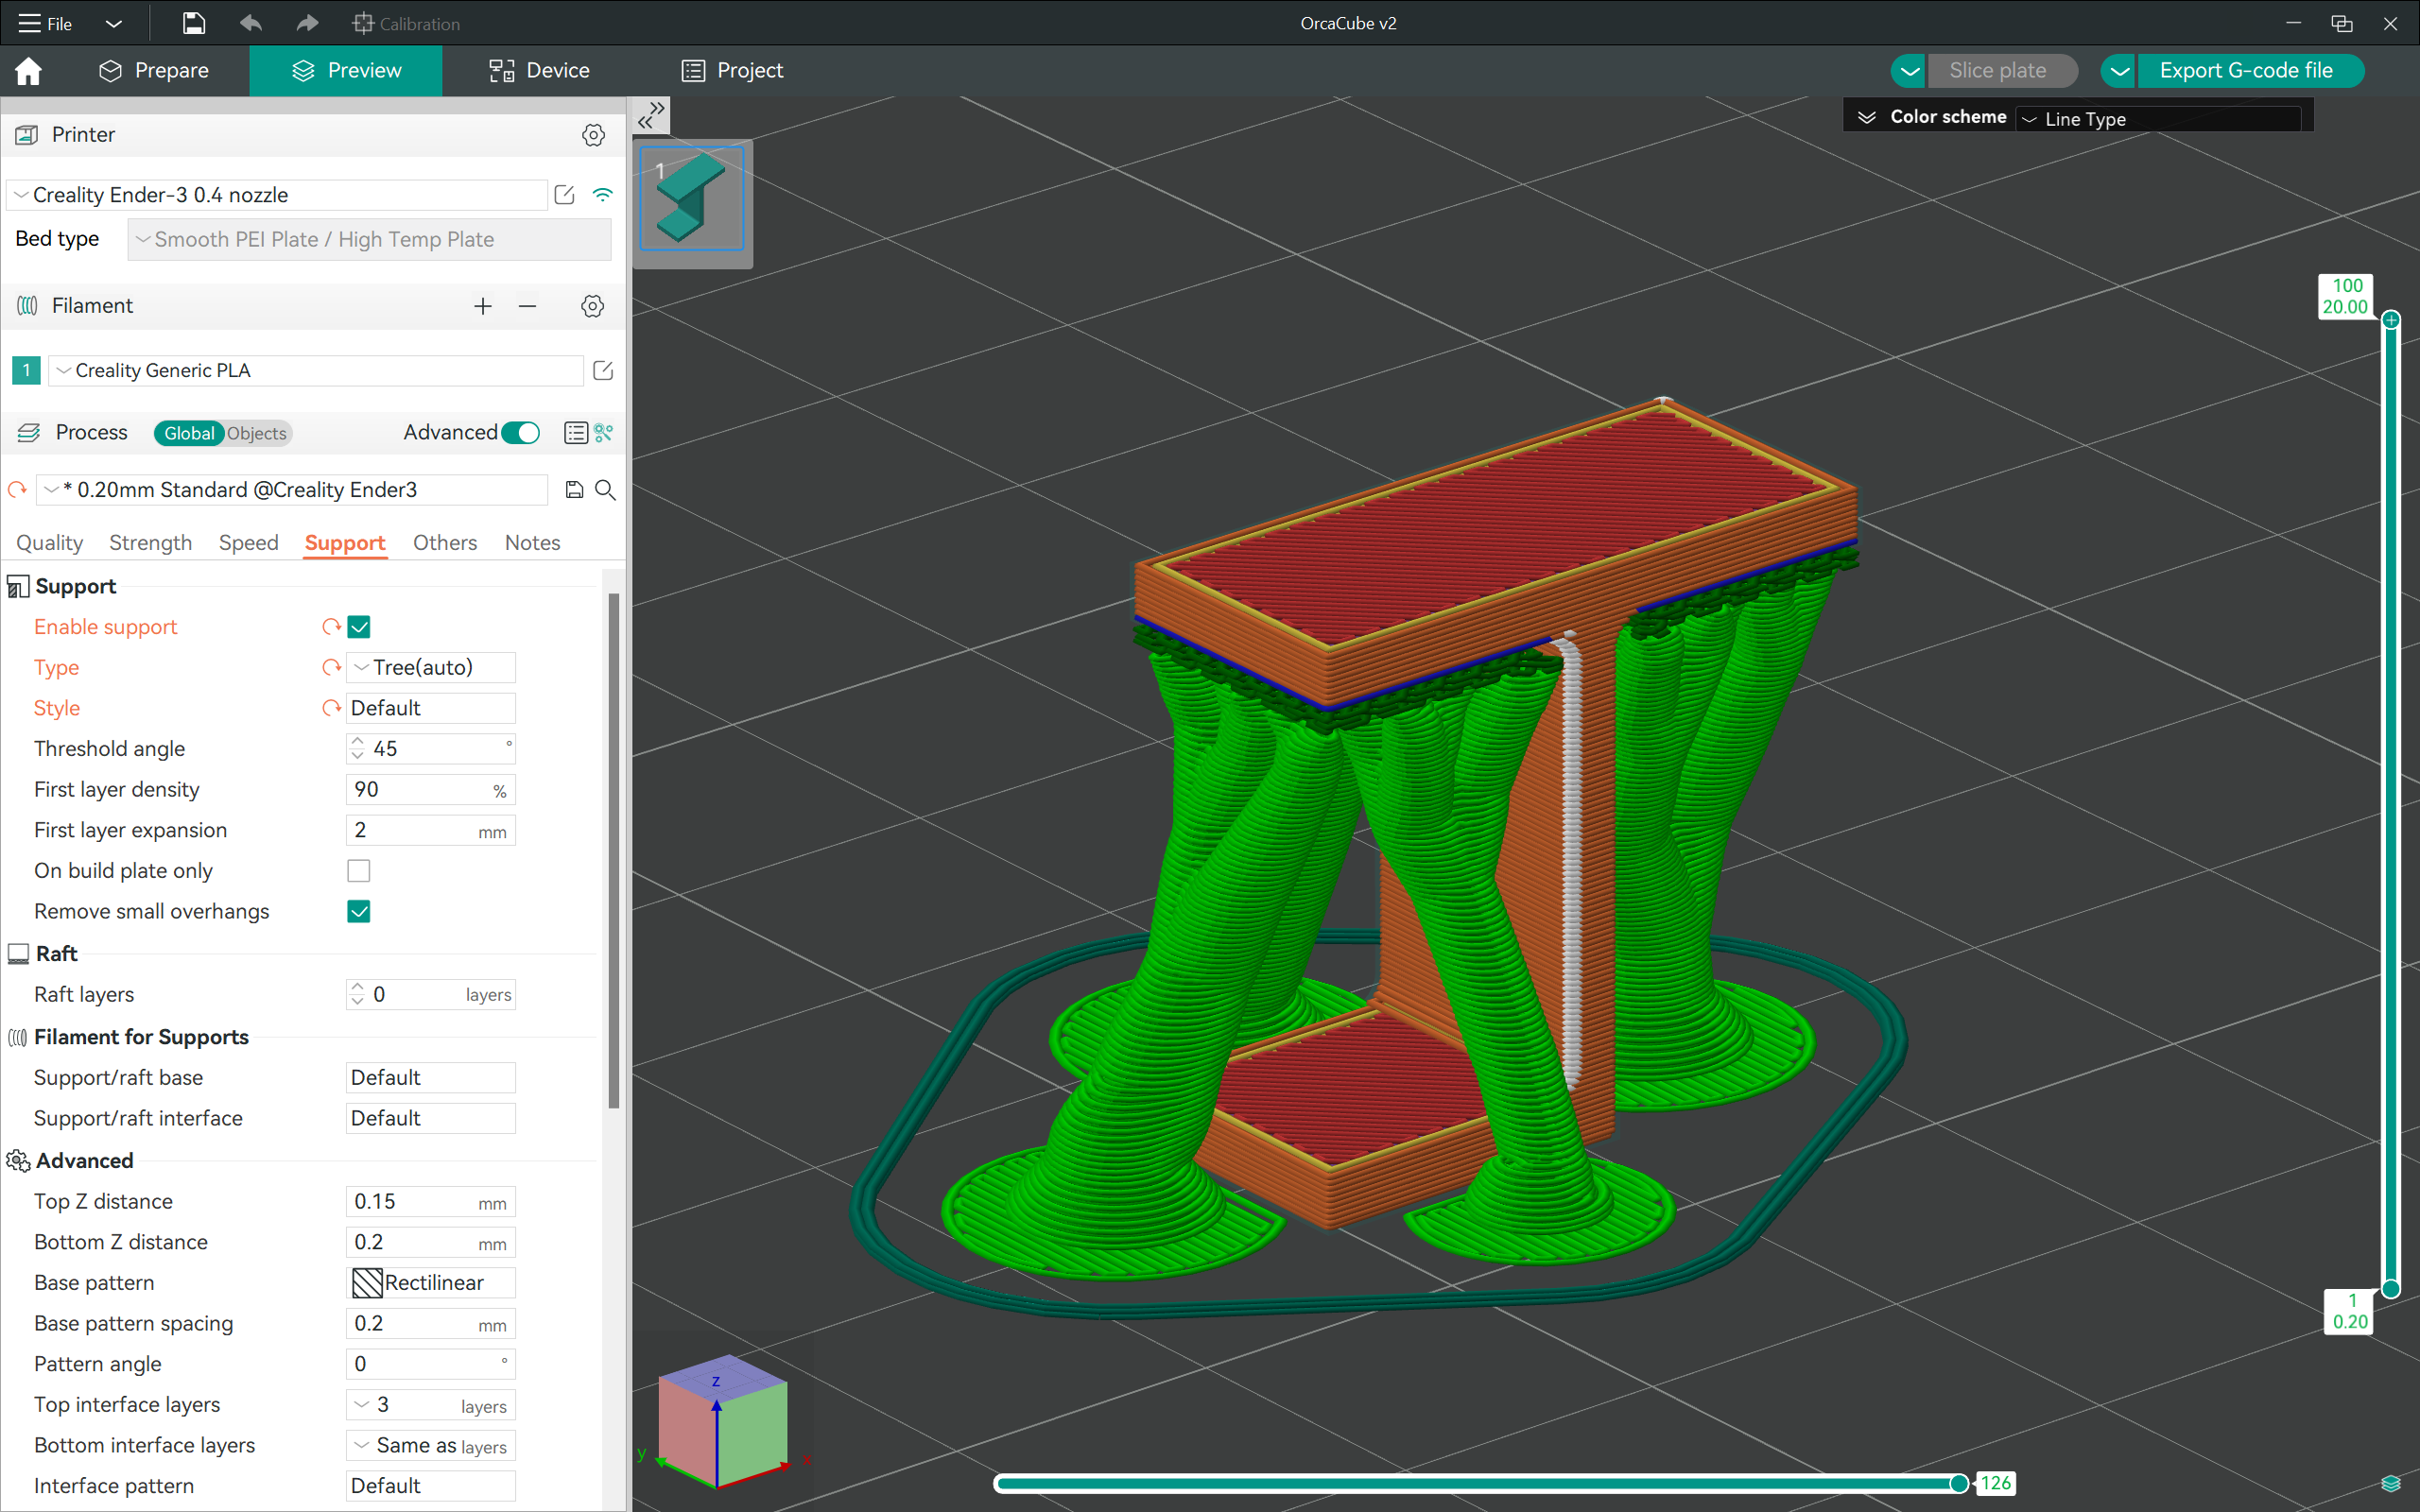
Support structures are useful for printing overhangs in your 3D prints. The supports also allow you to print parts with complicated geometry and intricate details, which would otherwise be impossible.
Support Type: Use the tree support style for better surface quality and fewer artifacts on the 3D print. Otherwise, the Normal Support style works great for complicated prints but will leave marks on the surface.
Support Angle: This value decides the overhang angle for which OrcaSlicer will automatically generate support structures. Keep the support angle threshold value between 45 and 55 degrees.
Support Distance: This setting determines the ease of support removal and the overhang quality for your 3D prints. Typically, this value should be equal to the layer height for your part. However, if the supports are not coming off easily, increase the support distance by 0.5 mm.
Support Interface Layers: The interface layers influence the overhang quality in your prints. These layers are slightly denser than the support structure, giving the overhang a solid base. Use two to three interface layers for clean overhangs and easy support removal.
Obico with OrcaSlicer
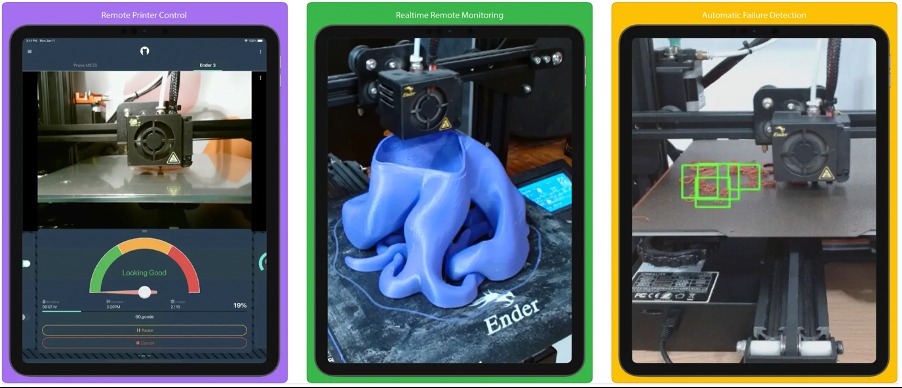
Obico, formerly known as The Spaghetti Detective, integrates seamlessly with OrcaSlicer. Using Obico, you can monitor your 3D prints remotely, start and stop your prints, and prevent print failures instantly.
Obico uses sophisticated image processing AI, which detects 3D print failures and informs you at once. This AI failure detection feature helps you save considerable print material and time you would’ve otherwise lost.
Additionally, Obico is entirely open-source, and you can host it on your personal server. There’s also a free cloud version that can help you get started with remote 3D printing.
You can directly connect Obico in the OrcaSlicer’s device tab and monitor your 3D prints from the slicer. It acts as a remote hub for your 3D printer and gives you complete access to your printer, regardless of your location.
Give Obico a try, and let us know your experience with remote 3D printing!